
Build Fast Web Apps using Qwik City

In the tech ecosystem, there is always the development of new languages, frameworks, and tools. Developers continually assess these different tech stacks to see the right fit for them and their projects. Qwik is a new web framework developed by Misko Hevery of Angular and a few other well-known developers.
Qwik tends to solve the problem of performance issues in most modern web frameworks. Some web frameworks, like Svelte, have changed their focus to making web apps faster in run-time, but nobody is focusing on the root cause of the issue; hence none of them have met real expectations. Qwik came up with shifting the focus from “doing faster” to “doing less”. Which also means doing repetitive work.
In this article, we explore a web framework - Qwik. We will look at Qwik and the benefits of using Qwik. We will look at how to create components, layouts, and pages, perform dynamic routing using Markdown, and style our Qwik application by creating a static blog application using Qwik city. Lastly, we will look at adding a markdown to our application.
What is Qwik?
Like React, Qwik is a component-based web framework that renders your user interface without requiring any hydration. It is an HTML-first framework designed to deliver instant loading, high-performance websites, and applications of any size or complexity. Qwik improves performance by rendering HTML on the server side, loading little or no javascript, and delaying the execution of any other javascript on the page until it is needed. This enables the program to download code gradually instead of instantly downloading a large bundle.
For instance, if a page begins with text that doesn’t require javascript, Qwik will not load anything; however, if you scroll down to a component that does, it will hydrate the page with the necessary javascript code.
Qwik transforms the code at build time using an Optimizer written in Rust. For Hot Module Replacement (HMR) and bundling code, Qwik uses Vite.
There are several advantages to this tool:
-
Resumability: To improve hydration, Qwik combines intelligent server-side and client-side rendering to avoid performing hydration twice, once on the server and again on the client. In Qwik, this process is known as resumability. It means that the client continues where the server left off instead of rebuilding all of the work on the client. It allows fully interactive sites to load a tiny amount of JS code onto the client, then loads the relevant parts of your site on demand.
-
Time to Interactive: The time to interact is the period between when a user requests or interacts with the website and when that website responds to the user’s activity. Qwik does include Javascript, but not when the app first launches. Instead, when you interact with it, it sends the Javascript Code. During SSR, Qwik gathers a lot of data to begin prefetching only the interactive parts of the current page as quickly as feasible. As a result, when the user clicks or interacts, the JS is already downloaded.
-
Lazy loading: Qwik takes lazy loading to new heights by downloading JavaScript in phases depending on how the user interacts with the site.
-
Performance: Qwik only sends HTML and loads JS when necessary to improve your site performance. This means that when the site loads, it has very little JavaScript to run, and the code is only downloaded when needed. It is the “HTML” first framework.
-
Less JavaScript: By delivering the client only the bare minimum of JavaScript, Qwik eliminates the massive amount of JavaScript a site must send to the client. A Qwik app can be made interactive with as little as 1 KB of JavaScript.
To get started with Qwik, you need the following:
- node.js v16 or higher installed
- Your favorite IDE (vscode recommended)
- Start to think Qwik
What is Qwik city?
Qwik City is built on top of Qwik, bringing opinionated routing and many features such as layouts, templating, data fetching, bundle optimization, prefetching, streaming, and interoperability with edge function providers out of the box to make development easier and faster. Qwik is the core framework, which can maintain stability by avoiding breaking changes and concentrating on long-term, stable primitives and component models.
Qwik City is to Qwik what Next.js is to React, what Nuxt is to Vue or SvelteKit to Svelte. Qwik City offers a quick, easy, and practical approach to producing content for your website by providing directory-based routing, nested layouts, file-based menus, breadcrumbs, and support authoring content with .tsx or .mdx file format and data endpoints. Qwik also integrates other libraries such as React, Tailwind, etc.
Scaffold new Qwik project
Using the command line interface (CLI) tool is the quickest method to get started with a Qwik program. Qwik CLI enables you to build a basic application skeleton. Start by running the command below in your terminal:
npm create qwik@latestAfter running the command, you will be prompted to give your project a name, then select Basic as your starter.
Change the directory to the project directory after choosing your project’s settings. Then use the following command to launch the application:
cd <project name> && npm startOn your terminal, the output seen in the screenshot below should appear.
VITE v3.2.4 ready in 6547 ms
➜ Local: http://localhost:5173/
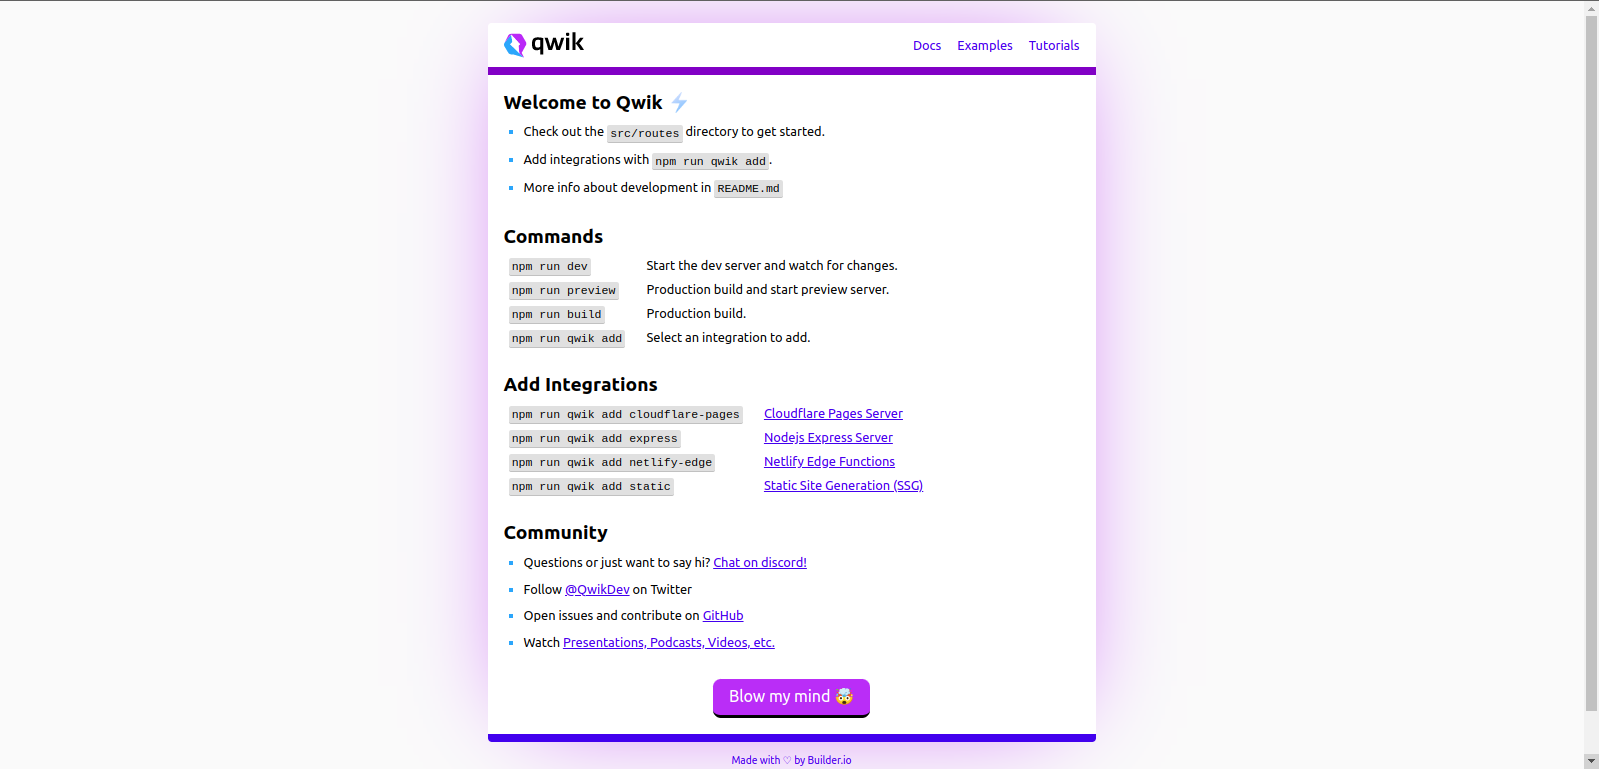
➜ Network: use --host to exposeNow open your browser and go to [http://localhost:5173/](http://localhost:5173/). As seen in the screenshot below, you will see the Qwik welcome page.
Qwik will generate the folder structure below when you complete the prompts in the create command:
qwik-blog
├── node modules
├── public
├── src
    ├── component
    └── routes
├── package-lock.json
├── package.json
├── tsconfig.json
└── vite.config.json- TypeScript: As you can see from tsconfig.json, the Qwik application, by default, supports TypeScript.
- Vite: During development, Qwik makes use of Vite.
src: Source code is often stored in thesrcdirectory by default.public: Static assets are stored in the public directory.
Session Replay for Developers
Uncover frustrations, understand bugs and fix slowdowns like never before with OpenReplay — an open-source session replay tool for developers. Self-host it in minutes, and have complete control over your customer data. Check our GitHub repo and join the thousands of developers in our community.
Creating Components
In this section, we create a header component for our navigation bar, used for all pages in our application, and a card component for our blog posts. In your **src > header > header** file, replace it with the code below:
import { component$ } from '@builder.io/qwik';
import { Link } from '@builder.io/qwik-city';

export default component$(() => {
  return (
    <header>
      <nav class="flex items-center justify-between flex-wrap bg-blue-700 p-6">
        <div class="flex items-center flex-shrink-0 text-white mr-6">
          <Link href='/' class="font-semibold text-xl tracking-tight">Qwik Blog</Link>
        </div>
        <div class=" block lg:hidden">
          <button class="flex items-center px-3 py-2 border rounded text-teal-200 border-teal-400 hover:text-white hover:border-white">
            <svg class="fill-current h-3 w-3" viewBox="0 0 20 20" xmlns="http://www.w3.org/2000/svg"><title>Menu</title><path d="M0 3h20v2H0V3zm0 6h20v2H0V9zm0 6h20v2H0v-2z"/></svg>
          </button>
        </div>
        <div class=" w-full block flex-grow lg:flex lg:items-center lg:w-auto">
          <div class= "text-sm lg:flex-grow">
            <Link href="/about" class="block mt-4 lg:inline-block lg:mt-0 text-teal-200 hover:text-white mr-4">
              About
            </Link>
          </div>
          <div class='flex gap-4'>
            <input class="shadow appearance-none border rounded w-full py-2 px-3 text-gray-700 leading-tight focus:outline-none focus:shadow-outline" id="username" type="text" placeholder="Search" />
            <button class="inline-block text-sm px-4 py-2 leading-none border rounded text-white border-white hover:border-transparent hover:text-blue-700 hover:bg-white mt-4 lg:mt-0">Search</button>
          </div>
        </div>
      </nav>
    </header>
  );
});
A component is a small, reused chunk of code that can be utilized to create a user interface. Qwik uses the component$ to create a component. This method comes from the builder.io/qwik package. Also, notice the $ symbol; it uses this feature to enable and optimize the lazy loading of JavaScript. We have also imported a Link component from the builder.io/qwik-city package. This component functions similarly to the anchor element <a>; however, instead of reloading the entire page, it will navigate as a SPA. This is handy if you need to navigate without losing your current state.
Inside your components folder, create a **card > card.tsx** file and add the following code.
import { component$ } from '@builder.io/qwik';
import { Link } from '@builder.io/qwik-city';

export default component$(() => {
    interface Blogs {
        id: number;
        title: string;
        description: string;
        author: string;
        slug:string;
        image: any;
        avatar: any;
    }
    const blogs: Blogs[] = [{
        id: 1,
        title: 'What is Qwik',
        description: 'Lorem ipsum dolor sit amet, consectetur adipisicing elit. Voluptatibus quia, nulla! Maiores et perferendis eaque, exercitationem praesentium nihil.',
        author: 'John Adam',
        avatar: '/images/john.jpg',
        slug: "what-is-qwik",
        image: "/images/qwik.jpg"
    },
    {
        id: 2,
        title: 'Building a blog with Qwik city',
        description: 'Lorem ipsum dolor sit amet, consectetur adipisicing elit. Voluptatibus quia, nulla! Maiores et perferendis eaque, exercitationem praesentium nihil.',
        author: 'Mandy Lane',
        avatar: "/images/mandy.jpg",
        slug: "building-a-blog-with-qwik-city",
        image: "/images/blog.jpg"
    },
    ];
  return (
    <div class='p-3 lg:p-8 gap-8 w-full max-w-full my-0 mx-auto flex flex-col justify-center items-center'>
        <h1 class='text-3xl'>Stories from Qwik</h1>
        {
            blogs.map(blog => (
                <Link key={blog.id} href={blog.slug} class= "flex flex-col items-center bg-white border rounded-lg shadow-md md:flex-row md:max-w-2xl hover:bg-gray-100">
                    <img class="object-cover w-full rounded-t-lg h-96 md:h-56 md:w-full md:rounded-none md:rounded-l-lg" src={blog.image} alt={blog.title} />
                    <div class="flex flex-col justify-between p-4 leading-normal">
                        <h5 class="mb-2 text-2xl font-bold tracking-tight text-gray-900 dark:text-white">{blog.title}</h5>
                        <p class="mb-3 font-normal text-gray-700 dark:text-gray-400">{blog.description}</p>
                        <div class=" flex items-center">
                            <img class="w-10 h-10 rounded-full mr-4" src={blog.avatar} alt={`avatar of ${blog.name}`} />
                            <div class="text-sm">
                                <p class="text-gray-900 leading-none">{blog.author}</p>
                                <p class="text-gray-600">Aug 18</p>
                            </div>
                        </div>
                    </div>
                </Link>
            ))
        }
    </div>
  );
});
From the code above, we established a structure for our blogs, and we created a blog interface. Next, we get some blog data and create a blog array. Using the blog’s slug, we also linked to the blog’s details. Qwik recommends using the /public folder to store all static assets such as images, fonts, etc.
Adding styles
Notice that we made use of Tailwind to style our application. Qwik makes it easy to integrate with other libraries. To install Tailwind in your terminal, type the command below:
npm run qwik add tailwindThe above command updates your app and modifies vite.config.ts to reflect the configuration.
Now in your global.css file, add the code below:
@tailwind base;
@tailwind components;
@tailwind utilities;
Creating Layouts
Let’s now create our app’s layout. The layout is a user interface that is shared by several pages. Layouts maintain state during navigation, stay interactive, and do not re-render, for example, <Header>, <Footer>, and <Menu>. You can make these components reusable using the Qwik layout. In your **src > routes > layout.tsx** file, replace it with the following code snippets:
import { component$, Slot } from '@builder.io/qwik';
import Header from '../components/header/header';

export default component$(() => {
  return (
    <>
      <Header />
      <main>
        <section class='p-3 lg:p-8 gap-8 w-1/2 max-w-full my-0 mx-auto flex flex-col justify-center items-center'>
          <Slot />
        </section>
      </main>
    </>
  );
});
Here we import the Slot component from Qwik. The Slot is used to specify where the route will be inserted. With this, the header will be available for all pages on our site.
Creating Pages
Routing is a technique for assigning particular components described in your application to specific public URLs for a site. To display the content to the user, Qwik City uses a routing strategy known as directory-based routing, which means that the index file with a filetype of jsx, js, tsx, ts, md, mdx we create in the src/routes/ folder becomes a page on our site.
Creating an about page or contact page in Qwik city is how you structure your routes. Otherwise, it won’t be a registered route, and any non-index files will be registered by Qwik City as routes.
src/
└── routes/
    ├── index.tsx                     # https://example.com/
    ├── contact/                      # https://example.com/contact
    │   └── index.tsx
    └── about/
        └── index.tsx                 # https://example.com/about
Now, replace the content in the routes/index.tsx file with the code snippet below:
import { component$ } from '@builder.io/qwik';
import Card from '../components/card/card';
export default component$(() => {
return (
<div>
<Card />
</div>
);
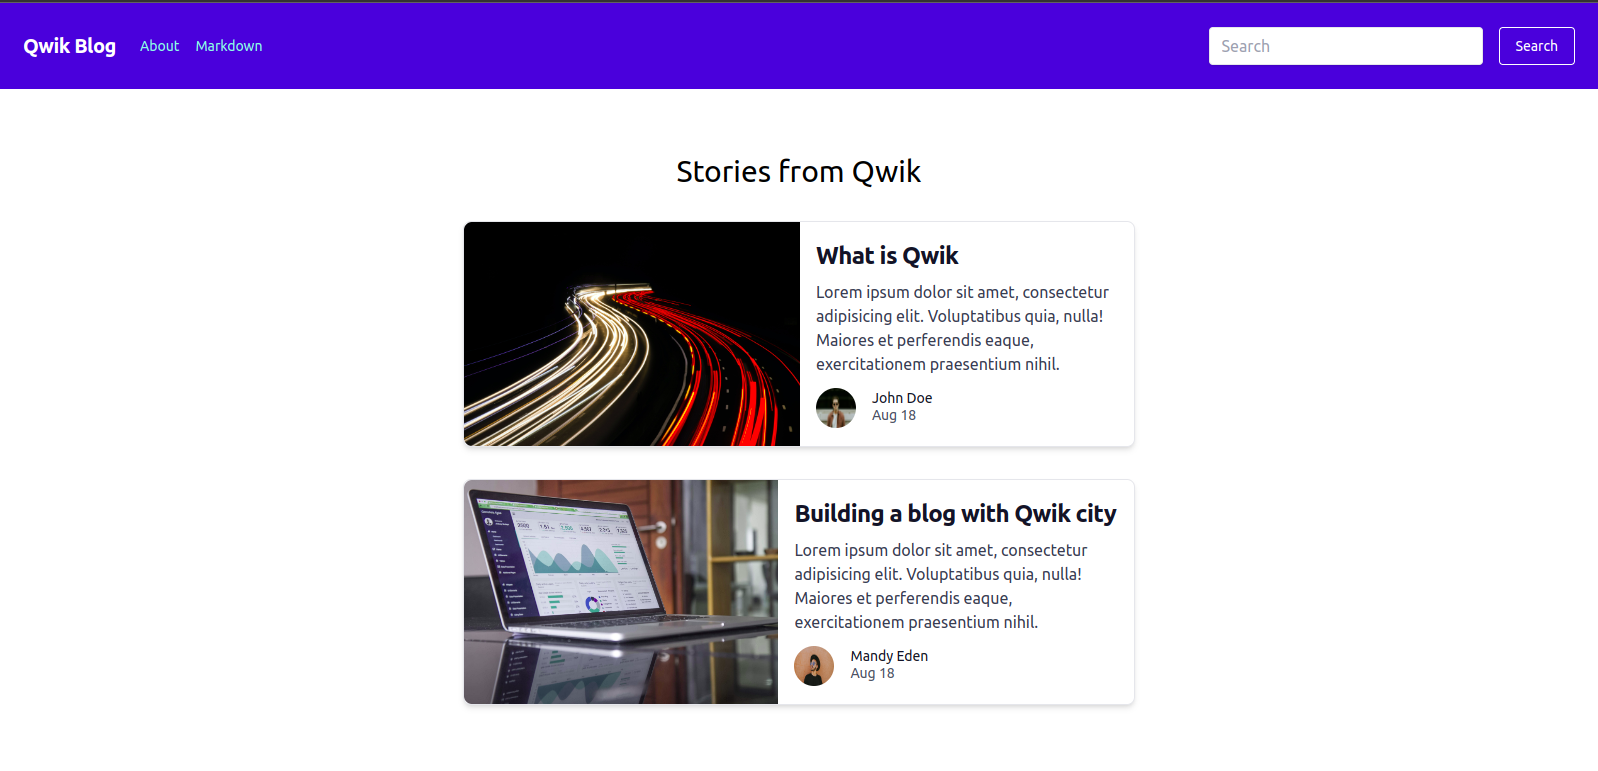
});From the above code sample, the Card component was imported. After locating the <slot/>, Qwik will inject our Card component into it. Here’s what our app looks like:
Adding Markdown
Another way to author content in Qwik is to use MDX (Markdown JSX). Although these files were written in Markdown, they are compiled into Qwik components. .mdx files also allow you to integrate your Qwik components other than Markdown syntax. Qwik allows you to add a .mdx file, which is also rendered as a page, like the .tsx file in the routes pages folder.
We want to ensure that when a user clicks on the blog’s link, they’ll be redirected to the blog details page. Create a new folder, what-is-qwik; inside the folder, create an index.mdx file and add the code samples below. Also, ensure that the Markdown folder matches the slug of the blog.
  ---
  title: Markdown page
  ---
  # What is Qwik?

Like React, Qwik is a component-based web framework that renders your user interface without requiring any hydration. It is an HTML-first framework designed to deliver instant loading, high-performance websites, and applications of any size or complexity. Qwik improves performance by rendering HTML on the server side, loading little or no javascript, and delaying the execution of any other javascript on the page until it is needed. This enables the program to download code gradually instead of instantly downloading a large bundle.
Now by clicking on the blog post, you’ll be directed to the post details.
Conclusion
In this article, we learned about Qwik, a web framework that can provide web apps of any size or complexity with rapid loading, its benefits, and about Qwik city. We look at how to create components, layouts, pages, and add markdowns by creating a sample blog application using Qwik city. Now that you are familiar with Qwik, you may read the official documentation to find out more. Enjoy using Qwik for your upcoming projects.
Code for this article can be found on GitHub.
Gain Debugging Superpowers
Unleash the power of session replay to reproduce bugs and track user frustrations. Get complete visibility into your frontend with OpenReplay, the most advanced open-source session replay tool for developers.
