Building a blog with React and RestDB
Build a blog using RestDB to store articles and React for the front end.


When building apps that require a backend, we spend much time setting up a server and database, writing APIs with which the frontend can send and receive data to and from the backend. With RestDB, you can easily spin up a server and create a database. Each database collection comes with Rest API endpoints to perform CRUD operations on the database, and of course, you can add more collections. In this article, we will learn how RestDB works by building a blog app with React using RestDB to store the blog’s articles.
What is RestDB?
RestDB (also known as restdb.io) is a simple online NoSQL database backend with automatic APIs and low code javascript hooks. Basically, with RestDB you get a ready-to-use database with automatic APIs that you can use to perform CRUD operations on the database. RestDB completely takes away the complexity of building a server and writing endpoints for basic CRUD operations. There are many reasons why software developers should consider using RestDB.
- Easy to use: With RestDB, you can define the schema for your data, and add collections and descriptions for your models.
- It is free for teams: You can give access to people on your team, depending on their needs and access levels.
- With RestDB, you don’t only get a database. You can also link the database up with your web page domain easily.
They are other NoSQL database backends like RestDB, like Google Firebase, Amazon DynamoDB, Azure Cosmos DB, Amazon DocumentDB, and more. These alternatives also provide easy-to-use and fully managed cloud-based databases just like RestDB with some other added features like MongoDB compatibility (Amazon DocumentDB), the option to integrate with an SQL database(Azure Cosmos DB), etc. Learn more about RestDB alternatives here: 5 Powerful Alternatives to REST APIs.
Next, we will learn how to work with RestDB by building a blog app with React and connecting it to a RestDB database.
Building a Blog with React and RestDB.
To get started, we will clone a repo from Github. This repo contains the project’s starting files (components) and some config/setups. To do this, open your command line terminal and run the command below.
git clone https://github.com/Origho-precious/RestDB-blog-starter.gitAfter cloning, navigate into the project folder and install dependencies by running yarn install or npm install. In this project, I have already added some components and configs. We have tailwind setup for styling, react-router-dom for navigation, to render markdown styles we will be using react-markdown and two of its plugins: remark-gfm and rehype-raw. Let’s quickly go over the components we have in the project.
Button- This is a simple Button component with two variants.Navbar- This component shows the blog’s name and a button that routes a page where we can create a post and a button to go back to the home page.PreviewPost- This component renders the body of a post withreact-markdown. We will use this in a write page to preview what the article’s body looks like.
We also have three helper functions in src/utils/helperFunctions.js,
truncateTextwill be used for truncating texts so they don’t overflow out of their parent elements.calcReadTimecalculates the read time of an article, using the number of words contained in the body of the article and a metric of 200 words per minute.convertDateconverts timestamps to a particular data format usingmoment.
Lastly, in src/page, there are three folders with index.jsx files. The files in each just render paragraphs for now, but we will update them later in this article.
Next, let’s create a RestDB account, set up a database, and connect our app to it.
Creating a RestDB Account
Let’s navigate to the RestDB official webpage.
Click on the “Get your account” button. That will take you to a page where you can signup.
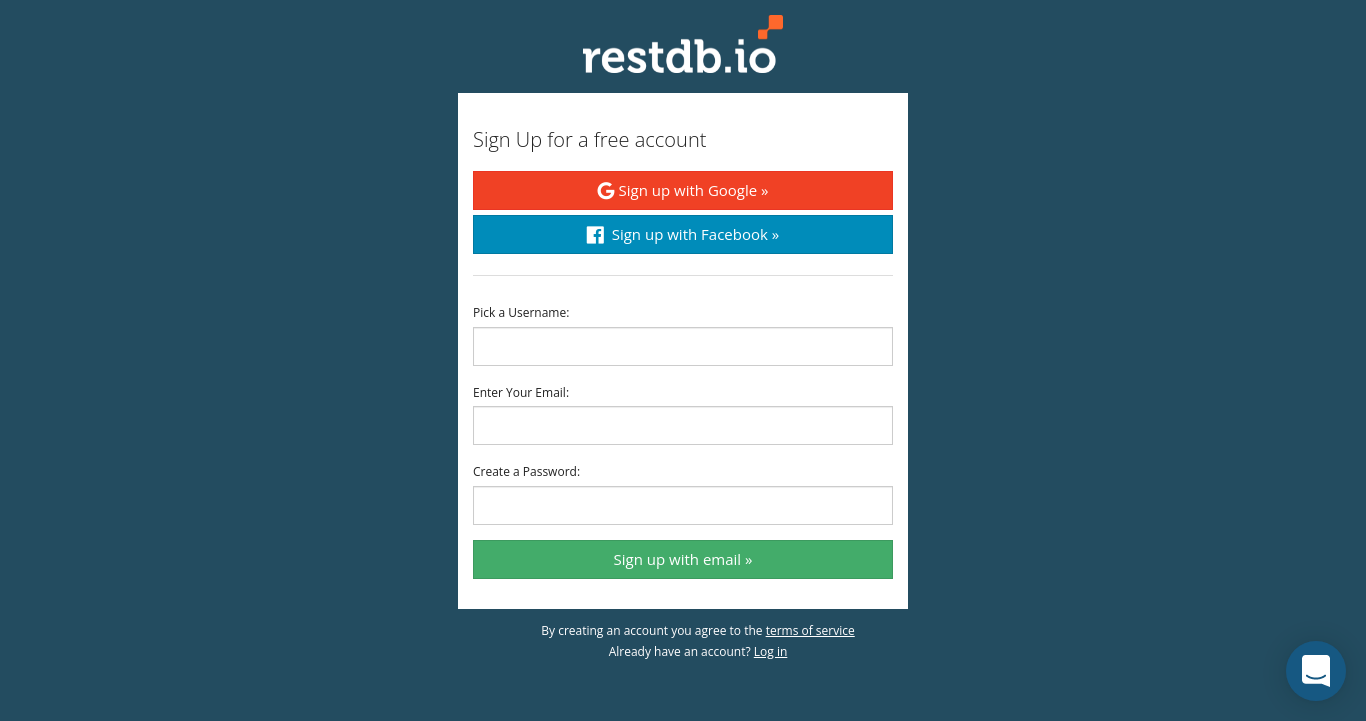
After signing up and verifying your account (if you don’t use the Google or Facebook signup options), You will see a page like the one below.
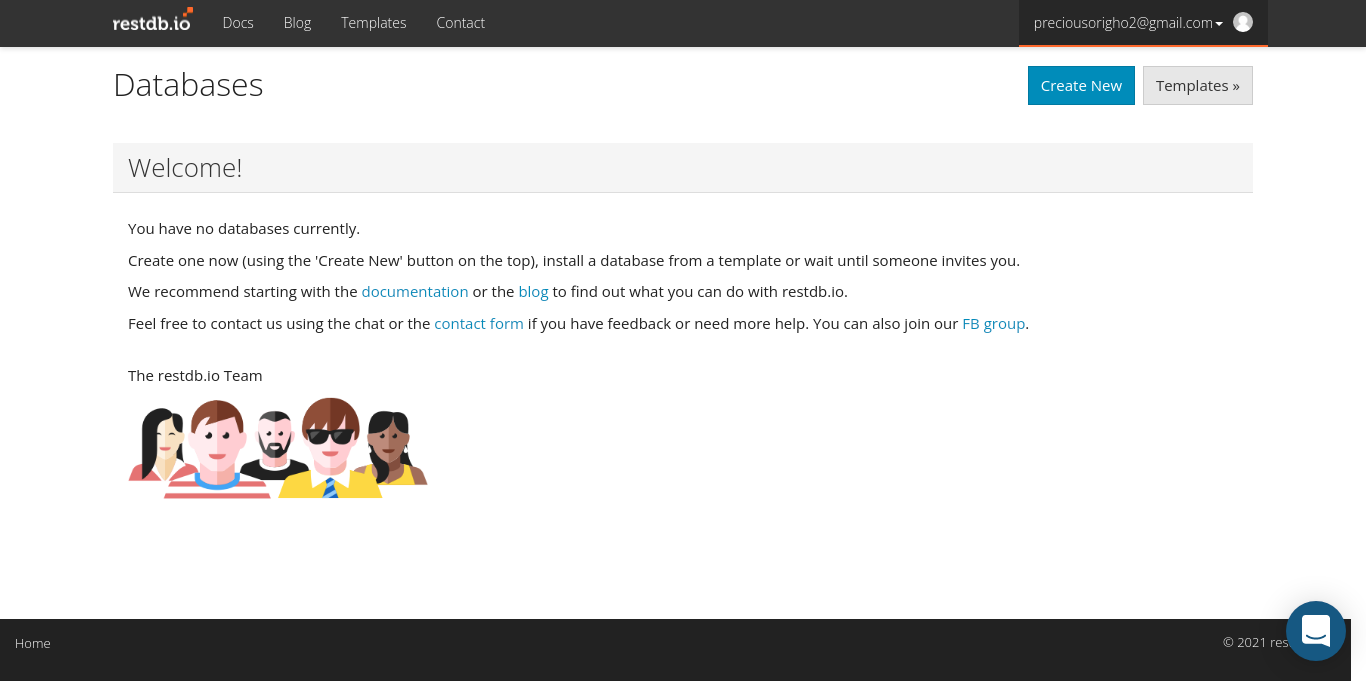
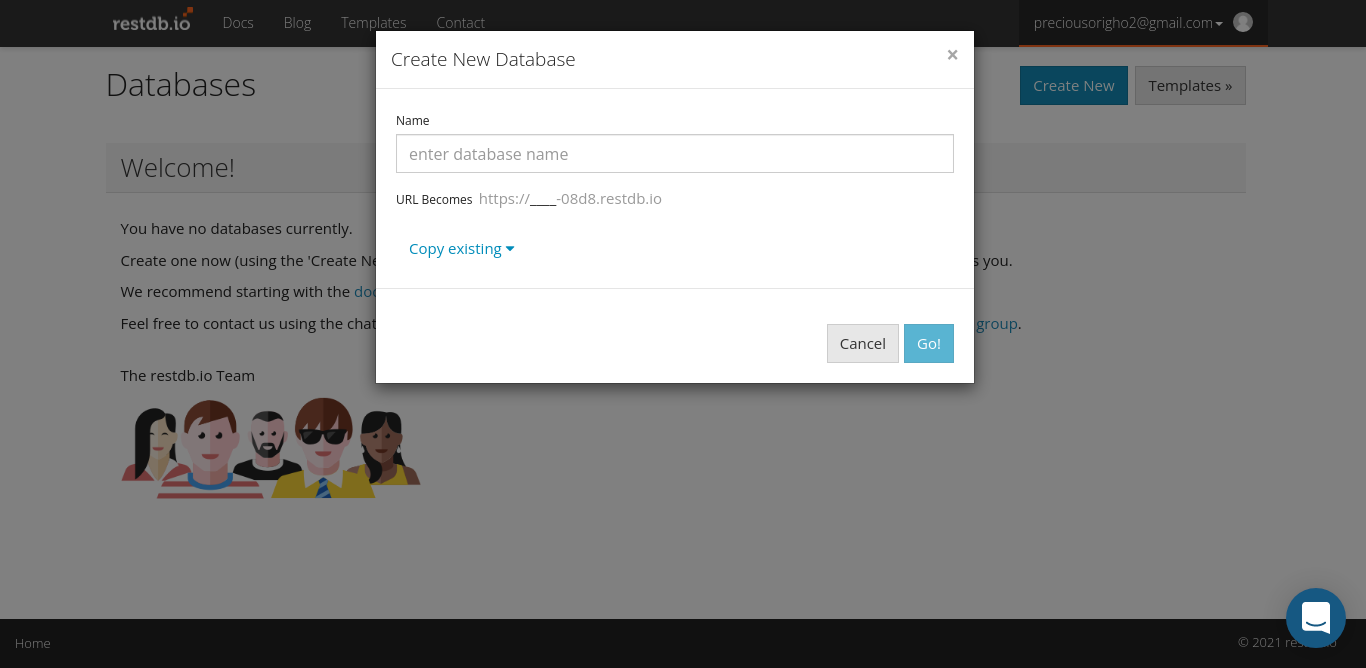
Yay!! You have now created your RestDB account. Next, let us create a database for our blog app. To do this, click on the “Create New” button at the top-right of the page. It will pull up a modal like the one below, where we can enter the name of the database or even copy an existing database. But we will be creating a new one here. So enter what you’d like to name the database; I will name mine restblog.
We just created our first RestDB database. You should see a screen like this.

Click on the database name to create a collection, define a schema for the collection’s models and connect our blog with it.
You will see a page like the one below, basically empty except for the sidebar and an icon at the top-right of the page. Click on that gear icon. It will enable developer mode so we can do all the things stated in the paragraph above.
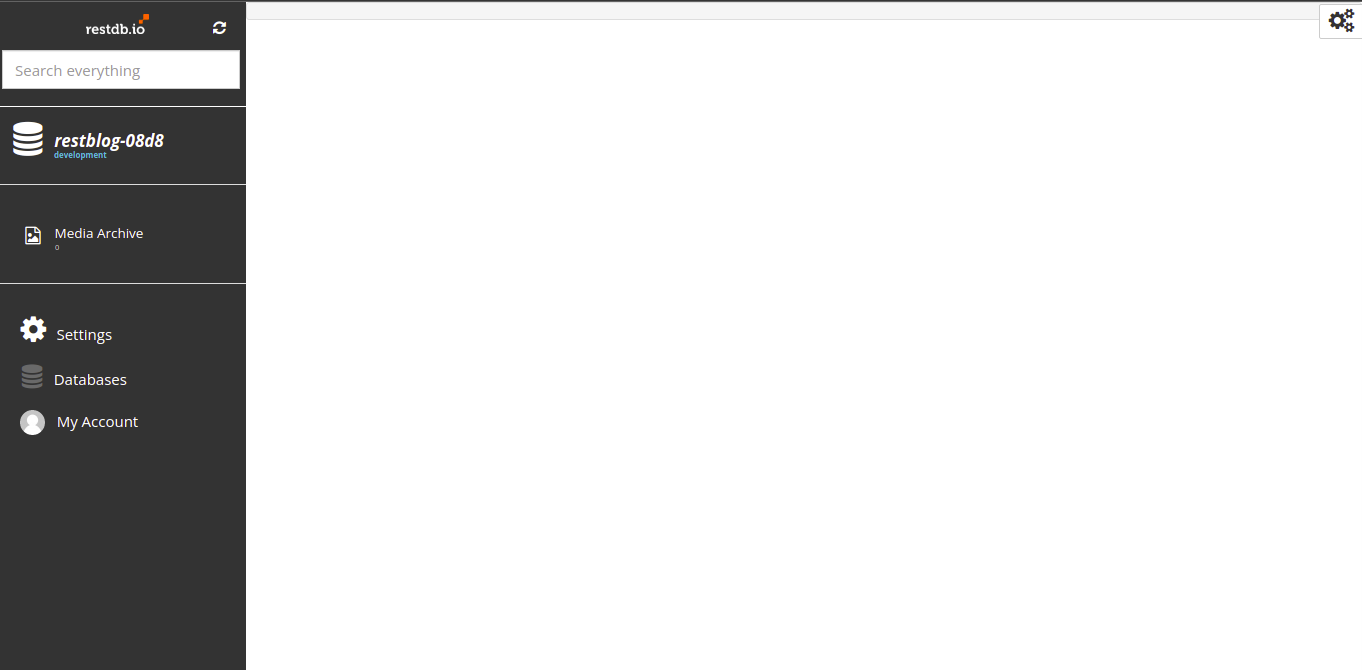
When you click on that icon, you should see a screen like this,
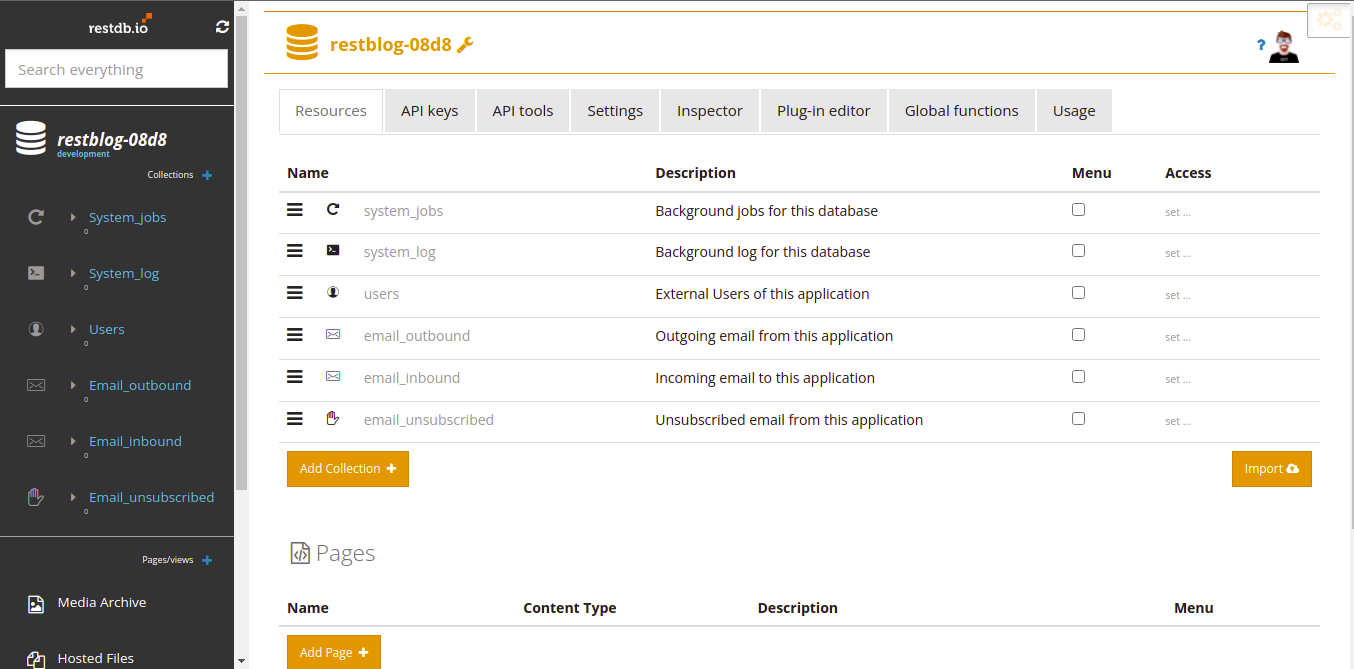
I know that doesn’t look very clear, and you might want to ask why we have those things there when we’ve not created any collection in the database. When you create a database in RestDB, it auto-generates a “users” collection, and it also generates other collections for emails, etc. For this article, we won’t be handling authentication. Let’s simply add a collection for our blog’s articles.
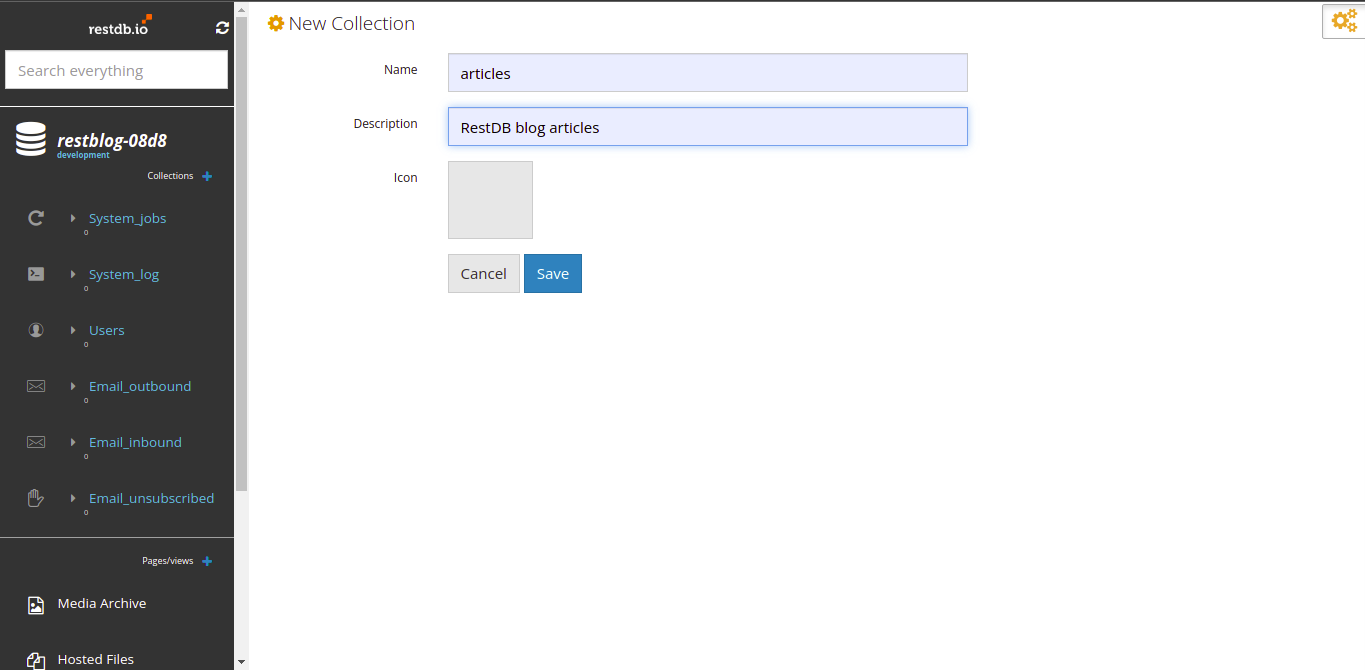
To do this, click on the “Add Collection” button. I’ll call the collection articles. Add a description as well (it’s optional, though) and save.
Upon saving, You will see that the collection we just created is in the list of collections. Click on it to add models to it. You should see a page like this.
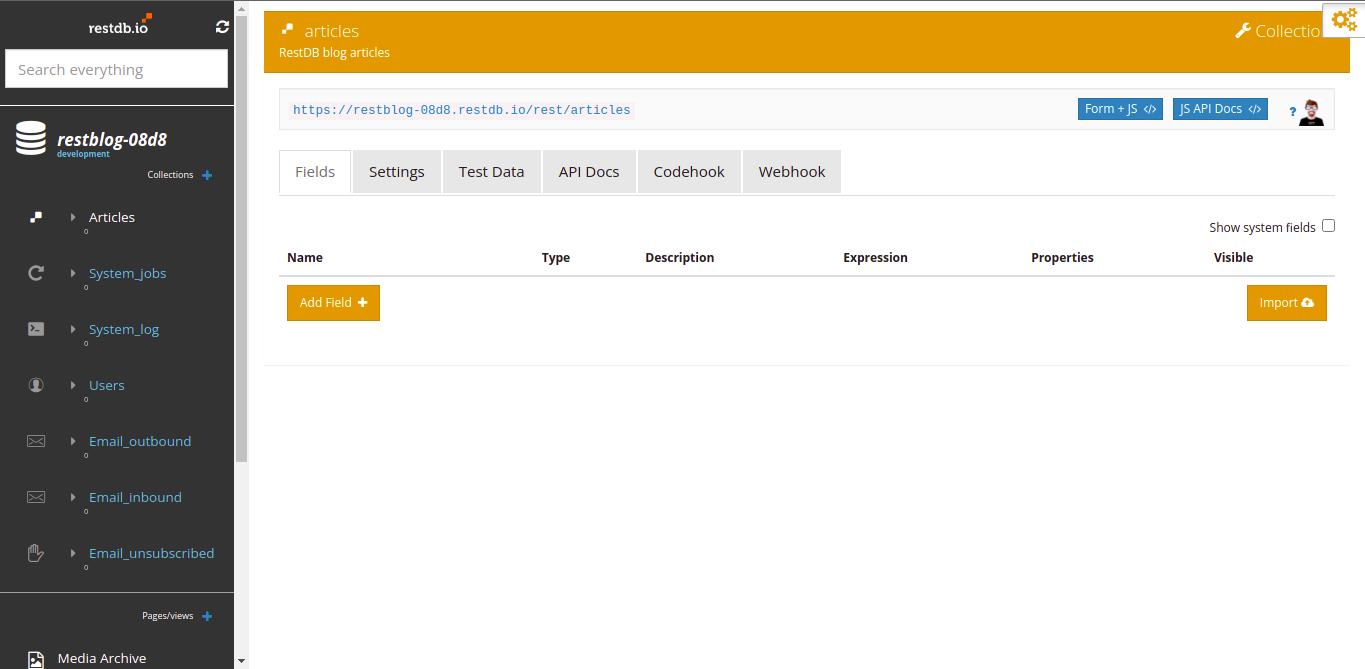
Here we will be adding fields (models for the collection we created). Click on the “Add Field” button to get started.
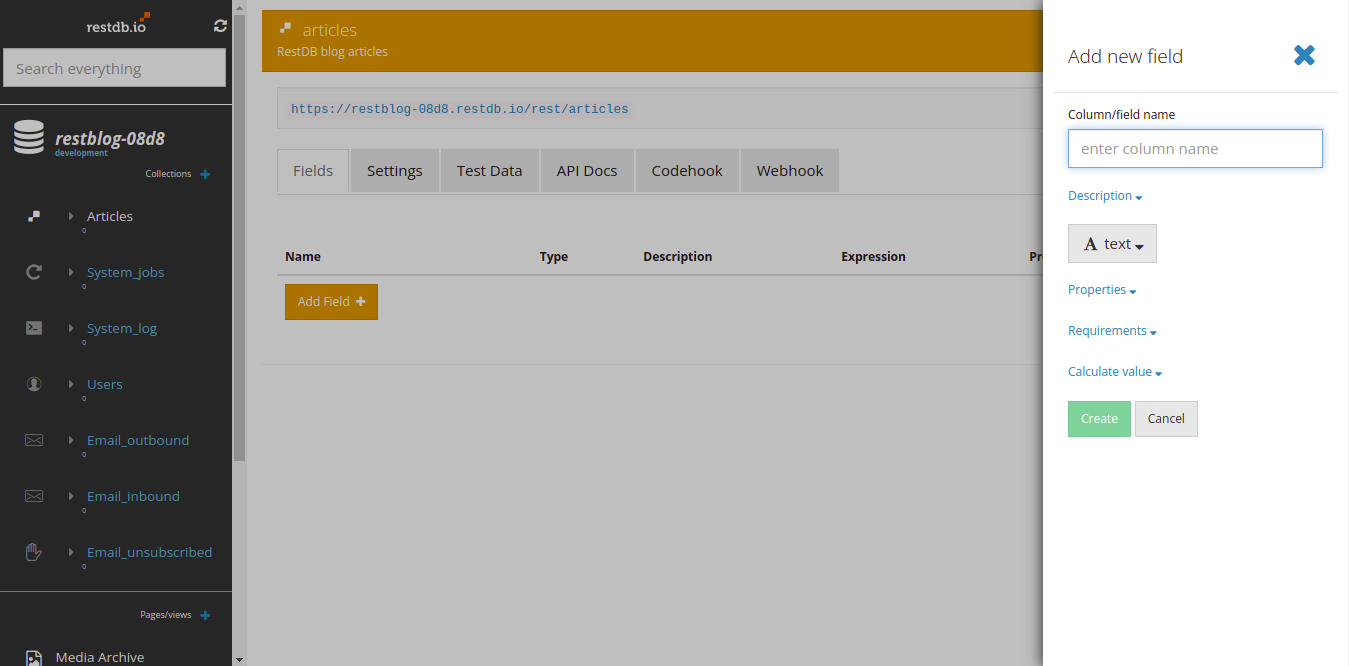
You will see a screen like the one above. We will be creating four fields:
- title - This will be an article’s title
- body - The article’s content
- tags - Technologies used in the article e.g. react, react-router-dom, etc. it will be optional.
- timestamp - time the article was posted.
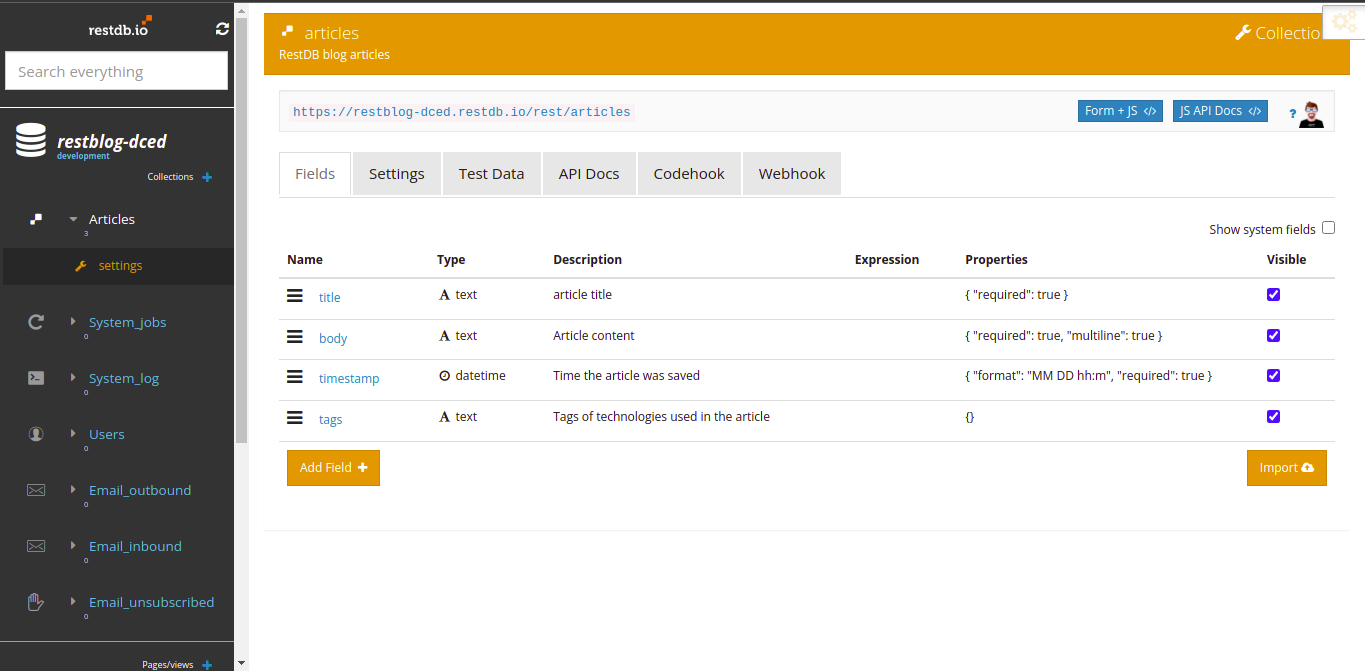
Here is a Github gist containing what we need to create each field.
If you added the fields following the table above, you should see something like this.
We have now successfully created a RestDB account, created a database, a collection in that database for the blog’s articles. We also add models to the collection. What we have to do next is connect our React app with this database, so we can add, delete, or edit articles in the database.
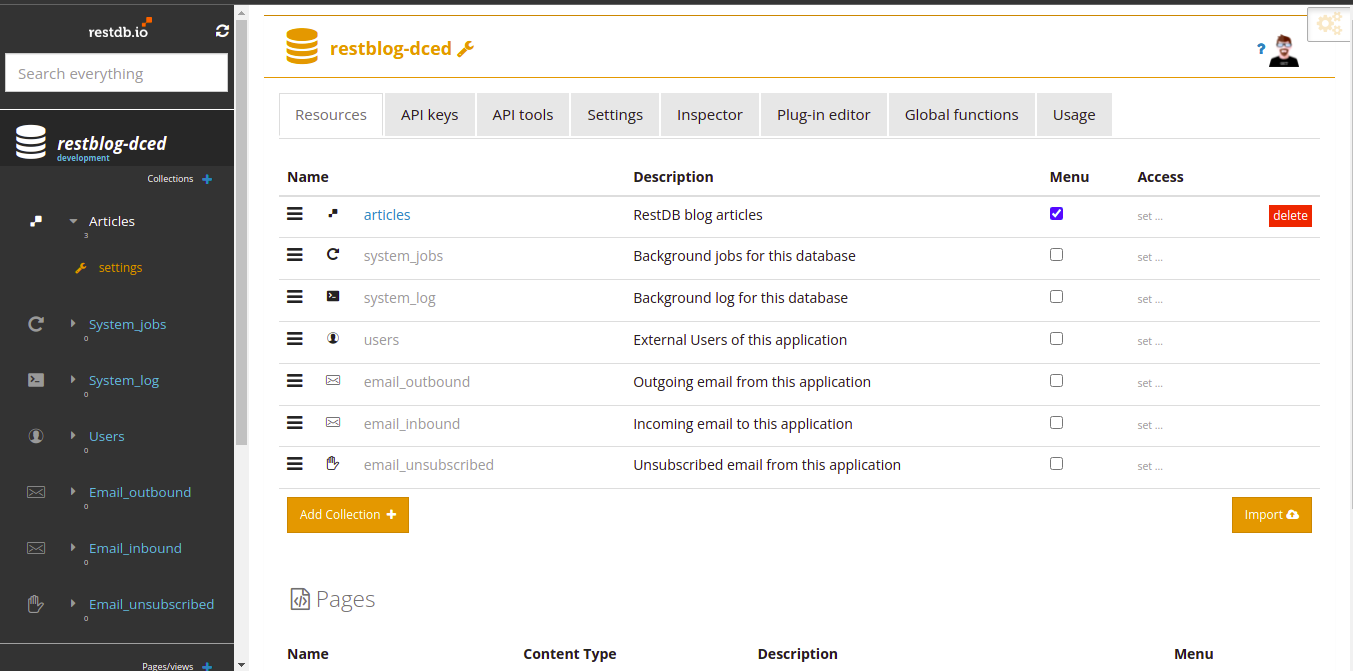
Let’s see the endpoints we can hit. RestDB provides a Swagger documentation for each database created. To access this documentation, click on the name of the database on the top of the sidebar, just beneath the search input. It will navigate us to a page like this.
Click on “API tools” to open up a page like this.
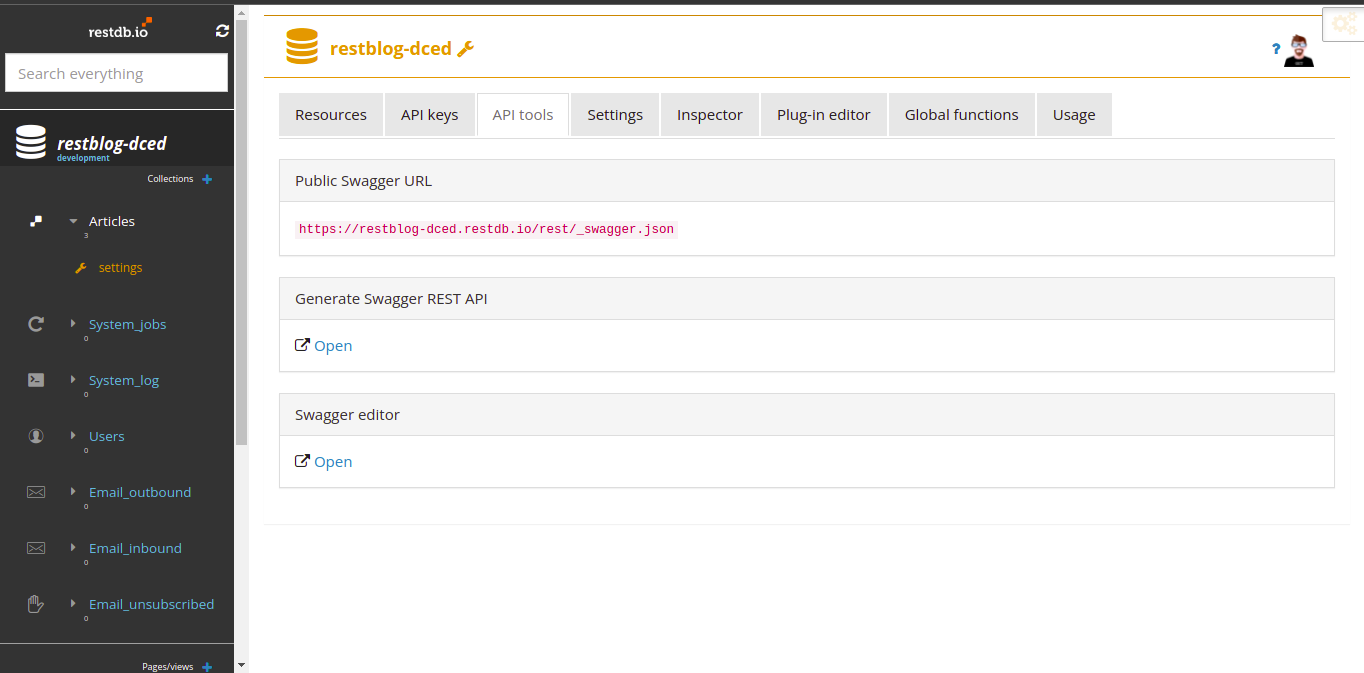
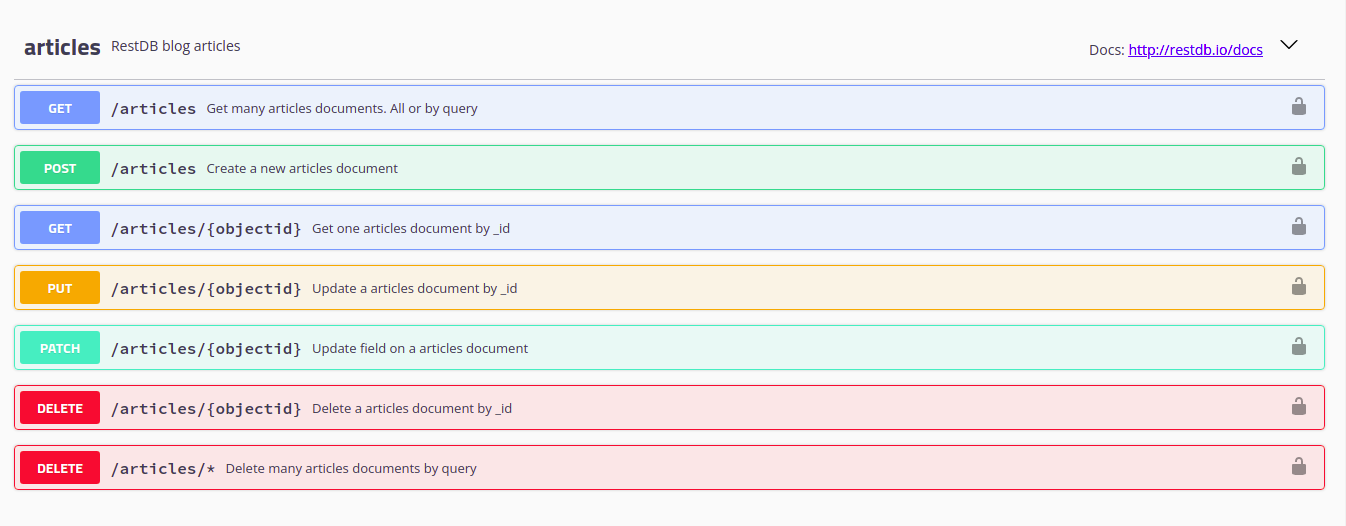
Click on the link under “Generate Swagger REST API” which will open up the swagger docs. You will see the endpoints autogenerated for the collections in the Swagger docs.
We will need an API key to be able to access the database from our app. Go back to the Swagger docs link and click on “API Keys”, and you will see this.
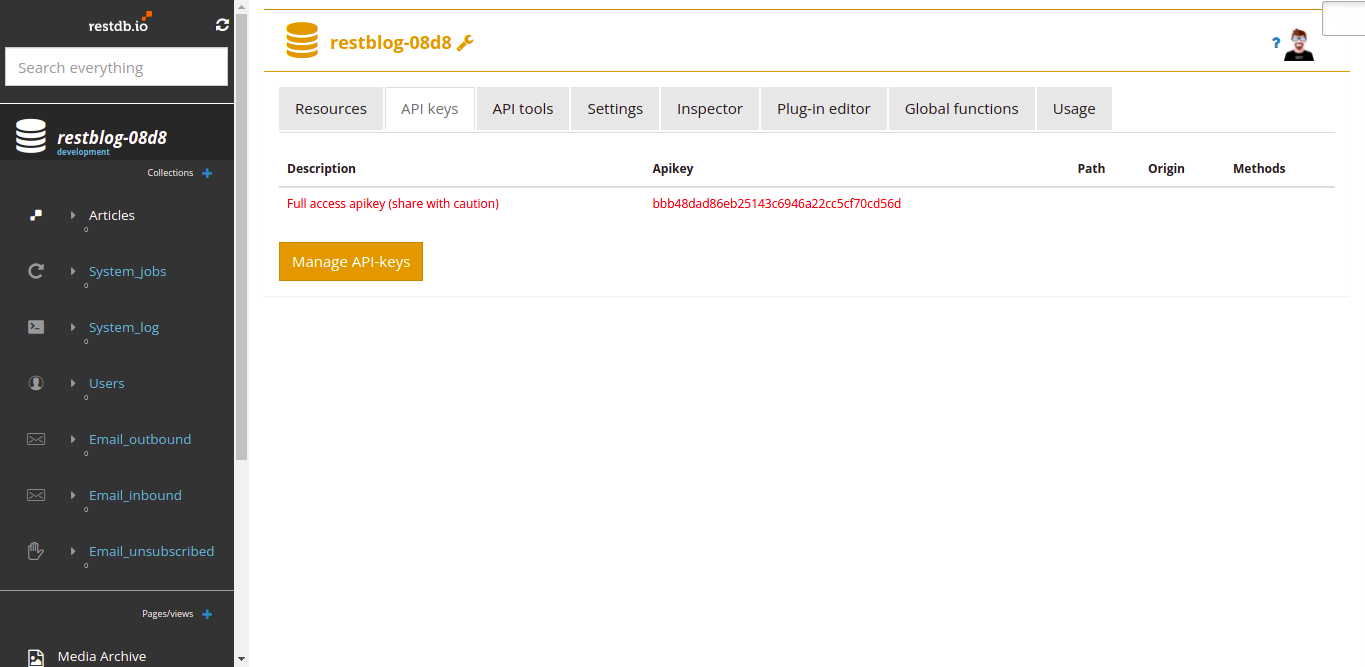
Click on “Manage API Keys”. You will be routed to a new page that should look like the one below.
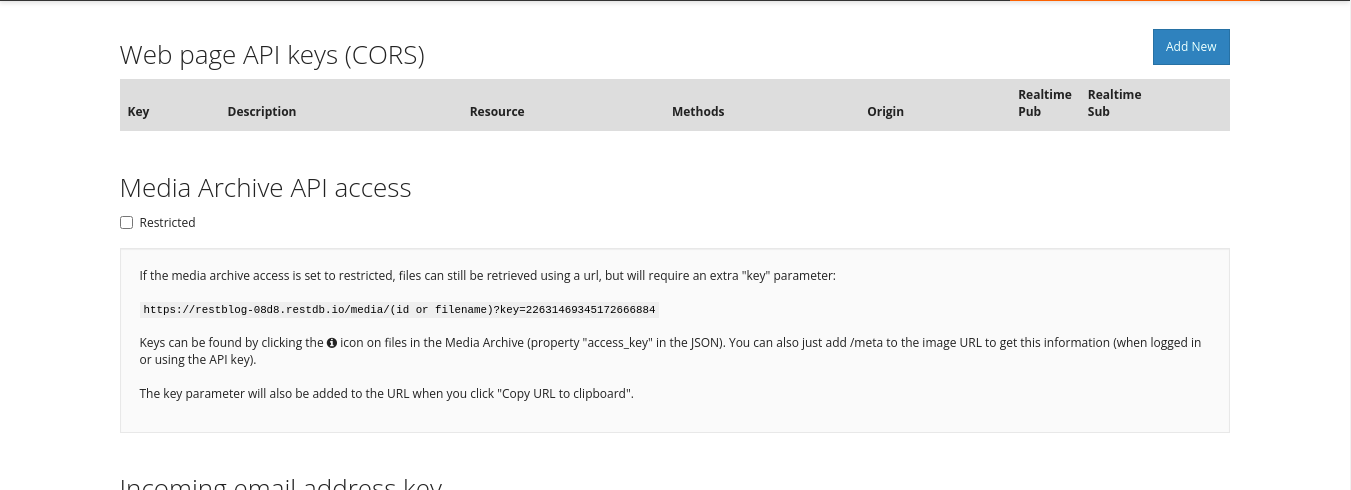
Let’s add a new API key for our project by clicking on the “Add new” button. A modal will pop up.
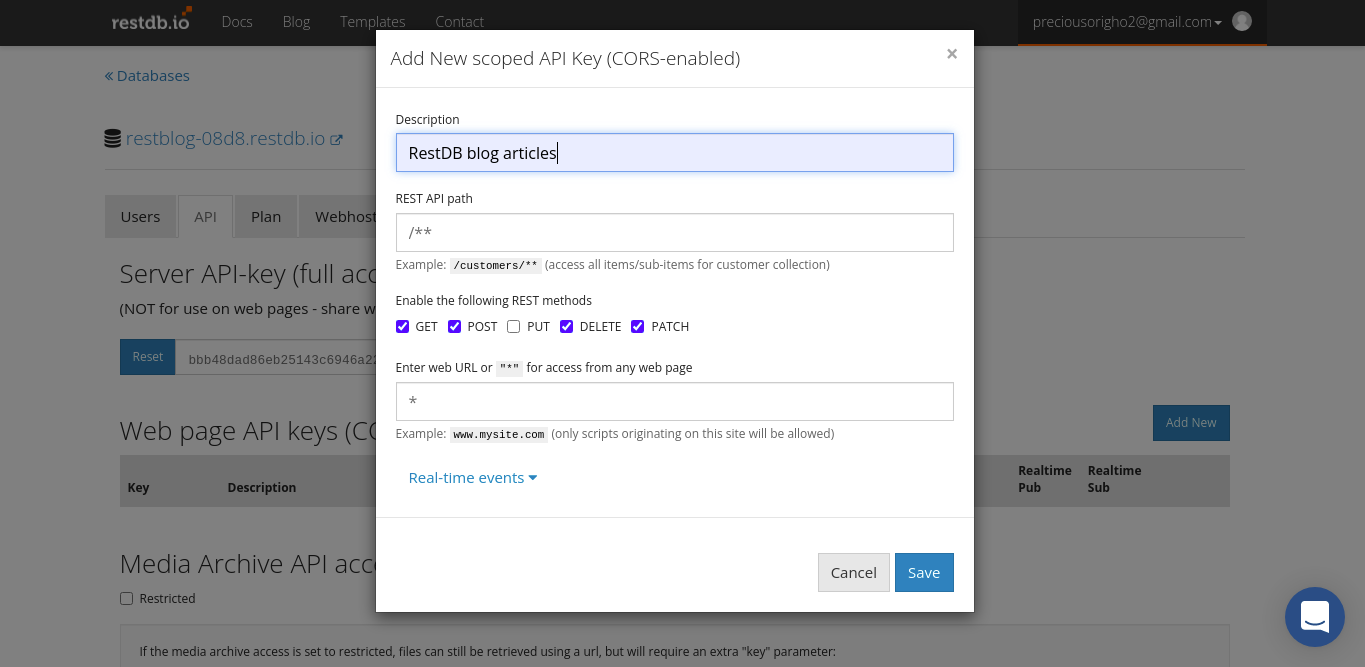
Add a description and select the type of HTTP request we want this API key to support. As seen above, I selected GET, POST, DELETE, and PATCH. Save and copy the API key generated for you. You can see mine below.

Copy the API key, and go to the project you cloned. In the root directory, create a .env file. In it, add the API key in this format,
REACT_APP_API_KEY=${YOUR_API_KEY}NOTE: Do not use my API Key because I will have deleted it by the time you read this. 😂
With the API key, we can now go back to our code editor and finish up the app.
Creating an Axios instance with custom configs
Let’s create an axios instance with some configs. To do this, we will need to add the base URL of the endpoints we will hit, we’d also add some headers (an example: our API key) so we don’t have to add them on all requests. Let’s get started by installing axios with yarn add axios or npm install axios. With Axios installed, let’s navigate to src/utils and add a new file, api.client.js, with the code below.
import axios from "axios";

export default axios.create({
  baseURL: "https://restblog-dced.restdb.io/rest",
  headers: {
    "Content-Type": "application/json",
    "x-apikey": process.env.REACT_APP_API_KEY,
    "cache-control": "no-cache",
  },
});
We created an axios instance with a base URL and custom headers. With it, we will make all the HTTP requests we will need in this app.
Building a PostForm component
In this section, we will build a component with which, We can create an article and make a POST request to add it to our RestDB database. We will also be able to edit an article with this component. In the components folder inside src, create a new folder called PostForm and a file inside it PostForm.jsx and add the code below.
import { useEffect, useState } from "react";
import { useHistory } from "react-router-dom";
import axios from "../../utils/api.client";

const PostForm = ({ state, id, setArticleBody }) => {
  const history = useHistory();
  const [data, setData] = useState(null);
  const [title, setTitle] = useState("");
  const [body, setBody] = useState("");
  const [tags, setTags] = useState("");
  const [loading, setLoading] = useState(false);
  const [error, setError] = useState("");

  useEffect(() => {
    if (id) {
      const fetchArticles = async () => {
        setLoading(true);
        try {
          const { data } = await axios.get(`/articles/${id}`);
          setData(data);
          setTitle(data?.title);
          setBody(data?.body);
          setArticleBody(data?.body);
          setTags(data?.tags);
          setLoading(false);
        } catch (error) {
          console.log(error);
          setLoading(false);
        }
      };
      fetchArticles();
    }
  }, [id, setArticleBody]);

  const postArticle = async () => {
    if ((title, body)) {
      setLoading(true);
      setError("");
      try {
        await axios.post(
          "/articles",
          JSON.stringify({
            title,
            body,
            tags,
            timestamp: new Date().toISOString(),
          })
        );
        return history.push("/");
      } catch (error) {
        setLoading(false);
        setError("Something went wrong!");
        return console.log(error);
      }
    }
    setError("Title and Body fields can't be empty!");
  };

  const editArticle = async () => {
    if ((title, body)) {
      setLoading(true);
      setError("");
      try {
        await axios.patch(
          `/articles/${id}`,
          JSON.stringify({
            ...data,
            title,
            body,
            tags,
          })
        );
        return history.push("/");
      } catch (error) {
        setLoading(false);
        setError("Something went wrong!");
        return console.log(error);
      }
    }
    setError("Title and Body fields can't be empty!");
  };

  const onSubmitHandler = (e) => {
    e.preventDefault();
    if (state !== "edit") {
      return postArticle();
    }
    return editArticle();
  };

  ...
Above, we imported several dependencies, and then we created states for input and text area values using useState. We also initialized the useHistory hook to get the history object.
This component has three props:
state- this will either be ‘add’ or ‘edit’. We will know if we’re to edit an article or create a new one with this.id- This will benullif the state equals’ edit’. If the id isn’t null/undefined, we use it to fetch the details of the article we want to edit.setArticleBody- this function will send the content of the article’s body to the page where this component will be used so that thePreviewPostcomponent can use it.
We added a useEffect, and inside it we are using the id prop to fetch the details of the article we want to edit by making an HTTP request with the id. We then set the values to their respective states to populate the inputs and text area with them.
Next, is a function postArticle. In this function, we check if the title and body states have values. If not, we trigger an error as those fields are required to create an article. Otherwise, we make a POST request to the RestDB server sending a stringified object containing the article’s title, body, tags(if any), and timestamp: all the fields we created in the database. The timestamp is set to the article’s creation time, converted to ISO format. Beneath that is a function for editing an article, similar to the postArticle function, except that it makes a PATCH request to the server with the article’s id.
The onSubmitHandler function, is passed to a form and it calls either editArticle or postArticle function depending on the state.
Let’s finish this component with the code below to render some jsx styled with tailwind.
  ...

  return (
    <form
      onSubmit={!loading ? onSubmitHandler : () => {}}
      id="post-article"
      className="w-full"
    >
      <h2 className="mb-6 text-2xl font-bold text-center">
        {state === "add" ? "Add New Blog Post" : "Edit Mode"}
      </h2>
      <div className="w-full">
        <input
          id="title"
          type="text"
          value={title}
          onChange={(e) => {
            setError("");
            setTitle(e.target.value);
          }}
          placeholder="Enter the article's title"
          disabled={id && loading && true}
        />
      </div>
      <div className="w-full my-6">
        <input
          id="tags"
          type="text"
          value={tags}
          onChange={(e) => setTags(e.target.value.trim())}
          placeholder="(Optional) Tags e.g javascript, typescript "
          disabled={id && loading && true}
        />
      </div>
      <div className="w-full">
        <textarea
          id="body"
          onChange={(e) => {
            setError("");
            setBody(e.target.value);
            setArticleBody(e.target.value);
          }}
          value={body}
          placeholder="Write post content. You can use markdown syntax here"
          disabled={id && loading && true}
        />
      </div>
      {error && <p className="text-red-600 text-xs mt-3 -mb-1">{error}</p>}
    </form>
  );
};

export default PostForm;
Open Source Session Replay
OpenReplay is an open-source, session replay suite that lets you see what users do on your web app, helping you troubleshoot issues faster. OpenReplay is self-hosted for full control over your data.

Start enjoying your debugging experience - start using OpenReplay for free.
Building an ArticleCard component
Let’s build a component that will display details of an article, handle delete functionality and route a user to the edit article page. In src/components, create a new folder ArticleCard and a file named ArticleCard.jsx inside it add the code below into the file.
import { Link, useHistory } from "react-router-dom";
import {
  calcReadTime,
  convertDate,
  truncateText,
} from "../../utils/helperFunctions";
import axios from "../../utils/api.client";

const ArticleCard = ({ id, title, body, timeStamp, tags, refresh }) => {
  const history = useHistory();
  const handleDelete = async () => {
    const confirmed = window.confirm(
      "Are you sure you want to delete this article?"
    );
    if (confirmed) {
      try {
        await axios.delete(`/articles/${id}`);
        refresh && refresh();
      } catch (error) {
        console.log(error);
      }
    }
  };

  return (
    <Link to={`/article/${id}`}>
      <div
        title={title}
        className="flex flex-col justify-between bg-black h-48 py-10 px-12 rounded-md hover:bg-gray-900 transition-all duration-700 relative"
      >
        <div className="absolute top-4 right-6 flex justify-end">
          <span
            className="mr-5 hover:text-white"
            onClick={(e) => {
              e.preventDefault();
              handleDelete();
            }}
            role="button"
          >
            <i className="fas fa-trash" />
          </span>
          <span
            className="hover:text-white"
            onClick={(e) => {
              e.preventDefault();
              history.push(`/write/${id}`);
            }}
            role="button"
          >
            <i className="fas fa-pencil-alt" />
          </span>
        </div>
        <div>
          <h3 className="font-bold text-2xl mb-4">{truncateText(title, 37)}</h3>
          <div className="flex">
            {tags?.map((tag, idx) => (
              <p key={tag + idx} className="mr-4 opacity-80 text-white text-sm">
                #{tag.trim()}
              </p>
            ))}
          </div>
        </div>
        <div className="flex items-center justify-between">
          <p>{convertDate(timeStamp)}</p>
          <p>{calcReadTime(body)}</p>
        </div>
      </div>
    </Link>
  );
};

export default ArticleCard;
The component above has five props;
id- the id of the article being rendered, needed for deleting and editing the articletitle,body,timeStamp,tags- properties of the article.refresh- a function that will be called whenever an article is deleted to refresh the page, thereby fetching the updated list of articles from the server.
We have a function that sends a DELETE request to the server with the id to delete the article. We render the article’s details, truncating the title with truncateText, and rendering the read time and date with calcReadTime and convertDate respectively.
Next, we will update the write page component.
Creating Articles from the App
In this section, we will update the write page, so it can handle creating articles from the app with the PostForm component we created earlier. This component will also handle article editing using the same PostForm component, expecting an id param.
Navigate to src/pages/write/index.jsx and replace what is there with the code below.
import { useState } from "react";
import { useParams } from "react-router-dom";
import Button from "../../components/Button/Button";
import PostForm from "../../components/PostForm/PostForm";
import PreviewPost from "../../components/PreviewPost/PreviewPost";

const Write = () => {
  const { id } = useParams();
  const [previewMode, setPreviewMode] = useState(false);
  const [articleBody, setArticleBody] = useState("");

  return (
    <div
      className="px-20 py-8 relative text-white bg-black w-3/5 mx-auto rounded-lg"
      style={{ height: "85vh", maxHeight: "600px", overflowY: "scroll" }}
    >
      <div
        role="button"
        onClick={() => setPreviewMode(!previewMode)}
        className="absolute right-8 top-6 hover:text-opacity-50 flex items-center duration-500 rdb-preview"
        style={{ color: previewMode ? "#2eff7b" : "" }}
      >
        {previewMode ? (
          <p className="mr-3">Write</p>
        ) : (
          <p className="mr-3">Preview Body</p>
        )}
        {!previewMode ? (
          <i className="fas fa-eye" />
        ) : (
          <i className="fas fa-pencil-alt" />
        )}
      </div>
      <div style={{ display: !previewMode ? "block" : "none" }}>
        <PostForm
          setArticleBody={setArticleBody}
          id={id}
          state={id ? "edit" : "add"}
        />
        <footer className="mt-4">
          <Button form="post-article" type="submit" className="mr-6">
            Publish
          </Button>
        </footer>
      </div>
      <div style={{ display: previewMode ? "block" : "none" }}>
        <PreviewPost children={articleBody} />
      </div>
    </div>
  );
};

export default Write;
Firstly, we imported the hooks and components we will need in this file.
useParams will help us access particular segments of the page’s URL. In this case, we are expecting the special segment of the URL to be an id (check src/App.js).
We destructured the id from the useParams hook in the component. We have two states. One will be handling previewMode: we will use this state to toggle between showing the PostForm or PreviewPost components. The second state, articleBody, will hold the article’s content, set from PostForm. We then render the content of the component.
Fetching and Rendering Articles
In this section, we will update src/pages/home/index.jsx file fetch articles from the server and render them using the ArticleCard component. To do this we will need the ArticleCard component, our Axios instance, useState to hold the response of the HTTP request (an array of articles) and another state for refreshing the page. Finally we have a useEffect to fetch the articles when the page is rendered or refreshed. Let’s do this by replacing the file’s content with the code below.
import { useEffect, useState } from "react";
import ArticleCard from "../../components/ArticleCard/ArticleCard";
import axios from "../../utils/api.client";

const Home = () => {
  const [articles, setArticles] = useState([]);
  const [loading, setLoading] = useState(false);
  const [refresh, setRefresh] = useState(false);

  const fetchArticles = async () => {
    setLoading(true);
    try {
      const res = await axios.get("/articles");
      setArticles(res?.data);
      setLoading(false);
    } catch (error) {
      console.log(error);
      setLoading(false);
    }
  };

  useEffect(() => {
    fetchArticles();
  }, [refresh]);

  return (
    <section className="w-1/2 mx-auto">
      {loading ? (
        <p className="text-center">Loading...</p>
      ) : articles?.length ? (
        articles?.map((article) => (
          <article key={article?._id} className="mb-4">
            <ArticleCard
              id={article?._id}
              title={article?.title}
              tags={article?.tags?.split(",")}
              body={article?.body}
              timeStamp={article?.timestamp}
              refresh={() => setRefresh(!refresh)}
            />
          </article>
        ))
      ) : (
        <p className="text-center">No article, create post</p>
      )}
    </section>
  );
};

export default Home;
So far, we have written some codes to create, edit and delete articles. One last thing to do is create a page to view the entire content of an article. The ArticleCard doesn’t show the body/content of an article. Let’s do that in the next section.
Building article page
Navigate to src/pages/article/index.jsx and replace the file’s content with the code below.
import { useEffect, useState } from "react";
import { useHistory, useParams } from "react-router";
import ReactMarkdown from "react-markdown";
import gfm from "remark-gfm";
import rehypeRaw from "rehype-raw";
import axios from "../../utils/api.client";
import { calcReadTime, convertDate } from "../../utils/helperFunctions";

const Article = () => {
  const params = useParams();
  const history = useHistory();
  const [loading, setLoading] = useState(false);
  const [article, setArticle] = useState(null);

  useEffect(() => {
    if (!params?.id) {
      history.push("/");
    }
  }, [history, params]);

  useEffect(() => {
    const fetchArticle = async () => {
      if (params?.id) {
        try {
          setLoading(true);
          const res = await axios.get(`/articles`, {
            params: {
              q: {
                _id: params?.id,
              },
            },
          });
          setArticle(res?.data[0]);
          setLoading(false);
        } catch (error) {
          setLoading(false);
        }
      }
    };
    fetchArticle();
  }, [params]);

  return (
    <div className="w-4/5 mx-auto mt-16 mb-24">
      {loading ? (
        <p className="text-center">Loading...</p>
      ) : article ? (
        <>
          <header className="rounded-md bg-black mb-10 max-w-9/12 py-12 px-20">
            <h1 className="text-2xl text-center font-semibold uppercase">
              {article?.title}
            </h1>
            <div className="flex items-center justify-center">
              <p className="mt-4 text-sm text-center mr-8">
                {convertDate(article?.timeStamp)}
              </p>
              <p className="mt-4 text-sm text-center">
                {calcReadTime(article?.body)}
              </p>
            </div>
          </header>
          <>
            <ReactMarkdown
              className="prose"
              remarkPlugins={[gfm]}
              rehypePlugins={[rehypeRaw]}
              children={article?.body}
            />
          </>
        </>
      ) : (
        <h3>Article not found!</h3>
      )}
    </div>
  );
};

export default Article;
Above, we added code to:
- fetch details of an article using the article’s id (gotten from the URL of the page),
- render the
title,tags, and thetimestampof the article properly using the necessary helper functions and render thebodywithreact-markdownas it might contain markdown syntax.
It is time to test the app. In your terminal, run yarn start or npm run start to start the dev server. You should see a screen like this.
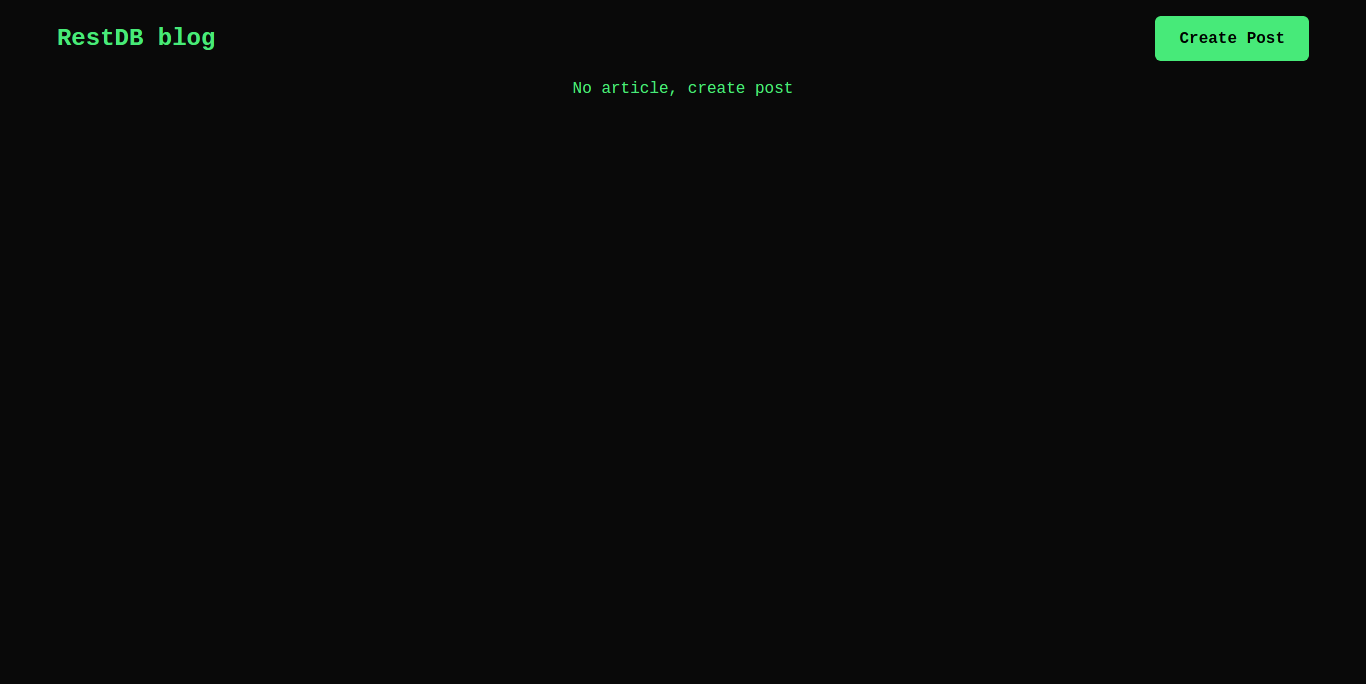
You can create, view, edit, and delete posts. Feel free to tweak the code to your preference.
Conclusions
We’ve now wholly built a blog app using React and RestDB, an online NoSQL database. In this article, we learned what RestDB is and how to use it by creating a RestDB account, setting up a database, adding a collection to the database, adding models, and defining a schema for them. We also learned how to generate an API key and how to generate a Swagger documentation for a RestDB database server. And finally, we were able to connect our blog app with it.
There are still some more things you can learn about RestDB, handle authentication, add custom routes, use webhooks, and host pages, etc. To learn more, visit the official documentation.