Building a Chess Game with React
Implement a multiplayer chess game using React and Socket.io


Want to play chess? Want to learn React tricks? Want to use sockets for communication? This article will answer all three questions by building a multiplayer chess game using React and Socket.io.
Chess is a timeless classic that has been enjoyed by millions of people around the world for centuries. With the rise of online gaming, it’s now possible to play chess with anyone, anywhere, at any time. In this article, we’ll explore how to build a multiplayer chess game using chess.js, react-chessboard, and socket.io. These powerful libraries will allow us to create a fast and responsive chess game with real-time multiplayer functionality. So, whether you’re an experienced chess player or just looking for a fun project to work on, let’s dive in and build our very own multiplayer chess game!
Here’s a breakdown of the libraries that will be used in this project:
- react-chessboard: For rendering the chess board.
- chess.js library: For move generation and validation.
- socket.io: for websocket connection and multiplayer connectivity.
- Material UI: For building the app UI.
Project Structure
In this project, we’ll make use of two directories. One for the client application and the other for the server. Here’s what the project directory structure looks like:
multiplayer-chess
|--client
|--server
Create the client and server directories. You can find the code for this project here.
Building the Client Application
Let’s create a new React app in the client directory. To do this, change into the client directory and run the following:
npx create-react-app .Next, let’s install the required dependencies for the client. In the client directory, run the following:
npm install react-chessboard chess.js socket.io-client @mui/material @emotion/react @emotion/styled
@mui/material, @emotion/react and @emotion/styled are required to setup material UI.
After installing the required dependencies, delete all files in the src directory except index.js and App.js. Edit the index.js file to contain the following:
import React from "react";
import ReactDOM from "react-dom/client";
import App from "./App";

const root = ReactDOM.createRoot(document.getElementById("root"));
root.render(<App />);
Also, let’s edit the App.js file to contain the following:
import { Container } from "@mui/material";
import Game from "./Game";

export default function App() {
  return (
    <Container>
      <Game />
    </Container>
  );
}
If you noticed, we are importing a Game.js file that hasn’t been created yet. This Game component will contain the core logic of our application.
We’ll create the Game component, but before that, let’s create a reusable modal/dialog component (based on Material UI) that will be used in various sections of the app. Create a new directory called components, then create a new file called CustomDialog.js in the components directory. Add the following content to CustomDialog.js:
src/components/CustomDialog.js
import Button from "@mui/material/Button";
import Dialog from "@mui/material/Dialog";
import DialogActions from "@mui/material/DialogActions";
import DialogContent from "@mui/material/DialogContent";
import DialogContentText from "@mui/material/DialogContentText";
import DialogTitle from "@mui/material/DialogTitle";

export default function CustomDialog({ open, children, title, contentText, handleContinue }) {
  return (
    <Dialog open={open}> {/*dialog container*/}
      <DialogTitle>{title}</DialogTitle>
      <DialogContent> {/* Main body of modal/dialog */}
        <DialogContentText> {/* main text */}
          {contentText}
        </DialogContentText>
        {children} {/* Other content */}
      </DialogContent>
      <DialogActions> {/* Dialog action buttons */}
        {/* Force users to make input without option to cancel */}
        {/* <Button onClick={handleClose}>Cancel</Button> */}
        <Button onClick={handleContinue}>Continue</Button>
      </DialogActions>
    </Dialog>
  );
}
The props of the CustomDialog component include:
open: Boolean value to determine if the dialog should be rendered or not.children: Prop to get the component’s children. Children elements are rendered in the dialog content.title: Title of the dialog.contentText: Message to be displayed in the dialog.handleContinue: Function to be called when the “continue button” is clicked.
Now, let’s create the Game component. Create a Game.js file in the src directory and add the following content:
import { useState, useMemo, useCallback, useEffect } from "react";
import { Chessboard } from "react-chessboard";
import { Chess } from "chess.js";
import CustomDialog from "./components/CustomDialog";

function Game({ players, room, orientation, cleanup }) {
  const chess = useMemo(() => new Chess(), []); // <- 1
  const [fen, setFen] = useState(chess.fen()); // <- 2
  const [over, setOver] = useState("");

  // onDrop function
  function onDrop() {} // <- 3

  // Game component returned jsx
  return (
    <>
      <div className="board">
        <Chessboard position={fen} onPieceDrop={onDrop} />  {/**  <- 4 */}
      </div>
      <CustomDialog // <- 5
        open={Boolean(over)}
        title={over}
        contentText={over}
        handleContinue={() => {
          setOver("");
        }}
      />
    </>
  );
}

export default Game;
Below is a breakdown of the code above. Notice the line-number comments in the code above; each line-number comment corresponds to a numbered line below.
- We created a memoized
Chessinstance with 0 dependencies. TheuseMemohook lets us cache the chess instance between re-renders so that the instance is not created on every re-render. ThisChessinstance will be used for move validation and generation. - We set the initial
fenstate to the FEN (Forsyth-Edwards Notation) returned from theChessinstance. FEN is a standard notation to describe the positions of a chess game. - We created an empty
onDropfunction - We set up the chessboard using the
Chessboardcomponent fromreact-chessboardand passed the FEN notation (fen) to thepositionprop, as well as passed theonDropfunction to theonPieceDrop prop. TheonPieceDropfunction prop is called every time a piece is moved. - We created a dialog component that will be rendered when the state
overis truthy.overwill contain a text that describes the reason the game is over. This may be a checkmate or a stalemate/draw.
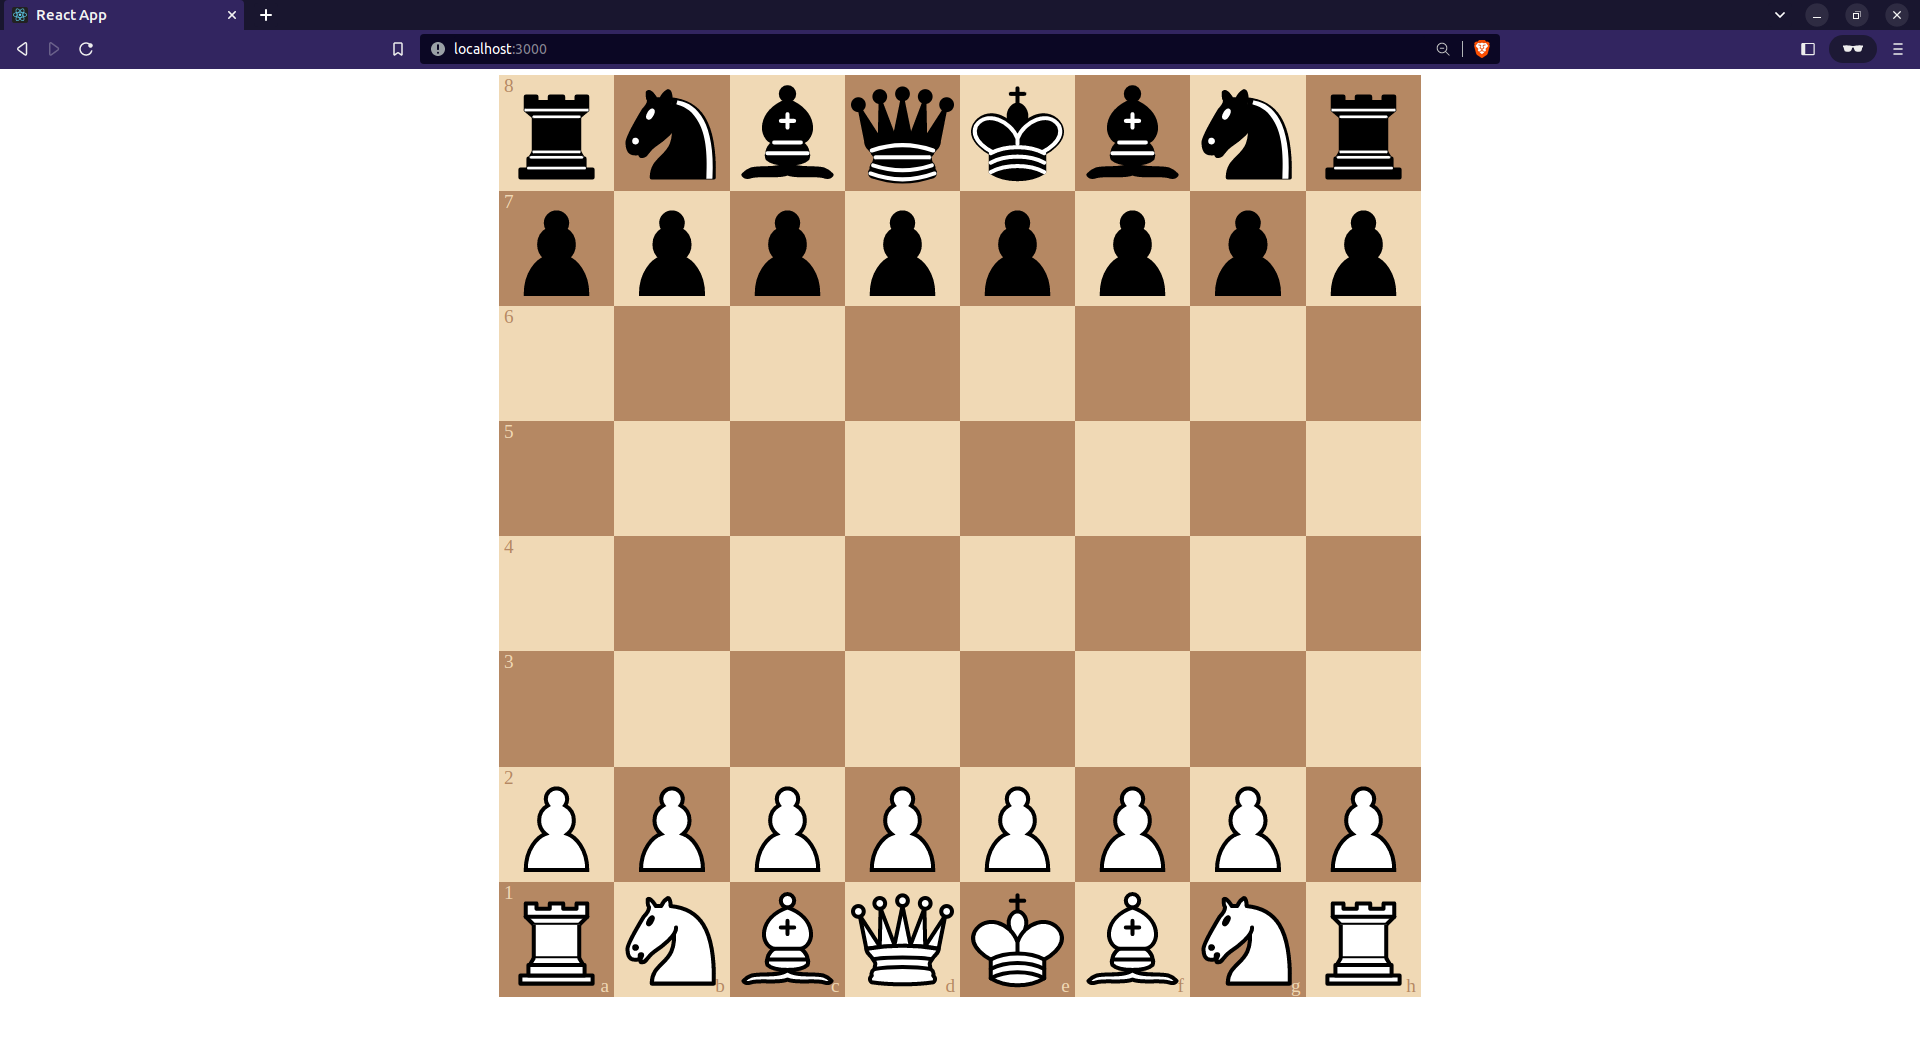
You can start the app by running npm start on your terminal (in the client directory). You’ll find a chessboard displayed.
We are not yet handling piece movements. Let’s fix that. Let’s complete the onDrop function in the Game component:
  // ...
  // onDrop function
  function onDrop(sourceSquare, targetSquare) {
    const moveData = {
      from: sourceSquare,
      to: targetSquare,
      color: chess.turn(),
      // promotion: "q",
    };

    const move = makeAMove(moveData);

    // illegal move
    if (move === null) return false;

    return true;
  }
  // ...
In the code above, we created the onDrop function that receives two function parameters sourceSquare (the initial piece position) and targetSquare(target position). Inside the function, we constructed a moveData object using sourceSquare, targetSquare, and color, which is set to chess.turn() (chess.turn() returns the color of the current side set to play, either 'b' or 'w'). Then we call makeAMove(not defined yet). This function will pass moveData to the Chess instance for validation and generation. We return true or false depending on the returned value of makeAMove.
Now let’s create the makeAMove function. Add the following to the Game component, just above the onDrop function.
// ...
const makeAMove = useCallback(
  (move) => {
    try {
      const result = chess.move(move); // update Chess instance
      setFen(chess.fen()); // update fen state to trigger a re-render

      console.log("over, checkmate", chess.isGameOver(), chess.isCheckmate());

      if (chess.isGameOver()) { // check if move led to "game over"
        if (chess.isCheckmate()) { // if reason for game over is a checkmate
          // Set message to checkmate.
          setOver(
            `Checkmate! ${chess.turn() === "w" ? "black" : "white"} wins!`
          );
          // The winner is determined by checking which side made the last move
        } else if (chess.isDraw()) { // if it is a draw
          setOver("Draw"); // set message to "Draw"
        } else {
          setOver("Game over");
        }
      }

      return result;
    } catch (e) {
      return null;
    } // null if the move was illegal, the move object if the move was legal
  },
  [chess]
);
// ...
In the code above:
- We created the
makeAMovefunction using auseCallbackhook withchessas a dependency in order to cache the function definition between re-renders and avoid creating the function on every re-render. - The
makeAMovefunction accepts a move and callschess.movewith amoveobject as an argument. This method (.move) validates the move and updates theChessinstance’s internal state. Next, we set theGamecomponent’sfenstate to reflect that of theChessinstance. This triggers a re-render and updates the chessboard. - After the move is made, we check if it resulted in a ‘game over’. If this is true, we determine if it was due to a checkmate or a draw and update the game’s state accordingly with an appropriate message.
- The
makeAMovefunction body is wrapped in a try…catch block because callingchess.movewith an illegal move object throws an error. When an error is thrown, we simply returnnull. The null return value is handled in theonDropfunction, as discussed earlier.
You can open the app in your browser and play as both sides. Ensure that the app is running by executing npm start in the client directory, and try to achieve a checkmate.

We have developed a web-based chess application that allows two players to play against each other on the same computer. Now, it’s time to set up the backend server to enable multiplayer connectivity and allow players to compete with each other over the internet.
Setting up the Backend
To enable multiplayer connectivity, we’ll need a backend server. Let’s create an HTTP and websocket server using ExpressJS and Socket.io.
-
Express is a minimal and flexible Node.js web application framework that offers a comprehensive set of features for building web applications. With Express, you can effortlessly set up an HTTP server in a Node.js environment.
-
Socket.io is a framework that offers a straightforward API for creating a WebSocket server to facilitate WebSocket connections. WebSocket connections provide a two-way communication channel between the client and server, where both sides can send and receive messages within a single TCP connection. WebSocket connections are established over HTTP connections through a process of upgrading the connection.
First, let’s initialize the project and install its dependencies. Open a terminal in the server directory and execute the following command:
npm init -ynpm install express socket.io uuidInstall Nodemon as a development dependency. Nodemon automatically restarts the server whenever changes are made. Execute the following command in the terminal:
npm install nodemon --save-devTo use Nodemon in the npm start command, include the start command in the package.json file as follows:”
{
  "scripts": {
    "start": "nodemon server.js"
  }
}
Create a new file named server.js in the server directory, and add the following code to set up an Express and Socket.io server:
const express = require('express');
const { Server } = require("socket.io");
const { v4: uuidV4 } = require('uuid');
const http = require('http');

const app = express(); // initialize express

const server = http.createServer(app);


// set port to value received from environment variable or 8080 if null
const port = process.env.PORT || 8080

// upgrade http server to websocket server
const io = new Server(server, {
  cors: '*', // allow connection from any origin
});

// io.connection

server.listen(port, () => {
  console.log(`listening on *:${port}`);
});
The code above initializes an Express server and creates a WebSocket server using the socket.io library. Here’s a breakdown of the code above:
- The necessary libraries (
express,socket.io,httpanduuid) are imported. - An Express application is initialized by calling the
express()function, then, an HTTP server is created using thehttp.createServer()function with the express application (app) passed as an argument. - The code sets the port to a value received from an environment variable using
process.env.PORTor defaults to8080if the environment variable is not set. - Next, it creates a WebSocket server by calling the
new Server()constructor function from the socket.io library, passing in the HTTP server, and setting thecorsoption to allow connections from any origin. - Finally, the server listens on the specified port using the
server.listen()function and logs a message to the console to indicate that it is listening for incoming connections.
After setting up the HTTP and WebSocket servers, we need to listen for incoming WebSocket connections on the WebSocket server. Add the following listener to server.js, just below the io server definition:
// io.connection
io.on('connection', (socket) => {
  // socket refers to the client socket that just got connected.
  // each socket is assigned an id
  console.log(socket.id, 'connected');
});
Run npm start in the terminal to start the server. You can also run node server.js, but this will not restart the server whenever changes are made. You should see a message listening on *:8080.
Implementing Multiplayer Functionality
To establish a WebSocket connection on the client, we need to enable it. We previously installed the socket.io-client package, and we’ll use the io function from this package to connect to the Socket.io server.
Switch to the client directory. In the src folder, create a new file called socket.js and add the following content:
import { io } from "socket.io-client"; // import connection function

const socket = io('localhost:8080'); // initialize websocket connection

export default socket;
From the code above, the io function is imported from socket.io-client. Then, the io function is called with the server address as a function argument, which initiates the WebSocket connection.
Each connected user needs to have an associated username. For simplicity, we will obtain a user’s desired username whenever the app is launched by making use of a dialog that contains a text field to accept user input.
When a username has been selected, the username retrieved from the user will be stored in a state in the App component. Then, a WebSocket event named username carrying the selected username as event data will be emitted to the server via the WebSocket connection. When the username event is received on the backend server, the username which was sent as event data will be attached to the client’s socket data.
Edit client/src/App.js to contain the following content:
import { useState } from "react";
import { Container, TextField } from "@mui/material";
import Game from "./Game";
import socket from './socket';
import CustomDialog from "./components/CustomDialog";

export default function App() {
  const [username, setUsername] = useState('');

  // indicates if a username has been submitted
  const [usernameSubmitted, setUsernameSubmitted] = useState(false);

  return (
    <Container>
      <CustomDialog
        open={!usernameSubmitted} // leave open if username has not been selected
        title="Pick a username" // Title of dialog
        contentText="Please select a username" // content text of dialog
        handleContinue={() => { // fired when continue is clicked
          if (!username) return; // if username hasn't been entered, do nothing
          socket.emit("username", username); // emit a websocket event called "username" with the username as data
          setUsernameSubmitted(true); // indicate that username has been submitted
        }}
      >
        <TextField // Input
          autoFocus // automatically set focus on input (make it active).
          margin="dense"
          id="username"
          label="Username"
          name="username"
          value={username}
          required
          onChange={(e) => setUsername(e.target.value)} // update username state with value
          type="text"
          fullWidth
          variant="standard"
        />
      </CustomDialog>
      <Game />
    </Container>
  );
}
Go through the comments for an explanation of what’s going on.
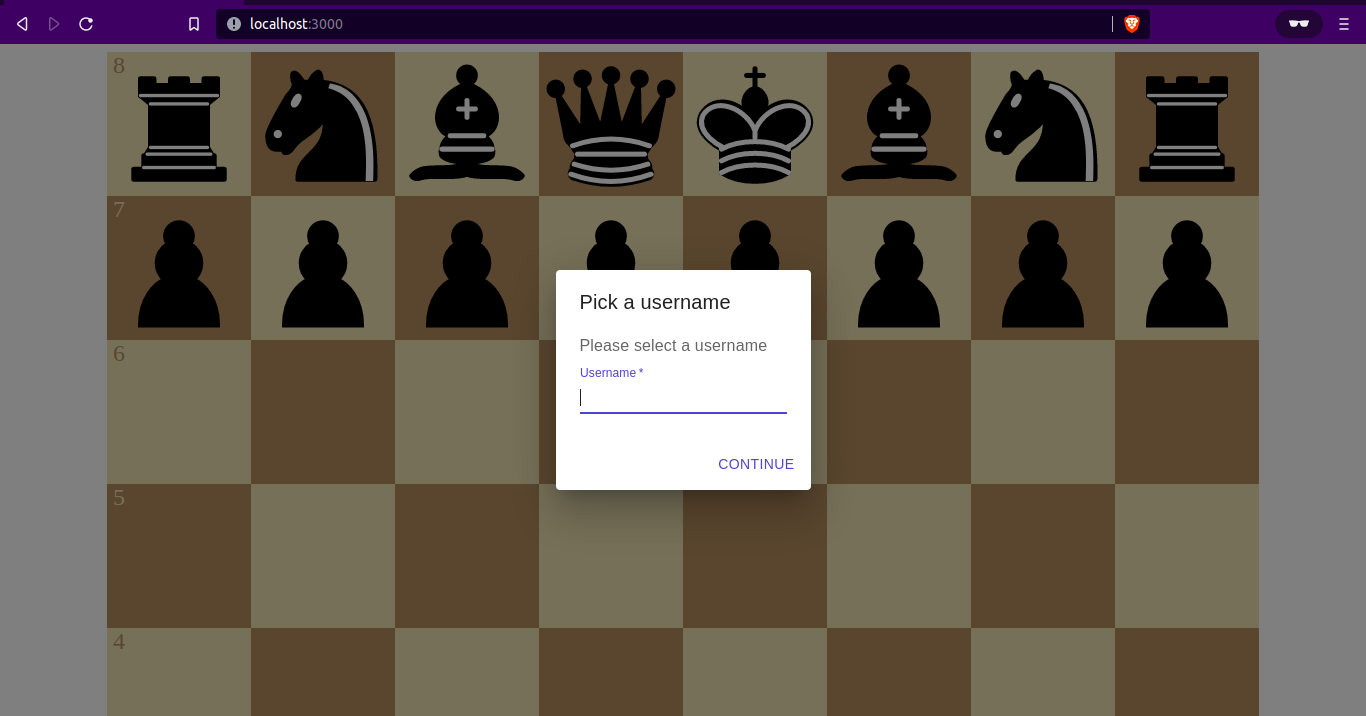
Make sure the backend server is already running (run npm start in the server directory on your terminal). Start the client app (if it isn’t running) by executing npm start in the client directory on your terminal. On your browser, you should see the dialog popup asking for a username.
You should also see a message in the server’s logs similar to this:
Q9uuNsmiSDiHMOCkAAAC connectedThe first item in the log message is the socket ID. You can see this log because the socket.js has been imported into App.js and a WebSocket connection has been initiated.
Now we have to add a WebSocket event listener on the backend to listen to the username event and retrieve the username data from the client. This data will be attached to the client’s socket instance.
In the server directory, open server.js and add the socket event listener inside the callback function of io.on('connection') as shown below:
server/server.js
// ...
// io.connection
io.on('connection', (socket) => {
  // socket refers to the client socket that just got connected.
  // each socket is assigned an id
  console.log(socket.id, 'connected');
  // listen to username event

  socket.on('username', (username) => {
    console.log('username:', username);
    socket.data.username = username;
  });
});
// ...
When you enter a username in the dialog box on the client app and click on ‘continue’, the server should receive the “username” event and data. You’ll find a log in the terminal similar to this:
username: judgeInitializing a Game
Let’s now create a component that will allow users to start or join a game. We’ll be making use of the concept of rooms. Think of it as a literal room that users can join and leave. When there are users in a room, any message emitted to that room will be received by all users in that room.
In our application, the two players in a game will be in a socket room. Events emitted to that room will be received by both players.
Let’s create a new component called InitGame. This component will be responsible for initializing a game. Through this component, a user can either create or join a game room. Create a new file called InitGame.js in the client’s src directory and add the following:
import { Button, Stack, TextField } from "@mui/material";
import { useState } from "react";
import CustomDialog from "./components/CustomDialog";
import socket from './socket';

export default function InitGame({ setRoom, setOrientation, setPlayers }) {
  const [roomDialogOpen, setRoomDialogOpen] = useState(false);
  const [roomInput, setRoomInput] = useState(''); // input state
  const [roomError, setRoomError] = useState('');

  return (
    <Stack
      justifyContent="center"
      alignItems="center"
      sx={{ py: 1, height: "100vh" }}
    >
      <CustomDialog
        open={roomDialogOpen}
        handleClose={() => setRoomDialogOpen(false)}
        title="Select Room to Join"
        contentText="Enter a valid room ID to join the room"
        handleContinue={() => {
          // join a room
        }}
      >
        <TextField
          autoFocus
          margin="dense"
          id="room"
          label="Room ID"
          name="room"
          value={roomInput}
          required
          onChange={(e) => setRoomInput(e.target.value)}
          type="text"
          fullWidth
          variant="standard"
          error={Boolean(roomError)}
          helperText={!roomError ? 'Enter a room ID' : `Invalid room ID: ${roomError}` }
        />
      </CustomDialog>
      {/* Button for starting a game */}
      <Button
        variant="contained"
        onClick={() => {
          // create a room
        }}
      >
        Start a game
      </Button>
      {/* Button for joining a game */}
      <Button
        onClick={() => {
          setRoomDialogOpen(true)
        }}
      >
        Join a game
      </Button>
    </Stack>
  );
}
Explanation of the code above:
- We created a new component called
InitGame. InitGamehas three states:roomDialogOpen: This is a boolean state that determines if theCustomDialogshould be rendered. The dialog contains a text field that allows the user to enter the ID of a room they’d like to join.roomInput: This state enables the component to control the text input. It will contain the room ID the user has provided.roomError: This state keeps track of whatever error was encountered while trying to join a room.
- Material UI’s Stack component is used to wrap other elements. A stack component is simply a css flex component with a default
flex-directionproperty of'column' - We created a dialog that contains a text field that’ll enable a user to enter a room ID they’d like to join.
- There are two action buttons. One to start a new game and another to join a game using the room ID. The button to join a game simply causes the dialog to pop up. All “room-joining” actions will be performed in the dialog
- The props (
setRoom,setOrientation,setPlayers) are functions to update the app state. We’ll see how these work.
Session Replay for Developers
Uncover frustrations, understand bugs and fix slowdowns like never before with OpenReplay — an open-source session replay tool for developers. Self-host it in minutes, and have complete control over your customer data. Check our GitHub repo and join the thousands of developers in our community.
Creating and Joining Game Rooms
To implement room creation on the client side, we need to update the onclick function of the button that starts a game. This function will emit a WebSocket event called createRoom. We will also update the socket.io server to listen to this event and create a new room.
Update the onclick prop of the “Start a game” button in the InitGame component, as shown below:
<Button
  variant="contained"
  onClick={() => {
    socket.emit("createRoom", (r) => {
      console.log(r);
      setRoom(r);
      setOrientation("white");
    });
  }}
>
  Start a game
</Button>
In the onclick function, we emit a createRoom event through the WebSocket connection, and this time, we make use of a callback. We use a callback because it will be called on the backend and passed a roomId argument. This callback function is a way of receiving a response from the server. The value of the response r will be the room’s ID. In the callback function, we update the room state (by calling setRoom) with the value of the room ID and also set the orientation/side to white (so a player who creates a room plays the white side by default).
On the server, we have to listen to this createRoom event and handle the creation of rooms.
Before adding an event listener for the createRoom event, we need a data structure to store the rooms’ data. A room’s data will include a room ID and a list of players in the room. For simplicity, we’ll be making use of a Javascript Map. If you intend to build for production, consider making use of a database like Redis to store room data and game state.
In the server/server.js file, create a new rooms constant above the io.on('connection') function and assign it a Map object.
// ...
const rooms = new Map();

// io.on('connection')
// ...
Then, update the callback function of io.on('connection') by adding a new createRoom event listener just below the username event listener, as shown below:
// io.on('connection');
io.on('connection', (socket) => {
  console.log(socket.id, 'connected');

  // socket.on('username')
  socket.on('username', (username) => {
    console.log(username);
    socket.data.username = username;
  });

  // createRoom
  socket.on('createRoom', async (callback) => { // callback here refers to the callback function from the client passed as data
    const roomId = uuidV4(); // <- 1 create a new uuid
    await socket.join(roomId); // <- 2 make creating user join the room

    // set roomId as a key and roomData including players as value in the map
    rooms.set(roomId, { // <- 3
      roomId,
      players: [{ id: socket.id, username: socket.data?.username }]
    });
    // returns Map(1){'2b5b51a9-707b-42d6-9da8-dc19f863c0d0' => [{id: 'socketid', username: 'username1'}]}

    callback(roomId); // <- 4 respond with roomId to client by calling the callback function from the client
  });
});
Each numbered line below maps to a line-number comment in the code above. In the createRoom event listener:
- A new room ID is created using the
uuidpackage. - The player creating the room joins the room.
- A key-value pair is added to the rooms map, with the uuid as key and room data as value. The room data contains the room Id and list of players.
- The
callbackfunction passed as data from the client (as shown previously in theonclickfunction of the “continue” button of theCustomDialog) is received in the listener function on the server. This callback is called at the end with the newly createdroomIdpassed as a parameter. When thecallbackis called, the client receives the roomId as a response from the server.
To implement room joins, the client application has to emit a socket.io event named joinRoom that will be handled by the server. This event’s data will include the ID of the room the player intends to join.
As outlined earlier, on the client-side, the socket.io client needs to emit a joinRoom event to the server when a user tries to join a room. Update the handleContinue prop of the CustomDialog element in the InitGame component, as shown below:
client/src/InitGame.js
// ...
<CustomDialog
  // ...
  handleContinue={() => {
    // join a room
    if (!roomInput) return; // if given room input is valid, do nothing.
    socket.emit("joinRoom", { roomId: roomInput }, (r) => {
      // r is the response from the server
      if (r.error) return setRoomError(r.message); // if an error is returned in the response set roomError to the error message and exit
      console.log("response:", r);
      setRoom(r?.roomId); // set room to the room ID
      setPlayers(r?.players); // set players array to the array of players in the room
      setOrientation("black"); // set orientation as black
      setRoomDialogOpen(false); // close dialog
    });
  }}
>
  {/** ... */}
</CustomDialog>
From the code snippet above:
- a socket.io event called
joinRoomis emitted along with the room ID when a user clicks on the ‘continue’ button in the dialog. - a callback function is also used to receive a response from the server.
- we set the
roomandplayersstates to the respective data returned from the callback, and we also set the orientation to “black”.
On the server side, we need to add a listener to listen to a joinRoom event and perform actions necessary to join a room. In the listener, we need to check that a room exists, has a player waiting, and is not full. If any of these conditions are not met, we return an error to the user indicating that the room ID is invalid.
The complete code for this implementation is available in the InitGame.js file located here.
In the server/server.js file, add a new joinRoom event listener in the io.on('connection') callback:
io.on('connection', (socket) => {
  // ...
  socket.on('joinRoom', async (args, callback) => {
    // check if room exists and has a player waiting
    const room = rooms.get(args.roomId);
    let error, message;

    if (!room) { // if room does not exist
      error = true;
      message = 'room does not exist';
    } else if (room.length <= 0) { // if room is empty set appropriate message
      error = true;
      message = 'room is empty';
    } else if (room.length >= 2) { // if room is full
      error = true;
      message = 'room is full'; // set message to 'room is full'
    }

    if (error) {
      // if there's an error, check if the client passed a callback,
      // call the callback (if it exists) with an error object and exit or
      // just exit if the callback is not given

      if (callback) { // if user passed a callback, call it with an error payload
        callback({
          error,
          message
        });
      }

      return; // exit
    }

    await socket.join(args.roomId); // make the joining client join the room

    // add the joining user's data to the list of players in the room
    const roomUpdate = {
      ...room,
      players: [
        ...room.players,
        { id: socket.id, username: socket.data?.username },
      ],
    };

    rooms.set(args.roomId, roomUpdate);

    callback(roomUpdate); // respond to the client with the room details.

    // emit an 'opponentJoined' event to the room to tell the other player that an opponent has joined
    socket.to(args.roomId).emit('opponentJoined', roomUpdate);
  });
});
Be sure to read the comments in the code to gain a clearer understanding of what’s going on.
The code snippet above includes a validation step to confirm the room ID’s validity. If the ID is valid, the “joining player” is added to the room, and a response containing the room ID and the list of players in the room is sent back to the “joining player” using the callback function. Additionally, we notify the other player in the room that an opponent has joined, indicating that the game is ready to begin. If the room ID is invalid, we respond with an error message. This error message is handled in the callback function passed to the socket.emit call in the handleContinue prop of the room-joining dialog in the InitGame component, as shown earlier.
Now, we need to update the App component in App.js to render the Game component only when a room has been created or joined by the user, otherwise, the InitGame component is rendered so that the user can choose to create or join a game room.
Modify the App component to resemble the following code:
import { useEffect, useState, useCallback } from "react";
import Container from "@mui/material/Container";
import Game from "./Game";
import InitGame from "./InitGame";
import CustomDialog from "./components/CustomDialog";
import socket from "./socket";
import { TextField } from "@mui/material";

export default function App() {
  const [username, setUsername] = useState("");
  const [usernameSubmitted, setUsernameSubmitted] = useState(false);

  const [room, setRoom] = useState("");
  const [orientation, setOrientation] = useState("");
  const [players, setPlayers] = useState([]);

  // resets the states responsible for initializing a game
  const cleanup = useCallback(() => {
    setRoom("");
    setOrientation("");
    setPlayers("");
  }, []);

  useEffect(() => {
    // const username = prompt("Username");
    // setUsername(username);
    // socket.emit("username", username);

    socket.on("opponentJoined", (roomData) => {
      console.log("roomData", roomData)
      setPlayers(roomData.players);
    });
  }, []);

  return (
    <Container>
      <CustomDialog
        open={!usernameSubmitted}
        handleClose={() => setUsernameSubmitted(true)}
        title="Pick a username"
        contentText="Please select a username"
        handleContinue={() => {
          if (!username) return;
          socket.emit("username", username);
          setUsernameSubmitted(true);
        }}
      >
        <TextField
          autoFocus
          margin="dense"
          id="username"
          label="Username"
          name="username"
          value={username}
          required
          onChange={(e) => setUsername(e.target.value)}
          type="text"
          fullWidth
          variant="standard"
        />
      </CustomDialog>
      {room ? (
        <Game
          room={room}
          orientation={orientation}
          username={username}
          players={players}
          // the cleanup function will be used by Game to reset the state when a game is over
          cleanup={cleanup}
        />
      ) : (
        <InitGame
          setRoom={setRoom}
          setOrientation={setOrientation}
          setPlayers={setPlayers}
        />
      )}
    </Container>
  );
}
Notice the following:
- We added three new states (
room,playersandorientation)room: stores the current room IDplayers: stores the players in a roomorientation: stores the board orientation for a user.
- These 3 new states are updated in the
InitGamecomponent as shown earlier when a user joins or creates a game room. - The
cleanupfunction resets the three states mentioned above which are responsible for initializing a game. This function will be used in theGamecomponent when the game is over. - The
Gamecomponent is now conditionally rendered only when a room has been created or joined (i.e when theroomstate holds a truthy value). - The
InitGamecomponent is rendered if a room has not yet been created or joined, allowing a user to create or join a game room. It receives three functions (setRoom,setOrientation, andsetPlayers) as props, which are used to update theroom,orientation, andplayersstates, respectively, when a user creates or joins a game. - Since WebSocket connections allow 2-way communication between the server and client, we added a socket.io event listener in the
useEffecthook that listens to theopponentJoinedevent. As discussed earlier, the server emits theopponentJoinedevent to a player when an opponent has joined a room they created. This event comes with the room data (including the list of players in the room), so we simply set theplayersstate to the value ofroomData.playersreceived from the event data.
To launch the app on your browser, ensure that the backend server is running on localhost:8080. Enter a username and click on the “Start Game” button to trigger the createRoom event, which will generate a room ID. You will find the room ID logged in the browser console. To join the same room from a different browser tab, open a new tab, enter a different username, and click on “Join a Game”. Next, copy and paste the room ID from the console in the previous tab and click on “Continue”. Upon joining the room, you will see the list of players logged on the console of the first tab. This list is retrieved from the “opponentJoined” event that is received by the room creator when an opponent joins the game room.
Handling Piece Movements
Whenever a player (let’s say player-1) makes a move, our application should send a move event to the player on the other end (player-2) to reflect the moves made by player-1. The Game component will handle the logic for transmitting move events.
Whenever a piece is moved, the onDrop function in the Game component is triggered. This function currently takes in two arguments (sourceSquare and targetSquare). It creates a move object using these arguments and then calls the makeAMove function (with the move object as a parameter), which passes the move object to the Chess.js instance for validation and state update. To inform the other player of a move, we will need to emit a socket event named move. This event will contain the move data. Once the other player receives this event, the makeAMove function will be called on their end to update the app’s state.
Before we update the onDrop function, let’s import the socket.io client into Game.js. Add the following import statement at the top of the Game.js file:
import socket from "./socket";Let’s update the onDrop function in the Game component
Game.js
  // onDrop function
  function onDrop(sourceSquare, targetSquare) {
    // orientation is either 'white' or 'black'. game.turn() returns 'w' or 'b'
    if (chess.turn() !== orientation[0]) return false; // <- 1 prohibit player from moving piece of other player

    if (players.length < 2) return false; // <- 2 disallow a move if the opponent has not joined

    const moveData = {
      from: sourceSquare,
      to: targetSquare,
      color: chess.turn(),
      promotion: "q", // promote to queen where possible
    };

    const move = makeAMove(moveData);

    // illegal move
    if (move === null) return false;

    socket.emit("move", { // <- 3 emit a move event.
      move,
      room,
    }); // this event will be transmitted to the opponent via the server

    return true;
  }
Each numbered line below maps to a line-number comment in the code above:
- A check is made to ensure that a player cannot move the chess pieces of their opponents. For example, a player on the white side should not be able to move black pieces.
- A check is made to ensure that an opponent is connected before making a move.
- After a move is validated and played, an event called
moveis emitted to the game room along with the move data. This move data would be emitted to the opponent’s client app.
How does the opponent receive the move data emitted by the first player? To accomplish this, we must utilize socket.io event listeners in both the backend and the client.
Let’s set up the backend server to listen to move event and transmit it to the second player.
In the server.js file, add a new move event listener function in the io.on("connection") callback function:
// ...
io.on('connection', (socket) => {
  // ...
  socket.on('move', (data) => {
    // emit to all sockets in the room except the emitting socket.
    socket.to(data.room).emit('move', data.move);
  });
});
In the code above, when a move event is received on the backend, it is broadcasted to all sockets in the room except the socket that generated the event. So if player-1 and player-2 are in the same game room and player-1 emits a move event, every socket except player-1’s socket connection will receive the move event, in this case, only player-2’s client receives the move event.
Here’s a visual representation of the event flow:

When the backend server emits the move event to player-2’s client, player-2’s client needs to listen to this event and play the move on behalf of player-1. Therefore, we need to set up an event listener on the Game component. The listener function will be triggered whenever the opponent makes a move. We’ll set up the listener in a useEffect hook so it’ll be registered when the component is mounted.
Add the following useEffect hook to the Game component in Game.js below the onDrop function:
  useEffect(() => {
    socket.on("move", (move) => {
      makeAMove(move); //
    });
  }, [makeAMove]);
In the code above, we set up the socket.io event listener when the component is mounted (i.e, in the useEffect hook). When a client receive’s a move event, the move is validated and played using the makeAMove function.
In the Game’s UI, we need to display the game room’s ID and list of players.
Add the following at the top of Game.js to import UI components from Material UI:
import {
  Card,
  CardContent,
  List,
  ListItem,
  ListItemText,
  ListSubheader,
  Stack,
  Typography,
  Box,
} from "@mui/material";
Update the returned JSX in the Game component to display the room ID and players:
// Game component returned jsx
return (
  <Stack>
    <Card>
      <CardContent>
        <Typography variant="h5">Room ID: {room}</Typography>
      </CardContent>
    </Card>
    <Stack flexDirection="row" sx={{ pt: 2 }}>
      <div className="board" style={{
        maxWidth: 600,
        maxHeight: 600,
        flexGrow: 1,
      }}>
        <Chessboard
          position={fen}
          onPieceDrop={onDrop}
          boardOrientation={orientation}
        />
      </div>
      {players.length > 0 && (
        <Box>
          <List>
            <ListSubheader>Players</ListSubheader>
            {players.map((p) => (
              <ListItem key={p.id}>
                <ListItemText primary={p.username} />
              </ListItem>
            ))}
          </List>
        </Box>
      )}
    </Stack>
    <CustomDialog // Game Over CustomDialog
      open={Boolean(over)}
      title={over}
      contentText={over}
      handleContinue={() => {
        setOver("");
      }}
    />
  </Stack>
);
Here’s a breakdown of what’s happening:
-
The code is returning a React component that renders a stack of elements using the
<Stack>component provided by Material UI. -
The first element in the stack is a
<Card>component with a<Typography>component inside of it that displays the room ID.Typographyis a Material UI component used for rendering text. -
The second element in the stack is a horizontal stack (
flexDirection="row) created with another<Stack>component. It contains a<div>element with aclassNameofboardthat sets some CSS styles to specify the size of the board. -
Notice the new prop in the
Chessboardcomponent calledboardOrientation. This determines the orientation of the chessboard for a player, which could be either white or black. Players who create a room play on the white side by default, while players who join a room play on the black side. -
The second element in the horizontal stack also conditionally renders a
<Box>component that contains a<List>of player names. This only occurs if the players array has at least one item. -
The third element in the stack is a custom dialog box (
<CustomDialog>) that displays when theoverstate variable is truthy. It contains a title, some content text, and a button that clears the over state when clicked.
Overall, the code above renders a chess game interface with a board and player list, and a custom dialog for when the game is over.
You can view the entire content of Game.js at this point here
Two players can now play against each other provided they are in the same room. Launch the app (make sure the server is up and running the coommand npm start on the server directory), open two browser tabs, create and join a room on each tab. Try playing both sides to get a checkmate.
Handling Disconnections
When a player gets disconnected while in a game room, the other player in the room has to be informed that the opponent has been disconnected. In a production app, you’ll want to implement some reconnection logic to allow disconnected clients to automatically rejoin a game room after they have reconnected. More information on this can be found in the “Conclusion” section of this article. For simplicity, when a client disconnects, we’ll just inform the other player that the opponent has been disconnected and then close the game room.
How does the server know when a client has been disconnected? Socket.io emits a special event called disconnect from the client to the server whenever a client gets disconnected. We can set up a disconnect event listener in the server and emit a playerDisconnected event to all rooms that the client has joined. When this event is emitted to a room, the other player in the room will receive this event and will be notified of the opponent’s disconnection.
Let’s add the disconnect event listener. In the server.js file, add a new disconnect event listener in the io.on("connection") callback function just below the move event listener.
// io.connection
io.on("connection", (socket) => {
  // ...

  socket.on("disconnect", () => {
    const gameRooms = Array.from(rooms.values()); // <- 1

    gameRooms.forEach((room) => { // <- 2
      const userInRoom = room.players.find((player) => player.id === socket.id); // <- 3

      if (userInRoom) {
        if (room.players.length < 2) {
          // if there's only 1 player in the room, close it and exit.
          rooms.delete(room.roomId);
          return;
        }

        socket.to(room.roomId).emit("playerDisconnected", userInRoom); // <- 4
      }
    });
  });
});
In the code above, we added a disconnect event listener. Below is a breakdown of what’s happening in the listener’s callback function. Notice the line number comments in the code above; each numbered line below corresponds to a line-number comment in the code above.
- The list of available rooms can be retrieved and stored in the
gameRoomsvariable. To obtain an array of all values within a map, we made use the.values()method. Specifically, callingrooms.values()would return an array containing all the values from the key-value pairs within the rooms map. - We loop over every room in the rooms map in a bid to find out what rooms the disconnecting client joined.
- Using the socket ID as a reference, we iterate over the list of players in the current room being looped over to find out if the disconnecting client/player is part of it.
- If the disconnecting client is part of the room, we simply emit a
playerDisconnectedevent to the room, this event will be received by the other players in the room.
In order to notify the user when an opponent has been disconnected, the client-side application must listen for the playerDisconnected event.
Add a new useEffect hook in the Game component in Game.js, the listener will be registered in this hook as seen below:
function Game({ players, username, room, orientation }) {
  // ...

  useEffect(() => {
    socket.on('playerDisconnected', (player) => {
      setOver(`${player.username} has disconnected`); // set game over
    });
  }, []);

  // ...
}
When the playerDiconnected event is received, we simply set the over state to “(username) has disconnected”. This state change causes the “game over” alert dialog to pop up as shown below.
Freeing Up Resources
After a game is finished, it is necessary for both the client and server to release the resources that were used to initialize the game. This involves closing the game room and removing it from the rooms map on the backend, as well as having all client sockets exit the room.
To implement this, a new event called closeRoom needs to be created. This event will be triggered when a player clicks on the “Continue” button in the “game over” alert dialog. To set up this event, the handleContinue function prop of the “game over” CustomDialog element in Game.js should be updated to emit a “closeRoom” event on the websocket connection:
Game.js
function Game({ players, room, orientation, cleanup }) {
  // ...

  return (
    // ...
      <CustomDialog // Game Over CustomDialog
        open={Boolean(over)}
        title={over}
        contentText={over}
        handleContinue={() => {
          socket.emit("closeRoom", { roomId: room });
          cleanup();
        }}
      />
    // ...
  );
}
In the code snippet above, we only modified the handleContinue function prop of the CustomDialog component that appears when a game is finished. In the handleContinue function, a closeRoom event is transmitted to the server, along with the room ID as data. The backend will manage the room closure, as you will soon discover. Following that, we invoke the cleanup function, which resets the state of the application, as previously described.
The server has to listen to the closeRoom event and perform the operations to close a room and free up resources. Let’s add a new closeRoom event listener in the io.on("connection") callback function in the server.js file:
io.on("connection", (socket) => {
  // ...

  socket.on("closeRoom", async (data) => {
    socket.to(data.roomId).emit("closeRoom", data); // <- 1 inform others in the room that the room is closing

    const clientSockets = await io.in(data.roomId).fetchSockets(); // <- 2 get all sockets in a room

    // loop over each socket client
    clientSockets.forEach((s) => {
      s.leave(data.roomId); // <- 3 and make them leave the room on socket.io
    });

    rooms.delete(data.roomId); // <- 4 delete room from rooms map
  });
});
Notice the line number comments in the code above; each numbered line below corresponds to a line-number comment in the code above.
- The
closeRoomevent is broadcasted to the other clients in the room to let them know that the room is closing. - All clients that have joined a room (using the socket.join method) are retrieved. The value of the variable
fetchedSocketsis an array of all clients in the room. - The array of client sockets is iterated over, and each socket is made to leave the room using the
socket.leavemethod. - Finally, the room is removed from the map of rooms.
As explained earlier, when a closeRoom event is received by the server, the server broadcasts the event to all clients in the room except the client that generated the event. The client applications need to listen to the closeRoom event in order to free up resources and leave the game environment. We can set up this listener in a new useEffect hook in the Game component. Add a new useEffect hook to the Game component in Game.js as shown below:
// ...
function Game({ players, room, orientation, cleanup }) {
  // ...

  useEffect(() => {
    socket.on('closeRoom', ({ roomId }) => {
      if (roomId === room) {
        cleanup();
      }
    });
  }, [room, cleanup]);

  // ...
}
In the code snippet above, when the client application receives a closeRoom event, it first checks if the ID of the closed room is the same as the currently joined room. It then calls cleanup, which resets the application’s state and exits the game environment. By resetting the room state, the Game component is unmounted and the InitGame component is mounted in its place.
To execute the code, run the application and create two browser tabs. Then, on one tab, create a game room, and on the other, join the room. Try to obtain a checkmate, which will trigger the “game over” alert dialog to appear. Once you click “Continue”, the “closeRoom” event will be transmitted via the websocket connection, and the cleanup function will be executed after sending the event. As a result, the Game component will be unmounted. The other client in the second tab will receive the “closeRoom” event, causing it to leave the game environment. This is demonstrated in the following example:
Conclusion
In this article, we’ve learned how to build a multiplayer chess game using react-chessboard to render the chessboard, chess.js for chess logic including moves and validation, and socket.io for websocket connectivity.
If you’re considering building a multiplayer chess game for production, here are some suggestions to make the app production-ready:
- Implement an authentication system to attach persistent user IDs to client sockets. This way, a client’s websocket connection can be easily identified. Here’s an example that illustrates the concept.
- Persist room data and game state. On the backend, store the game state and room data on a persistent and fast database like Redis. This way, if the server is restarted, room data and game states won’t be lost. When a disconnected client app reconnects, the room data and game state can be retrieved from the backend, and the client app can continue the game.
Gain Debugging Superpowers
Unleash the power of session replay to reproduce bugs and track user frustrations. Get complete visibility into your frontend with OpenReplay, the most advanced open-source session replay tool for developers.