Building a Responsive Sign Up Form


One way to build a simple yet responsive UI component is by combining HTML, CSS, and JavaScript. HTML is used to structure the form’s contents, such as labels, buttons, and input fields. CSS is used for the basic styling of the form, such as colors, fonts, and layouts. JavaScript adds interactivity and validation to the form, ensuring that the user’s input is correct before submission. It is essential to have a user-friendly and easily accessible form.
This article is geared toward beginners in Web UI development and will discuss how to create a responsive form using HTML, CSS, and JavaScript that looks great on any device and is easy for users to interact with.
Basic HTML
HTML plays a crucial role in creating the structure and content of a webpage, and it is the foundation of the modern web. HTML uses tags to define elements on a webpage. The HTML code specifies the webpage’s content and how it should be displayed, including the text, images, links, and other elements that make up the page.
The opening tag consists of the tag name, and the closing tag consists of a slash followed by the tag name. For example, the opening tag for a div element is <div>, and the closing tag is </div>. Some common HTML tags are <html>, <head>, <body>, <h1> to <h6>, <p>, <img>, and <a>.
Some tags are self-closing, meaning they don’t have a closing tag. These tags are closed by adding a slash at the end of the opening tag. For example, the <img> tag is used to add an image to a webpage, and it is self-closing: <img src=" image.jpg" alt=" A description of the image"/>.
Now let’s create the basic HTML for the sign-up page while deep-diving into what each tag stands for and how they work.
<div class= "container">: This tag defines a division or section of the webpage. Theclassattribute specifies a name used to apply styles to the element. As we have
<div class="container">
  ...
  ...
</div>
<form action="/signup" method=" post">: This tag creates a form that allows the user to input data and submit it to the server. Theactionproperty specifies the URL of the server-side script that will process the form data, and themethodattribute specifies the HTTP method (in this case,post) used to submit the form data.
  <form action="/signup" method="post">
    ...
    ...
  </form>
<label for= "username">Username:</label>: This tag creates a label for the input field that follows. Theforattribute specifies theidof the input field that the label is associated with.
<label for="username">Username:</label><input type= "text" class= "username" name= "username"/>: This creates an input field for the user to enter their username. Thetypeproperty specifies the type of input field (in this case, a text field), and theclassattribute specifies a class name that can be used to apply styles to the element. Thenamespecifies the name of the input field and therequiredattribute specifies that a value must be specified for the input before the form can be submitted.
<input type="text" class="username" name="username" required /> This should give this sort of message when the form is submitted without a username;
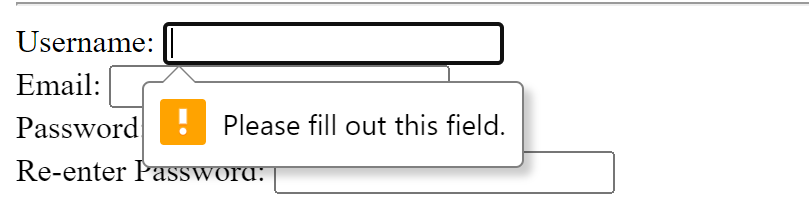
With the above, we can specify labels and inputs for usernames, emails, passwords, and any other information we want to retrieve when the user fills out the form.
Additionally, we can add,
<div>
  <button type="submit" class="button">SIGN UP</button>
  <p>
    By clicking sign up, you agree to
    <a href="#" style="color: #000000">Terms & Conditions</a>
  </p>
  <p>
    To learn more about how we collect, use, share, and protect your
    personal data
    <a href="#" style="color: #000000">Privacy and Policy</a>
  </p>
</div>
The type specifies the type of button being created. In this case, the value is “submit”, which indicates that the button is used to submit a form. When the user clicks the button, the form will be submitted, and the data it contains will be sent to the server for processing.
The class attribute specifies a class name for an element. The class name in this case can be used to apply CSS styles to the element or to reference the element in JavaScript code.
The text content of the button element, “SIGN UP”, is the text that will be displayed on the button. When the button is clicked, the form will be submitted with the specified type and class attributes, and the text on the button will be displayed to the user.
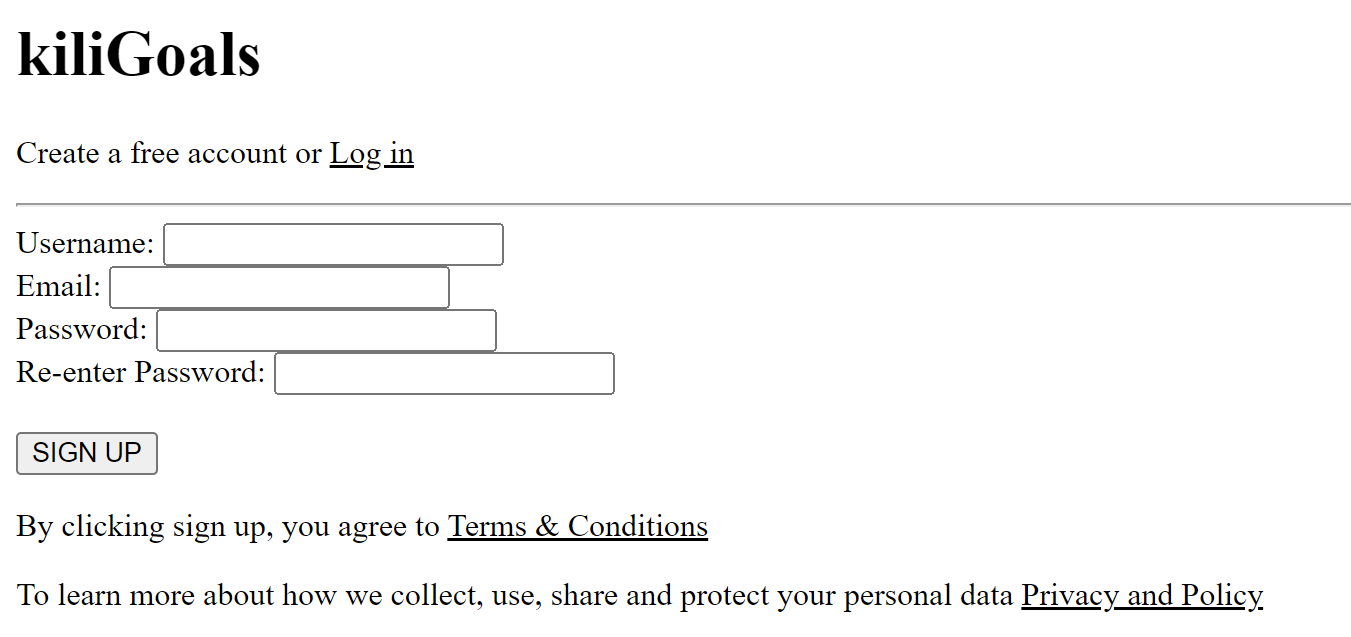
With additional HTML, the code should look like this on the browser;
In addition to the core HTML tags, many other technologies can be combined with HTML to create more complex and interactive web pages. These technologies include CSS, used to control the styling and layout of a webpage, and JavaScript. This programming language allows you to add interactive elements and functionality to a webpage.
Styling with CSS
To use CSS in an HTML document, you can include it directly in the document using a <style> element in the head of the document, or you can link to an external CSS file using the <link> element in the head of the document.
Here is an example showing how to include CSS in an HTML document using the <style> element:
<html>
  <head>
    <style>
      form {
  width: 50%;
  margin: 0 auto;
  padding: 20px;
}
</style>
</head>
<body>
    ...
</body>
</html>
And here is an example of how you might link to an external CSS file using the <link> element:
<html>
  <head>
    <link rel="stylesheet"  href="styles.css">
  </head>
  <body>
  ...
  </body>
</html>
In the CSS file, you can define various style rules that specify how different elements in the HTML document should be styled. A style rule consists of a selector and a declaration block. The selector identifies the element(s) that the rule applies to, and the declaration block contains one or more declarations that specify the styles to be applied to the element(s).
Here is an example of a style rule that sets different styles to a <button> element:
.button {
  background-color: #000000;
  color: #ffffff;
  padding: 8px 16px;
  margin: 8px 0;
  width: 100%;
  border-radius: 5px;
  cursor: pointer;
  font-weight: bold;
}
In this example, button is the selector and { } is the declaration block. The property specifies the aspect of the element’s style being modified. For example, background-color, and the value specifies the new value for that property, #000000.
With CSS, the code should look like this on the browser;

Session Replay for Developers
Uncover frustrations, understand bugs and fix slowdowns like never before with OpenReplay — an open-source session replay tool for developers. Self-host it in minutes, and have complete control over your customer data. Check our GitHub repo and join the thousands of developers in our community.
Form Validation
Before a form is submitted, it is validated to ensure that all fields have been filled out correctly. This is crucial since it ensures that the form is correct and complete, and that the data provided is legitimate. There are several methods for validating forms, including utilizing JavaScript to validate the form on the client side (the user’s computer) or server-side scripts to validate the form on the server. Checking that required fields have been filled out, that data is in the proper format (for example, a valid email address), and that numbers fall within a specific range are some frequent types of form validation.
HTML constraint validation
HTML attributes and elements can be used to establish criteria for form input formatting and entry during form validation. These guidelines may include minimum and maximum input lengths, the input type (such as an email address or password), and whether the input is necessary. Before submitting a form to the server, the browser can check the input against these guidelines to ensure it is valid.
Adding some HTML validation to the code;
<div>
  <label for="username">Username:</label>
  <input type="text" class="username" name="username" required minlength="3" maxlength="30">
</div>minlengthandmaxlengthon theusernameandpasswordinput fields ensure that the entered value is within the specified length range.
<div>
<label for="password">Password:</label>
    <input type="password" class="password" name="password" required minlength="8" maxlength="30" pattern="(?=.*[A-Z])(?=.*[0-9])(?=.*[a-z]).*" />
</div>-
patternon input fields specifies a regular expression that the entered value must match. In this case, the regular expression for the username allows only alphanumeric characters and underscores, and the regular expression for the password requires at least one uppercase letter, one lowercase letter, and one number. -
requiredon all input fields specifies that the field is required and must be filled out before the form can be submitted. -
typeon the input fields specifies that the field should contain a particular type of value, be it email, name, or password, and the browser may validate the value to ensure it is valid.
Form validation using HTML validation can help to improve the user experience by providing immediate feedback on invalid input and can also help to prevent incorrect or malicious data from being submitted to the
JavaScript Validation
First, call a function that gets the values of the form elements with the name attributes “username”, “email”, “password”, and “password2” from the form with the name attribute “signupForm” and store them in preferred variable names as shown;
function validateSignupForm() {
  var username = document.forms\["signupForm"\]["username"].value;
  var email = document.forms\["signupForm"\]["email"].value;
  var password = document.forms\["signupForm"\]["password"].value;
  var password2 = document.forms\["signupForm"\]["password2"].value;
To check if any of the fields are empty, write a statement that returns an alert
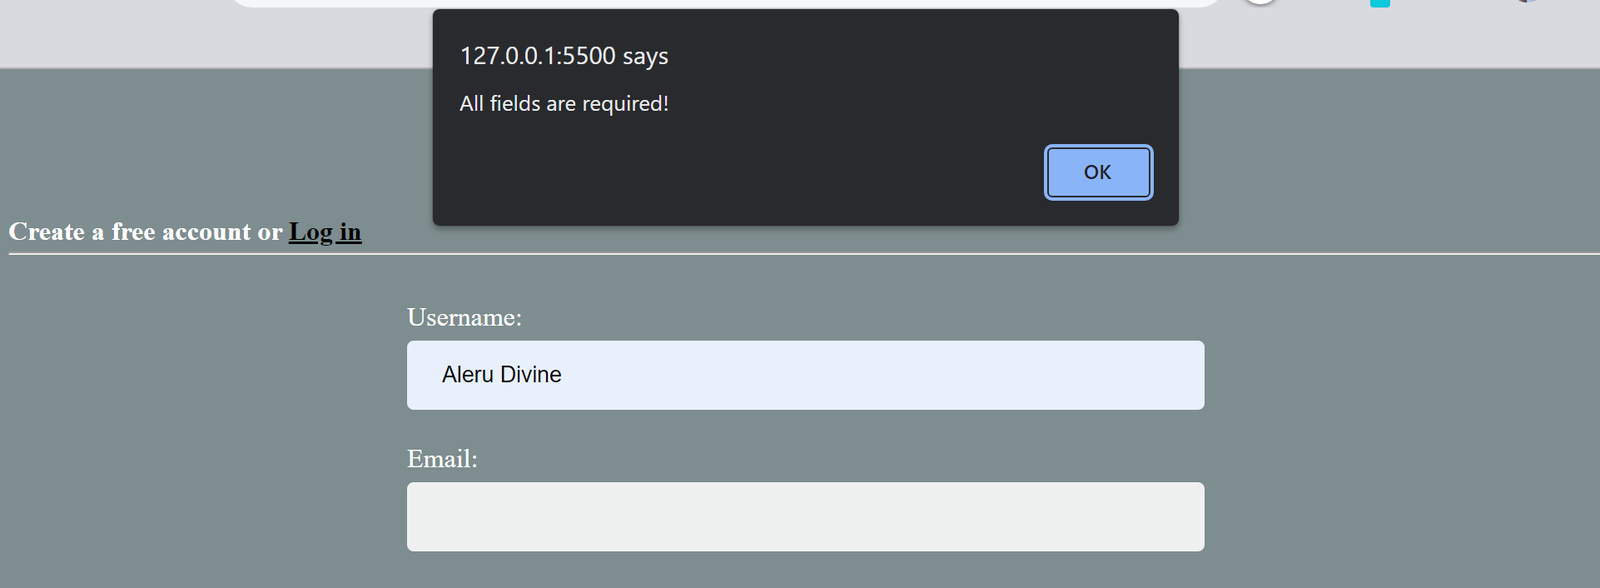
  if (username == "" || email == "" || password == "" || password2 == "") {
    alert("All fields are required!");
    return false;
  }
It checks if any of the form elements are empty. If any of them are empty, it displays an alert message saying “All fields are required!” and returns false.
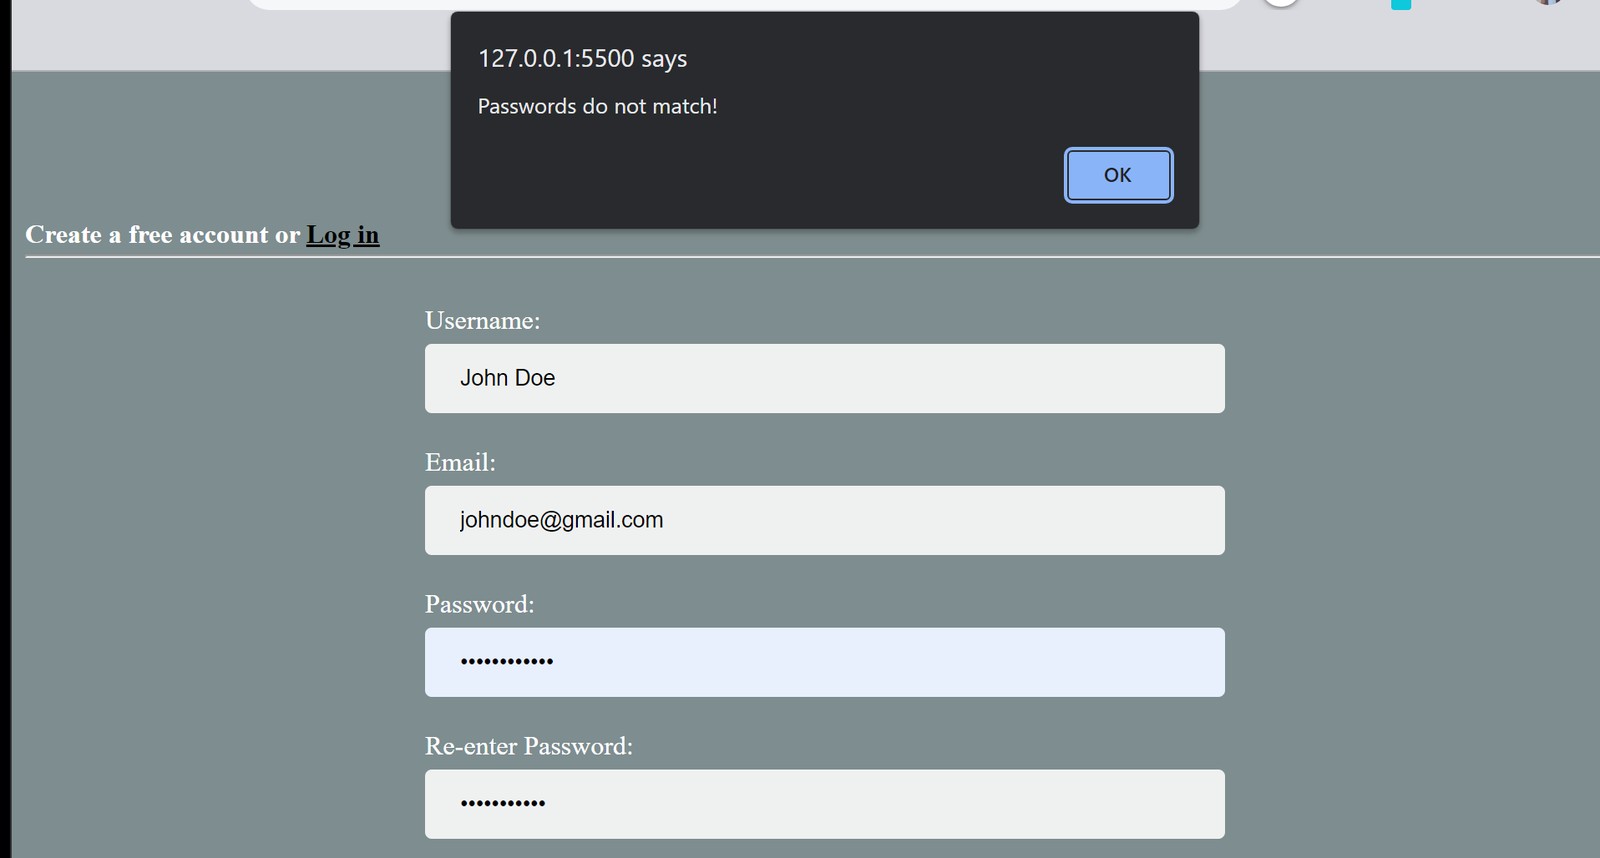
To check if the value of the password element is the same as the value of the password2 element.
  if (password !== password2) {
    alert("Passwords do not match!");
    return false;
  }
If passwords do not match, it displays an alert “passwords do not match” b and returns false.
To check if the email is valid, use a regular expression to validate the email address. If the email is invalid, it displays an alert message saying “Invalid email address!” and returns false.
  var emailRegex = /^(([^<>()\[\]\\.,;:\s@"]+(\.[^<>()\[\]\\.,;:\s@"]+)*)|(".+"))@((\[[0-9]{1,3}\.[0-9]{1,3}\.[0-9]{1,3}\.[0-9]{1,3}\])|(([a-zA-Z\-0-9]+\.)+[a-zA-Z]{2,}))$/;
    if (!emailRegex.test(email)) {
      alert("Invalid email address!");
      return false;
    }
    return true;
  }
If all validation checks pass, the function returns true. This is typically used to determine whether the form should be submitted or not.
Finally, for this function to work, the form element in the HTML should have a name attribute of “signupForm” and the form should have an onsubmit event handler that calls this function by its name. For example:
<form action="/signup" method="post" name="signupForm" onsubmit="return validateSignupForm()">Conclusion
For any web developer, creating a responsive UI sign-up form with HTML, CSS, and JavaScript is crucial. In addition to improving the user experience, a well-designed sign-up form aids in ensuring that the data given is authentic and accurate. To construct a sign-up form that is both practical and aesthetically pleasing, developers can use HTML to structure the form, CSS to style it, and JavaScript/HTML for form validation. Any web application’s integrity and security depend on proper form validation, which is easy to create using HTML, CSS, and JavaScript.
Gain Debugging Superpowers
Unleash the power of session replay to reproduce bugs and track user frustrations. Get complete visibility into your frontend with OpenReplay, the most advanced open-source session replay tool for developers.