Building an e-commerce app with Keystone

Building e-commerce applications have become relatively easier due to the existence of Headless CMS technologies. These technologies are efficient and save time by minimizing the hassles of building these platforms from scratch. This tutorial will show how to set up and build a simple e-commerce application using a headless CMS— Keystone JS, an open-source API-driven self-hosted CMS.
In this tutorial, we will build an e-commerce application with the basic CRUD(create, read, update and delete) functionalities using some features in Keystone. This application will let a user add a product, delete a product, view products, and update products. In this application, we will be working on a Next JS application.
Keystone as a headless CMS
Keystone is a robust API-driven self-hosted CMS used to create scalable data-driven applications. It adheres to the MVT (Model-View-Template) design pattern. It allows you to outline models (also known as schemas) by providing primitive data types such as Text, Password, DateTime, Relationships, etc., as well as complex types such as OEmbed, CloudinaryImage, and Markdown, which your application will use. It also includes an admin user interface and a template for managing the application. Keystone works like an ideal backend and helps the developer focus on UI development. It also provides an accessible GraphQL API which can be incorporated into the frontend section of the application.
- Modularity: Due to its MVT design pattern, it supports modularity and separation of concerns for specific components of your project.
- Session Management: Keystone provides an in-built authentication and session system which can be attached to your models to authenticate users to access certain models in your application.
- Custom Schema: You can create a custom keystone schema(or model) which usually comprises primitive data types like texts, passwords, integers, decimals, etc.; under the hood, it generates a Prisma file on the keystone application which will be used subsequently to create the model from the schema in any database of choice.
- Database Migrations: With Keystone, you can add and run migration files in your keystone project if you use a relational database as a source database for your application.
- TypeScript Support.
- Relational Data: You can create relationships between models easily and effectively using keystone.
- Automated CRUD: With Keystone, you can easily create, update, delete and retrieve contents from your schema using its available GraphQl API and the admin interface.
Building Our E-commerce Application
Using Keystone, we will be building a simple e-commerce application. This application will have two(2) sections:
- The keystone app serves as both the backend and admin section of the application
- The frontend NextJS app where we will integrate/consume the GraphQL API that the keystone app generated.
Set up the app
To install a Keystone application, type the following commands in sequence:
cd your/project/path/
yarn create keystone-app
On installation, keystone installs these files below;
├── auth.ts        # Authentication configuration for Keystone
├── keystone.ts    # The main entry file for configuring Keystone
├── node_modules   # Your dependencies
├── package.json   # Your package.json with four scripts prepared for you
├── README.md      # Additional info to help you get started
├── schema.graphql # GraphQL schema (automatically generated by Keystone)
├── schema.prisma  # Prisma configuration (automatically generated by Keystone)
├── schema.ts      # Where you design your data schema
├── tsconfig.json  # Your typescript config
└── yarn.lock      # Your yarn lock file
After the application is installed, run the command below to generate the Admin user interface
yarn devAfter running this command, you can see the admin interface.
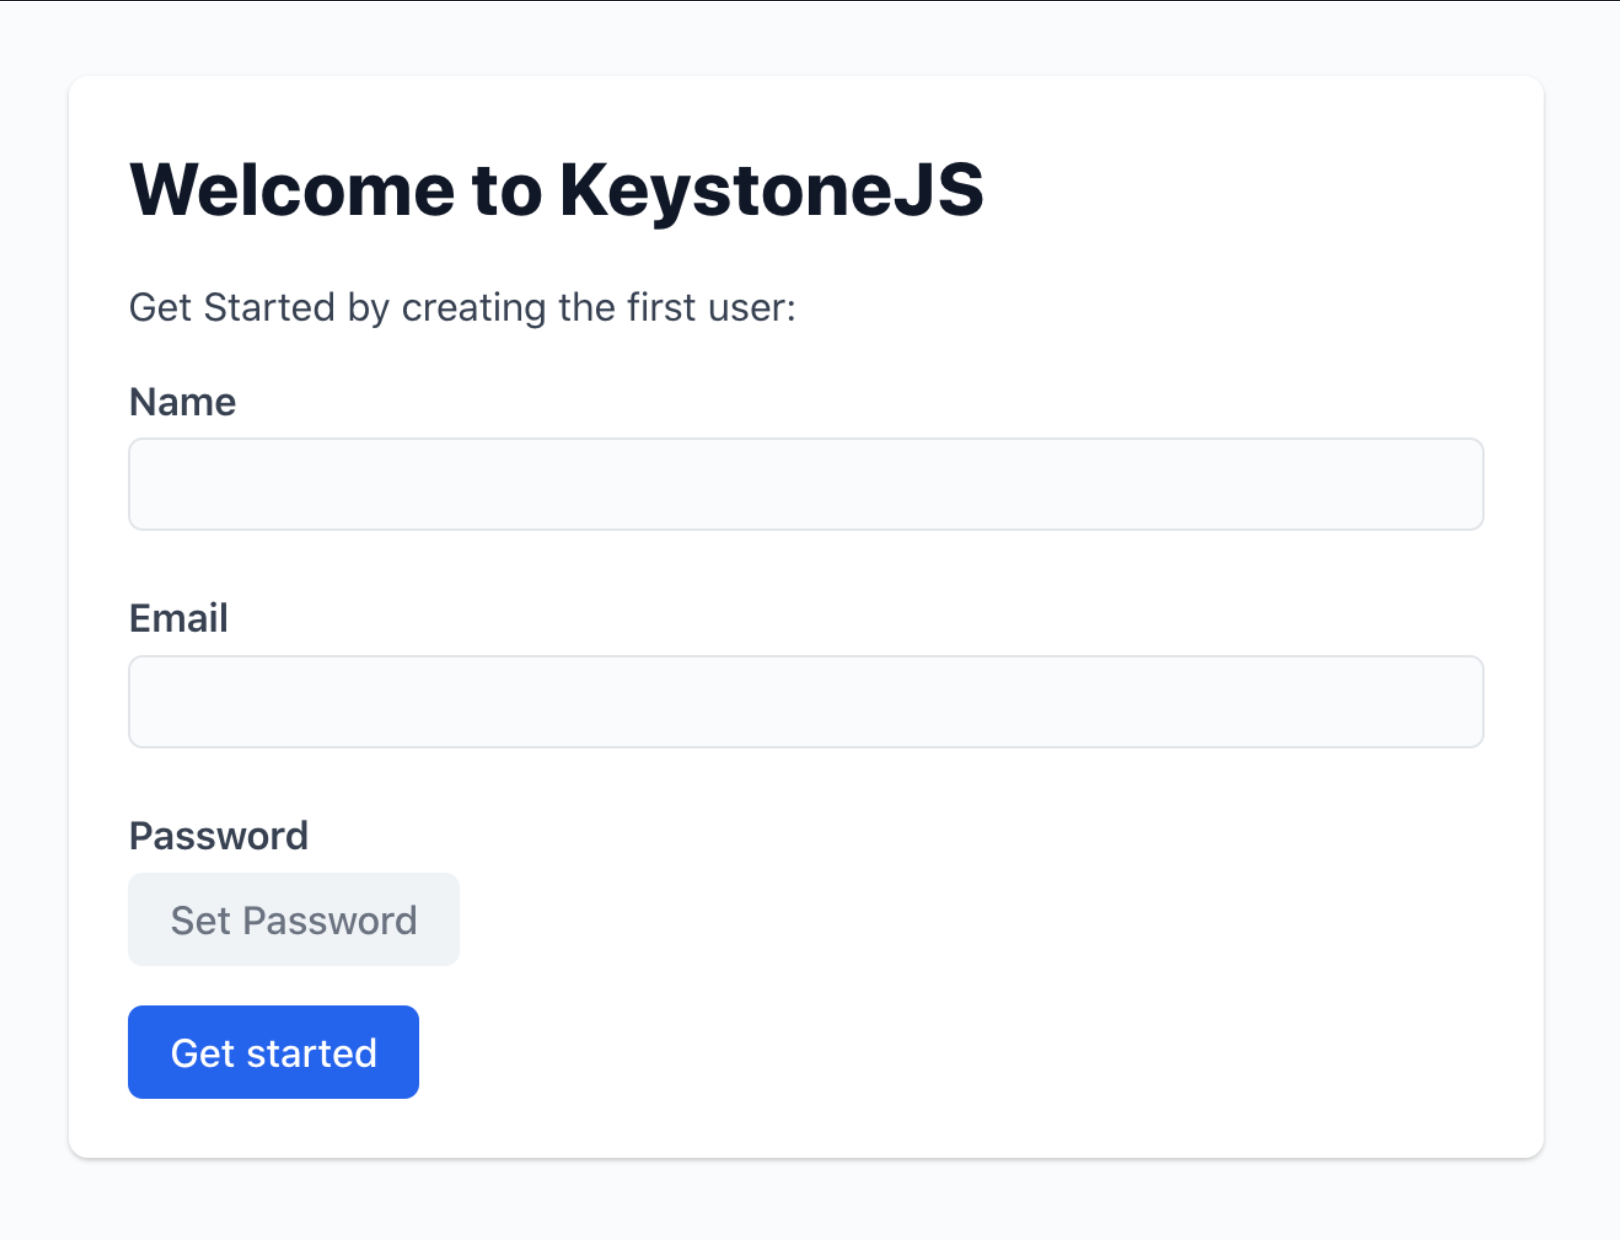
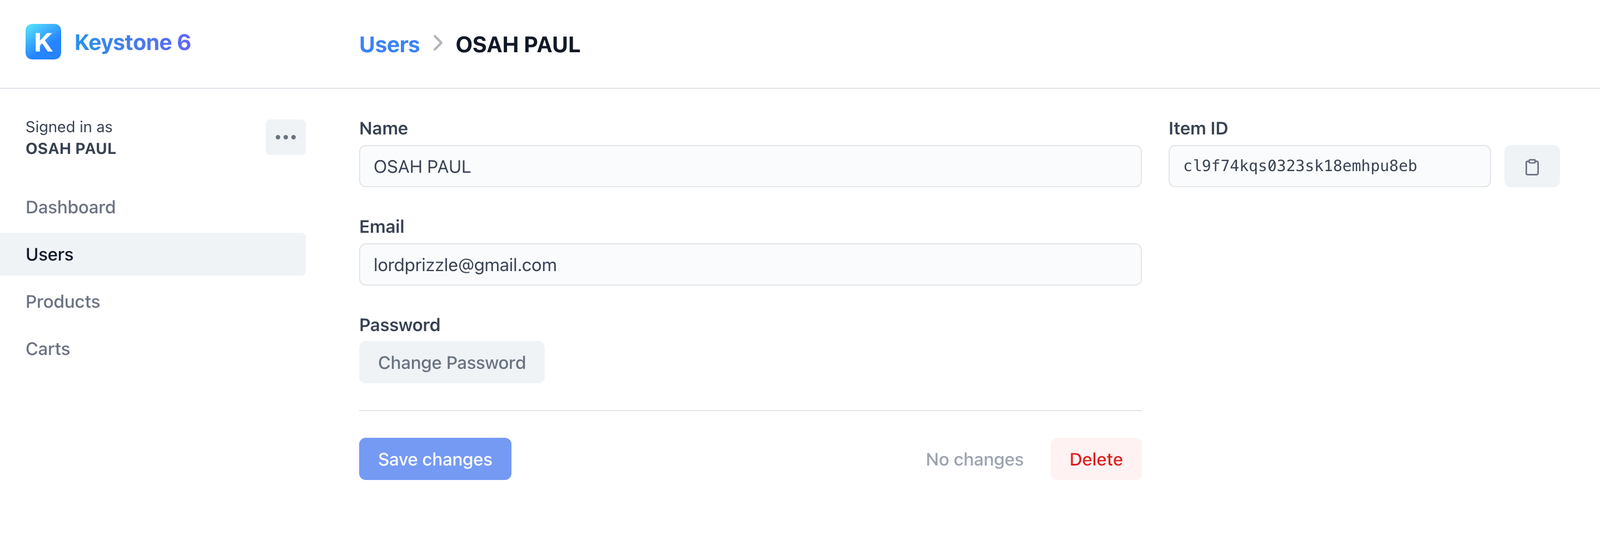
To start, we will have to create a user as indicated above.
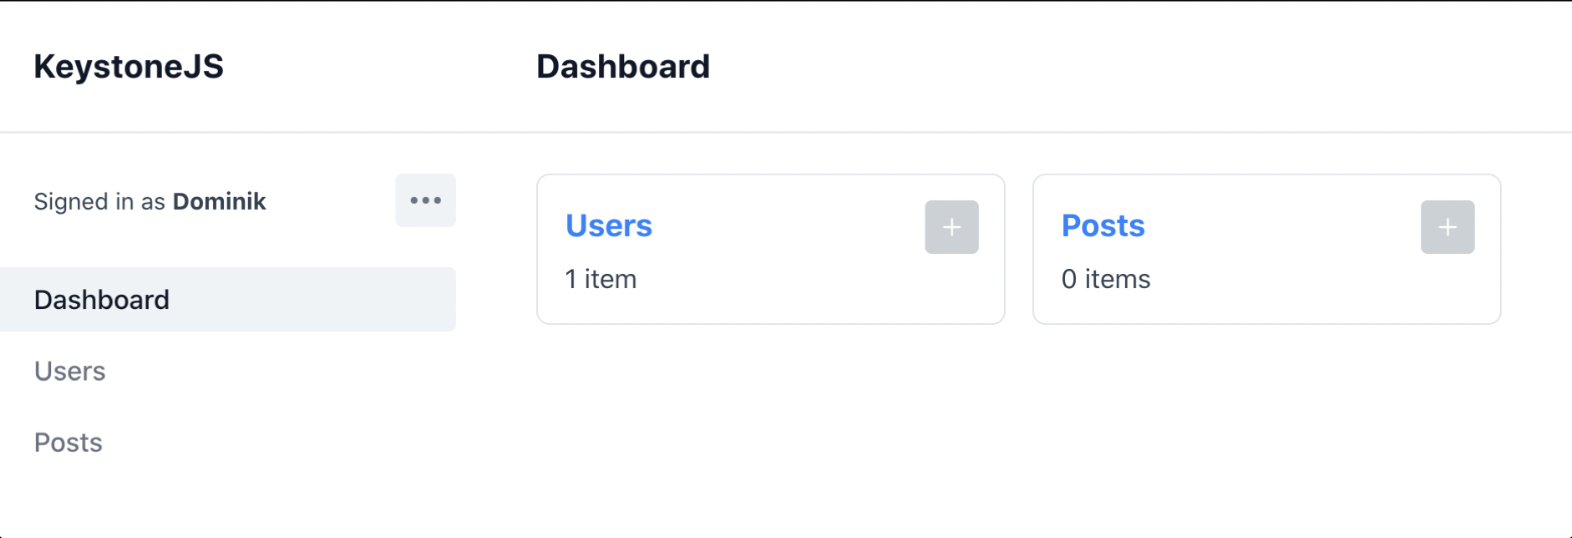
You will be redirected to the admin dashboard when creating a new user. Keystone automatically generates the sample schema for users and posts when the application is installed with the keystone CLI.
Set up the database
By default, Keystone sets up a sqlite database on installation. However, it can be configured to use any database of choices like PostgreSQL, MySQL, mongoDB, and many more. If you want to use any of these databases, you can visit here to view their setup and configuration steps. We will use sqlite for our project case.
The keystone CLI expects to find a module called keystone.ts which contains the default export of the keystone system configuration returned by the function config ().
import { config } from '@keystone-6/core';
import { withAuth, session } from './auth';
dotenv.config({path: '.env'})
export default config(
  withAuth( {
    server: {
      cors: { origin: ['http://localhost:3001'], credentials: true }
    },
    db: {
      provider: 'sqlite',
      url: 'file:./keystone.db',
    },
    session,
    ui: {
      isAccessAllowed: (context) => !!context.session?.data,
    },
  })
)
keystone.ts file
In the code above, SQLite is added as our provider on the db property in the keystone.ts file. We also added some CORS configuration on the server property so that our frontend application at origin localhost:3001 can only request the Keystone application.
Set up schemas for the application
Our Application of choice for this project is a simple e-commerce application. Therefore we will need three schemas for this application.
- The User schema, which will account for the creation of the admin user(s)
- The Product schema, which will account for the creation of products for the application
- Cart Schema accounts for a list of the products that could be purchased.
We will create these schemas, but firstly, we will create a schemas folder in the project’s root directory. This is where the schemas will be created and then imported to the keystone.ts file to be executed. We will also move the previously generated schemas (the User schema) to the schemas folder for better structure.
Therefore, the project structure will now become this:
├── auth.ts
├── schemas
    ├── cart.ts
    ├── product.ts
    ├── user.ts
├── keystone.ts
├── node_modules
├── package.json
├── README.md
├── schema.graphql
├── schema.prisma
├── schema.ts
├── tsconfig.json
└── yarn.lock
We will create the schemas:
// `schemas/user.ts` -- Users Schema

import { list } from '@keystone-6/core';
import { text, password, select } from '@keystone-6/core/fields';
export default list({
  fields: {
    name: text({ validation: { isRequired: true } }),
    email: text({ validation: { isRequired: true }, isIndexed: 'unique' }),
    password: password({ validation: { isRequired: true } }),

  },
});
The user schema above was generated automatically on installation of our project using the keystone CLI. This schema provides fields for the name, email, and password of the user. Keystone provides the primitive types like text and password types that suit these fields.
// `schemas/product.ts` -- Product Schema
import { list } from '@keystone-6/core';
import { text, timestamp, integer } from '@keystone-6/core/fields';
import { cloudinaryImage } from '@keystone-6/cloudinary';
import * as dotenv from 'dotenv';
dotenv.config()
export default list({
fields: {
name: text({ validation: { isRequired: true } }),
slug: text({ validation: { isRequired: true }}),
image: cloudinaryImage({
cloudinary: {
cloudName: process.env.CLOUDINARY_CLOUD_NAME || '',
apiKey: process.env.CLOUDINARY_API_KEY || '',
apiSecret: process.env.CLOUDINARY_API_SECRET || '',
folder: process.env.CLOUDINARY_API_FOLDER || '',
},
}),
price: integer({ validation: { isRequired: true }, defaultValue: 0}),
description: text({ validation: { isRequired: true }}),
quantityInStock: integer({ validation: { isRequired: true } }),
createdAt: timestamp({ validation: { isRequired: true }}),
},
ui: {},
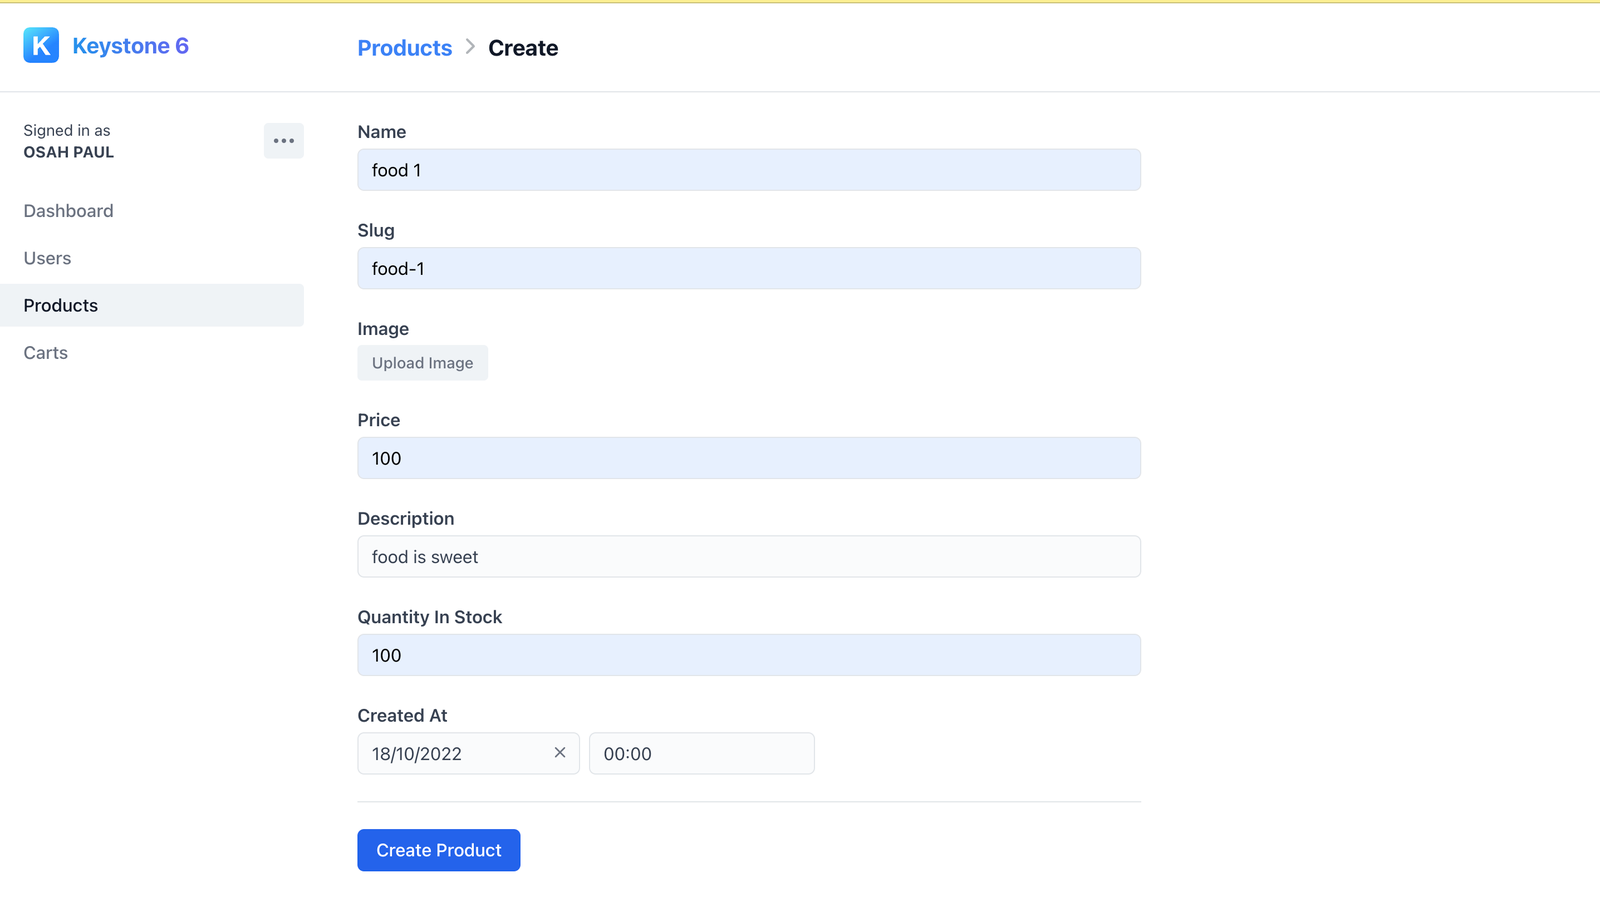
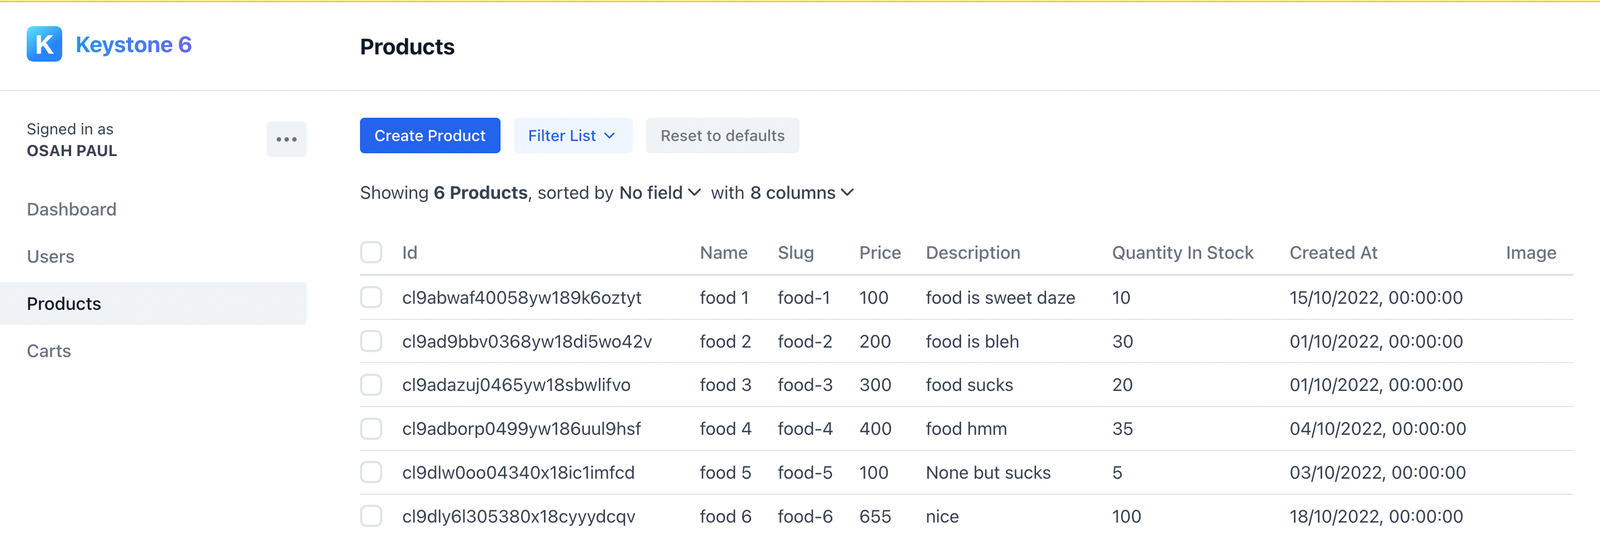
});The product schema above provides fields for the name of the product, its slug, image, price, description, quantityInStock, and when the product was created(createdAt). Keystone also provided the primitive types (text, integer, timestamp) for the respective fields. It also provides many complex types, like the cloudinary type used on the image field. This type enables the upload of an image to this field via Cloudinary’s API. The type exists as a plugin and can be installed using yarn.
yarn add @keystone-6/cloudinaryAfter creating these schemas, we will create dummy products using this schema on the admin User-interface
// `schemas/cart.ts` — Cart Schema

import { list } from '@keystone-6/core';
import { timestamp, integer, relationship } from '@keystone-6/core/fields';
export default list({
  fields: {
    product: relationship({ ref: 'Product', many: true, ui: { hideCreate: true }}),
    sum: integer({ validation: { isRequired: true }}),
    quantity: integer({ validation: { isRequired: true } }),
    createdAt: timestamp({ validation: { isRequired: true }}),
  },
});
The Cart schema above provides primitive types for the fields, sum, quantity, and createdAt. It also provides a complex type relationship for the field product. This type established a data relationship between a product and a cart, as a cart can contain a product.
We will import these schemas to the keystone.ts file and add them to the lists object.
// `keystone.ts`

import { config } from '@keystone-6/core';
import { withAuth, session } from './auth';
import User from './schemas/user'
import Product from './schemas/product';
import Cart from './schemas/cart';
import * as dotenv from 'dotenv';
dotenv.config({path: '.env'})

export default config(
  withAuth( {
    server: {
      cors: { origin: ['http://localhost:3001'], credentials: true }
    },
    db: {
      provider: 'sqlite',
      url: 'file:./keystone.db',
    },
    lists: {
      User,
      Product,
      Cart
    },
    session,
    ui: {
      isAccessAllowed: (context) => !!context.session?.data,
    },
  })
After creating and importing these schemas, we will restart our application by running yarn dev. This generates and updates the Prisma and GraphQL files on the keystone application, which will be used subsequently to create the model from the schema in our SQLite database.
Integrating keystone into the Frontend NextJS Application
To install a nextJS application, type the following commands in sequence:
cd your/project/path/
yarn create next-app
After Installation, the project structure will now become this:
├── node_modules
├── pages
├── public
├── styles
├── eslintrc.json
├── next.config.js
├── package.json
├── README.MD
└── yarn.lock
We will install tailwindCSS for styling. To install tailwindCSS in a NextJS application, visit here.
After installation, we will modify our package.json file. If we can recall, on the keystone application, we made a CORS configuration on the keystone.ts file to only allow requests from the origin- localhost:3001. NextJs development server, by default, has its origin placed at localhost:3000, which conflicts with the origin of our keystone application. We have to configure the origin to access our keystone application and prevent further conflict of origin.
{
  "name": "keystone-frontend",
  "version": "0.1.0",
  "private": true,
  "scripts": {
    ### "dev": "next dev"-- previously
    "dev": "next -p 3001", # new change --we will configure the next app port to 3001
    "build": "next build",
    "start": "next start",
    "lint": "next lint"
  }
  ...
Also, since our Keystone application uses a GraphQL API, we will install Apollo client and GraphQL dependencies.
yarn add @apollo/client graphqlAccessing keystone models on the NextJS application
In our Next Application, we want to be able to:
- View created products from the products model on keystone
- Add products to the cart model
- delete products from the cart model
To view created products, we need to write a GraphQL query to fetch all products from keystone. The queries are available on the Keystone application’s schema.graphql file. We will create an apolloClient folder where we will put our queries in the gqlQuery.js file and the setup of apollo-client in the index.js file, which we will be using to make requests to the API.
Therefore, the folder structure will now become the following:
├── apolloClient
    ├──gqlQuery.js
    ├── index.js
├── node_modules
├── pages
├── public
├── styles
├── eslintrc.json
├── next.config.js
├── package.json
├── README.MD
└── yarn.lock
// `apolloClient/index.js`
import { ApolloClient, InMemoryCache, createHttpLink } from "@apollo/client";
const enchancedFetch = (url, init) => {
return fetch(url, {
...init,
headers: {
...init.headers,
'Access-Control-Allow-Origin': '*',
},
}).then(response => response);
};
const httpLink = new createHttpLink({
uri: "http://localhost:3000/api/graphql",
credentials: 'include',
fetchOptions: {
mode: 'cors',
},
fetch: enchancedFetch,
});
const client = new ApolloClient({
link: httpLink,
cache: new InMemoryCache(),
});
export default client;The code block above creates a client from our API URL. this client will be used to make requests to our keystone graphQL API.
// `apolloClient/gqlQuery.js`

import { gql } from "@apollo/client"
export const getProducts = gql`
query {
  products {
    id
    name
    slug
    price
    description
    quantityInStock
    createdAt
  }
}
`
export const getProduct = gql`
query product($id: ID!) {
  product(where: { id: $id }) {
    id
    name
    description
    price
    quantityInStock
    createdAt
  }
}

export const createCart = gql`
  mutation createCart($data: [CartCreateInput!]!){
    createCarts(data: $data) {
      id
      sum
      quantity
      createdAt
    }
  }
`;

export const getCarts = gql`
query {
  carts {
    product {
      id
      name
      slug
      price
      description
      quantityInStock
      createdAt
    }
    id
    sum
    quantity
    createdAt
  }
}
`
export const deleteCart = gql`
  mutation deleteCart($data: [CartWhereUniqueInput!]!){
    deleteCarts(where: $data) {
      id
      sum
      quantity
      createdAt
    }
  }
`;
The code above contains the queries to get all products, get a single product, add a product to cart, deleting a product from the cart. These queries will be added to our client when we request the keystone GraphQl API.
Session Replay for Developers
Uncover frustrations, understand bugs and fix slowdowns like never before with OpenReplay — an open-source session replay tool for developers. Self-host it in minutes, and have complete control over your customer data. Check our GitHub repo and join the thousands of developers in our community.
Implementing CRUD operations on the NextJS application
Let’s now turn to implementing the basic functionality for our app.
Viewing All Products
After creating our queries and setting up the client, we will send a request to get all the products on the index.js file in our application’s pages folder.
The snippet of code below will be on the index.js file.
// `pages/index.js`
import Head from 'next/head';
import Link from "next/link";
import styles from '../styles/Home.module.css';
import client from "../apolloClient";
import { getProducts, getCarts, createCart } from '../apolloClient/gqlQuery';
import { useEffect, useState } from 'react';
import { toast, ToastContainer } from 'react-nextjs-toast'
import { useRouter } from 'next/router';
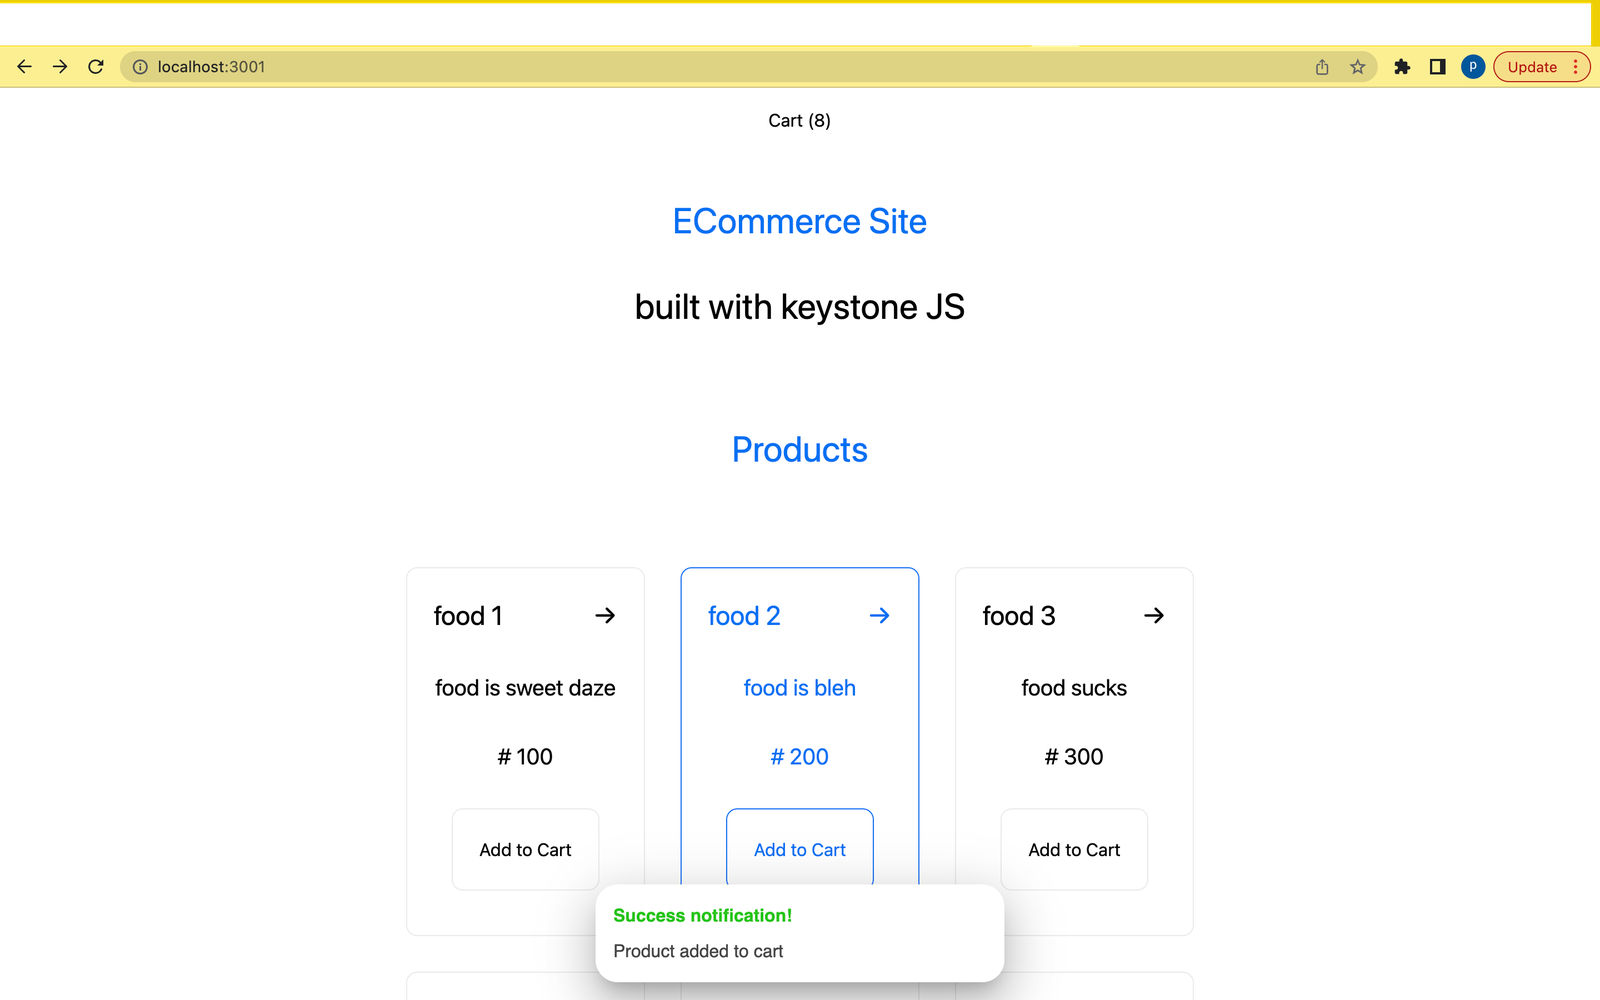
export default function Home({ products }) {
const router = useRouter();
return (
<div className={styles.container}>
<Head>
<title>Create Ecommerce App</title>
<meta name="description" content="Generated by create next app" />
<link rel="icon" href="/favicon.ico" />
</Head>
<ToastContainer/>
<main className={styles.main}>
<h1 className={`${styles.title} py-5`}>
<a className='block py-10'>ECommerce Site</a>
<span className='block pb-2'>built with keystone JS</span>
</h1>
<h5 className={`${styles.title} py-16`}>
<a className='block pb-2'>Products</a>
</h5>
<div className={styles.grid}>
{
products && products.map((curr) => {
return (
<>
<div key={curr}>
<div className={styles.card}>
<Link href={`/${curr.id}`} className="cursor-pointer">
<h2 className="flex items-center justify-between">
<span>{curr?.name}</span>
<span>→</span>
</h2>
</Link>
<p className='py-4 text-center'>
{curr?.description}
</p>
<p className='py-4 text-center'>
# { curr?.price }
</p>
<button onClick={() => addToCart({ ...curr, __typename: undefined })} className={styles.card}>
Add to Cart
</button>
</div>
</div>
</>
);
})
}
</div>
</main>
</div>
);
}
export async function getStaticProps() {
const { data } = await client.query({
query: getProducts,
});
return { props: { products: data.products } };
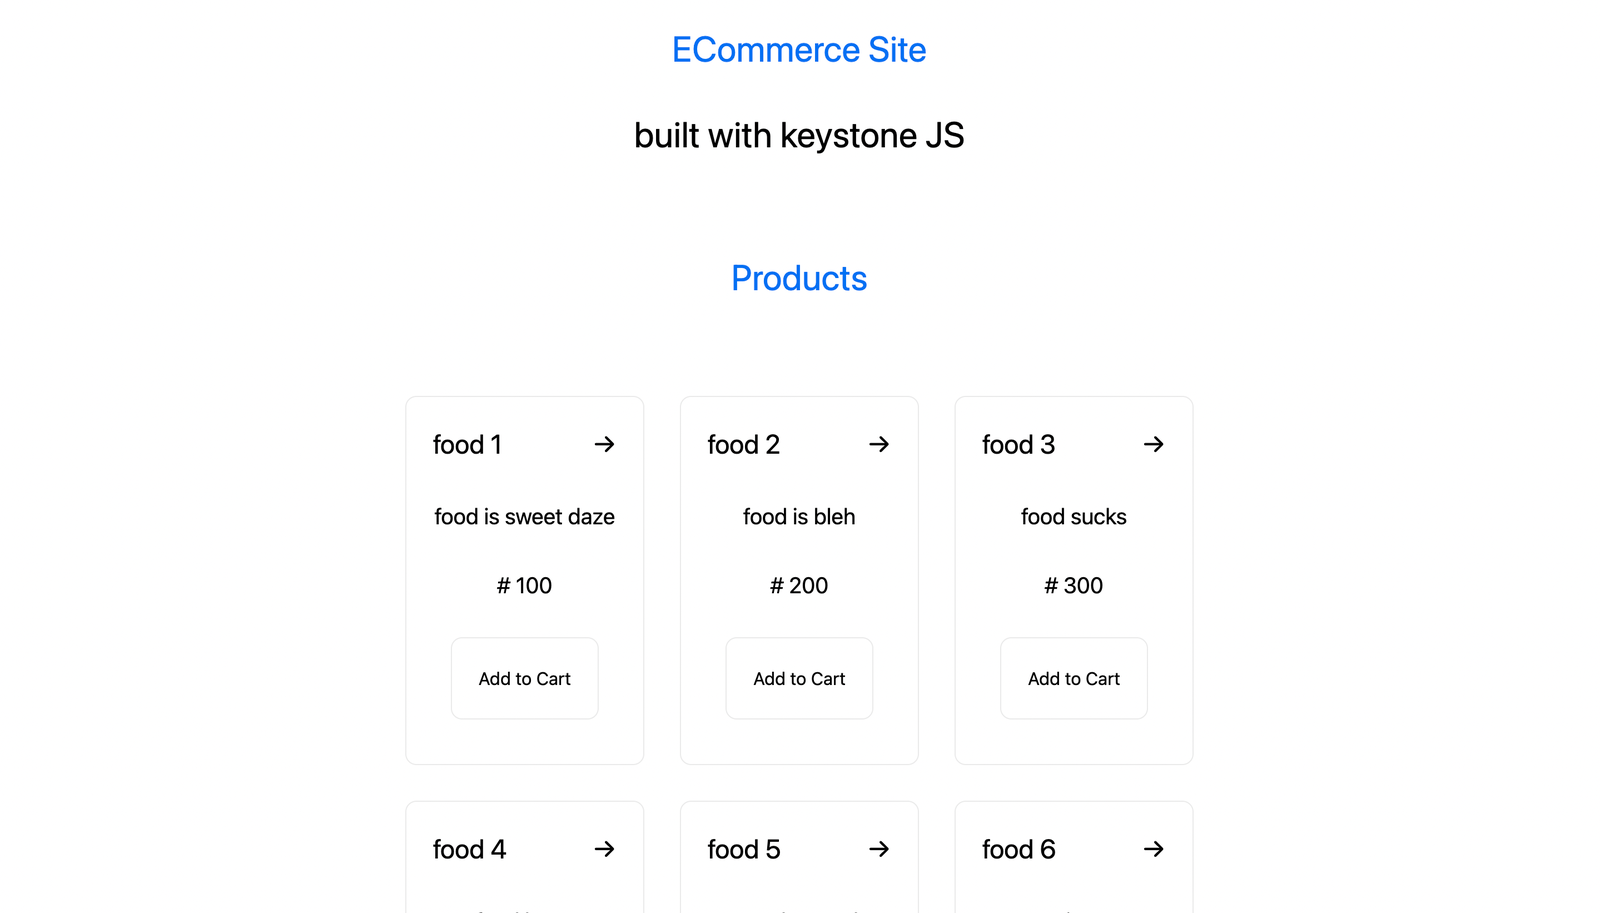
}From the code above, the query is run from the [getStaticProps](https://nextjs.org/docs/basic-features/data-fetching/get-static-props)``() function, which fetches the products on build and inserts them into the props of the component on the index.js page.
Viewing a Product
We will create a dynamic page, [id].js, to view a specific product in our pages folder. The snippet of code on the index.js file is pasted below:
// `pages/[id].js`
import Head from 'next/head';
import Image from 'next/image';
import Link from "next/link";
import styles from '../styles/Home.module.css';
import client from "../apolloClient";
import { getProducts, getProduct } from '../apolloClient/gqlQuery';
import { useRouter } from 'next/router';
export default function SingleProduct({ product }) {
const router = useRouter();
return (
<div className={styles.container}>
<Head>
<title>SingleProduct</title>
<meta name="description" content="Generated by create next app" />
<link rel="icon" href="/favicon.ico" />
</Head>
<h1 className={`${styles.title} py-5`}>
<a className='block py-10'>{product?.name}</a>
</h1>
<div className='py-10'>
<button onClick={()=> router.back()}>
←
Back
</button>
</div>
<main className={styles.main2}>
<div className={`${styles.card2} text-center flex items-center justify-center`}>
<div>
<h2 className='py-4'>
<span className='c-green'>Name:</span>
<div>{product?.name}</div>
</h2>
<h2 className='py-4'>
<span className="c-green">Description:</span>
<div>{product?.description}</div>
</h2>
<p className='py-4'>
<span className="c-green">Price:</span>
<div>#{product?.price}</div>
</p>
<p className='py-4'>
<span className="c-green">Quantity In Stock:</span>
<div>{product?.quantityInStock}</div>
</p>
<p className='py-4'>
Product Created At:
<div>{new Date(product?.createdAt).toLocaleString('en-US')}</div>
</p>
</div>
</div>
</main>
</div>
);
}
export async function getStaticPaths() {
const { data } = await client.query({
query: getProducts,
});
const paths = data.products.map((curr) => {
return {
params: {
id: curr.id
}
};
});
return { paths, fallback: false };
}
export async function getStaticProps(context) {
console.log('context', context);
const { data } = await client.query({
query: getProduct,
variables: { id: context.params.id }
});
return { props: { product: data?.product || null } };
}From the code above, we simply get the Id parameter of the dynamic route in the [getStaticPaths](https://nextjs.org/docs/basic-features/data-fetching/get-static-paths)``() function and pass that to the context parameter of the [getStaticProps](https://nextjs.org/docs/basic-features/data-fetching/get-static-props)``() function which then will be used to send a request to get a specific product based on its Id.
![7 output of the [id].js page with a fetched product](/images/building-an-ecommerce-app-with-keystone/images/image07.png)
Adding an Item(Product) to a Cart
We will insert this code block into our index.js file to add a product to the cart.
// `pages/index.js`

import { createCart } from '../apolloClient/gqlQuery';
const addToCart = async (curr) => {
    try {
      await client.mutate({
        mutation: { ...createCart },
        variables: {
          data: [
            {
              product: { connect: { id: curr.id } },
              sum: 1, quantity: 1,
              createdAt: new Date(Date.now()).toISOString()
            }
          ]
        }
      });
      toast.notify(`Product added to cart`, {
        duration: 5,
        type: "success"
      })
      await AllCarts();
    } catch (err) {
      toast.notify(`unable to add Product to cart`, {
        duration: 5,
        type: "error"
      })
    } finally {
      setTimeout(() => {
        router.reload(window.location.pathname)
      }, 5000);

    }
  };
The code above is simply a function that sends a request to the API to add a specific product to the cart.
View Items in the Cart
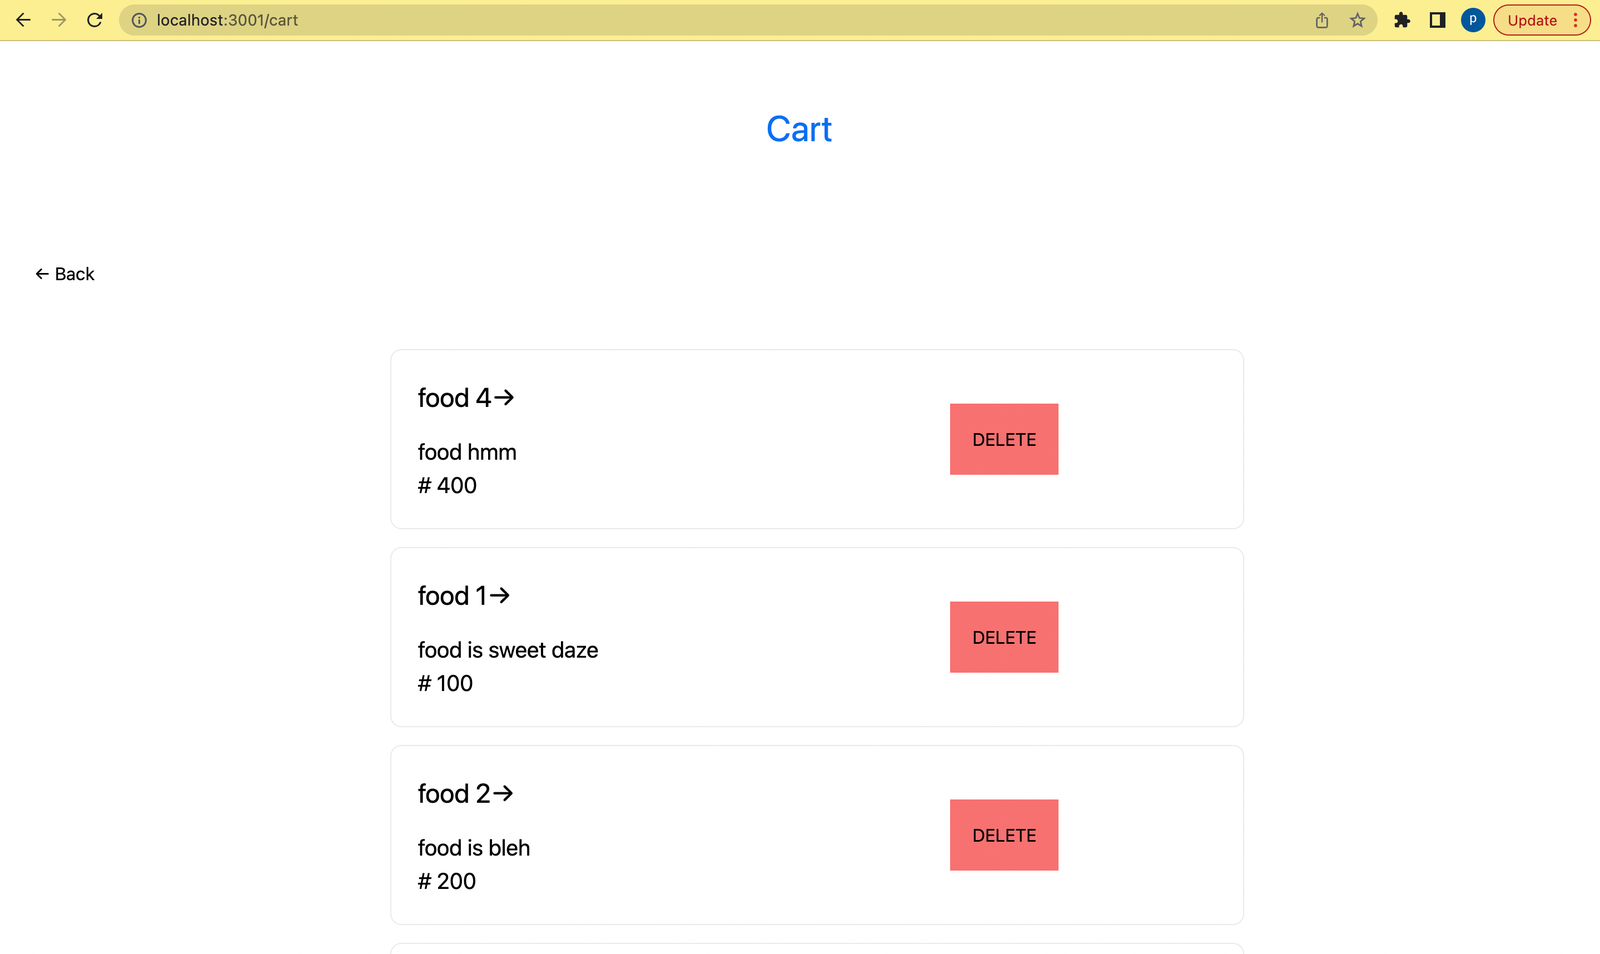
To view products in the cart model, we will create a page, cart.js, in our pages folder. We will send a request to get all the items on the cart on the cart.js file in our application’s pages folder.
The snippet of code on the cart.js file is pasted below :
// `pages/cart.js`
import Head from 'next/head';
import Image from 'next/image';
import Link from "next/link";
import styles from '../styles/Home.module.css';
import client from "../apolloClient";
import { getCarts } from '../apolloClient/gqlQuery';
import { useEffect, useState } from 'react';
import { useRouter } from 'next/router';
import { toast, ToastContainer } from 'react-nextjs-toast'
export default function Cart() {
const router = useRouter();
const [cart, setCart] = useState([]);
const AllCarts = async () => {
try {
const { data } = await client.query({
query: getCarts,
});
setCart(data.carts);
console.log('paths', data.carts);
} catch (err) {
toast.notify(`unable to fetch products in cart`, {
duration: 5,
type: "error"
})
}
};
useEffect(() => {
AllCarts();
}, []);
return (
<div className={styles.container}>
<Head>
<title>Cart</title>
<meta name="description" content="cart" />
<link rel="icon" href="/favicon.ico" />
</Head>
<ToastContainer/>
<h1 className={`${styles.title} py-5`}>
<a className='block py-10'>Cart</a>
</h1>
<div className='py-10'>
<button onClick={()=> router.back()}>
←
Back
</button>
</div>
<div className={styles.main2}>
{
cart && cart.map((curr, idx) => {
return (
<div key={idx}>
<div className={`${styles.card} ${styles.cardw100}`}>
<div className='flex flex-row justify-between items-center'>
<div className='md:w-8/12'>
<h2>
<div>
{curr?.product[0]?.name}
→
</div>
</h2>
<p className='mt-2'>
{curr?.product[0]?.description}
</p>
<p className='mt-2'>
# { curr?.product[0]?.price }
</p>
</div>
<div className='md:w-4/12'>
<button className="p-5 bg-red-400">DELETE</button>
</div>
</div>
</div>
</div>
);
})
}
</div>
</div>
);
}The code above runs the query from the [useEffect](https://reactjs.org/docs/hooks-effect.html) hook, and the cart items are inserted into a state value and rendered on the component.
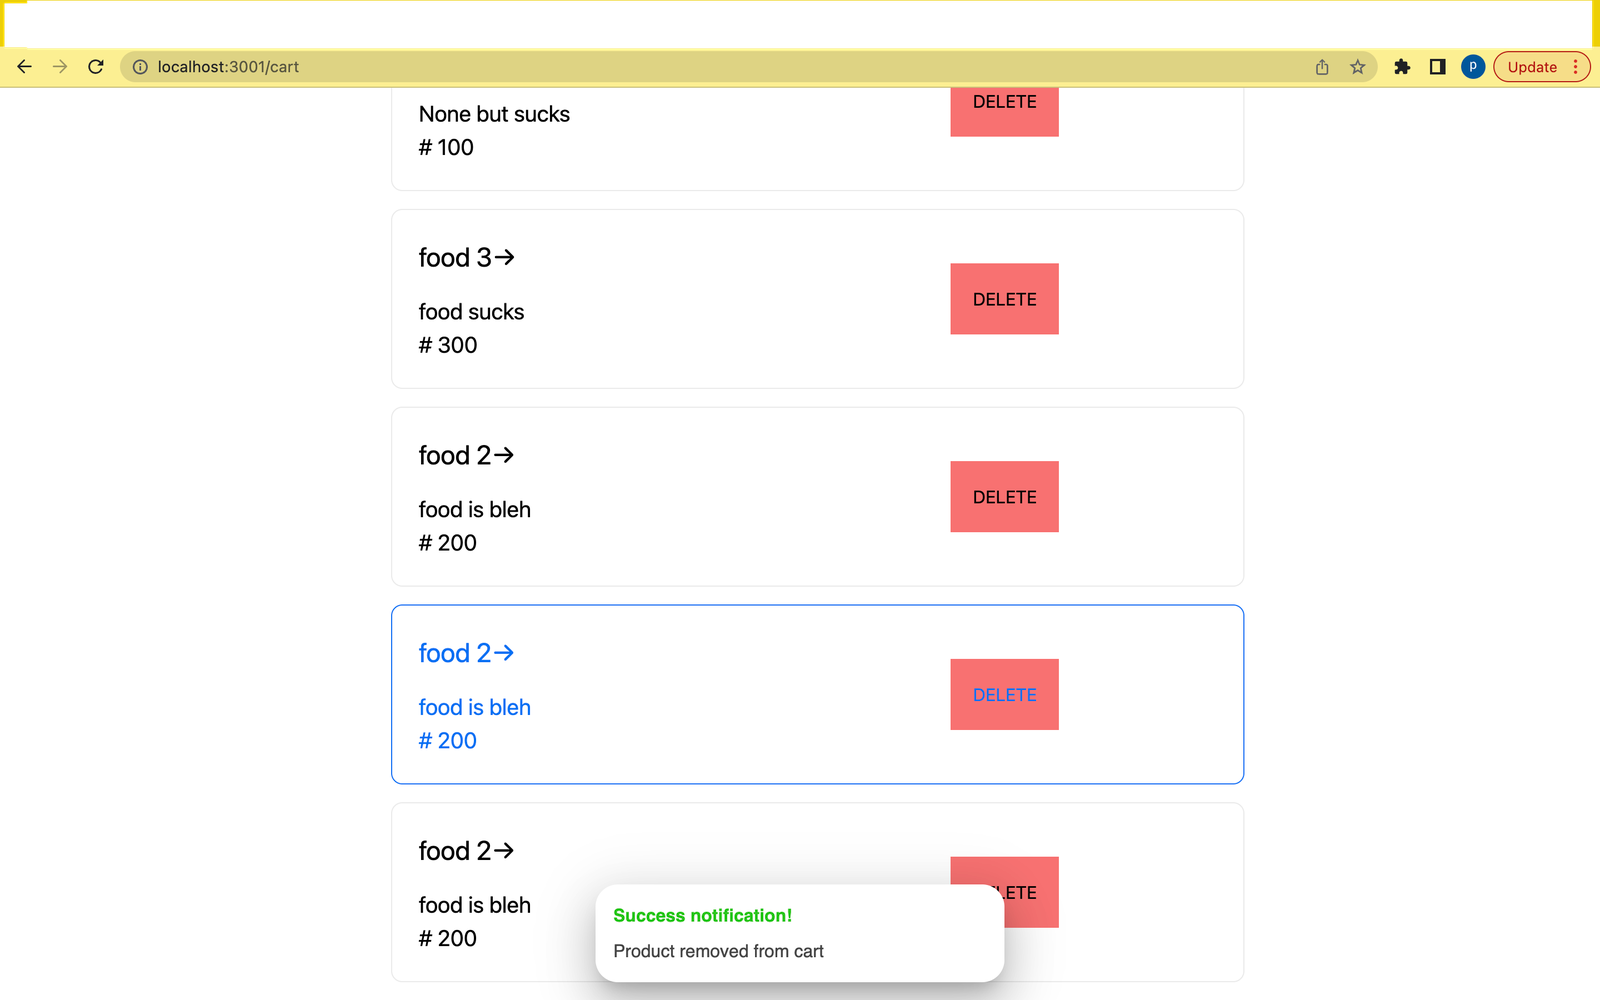
Delete Items in the Cart
We will insert this code block into our cart.js file to delete an item from the cart.
import { deleteCart } from '../apolloClient/gqlQuery';

const deleteFromCart = async (curr) => {
  console.log('curr', curr)
  try {
    await client.mutate({
      mutation: { ...deleteCart },
      variables: { data: [{id: curr.id}] }
    });
    toast.notify(`Product removed from cart`, {
      duration: 5,
      type: "success"
    })
    await AllCarts()
  } catch (err) {
    toast.notify(`unable to remove Product from cart`, {
      duration: 5,
      type: "error"
    })
  }finally {
    setTimeout(() => {
      router.reload(window.location.pathname)
    }, 5000);
  }
};
From the code above, the function deleteFromCart() takes in a cart item and sends a request to the API to remove the item from the cart.
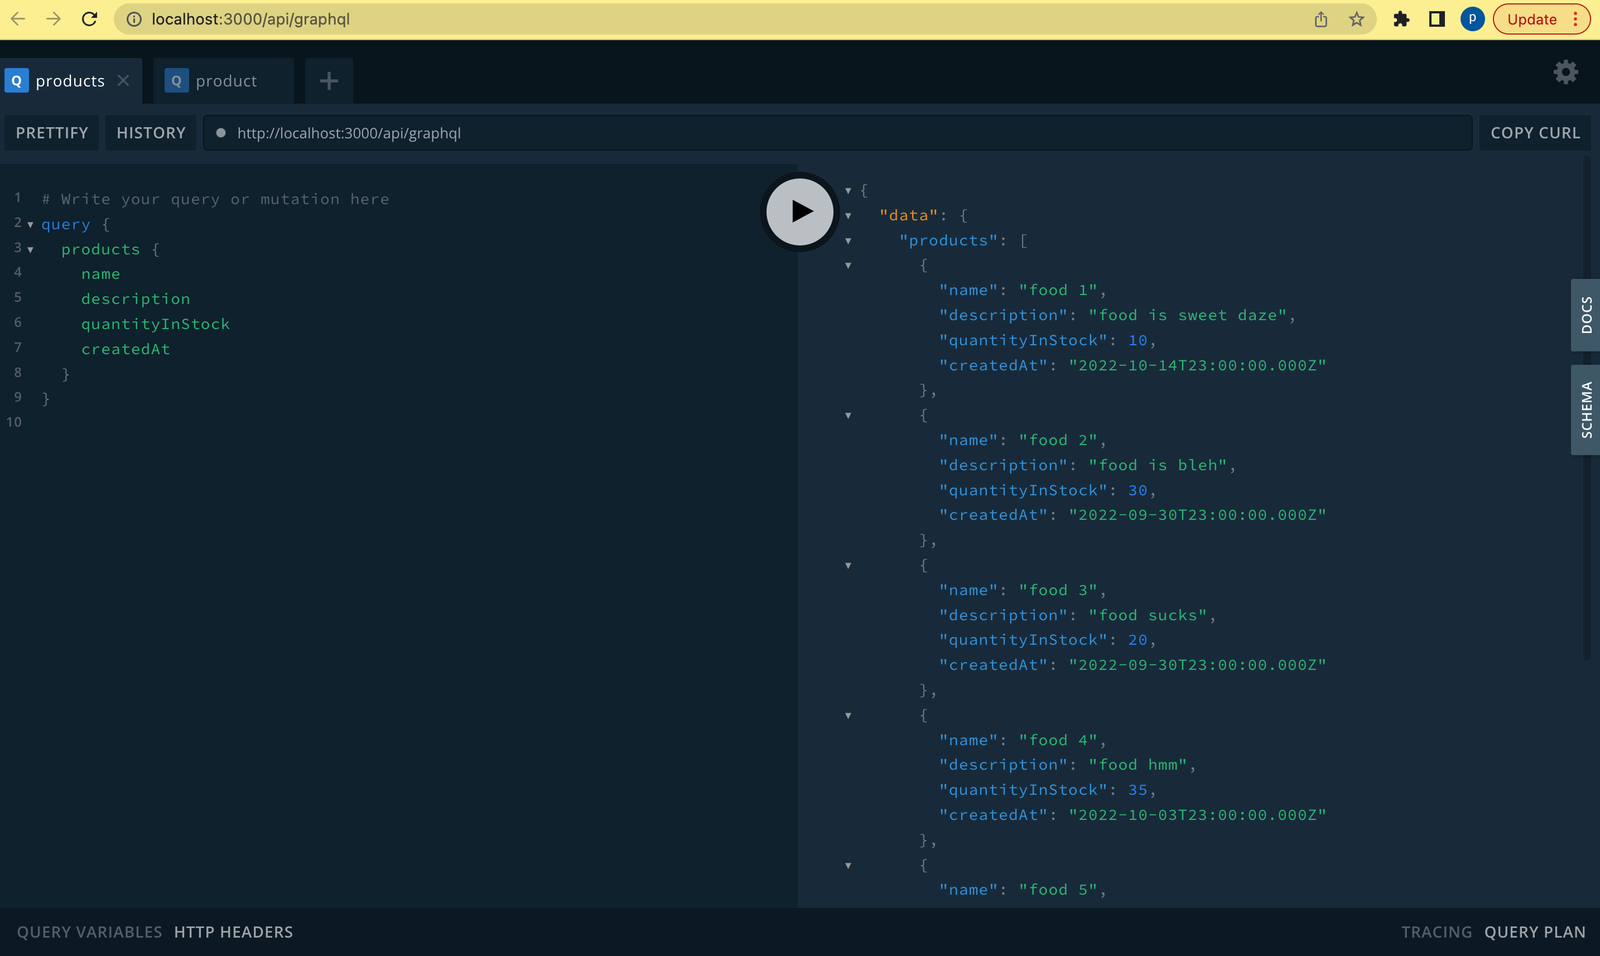
GraphQL Playground
Keystone JS provides a graphQL playground for accessing the API URL directly on the browser. You can quickly test your queries and mutations on the playground and view the outputs.
Conclusion
This tutorial shows how to build an e-commerce application using Keystone JS as the CMS. Additionally, we have explored some of the features available in keystone JS.
If you wish to test and run both projects locally, you can clone them from the GitHub repositories below:
Resources
- https://github.com/lordprizzle/keystone-backend
- https://github.com/lordprizzle/keystone-frontend
- https://keystonejs.com/docs
- https://keystonejs.com/docs/config/access-control#title
- https://betterprogramming.pub/build-your-own-e-commerce-keystone-js-based-system-environment-setup-and-base-models-2c02a3e3a70b
- https://javascript.plainenglish.io/build-a-website-with-keystone-next-and-next-js-6c2618c489f6
A TIP FROM THE EDITOR: We have had articles on other CMS packages: check Building A Photo Gallery App With Gatsby And GraphCMSor Building An Astro Website With WordPress As A Headless CMS, for instance.
Gain Debugging Superpowers
Unleash the power of session replay to reproduce bugs and track user frustrations. Get complete visibility into your frontend with OpenReplay, the most advanced open-source session replay tool for developers.