Capturing Screenshots in React Native

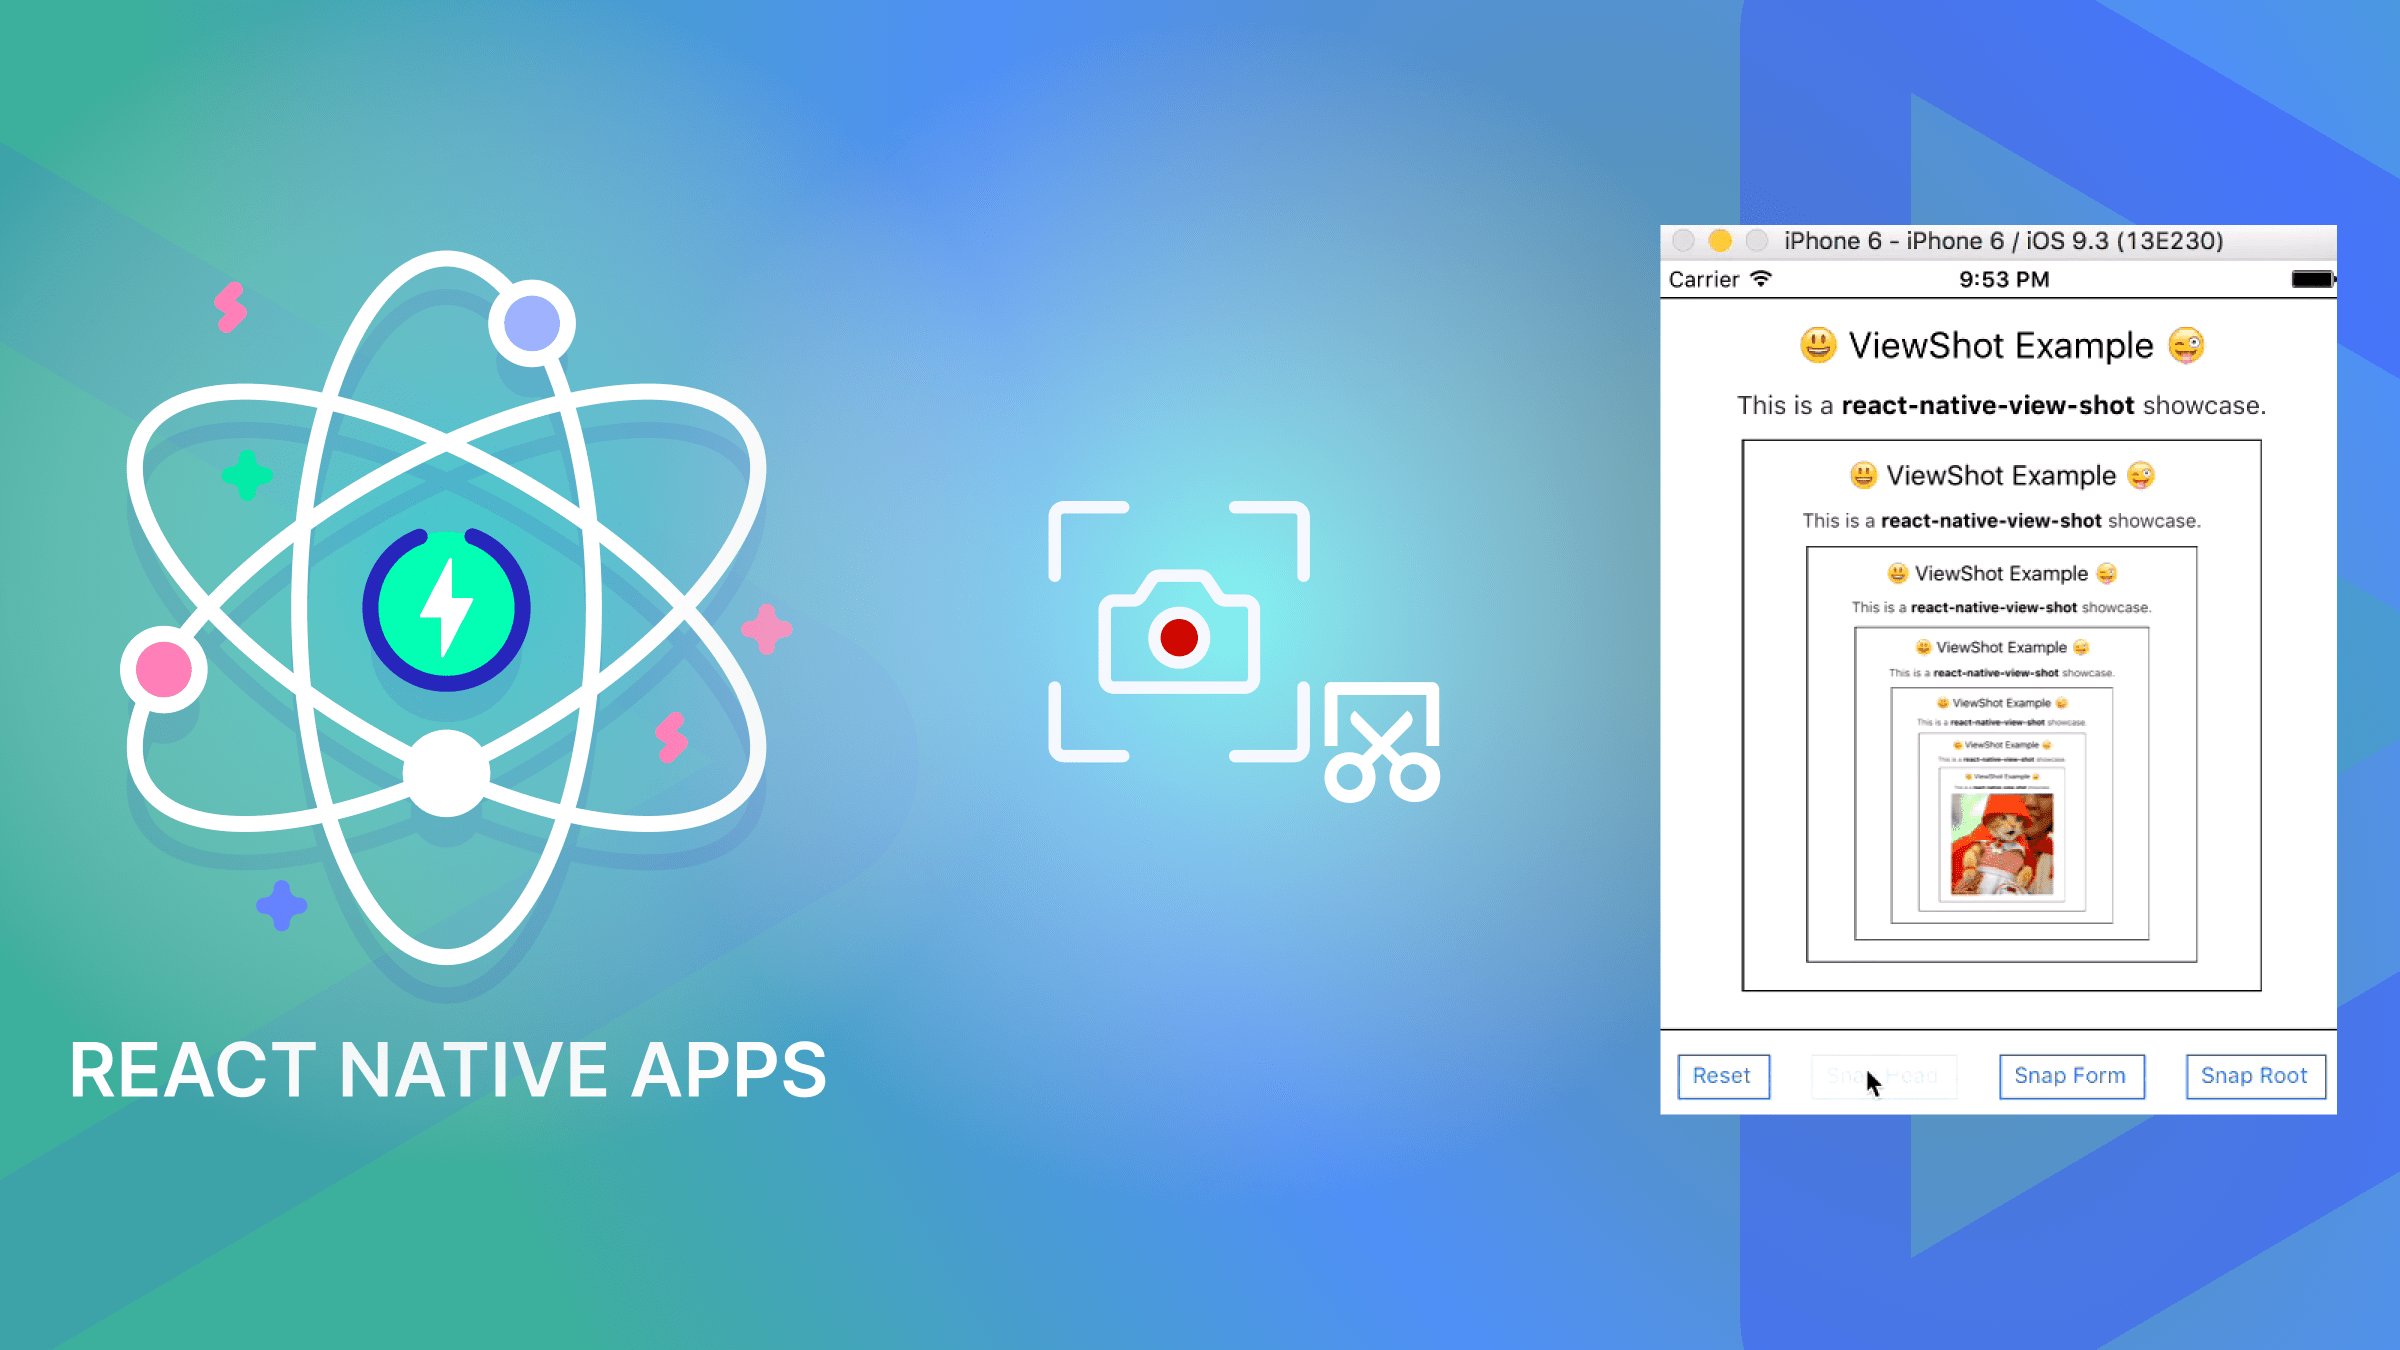
Taking screenshots is a valuable feature for mobile app developers and users. A view shot library is a tool in React Native that lets developers take screenshots of specific parts of their apps. This is especially handy for gathering user feedback. This article will explain how to use this library to take screenshots in your React Native applications.

Discover how at OpenReplay.com.
Taking screenshots within a React Native app provides specific benefits over just using the default screenshot functions of smartphones. Here’s why.
Limitations of Default Screenshot Methods:
- Limited Detail: Standard screenshots capture the entire screen, not just the specific area or component of interest in your React Native app, which can be inconvenient.
- Lack of Control: You can’t choose when or what the user captures in a screenshot.
- Restricted Application: User-taken screenshots aren’t the best for debugging or integrating directly into the app’s functions.
Benefits of Programmatic Screenshotting:
- Targeted Capture: Programmatically take screenshots of specific app sections to focus on relevant content.
- Customization: With this feature, you can trigger screenshot captures at exact moments or in response to user actions, giving you greater control over when and what to capture.
- Enhanced Functionality: Integrate screenshots into app features, like sharing payment receipt images from specific sections.
Introducing React Native View Shot
The view shot library offers an exciting solution to overcome the limitations of traditional device-level screenshots in React Native apps. This robust and flexible library enables developers to programmatically take screenshots of specific app views, significantly enhancing functionality and user experience.
Imagine a camera zooming in on a precise section of your app’s interface. That’s the magic of the view shot library. Instead of capturing the entire screen, often filled with irrelevant elements, this library allows you to target and capture exactly the view or component you desire. This provides a more focused and streamlined approach to screenshotting within your app.
Unveiling the Power of View Shot
The view shot library, or view shot functionality for short, allows you to capture specific screenshots within your React Native app. It offers a range of features and functionalities, making it an invaluable asset for developers. Let’s explore what makes this tool so useful.
Key Features and Benefits
- Targeted Capturing: Capture screenshots of specific app views or components, excluding unnecessary elements.
- Customization and Control: Precisely control screenshot timing based on user actions, events, or programmatically before displaying a view.
- Image Format Flexibility: For iOS, screenshots can be saved in multiple formats, such as PNG, JPEG, and HEIC, allowing optimal format selection for your needs.
These features translate into a range of benefits for developers:
- Enhanced Debugging: Capture screenshots of specific views to effectively diagnose and streamline the resolution of rendering issues.
- Improved User Experience: Enable users to share screenshots of their achievements or progress, enhancing engagement and interaction.
- Dynamic Content Sharing: Utilize screenshots to generate personalized reports or progress charts, adding customization and value to your app.
Common Use Cases
The ability to capture user-generated content enhances the user experience by allowing individuals to take and share screenshots of their in-game achievements or customized dashboards. Similarly, generating reports and visualizations can be automated to capture screenshots of data visualizations, which users can then share or include in reports. Additionally, debugging layouts and rendering issues can be streamlined through targeted screenshots, which help identify and troubleshoot any problems with layouts or rendering more effectively.
Getting Started with View Shot
With a grasp of this library’s capabilities, let’s integrate it into your React Native project. We will cover the installation process, setup, and how to import the necessary components to begin capturing screenshots.
Installation and Setup
Installing the library is straightforward, but the process depends on whether you’re using a regular React Native CLI setup or working with Expo. We’ll walk you through both methods.
CLI Projects: Open your terminal, go to your project directory, and run the following command to install the library.
npm install react-native-view-shotExpo Projects: Open your terminal, navigate to your project directory, and run the following command to install the library.
expo install react-native-view-shotAfter installing this library in a bare React Native project, you may need to link the native modules to ensure the library functions appropriately. The process for linking can vary based on your development environment. For detailed instructions on how to link native modules, refer to the official documentation by clicking here.
Importing the ViewShot Component
After you have completed the installation, you can begin to use the library in your application by initially importing the ViewShot component as demonstrated below:
import ViewShot from 'react-native-view-shot';The ViewShot component is the cornerstone of the view shot library’s functionality. It provides two essential props to configure your screenshot capture:
ref: This prop is a reference to the view or component you wish to capture as a screenshot. You can create this reference using React’suseRefhook or directly assign arefattribute to the component.options(optional): This prop allows you to specify optional configuration settings for the screenshot, such as the image format, quality, and dimensions.
Capturing Screenshots Like a Pro
This section explores leveraging the view shot functionality within your React Native app. We’ll explore the library’s core capabilities and how to customize the captured image to your specific needs.
Using the Capture Function
To take a screenshot, first enclose the areas you want to capture within the ViewShot component you imported earlier. Then, you can use the capture function as demonstrated below:
const viewShotRef = useRef();
const captureScreen = async () => {
  try {
    const result = await viewShotRef.current.capture();
    console.log(result);
 } catch (error) {
    console.error("Capture failed:", error);
 }
};
The code above defines a function named captureScreen that tries to take a screenshot of a view referenced by viewShotRef. It makes an asynchronous call to the capture method on viewShotRef.current, logging the result to the console if successful. If an error occurs during the capture process, it catches it and logs an error message to the console, indicating that the capture failed.
When you check your terminal, you will see the path indicating where the screenshot was saved, as shown below:

You can view the captured image by saving the path in a useState and using it with the React Native Image component, as demonstrated below:
<Image
  source={{
    uri: imagePath,
 }}
/>Customizing Options (Format, Quality, Dimensions)
The view shot library offers flexibility by customizing the captured screenshots to your specific needs. Here’s a look at some key options you can utilize:
format: The default image format is PNG, but you can change it to JPEG using theformatoption. The valid formats are “png” and “jpg.”quality(JPEG only): When you opt for the JPEG format (format: "jpg"), you have complete control over the compression level with thequalityoption. This control directly impacts both the file size and the clarity of the image. You can specify a value from 0 (lower quality, smaller file size) to 1 (higher quality, larger file size).dimensions: You can select the size of the captured image with thewidthandheightoptions, which set the output image’s pixel dimensions. If these options aren’t used, the captured image will retain the original dimensions of the view.
Here’s an example to show how you can customize these settings:
const captureScreen = async () => {
  try {
    const uri = await captureRef(viewShotRef, {
      format: "jpg",
      quality: 0.8,
      width: 800,
      height: 600,
 });
    console.log("Image captured:", uri);
    // Use the captured image URI (uri) for further processing or display
 } catch (error) {
    console.error("Capture failed:", error);
 }
};
The code above outlines an asynchronous function called captureScreen that tries to take a screenshot of a component referenced by viewShotRef. The function captures the screenshot as a JPG image, set at a quality of 0.8 and dimensions of 800x600 pixels. If successful, the function logs the URI of the captured image to the console with the message “Image captured:” This URI can then be used for additional processing or to display the image. If the capture fails, the function logs “Capture failed:” followed by the error details to assist in troubleshooting the issue.
Advanced Techniques
While capturing the entire screen can be helpful in some scenarios, the React Native view shot gives you more control. Let’s delve into some advanced techniques.
Capturing Specific Views
In this section, I’ve designed a payment receipt component demonstrating how to capture a specific area of your app using this library. Below is the complete code for the receipt component:
import { Image, StyleSheet, Text, View } from "react-native";
import React, { useRef, useState } from "react";
import { TouchableOpacity } from "react-native";
import ViewShot, { captureRef } from "react-native-view-shot";
const PlayGround = () => {
  const viewShotRef = useRef();
  const [imagePath, setImagePath] = useState("");
  const captureScreen = async () => {
    try {
      const uri = await captureRef(viewShotRef, {
        format: "jpg",
        quality: 0.8,
 });
      setImagePath(uri);
 } catch (error) {
      console.error("Capture failed:", error);
 }
 };
  return (
    <View style={styles.body}>
      <ViewShot ref={viewShotRef}>
        <View style={styles.receipt_container}>
          <View style={styles.section}>
            <Text style={styles.boldText}>Transaction Detials</Text>
            <View style={styles.trx_row}>
              <Text style={styles.text}>Amount</Text>
              <Text style={styles.boldText_}>$10.00</Text>
            </View>
            <View style={styles.trx_row}>
              <Text style={styles.text}>Date and Time</Text>
              <Text style={styles.boldText_}>
                {new Date().toLocaleDateString()} -{" "}
                {new Date().toLocaleTimeString()}
              </Text>
            </View>
            <View style={styles.trx_row}>
              <Text style={styles.text}>Customer ID</Text>
              <Text style={styles.boldText_}>johndoe@gmail.com</Text>
            </View>
            <View style={styles.trx_row}>
              <Text style={styles.text}>TRX type</Text>
              <Text style={[styles.boldText_, { textTransform: "capitalize" }]}>
 Transfer
              </Text>
            </View>
            <View style={styles.trx_row}>
              <Text style={styles.text}>Status</Text>
              <Text style={[styles.boldText_, { textTransform: "capitalize" }]}>
                {" "}
 Success
              </Text>
            </View>
          </View>
        </View>
      </ViewShot>
      <View>
        <TouchableOpacity style={styles.btn_container} onPress={captureScreen}>
          <Text style={styles.btn_text}>Share Receipt</Text>
        </TouchableOpacity>
      </View>
      <View
        style={{
          padding: 10,
 }}
      >
        <Text style={[styles.boldText, { marginVertical: 20 }]}>
 Captured receipt:
        </Text>
        <Image
          style={styles.capturedImage}
          source={{
            uri: imagePath,
 }}
        />
      </View>
    </View>
 );
};
export default PlayGround;
The above code introduces a PlayGround component that showcases the functionality of capturing and sharing a screenshot of transaction details. This component leverages the react-native-view-shot library to capture a designated part of the component referenced by viewShotRef. Within the component’s state, which is managed by the useState hook, imagePath holds the URI of the captured image. The captureScreen function operates asynchronously to capture the content referenced by viewShotRef, processes it into a JPEG image with specific dimensions and quality, and updates imagePath with the URI of the new image. The user interface features a ViewShot component that encloses transaction details such as the amount, date/time, customer ID, transaction type, and status. A TouchableOpacity element is used to trigger the captureScreen function. Below this, an Image component displays the captured screenshot when available. The styles for various elements are defined through predefined styles.
To include the styles, add the following code:
const styles = StyleSheet.create({
body: {
flex: 1,
backgroundColor: "black",
padding: 10,
},
receipt_container: {
color: "black",
},
image: {
width: 70,
height: 70,
borderRadius: 20,
},
bitText: {
fontSize: 25,
color: "white",
},
row: {
flexDirection: "row",
alignItems: "center",
marginVertical: 20,
marginLeft: -15,
},
boldText: {
color: "white",
fontWeight: "bold",
fontSize: 20,
marginBottom: 10,
},
boldText_: {
color: "white",
fontWeight: "bold",
fontSize: 18,
},
text: {
color: "white",
fontSize: 15,
fontWeight: "bold",
},
section: {
marginVertical: 15,
backgroundColor: "black",
},
trx_row: {
flexDirection: "row",
justifyContent: "space-between",
alignItems: "center",
marginVertical: 10,
},
btn_container: {
width: "100%",
backgroundColor: "cornflowerblue",
padding: 20,
borderRadius: 40,
justifyContent: "center",
alignItems: "center",
},
btn_text: {
fontSize: 20,
color: "white",
fontWeight: "bold",
},
capturedImage: {
width: "100%",
height: 227,
borderWidth: 2,
borderColor: "white",
},
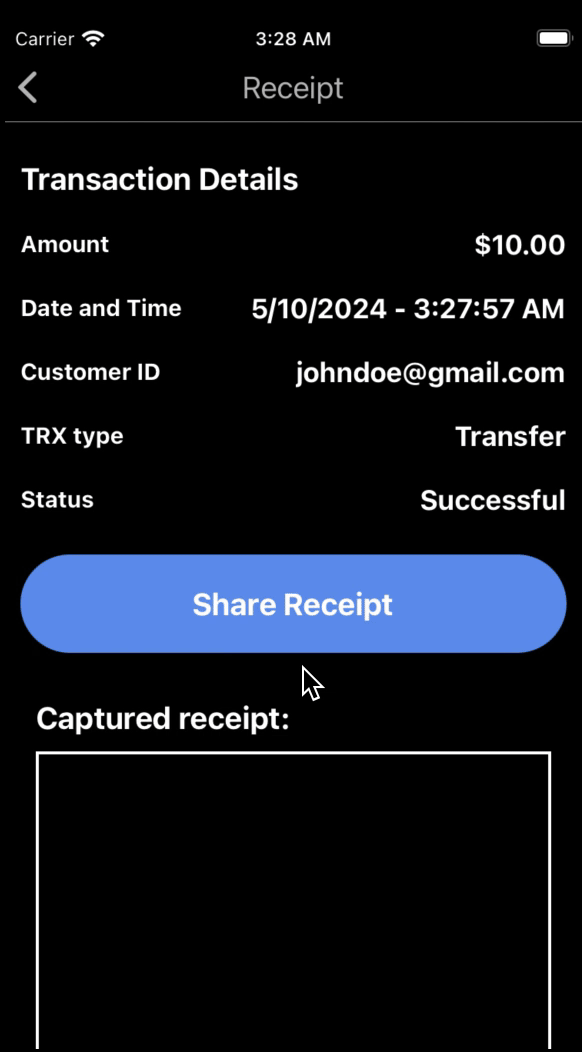
});After you have added the styles to the component mentioned earlier in your app, you will see the output as illustrated below:
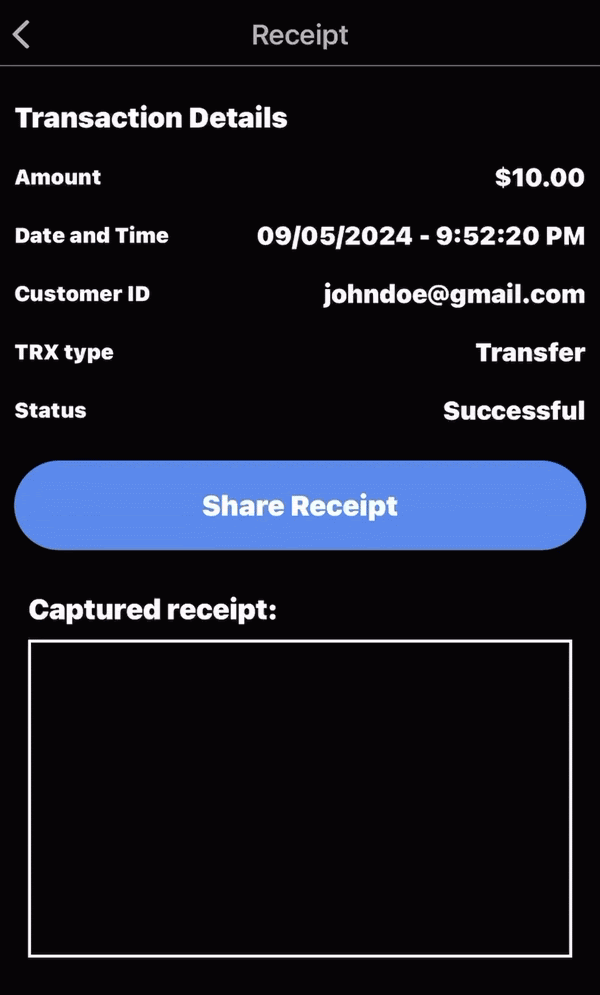
The output above shows that the captured receipt section includes the captured image displayed using URI. Additionally, the share button was not included in the captured section of the receipt.
Saving Screenshots to Device Storage
When you capture an image, it provides you with a URI. Using the react-native-fs library, you can manage the saving of this image to your device’s storage. You can learn more about this library by clicking here. For this article, let’s look at how you can utilize this library alongside the view shot library.
import RNFS from "react-native-fs";

const captureImage = async () => {
  try {
    // ... your capture logic using captureRef ...
    const uri = await captureRef(viewRef);
    await saveScreenshot(uri);
 } catch (error) {
    console.error("Failed to capture image:", error);
    // Optionally add logic to handle the error, like showing an error message to the user.
 }
};

const saveScreenshot = async (uri) => {
  try {
    const path = `${RNFS.DocumentDirectoryPath}/screenshot.jpg`; // Define desired path
    await RNFS.moveFile(uri, path);
    console.log("Screenshot saved to:", path);
 } catch (error) {
    console.error("Failed to save screenshot:", error);
    // Optionally add logic to handle the error, like showing an error message to the user.
 }
};
This code above defines two asynchronous functions: captureImage and saveScreenshot, using the react-native-fs library. The captureImage function captures an image from a view reference and then calls saveScreenshot to save the captured image. In saveScreenshot, the image is moved to a specified path in the device’s document directory. Both functions include error handling to log any issues that occur during the capture or save processes.
Sharing Screenshots with Users
In this part of the guide, I’ll show you how to share screenshots using the react-native-share library, which allows you to share files and media. Follow the instructions here to install and set up this library.
Using the library is straightforward. Use the open function from RNShare and provide the image URI created by the captureRef function discussed earlier in this article.
import Share from "react-native-share";

const shareImage = async (imageUri) => {
  try {
    await Share.open({ url: imageUri });
 } catch (error) {
    console.error("Failed to share image:", error);
 }
};
The code above imports Share from react-native-share and defines an async function shareImage that tries to share an image using Share.open with the provided URL. If it fails, it logs an error message to the console.
When you call the shareImage function and pass in the image uri, a share popup will appear like this:
If you run this on your mobile device, you’ll see many apps, such as WhatsApp, Gmail, and others, with which you can share the screenshot.
Conclusion
I’m glad you found the article enjoyable! In it, we discussed why the view shot library is essential and how it can be used in React Native mobile apps. We even explored using a payment receipt to highlight its significance. With the knowledge you’ve gained, you can now begin implementing screenshot functionality in your personal or client projects using what we’ve covered.
Gain Debugging Superpowers
Unleash the power of session replay to reproduce bugs, track slowdowns and uncover frustrations in your app. Get complete visibility into your frontend with OpenReplay — the most advanced open-source session replay tool for developers. Check our GitHub repo and join the thousands of developers in our community.