
Creating Client-Serverless Apps with FaunaDB and Nuxt JS


Client-serverless applications have become a mainstay in application development, increasing use for building modern applications. These are applications that enable developers to build and run applications without managing servers themselves. In client-serverless applications, servers are abstracted from application development and handled by a Cloud database/provider, which is beneficial because developers only have to focus on the design and business logic of application development, relinquishing server management to the Cloud provider.
In this tutorial, we will build a simple client-serverless application, a note-taking app, using FaunaDB, a cloud service, and Nuxt, a highly performant Vue framework. We will also take a quick dive into the benefits of using FaunaDB as our cloud provider for this application. We will also explain further state management with VueX and its setup on a Nuxt app as we will be implementing state management in this tutorial.
Why FaunaDB?
Utilizing FaunaDB to build applications stems from the reality that FAUNADB is a fast and secure cloud database that can effortlessly be accessed anywhere by any client-side application.
It supports the ACID (Atomicity, Consistency, Isolation, and Durability) convention, which is possible due to its utilization of the “state-of-the-art” Calvin algorithm to maintain several consistent copies of the data, called replicas, with the ability to both read and write on every node. A Replica consists of several geographically aware nodes.
It also has a flexible data model that enables users to easily model data to suit their business requirements. It supports the expression of complex conditional business logic in the form of Atomic functions that execute quickly and close to the data in one transaction.
It also combines attribute-based access control with SSL and 3rd party authentication to offer strong security. This implies that one can easily invoke the cloud provider directly from the browser/client with little or no security risks.
There are many benefits to using FaunaDB. To take a look at more features of FaunaDB, visit here. “
Project Set Up
To get started, there are prerequisites needed for this project.
- Code Editor (visual studio code preferably)
- Web browser
- Node.js and Npm (or yarn)
Open your terminal to install a Nuxt application using the following command:
npx create-nuxt-app <appname>Upon running the command, you will have to make some selections. Follow all the selections as specified below. We will be using Tailwind CSS to minimize the creation of more custom styling for this project. Next, we will install the FaunaDB javascript driver to connect to FaunaDB and NUXT-toast for toast alerts/notifications.

Next, we will install the FaunaDB javascript driver to connect to FaunaDB and nuxt-toast for toasts alerts/notifications.
yarn add faunadb @nuxtjs/toast -- for yarn
npm install faunadb @nuxtjs/toast --- for npm
We will get the following project structure.
faunadbnotes
├─ api
│  ├─ db.js
│  └─ index.js
├─ assets
│  └─ css
│     └─ style.css
├─ components
│  └─ FloatingButton.vue
├─ layouts
│  └─ default.vue
├─ middleware
├─ pages
│  ├─ note
│  │  └─ _id
│  │     ├─ index.vue
│  │     └─ view.vue
│  ├─ create-note.vue
│  └─ index.vue
├─ plugins
├─ static
│  ├─ images
│  │  ├─ arrow-right-w.svg
│  │  └─ ic-transact.svg
│  └─ favicon.ico
├─ store
│  └─ notes.js
├─ nuxt.config.js
├─ package.json
└─ yarn.lock
Setting up FaunaDB
First and foremost, we need to create a FaunaDB account.
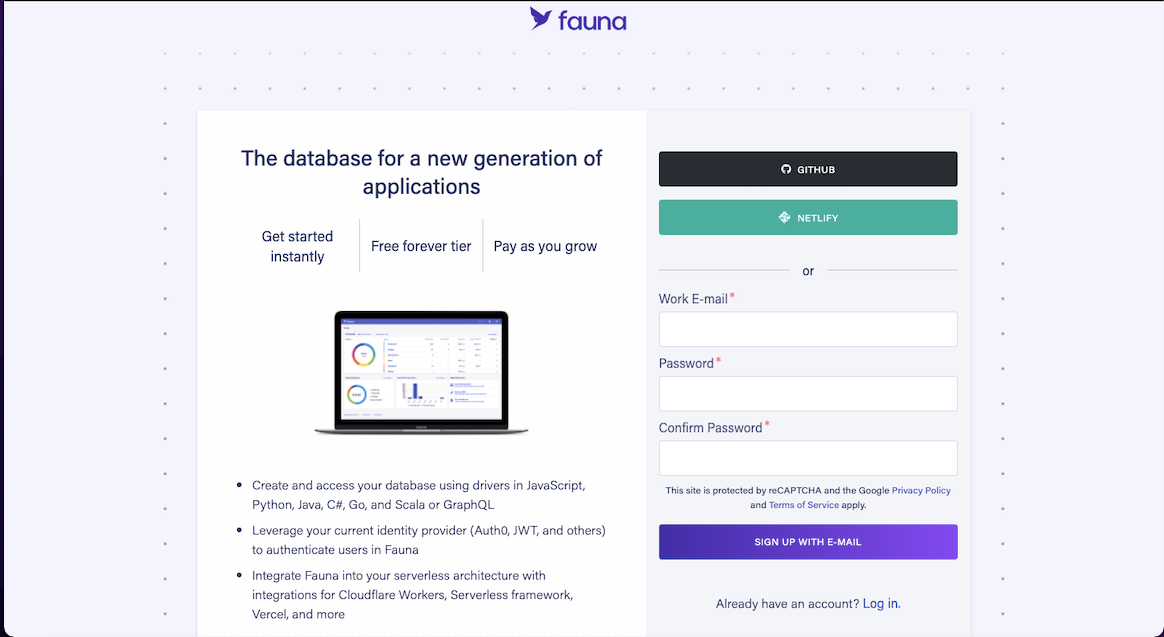
Once you create an account, you will be redirected to the dashboard. On the dashboard, create a database. You can name it fauna_notes or any preferable name you see fit.
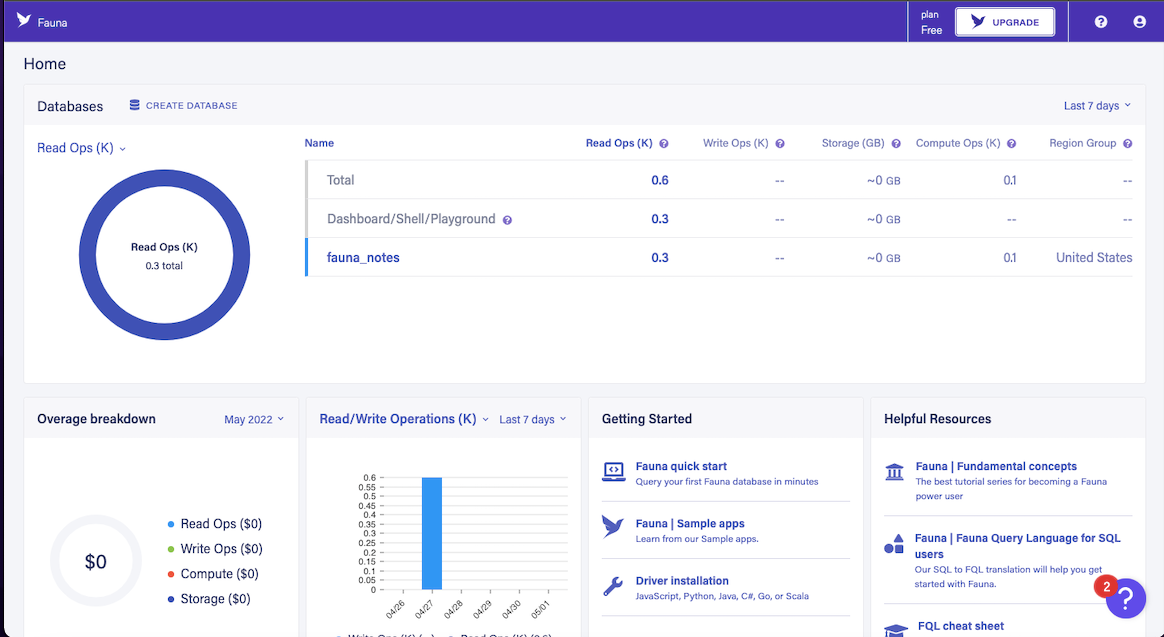
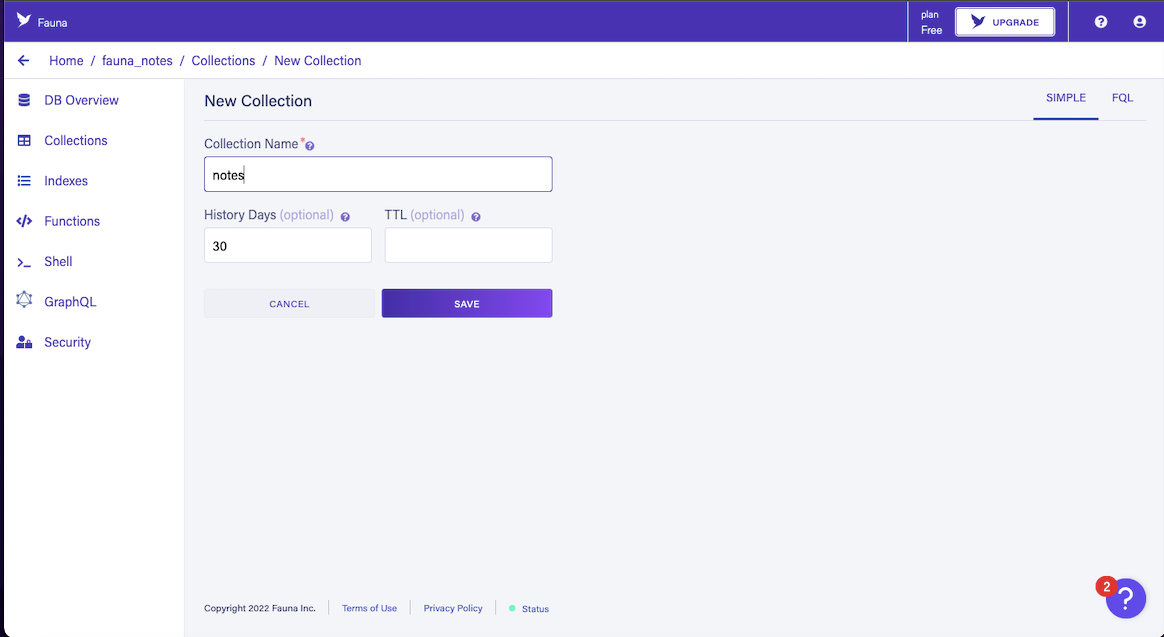
After creating the database, click on the newly created database to view it. Once you’re done, create a collection. You can create a new collection by going to Home → database → collections → new Collection
To create a collection, you will have to create an “index”. An “index” is a storage structure maintained by the database system to facilitate efficient retrieval of subsets of the data. It is essential to create one for your collection. Go to Home → database → indexes → new Index.

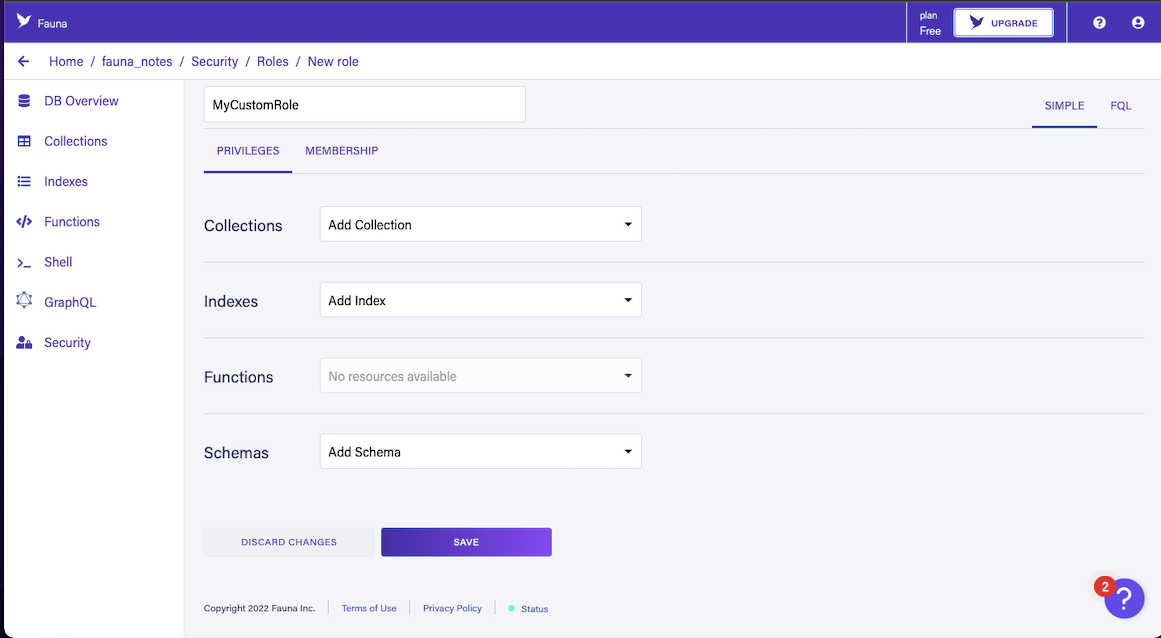
After creating an index, you will create a role. A role is a privilege that shows fauna the type of user and the collection(s) a user can have access to. You can create a new role by going to Home → database → security → roles → new role.
After creating a role, create an access key. An access key authorizes a user to connect to the database and perform read and write actions. You can create an access key by going to Home → database → security → keys → new key.
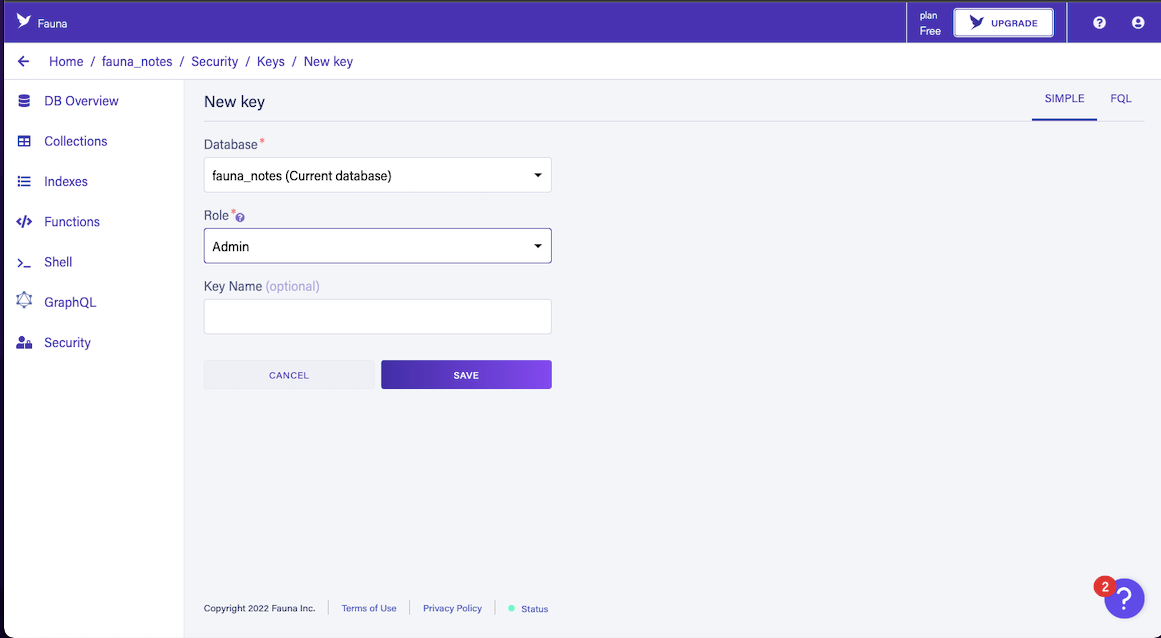
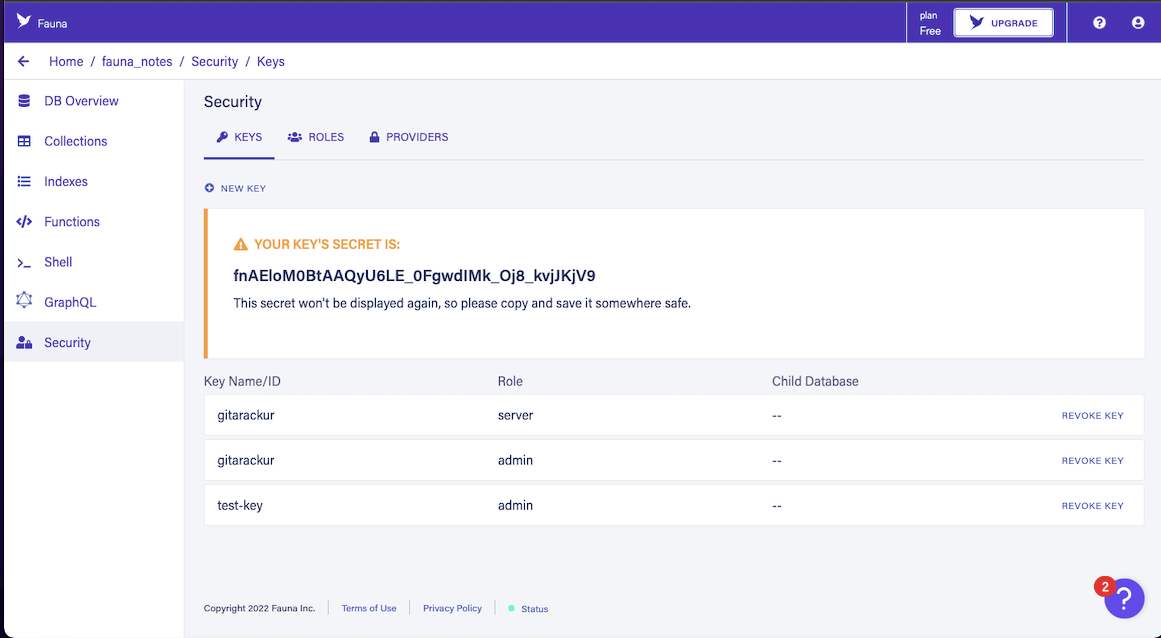
Upon saving, you should see the FaunaDB access key. Remember to save the access key somewhere because the key only displays once.
Connecting Nuxt to FaunaDB
After creating the collections and roles on FaunaDB, we will create an api folder in the base directory of the project. In this folder, we will be creating two files:
db.js“— this file contains the functions that will connect to FaunaDB.index.js“— this contains the query methods used to perform operations on the database.
We will also create an env file. Such files enable developers to protect keys and other secrets. A .env file will bear the access key generated for creating the roles on the FaunaDB dashboard.
After setting up the api folder, we will add a code block to the db.js file. This code connects the application to FaunaDB using the FaunaDB javascript driver and also exports it so that we can use it in our application.
// api/db.js

import faunadb from 'faunadb'

const client = new faunadb.Client({
  secret: process.env.FAUNADB_KEY,
  domain: "db.us.fauna.com"
})
const q = faunadb.query

export { client, q }
We will also add some blocks of code to the index.js file to allow us to query the database. The application is a note application, so it should allow a user to create, delete, edit, and get all notes. Therefore, we will write queries to get all notes, create a “note”, edit a “note”, and delete a “note” in the collection. We will also export the queries to use them in the application.
// api/index.js

import { client, q } from './db'

export const getAllNotes = async() => {
  try{
    const response= await client.query(q.Paginate(q.Match(q.Ref('indexes/all_notes'))))
    const getAllProductDataQuery = response.data.map((ref) => q.Get(ref))
    const RefsToData= await client.query(getAllProductDataQuery)
    return RefsToData;
  }catch(err){
    console.log(err)
  }
}

export const getSingleNote = async(noteId) => {
  try{
    const response= await client.query(q.Get(q.Ref(q.Collection('notes'), noteId)))
    return response;
  }catch(err){
    console.log(err)
  }
}

export const createNote = async(text) => {
  try{
    const newNote= await client.query(q.Create(q.Collection('notes'),{data: {text},},))
    return newNote;
  }catch(err){
    console.log(err)
  }
}

export const editNote = async(noteId, text) => {
  try{
    const updatedNote = await client.query(q.Update(q.Ref(q.Collection('notes'), noteId),
    { data: { text } },))
    return updatedNote
  }catch(err){
    console.log(err)
  }
}

export const deleteNote = async(noteRef) => {
  try{
    const deletedNote = await client.query(q.Delete(q.Ref(q.Collection('notes'), noteRef)));
    return deletedNote;
  }catch(err){
    console.log(err)
  }
}
Create the Notes Store
Before we dive into creating a store for this application, here are a few terminologies that you might come across and so it is best to explain what they are.
- State — A State can be described as any object you need to rebuild your app. This object stores reactive variables and is accessible from any component in the app.
- Getter — A getter is simply a function that returns a state value. With a getter, we can easily retrieve the state values from the store.
- Mutations — State values are naturally immutable and can only be mutated by mutations. Mutations enable change of state.
- Action — Action is simply a function that performs change. This feature allows you to make API calls whose responses can update the state. Furthermore, an action is an object that contains individual actions that change states individually.
- Store - A store comprises application state, mutations, getters, and actions.
We will be using the Vuex store. Thankfully, Nuxt automatically enables a Vuex store instance that notices a file in the store folder located in your project’s root directory. NUXT automatically converts every file in the store directory to a namespaced module, which gives the actions and mutations of these modules the same names and enables them to run independently.
We will create a store called notes.js “in the store directory and create its state, actions, getters, and mutations.
- The store object contains the variables loading, notes, and note. The
notesvariable will contain all the notes fetched from our FaunaDB collection, and thenotevariable will contain a single note fetched from FaunaDB. Lastly, the loading text can be displayed using theloadingvariable when the values are getting fetched. - The getter function returns the state values of
loading,notes, andnote, respectively. - The object of the action contains actions to get “all notes”, get “single note”, and create, edit and update “notes”. These actions hold imported queries from the API file. When the action function gets called, FaunaDB gets queried, which returns a response or data which can be sent to a mutation to update the state variables.
// store/notes.js

import { getAllNotes, getSingleNote, editNote, createNote, deleteNote} from '../api/index'

export const state = () => ({
  loading: false,
  notes: null,
  note: null,
})

export const mutations = {
  SET_LOADING(state, loading) {
    state.loading = loading
  },
  SET_NOTES(state, data) {
    state.notes = data
  },
  SET_NOTE(state, data) {
    state.note = data
  },
}

export const actions = {
  async getNotes(context) {
    context.commit('SET_LOADING', true)
    try{
      const notes = await getAllNotes()
      context.commit('SET_NOTES', notes)
    }catch(err){
      console.log('store error getNote', err)
    }finally{
      context.commit('SET_LOADING', false)
    }
  },

  async getNote(context, id) {
    context.commit('SET_LOADING', true)
    try{
      const note = await getSingleNote(id)
      context.commit('SET_NOTE', note)
    }catch(err){
      console.log('store error getNote', err)
    }finally{
      context.commit('SET_LOADING', false)
    }
  },

  async createNote(context, text) {
    context.commit('SET_LOADING', true)
    try{
      await createNote(text)
      context.dispatch('getNotes')
    }catch(err){
      console.log('store error createNote', err)
    }finally{
      context.commit('SET_LOADING', false)
    }
  },

  async editNote(context, data) {
    context.commit('SET_LOADING', true)
    try{
      await editNote(data?.id, data?.text)
      context.dispatch('getNotes')
    }catch(err){
      console.log('store error editNote', err)
    }finally{
      context.commit('SET_LOADING', false)
    }
  },

  async delete_Note(context, id) {
    context.commit('SET_LOADING', true)
    try{
      await deleteNote(id)
      context.dispatch('getNotes')
    }catch(err){
      console.log('store error deleteNote', err)
    }finally{
      context.commit('SET_LOADING', false)
    }
  }
}

export const getters = {
  getLoading: (state) => state.loading,
  getAllNotes: (state) => state.notes,
  getNote: (state) => state.note,
}

export default {
  state,
  mutations,
  actions,
  getters,
}
Open Source Session Replay
OpenReplay is an open-source, session replay suite that lets you see what users do on your web app, helping you troubleshoot issues faster. OpenReplay is self-hosted for full control over your data.

Start enjoying your debugging experience - start using OpenReplay for free.
Building Routes and Components
We will create a route to add a note to FaunaDB, but we will first create a component that bears the floating button that, when clicked, routes the user to a screen to make a new note.
// components/FloatingButton.vue

<template>
  <div>
    <div class="circle">
      <nuxt-link to='/create-note'
        class="inline-block smallP12px text-uppercase c-black"
      >
        <img src="../static/images/ic-transact.svg"/>
      </nuxt-link>
    </div>
  </div>
</template>

<script>
export default {}
</script>

<style scoped>
.circle {
  position: fixed;
  right: 80px;
  bottom: 35px;
  display: flex;
  align-items: center;
  border-radius: 50%;
  line-height: 0.8;
  letter-spacing: 1.44px;
  z-index: 10;
}

@media (max-width: 768px) {
  .circle {
    right: 10px;
  }
}

.circle__content {
  display: table-cell;
  vertical-align: middle;
}
</style>
We are now creating a route to creating a note. Creating a route in Nuxt is super easy as Nuxt automatically generates routes when it notices a file in the pages directory located at the root directory of the project. So, we will create a page called create-note.vue in the “pages” directory. This route contains input boxes that let users input a note name and description. On note creation, it calls a method that fires an action from the store to create a new “note”.
// pages/create-note.vue

<template>
  <div>
    <div v-show="!loading" class="md:mx-auto px-6 md:px-0 mt-10 md:w-9/12">
      <form class="" @submit.prevent="createNoteinFdb">
        <div class="mt-8">
          <label class="edge-label mb-2"> Title </label>
          <input type="text" class="edge-input" placeholder="" required v-model="title"/>
        </div>
        <div class="mt-8">
          <label class="edge-label mb-2"> Add your note description </label>
          <textarea class="edge-input" data-provide="markdown" required v-model="description"></textarea>
        </div>
        <div class="flex justify-end mt-8">
            <button type="submit" class="px-4 py-4 bg0e9f64 c-white border-radius">
            {{load ? 'loading': 'Create Note'}}</button>
        </div>
      </form>
    </div>
  </div>
</template>

<script>
import { mapActions, mapGetters, mapState } from 'vuex'
  export default {
  data() {
    return {
      title:'',
      description:'',
      load: false
    }
  },
  computed: {
    ...mapState('notes', ['loading']),
    ...mapGetters({
      Loading: ['notes/getLoading'],
      All_Notes: ['notes/getAllNotes'],
      getSingleNote: ['notes/getNote'],
    }),
  },
  methods: {
    ...mapActions('notes',
      ['getNotes', 'getNote', 'createNote', 'delete_Note', 'editNote']
    ),

    async createNoteinFdb(){
      this.load= true
      const data= {
        title: this.title,
        description: this.description
      }
      try{
        await this.createNote(data)
        this.$toast.success('created note successfully')
        this.$router.push('/')
      }catch(err){
        this.$toast.error('unable to create note')
      }finally{
        this.load= false
      }
    }
  },

  async created() {
    if(process.browser){
      try{
        await this.getNotes()
      }catch(err){
        console.log(err)
      }
    }
  },

  async mounted() {},
  }
</script>

<style scoped>
</style>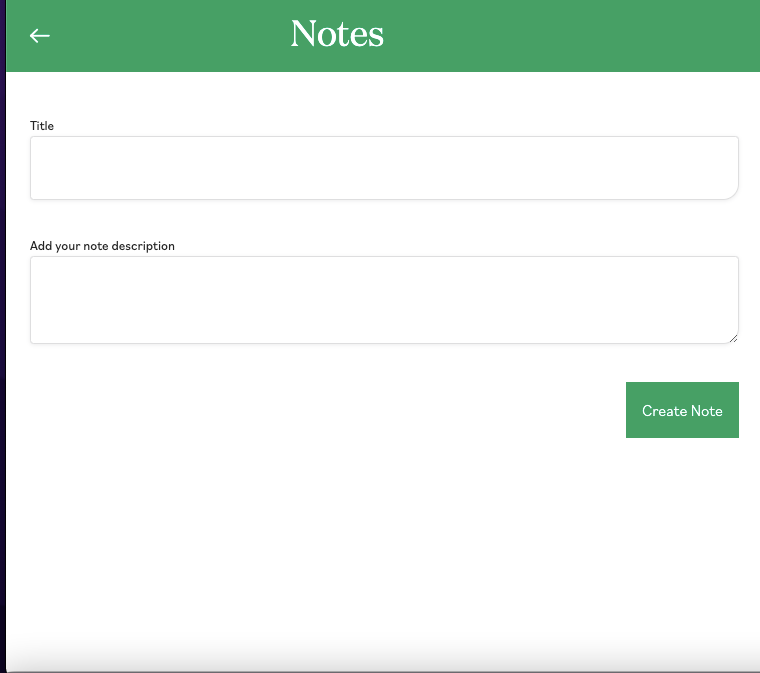
Next, we create a route to get all the notes. We will create an index.vue route in the pages directory. This route contains actions that fetch all notes, delete a note, and edit a note.
// pages/index.vue

<template>
  <div>
    <div class="">
      <div v-if="!loading && All_Notes" class="md:mx-auto px-6 md:px-0 md:w-9/12">
        <div class="py-2"
          v-for="(note) in All_Notes"
          :key="note.ref.id"
        >
          <div
            class="flex items-center justify-between px-2 py-4 border border-radius"
          >
            <div>
              <h5
                class="w-full break-word"
              >
              {{note.data.text.title}}
              </h5>
            </div>
            <div class="flex justify-between">
              <button @click="delete_Note(note.ref.id)" class="inline-block px-2 py-4 cD60000 border-radius">Delete</button>
              <nuxt-link :to='"/note/" + note.ref.id' class="inline-block px-2 py-4 #0e9f64 border-radius">Edit</nuxt-link>
              <nuxt-link :to='"/note/" + note.ref.id + "/view"' class="inline-block px-2 py-4 #0e9f64 border-radius">View</nuxt-link>
            </div>
          </div>
        </div>
      </div>
      <div class="" v-if="!loading && (!All_Notes || All_Notes.length===0)">
        <h1 class="flex items-center justify-center border border-dashed c0e9f64 h-screen">No Notes</h1>
      </div>
      <div class="" v-if="loading">
        <h1 class="flex items-center justify-center h-screen cD60000">loading....</h1>
      </div>
    </div>
    <floating-button/>
  </div>
</template>

<script>
import { mapActions, mapGetters, mapState } from 'vuex'
import FloatingButton from '../components/FloatingButton.vue'
export default {
  components: { FloatingButton },
  data() {
    return {
      title:'',
      description:''
    }
  },
  computed: {
    ...mapState('notes', ['loading']),
    ...mapGetters({
      Loading: ['notes/getLoading'],
      All_Notes: ['notes/getAllNotes'],
      getSingleNote: ['notes/getNote'],
    }),
  },
  methods: {
    ...mapActions('notes',
      ['getNotes', 'getNote', 'createNote', 'delete_Note', 'editNote']
    ),
    async createNoteinFdb(){
      const data= {
        title: this.title,
        description: this.description
      }
      try{
        await this.createNote(data)
        this.$toast.success('note created successfully')
      }catch(err){
        console.log(err)
        this.$toast.error('unable to create note')
      }
    },
    async deleteNoteInFdb(id){
      try{
        await this.delete_Note(id)
        this.$toast.success('note deleted successfully')
      }catch(err){
        this.$toast.error('unable to delete note')
      }
    }
  },
  async created() {
    if(process.browser){
      try{
        await this.getNotes()
      }catch(err){
        console.log(err)
      }
    }
  },
  async mounted() {},
}
</script>

<style>
.jumbotron{
  width: 100%;
  min-height: 50vh;
}
@media (max-width: 768px) {
  .jumbotron{
    width: 100%;
    min-height: 50vh;
  }
}
</style>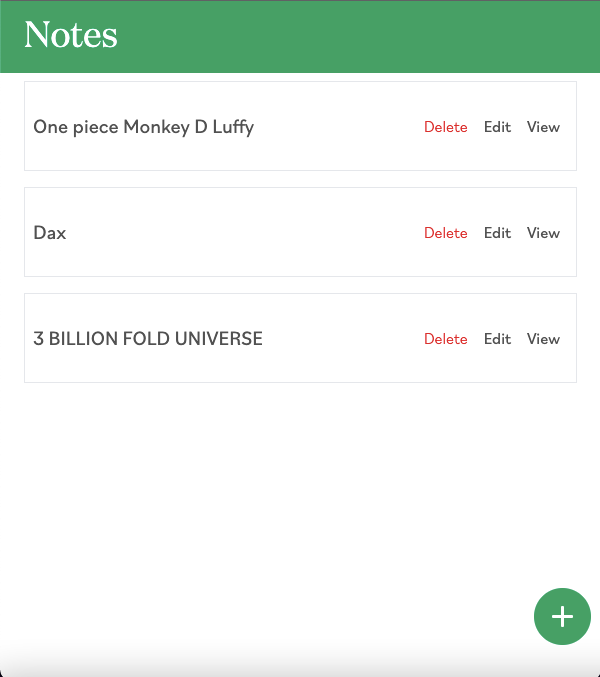
Next, we will create a route for editing a note. Editing a note requires the id of an existing note so that we use that id to redirect the user to the route where the user can edit a note with that specific id. The route is created as a dynamic route that accepts an id. To do this, we create a note folder in the pages directory that will contain an _id folder. The _id folder accepts dynamic id values and will render the route based on that id value. After which, the index.vue file will be created in the _id folder to show the view.
// pages/note/_id/index.vue

<template>
  <div>
    <div v-if="!loading" class="md:mx-auto px-6 md:px-0 mt-10 md:w-9/12">
      <form class="" @submit.prevent="editNoteinFdb">
        <div class="mt-8">
          <label class="edge-label mb-2"> Title </label>
          <input type="text" class="edge-input" placeholder="" required v-model="title"/>
        </div>
        <div class="mt-8">
          <label class="edge-label mb-2"> Add your note description </label>
          <textarea class="edge-input" data-provide="markdown" required v-model="description"></textarea>
        </div>
        <div class="flex justify-end mt-8">
            <button type="submit" class="px-4 py-4 bg0e9f64 c-white border-radius">
            {{load ? 'loading': 'Edit Note'}}</button>
        </div>
      </form>
    </div>
    <div class="" v-else>
      <h1 class="flex items-center justify-center h-screen cD60000">loading....</h1>
    </div>
  </div>
</template>

<script>
import { mapActions, mapGetters, mapState } from 'vuex'
  export default {
  data() {
    return {
      title:'',
      description:'',
      load: false
    }
  },
  computed: {
    ...mapState('notes', ['loading']),
    ...mapGetters({
      Loading: ['notes/getLoading'],
      All_Notes: ['notes/getAllNotes'],
      getSingleNote: ['notes/getNote'],
    }),
  },
  methods: {
    ...mapActions('notes',
      ['getNotes', 'getNote', 'createNote', 'delete_Note', 'editNote']
    ),
    async editNoteinFdb(){
      this.load= true
      const data= {
        title: this.title,
        description: this.description
      }
      try{
        await this.editNote({id: this.$route.params.id, text: data})
        this.$toast.success('edited note successfully')
        this.$router.push('/')
      }catch(err){
          this.$toast.error('unable to edit note')
      }finally{
        this.load= false
      }
    },
    async getNoteinFdb(){
      try{
        await this.getNote(this.$route.params.id)
        this.title = this.getSingleNote?.data?.text?.title;
        this.description = this.getSingleNote?.data?.text?.description;
      }catch(err){
        console.log(err)
      }
    }
  },
  async created() {
    if(process.browser){
      try{
        await this.getNoteinFdb()
      }catch(err){
        console.log(err)
      }
    }
  },
  async mounted() {},
  }
</script>

<style scoped>
</style>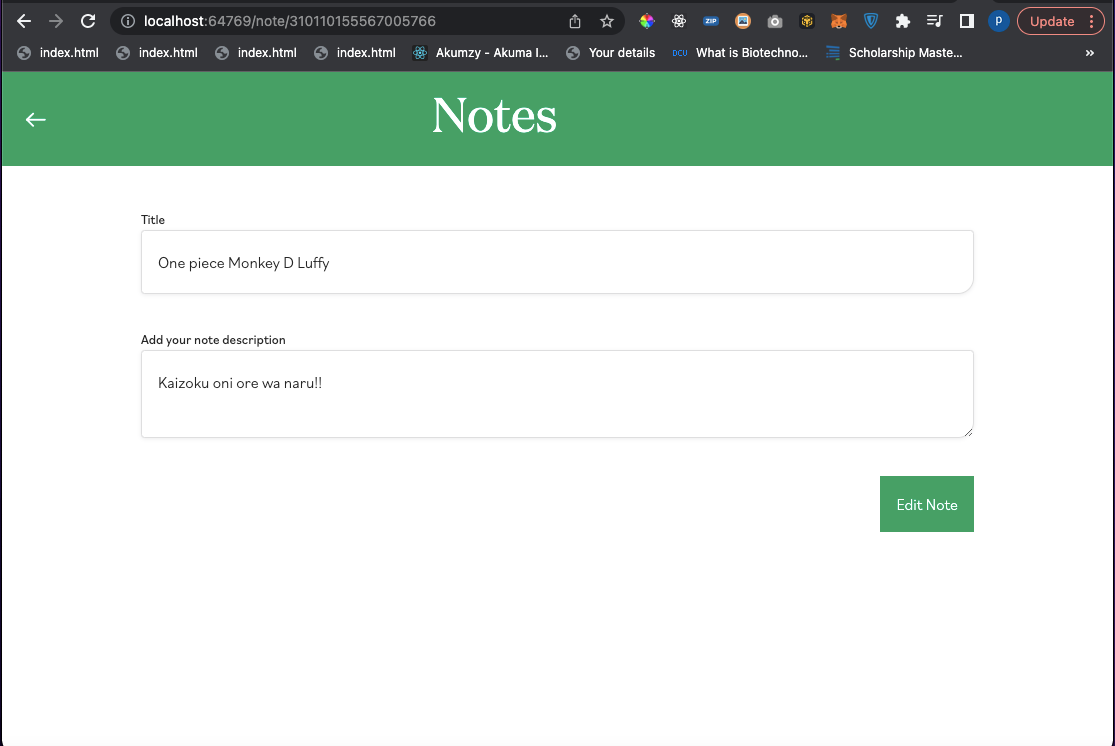
The same procedure used in editing a note applies to that of viewing a note.
// pages/note/_id/view.vue

<template>
  <div>
    <div v-if="!loading" class="md:mx-auto px-6 md:px-0 mt-10 md:w-9/12">
      <form class="" @submit.prevent="editNoteinFdb">
        <div class="mt-8">
          <label class="edge-label mb-2"> Title </label>
          <input type="text" class="edge-input" placeholder="" required v-model="title"/>
        </div>
        <div class="mt-8">
          <label class="edge-label mb-2"> Add your note description </label>
          <textarea class="edge-input" data-provide="markdown" required v-model="description"></textarea>
        </div>
        <div class="flex justify-end mt-8">
            <button type="submit" class="px-4 py-4 bg0e9f64 c-white border-radius">
            {{load ? 'loading': 'Edit Note'}}</button>
        </div>
      </form>
    </div>
    <div class="" v-else>
      <h1 class="flex items-center justify-center h-screen cD60000">loading....</h1>
    </div>
  </div>
</template>

<script>
import { mapActions, mapGetters, mapState } from 'vuex'
  export default {
  data() {
    return {
      title:'',
      description:'',
      load: false
    }
  },
  computed: {
    ...mapState('notes', ['loading']),
    ...mapGetters({
      Loading: ['notes/getLoading'],
      All_Notes: ['notes/getAllNotes'],
      getSingleNote: ['notes/getNote'],
    }),
  },
  methods: {
    ...mapActions('notes',
      ['getNotes', 'getNote', 'createNote', 'delete_Note', 'editNote']
    ),
    async editNoteinFdb(){
      this.load= true
      const data= {
        title: this.title,
        description: this.description
      }
      try{
        await this.editNote({id: this.$route.params.id, text: data})
        this.$toast.success('edited note successfully')
        this.$router.push('/')
      }catch(err){
          this.$toast.error('unable to edit note')
      }finally{
        this.load= false
      }
    },
    async getNoteinFdb(){
      try{
        await this.getNote(this.$route.params.id)
        this.title = this.getSingleNote?.data?.text?.title;
        this.description = this.getSingleNote?.data?.text?.description;
      }catch(err){
        console.log(err)
      }
    }
  },
  async created() {
    if(process.browser){
      try{
        await this.getNoteinFdb()
      }catch(err){
        console.log(err)
      }
    }
  },
  async mounted() {},
  }
</script>

<style scoped>
</style>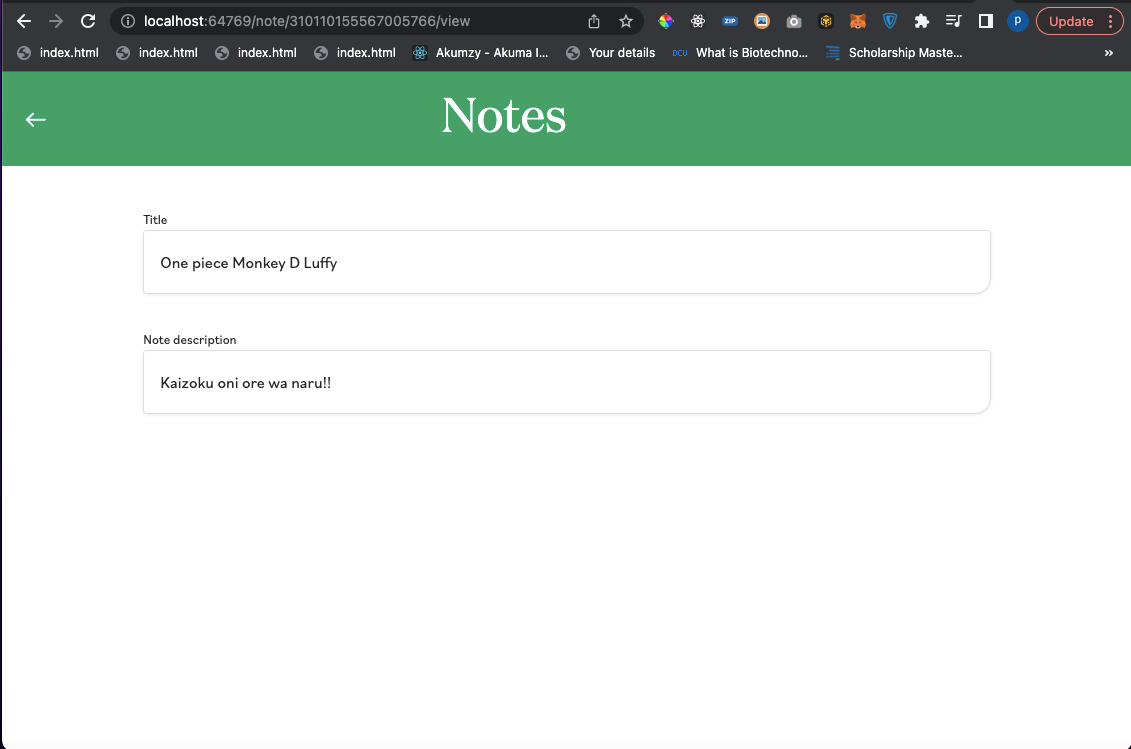
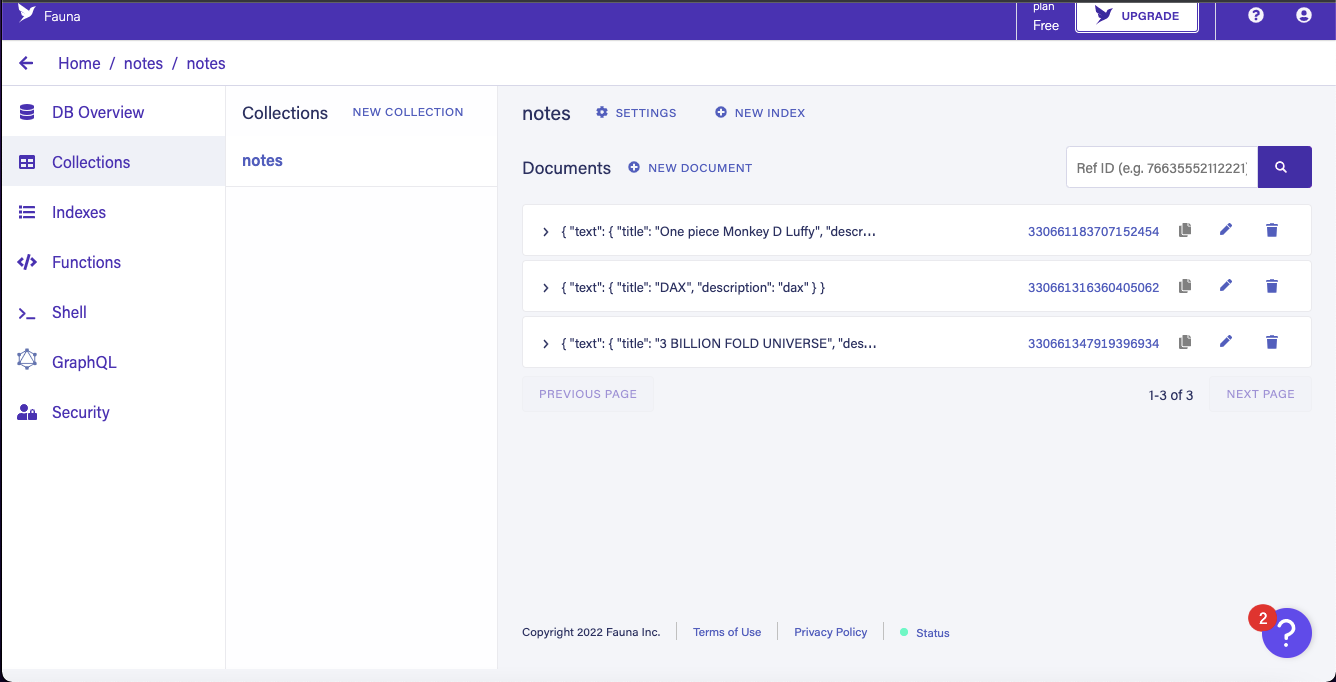
If we inspect our FaunaDB collection, we can see new notes inserted. You can try adding notes, editing, and deleting “notes” on the application and watch it reflect on the collection.
Conclusion
In this tutorial, we talked about client-serverless applications and the benefits of building them. We also illustrated how we could build client-serverless applications with the help of FaunaDB, a fast and efficient cloud provider. We also dived into concepts in state management with VueX and how to use states, mutations, getters, and actions in our application.