Continuous Integration testing for APIs with Cypress
Using Cypress to test APIs in CI processes.
An essential aspect of building a project is evaluating and verifying that the software product or application works as it ought to. Testing software ensures it performs optimally, allowing developers to detect and fix bugs and anomalies in their app before shipping to deployment.
There are several kinds of software development testing: Unit testing, end-to-end testing, and integration testing, each with its purpose and focus. Several tools are also available to developers for testing their products/apps. The prevalent ones are JUnit, Selenium, Postman, and Cypress.
According to the documentation, Cypress is a next-generation front-end testing tool built for the modern web to address the critical pain points developers and QA engineers face when testing modern applications. It is a JavaScript-based front-end testing tool that makes writing, running, and debugging tests for web applications easy.
So why use Cypress for your CI testing? The first notable advantage of Cypress is that it is easy to set up and use, requiring very minimal configuration. It also provides a range of built-in debugging tools that make it easy to identify and fix issues with tests and provide real-time feedback while tests run, making it easier to identify and fix issues as they occur.
In this article, we will be focusing on continuous integration (CI) testing API using Cypress. We would cover the basics of CI testing, the importance of testing with Cypress, and examples showing how to carry out a CI test with Cypress.
Introduction to Continuous Integration(CI) testing
Working with a remote team or many developers making code changes can prove challenging, mainly because you must ensure everyone’s code integrates properly and bug-free. Not testing the code as deployed can make resolving bugs a bit difficult, while manual testing can be a hectic and repetitive job; hence, the need for CI testing.
Continuous integration is a development practice where developers regularly merge their code changes into a single repository, after which an automated build and automated tests verify the codes. Automated testing makes it easier to catch bugs and regression immediately. It checks every new feature, improvement, or bug fix added and its effect on the application. You can run specific tests on all code pushes across all branches or only particular tests on specific branches. However, what constitutes a “test,” a pass or fail, depends on your application and strategy.
There are several CI automation tools, such as Jenkins, Bamboo, CircleCI, Travis CI, and GitLab CI, among many others, and the best tool for your project will depend on your specific needs and requirements.
Testing APIs with Cypress
This article session will walk you through a step-by-step guide on implementing your first CI test with Cypress.
In our example, we would be creating a basic test that verifies the End-to-End point of an API
Pre-requisite:
- Have Node.js installed and NPM installed. Here is a guide that will walk you through, https://radixweb.com/blog/installing-npm-and-nodejs-on-windows-and-mac
- Have a GitHub account, and create a new repository for the project. Here is a helpful guide that would get you started; https://product.hubspot.com/blog/git-and-github-tutorial-for-beginners
- Basic knowledge of JavaScript would be helpful
For this example, we would write tests to verify the ‘https://dummyjson.com/products’ API. This test would be written in JavaScript.
Step 1: Initialize the project
Create a folder named cypress-test and initialize your node project by running this command on your terminal.
$ mkdir cypress-test
$ npm init
Step 2: Install Cypress
Use the command below to install Cypress.
npm install cypress --save-devStep 3: Run Cypress
In the terminal, run the npx cypress open command. This will open the Cypress test runner. It is important to note that Cypress has a new UI/structure. Here is how you navigate the test runner.
- Select the E2E testing option.
- Select a browser (chrome).
- Select the Create new empty spec option.
- Edit the
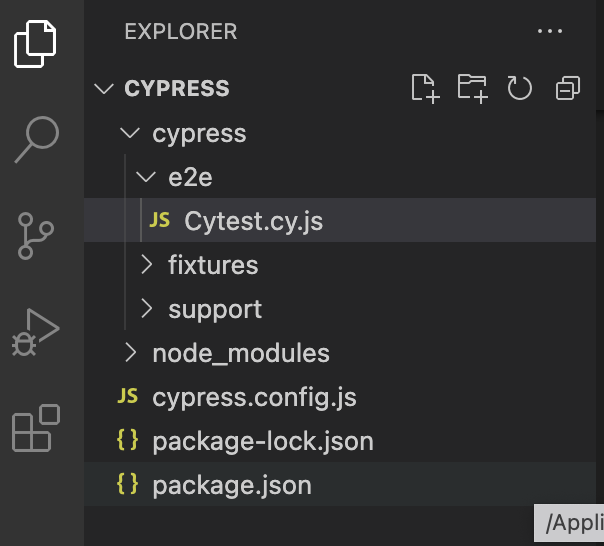
spec.cy.jsoption and rename; for this tutorial, our spec file is namedCytest.cy.js, and here is where our test would be written. - Once done, click on the create spec option. This would create a new folder structure in your root folder. Here is what your folder directory would look like.
Step 4: Write tests
We will write a test in the new file (cytest.spec.js) to check that the API endpoint returns the expected data.
describe('API testing sample', () => {
  const productsEndpoint = 'https://dummyjson.com/products';
    it('GET request to products endpoint', () => {
    cy.request('GET',productsEndpoint)
      .then((response) => {
      expect(response.status).to.equal(200);
      expect(response.body).to.have.property('products');
      });
  });
In this test, we assigned our API to productsEndpoint using const. The cy.request command is used to make a GET request to the specified API endpoint. The then function is used to make assertions about the response, such as checking that the status code is 200 and that the response body contains a ‘products’ property.
Our example above runs a simple unit test. You could test for other things, For instance;
- We could test for specific properties in the response body, like the product title, price, or description. Here is what the code would look like;
  it('checks for specific properties in the response body', () => {
    cy.request('GET', productsEndpoint)
    .then((response) => {
      const products = response.body.products;
      expect(products[0]).to.have.property('title');
      expect(products[0]).to.have.property('price');
      expect(products[0]).to.have.property('description');
    });
  });
This test uses the cy.request function to make a GET request to the products endpoint and the then function to handle the response. The expect function checks that the response body has specific properties: title, price, and description.
- We could also test for the number of items in the response body
  it('checks the number of items in the response body', () => {
    cy.request('GET', productsEndpoint)
    .then((response) => {
      expect(response.body.products).to.have.length(30);
      });
    });
  });
This test uses the cy.request function to make a GET request to the products endpoint and the then function to handle the response. The expect function check that the response body has a specific number of items, in this case, 30.
We are illustrating that you can run several tests, depending on your specific requirements.
If we combine all the tests in one code, here is what it would look like:
describe('Cytest.cy.js', () => {
  const productsEndpoint = 'https://dummyjson.com/products';
    it('GET request to products endpoint', () => {
    cy.request('GET',productsEndpoint)
      .then((response) => {
      expect(response.status).to.equal(200);
      expect(response.body).to.have.property('products');
      });
    });

  it('checks for specific properties in the response body', () => {
    cy.request('GET', productsEndpoint)
    .then((response) => {
      const products = response.body.products;
      expect(products[0]).to.have.property('title');
      expect(products[0]).to.have.property('price');
      expect(products[0]).to.have.property('description');
    });
  });

  it('checks the number of items in the response body', () => {
    cy.request('GET', productsEndpoint)
    .then((response) => {
      expect(response.body.products).to.have.length(30);
    });
  });
});
This test checks if the endpoint returns the products, and also checks for specific properties like the product title, price, and description. Finally, it checks that the API has a specific number of items.
Step 5: Run the test
A successful output would look something like this:
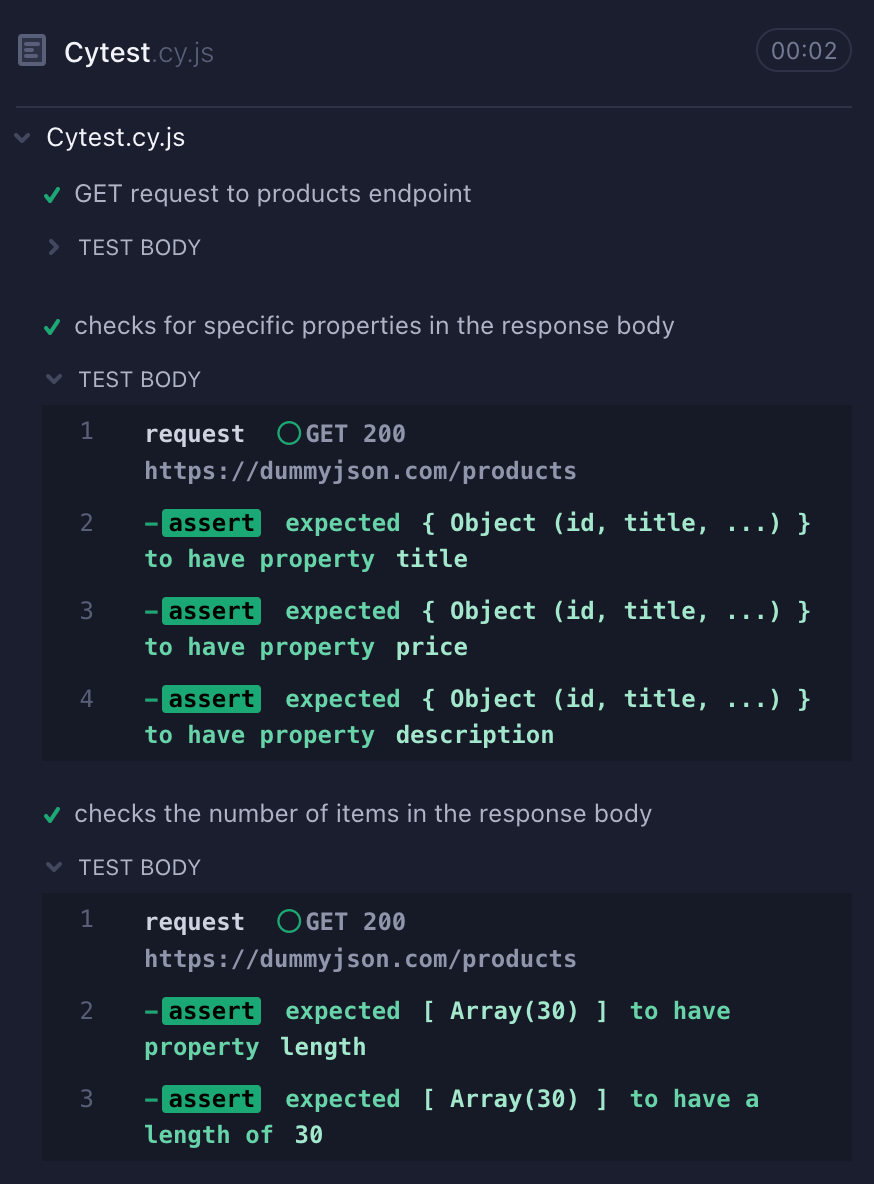
The tick symbol indicates that our test passed and is successful. And there we have successfully written our Cypress test.
Step 6: Commit your code
Commit all your changes and push them to a GitHub repository to save your work.
Session Replay for Developers
Uncover frustrations, understand bugs and fix slowdowns like never before with OpenReplay — an open-source session replay tool for developers. Self-host it in minutes, and have complete control over your customer data. Check our GitHub repo and join the thousands of developers in our community.
Setting up a CI automation tool:
We can automate our test using any CI automation tool. Cypress is easily configurable with several CI automation tools, including GitHub Action, Travis CI, Circle CI, etc. You can check out more examples in the documentation.
For this tutorial, we will use the Circle CI tool to run our continuous integration API test. CircleCI is a platform for automating code building, testing, and deployment. It supports multiple languages and frameworks and has built-in support for popular version control systems. You can learn more about Circle CI here.
In continuation to our example, we would be configuring Circle CI:
- Create a folder
.circleciin your GitHub repo - Within the
.circleci folder, create aconfig.yml file. This file will contain the configuration for our CircleCI build.
 version: 2.1
orbs:
 cypress: cypress-io/cypress@1
workflows:
 build_and_test:
  jobs:
   - cypress/run:
jobs:
 run_tests:
  executor: cypress/executor
  steps:
   - checkout
   - run:
     name: Install dependencies
     command: npm ci
   - cypress/run:
     start: npm start
     browser: chrome
This config file uses the Cypress orb, which provides preconfigured jobs for running Cypress tests. The cypress/run job runs the tests, starts the development server with npm start, and the browser shows what browser the test would be run on, in this case, the Chrome browser.
NB: You should replace the chrome browser with any browser you use. You can understand more about setting up the config.yml configuration here.
-
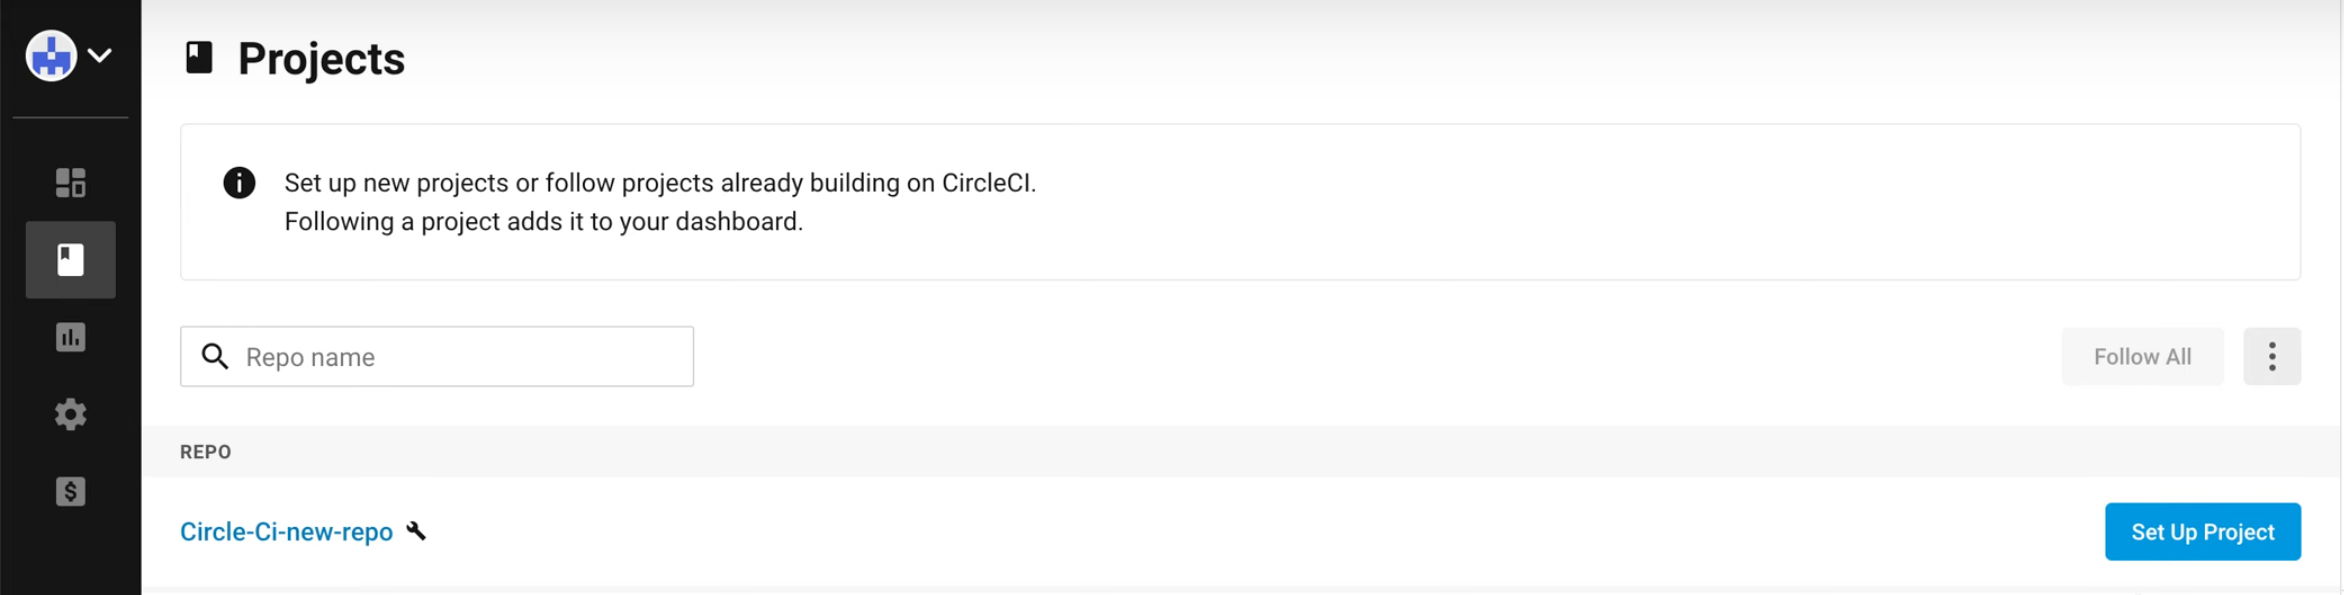
Next, log in to CircleCI with GitHub, and you’ll have access to all your GitHub repositories within the Project listing screen. It would look something like this:
-
To set up CircleCI for your GitHub project, select the Setup project option. You will be prompted to select an existing config or to commit and run. Select the use existing config option. You’ll get a prompt that looks like this:
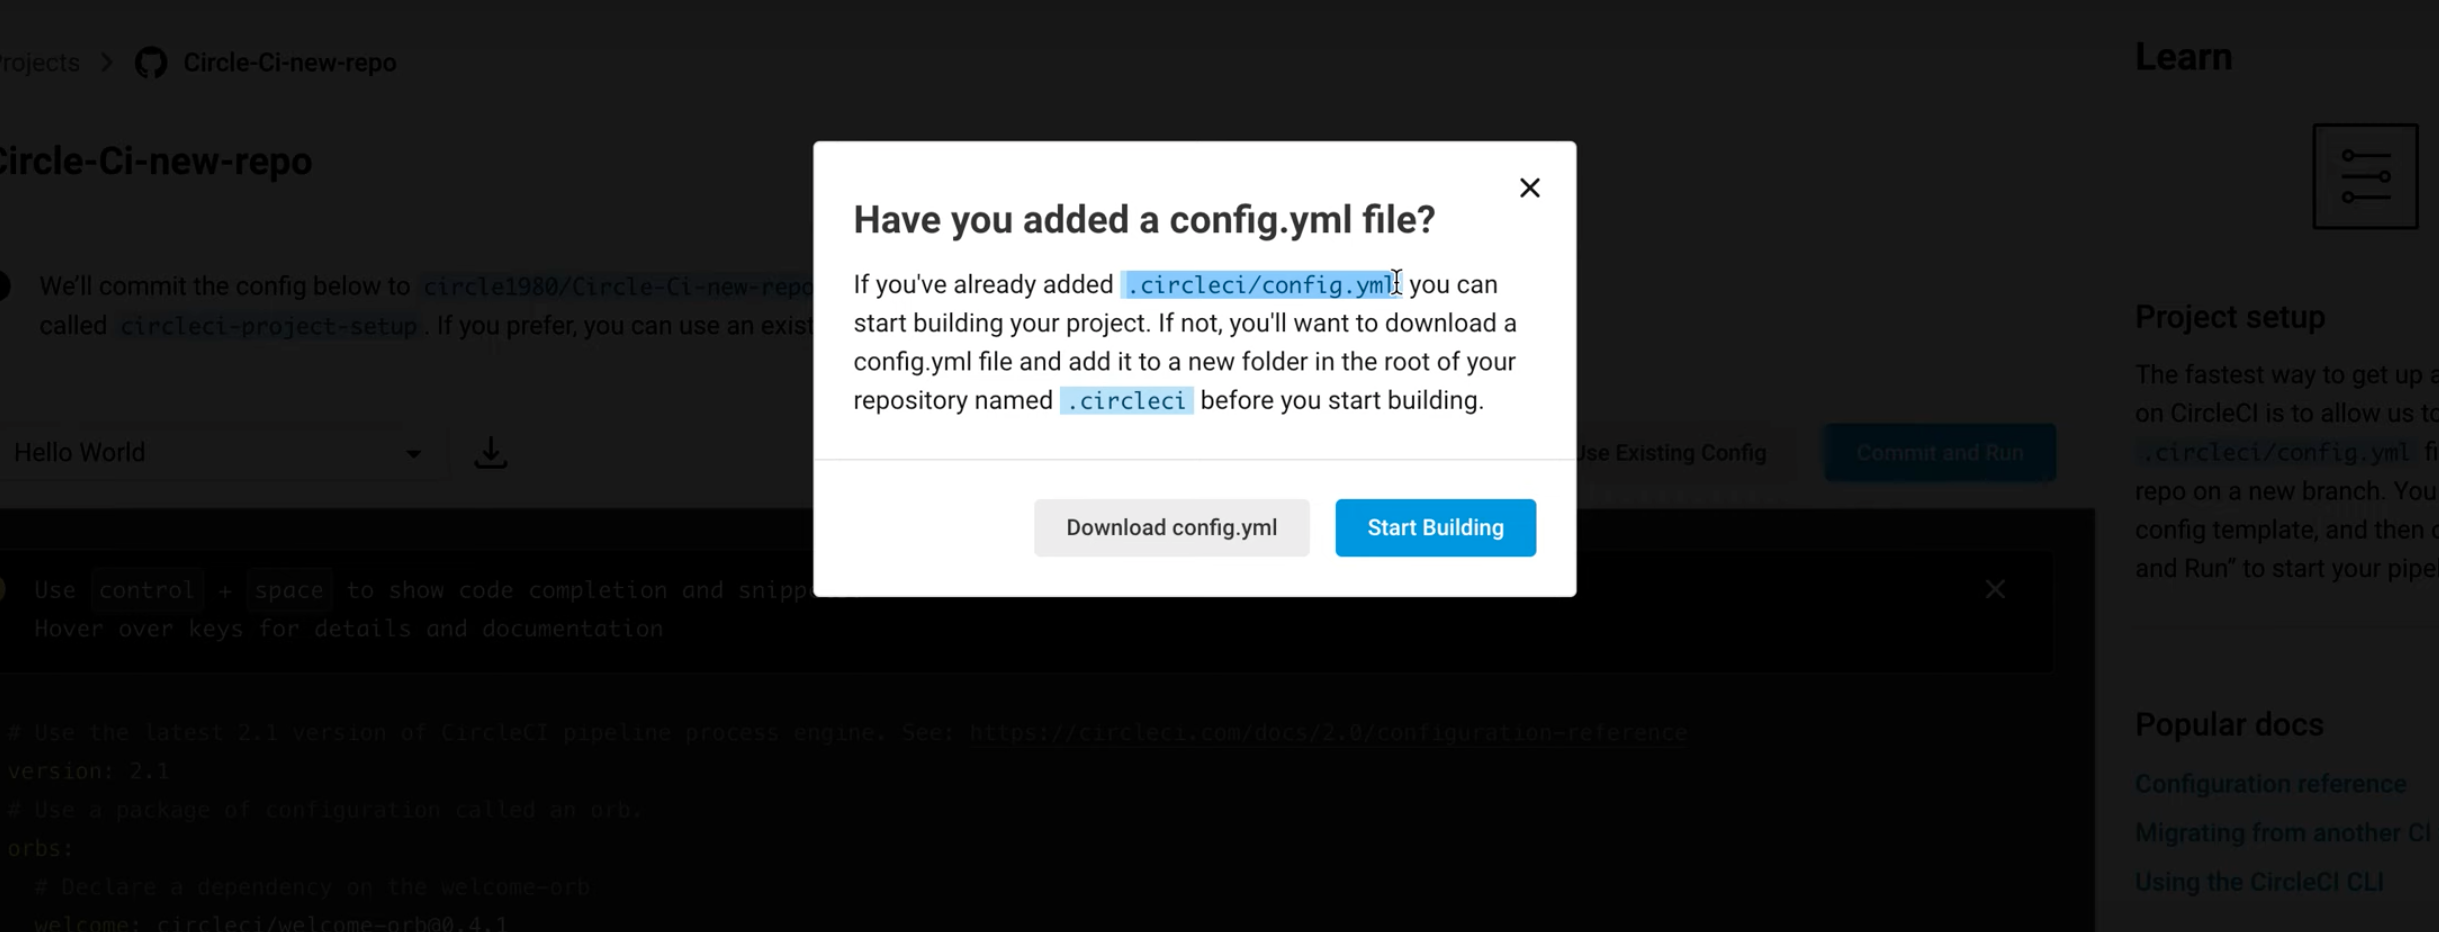
- Since we have already configured our
.circleci/config.ymlfile on GitHub, select the start building option. Here is what your screen will look like when it’s done:
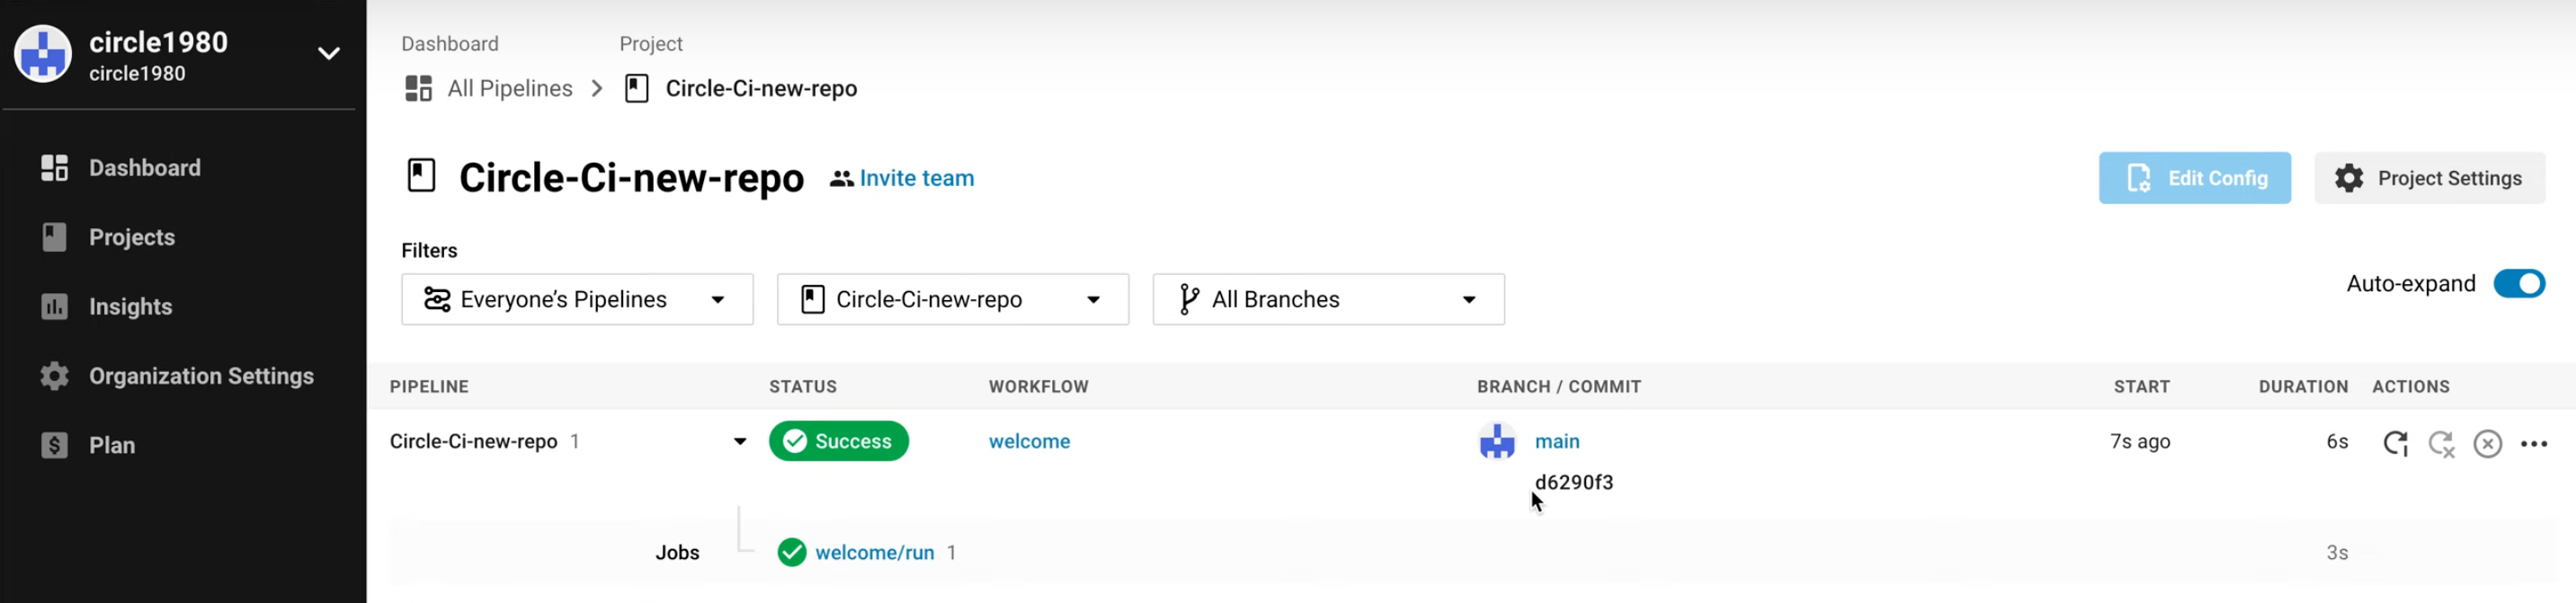
And that’s it!!! We have successfully automated our Cypress tests using CI. When you push new codes to the GitHub repository, CircleCI automatically detects the config.yml file and starts running the tests. You can view the test results in the CircleCI web interface.
Conclusion
Automating API testing with Cypress and Continuous Integration can greatly improve the efficiency and reliability of the testing process. Combined, these tools can help ensure your API functions correctly and provide quick feedback on any issues.
Gain Debugging Superpowers
Unleash the power of session replay to reproduce bugs and track user frustrations. Get complete visibility into your frontend with OpenReplay, the most advanced open-source session replay tool for developers.