Create a Contacts App with React and Supabase
Use React and Supabase to create a contacts management app


Supabase is an open-source alternative to Firebase, which has some advantages. This article will elaborate on using Supabase’s storage feature to create a contacts management app using the also open-source, popular React tool.
Supabase is a backend-as-a-service (BaaS) platform that provides services such as Authentication, Storage, Real-Time, and database. One major difference between Supabase and Firebase is that Supabase is an open-source software while Firebase isn’t. In this tutorial, we’ll create a contact management app. (Although Supabase may be used in JavaScript or any JavaScript framework, I’ll be using it in ReactJS for this tutorial.) This app store contact info in Supabase.
Main idea of the project: For users to add contacts by filling in details such as their name, email address, and phone number and even upload their image for easy identification. Users will also be able to update and delete contacts. The following is a glimpse of how the app will look like:
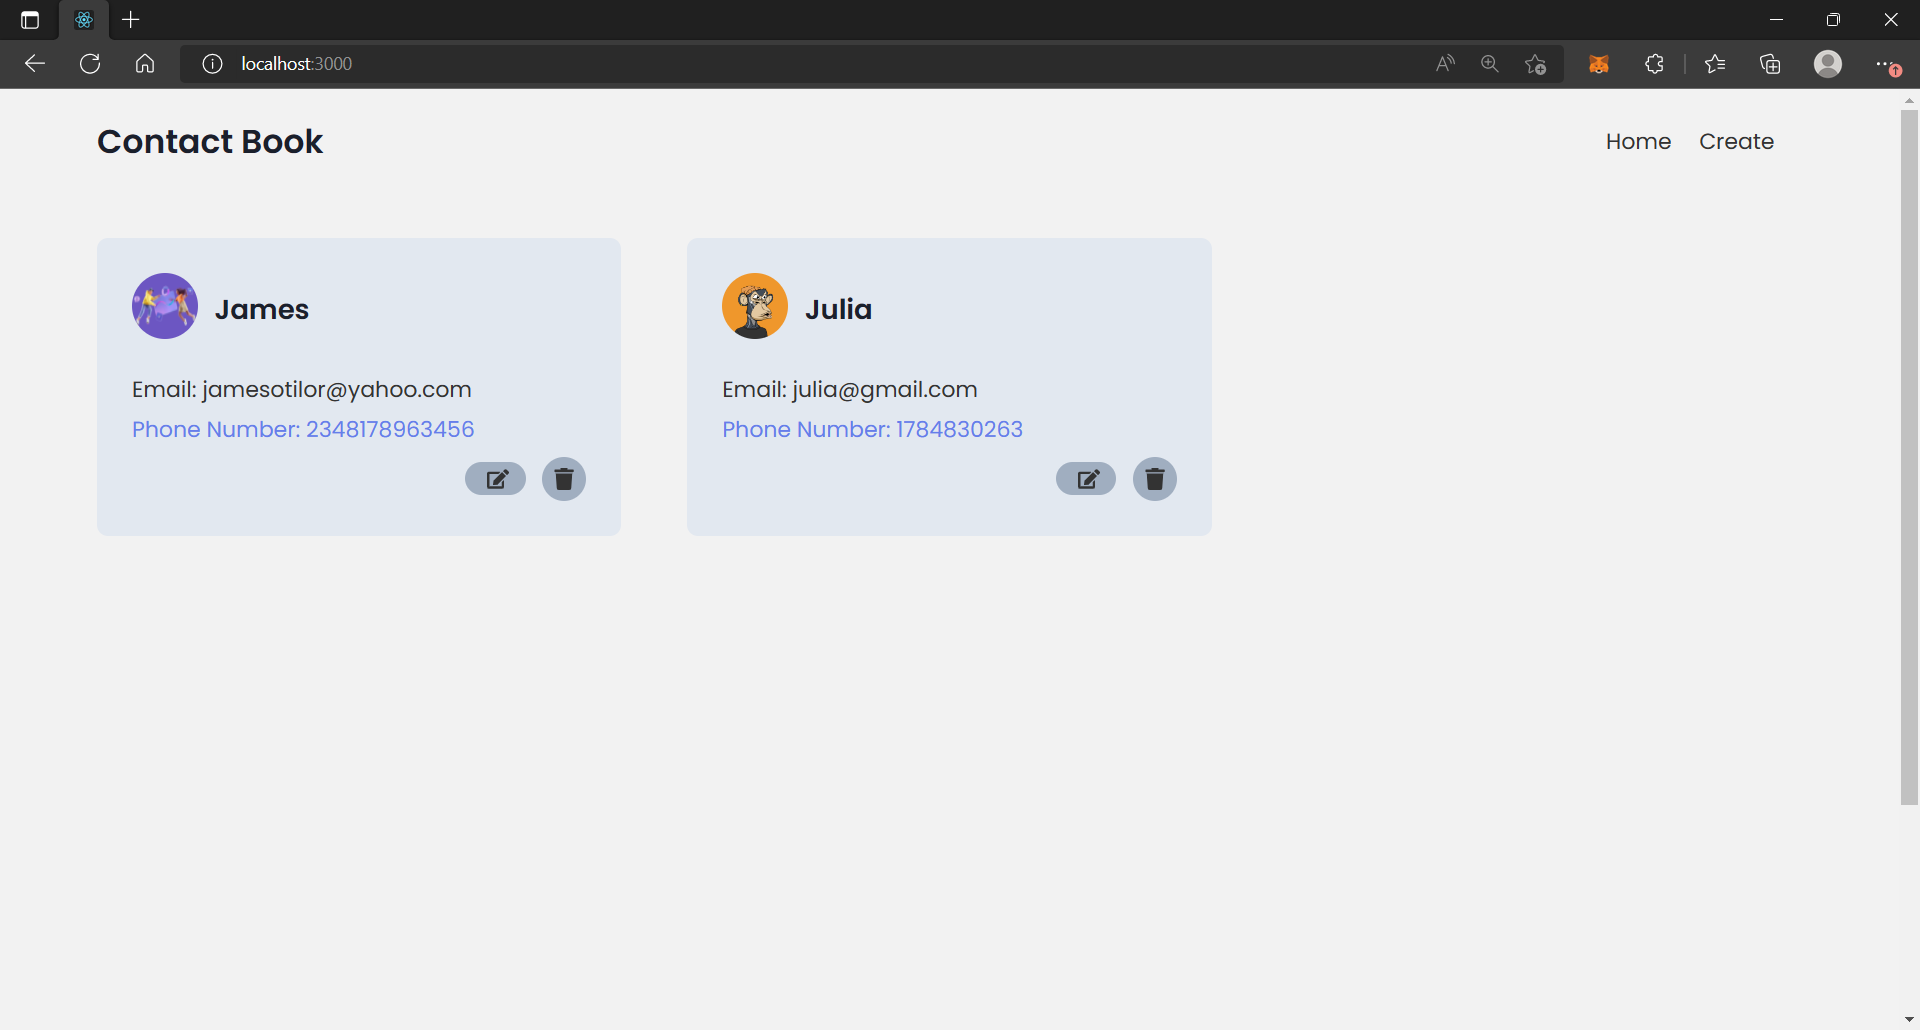
Looks fun right? Alright, let’s get started.
Creating your project
First, create your React app and install the necessary dependencies.
- First, use this npx command to create your React app:
npx create-react-app contact-app. - Navigate to your app:
cd contact-app. - Start up your development server:
npm start. - Install the React router to navigate the pages:
npm i react-router-dom. - Install Supabase into your app by typing:
npm install @supabase/supabase-js.
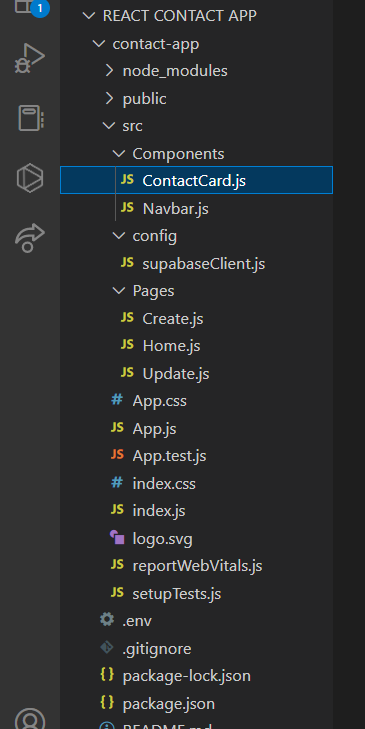
You need to create some folders and files to have a clean folder structure in your app.
- Create a “Components” folder where you will have the “Navbar.js” and “ContactCard.js” components.
- Next, create a “Pages” folder which will house three files, namely: “Create.js”, “Home.js,” and “Update.js”.
The folder structure should now look like this:
Now we have to create a Supabase project.
- Sign up to Supabase or log in using your GitHub credentials.
- You’ll be directed to a new project dashboard; click the “New Project” button to create a new project for your app.
- Fill out the info for the project with details such as project name (Contact) and region and set a project database password.
- Create the project by clicking the “Create New Project” button at the bottom right-hand corner of the form.
- This will set up the project for you and provide you with an API key and a project URL. Copy them out, as they will be useful later in the project.
Connecting the app to Supabase
We will have to connect our app to Supabase. Create a file called “.env” in your root directory. This is where the environment variables will be stored. Add the following lines of code to the.env file:
REACT_APP_SUPABASE_URL=Your-supabase-url
REACT_APP_ANON_KEY=Your-supabase-key
You need to initialize Supabase to link the front end to the Supabase and have access to Supabase storage.
- Create a “config” folder in your src directory.
- Inside this folder, create a “supabaseClient.js” file and paste the following code snippets into it:
import { createClient } from '@supabase/supabase-js'

const supabaseUrl = process.env.REACT_APP_SUPABASE_URL
const supabaseKey = process.env.REACT_APP_ANON_KEY
const supabase = createClient(supabaseUrl, supabaseKey)

export default supabase;
Creating a Table
You need to be able to display data from Supabase on the front end to confirm that the connection to Supabase has been successful. To accomplish this, create a table in Supabase with the necessary information, then try to display it in your app.
- Go to your Supabase dashboard, and click the “Table Editor” icon to set up a table.
- Give your table a name (contacts) and a brief description (this is optional).
- Uncheck the Row Level Security box that has been ticked by default.
- Under the “Columns” section, add a new column by giving it a column name and selecting a value type from the options.
- First column should be “name” with a value type of “text”.
- Second column should be “email” with a value type of “text”.
- The third column should be “number” with a value type of “int8”.
- The fourth column should be “fileUrl” with a value type of “text” for the image. This will be explained later on.
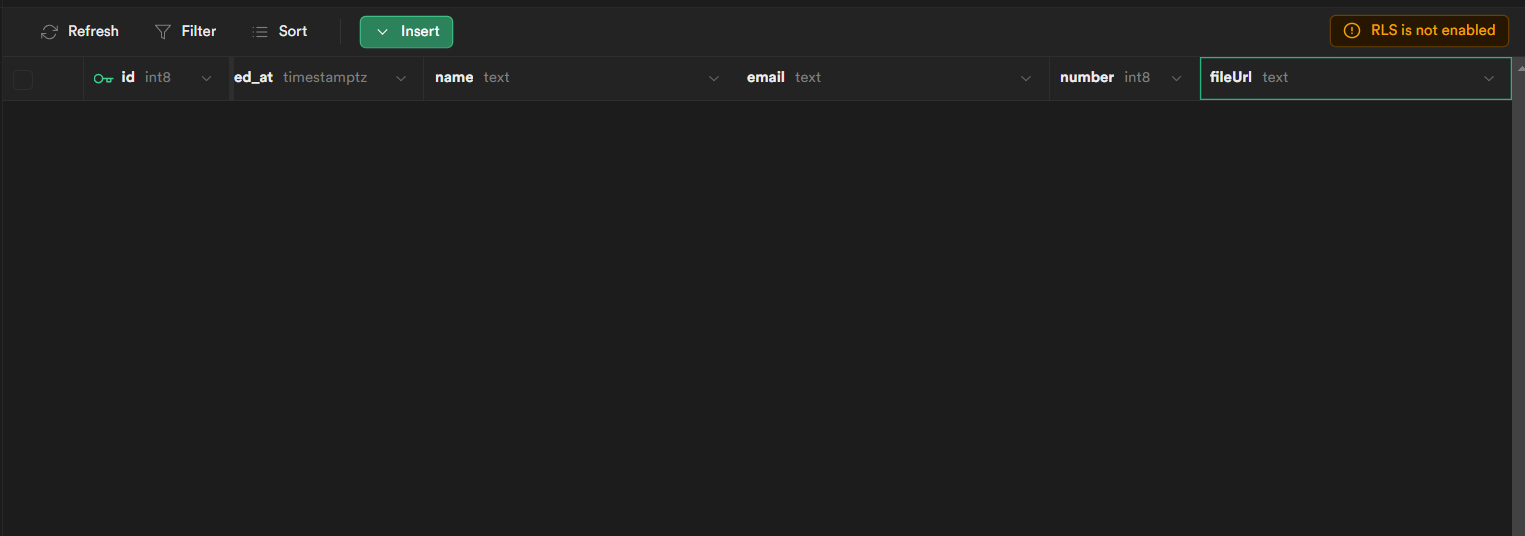
- Save the table. This will generate a new table for you.
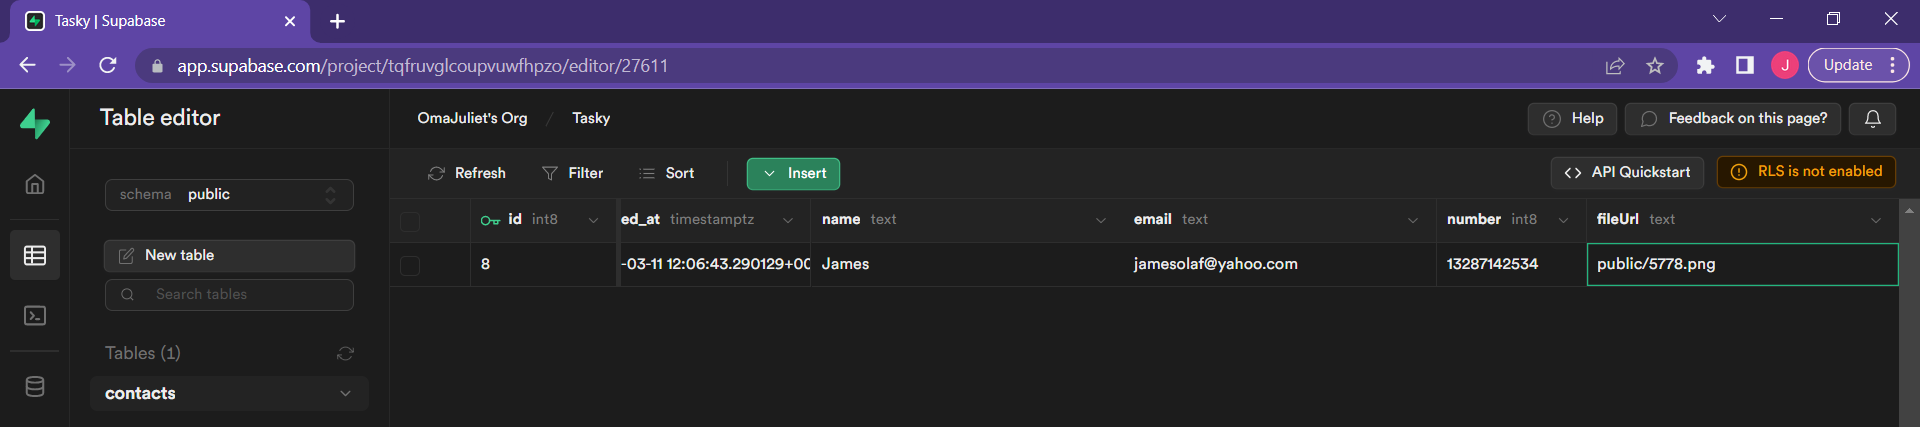
This is how the table should look like after it has been created:
- Try adding a record to the table by clicking the “insert” button and selecting the “insert row” option.
- Enter a contact’s name, email address, and phone number and save it. It has a timestamp to indicate when the record was added and an ID generated specifically for it.
Creating a bucket in Supabase
Buckets in Supabase are distinct containers for files and folders. This means that to store files and folders in your Supabase, you have to create a bucket in it. Files and folders aren’t like other value types, such as texts, numbers, and integers, so they cannot be stored in a table.
Here you will need to create a bucket and find a way to connect it to your table to reflect on your front end.
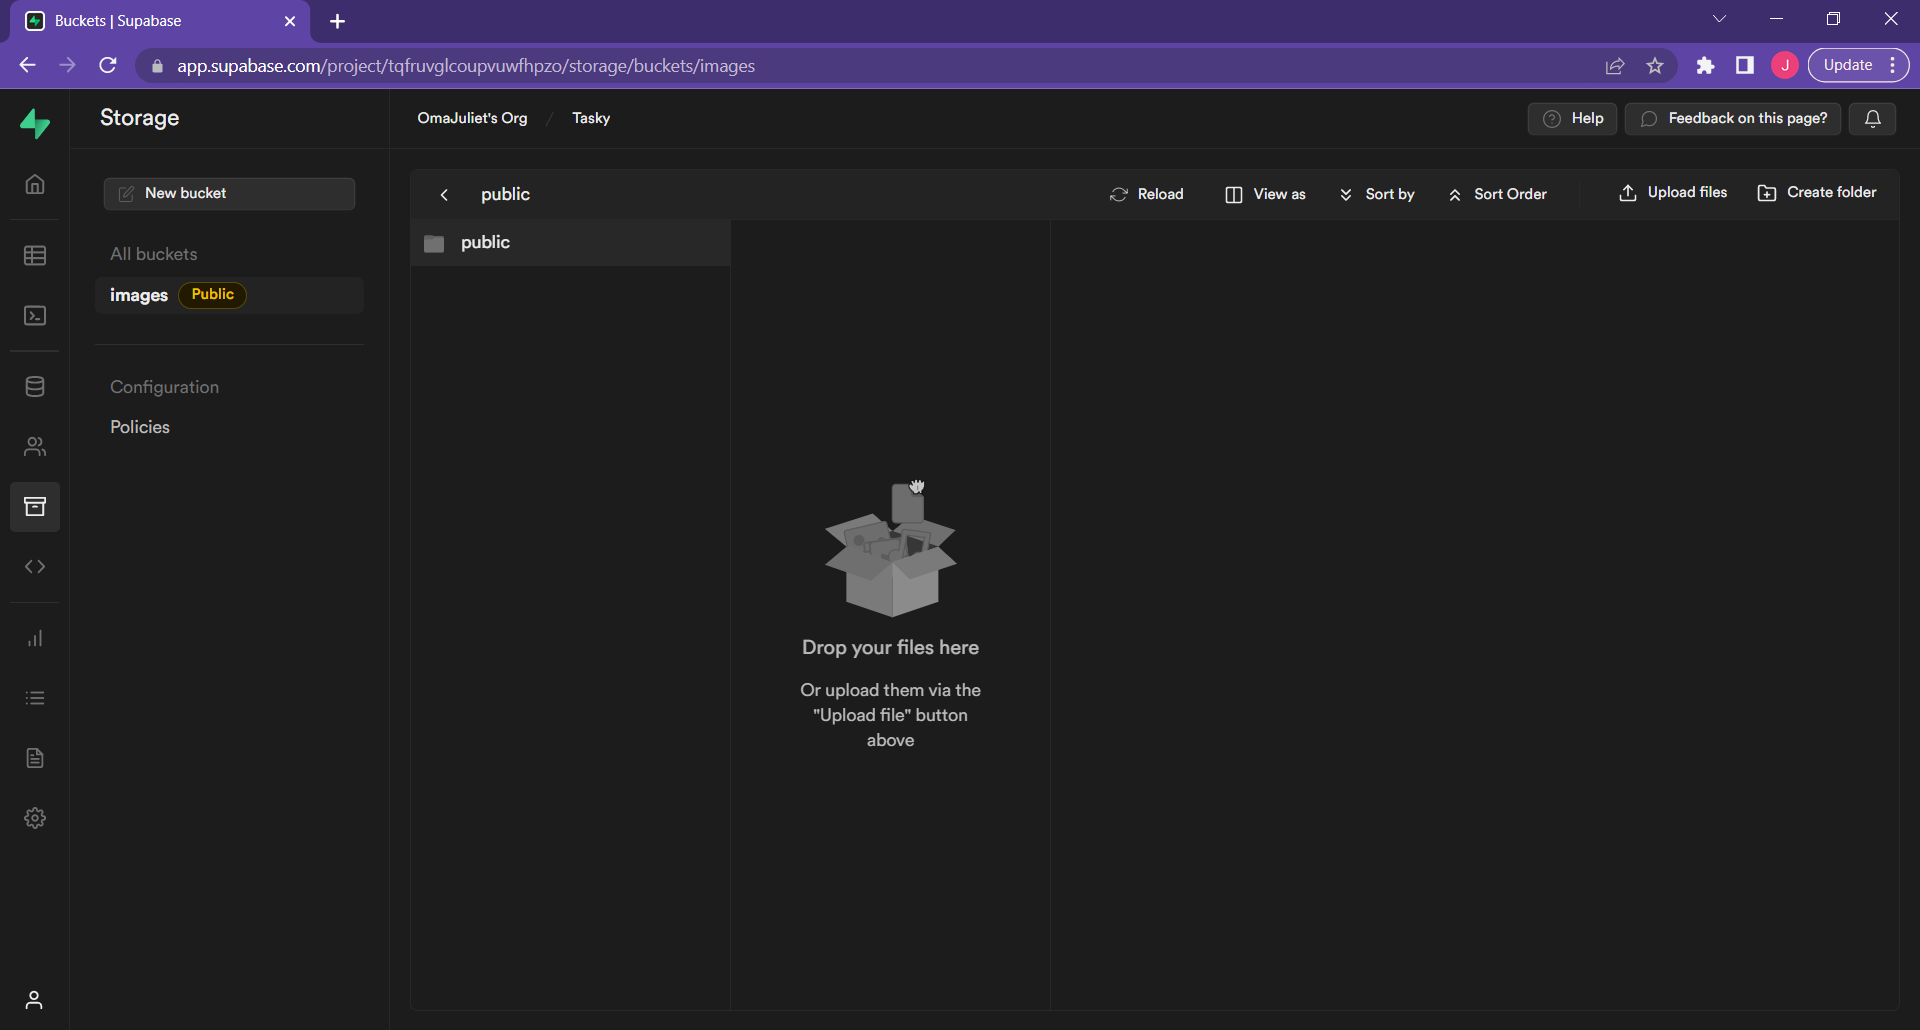
- Locate the bucket icon at the left-hand side of your Supabase dashboard.

- Click the “Create a new bucket” button, name your bucket, toggle the Public slide to make the bucket public, and create.
- To create a new policy for your bucket, click “Policies” in the configuration section. Click the “New policy” button at the very end of your bucket name on the page that will open.
- Select the “Get started quickly” option. Select the first option, “Allow access to JPG images in a public folder to anonymous users,” and click the “Use template” button at the bottom.
- On the next page, tick the “select”, “insert”, “update”, and “delete” checkboxes. Scroll down, click the review button, and save the policy.
As your app is not authenticated, the generated policy allows users to perform CRUD operations in the bucket.
The “fileUrl” column you generated in the table will now be used to connect this bucket to the table. The fileUrl column in the table gets its values in text format when the bucket receives the image as a URL path. You can test it out manually by following these steps:
-
Upload an image right there in the “images” bucket of your Supabase dashboard
-
Get the URL by clicking the “Get URL” button at the bottom right-hand corner of the page
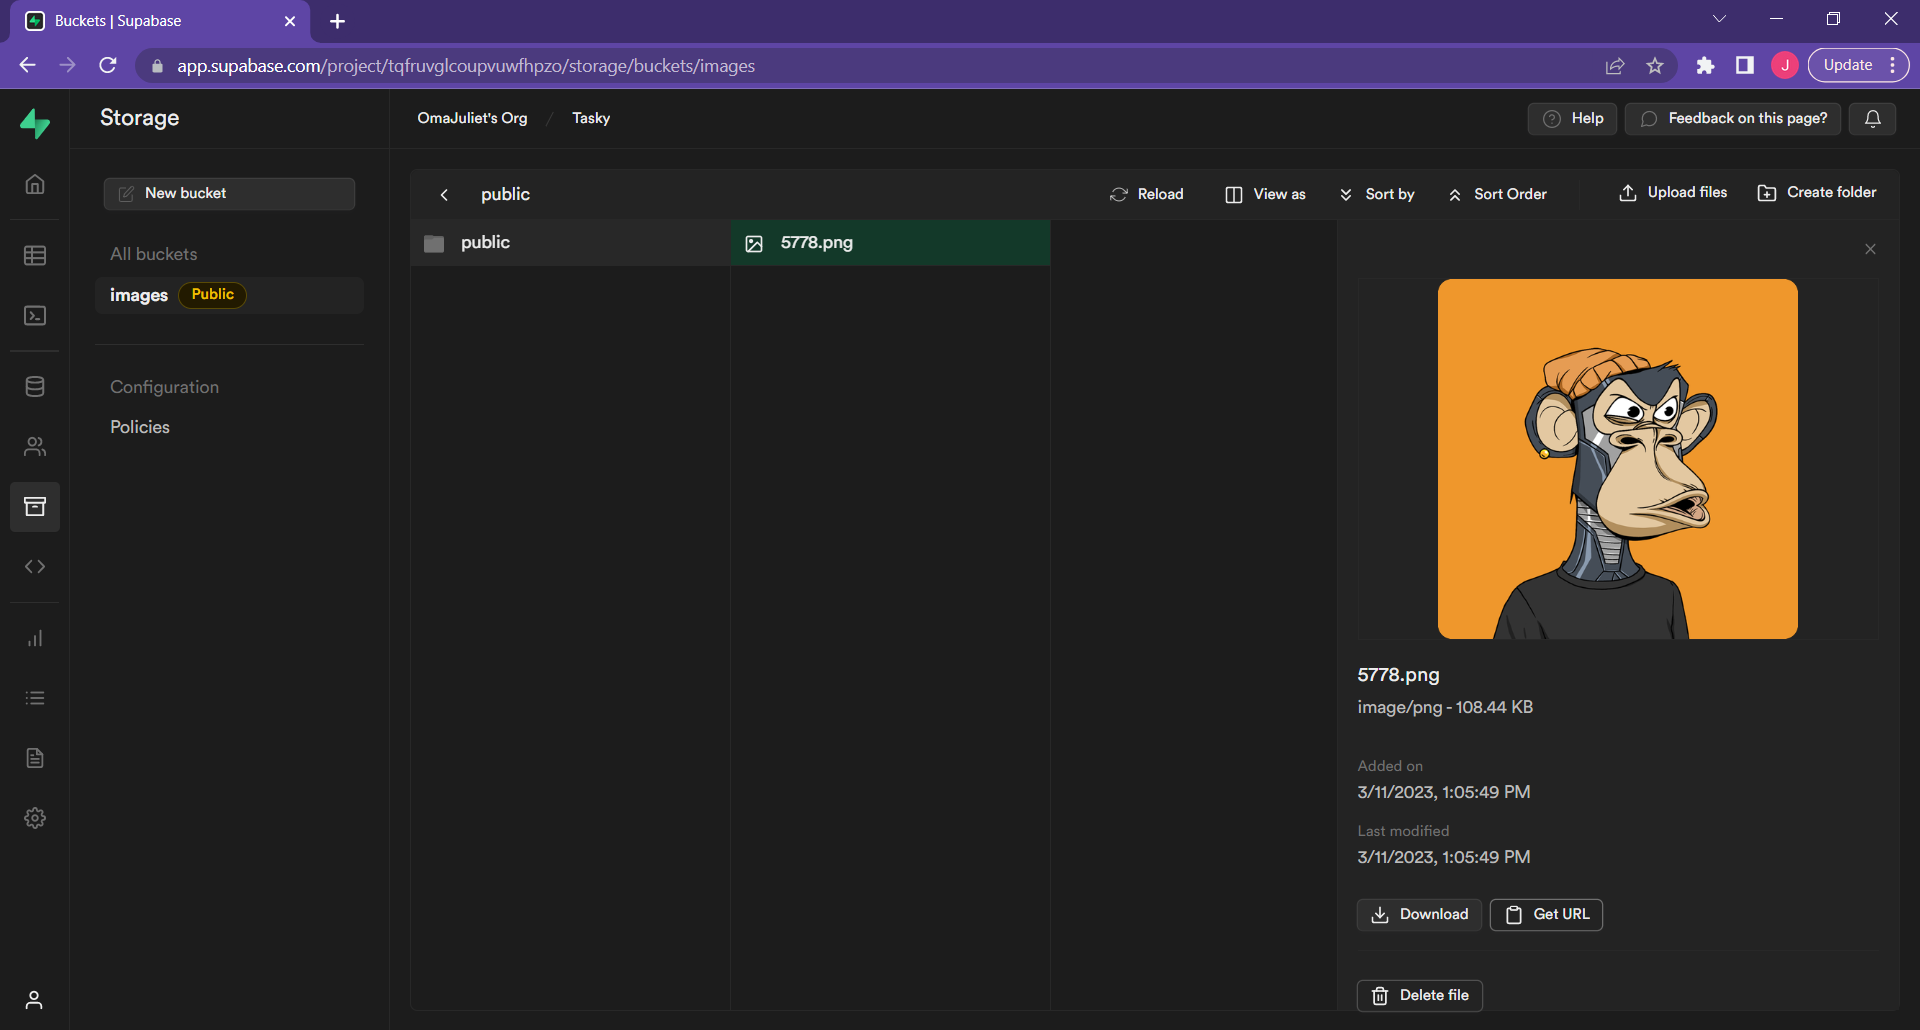
-
Paste the URL (only the part starting from “public”) into the fileUrl column of your “contacts” table.
-
This will be displayed on your front end along with any other contact details you inserted in the table.
Session Replay for Developers
Uncover frustrations, understand bugs and fix slowdowns like never before with OpenReplay — an open-source session replay tool for developers. Self-host it in minutes, and have complete control over your customer data. Check our GitHub repo and join the thousands of developers in our community.
Completing our app
Fetching the table data into the frontend
The Home.js component is the page where the contact cards will be displayed. Add these lines of code to your “Home.js” file:
import React from "react";
import supabase from "../config/supabaseClient";
import { useEffect, useState } from "react";
import ContactCard from "../Components/ContactCard";

const Home = () => {
  const [fetchError, setFetchError] = useState(null);
  const [contacts, setContacts] = useState(null);

  const handleDelete = (id) => {
    setTasks((prevContacts) => {
      return prevContacts.filter((sm) => sm.id !== id);
    });
  };

  useEffect(() => {
    const fetchContacts = async () => {
      const { data, error } = await supabase.from("contacts").select();

      if (error) {
        setFetchError("Could not fetch contacts");
        setContacts(null);
        console.log(error);
      }

      if (data) {
        setContacts(data);
        setFetchError(null);
      }
    };

    fetchContacts();
  }, []);
  return (
    <>
      <section>
        {fetchError && <p>{fetchError}</p>}
        {contacts && (
          <article>
            {contacts.map((contact) => (
              <ContactCard
                key={contact.id}
                contact={contact}
                onDelete={handleDelete}
              />
            ))}
          </article>
        )}
      </section>
    </>
  );
};

export default Home;
Code explanation for Home.js
- Import the useState hook, which will be used to store the contacts when it is fetched, as well as any errors that might occur.
- Updating the UI when a contact is deleted.
- The useEffect hook in which an asynchronous function will be created. The “await” keyword is used, and this makes the program wait for the Promise returned by the async function.
- What the function is basically saying is to fetch the data or the error from the ‘contacts’ table in Supabase.
- If it gets an error (due to internet disconnection or so), display the error and set the data value to null. If it gets the data, display it and set the error to null.
- Invoke the fetchContacts function.
- Map through the contacts to display them separately on separate cards.
The Contact Card to display the Contacts
We need to specify where the contact details will be shown, so add the following lines of code to the “ContactCard.js” file:
import React from "react";
import supabase from "../config/supabaseClient";
import { Link } from "react-router-dom";
import { FaTrash, FaEdit } from "react-icons/fa";

const reactimages = "API_URL/storage/v1/object/public/BUCKET-NAME";

const ContactCard = ({ contact, onDelete }) => {
  const handleDelete = async () => {
    const { data, error } = await supabase
      .from("contacts")
      .delete()
      .eq("id", contact.id);

    if (error) {
      console.log(error);
    }
    if (data) {
      console.log(data);
      onDelete(contact.id);
    }
    window.location.reload();
  };

  return (
    <section>
      <section>
        <img {`${reactimages}/${contact.fileUrl}`} alt="user" />
        <h1>{contact.name}</h1>
        <p>Email: {contact.email}</p>
        <p>Phone Number: {contact.number}</p>
      </section>
      <section>
        <span>
          <Link to={"/" + contact.id}>
            <FaEdit />
          </Link>
        </span>
        <span>
          <FaTrashonClick onClick={handleDelete} />
        </span>
      </section>
    </section>
  );
};

export default ContactCard;
Code explanation for ContactCard.js
- The “const reactimages” variable is set to the ‘images’ default image URL path.
- Your bucket will generate a public folder. Any image uploaded by any user will be stored at this location.
- Define the delete function that will be available by default in every contact card added, allowing users to remove any contact by selecting their unique ID.
- The handleDelete function is basically telling the application to delete any contact from the ‘contacts’ table whose id matches the specified contact card using the delete method.
- Reload the page after deleting the contact
- Develop the UI of the contact card.
Creating a new contact
This is the component containing the form that will be used to add contact details. Paste the following lines of code into your “Create.js” file.
import { useState } from "react";
import { useNavigate } from "react-router-dom";
import supabase from "../config/supabaseClient";

const Create = () => {
  const navigate = useNavigate();
  const [name, setName] = useState("");
  const [email, setEmail] = useState("");
  const [number, setNumber] = useState("");
  const [fileUrl, setFileUrl] = useState("");
  const [formError, setFormError] = useState(null);

  const uploadImage = async (e) => {
    const date = Date.now();
    const avatarFile = e.target.files[0];
    const { data, error } = await supabase.storage
      .from("BUCKET-NAME")
      .upload(`public/${date}.jpg`, avatarFile, {
        cacheControl: "3600",
        upsert: false,
      });
    console.log("success", data);
    console.log("error", error);
    if (data) {
      setFileUrl(data.path);
    }
  };

  const handleSubmit = async (e) => {
    e.preventDefault();

    if (!name || !email || !number || !fileUrl) {
      setFormError("Please fill in all the fields.");
    }

    const { data, error } = await supabase
      .from("contacts")
      .insert([{ name, email, number, fileUrl }]);

    if (error) {
      console.log(error);
      setFormError("Please fill in all the fields.");
    }

    if (data) {
      setFormError(null);
    }
    navigate("/");
  };

  return (
    <section>
      <h1>Add a new contact</h1>
      <section>
        <form onSubmit={handleSubmit}>
          <div>
            <label htmlFor="name">Name</label>
            <input
              type="text"
              id="name"
              value={name}
              onChange={(e) => setName(e.target.value)}
            />

            <label htmlFor="email">Email</label>
            <input
              type="email"
              id="email"
              value={email}
              onChange={(e) => setEmail(e.target.value)}
            />

            <label htmlFor="number">Number</label>
            <input
              type="number"
              id="number"
              value={number}
              onChange={(e) => setNumber(e.target.value)}
            />

            <label htmlFor="file">Upload Image</label>
            <input type="file" id="fileUrl" onChange={uploadImage} />

            <button>Add Contact</button>
          </div>
        </form>
        {formError && <p className="error">{formError}</p>}
      </section>
    </section>
  );
};

export default Create;
Code explanation for Create.js
- Set states to store the different values of the form fields and any error message.
- Create a function for image uploads. Add the date method to eliminate duplicate images. It will create a timestamp on each image; therefore, users won’t encounter the Supabase error of duplicate images.
- Use the “from” and “upload” methods to fetch the “images” bucket and upload an image to it.
- Check if all the form fields have been inputted.
- Insert a row with the inputted data to the “contacts” table in Supabase.
- Set the image URL path as the data.
- Check if there’s an error and output the error message.
- After adding the values in the form field, navigate the user to the home page so they can view the newly added contact.
- Create the form to allow users to input details.
Updating a Contact
Users will need to be able to update contact details previously inputted, so you will have to work on that. Paste these lines of code into your “Update.js” file:
import { useEffect, useState } from "react";
import { useParams, useNavigate } from "react-router-dom";
import supabase from "../config/supabaseClient";

const reactimages = "API_URL/storage/v1/object/public/BUCKET_NAME"

const Update = () => {
  const { id } = useParams();
  const navigate = useNavigate();

  const [name, setName] = useState("");
  const [email, setEmail] = useState("");
  const [number, setNumber] = useState("");
  const [fileUrl, setFileUrl] = useState("");
  const [imageUpdate, setImageUpdate] = useState(true);
  const [formError, setFormError] = useState(null);

  const uploadImage = async (e) => {
    const date = Date.now();
    const avatarFile = e.target.files[0];
    const { data, error } = await supabase.storage
      .from("BUCKET_NAME")
      .upload(`public/${date}.jpg`, avatarFile, {
        cacheControl: "3600",
        upsert: false,
      });
    console.log("success", data);
    console.log("error", error);

    if (data) {
      setFileUrl(data.path);
    }
  };

  const handleSubmit = async (e) => {
    e.preventDefault();

    const { data, error } = await supabase
      .from("contacts")
      .update({ name, email, number, fileUrl })
      .eq("id", id);
    if (error) {
      setFormError("Please fill in all the fields.");
    }
    navigate("/");
  };

  useEffect(() => {
    const fetchContact = async () => {
      const { data, error } = await supabase
        .from("contacts")
        .select()
        .eq("id", id)
        .single();

      if (error) {
        navigate("/", { replace: true });
      }

      if (data) {
        setName(data.name);
        setEmail(data.email);
        setNumber(data.number);
        setFileUrl(data.fileUrl);
      }
    };
    fetchContact();
  }, [id, navigate]);

  return (
    <section>
      <h1>Update Contact</h1>
      <form onSubmit={handleSubmit}>
        <div>
          <label htmlFor="name"> Name</label>
          <input
            type="text"
            id="name"
            value={name}
            onChange={(e) => setName(e.target.value)}
          />

          <label htmlFor="email">Email</label>
          <input
            type="email"
            id="email"
            value={email}
            onChange={(e) => setEmail(e.target.value)}
          />

          <label htmlFor="number">Phone number</label>
          <input
            type="number"
            id="number"
            value={number}
            onChange={(e) => setNumber(e.target.value)}
          />
          {imageUpdate == true ? (
            <div>
              <img src={`${reactimages}/${fileUrl}`} alt="user" />
              <button
                onClick={() => {
                  setImageUpdate(false);
                }}
              >
                Change Image
              </button>
            </div>
          ) : (
            <div>
              <label htmlFor="file">Image</label>
              <input type="file" id="fileUrl" onChange={uploadImage} />
            </div>
          )}

          <button>Update contact</button>
        </div>

        {formError && <p className="error">{formError}</p>}
      </form>
    </section>
  );
};

export default Update;
Code explanation for Update.js
- Invoke the useParam hook to get the id parameter.
- Set the state to store the records you get back and set a new state for the image update with a value of true.
- Define an uploadImage function that will handle the image upload to the “images” bucket.
- Add the inputted data as a row in the “contacts” table in Supabase and use the update method to update the four fields.
- Specify and update the particular contact the user wants to update using the “id” parameter.
- Check for an error to output an error message. If you have the data instead, set the error message to null and navigate the user back to the home page.
- Fetch the data and the error from the Supabase “contacts” table that was created using the useEffect hook.
- Grab the particular contact where the id is equal to the id parameter defined above.
- Enable it to return a single contact item from the “contacts” table.
- Redirect users back to the home page if they go to an update page that doesn’t exist and replace the route in the history with the home page.
- Grab all the data from the record you got back and update each of the fields.
- Invoke the fetchContact function, and declare the “id” and “navigate” dependencies.
- Create the form that will be filled out to update the contacts.
This is how the create page looks like now.
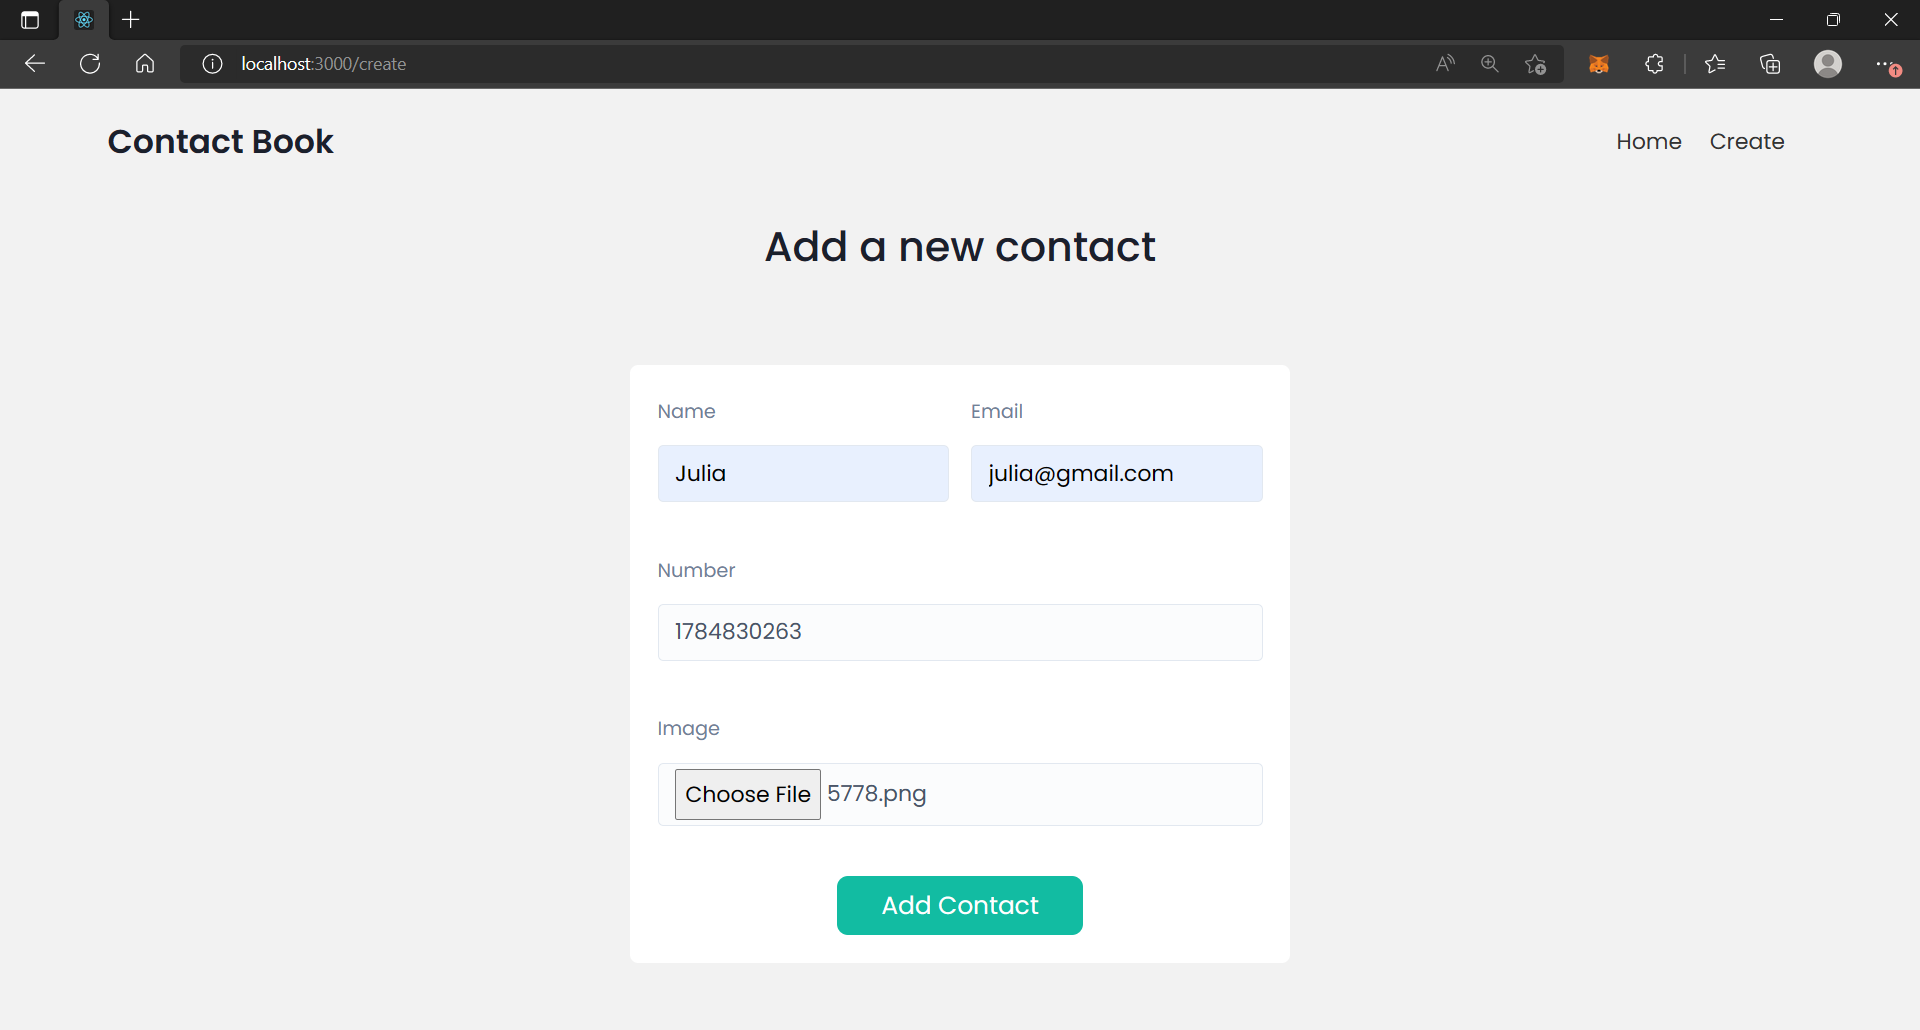 Notice that I styled the app? You can do so using any means of styling to make your contact manager app look presentable.
Now you can go ahead to create, update and delete contact details of people you know.
Conclusion
We’ve come to the end of the article. In this article, you learned how to work with Supabase by creating a project, connecting the Supabase to the front end, creating a table and a bucket in Supabase, fetching data from Supabase storage, performing CRUD operations with it, and dealing with images in Supabase.
I sincerely hope you enjoyed it, and gained a thorough understanding of how to build a CRUD application in React using Supabase and how to work with images in it. Feel free to leave a comment with any suggestions or questions regarding any issues you might be facing in the implementation of these codes.
For further reading on the Supabase bucket for file storage, take a look at the Supabase Storage Docs.
Gain Debugging Superpowers
Unleash the power of session replay to reproduce bugs and track user frustrations. Get complete visibility into your frontend with OpenReplay, the most advanced open-source session replay tool for developers.