Creating a custom 404 error page with HTML and CSS
Find out how to add your own touch to the 404 error page in your web site


The 404 error page is what a browser displays when a page doesn’t exist on a website. In this article, you’ll learn how to create an error 404 page. This custom error page will have the same theme as the rest of the site. We’ll also cover how to tell the browser when to display it.

Discover how at OpenReplay.com.
The HTTP 404 status code, “Not Found” error, indicates that the web server cannot find a requested page.
This error code is triggered when a user tries to access a page that’s been deleted or moved. You can also trigger this error when accessing an incorrect URL.
Importance of having a custom 404 page
If your website doesn’t have an error page, the browser displays a generic black-and-white page from the server containing very little information.
Here are some reasons why you should have a custom 404 error page:
- Web design consistency: Having the same branding as the rest of your website on your error page will improve user experience.
- More information: This will reduce the likelihood of users leaving your site immediately after encountering an error page.
- SEO: Relevant links on an error page will help search engines index the page, improving your search ranking.
- Analytics: You can track the 404 error page to record and analyze the number of errors on your site. This will help you find and fix broken links and any other issues.
Common components of a 404 page
Here is what you’re likely to find on an error page:
- Error message: You must tell the user what went wrong. There are several other errors they can encounter when visiting your site. Other errors include 401 Unauthorized, 403 Forbidden, 500 Internal Server Error, 502 Bad Gateway, and 503 Service Unavailable.
- Navigation: You should have links to the homepage and other relevant pages to help redirect the user.
- Search bar: This will help users find exactly what they want.
- Friendly message: You can have an apology message or some lighthearted humor.
Creating the error 404 page with HTML and CSS
Here’s a screenshot of what we’ll aim for in this tutorial:
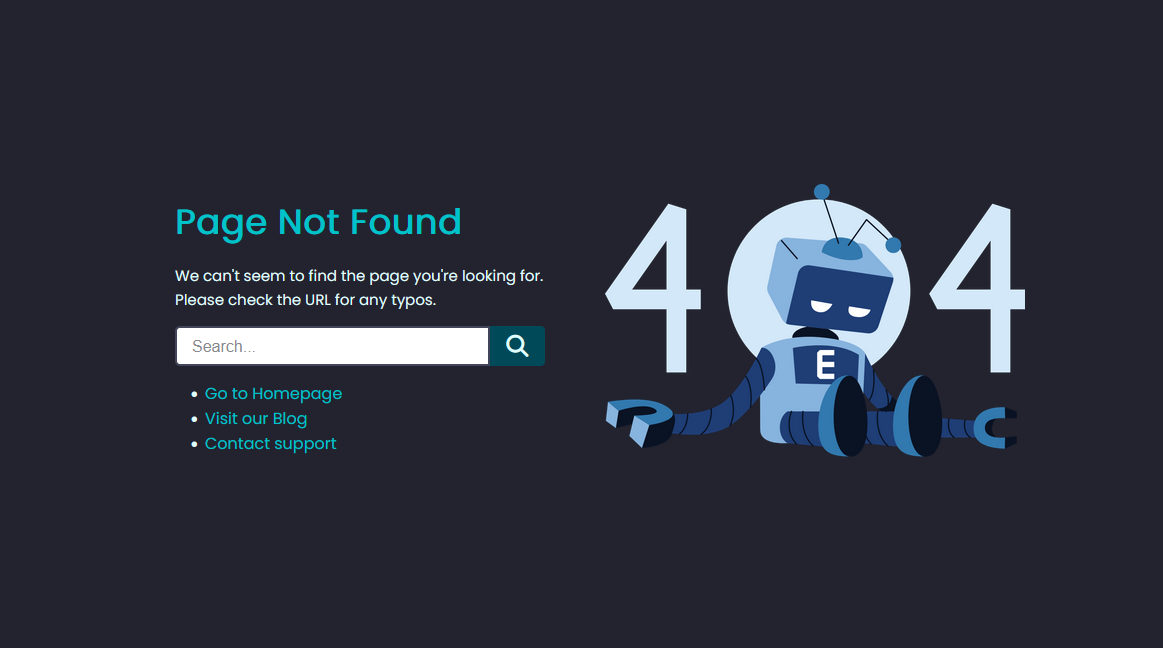
It’s a simple design containing some of the common components you can find on a 404 page.
Here’s the HTML:
<section>
   <div class="container">
     <div class="text">
       <h1>Page Not Found</h1>
       <p>We can't seem to find the page you're looking for. Please check the URL for any typos.</p>
       <div class="input-box">
         <input type="text" placeholder="Search...">
         <button><i class="fa-solid fa-search"></i></button>
       </div>
       <ul class="menu">
         <li><a href="#">Go to Homepage</a></li>
         <li><a href="#">Visit our Blog</a></li>
         <li><a href="#">Contact support</a></li>
       </ul>
     </div>
     <div><img class="image" src="errorimg.png" alt=""></div>
   </div>
   </div>
 </section>
There are several main parts: the error message, the search box and links, and the image. Adding an image to the page is not compulsory, but it’s always nice.
In the CSS, you’ll start with positioning the elements.
section {
 width: 100%;
}
.container {
 display: flex;
 justify-content: center;
 align-items: center;
 flex-direction: row;
 column-gap: 20px;
}
.container img {
 width: 420px;
}
.text {
 display: block;
 padding: 40px 40px;
 width: 450px;
}
After this, you style the rest of the elements how you see fit. Remember to use a design theme consistent with the rest of the website.
..text {
 display: block;
 padding: 40px 40px;
 width: 450px;
}
.text h1 {
 color: #00c2cb;
 font-size: 35px;
 font-weight: 700;
 margin-bottom: 15px;
}
.text p {
 font-size: 15px;
 color: #e0ffff;
 margin-bottom: 15px;
 line-height: 1.5rem;
 margin-bottom: 15px;
}
Moving on to the search box and the links.
.input-box{
 position: relative;
 display: flex;
 width: 100%;
}
.input-box input{
 width: 85%;
 height: 40px;
 padding: 5px 15px;
 font-size: 16px;
 color: #22232e;
 border-radius: 5px 0px 0px 5px;
 border: 2px solid #42455a;
 outline: none;
}
.input-box button{
 display: flex;
 width: 15%;
 border: 1px solid #004958;
 border-radius: 0px 5px 5px 0px;
 background: #004958;
 color: #e0ffff;
 font-size: 22px;
 align-items: center;
 justify-content: center;
 cursor: pointer;
}
.menu{
 display: flex;
 flex-direction: column;
 margin-top: 15px;
 margin-left: 30px;
}
.menu li a{
 display: flex;
 font-size: 1rem;
 color: #00c2cb;
 transition: 0.1s;
}Catering for mobile devices
You have to consider the users with mobile devices with smaller screens. Using media queries will cater to these.
@media screen and (max-width:600px) {
 .container{
   display: flex;
   flex-direction: column-reverse;
 }
 .text,.image{
   width: 100%;
 }
 .container{
   min-width: 200px;
   padding: 40px 0px;
 }
 .text{
   display: block;
   width: 100%;
   padding: 20px 40px;
 }
 .image{
   display: flex;
   width: 200px;
   align-self: center;
   justify-content: center;
   margin: auto;
 }
}
With this, you have a complete 404 error page. You can decide to use a different layout for the page.
Here’s a CodePen you can interact with:
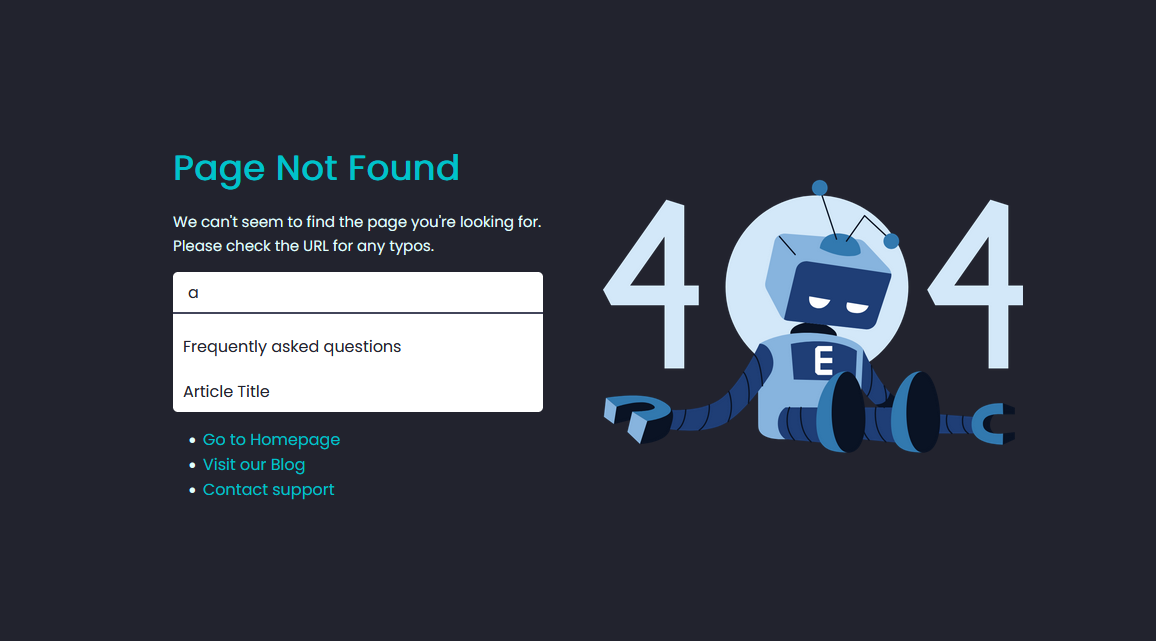
You can go further by customizing the search box to redirect users to important pages on your site. Consider why users visit your site and create a list of relevant URLs and corresponding keywords.
Here’s a screenshot of what it’ll look like:
First, update the HTML by adding a div to hold the search results list.
<div class="input-box">
 <input type="text" id="input-box" placeholder="Search..." autocomplete="off">
 </div>
<div class="result-box"></div>
Now add the links and keywords to your JavaScript:
const links = [
 {
  href: "www.example.com/faqs",
  text: "Frequently asked questions",
 },
 {
  href: "www.example.com/blog/article",
  text: "Article Title",
 },
 {
  href: "www.example.com/contact",
  text: "Contact",
 },
];
After this, you’ll create variables for the input element and the results box.
const resultsBox = document.querySelector(".result-box");
const inputBox = document.getElementById("input-box");
Next, you’ll use the onkeyup event listener to execute a function as the user types in the search box.
inputBox.onkeyup = function () {
 let result = [];
 let input = inputBox.value;
 if (input.length) {
   result = links.filter((link) => {
     return link.text.toLowerCase().includes(input.toLowerCase());
   });
 }
 display(result);
}
It’ll filter the links and store them in an empty array according to the input. Users may use lower or uppercase when typing, so you should convert both the input and links to lowercase before checking.
Finally, you create the function that displays the search results.
function display(result) {
     if (result.length) {
       const content = result.map((list, index) => {
         const href = list.href;
         return `<li><a href="${href}">${list.text}</a></li>`;
       });
       resultsBox.innerHTML = `<ul>${content.join('')}</ul>`;
     } else {
       resultsBox.innerHTML = '';
     }
   }
We can then style the input and result box with pure CSS code.
.result-box ul {
 border-top: 2px solid #42455a;
 padding: 10px 5px;
 background: #e0ffff;
}
.result-box ul li {
 list-style: none;
 border-radius: 3px ;
 padding: 10px 5px;
 cursor: pointer;
 color: #22232e;
}
.result-box ul li:hover {
 background-color: #004958;
}
.result-box {
 max-height: 100px;
 overflow: scroll;
 border-radius: 0px 0px 5px 5px;
}
.result-box li a{
 color: #22232e;
}
Here’s a CodePen:
That’s it! You can create a custom 404 error page with a functioning search bar.
Configuring the Server
“404.html” is a common way to name this error page, and many servers will look for this name by default. You can give the page another name, for instance, “page-not-found.html”, and then configure the server to detect the error page.
You’ll create a file called “.htaccess” in the root directory of your website on the server or create it with your code editor and then upload it to the server.
All you need is one line of code:
ErrorDocument 404 /page-not-found.htmlAnd that’s all you need to do. You can redirect the users to a different page if you want. The .htaccess file contains configuration directives that tell the server how to handle requests.
Apart from handling errors, you can use the .htaccess file to redirect users from an old URL to a new one, restrict access to files, and set upload size.
Tips
When the user lands on the 404 page, it should be clear that the page does not exist. This is very important. Also, keep it simple and short; there’s no need for unnecessary information.
Also, always have relevant links, making the user more likely to stay on the site. Include a way for them to find your homepage.
Finally, use colors and images that are relevant to your brand. Don’t use a stock image, which defeats the purpose of having a custom 404 page.
Conclusion
A custom error 404 page will reduce the likelihood of users leaving your site. You’ve just learned how to create one. We also covered how to add an autocomplete search bar to the page to help redirect users. You can also configure the server to detect the error page.
With this, you can give your visitors a unique and consistent experience.
Gain control over your UX
See how users are using your site as if you were sitting next to them, learn and iterate faster with OpenReplay — the open-source session replay tool for developers. Self-host it in minutes, and have complete control over your customer data.
Star on GitHub12k