
In this article, you will learn how to create a weather forecast app using Next JS and Chakra UI. The app will use the OpenWeatherMap API to get its weather forecast, time and date, and the icons needed.
To start the project, you must have an OpenWeatherMap API account. But first, you need to know what OpenWeatherMap is. OpenWeatherMap is an online service that provides weather details or conditions based on current weather forecasts and time zones globally. What are its uses?
- It is used to get current weather info.
- It is used to get historical data on weather.
- It can be used to get weather data hourly or minutely.
- In development, you can get each time zone of cities or countries.
All the information is returned as object data through the API.
You must create an account and have an API key for this project. To create an account on OpenWeatherMap, open any browser and type https://openweathermap.org/. Then click on sign in to log in if you already have an account, or click Create an account to create one for yourself. After opening an account, you will see your name at the top of the screen next to a drop-down icon; click on it. A drop-down tab will appear, then click on my API keys or click on API keys from the navigation pane to get your API key. You can create as many API keys as possible.
Note: An API key becomes active for use after some hours.
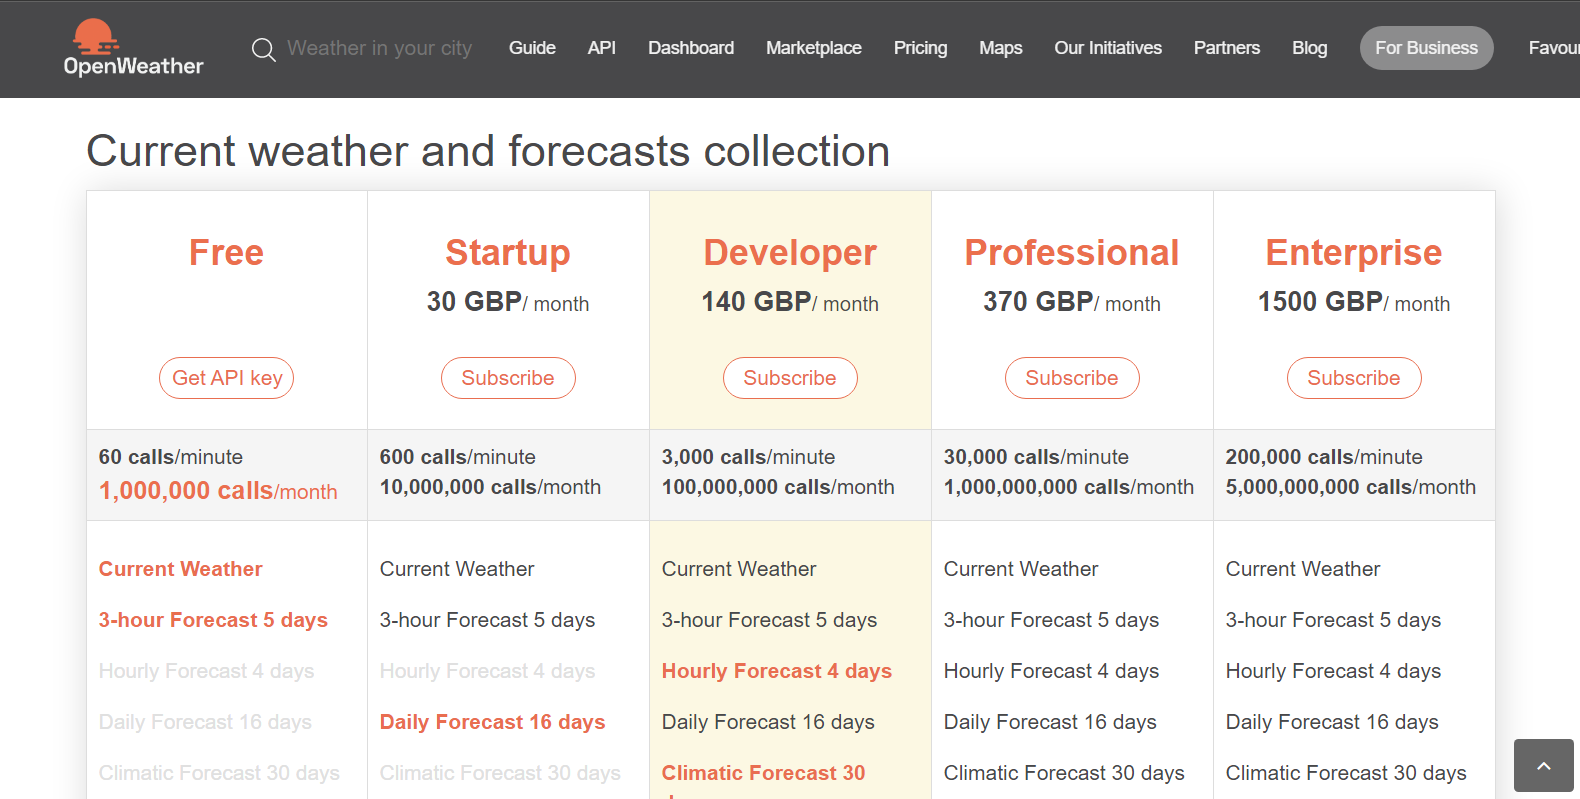
You will see all the offered weather services if you click on the services navigation tab. In this project, we will use the current weather API. This forecast is a free plan, so you don’t need to pay for it. There are others, but they are not free; they are for company use, or they provide more advanced weather data. To use the free version, click on view under details on the service page; it will take you to a pricing page. Then scroll down and click on current weather under the free plan. The documentation for the current weather API will open; you can look through it.
After doing everything above, it’s time to create the main project.
Getting Started
Chakra UI is a style library that helps you create or build front-end UI much faster with its already-made components and styling commands. It can be used with React or Next js. Now create a folder called weather-app, and open up the command prompt to open the weather app folder and create the Next js app. After that, install the Chakra UI library (plus a couple more we’ll need) by doing:
npm i @chakra-ui/react @emotion/react @emotion/styled framer-motionAfter the library has been installed, you also have to install Axios. using;
npm install axios
//or
yarn add axios
Once the package is installed, run your Next js app using the following:
npm run devNow open the Next js app in visual studio code, and then in the styles folder, open globals.css and add;
background-color: orange;Write the code above into the body style of globals.css. Note: only add important CSS styles in the globals.css file, don’t use it to try to style your app pages. The style above will make the background color of our app Orange.
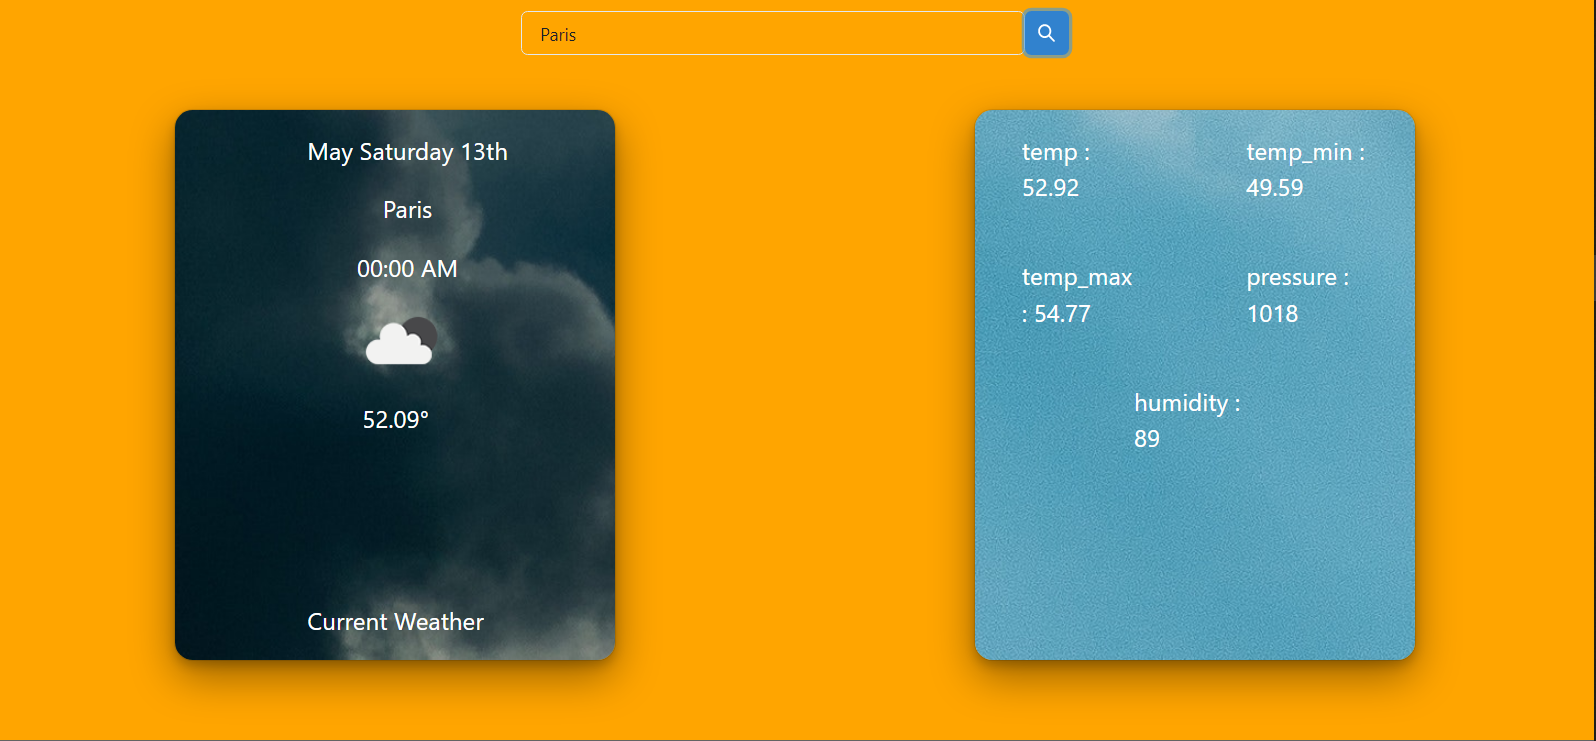
The image above simply represents how our weather app will look when completed.
Working on the UI
In this project, you will work more with Chakra UI. The first thing to do is to import the ChakraProvider component into your _app.tsx.
import { ChakraProvider } from '@chakra-ui/react'It will wrap the Component element.
<ChakraProvider>
  <Component {...pageProps} />
</ChakraProvider>;
This will enable the use of Chakra for your components. The main components of the app are a search bar and cards. To create the app, create a Components folder if none. Create it in the weather app directory. Inside it create two typescript files named;
- Search.tsx
- Card.tsx
Next, inside the index.tsx file, import the search component. The other component will be imported into the search component. The reason will be explained later on in this article. In the image notice a Head component was imported from Next js to edit the title and description of the app and change the app icon on the browser. There is also a Box component imported from Chakra UI. The box component is almost like a div in HTML. The components of Chakra UI are mostly written in Pascal’s case (ChakraProvider, Box).
Notice in the image that the Chakra component can also be written inside an HTML tag. You can write the following code in your index.tsx file;
import { Box } from "@chakra-ui/react";
import Head from "next/head";
import styles from "../styles/Home.module.css";
import Search from "../components/search";

export default function Home() {
  const myStyle = {
    backgroundColor: "orange",
    minHeight: "100vh",
  };
  return (
    <div className={styles.container} style={myStyle}>
      <Head>
        <title>Weather App</title>
        <meta
          name="An app showing weather details"
          content="Generated by create next app"
        />
        <link rel="icon" href="/favicon.ico" />
      </Head>
      <Box>
        <Search />
      </Box>
    </div>
  );
}
Creating the search box
You have already created the search.tsx file, now you will write the code to create the search box. You will use some Chakra UI components and style properties in this part. To create the search bar, import the Container, Input, SearchButton, and IconButton. What do these components do?
- Container: This component creates an area of space similar to the Box component. Within it, you can have other components or elements and style it using props.
- Input: This component allows for the taking of input similar to the HTML Input tag.
- SearchButton: This is not a component but an icon obtained from the Chakra UI icon library.
- IconButton: This is similar to the button component but only for icons.
These are part of the Chakra UI components library. In other to use the Chakra UI icon library, you have to install it using;
npm i @chakra-ui/icons
//or
yarn add @chakra-ui/icons
Then you can import any icon by using the code;
import <IconName> '@chakra-ui/react'To create the search box, import the following;
import { Input } from '@chakra-ui/react'
import { Container } from '@chakra-ui/react'
import { IconButton } from '@chakra-ui/react'
import { SearchIcon } from '@chakra-ui/icons'
import { Flex } from '@chakra-ui/react'
import {useState, useEffect} from 'react'
import axios from 'axios'
import Card from './Card'
Here we import the card component because we will perform conditional rendering.
Next, write the following code in the return function to render the search box to the screen.
<>
  <Container padding="10px" width="100vw">
    <Flex>
      <Input
        placeholder="Enter Your City"
        onChange={(e) => {
          setSearchValue(e.target.value);
        }}
      />
      <IconButton
        colorScheme="blue"
        aria-label="Search database"
        icon={<SearchIcon />}
        onClick={handleClick}
      />
    </Flex>
  </Container>
</>;
Notice that inside the opening component tags, there are stylings. Styling can be done inline in Chakra UI. The properties are also similar to CSS styling properties. The only difference is if the styling property has two words, it will be written in camel case (backgroundColor, border-radius). Later in this article, you will get to know how to make the search box more responsive.
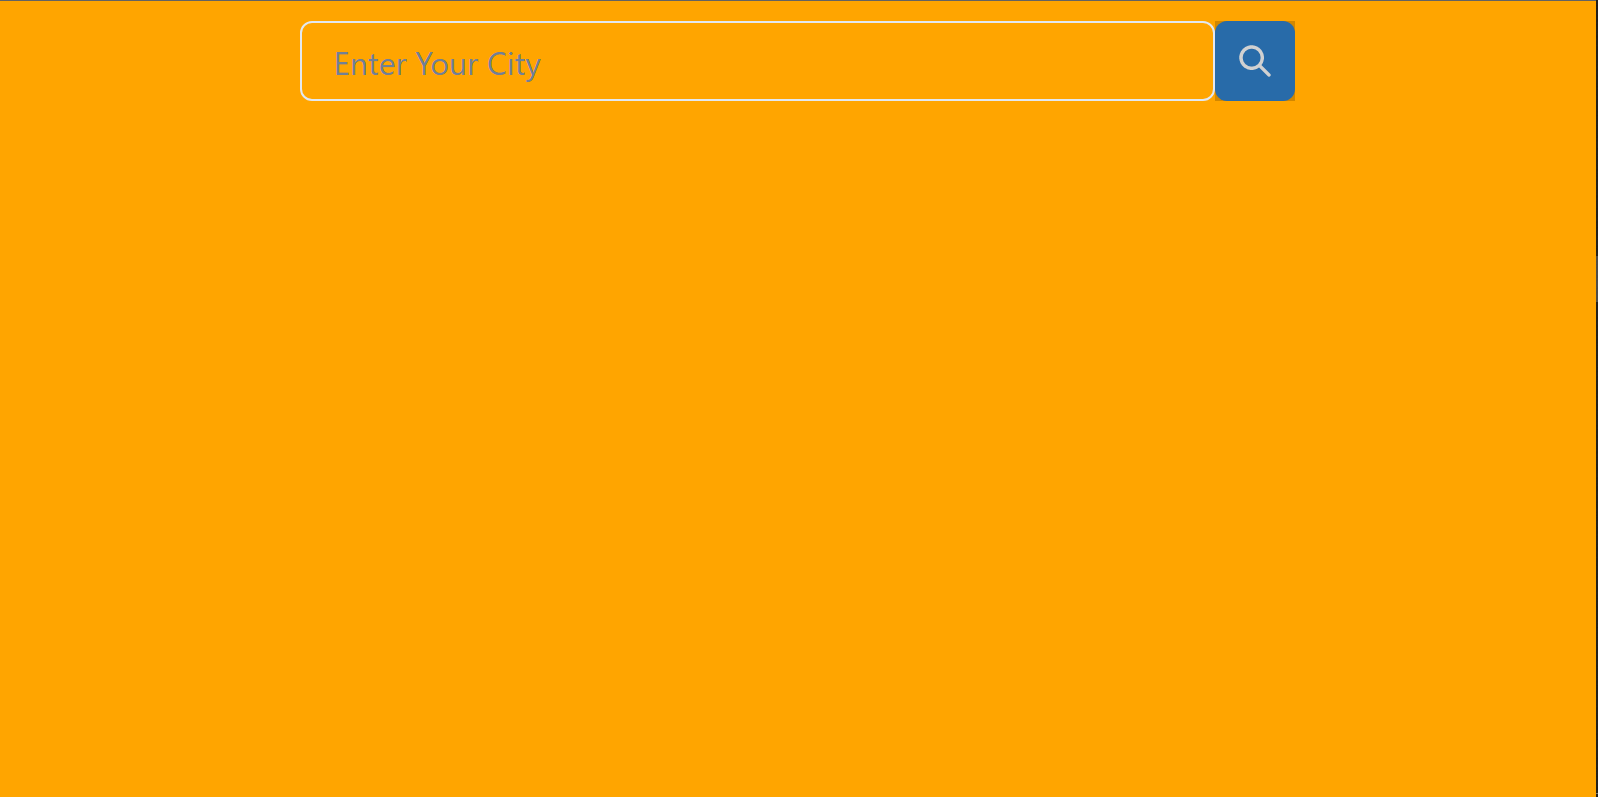
When you run the code, you get the image below. It will output a search input box and an icon button to handle click events.
Creating cards
Creating cards with Chakra is not difficult; you can easily use the Card component of Chakra. Though here, you will see how to make a card using the Box component.
To get started, import the following;
import {
  Flex,
  Text,
  Image,
  Box,
  SimpleGrid,
  ListItem,
  UnorderedList,
} from "@chakra-ui/react";
Observe that in the import, the components were all listed with a comma as a separator.
To work on the background image, create a folder in the public directory and name it image or img and copy all your background images and paste them there. Make sure the names are short. Then inside the Box component, use the Chakra styling property;
bgImage='url(./image/<imageName.jpg)'
// and
bgPosition='bottom' //center, top
To style the Box image.
Next, write the following line of code for the card;
<SimpleGrid columns={2} minChildWidth="500px" placeItems="center" spacing={16}>
  <Box
    m="10px"
    h="500px"
    w="400px"
    mt="40px"
    bgImage="url(./img/cloudy.jpg)"
    bgPosition="bottom"
    borderRadius="2xl"
    shadow="dark-lg"
  >
    <Text
      color="white"
      display="flex"
      justifyContent="center"
      mt="5px"
      fontSize="20px"
    >
      Weather
    </Text>
    <Text color="white" display="flex" justifyContent="center" mt="200px">
      Current Weather
    </Text>
  </Box>

  <Box
    m="10px"
    h="500px"
    w="400px"
    mt="40px"
    bgImage="url(./img/sunshine.jpg)"
    bgPosition="center"
    borderRadius="2xl"
    shadow="dark-lg"
  >
    <Flex wrap="wrap" gap="2" justifyContent="space-around">
      <Box>My city weather</Box>
      <Box>City condition</Box>
    </Flex>
  </Box>
</SimpleGrid>;
You can also add a border radius and box shadow to your box to make it look more card-like.
Use Flex to make your components layout flex side by side.
SimpleGrid makes your components have a row, or column type of view. It has its styling properties.
To see how the card will look, in index.tsx file, import the card component as Card.
import Card from "../components/Card";And replace the search component in the code with Card to display the two cards on the screen like in the image below.
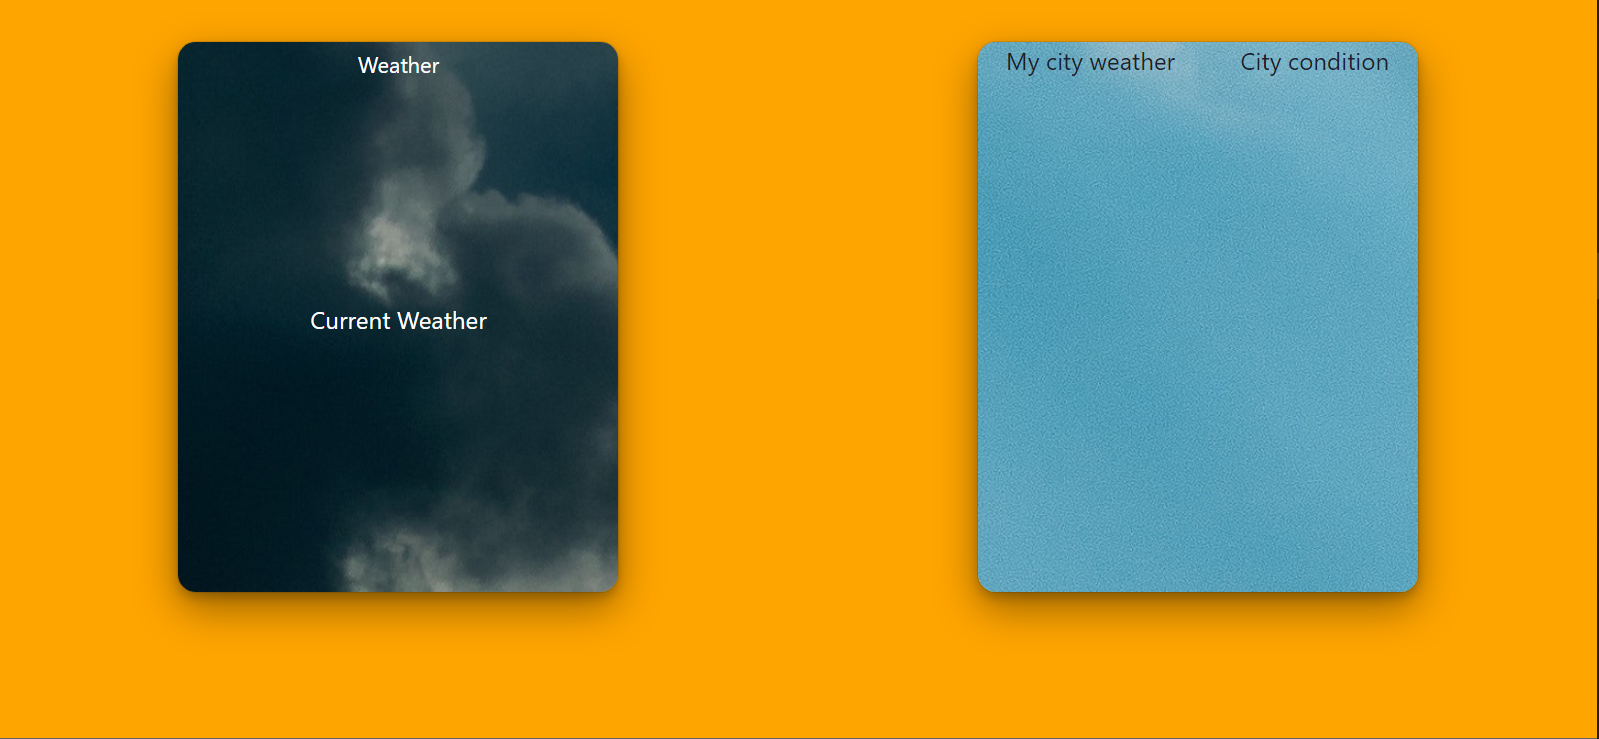
After that, you can replace the Card component with the Search component in the index file page.
Note: The card background image is based on the image of your choice.
Session Replay for Developers
Uncover frustrations, understand bugs and fix slowdowns like never before with OpenReplay — an open-source session replay tool for developers. Self-host it in minutes, and have complete control over your customer data. Check our GitHub repo and join the thousands of developers in our community.
Getting data
Now that the UI is halfway set, it’s time to make it responsive.
Making fetch request to OpenWeatherMap.
In the Next js App, you had installed Axios. Now it’s time to use it to fetch the weather data. In the search component above return, create three states;
const [searchValue, setSearchValue] = useState('');
const [weather, setWeather] = useState([]);
const [isData, setData] = useState(false);
You can use any name of your choice for your state variables.
Next, below the states, create a function called handleClick This function will handle the request from the search input. Before going on, what does each state do?
The search value state gets each input of the user from the search input. The weather state gets the data that the weather API will return; the last state will hold a Boolean value, false if the weather state has no data or returns an error, and true if it has a value. This will help determine the conditional rendering of the cards.
Now for the handleClick function, write the following code;
const handleClick = () => {
  const err = axios
    .get(
      `http://api.openweathermap.org/data/2.5/weather?q=${searchValue}&appid=f7dd5f65195d863069e051cef5e0e2ec&units=imperial`
    )
    .then((res) => {
      setWeather(res.data);
      console.log(res.data);
      setData(true);
    })
    .catch((err) => {
      err;
      setData(false);
    });
};
In the function above we use Axios to get the data and catch errors if any, store the weather data in the weather state, and set the data value to true or false depending on the value.
Also, make some changes to the search components.
<>
  <Container padding="10px" width="100vw">
    <Flex>
      <Input
        placeholder="Enter Your City"
        onChange={(e) => {
          setSearchValue(e.target.value);
        }}
      />
      <IconButton
        colorScheme="blue"
        aria-label="Search database"
        icon={<SearchIcon />}
        onClick={handleClick}
      />
    </Flex>
  </Container>
  //Conditional rendering
  {isData ? <Card value={weather} /> : <div> oops no value </div>}
</>;
In the curly brackets, you conditionally render if the data is true, else it renders the div element if false. Also, notice a value was passed in the cards component. That value is the data gotten from the API and stored in the weather state. It is being passed as props(property) to the card component for use.
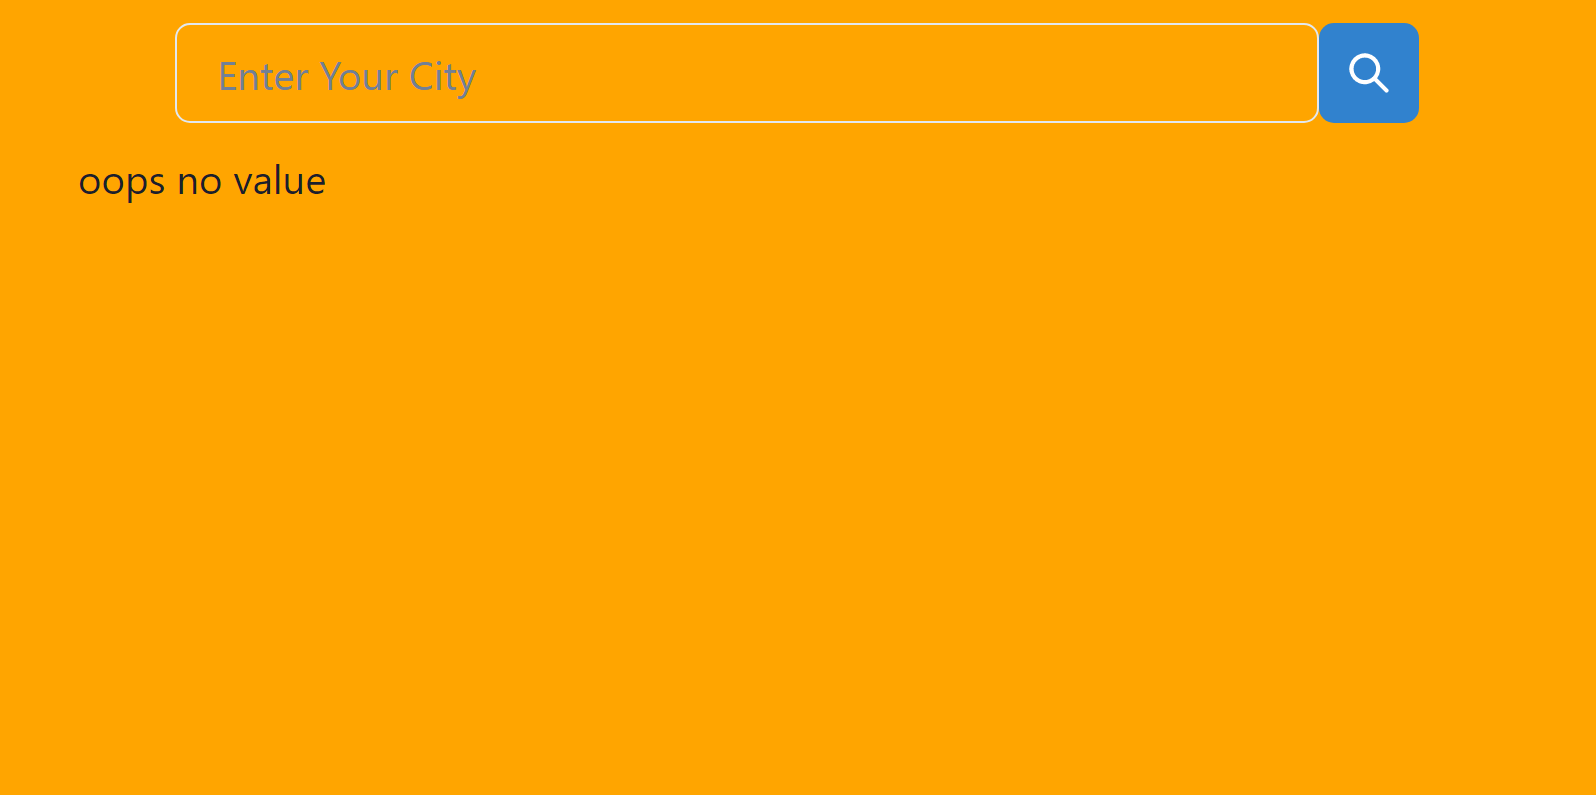
The image above is how the app will look after the conditional rendering code is added. It evaluates to false and returns the false value if there is no data.
Getting Data on The Front-End
This is the part where the data will be put on the cards for the client to see. Here there are some manipulations taking place with JavaScript to get the date, time, weather data, and weather icon.
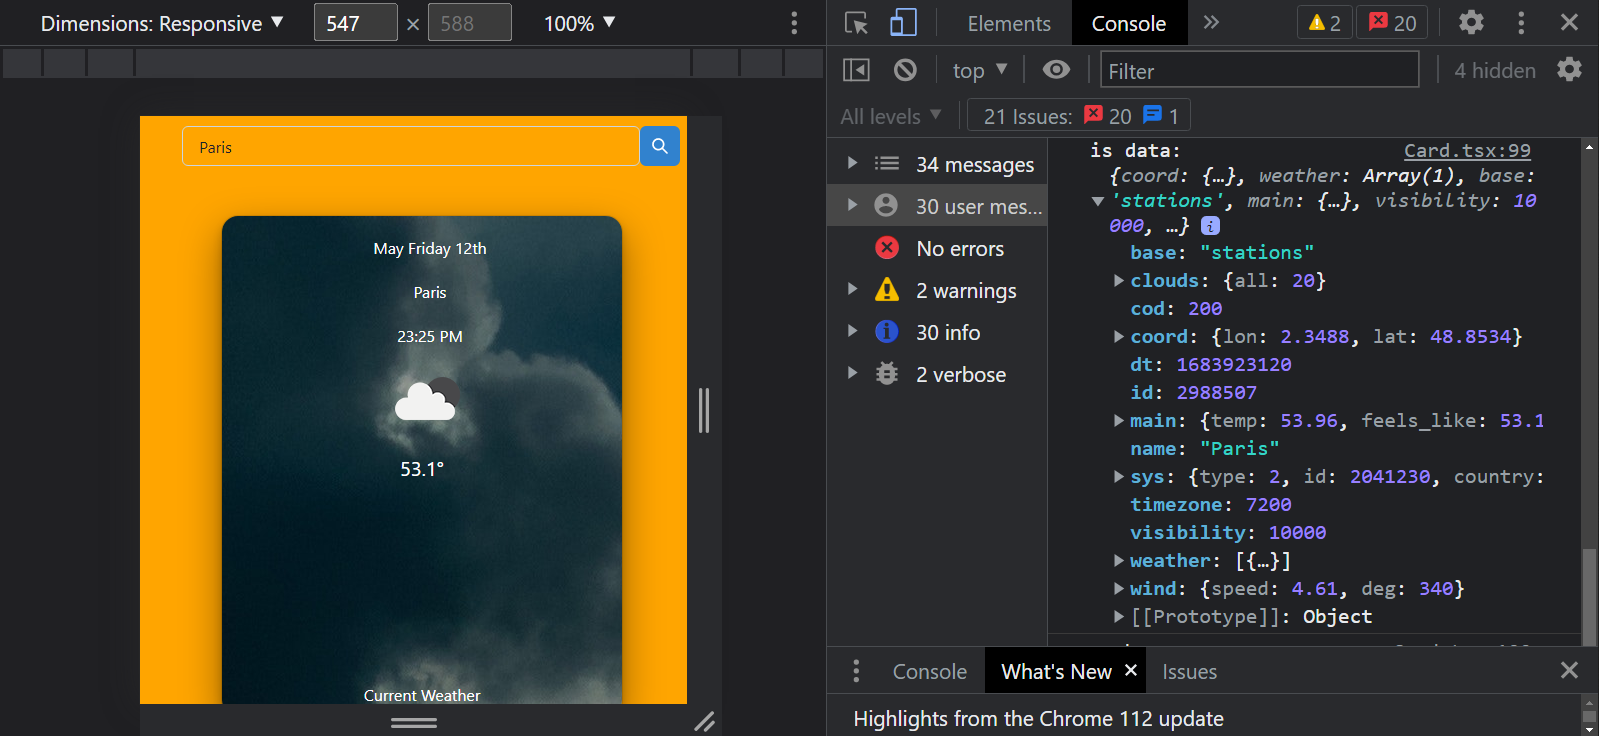
The above image shows the data obtained from the weather map API in the console of the browser.
To get the needed data, you have to do the following; First, pass in the data as a prop into the card component.
const card = (props: any) => {
  return()
}
export default cards;
Note: if any error shows in your code on Visual Studio Code, but your code seems to run fine on the browser, do two things;
- State the type to be
any, like in the code above. - Click F1, then click on TypeScript: select TypeScript Version, then select 4.9.4 (it depends on your system TypeScript version) to downgrade it. This happens because Next js 13 comes with a higher version 5.0.4. Maybe in the future, it will be handled for TypeScript.
Now, write the following JavaScript code. It will handle the manipulation of the data.
const data = props.value; //stores props values in data
const weatherItems = data.weather; //gets the values of weather
const cityName = data.name;
const cityMain = data.main;
const weatherForecast = data.main.feels_like;
const weatherIcon = Object.values(weatherItems)
  .map((itm: any) => itm.icon)
  .join("");
const url = `https://openweathermap.org/img/wn/${weatherIcon}@2x.png`;
//date and time
const dT = data.dt;
const time = data.timezone;
const cityMonth = new Date(dT * 1000 + time * 1000).getMonth();
const cityTime = new Date(dT * 1000 + time * 1000).getDay();
const minutes = new Date(dT * 1000 + time * 1000).getMinutes();
const hours = new Date(dT * 1000 + time * 1000).getHours();
const cityDate = new Date(dT * 1000 + time * 1000).getDate();
const cityMinutes = minutes < 10 ? `0` + minutes : minutes;
const cityHours = hours < 10 ? `0` + hours : hours;
const timeFormat = cityHours >= 12 ? "PM" : "AM";
const mainTime = `${cityHours}:${cityMinutes} ${timeFormat}`;
let val;
const dayArray = [
  "Sunday",
  "Monday",
  "Tuesday",
  "Wednesday",
  "Thursday",
  "Friday",
  "Saturday",
];
const day = dayArray[cityTime];
const monthArray = [
  "January",
  "February",
  "March",
  "April",
  "May",
  "June",
  "July",
  "August",
  "September",
  "October",
  "November",
  "December",
];
const month = monthArray[cityMonth];
let tempName: any = [];
let tempValue: any = [];
let dateSuffix;
switch (cityDate) {
  case 2:
    dateSuffix = "nd";
    break;
  case 3:
    dateSuffix = "rd";
    break;
  default:
    dateSuffix = "th";
}
const fullDate = `${month} ${day} ${cityDate + dateSuffix}`;
const unicode = "\u00b0";
Line 1 to line 6 gets the values of the data that was passed by referring to the key name of the data. Line 6 to 7 gets the icon number and appends it to the OpenWeatherMap icon URL to get the icon image. While line 9 to 39 is used to get the month, day, hours, minutes, and date numbers. The numbers are then operated upon to get the actual date and time. Line 40 only contains the Unicode symbol for degrees, which will be used in the return function for the cards.
Next, in other to return the data for humidity, pressure, and temperature we create a map to return the values. And there is also an array for the card to get the full date, city name, and main time that was coded.
//actual data array
let weatherArray = [fullDate, cityName, mainTime];
//weather key names
Object.keys(cityMain)
  .filter((val, index) => index != 1)
  .map((key) => {
    tempName.push(key);
  });
//weather value numbers
Object.values(cityMain)
  .filter((val, index) => index != 1)
  .map((val) => {
    tempValue.push(val);
  });

//main weather key name and value to display
let mainTemp = tempName.map((val: any, index: any) => {
  return `${val} : ${tempValue[index]}`;
});
Now you have to update the return body;
<SimpleGrid columns={2} minChildWidth="500px" placeItems="center" spacing={16}>
  <Box
    m="10px"
    h="500px"
    w="400px"
    mt="40px"
    bgImage="url(./img/cloudy.jpg)"
    bgPosition="bottom"
    borderRadius="2xl"
    shadow="dark-lg"
  >
    {weatherArray.map((element, index) => (
      <UnorderedList>
        <ListItem
          color="white"
          display="flex"
          justifyContent="center"
          mt="20px"
          key={index}
        >
          {element}
        </ListItem>
      </UnorderedList>
    ))}
    <Image
      src={url}
      alt="weather-icon"
      width={100}
      height={100}
      ml="155"
      p="0"
    />
    <Text
      color="white"
      display="flex"
      justifyContent="center"
      mt="5px"
      fontSize="20px"
    >
      {weatherForecast}
      {unicode}
    </Text>
    <Text color="white" display="flex" justifyContent="center" mt="200px">
      {" "}
      Current Weather{" "}
    </Text>
  </Box>

  <Box
    m="10px"
    h="500px"
    w="400px"
    mt="40px"
    bgImage="url(./img/sunshine.jpg)"
    bgPosition="center"
    borderRadius="2xl"
    shadow="dark-lg"
  >
    <Flex wrap="wrap" gap="2" justifyContent="space-around">
      {mainTemp.map((val: any, index: any) => (
        <Box
          color="white"
          display="flex"
          justifyContent="center"
          alignItems="center"
          p="5"
          w="150px"
          key={index}
        >
          {" "}
          {val}{" "}
        </Box>
      ))}
    </Flex>
  </Box>
</SimpleGrid>;
The app code is 90 percent done but there is still one thing to be done. Even if you were to write the code above you would get an error. The reason is that you are going to use an external image from a website. Since the image is not contained in our app we get a source error or server error. This was caused because in line 12 we tried to get an image from an external source. To solve this you have to open the next.config.js file and make some editions in it by adding the following code in the module.exports;
{
  images: {
    remotePatterns: [
      {
        protocol: 'https',
        hostname: 'openweathermap.org',
      },
    ],
  },
}
After that, the code should now be 99 if not 100 percent complete. You can try to add some things you like in the app from the data or even remove some. You can even design a better card than me. You can check out the style properties of Chakra UI here:
The gif below shows how the app will work.
Conclusion
From this article, you learned to build a simple weather app in Next js using Chakra UI and the Open Weather Map API. If you want to learn a lot about Chakra UI you can check their documentation and also check out the documentation for OpenWeatherMap. Chakra UI documentation, OpenWeatherMap.
Gain Debugging Superpowers
Unleash the power of session replay to reproduce bugs and track user frustrations. Get complete visibility into your frontend with OpenReplay, the most advanced open-source session replay tool for developers.