Decoding CSS Specificity: Elevating Web Styling Mastery
How to calculate and understand specificity

CSS is the foundation for developers to transform HTML documents into visually engaging and functional websites for the public. For a front-end developer, understanding the rules governing CSS is crucial for enhancing proficiency in styling websites. This article will explore the concept of CSS specificity, break down its components, and show how a deeper understanding can improve your skills in styling websites.

Discover how at OpenReplay.com.
CSS specificity is simply a set of rules browsers use to decide the CSS styling that should be applied to an element when different styles try to change the same thing on a webpage. Think of it as a hierarchy for selectors, where the one with the highest specificity value will have its style declaration applied to the HTML element.
Components of CSS specificity
Let’s talk about the key components of CSS specificity.
Inline styling involves the addition of styles directly within HTML elements, making it the most powerful method due to its highest specificity. This allows them to take control over other styles. This is useful when targeting a specific element and overwriting existing styles.
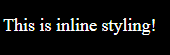
<p style="color: white; font-size: 18px;">This is inline styling!</p>;The code above generates a paragraph with inline styling, setting the text color to white and the font size to 18 pixels, as seen below:
Id styling involves selecting an element by its id. They are more specific than classes and elements. This means styles are applied using id priority over less specific styles. Each targeted HTML element has a unique id, which allows the id selector to target the intended element accurately.
<div id="header">This is ID styling.</div>;#header {
color: white;
font-size: 18px;
font-weight: bold;
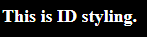
}The code above generates a paragraph with id styling, setting the text color to white, the font-weight to bold, and the font-size to 18 pixels, as seen below:
Classes, pseudo-classes, and attribute selectors all share the same specificity, and combining these three selectors provides flexibility for developers.
Classes make use of a period (e.g., .form).
.form-container {
  background-color: #fff; /* White background for the form container */
  padding: 20px;
  border-radius: 8px;
  box-shadow: 0 0 10px rgba(0, 0, 0, 0.2);
}
Let’s use the above code in a real project.
Here is the HTML:
<!doctype html>
<html lang="en">
  <head>
    <meta charset="UTF-8" />
    <meta name="viewport" content="width=device-width, initial-scale=1.0" />
    <link rel="stylesheet" href="styles.css" />
    <title>Form</title>
  </head>
  <body>
    <div class="form-container">
      <form>
        <label for="name">Name:</label>
        <input type="text" id="name" name="name" placeholder="Your name" />

        <label for="email">Email:</label>
        <input type="email" id="email" name="email" placeholder="Your email" />

        <input type="submit" value="Submit" />
      </form>
    </div>
  </body>
</html>
Here is the CSS;
body {
display: flex;
justify-content: center;
align-items: center;
height: 100vh;
margin: 0;
background-color: blue;
}
.form-container {
background-color: #fff; /* White background for the form container */
padding: 20px;
border-radius: 8px;
box-shadow: 0 0 10px rgba(0, 0, 0, 0.2);
}
form {
display: flex;
flex-direction: column;
}
label,
input {
margin-bottom: 16px;
}
input {
padding: 8px;
border: 1px solid #ccc;
border-radius: 4px;
}
input[type="submit"] {
background-color: blue;
color: #fff;
cursor: pointer;
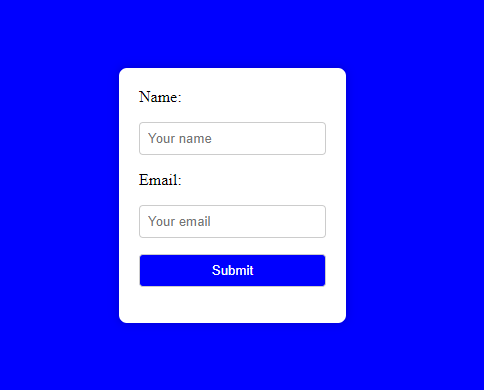
}The HTML and CSS code above generates a centered form with a blue background. The form includes input fields for name and email, styled with a white background, padding, and border. The submit button has a blue background with white text. This example shows how you use classes, pseudo-classes, and attribute selectors in a real project, as seen below:
They target particular states or positions of elements.
Pseudo-classes make use of a colon, e.g., :focus as seen below:
:focus {
  color: yellow;
}
Attribute selectors target elements based on their attributes (e.g., [type="text"]):
input[type="checkbox"] {
  margin-right: 5px;
}
HTML elements can also be selected by their tag name, as seen in the example below:
 p {
  color: red;
  font-size: 17px;
}
In this example, every <p> element will be styled with a red color and a font-size of 17 pixels.
Pseudo-elements are also used to style specific parts of an element.
p::before {
  color: blue;
}
Calculating specificity
To calculate specificity:
- Count the number of selectors like
div,p, or any HTML tag names in your CSS rule. - Count the number of selectors with a period (.) before them in the CSS rule.
- Count the number of selectors with a hash (#) before them, like
#my-id. in the CSS rule. - Check if there are inline styles within the rule, and add 1 to the specificity If present.
The next step is to organize the specificity values in the order of Id, class, and element type.
This arrangement plays an important role in determining the weight of each selector in the specificity calculation. With this in mind, create a three-part number based on the arrangement order. For example:
If you have 1 id selector, 2 class selectors, and 3 element selectors, the specificity could be represented as 1-2-3.
The following reasons explain why specificity is important:
- Knowledge of specificity prevents conflicts between styles.
- Understanding the specificity of a selector allows you to predict which styles will take precedence.
- Proper use of specificity allows developers to write clear and maintainable codes.
- It becomes easy to identify and resolve conflicts by inspecting applied styles.
Real-world Examples of CSS Specificity
Here, we will talk about several instances that illustrate the application of specificity.
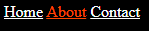
In this example, we will style a Nav menu with links showing the different links based on their current state.
<!doctype html>
<html>
  <head> </head>
  <body>
    <nav>
      <a href="#" class="nav-link">Home</a>
      <a href="#" class="nav-link" id="active-link">About</a>
      <a href="#" class="nav-link">Contact</a>
    </nav>
  </body>
</html>
body {
background-color: black;
color: white; /* Set text color to white for better visibility on a black background */
}
.nav-link {
color: white;
}
/* Active Link Style with Higher Specificity */
#active-link {
color: #ff4500;
}Regular links have a different styling, while an id is used for the active links to increase specificity, as seen below.
To demonstrate the application of specificity in the above code, let’s calculate it.
As mentioned earlier, specificity is calculated as a three-part value, with the leftmost digit representing the highest specificity level. With this in mind, we calculate the specificity of the code above as:
The body selector holds a specificity of 1 as an element selector, with the breakdown:
- No id selector is used here, so it is represented as 0.
- No class selector is used, so it is represented as 0.
- One element selector is used, so it is represented as 1.
- Therefore, the specificity is represented as [0, 0, 1].
The .nav-link selector:
- No id selector is used here, so it is represented as 0.
- One class selector is used, so it is represented as 1.
- No element selector is used, so it is represented as 0.
- Therefore, the specificity is represented as [0, 1, 0].
The #active-link selector:
- One id selector is used, so it is represented as 1.
- No class selector is used, so it is represented as 0.
- No element selector is used, so it is represented as 0.
- Therefore, the specificity is represented as [1, 0, 0].
In summary:
- The
bodyselector has the specificity [0, 0, 1]. - The
.nav-linkselector has the specificity [0, 1, 0]. - The
#active-linkselector has the specificity [1, 0, 0].
When comparing selectors, the higher the number in a specificity category, the more specific the selector is. In the example above, the styles for #active-link will override those set by .nav-link due to its higher specificity.
The example below shows styling a form with input elements of different types, such as text and buttons.
Here is the HTML:
<!doctype html>
<html lang="en">
  <head>
    <meta charset="UTF-8" />
    <meta name="viewport" content="width=device-width, initial-scale=1.0" />
    <link rel="stylesheet" href="styles.css" />
    <title>Form</title>
  </head>
  <body>
    <form>
      <input type="text" class="input-text" placeholder="Username" />
      <input type="submit" class="input-submit primary-btn" value="Submit" />
    </form>
  </body>
</html
Here is the CSS;
input[type="text"] {
  border: 1px solid #ccc;
}

input[type="submit"].primary-btn {
  background-color: #4caf50;
  color: #fff;
}
Calculating the specificity for the code above:
For the input[type="text"]:
- No id selector is used here, so it is represented as 0.
- No class selector is used here, so it is represented as 0.
- One attribute selector is used here, so it is represented as 1 (for the attribute selector
type="text"). - One element selector is used here, so it is represented as 1 (for the element selector
input). - Therefore, the specificity is represented as [0, 1, 1].
For the input[type="submit"].primary-btn:
- No id selector is used here, so it is represented as 0.
- Two class selector are used here, so it is represented as 2 for the class selectors
.primary-btn. - One attribute selector is used here, so it is represented as 1 for the attribute selector
type="submit". - One element selector is used here, so it is represented as 1 for the element selector
input. - Therefore, the specificity is represented as [0, 2, 1].
In the example above, the styles for input[type="submit"].primary-btn will override those set by input[type="text"] due to its higher specificity.
The text inputs here are styled with a basic border, while the submit button with the class primary-btn has a more specific styling, which includes a distinct background color and text color.

This shows a precise and customized method of styling based on the type and class of form elements. This highlights the adaptability and control that CSS specificity offers in presenting the appearance of particular components.
The next example shows how to customize specific elements without changing the original styles, you can make use of id or nested selectors to achieve higher specificity.
<div id="custom-container">
  <button class="third-party-button">Click me</button>
</div>.third-party-button {
background-color: #007bff;
color: #fff;
}
#custom-container .third-party-button {
background-color: #ff4500;
}Calculating the specificity for the code above:
For .third-party-button:
- No id selector is used here, so it is represented as 0.
- One class selector is used here, so it is represented as 1 for the class selector
.third-party-button. - No attribute selector is used here, so it is represented as 0.
- One element selector is used here, so it is represented as 1 for the element selector
button. - Therefore, the specificity is represented as [0, 1, 0, 1].
For #custom-container .third-party-button:
- One id selector is used here, so it is represented as 1 for the ID selector
#custom-container. - One class selector is used here, so it is represented as 1 for the class selector
.third-party-button. - No attribute selector is used, so it is represented as 0.
- One element selector is used here, so it is represented as 1 for the element selector
button. - Therefore, the specificity is represented as [1, 1, 0, 1].
In summary, the specificity values are as follows:
.third-party-buttonselector: [0, 1, 0, 1].#custom-container .third-party-button selector: [1, 1, 0, 1].
The selector #custom-container .third-party-button has higher specificity due to the presence of an id selector, and it will take precedence over the more general .third-party-button selector.
The example above shows how to use CSS specificity to style a button element, as seen below.

Best practices for maintaining Clean and efficient CSS Code
Below are various practices you can adopt to improve your code;
- Arrange your selectors in a way that balances specificity: Consider the natural hierarchy of your HTML and write styles accordingly.
- Assign unique id’s to distinctive elements like header and footer containers.
- For general styling purposes, make use of classes to improve flexibility.
- Make use of consistent class naming conventions to improve clarity and structure.
- Make use of simple selectors for improved readability.
- Exercise caution when using the !important declaration; use it sparingly to prevent disturbance in the natural flow of specificity.
- Structure the stylesheet clearly and use comments for documentation purposes.
Adopting these practices will produce a well-organized CSS codebase that is easy to read and scalable.
Conclusion
CSS plays a vital role in web development by transforming HTML documents into visually engaging and functional websites for the public. It is important for a front-end developer to have at least a basic understanding of CSS rules to enhance the styling of websites.
This is an important role CSS specificity plays by prioritizing the styles applied to a webpage based on the hierarchy of selectors.
Knowing how to calculate specificity values for different selectors and creating a hierarchy based on id, class, and element type is very important to avoid conflicts between styles and to produce clear and maintainable code.
Gain control over your UX
See how users are using your site as if you were sitting next to them, learn and iterate faster with OpenReplay — the open-source session replay tool for developers. Self-host it in minutes, and have complete control over your customer data.
Star on GitHub12k