Building a digital Signature pad and Signature Images with Flutter
Create a Flutter app to draw and export your signature in an easy way

Have you ever been in a situation where you’re to sign a document or paperwork on your device, but you end up going online and looking for a signature generating app or site? This tutorial got you covered.
The Coronavirus (COVID-19) epidemic brought about a revolution in the business world, with most businesses embracing remote operations and turning to digital equipment and gadgets. A digital signature pad is a Sign-area that digitally captures a person’s handwritten signature on a device using a signature pad—this aids in signing online documents, contracts, forms, receipts, and other paperwork. Digital signature pads make it easier to capture your signature, enabling you to sign documents and receipts.
We will build a Signature application that allows users to draw and save signatures to their local storage. By the end of the tutorial, we will be able to achieve the following:
- Create a Signature pad.
- Create different orientations for all devices.
- Export our Signatures to images.
- Persist signature images to Gallery.
- Build an Android app release.
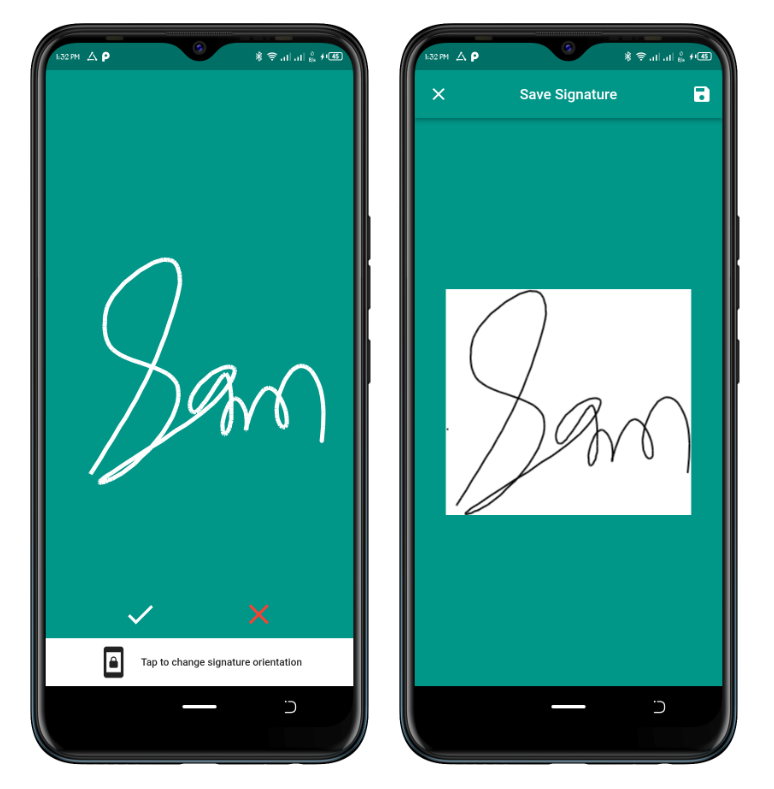
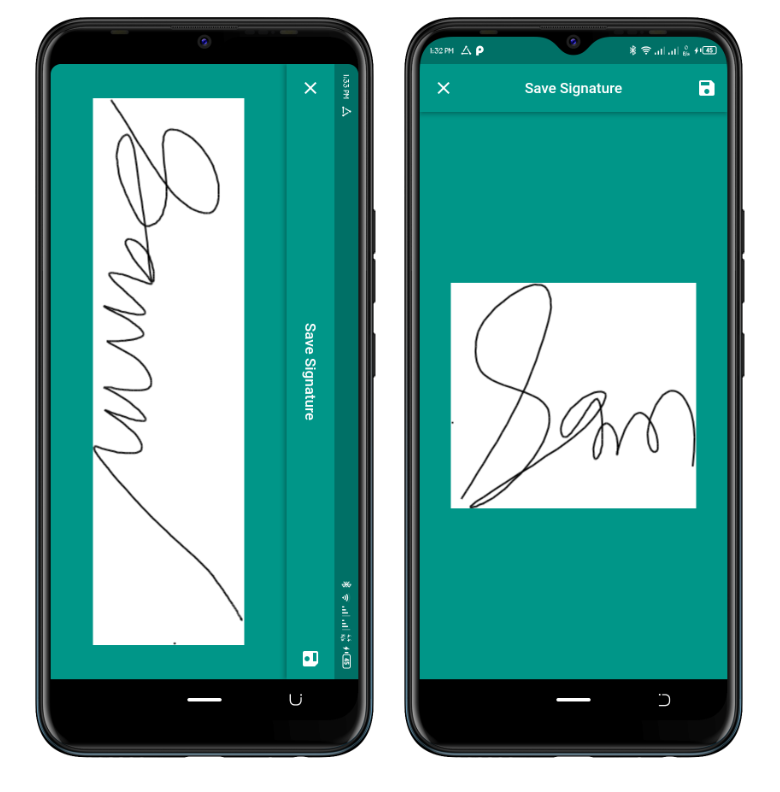
Below is a preview of what our application will look like:
This tutorial assumes that you have dart and flutter CLI and installed emulators on your machine.
Setting up Flutter App
Open your terminal, navigate to your preferred directory where you want to create your project, and run the following command:
flutter create signature_appRun your code on an emulator or an actual device using the command below:
flutter runOpen up the project in your preferred Code Editor and Replace the contents of your pubspec.yaml file with:
name: signature_app
description: A new Flutter project.
version: 1.0.0+1
environment:
  sdk: ">=2.16.2 <3.0.0"

dependencies:
  cupertino_icons: ^1.0.2
  flutter:
    sdk: flutter
  signature: ^5.0.0
  permission_handler: ^9.2.0
  image_gallery_saver: ^1.7.1
  get: ^4.6.1

dev_dependencies:
  flutter_lints: ^1.0.0
  flutter_test:
    sdk: flutter

flutter:
  uses-material-design: true
For this tutorial, we’ll be installing the following packages:
- signature for our Signature pad
- permission_handler to handle our in-app permissions
- image_gallery_saver for saving our exported signatures
- get for our custom snackbar
Next, run in the terminal flutter pub get to install all the above dependencies.
The file structure generated by Flutter contains many folders, including the lib folder, which contains the default main.dart file. In that folder, create another folder called pages, and there create two dart files called homepage.dart and signaturePage.dart.
┣ lib/
┃ ┣ pages/
┃ ┃ ┣ homepage.dart
┃ ┃ ┗ signaturePage.dart
┃ ┗ main.dart
┃
┣ pubspec.lock
┗ pubspec.yaml
Before we get started, let’s clean up our main.dart and populate it with our data.
import 'package:flutter/material.dart';
import 'package:signature_app/pages/homepage.dart';
import 'package:get/get.dart';

void main() {
  runApp(const MyApp());
}

class MyApp extends StatelessWidget {
  const MyApp({Key? key}) : super(key: key);
  // This widget is the root of your application.
  @override
  Widget build(BuildContext context) {
    return GetMaterialApp(
      title: 'Signature App',
      debugShowCheckedModeBanner: false,
      theme: ThemeData(
        primarySwatch: Colors.blue,
      ),
      home: const HomePage(),
    );
  }
}
Let’s talk about the code block above. The main() function is the entry point of our application. This runs our dart code, providing us with the runApp() method that runs our first Flutter component, a stateless widget called MyApp.
void main() {
  runApp(const MyApp());
}
MyApp is a flutter stateless widget that returns a GetMaterialApp. Flutter provides developers with the option of a MaterialApp for building an app with the material design used for android development or a CupertinoApp, which gives developers the IOS design look for our User Interface. We are using the GetMaterialApp, which is a requirement when using the get package. This equips us with the android material design and also with some get properties, which we are going to use later in this tutorial,
(Note: Stateless Widgets are static widgets or stateless, as the name implies. They can’t be re-rendered at runtime, while Stateful Widgets are widgets that hold states in them and can be updated or re-rendered at runtime. This is based on user action or data changes.)
We’ll create a StatefulWidget with the name HomePage and initialize and dispose of the signature controller within the _HomePageState scope.
SignatureController? controller;

@override
void initState() {
  // we initialize the signature controller
  controller = SignatureController(penStrokeWidth: 5, penColor: Colors.white);
  super.initState();
}
@override
void dispose() {
  controller!.dispose();
  super.dispose();
}
The initState() function above will initialize the controller at runtime and assign the given parameters as defaults during the initialization of the HomePage widget. At the same time, the dispose() function will clear or remove the controller from memory when the page or screen is closed, avoiding memory leaks.
Before we continue, let’s review the properties of the SignatureController:
SignatureController(
  Color penColor,
  double penStrokeWidth,
  Color exportBackgroundColor,
  List points,
  VoidCallback onDrawStart,
  VoidCallback onDrawMove,
  VoidCallback onDrawEnd,
)
Based on the properties above,
penColor:This is the color of the signature line drawn on the pad.penStrokeWidth:This determines the width or thickness of the signature line drawn.exportBackgroundColor:This will determine the color of the exported png image.point:this is a setter representing the position of the signature on the 2D canvas.onDrawStart:A callback function that notifies us when the drawing has started.onDrawMove:A callback function that notifies us while drawing our signature.onDrawEnd:A callback function that notifies us when the drawing has stopped.
Next, we’ll build the Check(✓) and Close(❌) buttons.
Widget? buttonWidgets(BuildContext context) => Container(
      color: Colors.teal,
      child: Row(mainAxisAlignment: MainAxisAlignment.spaceEvenly, children: [
        IconButton(
            onPressed: () {},
            iconSize: 40,
            color: Colors.white,
            icon: const Icon(Icons.check)),
        IconButton(
            onPressed: () {
              controller!.clear();
            },
            iconSize: 40,
            color: Colors.red,
            icon: const Icon(Icons.close)),
      ]),
    );
In the code block above, we created two buttons, the check button that will export the image and the Clear button that empties the signature pad.
Below is the exportSignature() function which exports the signature to pngBtyes. The exported image signature can as well be customized.
Future<Uint8List?> exportSignature() async {
  final exportController = SignatureController(
    penStrokeWidth: 2,
    exportBackgroundColor: Colors.white,
    penColor: Colors.black,
    points: controller!.points,
  );
  //converting the signature to png bytes
  final signature = exportController.toPngBytes();
  //clean up the memory
  exportController.dispose();
  return signature;
}
Open Source Session Replay
OpenReplay is an open-source, session replay suite that lets you see what users do on your web app, helping you troubleshoot issues faster. OpenReplay is self-hosted for full control over your data.

Start enjoying your debugging experience - start using OpenReplay for free.
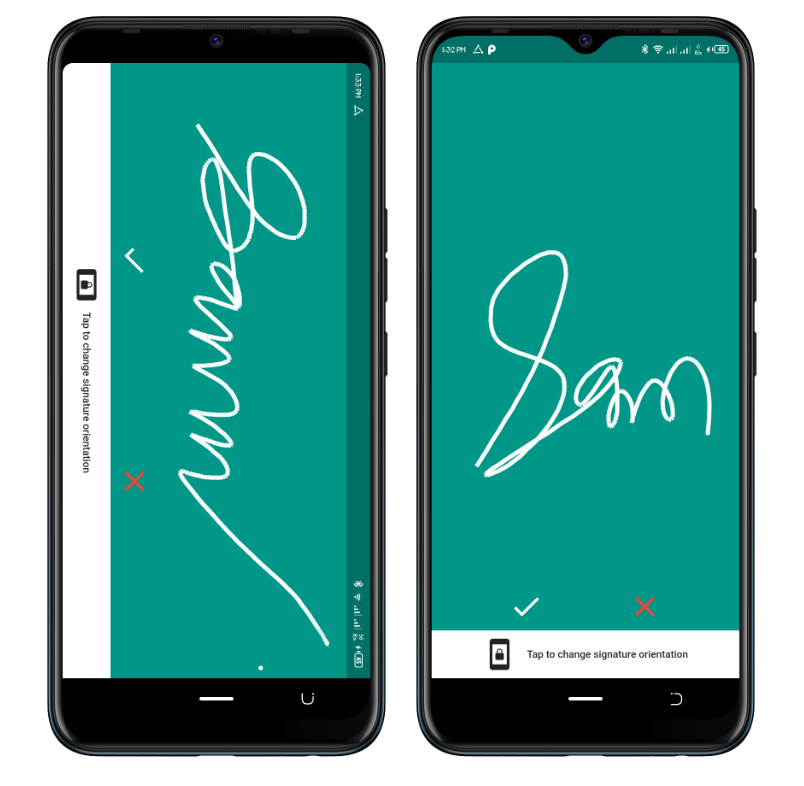
Creating different orientations for all devices
Signatures vary in length and width, and drawing them in portrait mode on a mobile phone could be tedious. Our application needs the flexibility of tilting between portrait and landscape modes, thereby giving the user the flexibility of drawing longer signatures.
To achieve this, we’ll first import
import 'package:flutter/services.dart';The services.dart import gives us access to the Services class, and it provides our app with specialized features like orientations.
Still in the Homepage scope, let’s create our setOrientation() function and *buildSwapOrientation* button
void setOrientation(Orientation orientation) {
  if (orientation == Orientation.landscape) {
    SystemChrome.setPreferredOrientations([
      DeviceOrientation.landscapeRight,
      DeviceOrientation.landscapeLeft,
    ]);
  } else {
    SystemChrome.setPreferredOrientations([
      DeviceOrientation.portraitUp,
      DeviceOrientation.portraitDown,
    ]);
  }
}
The setOrientation function takes in orientation as a parameter with the device’s current mode, checks if it’s in portrait mode, and returns the opposite, landscape.
Building the Orientation Button widget
Widget? buildSwapOrientation(BuildContext context) {
  final isPortrait =
      MediaQuery.of(context).orientation == Orientation.portrait;
  return GestureDetector(
    behavior: HitTestBehavior.opaque,
    onTap: () {
      final newOrientation =
          isPortrait ? Orientation.landscape : Orientation.portrait;

      // clearing the controller to prevent tilt issues
      controller!.clear();

      setOrientation(newOrientation);
    },
    child: Container(
      color: Colors.white,
      padding: const EdgeInsets.symmetric(vertical: 8),
      child: Row(
        mainAxisAlignment: MainAxisAlignment.center,
        children: [
          Icon(
            isPortrait
                ? Icons.screen_lock_portrait
                : Icons.screen_lock_landscape,
            size: 40,
          ),
          const SizedBox(
            width: 12,
          ),
          const Text(
            'Tap to change signature orientation',
            style: TextStyle(fontWeight: FontWeight.w600),
          ),
        ],
      ),
    ),
  );
}
In the code above, we change our container color to white as wraps the Row widget, which contains an Icon and a SizedBox (used to put a horizontal space between our icon and text widgets), and a Text widget. The icon property is set to a ternary statement that returns a portrait or landscape icon based on the device’s current state. Finally, we will be wrapping the container with a GestureDetector widget, making the container clickable and providing us with the ontap parameter.
We are almost there! With our current progress, we can sign our Signature pad in both landscape and portrait modes.
Head over to the lib/signature.dart file and create a StatelessWidget called ReviewSignaturePage.
class ReviewSignaturePage extends StatelessWidget {
  final Uint8List signature;
  const ReviewSignaturePage({Key? key, required this.signature})
      : super(key: key);
  @override
  Widget build(BuildContext context) {
    return Scaffold(
        backgroundColor: Colors.teal,
        appBar: AppBar(
          backgroundColor: Colors.teal,
          leading: IconButton(
            onPressed: () {
              Navigator.pop(context);
            },
            icon: const Icon(Icons.close),
          ),
          actions: [
            IconButton(
              onPressed: (){},
              icon: const Icon(Icons.save),
            ),
          ],
          centerTitle: true,
          title: const Text('Save Signature'),
        ),
        body: Center(
          child: Image.memory(signature),
        ));
  }
}
Based on the code block above, we created a StatelessWidget with two buttons in the appbar, the close button, which takes us back to the HomePage, and the save button, which will save our signature image to storage.
The body contains the signature property, which will be passed in from the HomePage into our Image widget to display the signature image.
Navigating and passing of signature to Signature screen
To view our already signed signature in the ReviewSignaturePage, head back to
check IconButton in the buttonWidgets in the homepage.dart file, and add the following functions to the onPressed property.
onPressed: () async {
            if (controller!.isNotEmpty) {
              final signature = await exportSignature();
              await Navigator.of(context).push(
                MaterialPageRoute(
                  builder: ((context) =>
                      ReviewSignaturePage(signature: signature!)),
                ),
              );
              controller!.clear();
            }
          },
The code block above checks if the initialized controller is not empty, it then exports the signature and passes it as a property to the ReviewSignaturePage, after which it clears the controller. With these lines, we’ve achieved signing and reviewing signatures.
Exporting our Signatures to images
Before we process, Let’s set up some permissions to give us access to the device storage. Head over to your android/app/src/main/res/AndroidManifest.xml file and add the code block below to enable your Android device to have permission to your device gallery:
<manifest xmlns:android="http://schemas.android.com/apk/res/android"
    package="com.example.signature_app">

    // add the codeblock below
    <uses-permission android:name="android.permission.WRITE_EXTERNAL_STORAGE"/>

    <application
        android:label="Signature App"
        android:name="${applicationName}"
With that done, head over to your ios/Runner/Info.plist file and add the code block below the:
<dict>
    // add these codeblocks
    <key>NSPhotoLibraryUsageDescription</key>
    <string>This app requires to save your images user gallery</string>

    ....
</dict>
Persisting Signature images to Gallery
In the ReviewSignaturePage scope, let’s create our saveSignature() function
Future? saveSignature(BuildContext context) async {
  // requesting for permission
  final status = await Permission.storage.status;
  if (!status.isGranted) {
    await Permission.storage.request();
  }

  //making signature name unique
  final time = DateTime.now().toIso8601String().replaceAll('.', ':');
  final name = 'signature_$time';

  // saving signature to gallery
  final result = await ImageGallerySaver.saveImage(signature, name: name);
  final isSuccessful = result['isSuccess'];

  //displaying snackbar
  if (isSuccessful) {
    Navigator.pop(context);
    Get.snackbar('Success', 'Signature saved to device',
        backgroundColor: Colors.white, colorText: Colors.green);
  } else {
    Get.snackbar('Success', 'Signature saved to device',
        backgroundColor: Colors.red, colorText: Colors.white);
  }
}
In the signature function above, we first requested permissions to save to the device storage and created a unique name using the current timestamp. Then we passed the signature and the name as paraments to the ImageGallerySaver. ImageGallerySaver returns a response isSuccess, which our get snackbar listens to.
Build Android App Release
To test our application on our real devices, run the code below.
flutter build apkThe code above will build a release apk for Android. To get the build file, navigate to the build/app/outputs/flutter-apk folder, copy the app-release.app to your Android device, and install it.
Conclusion
One of the peculiarities of developers is being able to provide creative solutions in every condition. In our case, we managed to solve the problem of signing documents and other paperwork, but remotely.
Take home keys in the tutorial:
- First, we started by learning about signature apps and their uses in our everyday lives.
- Next, we learned how to build our Signature pad app and how to orientate it.
- Lastly, we also covered how to export our Signatures to images, save them to our gallery and build our android app release.
I hope this tutorial helps solve your problem of signing documents and other paperwork with ease.
Source Code
Here is the link to the full source code on Github