Doing pagination with React Query
Implement pagination easily in React with React Query.


When getting data from a large dataset (an API or a database), developers frequently struggle with presenting it to the user while keeping in mind specific requirements, such as a short load time and an excellent user interface.
Pagination is one method of resolving this. Using pagination enables developers to separate the data into pages for the end-users. As a result, chunks of large datasets are displayed on different pages, and as the user interacts with the pagination controls, data for each page is fetched and displayed. Pagination is a feature frequently found in applications like learning management systems, product sites (eCommerce with dozens of goods), blog pages, Google search results, and any page with massive data results.
Constructing the logic to perform pagination can be daunting, as you’ll have to introduce some mathematical programming techniques coupled with React hooks. However, I’ll show you how to use React-Query to implement pagination in this article.
Building the application
I have created a starter template repository to bootstrap the build process. You will need to clone this GitHub repository to your local desktop.
First, open your terminal and change the directory to where you want to save the app folder. For example, I want mine to be on the desktop, and I will run the following command.
cd desktopNext, clone the starter application to our desktop:
git clone https://github.com/shegz101/Pagination-React-Query.gitYour folder structure should have the following directories and files:

Installing dependencies
The application has node packages attached to it, and for the build to run smoothly, we must download all the needed dependencies. To do this, run the following command:
cd Pagination-React-Query
npm install
After running the command above, a node module directory gets added to your folder structure.
Disconnect from the Remote Git Repository
Since this application is now your setup, and you may like to push it to your GitHub account as your project, you must disconnect it from the remote repository (i.e., the repo you cloned the starter folder from).
You have first to check if this folder is connected to any remote repository by running this:
git remote -vYou will get the links in the snapshot below as the result of the command above.
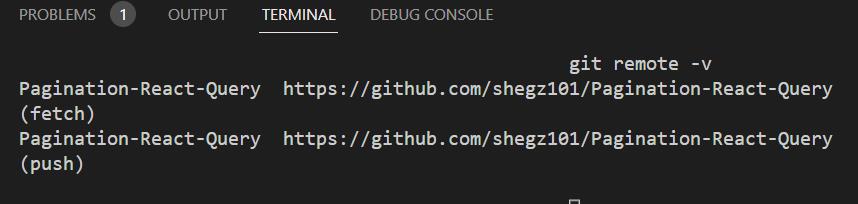
The snapshot above tells us that the folder is connected to the git repository link returned.
Now, to disconnect the folder, run the command below:
git remote remove originThe folder is now disconnected. If you run git remote -v, you notice no repository link is returned (proof that the folder has been disconnected).
Starting the application
To run this application, type this command in your terminal:
//not npm start since we used vite and not CRA
npm run dev
The command above will compile the application and host it at “http://localhost:5173/”. Simply click on the localhost link, and the application will open in your browser.
Here is what your browser will display:
So far, what we have done in the app is fetch and display the data. With Axios, a package used for HTTP requests, we could fetch data from the API and display it. Try to understand what the starter files entail and how we’ve been able to get to this point (the snapshot above) because this would form the basis of your foundation for this web build, thus the prerequisites.
We can now move into the central part of this article, which is how to implement pagination using React-Query. I assume you understand the build-up to this point. Let’s get into the nitty-gritty of this article.
Remember to tidy up your code before starting to use React Query. Simply deleting the posts state from Posts.jsx and the useEffect we used to collect the data will accomplish this. Remove the code that follows:
const [posts, setPosts] = useState([]);

useEffect(() => {
  getPosts(page).then((json) => setPosts(json));
}, [page]);
Session Replay for Developers
Uncover frustrations, understand bugs and fix slowdowns like never before with OpenReplay — an open-source session replay tool for developers. Self-host it in minutes, and have complete control over your customer data. Check our GitHub repo and join the thousands of developers in our community.
Initialising React Query
The official documentation describes React Query as the missing data-fetching library for React. Still, in more technical terms, it makes fetching, caching, synchronizing, and updating server state in your React applications a breeze. In simple terms, React Query is powerful asynchronous state management for React.
You first need to install the React Query library to get access to the React Query pagination feature. You can do this by running the following command:
npm i react-queryNext, navigate to the Posts.jsx file and import the useQuery hook from React Query.
import { useQuery } from 'react-query';For the best experience, use the useQuery hook and set the KeepPreviousData option to true. We can then access states like:
isPreviousData- This lets us know the data the query is currently providing.isLoading- This lets us know if the data to be fetched is loadingisError- This lets us know if an error existserror- returns the error objectdata- This is the result we get and display on each pageisFetching- This is the fetching status.
It should be noted that every useQuery state with the ‘is’ prefix produces a boolean value (true or false). Additionally, the UI is maintained via the KeepPreviousData option even though several queries are made and discarded for each page of data read.
The useQuery takes two parameters - the queryKey, and the queryFn. The queryKey is a pair of elements in an array. The first element depends on the URL; navigate to the axios.js file and find the line of code that reads const resp = await axiosRequest.get('/posts?_page=${pageParam}');, what comes before the question mark (?) which is /posts is the first element and the second is the page state. While the queryFn comprises calling the function to fetch data from the API and setting the keepPreviousData to true. The queryKey is what React Query utilizes to cache the data for each page, and the queryFn is used to fetch the data.
Let’s put the previous information into practice. Since we are now utilizing React Query to obtain the data, we will no longer use the ‘useEffect’ hook as we previously did. Additionally, since the “posts” array is no longer defined, we won’t be mapping through it; instead, we’ll be mapping through the data array that react-query produces.
This is what your Posts.jsx file should look like:
import "../App.css";
import { getPosts } from "../api/axios";
import { useState } from "react";
import { useQuery } from "react-query";

const Posts = () => {
  const [page, setPage] = useState(1);

  const { isLoading, isError, error, data, isFetching, isPreviousData } =
    useQuery({
      queryKey: ["/posts", page],
      queryFn: () => getPosts(page),
      keepPreviousData: true,
    });

  return (
    <div className="posts__section">
      <div className="pages__section">
        <button>prev</button>
        <button>1</button>
        <button>2</button>
        <button>3</button>
        <p>Page {page}</p>
        <button>4</button>
        <button>5</button>
        <p>...</p>
        <button>10</button>
        <button>Next</button>
      </div>

      <div className="blog__posts">
        <div className="posts">
          {data.map((post) => (
            <div className="post">
              <p>{post.id}</p>
              <p>{post.title}</p>
              <p>{post.body}</p>
            </div>
          ))}
        </div>
      </div>
    </div>
  );
};

export default Posts;
Fixing the No QueryClient Error
Finally, React-Query is all set. But there is one crucial piece missing. If you check your browser’s developer tools, you should see a warning in the Console -tab, which says No Queryclient declared.
Let’s fix that.
- First, reinstall React-Query with this command:
npm i @tanstack/react-queryNext, once you’ve reinstalled the library using the npm command above, you’ll also have to re-import the library into your React component by replacing this command:
import { useQuery } from 'react-query'With this command:
import {
  QueryClient,
  QueryClientProvider,
  useQuery,
} from "@tanstack/react-query";
We can now override the error we were getting because we have access to the QueryClient.
- Next, create a client.
It is advisable to create the queryClient outside of your component (Posts), so as not to get your cache (generated from the queryCache, which is embedded in the queryClient) thrown away whenever things like re-rendering occur in the component. This makes it referentially stable. Declare a ‘queryClient’ variable outside of your component to accomplish this:
//Create a Client
const queryClient = new QueryClient()
The next thing is to declare the QueryClient Provider, which creates a context to store the QueryClient and makes it accessible throughout the app.
Declare the Provider and export it as default using the following code:
const PostApp = () => {
  return (
    <QueryClientProvider client={queryClient}>
      <Posts />
    </QueryClientProvider>
  );
};

export default PostApp;
Navigate to your App.jsx file and import the Provider. Your code block in the App.jsx file should look like this:
import React from "react";
import "./App.css";
import PostApp from "./components/Posts";

function App() {
  return (
    <div className="app">
      <h1 className="app__header">Random Generated Posts.</h1>
      <PostApp />
    </div>
  );
}

export default App;
Implementing Pagination using the Query Result
The query result is returned by useQuery, and contains the information/states needed to use the data. Navigate to the Posts component (Posts.jsx) file; that’s where we would implement pagination.
We would first map through the data outside of the return block. Rendering of data will be based explicitly on the states/status react-query provides. We want to render data only when it isn’t in the loading/fetching state, and there aren’t any errors while fetching data. This can be done with the help of a control statement - the if, else if, and else statements.
Create a variable for mapping through the data:
const newFetch = (
  <div className="posts">
    {data.map((post) => (
      <div className="post">
        <p>{post.id}</p>
        <p>{post.title}</p>
        <p>{post.body}</p>
      </div>
    ))}
  </div>
);
Next, create a function that handles data rendering using control statements.
const isPostFetched = () => {
  if (isLoading || isFetching) {
    return (
      <p style={{ color: "white", fontSize: "30px", marginTop: "20px" }}>
        Loading Posts....
      </p>
    );
  } else if (isError) {
    return (
      <p style={{ color: "white", fontSize: "30px", marginTop: "20px" }}>
        The Error is: {error.message}
      </p>
    );
  } else {
    return newFetch;
  }
};
To determine what should be rendered on the webpage, we are just checking the status of the data in the code above. We first check if it is in the fetching or loading state, where it should display loading posts...., then we check whether there is an error; if so, we display the error message, and finally, if it is not in any of the aforementioned states, it should provide us with the actual data.
We can now call the isPostFetched function inside the return block to render data on the web page.
<div className="blog__posts">{isPostFetched()}</div>;The Button Functions
Be aware that the functions for the buttons would be hard coded because the API doesn’t return certain helpful information that would have allowed us to perform the task more efficiently. The functions are as follows:
const prevPage = () => setPage((prev) => prev - 1);
const pageOne = () => setPage(1);
const pageTwo = () => setPage(2);
const pageThree = () => setPage(3);
const pageFour = () => setPage(4);
const pageFive = () => setPage(5);
const pageTen = () => setPage(10);
const nextPage = () => setPage((next) => next + 1);
Next, update the div where the buttons are embedded to this:
<div className="pages__section">
  <button onClick={prevPage} disabled={isPreviousData || page === 1}>
    prev
  </button>
  <button onClick={pageOne}>1</button>
  <button onClick={pageTwo}>2</button>
  <button onClick={pageThree}>3</button>
  <p>Page {page}</p>
  <button onClick={pageFour}>4</button>
  <button onClick={pageFive}>5</button>
  <p>...</p>
  <button onClick={pageTen}>10</button>
  <button onClick={nextPage} disabled={isPreviousData || page === 10}>
    Next
  </button>
</div>;
The function for each button was activated in the div above using the onClick event. We also implemented a feature that would disable the prev button if we were on the first page and the next button if we were on the last page.
Navigate to the App.css file and add this code:
button: disabled {
  opacity: 0.5;
  cursor: not - allowed;
}
The style code above reduces the opacity of the button color when it is disabled.
Final Thoughts
The function that triggers each page button to display data was hard coded in this case because the API we used did not return the value of the total number of pages for us. When building an API for a webpage that uses pagination, be sure to return the following data: the current page, the amount of data that will be displayed on each page, the total amount of data being retrieved from the API, and the number of pages based on the formula: total data generated minus total data to be displayed on each page.
If these are provided, you can easily get the pages array:
const pgArray = Array(totalpages {number of pages})
  .fill()
  .map((_, id) => id + 1 {id + 1 because index are zero based});
Render the page buttons by referencing the PgButtons component.
{
  pgArray.map((pageNumber) => (
    <PgButtons
      key={pageNumber}
      pageNumber={pageNumber}
      setPage={setPage}
      isPreviousData={isPreviousData}
    />
  ));
}
Next, you can create a separate component to display the buttons to keep things clean. Pass the page number, the setPage, and isPreviousData as props.
const PgButtons = ({ pageNumber, setPage, isPreviousData }) => {
  return (
    <button onClick={() => setpage(pg)} disabled={isPreviousData}>
      {pageNumber}
    </button>
  );
};
That’s how the buttons should be implemented and not hard coded.
Overview of the Posts Component
If your application still has trouble rendering, check your code in the Posts.jsx file against the following:
import "../App.css";
import { getPosts } from "../api/axios";
import { useState } from "react";
// import { useQuery } from 'react-query';
import {
  QueryClient,
  QueryClientProvider,
  useQuery,
} from "@tanstack/react-query";

//Create a Client
const queryClient = new QueryClient();

const Posts = () => {
  const [page, setPage] = useState(1);

  const { isLoading, isError, error, data, isFetching, isPreviousData } =
    useQuery({
      queryKey: ["/posts", page], //used internally for refetching, caching, and sharing your queries throughout your application.
      queryFn: () => getPosts(page),
      keepPreviousData: true,
    });

  const newFetch = (
    <div className="posts">
      {data.map((post) => (
        <div className="post">
          <p>{post.id}</p>
          <p>{post.title}</p>
          <p>{post.body}</p>
        </div>
      ))}
    </div>
  );

  const isPostFetched = () => {
    if (isLoading || isFetching) {
      return (
        <p style={{ color: "white", fontSize: "30px", marginTop: "20px" }}>
          Loading Posts....
        </p>
      );
    } else if (isError) {
      return (
        <p style={{ color: "white", fontSize: "30px", marginTop: "20px" }}>
          The Error is: {error.message}
        </p>
      );
    } else {
      return newFetch;
    }
  };

  const prevPage = () => setPage((prev) => prev - 1);
  const pageOne = () => setPage(1);
  const pageTwo = () => setPage(2);
  const pageThree = () => setPage(3);
  const pageFour = () => setPage(4);
  const pageFive = () => setPage(5);
  const pageTen = () => setPage(10);
  const nextPage = () => setPage((next) => next + 1);

  return (
    <div className="posts__section">
      <div className="pages__section">
        <button onClick={prevPage} disabled={isPreviousData || page === 1}>
          prev
        </button>
        <button onClick={pageOne}>1</button>
        <button onClick={pageTwo}>2</button>
        <button onClick={pageThree}>3</button>
        <p>Page {page}</p>
        <button onClick={pageFour}>4</button>
        <button onClick={pageFive}>5</button>
        <p>...</p>
        <button onClick={pageTen}>10</button>
        <button onClick={nextPage} disabled={isPreviousData || page === 10}>
          Next
        </button>
      </div>

      <div className="blog__posts">{isPostFetched()}</div>
    </div>
  );
};

const PostApp = () => {
  return (
    <QueryClientProvider client={queryClient}>
      <Posts />
    </QueryClientProvider>
  );
};

export default PostApp;
Conclusion
In this article, we learned how to implement pagination using react-query. We learned about the perks of using react-query for handling pagination in our web apps.
A TIP FROM THE EDITOR: If you want infinite scrolling instead of paging, don’t miss Infinite Scrolling With React Query.
Gain Debugging Superpowers
Unleash the power of session replay to reproduce bugs and track user frustrations. Get complete visibility into your frontend with OpenReplay, the most advanced open-source session replay tool for developers.