

Forms continue to be a crucial component of web user interaction. When dealing with forms, we have to monitor user input, verify and report errors, and manage form submissions. Validating form input is essential to development, ensuring we receive only the required information from the form.
This article will review how input bindings work in Svelte, validating forms with Yup, and how the Svelte form library (svelte-forms-lib) makes managing forms simpler. We will also create a sample form and validate it with these tools to demonstrate our various options when building and validating forms in Svelte.
Input binding in Svelte
In this section, we’ll talk about input binding because there is a need to track and store the values of input fields as the user types. Svelte has two directives to do this: on:input and bind.
on:input
This is an event listener that is invoked anytime an input event occurs:
    <script>
      let email = "";
      const handleInput = (e) => {
        email = e.target.value;
      };
    </script>

    <input type="email" name="email" on:input={handleInput} />
    <p>{email}</p>
We define a handleInput and feed it to the email input box in the code above. The email variable is updated with the field’s value each time the user inputs.
bind:value
In Svelte, monitoring form data is easier to do with the bind directive:
<input type="email" name="email" bind:value={email} />This saves us from having to create a handleInput event and setting event.target.value for each input field on a particular form as the bind takes care of that for us, and each time we fill out an input, the email variable is updated.
In this article, we will monitor and store form values using the bind directive, as it is a simpler method of operation.
Validation with Yup
Yup is a JavaScript schema builder for value parsing and validation. It ensures that the information contained in an item is in the form and shape that we desire:
    import * as yup from 'yup';

    let values = {
        email: "",
        password: "",
        confirmPassword: "",
        country: "",
        checkbox: false,
    };

    const schema = yup.object().shape({
      email: yup.string().required("Email is required")
        .email("Email is invalid"),
      password: yup.string().required("Password is required"),
      confirmPassword: yup.string().required("Please confirm your password")
        .oneOf([yup.ref("password"), null], "Passwords do not match"),
      country: yup.string().required("Country is required"),
      checkbox: yup.bool().required("Checkbox must be accepted")
        .oneOf([true], "Checkbox must be accepted"),
    });

    const validationResult = schema
        .validate(values, { abortEarly: false })
        .then(() => {
          alert(JSON.stringify(values, null, 2));
        })
        .catch((err) => {
          console.log(err.errors);
        });

        //console.log message
        //[ "Email is invalid", "Passwords do not match", "Country is required", "Che//ckbox must be accepted" ]
We specify the look of the data for our form values in schema, which guarantees that the information delivered to the server is valid.
Yup’s validate function is used to validate objects. Any schema we define can call this method.
Creating and validating a profile form
This section covers creating and validating profile forms in Svelte since we now understand how form binding works and how Yup validates object values.
Setting up a profile form is as follows.
    <script>
      import schema from './schema';
      let values = {
        //store form data that will then be validated
      };

      const handleSubmit = () => {
        //validate the form and submit data
      };
    </script>

    <div class="container">
      <h1>Profile Form</h1>
      <form on:submit|preventDefault={handleSubmit}>
        <div>
          <input type="text" name="email" bind:value={values.email}
            placeholder="Email"
          />
        </div>
        <div>
          <input type="password" name="password" bind:value={values.password}
            placeholder="Password"
          />
        </div>
        <div>
          <input type="password" name="confirmPassword"
            bind:value={values.confirmPassword}
            placeholder="Confirm password"
          />
        </div>
        <div>
          <select name="country" bind:value={values.country}>
            <option value="">Select a country</option>
            <option value="England">England</option>
            <option value="USA">USA</option>
            <option value="France">France</option>
          </select>
        </div>
        <div>
          <label for="checkbox">Check this box</label>
          <input name="checkbox" type="checkbox" bind:checked={values.checkbox} />
        </div>
      </form>
</div> 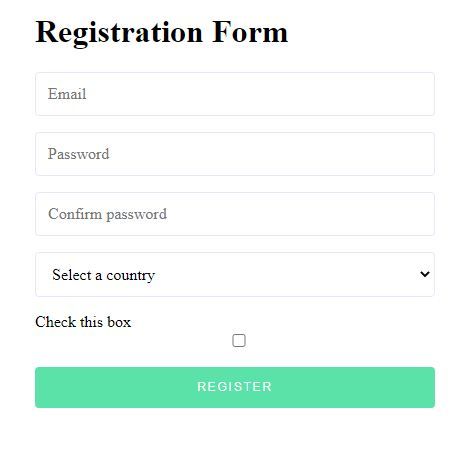
To collect user data, we begin by creating a straightforward profile form. We bind the form fields to a value object. This object is where we will store the data from the form.
Now we need to validate the profile form that we have created. This time, instead of logging the errors to the console, we want to display them to the user.
    <script>
      let errors = {};

      const handleSubmit = async () => {
        try {
          await schema.validate(values, { abortEarly: false });
          alert(JSON.stringify(values, null, 2));
          errors = {};
        } catch (err) {
          errors = err.inner.reduce((acc, err) => {
            return { ...acc, [err.path]: err.message };
          }, {});
        }
      };
    </script>
An errors object is created in this code block to store any error returned from the validate function. The handleSubmit function is an async function responsible for validating the form and handling its submission.
We pass the data to be validated to this procedure. Here, we will validate the values obtained from a form.
A second parameter, an options object, may be passed to validate. Validation by default exits on the first error. We must set abortEarly to false to receive all the errors returned.
If there are no errors, we display the form values. If there are, we display the errors. However, before we can display the errors, we must access them.
We iterate over Yup’s validation error.inner array to access the errors and return a new object with the fields’ error details. After that, we add the errors for each corresponding input field to the errors object.
    errors = err.inner.reduce((acc, err) => {
      return { ...acc, [err.path]: err.message };
    }, {});
Displaying Validation Error
We need to display the errors that hold the errors object, which contains the error for each input field:
    <div>
          <input type="email" />
          {#if errors.email}
            <span class="error">{errors.email}</span>
          {/if}
        </div>
        <div>
          <input type="password" />
          {#if errors.password}
            <span class="error">{errors.password}</span>
          {/if}
        </div>
        <div>
          <input type="password" />
          {#if errors.confirmPassword}
            <span class="error">{errors.confirmPassword}</span>
          {/if}
        </div>
        <div>
          <select name="country" bind:value={values.country}>
            <option value="">Select a country</option>
            <option value="England">England</option>
            <option value="USA">USA</option>
            <option value="France">France</option>
          </select>
          {#if errors.country}
            <span class="error">{errors.country}</span>
          {/if}
        </div>
        <div>
          <input name="checkbox" type="checkbox" bind:checked={values.checkbox} />
          {#if errors.checkbox}
            <span class="error">{errors.checkbox}</span>
          {/if}
        </div>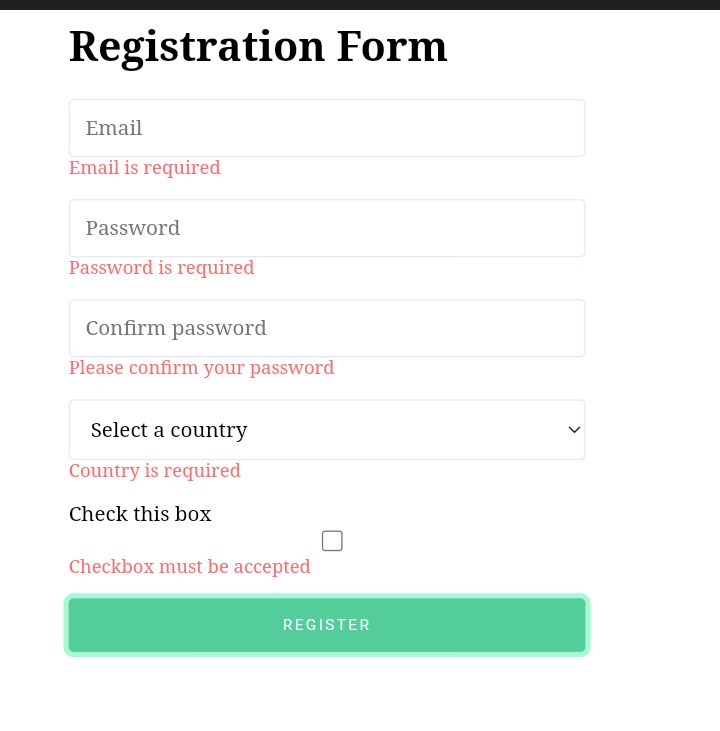
We set up an if block to handle the error display. We show an error for any particular field if it has one.
Session Replay for Developers
Uncover frustrations, understand bugs and fix slowdowns like never before with OpenReplay — an open-source session replay tool for developers. Self-host it in minutes, and have complete control over your customer data. Check our GitHub repo and join the thousands of developers in our community.
Validation with svelte-forms-lib
Svelte forms lib is a library designed after Formik that makes creating forms in Svelte projects simple. If you are new to SvelteJs, you can install svelte-forms-lib with npm i svelte-forms-lib.
Then import createForm function from svelte-forms-lib: Import { createForm } from "svelte-forms-lib";. This function is an important part of integrating svelte-forms-lib into a form.
The CreateForm provides us access to form helpers such as handleSubmit and handleChange, among others. To put up the form, we’ll need the following auxiliary functions:
<script>
import { createForm } from "svelte-forms-lib";
const { form, handleChange, handleSubmit } = createForm({
initialValues: {
email: "",
password: "",
confirmPassword: "",
country: "",
checkbox: "",
},
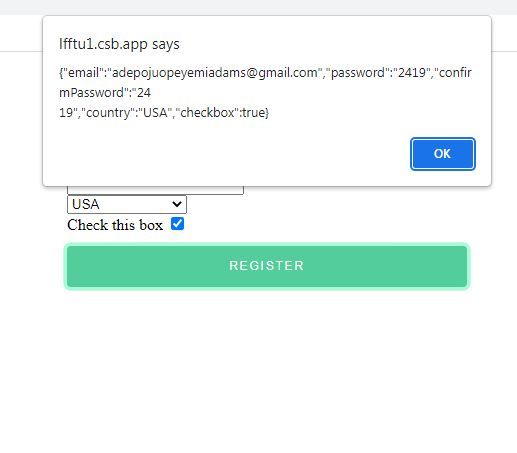
onSubmit: (values) => {
alert(JSON.stringify(values));
},
});
</script>
<div class="container">
<h1>Registration Form</h1>
<form on:submit|preventDefault={handleSubmit}>
<div>
<input
type="text"
name="email"
bind:value={$form.email}
placeholder="Email"
on:change={handleChange}
/>
</div>
<div>
<input
type="password"
name="password"
bind:value={$form.password}
placeholder="Password"
on:change={handleChange}
/>
</div>
<div>
<input
type="password"
name="confirmPassword"
bind:value={$form.confirmPassword}
placeholder="Confirm password"
on:change={handleChange}
/>
</div>
<div>
<select name="country" bind:value={$form.country} on:blur={handleChange}>
<option value="">Select a country</option>
<option value="England">England</option>
<option value="USA">USA</option>
<option value="France">France</option>
</select>
</div>
<div>
<label for="checkbox">Check this box</label>
<input
name="checkbox"
type="checkbox"
bind:checked={$form.checkbox}
on:change={handleChange}
/>
</div>
<div>
<button type="submit">Register</button>
</div>
</form>
</div>Svelte-forms-lib also offers observable values that notify us of the form’s current status in addition to utility functions. Working with forms and errors observables are the main topics of this article, although you can find the full list of observables here.
We feed createForm with a config object as an argument. In this, we specify the form’s InitialValue and onSubmit handler, which will manage form submission.
Once createForm is configured, we must connect the profile form to svelte-forms-lib so it can track the form values and manage submission.
We achieve this by providing the form element with the handleSubmit helper. Additionally, we pass the input fields with handleChange and bind their values to the form observable. This process completes the integration of svelte-forms-lib into a form.
Custom validation in svelte-forms-lib
Since we can now integrate svelte-forms-lib into a form, we now need to handle the form validation:
    <script>
      import { createForm } from "svelte-forms-lib";
      const { form, errors, handleChange, handleSubmit } = createForm({
        initialValues: {},
        validate: (values) => {
          let errors = {};
          if (!values.email) {
            errors.email = "Email is Required";
          } else if (!/^[^\s@]+@[^\s@]+\.[^\s@]+$/.test(values.email)) {
            errors.email = "Invalid emaill address";
          }
          if (!values.password) {
            errors["password"] = "password is required";
          }
          if (!values.confirmPassword) {
            errors["confirmPassword"] = "confirm password is required";
          } else if (values.confirmPassword !== values.password) {
            errors["confirmPassword"] = "password does not match";
          }
          if (!values.country) {
            errors["country"] = "country is required";
          }
          if (!values.checkbox) {
            errors.checkbox = "You must accept our terms";
          }
          return errors;
        },
        onSubmit: (values) => {
          alert(JSON.stringify(values));
        },
      });
    </script>
    <div class="container">
      <h1>Registration Form</h1>
      <form on:submit|preventDefault={handleSubmit}>
        <div>
          <input
            type="text"
            name="email"
            bind:value={$form.email}
            placeholder="Email"
            on:change={handleChange}
          />
          {#if $errors.email}
            <span class="error">{$errors.email}</span>
          {/if}
        </div>
        <div>
          <input
            type="password"
            name="password"
            bind:value={$form.password}
            placeholder="Password"
            on:change={handleChange}
          />
          {#if $errors.password}
            <span class="error">{$errors.password}</span>
          {/if}
        </div>
        <div>
          <input
            type="password"
            name="confirmPassword"
            bind:value={$form.confirmPassword}
            placeholder="Confirm password"
            on:change={handleChange}
          />
          {#if $errors.confirmPassword}
            <span class="error">{$errors.confirmPassword}</span>
          {/if}
        </div>
        <div>
          <select name="country" bind:value={$form.country} on:blur={handleChange}>
            <option value="">Select a country</option>
            <option value="England">England</option>
            <option value="USA">USA</option>
            <option value="France">France</option>
          </select>
          {#if $errors.country}
            <span class="error">{$errors.country}</span>
          {/if}
        </div>
        <div>
          <label for="checkbox">Check this box</label>
          <input
            name="checkbox"
            type="checkbox"
            bind:checked={$form.checkbox}
            on:change={handleChange}
          />
          {#if $errors.checkbox}
            <span class="error">{$errors.checkbox}</span>
          {/if}
        </div>
        <div>
          <button type="submit">Register</button>
        </div>
      </form>
    </div>
In addition to providing an initialValues object and an onSubmit function when configuring createForm, we can also include a validate callback to take care of form validation.
Here, we verify the status of each input field and update the errors object accordingly. We show errors in an if block whenever they occur in any input field.
Yup validation in svelte-forms-lib
While we may design a custom validation for our form, we can transfer that duty to Yup. We will be using the same schema validation object we just created:
<script>
import schema from "./schema";
import { createForm } from "svelte-forms-lib";
const { form, errors, handleChange, handleSubmit } = createForm({
initialValues: {
//initial values here
},
validationSchema: schema,
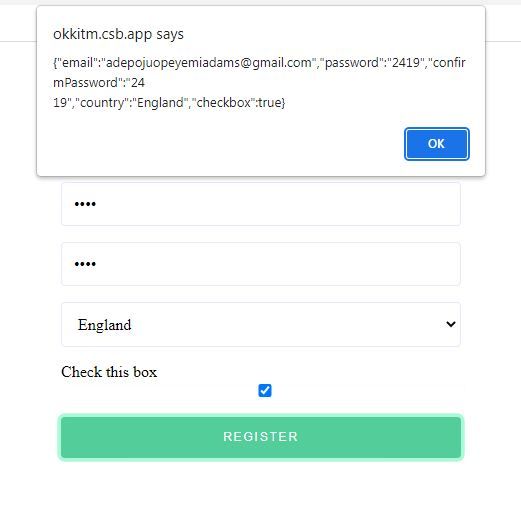
onSubmit: (values) => {
alert(JSON.stringify(values));
},
});
</script>
//full code belowYup validation is supported by Svelte-forms-lib using a validationSchema prop that accepts a schema object. We then pass the defined schema. Here is a Github link to the full code.
Custom form components in svelte-forms-lib
Here, we will look at the alternative on how to pass handlesubmit to a form, binding the field to their corresponding value and passing in handlechange to each field in svelte-forms-lib, which is better and less redundant to work with custom forms.
<script>
import { Form, Field, ErrorMessage, Select } from "svelte-forms-lib";
import schema from "./schema";
const formProps = {
initialValues: {},
validationSchema: schema,
onSubmit: (values) => {
alert(JSON.stringify(values));
},
};
</script>
<div class="container">
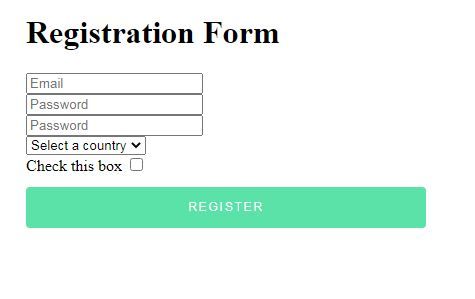
<h1>Registration Form</h1>
<Form {...formProps}>
<div>
<Field type="email" name="email" placeholder="Email" />
<ErrorMessage name="email" />
</div>
<div>
<Field type="password" name="password" placeholder="Password" />
<ErrorMessage name="password" />
</div>
<div>
<Field type="password" name="confirmPassword" placeholder="Password" />
<ErrorMessage name="confirmPassword" />
</div>
<div>
<Select name="country">
<option value="">Select a country</option>
<option value="England">England</option>
<option value="USA">USA</option>
<option value="France">France</option>
</Select>
<ErrorMessage name="country" />
</div>
<div>
<label for="checkbox">Check this box</label>
<Field type="checkbox" name="checkbox" />
<ErrorMessage name="checkbox" />
</div>
<div>
<button type="submit">Register</button>
</div>
</Form>
</div>
//full code belowIn this, we use the <Form/>, <Field/>, <Select/>, and <ErrorMessage/> components.
initialValues, onSubmit, and validationSchema are passed into <Form/> using the formProps variable we define. The name and type are necessary for <Field/> to work properly and render the appropriate input type.
If there is an error for the input field we wish to track, we send the input field’s name to ErrorMessage/>, and it will display the error if there is one. We no longer have to manually render the error.
Here is a Github link to the full code.
Conclusion
I hope this article has shown you how to validate in SvelteJS correctly. Customizing error messages and creating custom errors have also been covered. You can visit the official website and the GitHub repository to Svelte form library containing the examples used in the article to learn more about the library.
Gain Debugging Superpowers
Unleash the power of session replay to reproduce bugs and track user frustrations. Get complete visibility into your frontend with OpenReplay, the most advanced open-source session replay tool for developers.