Integrating Google Maps into Vue applications
Add Google Maps to your own Vue-based website

Google Maps is a powerful tool for displaying interactive maps and location-based services on the web. Imagine you’re creating a travel app that helps users plan trips. With Google Maps, you can display different routes and points of interest and allow users to zoom in and click on markers for a better experience. Integrating it into a Vue.js application can enhance the user experience and provide valuable geospatial features. This tutorial will explore the process of integrating Google Maps into your apps by using the popular Vue-google-maps library.

Discover how at OpenReplay.com.
Before fully diving into the tutorial, we should have the following requirements to follow along and complete the tutorial.
- Node.js and npm installed on your system.
- You will need a Google Maps account.
- You should be familiar with Vue.
Getting Google Map API Key
I assume you already have a Google Maps account. If you don’t have one, you can create a new account by following these steps.
- Login to the Google Cloud Console.
- Click on the
Select a Projectdrop-down menu and chooseNew Project.Name your project and clickCreate. - Navigate to
APIs & Services→Dashboardfrom the Cloud Console’s navigation menu. - Click the
+ ENABLE APIS AND SERVICESbutton. - Search for
Maps JavaScript APIand select it. - Click on the
Enablebutton to activate the API for your project. - Go back to the navigation menu and choose
APIs & Services→Credentials. - Click
Create Credentialsand selectAPI key. - Copy the generated Google API key and ensure its security. To access Google Maps services, you must add this key to your Vue.js application.
Vue-google-maps Installation
Vue-google-maps is a popular integration for Vue.js applications that enables seamless incorporation of Google Maps functionality. It offers a Vue component collection that simplifies implementing interactive maps, markers, and geolocation-based features within Vue applications.
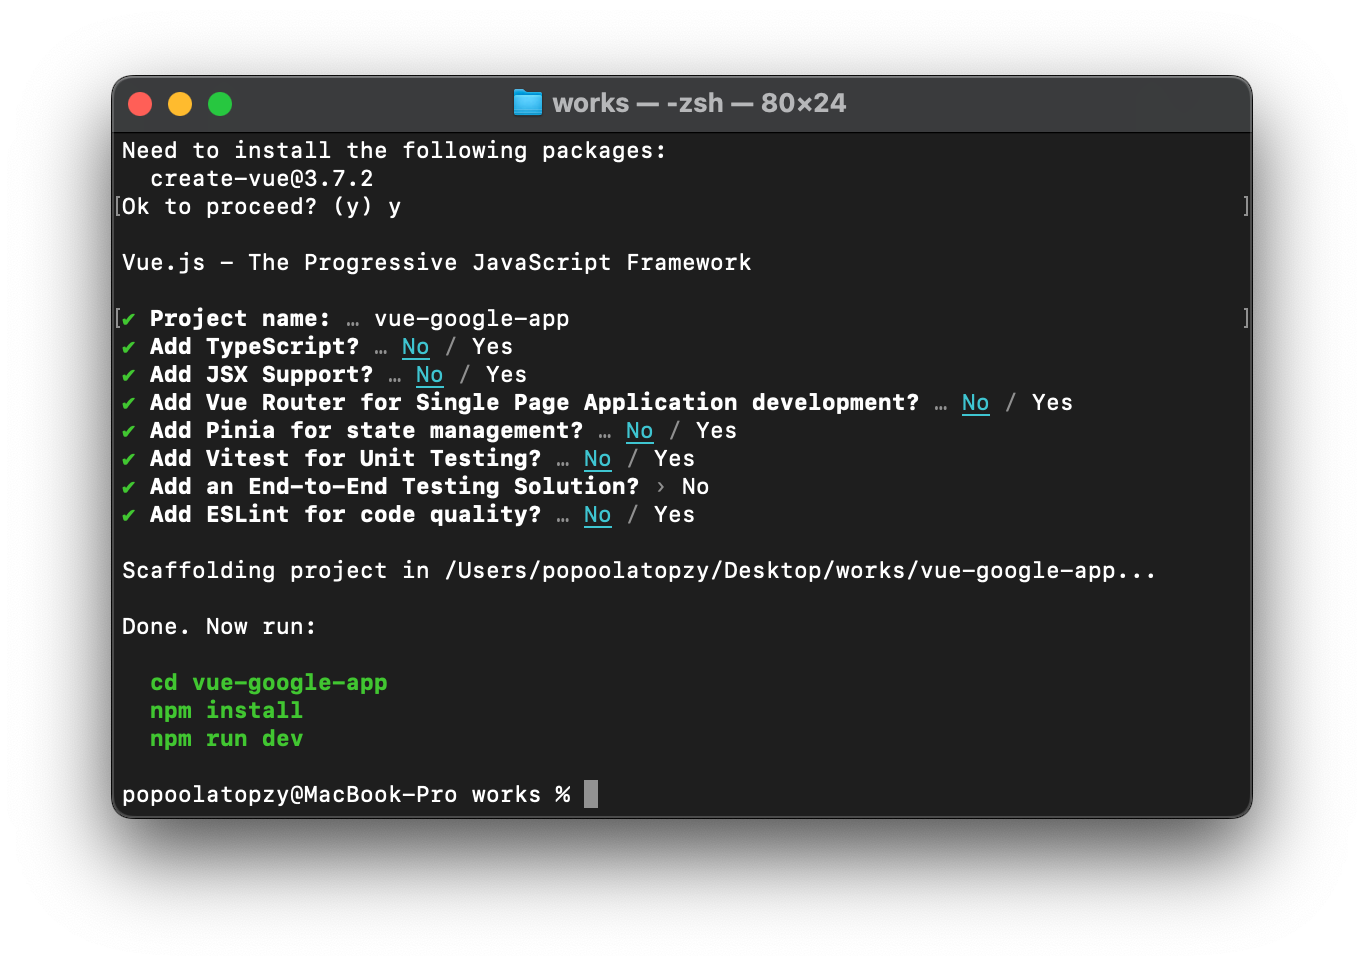
Before installing vue-google-maps, let’s create a new Vue project. To do so, open your terminal and execute the following command:
npm create vue@latestFollow the instructions provided by the prompt to create a new Vue project, as shown in the image below.
Next, we will install the vue-google-maps package into the application by running the following command:
npm install -S @fawmi/vue-google-mapsVue-google-maps Configuration
After installing the library, you must configure it to use your Google Maps API key. In your Vue project, open the main.js file and add the following code:
import { createApp } from "vue";
import VueGoogleMaps from "@fawmi/vue-google-maps";
import App from "./App.vue";
import "./assets/main.css";
const app = createApp(App);
app.use(VueGoogleMaps, {
  load: {
    key: 'YOUR_GOOGLE_MAPS_API_KEY,
  },
 })
 .mount("#app");
Replace YOUR_GOOGLE_MAPS_API_KEY with the API key you obtained earlier and save the code.
At this stage, if you reload the application, an import issue will occur. Add the following configuration to your vite.config.js file to resolve this error.
import { fileURLToPath, URL } from "node:url";
import { defineConfig } from "vite";
import vue from "@vitejs/plugin-vue";
// https://vitejs.dev/config/
export default defineConfig({
 plugins: [vue()],
 resolve: {
  alias: {
   "@": fileURLToPath(new URL("./src", import.meta.url)),
  },
 },
 optimizeDeps: {
  include: ["@fawmi/vue-google-maps", "fast-deep-equal"],
 },
});
Displaying a map View
Now that the library is set up, let’s create a Vue component to display the Google Map. In your Vue project, open the App.vue file. In it, we use the GMapMap component to display a map in our application. To achieve this, replace the existing code with the following:
<template>
<GMapMap
:center="center"
:zoom="7"
map-type-id="terrain"
style="width: 1000px; height: 800px"
>
</GMapMap>
</template>
<script>
export default {
name: "App",
data() {
return {
center: { lat: 51.093048, lng: 6.84212 },
};
},
};
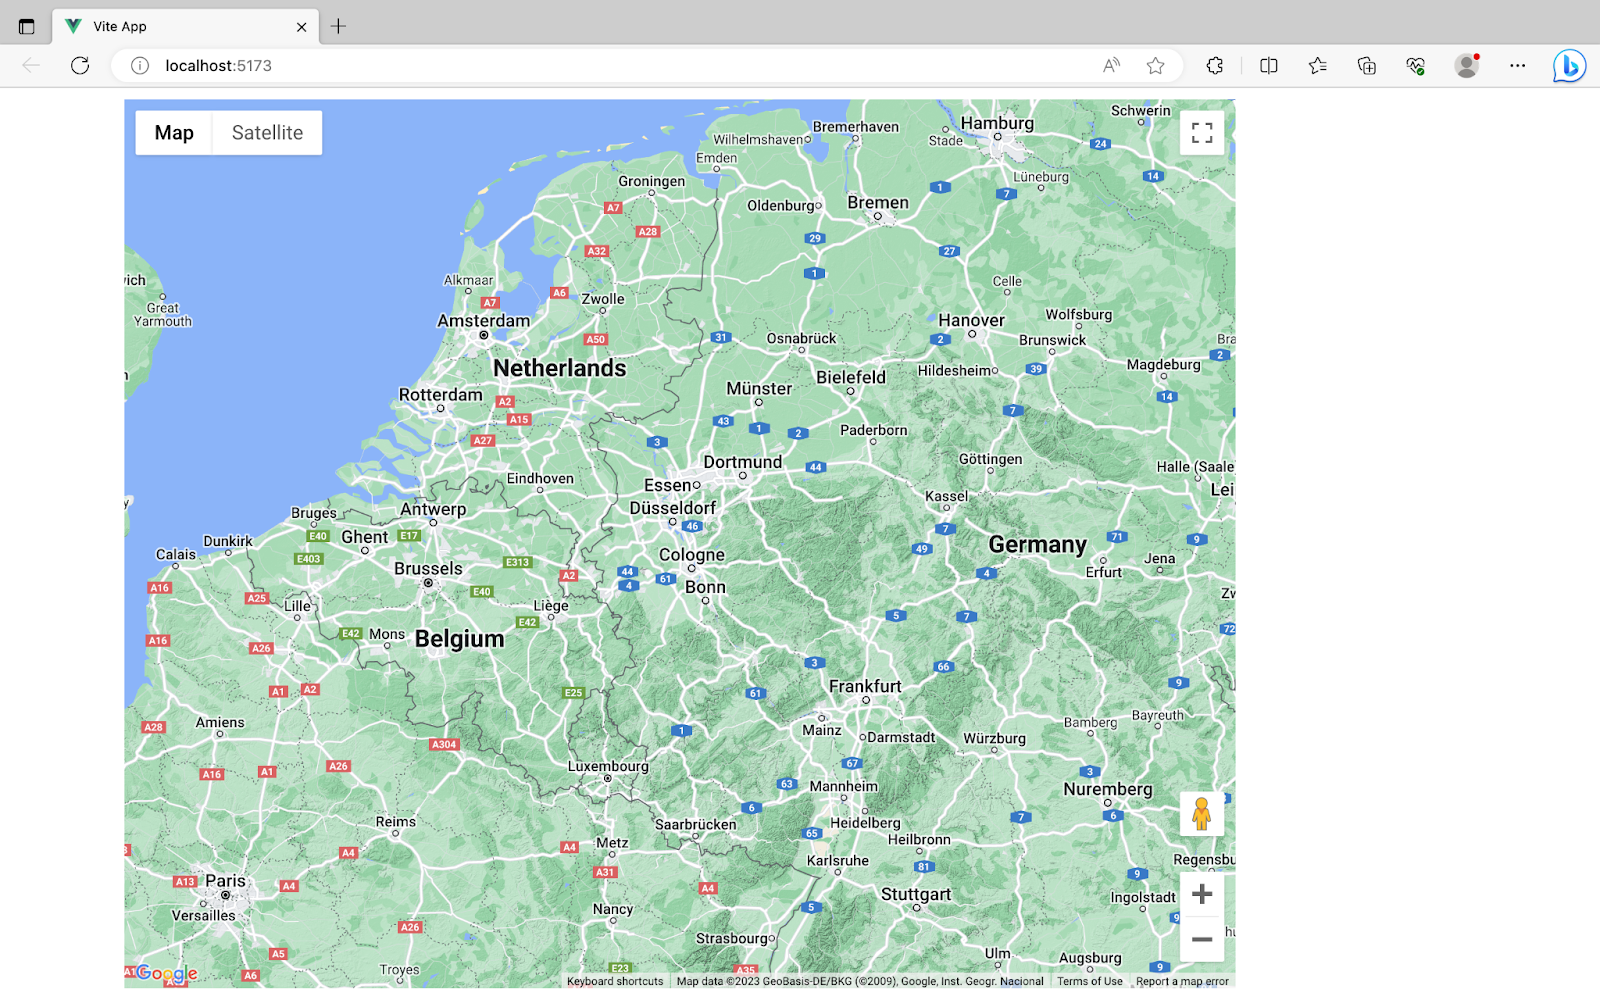
</script>From the above code, we have the following:
- The
GMapMapcomponent displays the Google Map within the template section. - The
:centerprop is used to set thecenterposition of the map. In this case, it’s set to latitude51.093048and longitude6.842120. - The
:zoomprop sets the initial zoom level of the map to 7. - The
map-type-idprop defines the type of map to display. Here, theterraintype is used. Now, start the application usingnpm run dev. You should see the map displayed in the application, as shown in the image below.
Getting current user location - Map Marker
We can also obtain the current location of a user using the Geolocation API, which will prompt the user to allow the application to access their location. Then, we can add a marker to the user’s location on the map to indicate their position. To achieve this, replace the code in app.vue with the following code.
<template>
<GMapMap
:center="center"
:zoom="zoom"
map-type-id="terrain"
style="width: 1000px; height: 800px"
>
<GMapMarker
:key="marker.id"
v-for="marker in markers"
:position="marker.position"
/>
</GMapMap>
</template>
<script>
export default {
name: "App",
data() {
return {
center: { lat: 6.465422, lng: 3.406448 },
zoom: 7,
markers: [
{
id: "user-marker",
position: {
lat: position.coords.latitude,
lng: position.coords.longitude,
},
},
],
};
},
methods: {
geolocate: function () {
navigator.geolocation.getCurrentPosition((position) => {
this.center = {
lat: position.coords.latitude,
lng: position.coords.longitude,
};
this.markers.push({
id: "user-marker",
position: {
lat: position.coords.latitude,
lng: position.coords.longitude,
},
});
});
},
},
mounted() {
this.geolocate();
},
};
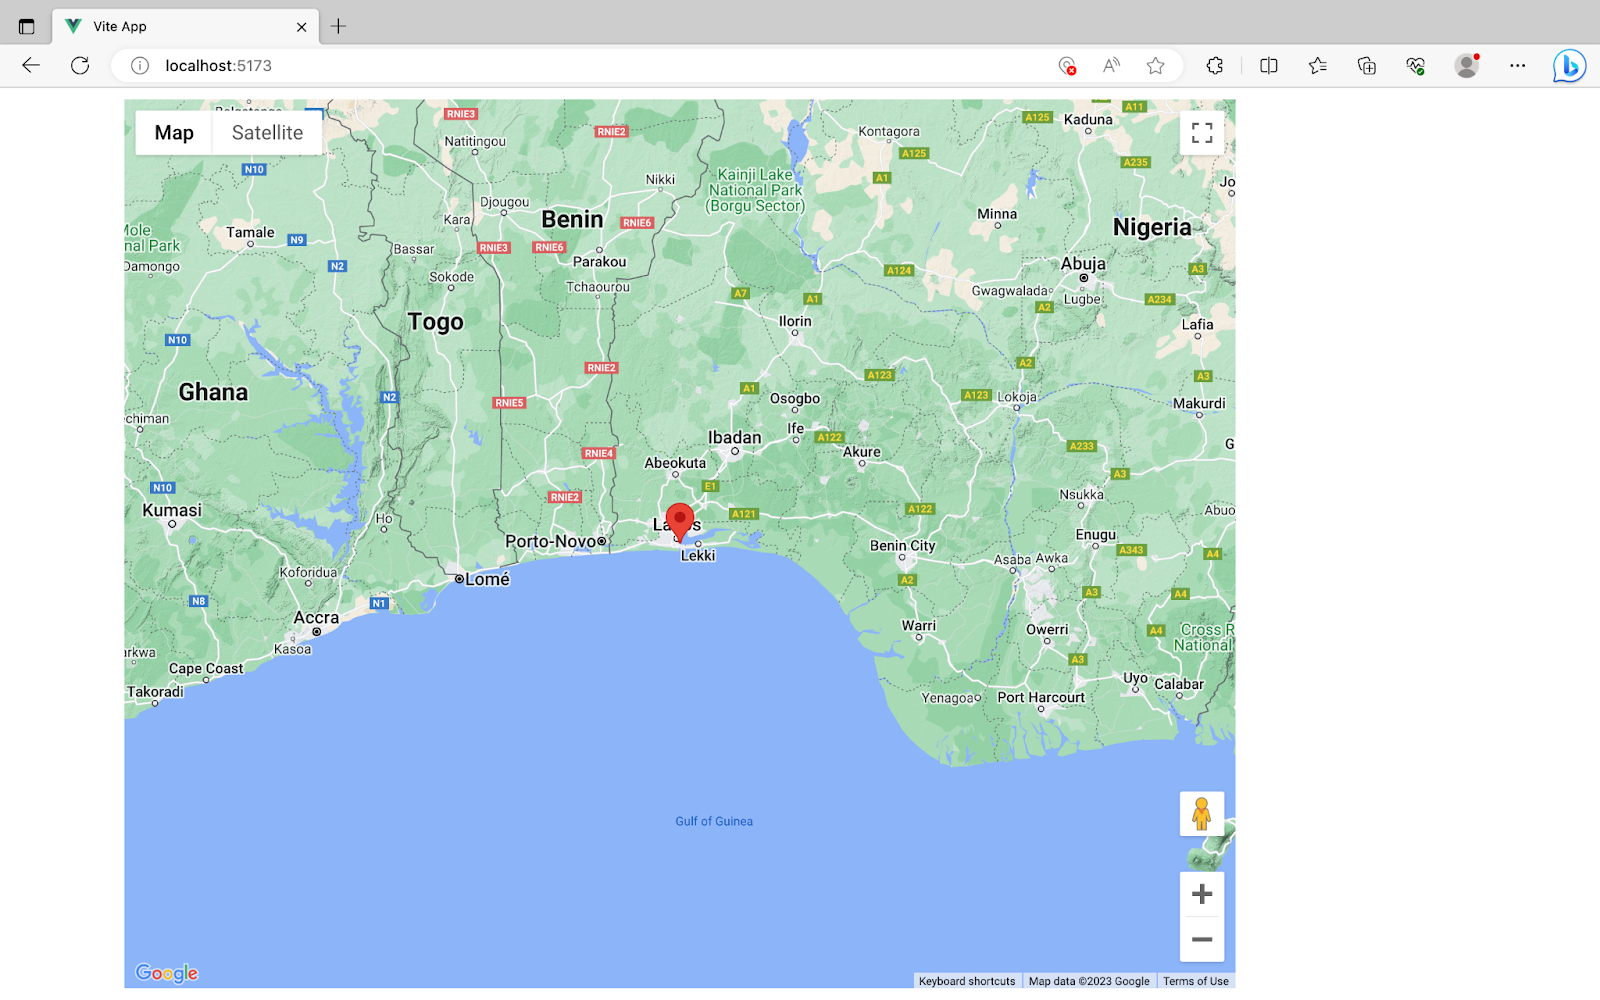
</script>In the code above, we wrap the GMapMarker within the GMapMap component, which contains all the props used for the marker indicator. Then, we utilize getCurrentPosition method from the Geolocation API to retrieve the user’s location coordinates and update them within the GMapMarker component.
Refresh the application; this will add a map marker to the user’s current location, as shown in the image below:
Using Location Search
Now, let’s implement a location search feature allowing users to search for places and display them on the map. Before adding location search features into our vue application, we must first place libraries to vite.config.js. Using the code below:
//...
load: {
key: 'YOUR_GOOGLE_MAPS_API_KEY',
libraries: "places"
},
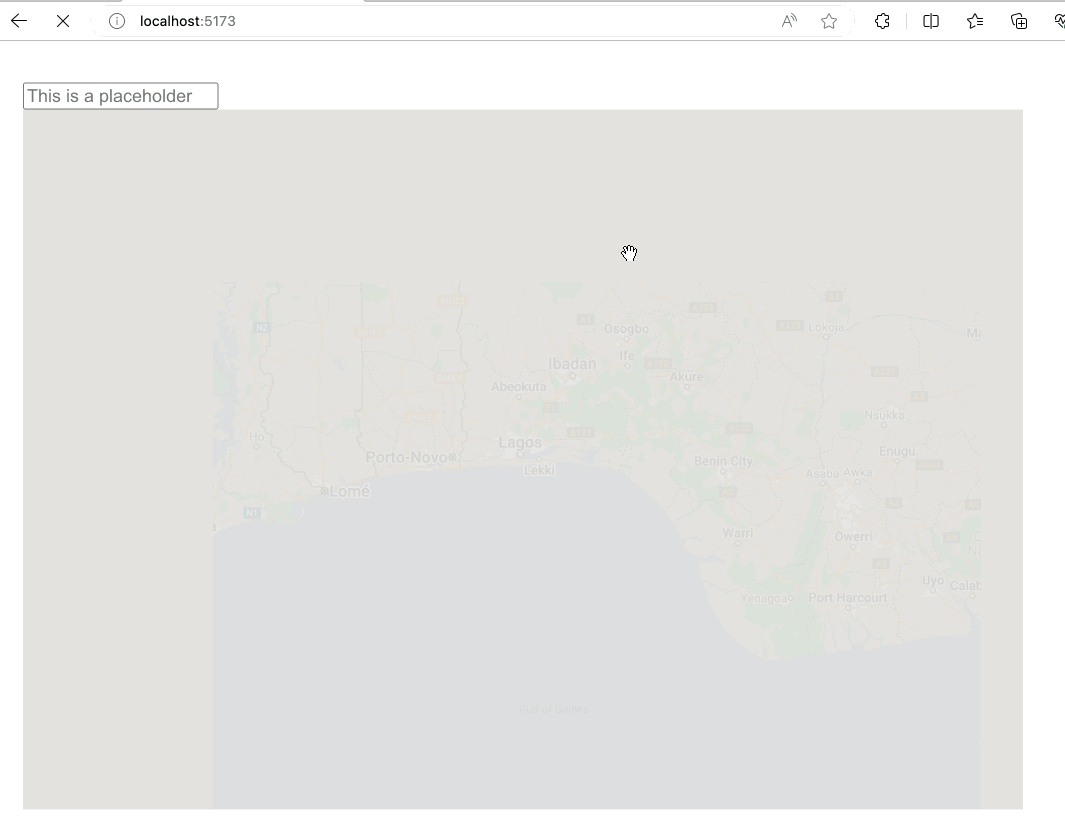
//...Next, we will use the GMapAutocomplete component to add location searches to the vue application. To achieve this, update the app.vue code with the following code.
<template>
 <div>
  <GMapAutocomplete
   placeholder="This is a placeholder"
   @place_changed="setPlace"
   style="font-size: large"
  ></GMapAutocomplete>
  <GMapMap
   :center="mapCenter"
   :zoom="mapZoom"
   style="width: 1000px; height: 700px"
  >
   <GMapMarker :position="markerPosition" />
  </GMapMap>
 </div>
</template>
<script>
 export default {
  name: "App",
  data() {
   return {
    mapCenter: { lat: 6.465422, lng: 3.406448 }, // Initial center
    mapZoom: 7, // Initial zoom level
    markerPosition: null, // Marker position will be set based on searched location
   };
  },
  methods: {
   setPlace(place) {
    this.markerPosition = {
     lat: place.geometry.location.lat(),
     lng: place.geometry.location.lng(),
    };
    this.mapCenter = {
     lat: place.geometry.location.lat(),
     lng: place.geometry.location.lng(),
    };
   },
  },
 };
</script>
In the code above, we added an input field where users can easily search for places and then display the location on the map by indicating the selected place with a map marker. The code will produce the result below, as shown in the image.
Conclusion
You have successfully integrated Google Maps into your Vue.js application using the Vue-google-maps library. You now have a map view with location markers and the ability to search for locations. Feel free to further enhance your application with additional features such as custom markers, directions, or geolocation-based services. Remember to adhere to Google Maps API usage policies and consider implementing additional security measures when utilizing location-based services in your application. Happy mapping!
Gain control over your UX
See how users are using your site as if you were sitting next to them, learn and iterate faster with OpenReplay — the open-source session replay tool for developers. Self-host it in minutes, and have complete control over your customer data.
Star on GitHub12k