

Several methods exist for user account verification, such as sending a verification OTP (One-Time Password) via email, SMS, or a phone call. Each verification method helps improve the application user experience and provides security to the user’s account. This article will show you how to add Voice OTP to your React Native app.

Spot abnormal user behaviors and iron out the bugs early with OpenReplay. Dive into session replays and reinforce your front-end against vulnerabilities that hackers search for.
Discover how at OpenReplay.com.
OTP (One-Time Password) verification is a security measure used to authenticate users during online transactions, account logins, or other sensitive activities. It works by generating a unique password that is sent to the user’s registered mobile number or email address. This password is only valid for a single use or for a limited period, hence the name one-time password.
In this article, you will learn how to integrate Voice OTP into your React Native application using Twilio Programmable Voice.
To complete this tutorial, you need the following:
- Node.js and Expo CLI installed
- Basic knowledge of using React Native
- Xcode or Android Studio installed
- Access to MySQL database
- A Twilio account with an active Twilio phone number. You can register for a Twilio trial account.
What is Voice Call OTP?
Voice call OTP is a form of two-factor authentication where a user receives a one-time password via a voice call. It provides additional security for the user authentication process, making it less vulnerable to various cyber threats.
Voice call OTP can be integrated during user registration and login, account activation, payment confirmation, etc., as an alternative to the normal email and SMS methods of sending OTP.
What is Twilio?
Twilio is a cloud communications platform that provides a set of APIs (Application Programming Interfaces) and services for building communication-related applications.
Developers use Twilio to integrate voice, messaging, and video capabilities into their software applications, allowing them to create diverse communication experiences.
Setting up
Let’s set up our project.
Creating the Database
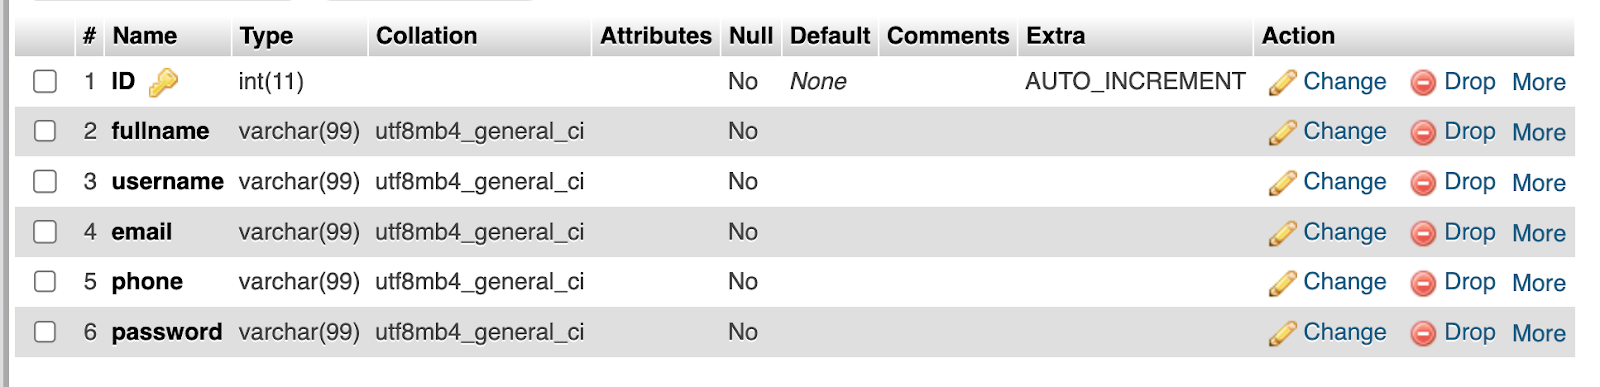
Now, you need to create the database and its table properties. To do so, log in to your MySQL server, create a new database named userinfo, and then create a table named registered_user. Add the following fields to the table, as shown in the screenshot below.
Creating a New Node Project
For this tutorial, we will create a Node API to add backend functionality to our mobile application authentication system. Create a new Node project by running the command below:
npm init -yAfter running the command above, open the project folder in your preferred code editor.
Installing Other Dependencies
You need to install the necessary packages, such as MySQL to establish the database connection, Express to create the endpoint server, and body-parser to handle incoming request bodies. Run the following commands to install the dependencies.
npm install express mysql body-parserGetting Twilio API Credentials
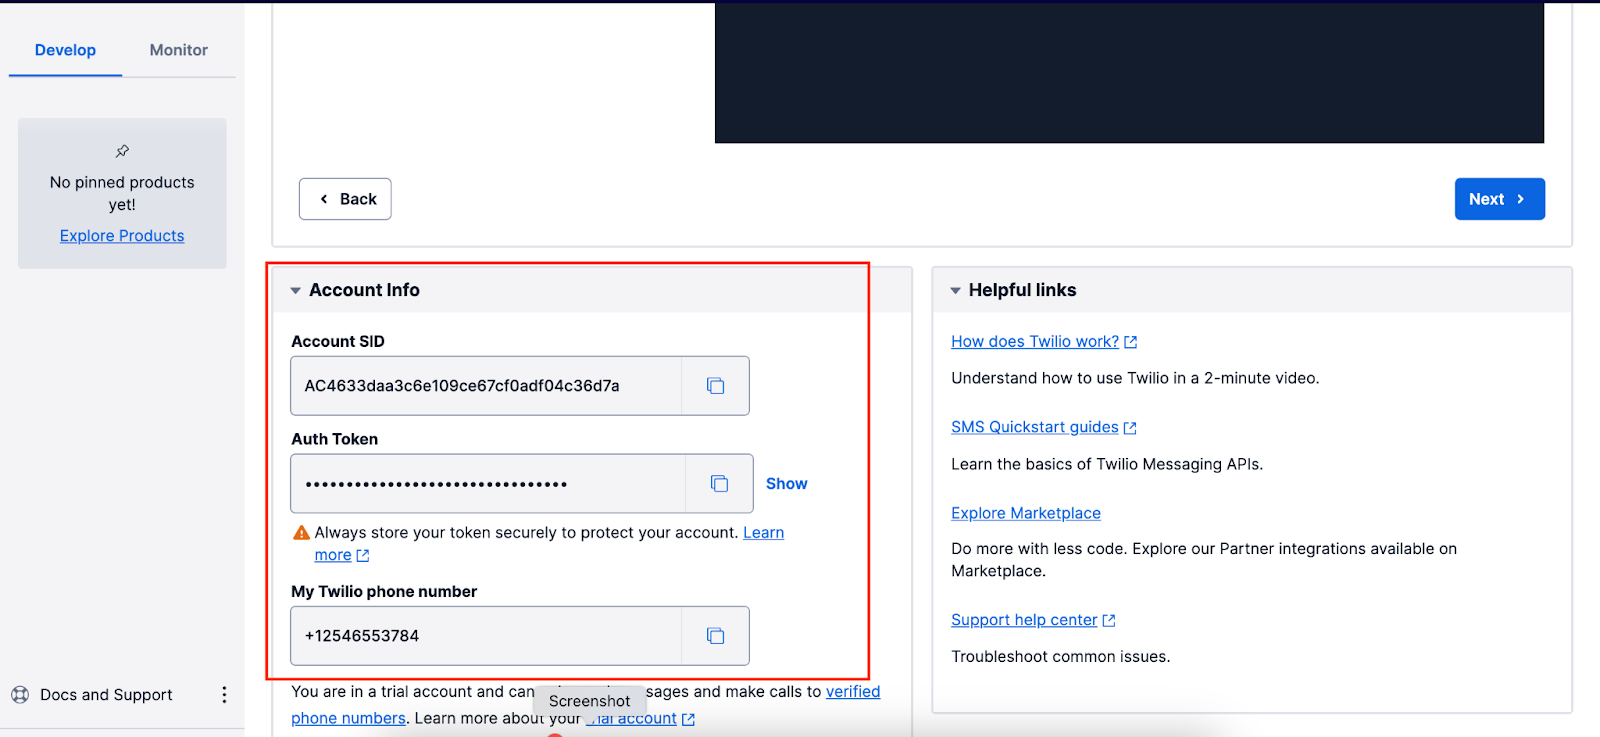
To obtain your Twilio Account SID, Auth Token, and Twilio phone number, either register a new account or log in to your dashboard page. Copy all the keys as shown in the screenshot below:
Storing the API Keys as Environment Variables
To ensure that the API keys are secure, you need to store the keys in the environment variables. To use the environment variables, install dotenv using the command below:
npm install dotenvNext, in the project’s root folder, we must create a .env file and add the following environment variables.
TWILIO_SID = "twilio_sid"
TWILIO_TOKEN = "twilio_token"
TWILIO_PHONE_NUMBER = "twilio_phone_no"
From the code above, replace TWILIO_SID, TWILIO_TOKEN, and TWILIO_PHONE_NUMBER with your actual Twilio values.
Creating the Application Endpoints
Now, let’s create the API endpoints that will handle the actual functionality of the mobile application, such as connecting to the database, interacting with the Twilio Programmable Voice API, and validating and fetching user information.
Registration Endpoint
Let’s create a registration endpoint that will handle the user registration functionality, validate the user details, and store them in the database. To do so, create app.js in the project folder.
Next, we need to establish a connection to the database and create the registering endpoint by adding the following code to app.js.
const express = require("express");
const mysql = require("mysql2");
const bodyParser = require("body-parser");
const twilio = require("twilio");
const app = express();
app.use(bodyParser.json());
const pool = mysql.createPool({
  host: "localhost",
  user: "db_usernam",
  password: "db_password",
  database: "userinfo",
  waitForConnections: true,
  connectionLimit: 10,
  queueLimit: 0,
});
const twilioAccountSid = process.env.TWILIO_SID;
const twilioAuthToken = process.env.TWILIO_TOKEN;
const twilioPhoneNumber = process.env.TWILIO_PHONE_NUMBER;
// Registration Endpoint
app.post("/register", (req, res) => {
  const { fullname, username, email, phone, password } = req.body;
  if (!fullname || !username || !email || !phone || !password) {
    return res.status(400).json({ error: "All parameters are required." });
  }
  pool.query(
    "SELECT * FROM users WHERE username = ?",
    [username],
    (selectError, selectResults) => {
      if (selectError) {
        return res
          .status(500)
          .json({ error: "Error checking username availability." });
      }
      if (selectResults.length > 0) {
        return res.status(409).json({ error: "Username already in use." });
      }
      pool.query(
        "INSERT INTO users (fullname, username, email, phone, password) VALUES (?, ?, ?, ?, ?)",
        [fullname, username, email, phone, password],
        (insertError, insertResults) => {
          if (insertError) {
            return res.status(500).json({ error: "Error registering user." });
          }
          return res
            .status(201)
            .json({ message: "User registered successfully." });
        },
      );
    },
  );
});
const port = 3000;
app.listen(port, () => {
  console.log(`Server is running on port ${port}`);
});
In the above code, we:
- Import all the necessary packages and establish the connection to the MySQL database (replace
db_usernameanddb_passwordwith your actual MySQL database values). - Retrieve the Twilio access tokens from the environment variable.
- Then we create the
registerendpoint (http://localhost:3000/register) using a POST method to validate user details and store them in the database.
Login Endpoint
Next, create the login endpoint that accepts a username and password as a POST request and checks whether the user login details are correct. Add the following code to app.js to create the login endpoint.
// Login Endpoint
app.post("/login", (req, res) => {
  const { username, password } = req.query;
  if (!username || !password) {
    return res
      .status(400)
      .json({ error: "Username and password are required." });
  }
  conn.query(
    "SELECT * FROM user WHERE username = ? AND password = ?",
    [username, password],
    (error, results) => {
      if (error) {
        return res.status(500).json({ error: "Error during login." });
      }
      if (results.length === 0) {
        return res.status(401).json({ error: "Invalid username or password." });
      }
      return res
        .status(200)
        .json({ results, message: "Login successful.", status: "success" });
    },
  );
});
In the code above, we created a login endpoint (http://localhost:3000/login) using the POST method and returned the user details if the username and password were correct.
OTP Endpoint
Now, let’s create the last endpoint called OTP, which generates a random OTP code, connects to the Twilio API to place a phone call, and delivers the OTP to the user whenever a request is made to the OTP endpoint. To create the OTP endpoint, add the following code to app.js.
// OTP Endpoint
app.post("/otp", (req, res) => {
  const { phoneNumber } = req.query;
  const formattedPhoneNumber = `+${phoneNumber}`;
  const otp = Math.floor(100000 + Math.random() * 900000);
  const twilioClient = twilio(twilioAccountSid, twilioAuthToken);
  const twiml = `
    <Response>
      <Say>Your OTP is ${otp}</Say>
    </Response>
  `;
  twilioClient.calls
    .create({
      twiml: twiml,
      to: formattedPhoneNumber,
      from: twilioPhoneNumber,
    })
    .then((call) => {
      return res
        .status(200)
        .json({
          message: "OTP sent successfully as a voice call.",
          otp,
          status: "success",
        });
    })
    .catch((error) => {
      console.error(error);
      return res
        .status(500)
        .json({ error: "Error sending OTP as a voice call." });
    });
});
In the code above, we:
- The http://localhost:3000/otp endpoint is established as a POST request handler, responsible for generating a random OTP code and delivering it to the specified phone number via a Twilio voice call.
- A Twilio client instance is initialized using the Twilio access token.
- The Twilio client’s `calls.create()“ method is utilized to initiate a voice call and deliver the OTP code using TwiML markup language, containing the randomly generated code.
- If successful, a JSON response confirms the OTP has been sent as a voice call; otherwise, an error message is returned in case of failure.
Now that you have successfully created the application backend let’s proceed to the application frontend and integrate the login verification OTP.
Settings up the React Native application
In this section, we will create a new native project, configure screen navigation using react-navigation, and implement the voice call OTP.
Creating a New Project
Let’s create a new React native project. To do that, on your terminal, navigate to the directory you wish to create the project and run the code below:
npx create-expo-app VerificationProject
cd VerificationProject
npx expo start
Installing react-navigation
Now, we need to use react-navigation to navigate between screens in the application. To install react-navigation, run the command below:
npm install @react-navigation/native @react-navigation/stackDefining the Screen Navigations
Our application should be able to allow users to navigate through the login, registration, OTP, and profile screens. Add the following code to the app.js file to navigate between screens.
// App.js
import React from "react";
import { NavigationContainer } from "@react-navigation/native";
import { createStackNavigator } from "@react-navigation/stack";
import HomeScreen from "./components/HomeScreen";
import LoginScreen from "./components/LoginScreen";
import LoginOTPScreen from "./components/LoginOTPScreen";
import RegisterScreen from "./components/RegisterScreen";
import UserProfileScreen from "./components/UserProfileScreen";
const Stack = createStackNavigator();
const App = () => {
  return (
    <NavigationContainer>
      <Stack.Navigator initialRouteName="Home">
        <Stack.Screen
          name="Home"
          options={{ headerShown: false }}
          component={HomeScreen}
        />
        <Stack.Screen
          name="Login"
          options={{ headerShown: false }}
          component={LoginScreen}
        />
        <Stack.Screen
          name="LoginOTP"
          options={{ headerShown: false }}
          component={LoginOTPScreen}
        />
        <Stack.Screen
          name="Register"
          options={{ headerShown: false }}
          component={RegisterScreen}
        />
        <Stack.Screen
          name="UserProfile"
          options={{ headerShown: false }}
          component={UserProfileScreen}
        />
      </Stack.Navigator>
    </NavigationContainer>
  );
};
export default App;
In the code above:
- All the necessary libraries and application screen components are imported.
- React Navigation is then used to define the application screen navigations.
Creating the Home Screen
Now, let’s create the application home screen where users can navigate to the login or register screen. To do that, create a new folder named components from the application root directory. Inside the components folder, create a HomeScreen.js file and add the following code.
// HomeScreen.js
import React from "react";
import { View, Text, Button, StyleSheet } from "react-native";
import { StatusBar } from "expo-status-bar";
const HomeScreen = ({ navigation }) => {
return (
<View style={styles.container}>
<StatusBar style="auto" />
<Text style={styles.title}>Hey👋, Welcome</Text>
<View style={styles.buttonContainer}>
<Button
title="Login"
onPress={() => navigation.navigate("Login")}
style={styles.button}
/>
</View>
<View style={styles.buttonContainer}>
<Button
title="Register"
onPress={() => navigation.navigate("Register")}
style={styles.button}
/>
</View>
</View>
);
};
const styles = StyleSheet.create({
container: {
flex: 1,
justifyContent: "center",
alignItems: "center",
backgroundColor: "#f0f0f0",
paddingTop: 40,
},
});
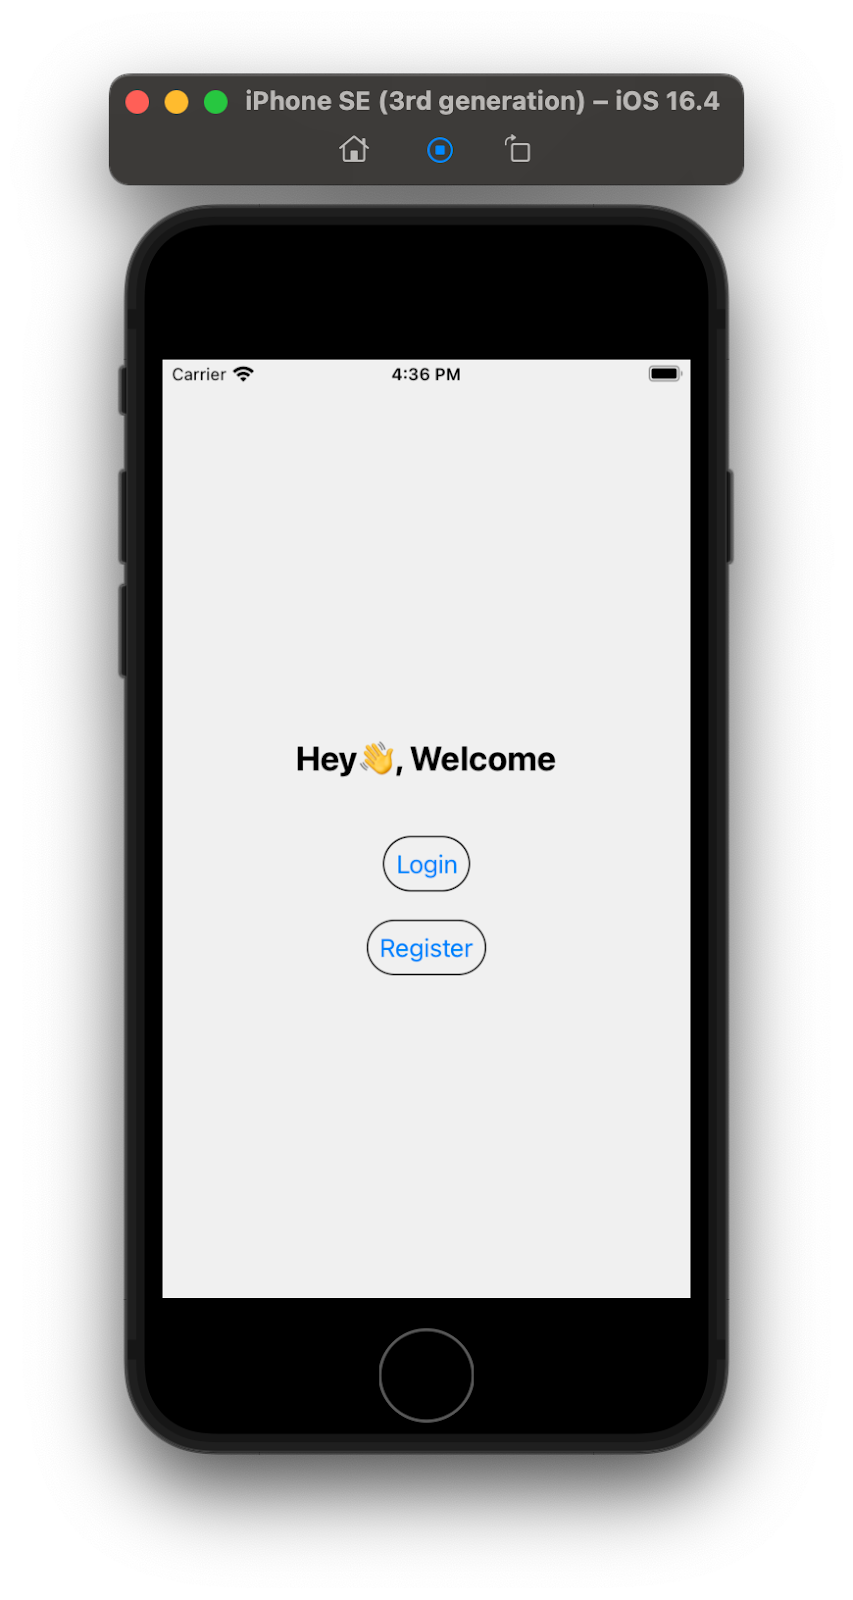
export default HomeScreen;In the code above, we create a simple welcome screen that contains a login and register button to navigate to the authentication screen.
Save the code above and check your simulator; you should have the following output, as shown in the image below.
Creating the Registration Screen
Let’s create the Registration Screen allowing users to create new accounts by connecting to the Node API endpoint we created for the application backend. To do so, inside the components, create the RegisterScreen.js file and add the following code:
// RegisterScreen.js
import React, { useState } from "react";
import { View, Text, TextInput, Button, StyleSheet } from "react-native";
import { StatusBar } from "expo-status-bar";
const RegisterScreen = ({ navigation }) => {
const [fullname, setFullname] = useState("");
const [username, setUsername] = useState("");
const [email, setEmail] = useState("");
const [phone, setPhone] = useState("");
const [password, setPassword] = useState("");
const [successMessage, setSuccessMessage] = useState("");
const handleRegister = async () => {
try {
const response = await fetch(
`http://localhost:3000/register?fullname=${fullname}&username=${username}&email=${email}&phone=${phone}&password=${password}`,
);
const data = await response.json();
if (response.ok) {
setSuccessMessage(data.message || "User registered successfully.");
} else {
setSuccessMessage(
data.message || "Registration failed. Please try again.",
);
}
} catch (error) {
setSuccessMessage("An error occurred. Please try again later.");
}
};
return (
<View style={styles.container}>
<Text style={styles.title}>Register Screen</Text>
{successMessage ? (
<Text style={styles.successMessage}>{successMessage}</Text>
) : null}
<TextInput
style={styles.input}
placeholder="Fullname"
value={fullname}
onChangeText={(text) => setFullname(text)}
/>
<TextInput
style={styles.input}
placeholder="Username"
value={username}
onChangeText={(text) => setUsername(text)}
/>
<TextInput
style={styles.input}
placeholder="Email"
value={email}
onChangeText={(text) => setEmail(text)}
/>
<TextInput
style={styles.input}
placeholder="Phone"
value={phone}
onChangeText={(text) => setPhone(text)}
/>
<TextInput
style={styles.input}
placeholder="Password"
secureTextEntry
value={password}
onChangeText={(text) => setPassword(text)}
/>
<Button title="Register" onPress={handleRegister} />
<Button title="Go back" onPress={() => navigation.goBack()} />
<StatusBar style="auto" />
</View>
);
};
const styles = StyleSheet.create({
container: {
flex: 1,
justifyContent: "center",
alignItems: "center",
backgroundColor: "#f0f0f0",
padding: 20,
},
});
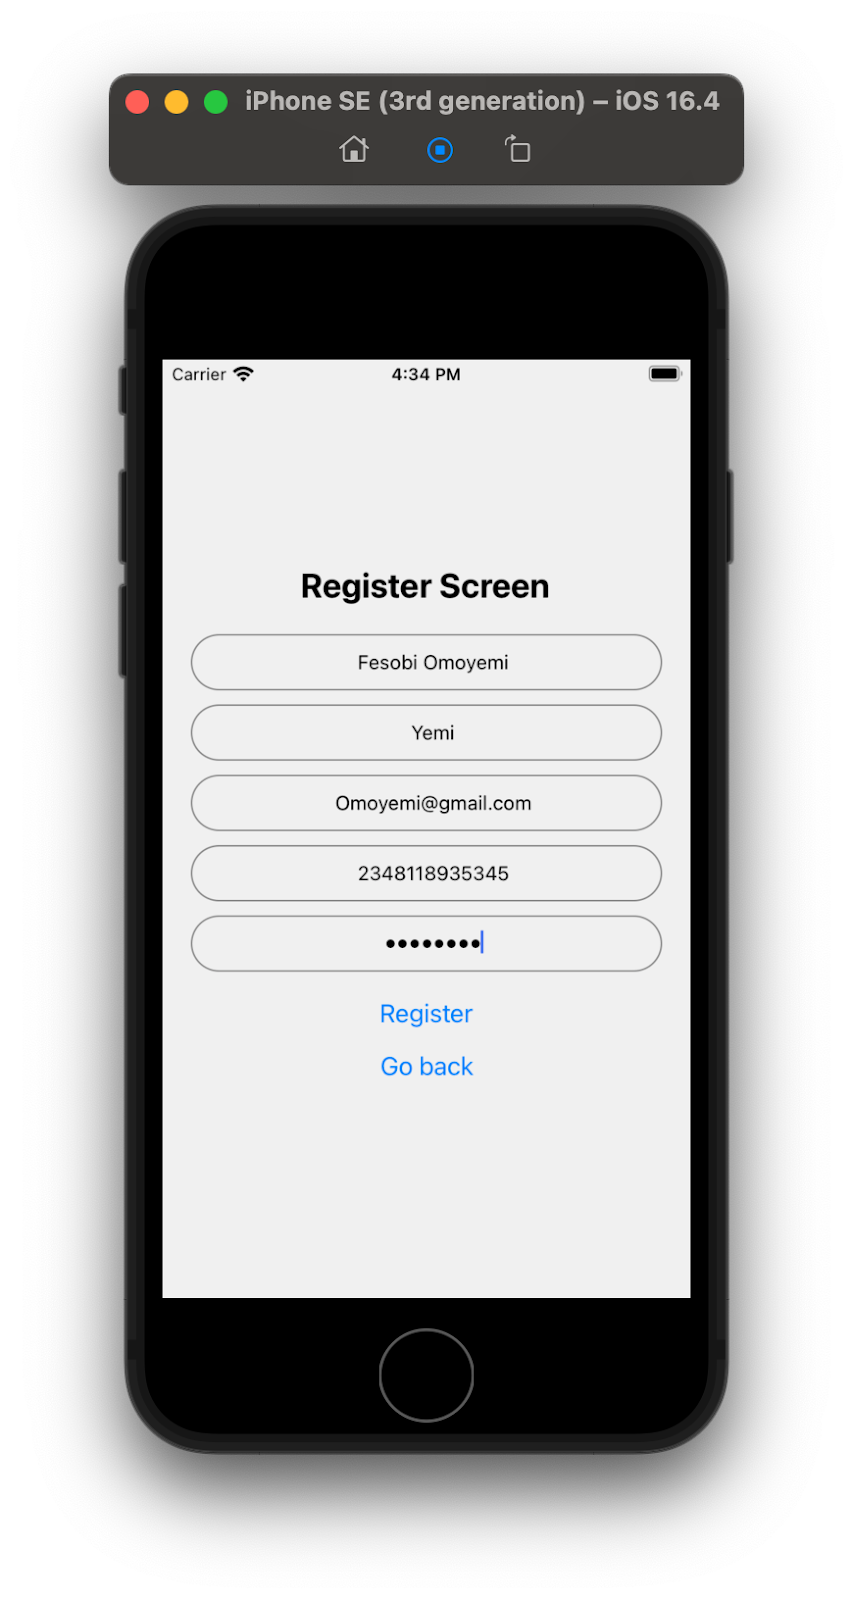
export default RegisterScreen;From the code above, we create a registration form and use the handleRegister() function to validate the registration data and send the data to the backend (http://localhost:3000/register) to be stored in the database.
Now, from the home screen, click on the register button. You should be able to register a new account, as shown in the image below.
Creating the Login Screen
Let’s create the login screen that will allow users to log in with their username and password and then direct the user to the OTP screen to verify their login. To do so, inside the components folder, create the LoginScreen.js file and add the following code:
// LoginScreen.js
import React, { useState } from "react";
import { View, Text, TextInput, Button, StyleSheet } from "react-native";
import { StatusBar } from "expo-status-bar";
const LoginScreen = ({ navigation }) => {
const [username, setUsername] = useState("");
const [password, setPassword] = useState("");
const [errorMessage, setErrorMessage] = useState("");
const handleLogin = async () => {
try {
const response = await fetch(
`http://localhost:3000/login?username=${username}&password=${password}`,
);
const data = await response.json();
if (response.ok) {
if (data.results.length > 0) {
const user = data.results[0];
// Pass the username to the OTP screen
navigation.navigate("LoginOTP", { username: user.username });
} else {
setErrorMessage("Invalid username or password");
}
} else {
setErrorMessage(data.message || "Login failed. Please try again.");
}
} catch (error) {
setErrorMessage("An error occurred. Please try again later.");
}
};
return (
<View style={styles.container}>
<Text style={styles.title}>Login Screen</Text>
<TextInput
style={styles.input}
placeholder="Username"
value={username}
onChangeText={(text) => setUsername(text)}
/>
<TextInput
style={styles.input}
placeholder="Password"
secureTextEntry
value={password}
onChangeText={(text) => setPassword(text)}
/>
{errorMessage ? (
<Text style={styles.errorMessage}>{errorMessage}</Text>
) : null}
<Button title="Submit" onPress={handleLogin} />
<Button title="Go back" onPress={() => navigation.goBack()} />
<StatusBar style="auto" />
</View>
);
};
const styles = StyleSheet.create({
container: {
flex: 1,
justifyContent: "center",
alignItems: "center",
backgroundColor: "#f0f0f0",
padding: 20,
},
});
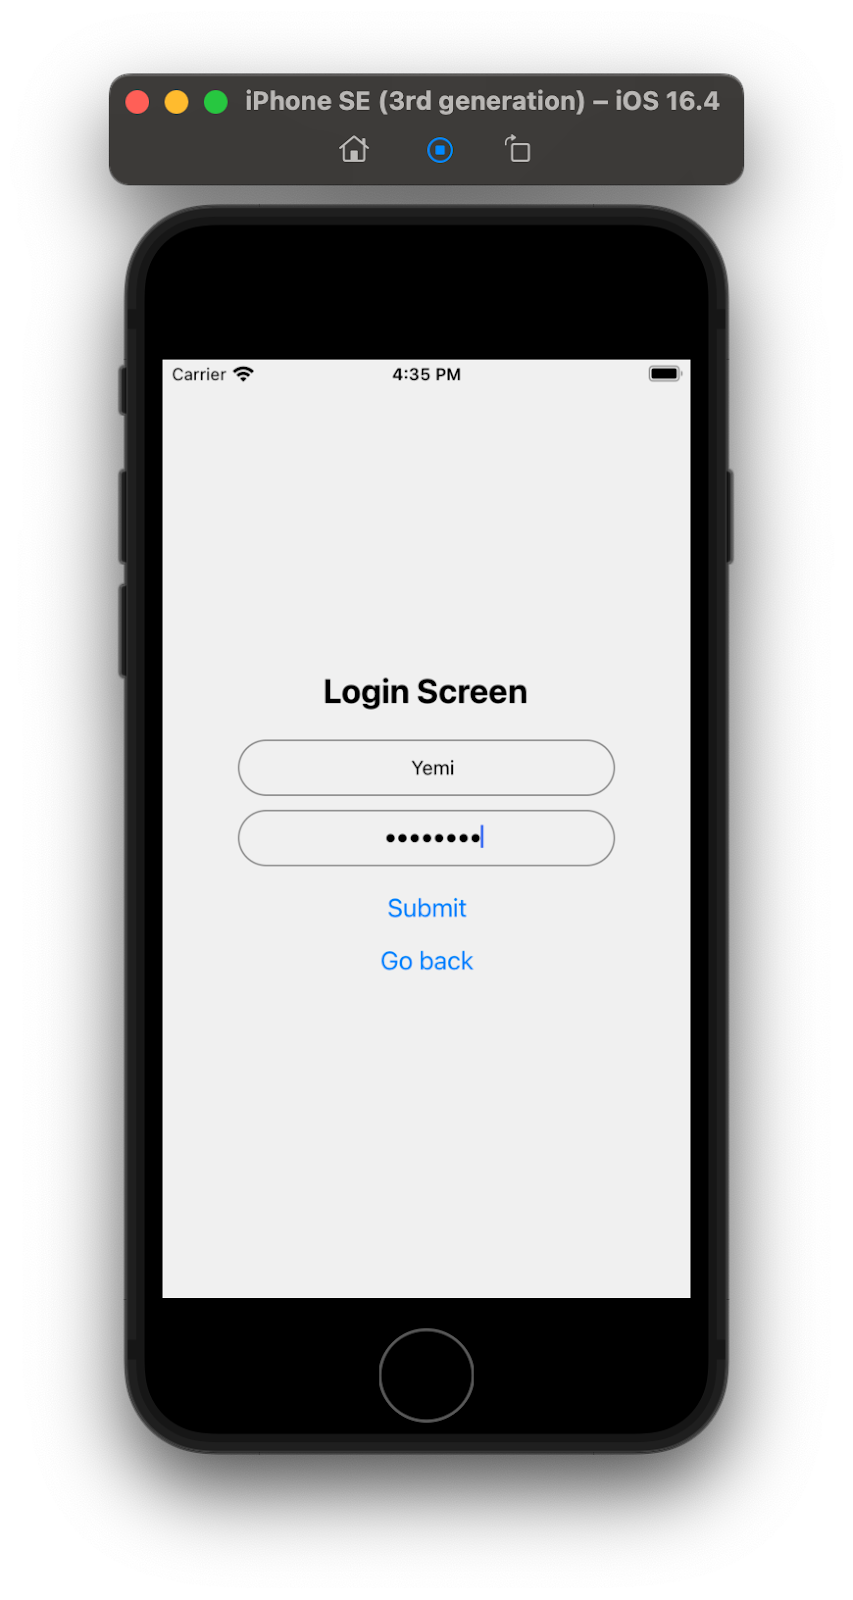
export default LoginScreen;From the code above, we create a login form and use the handleLogin() function to handle the user login details by making a request to the http://localhost:3000/login endpoint to check whether the username and password are correct.
Save the code above and navigate to the login screen. You should see the following output, as shown below.
Creating the Login’s Verification Screen
Now, for the phone call OTP, after the user logs in with the correct username and password, we need to send an OTP to the user via a phone call to verify their login. To do that, inside the components folder, create the LoginOTPScreen.js file and add the following code:
// LoginOTPScreen.js
import React, { useState, useEffect } from "react";
import { View, Text, TextInput, Button, StyleSheet } from "react-native";
import { StatusBar } from "expo-status-bar";
const LoginOTPScreen = ({ navigation, route }) => {
const [otp, setOTP] = useState("");
const [errorMessage, setErrorMessage] = useState("");
const [userData, setUserData] = useState(null);
const [storedOTP, setStoredOTP] = useState(null);
useEffect(() => {
const fetchUserDataAndSendOTP = async () => {
if (userData == null) {
try {
const userResponse = await fetch(
`http://localhost:3000/userinfo?username=${route.params.username}`,
);
const userData = await userResponse.json();
if (userResponse.ok) {
setUserData(userData.results[0]);
const otpResponse = await fetch(
`http://localhost:3000/otp?phoneNumber=${userData.phone}`,
);
const otpData = await otpResponse.json();
console.log(otpData.otp);
setStoredOTP(otpData.otp);
if (!otpResponse.ok) {
setErrorMessage(
otpData.message || "OTP sending failed. Please try again.",
);
}
} else {
setErrorMessage(userData.message || "Failed to fetch user data");
}
} catch (error) {
setErrorMessage("An error occurred. Please try again later.");
}
}
};
fetchUserDataAndSendOTP();
}, [route.params.username]);
const handleVerifyOTPcode = async () => {
console.log(otp);
console.log(storedOTP);
if (otp == storedOTP) {
navigation.navigate("UserProfile", { username: route.params.username });
} else {
setErrorMessage("Invalid OTP code.");
}
};
return (
<View style={styles.container}>
<Text style={styles.title}>Login Verification</Text>
<Text style={{ textAlign: "center", fontSize: 15 }}>
You will receive a call on your {userData?.fullname} with your login
OTP; enter the OTP below.
</Text>
<TextInput
style={styles.input}
placeholder="Enter OTP"
value={otp}
onChangeText={(text) => setOTP(text)}
/>
{errorMessage ? (
<Text style={styles.errorMessage}>{errorMessage}</Text>
) : null}
<Button title="Verify OTP" onPress={handleVerifyOTPcode} />
<Button title="Login" onPress={() => navigation.navigate("Login")} />
<StatusBar style="auto" />
</View>
);
};
const styles = StyleSheet.create({
container: {
flex: 1,
justifyContent: "center",
alignItems: "center",
backgroundColor: "#f0f0f0",
padding: 20,
},
});
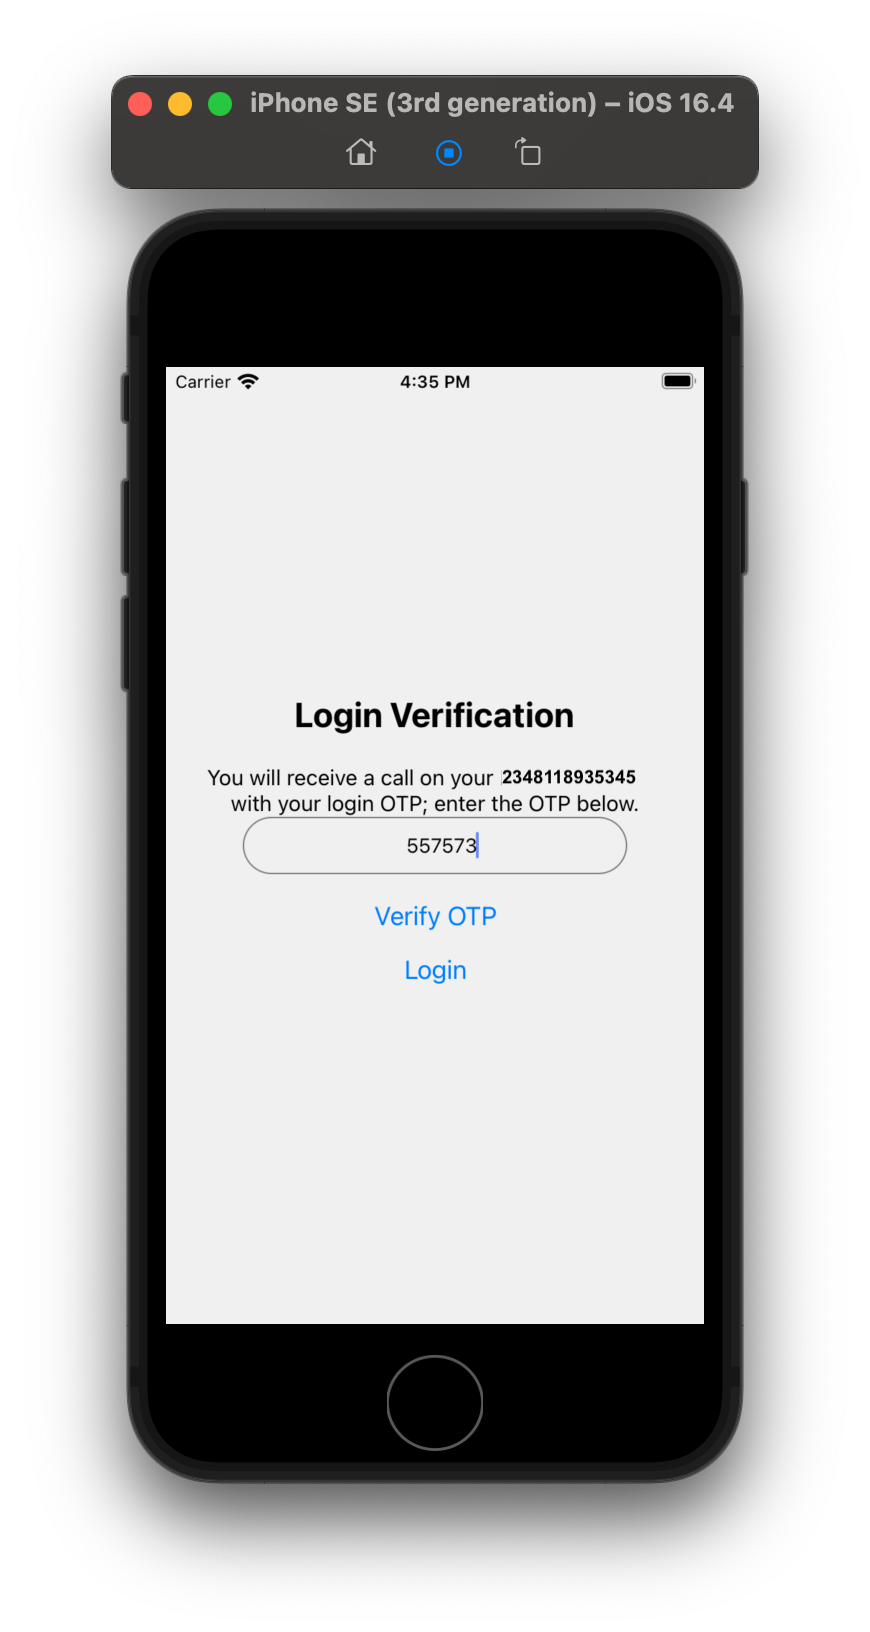
export default LoginOTPScreen;In the code above, we make a request to the http://localhost:3000/otp endpoint to place a phone call to the user’s number to deliver the OTP. Enter the received voice OTP code as shown in the image below.
Creating the User Profile Screen
After the user login verification is successful, they can then have access to the profile screen.To create the profile screen, inside the components folder, create the UserProfileScreen.js file and add the following code:
// UserProfileScreen.js
import React, { useState, useEffect } from "react";
import { View, Text, Button, StyleSheet } from "react-native";
import { StatusBar } from "expo-status-bar";
const UserProfileScreen = ({ navigation, route }) => {
  const [userData, setUserData] = useState(null);
  useEffect(() => {
    const fetchUserProfile = async () => {
      try {
        const response = await fetch(
          `http://localhost:3000/userinfo?username=${route.params.username}`,
        );
        const data = await response.json();
        if (response.ok) {
          setUserData(data.results[0]);
        } else {
          console.error(data.message || "Failed to fetch user data");
        }
      } catch (error) {
        console.error("An error occurred. Please try again later.");
      }
    };
    fetchUserProfile();
  }, [route.params.username]);
  return (
    <View style={styles.container}>
      <Text style={styles.title}>User Profile</Text>
      {userData && (
        <View style={styles.profileContainer}>
          <Text style={styles.label}>Name:</Text>
          <Text style={styles.info}>{userData.fullname}</Text>
          <Text style={styles.label}>Username:</Text>
          <Text style={styles.info}>{userData.username}</Text>
          <Text style={styles.label}>Email:</Text>
          <Text style={styles.info}>{userData.email}</Text>
          <Text style={styles.label}>Phone:</Text>
          <Text style={styles.info}>{userData.phone}</Text>
          {/* Add more fields as needed */}
        </View>
      )}
      <Button title="Logout" onPress={() => navigation.navigate("Login")} />
      <StatusBar style="auto" />
    </View>
  );
};
const styles = StyleSheet.create({
  container: {
    flex: 1,
    justifyContent: "center",
    alignItems: "center",
    backgroundColor: "#f0f0f0",
    padding: 20,
  },
});
export default UserProfileScreen;
In the code above, we use the fetchUserProfile() function to display the user details in the profile screen by making a request to the http://localhost:3000/userinfo endpoint.
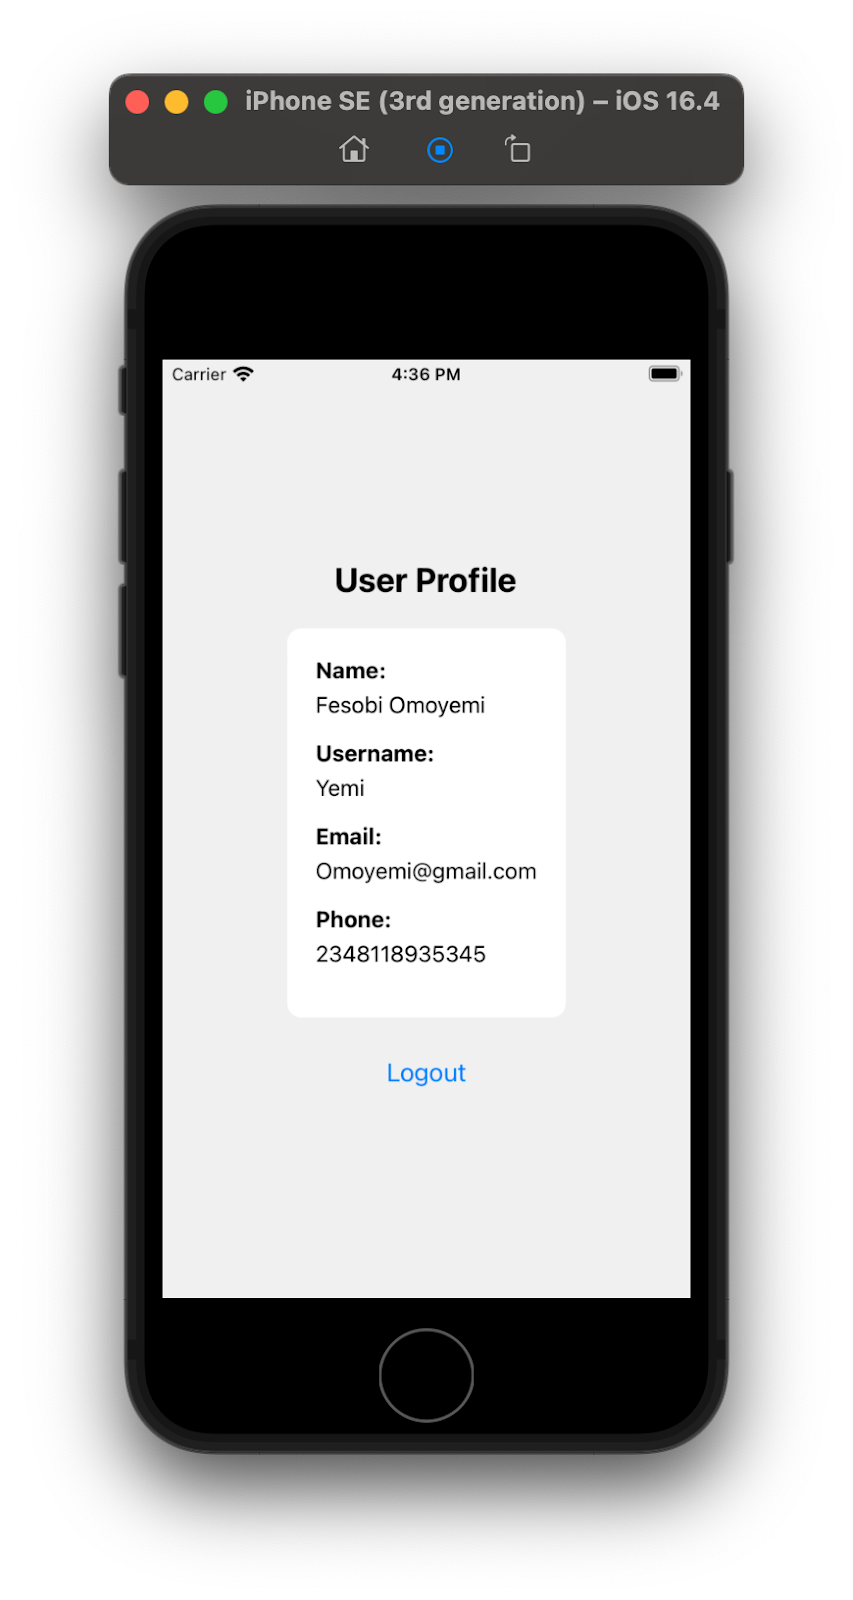
The image below shows the user details displayed on the profile screen from the code above.
Conclusion
Voice OTP offers a secure and user-friendly alternative for two-factor authentication, with benefits like reduced phishing risks, enhanced security, and multi-factor authentication.
This article walks you through integrating Voice OTP into a React Native app using Twilio Programmable Voice. It covers essential steps, including setting up the backend API endpoints with Node.js and implementing OTP verification via a phone call for your mobile application.
Detect, Fix, and Fortify
Spot abnormal user behaviors and iron out the bugs early with OpenReplay. Dive into session replays and reinforce your front-end against vulnerabilities that hackers search for.
Explore DevTools