
Make your app speak with React-Speech-kit


On sites, converting text to speech can be helpful for visitors with certain disabilities or those who just prefer listening to someone read. It’s primarily used in books and dictionary sites to help accommodate different users. In this article, we will learn how to convert text to speech in React using react-speech-kit. We are assuming that you are familiar with React and React hooks.
Introduction to React Speech Kit
React Speech Kit is a wrapper around the Web Speech API which provides a feature for converting text to speech and speech recognition. It provides hooks that expose options and controls to Web Speech API interfaces.
There are two hooks available in this package in relation to the Web Speech API interfaces: useSpeechSynthesis() for text-to-speech conversion, and useSpeechRecognition() for speech recognition. For our use case, we will only need the first hook.
The useSpeechSynthesis hook
Calling this hook returns an object with the following properties:
speak: This is a function that, when called, makes the browser read some text. It receives an object as a parameter containing the text to be read and other options for speech control.cancel: A function called to stop reading a text.speaking:A boolean which istruewhen a text is being read andfalsewhen it’s not.supported:A boolean that is either true or false based on whether the browser supports SpeechSynthesis.voices:An array of available voices that can be passed to thespeak()function to change the voice used by the browser. Voices available depend on the browser.
We can add a function as a parameter to this hook when SpeechSynthesis finishes reading the text or is canceled, which can be used to empty the React state. Here is a basic example of how to use useSpeechSynthesis hook:
import { useState } from 'react';
import { useSpeechSynthesis } from 'react-speech-kit';

function Example() {
  const { speak } = useSpeechSynthesis()
  const text = 'Some dummy text'

  return (
    <button onClick={() => speak({ text: text })}>Speak</button>
  )
}
When the above code is run, and the Speak button is clicked, the text will be read if SpeechSynthesis is supported.
Building a text-to-speech app
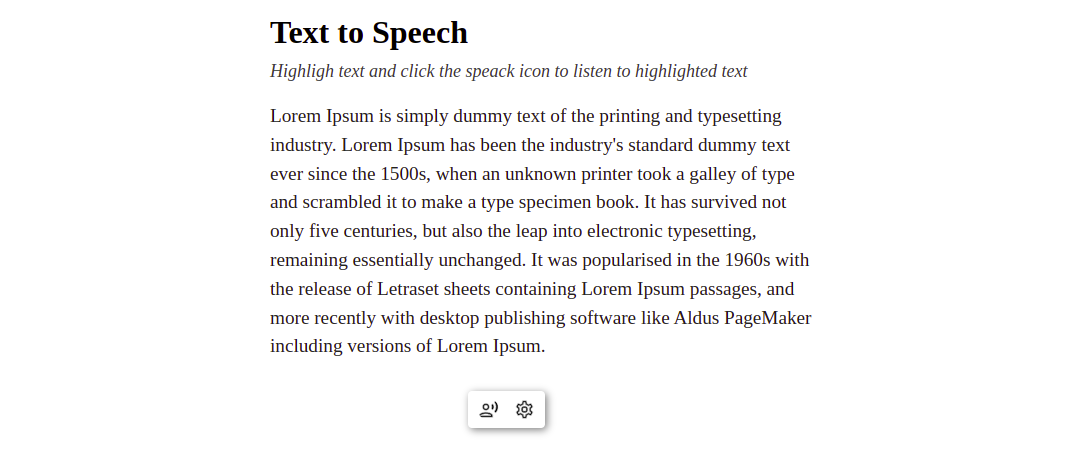
We will build an app where we can read text by highlighting it. It will also contain settings/options for customizing the voice used while reading. You can view the live example app here. The code for this app is available on GitHub.
I have already created a starter template so we can solely focus on working on the speech functionality. The next step is to clone the GitHub repo and install the react-speech-kit package. We can do that with the following commands:
git clone -b starter https://github.com/SammSuccess/text-to-speech.git
cd text-to-speech
yarn
yarn add react-speech-kit
We are using yarn to install the dependencies in our app because currently, npm is unable to install the react-speech-kit package. If you don’t have yarn already installed on your machine, you can do that with the following command:
npm install --global yarnIn our cloned app, I am using Material Icons to add icons. I have included it in the dependency object of the package.json file, so by running the yarn command, it will be installed along with other needed dependencies.
Now when we start the app with $ yarn start, we should see this page in our browser:
Reading highlighted texts
Right now, when we highlight a text in our app, it will be stored in the highlightedText state in the App component. In this section, we will add the functionality to read the highlighted text and also change the voice used for reading. In the src directory, go over the App.js file and add the following import:
// src/App.js
import { useSpeechSynthesis } from "react-speech-kit";
Next, add the following lines of code after the highlightedText state the App component:
// src/App.js
const onEnd = () => {
  setHighlightedText('')
}

const { speak, cancel, speaking, supported, voices } = useSpeechSynthesis({onEnd})
In the above code, we created an onEnd function that will reset the highlightedText state. We passed this function as a parameter to the useSpeechSynthesis hooks; this way, it will be called whenever a text finishes reading. We have also destructured all the properties returned by useSpeechSynthesis, which we will be using shortly.
Next, let’s make the text reading functionality work. Modify the div with the speechMenu class name which is in the return statement after the </p> tag:
// src/App.js
{supported &&
  <div className="speechMenu">
    {!speaking
      ? <RecordVoiceOverOutlined onClick={() => speak({ text: highlightedText })}/>
      : <VoiceOverOff onClick={cancel}/>
    }
    <SettingsOutlined onClick={() => setShowSpeechSettings(true)}/>
  </div>
}
We are conditionally displaying the icons to work with SpeechSynthesis based on browser support in the above code. There are three icons in the div element: the first two are to start and stop reading, and the last is to display the setting dialog. Above, we use the ternary operator to display the start or stop icon depending on whether a text is currently being read or not. In the start icon component, we added an onClick event that calls the speak() function, passing the highlightedText state as the text to be read. In the stop icon, we call the cancel() function when the onClick event is fired.
Aside from the text property in the object passed as parameters to the speak() function, other properties can also be included: voice, rate, and pitch. (We will look into all of this shortly.) With this in our app, we can now read text by highlighting the text to be read and clicking the start icon.
Now let’s work on the voice functionality to enable us to switch between voices. Earlier, we destructured the voices property from useSpeechSynthesis hook. The value of this property is an array of voices supported by the browser being used. Each voice is represented as an object which looks something like this:
{
  default: true
  lang: "en-AU"
  localService: true
  name: "Karen"
  voiceURI: "Karen"
}
To switch between voices in our app we just need to pass the object of our desired voice to the speak function. To accomplish this, in our app we display all the available voices as options of the select element. When an option is selected, we will use its index value (0, 1, 2, 3…) to get the desired voice from the voices array and then pass it to the speak() function. Let’s do that; in the App component add the following state after the highlightedText:
// src/App.js
const [voiceIndex, setVoiceIndex] = useState(null);
Next, add the following line of code after the useSpeechSynthesis() function call:
// src/App.js
const voice = voices[voiceIndex] || null
Next, add the following lines of code as a child of the of Dialog component in the return statement of the App component like this:
// src/App.js
<div className='speechSettings'>
  <select
    name="voice"
    value={voiceIndex || ''}
    onChange={(e) => {
      setVoiceIndex(e.target.value)
    }}
  >
    {voices.map((option, index) => (
      <option key={option.voiceURI} value={index}>
        {`${option.lang} - ${option.name} ${ option.default ? '- Default' : ''}`}
      </option>
    ))}
  </select>
</div>
Now, let’s pass voice to the speak() function. Modify the RecordVoiceOverOutlined icon component to look like this:
// src/App.js
RecordVoiceOverOutlined onClick={() => speak({ text: highlightedText, voice })}/>
With this, we can now change the voices used. To test this, click on the settings icon on our app, and a dialog box with a select input will pop up.

When we click on the browser select input, we will see a list of available voices, which will vary depending on the browser. Select a voice and click on the Done button. Now when we highlight a start reading it, the voice used will be different.
Open Source Session Replay
OpenReplay is an open-source, session replay suite that lets you see what users do on your web app, helping you troubleshoot issues faster. OpenReplay is self-hosted for full control over your data.

Start enjoying your debugging experience - start using OpenReplay for free.
Customizing voice Rate and Pitch
Rate is the speed of the voice, while pitch has to do with its tone. To specify this in the voice used, we can add rate and pitch properties to the object passed to the speak() function. The rate and pitch properties receive a number from 0-2 as their value.
Now, let’s add controls in the speech setting dialog of our app to enable us to customize the rate and pitch of the voice used to read the highlighted text.
First, in the App component add the following state after the voiceIndex state:
// src/App.js
const [pitch, setPitch] = useState(1)
const [rate, setRate] = useState(1)
Next, add the following lines of code after the closing tag of the select element (</select>) in the Dialog component:
// src/App.js
<div className='rangeContainer'>
  <div>
    <label htmlFor="rate">Rate: </label>
    <span>{rate}</span>
  </div>
  <input
    type="range"
    min="0.5"
    max="2"
    step="0.1"
    value={rate}
    onChange={(e) => {
      setRate(e.target.value);
    }}
  />
</div>
<div className='rangeContainer'>
  <div>
    <label htmlFor="pitch">Pitch: </label>
    <span>{pitch}</span>
  </div>
  <input
    type="range"
    min="0"
    max="2"
    step="0.1"
    value={pitch}
    id="pitch"
    onChange={(event) => {
      setPitch(event.target.value);
    }}
  />
</div>
Now, let’s pass the pitch and rate state to the speak() function. To do this, modify the RecordVoiceOverOutlined icon component to now look like this:
// src/App.js
<RecordVoiceOverOutlined onClick={() => speak({ text: highlightedText, voice, rate, pitch })}/>
With this, when we go to our app and click on the settings icon, we will see the selection and the two range inputs.
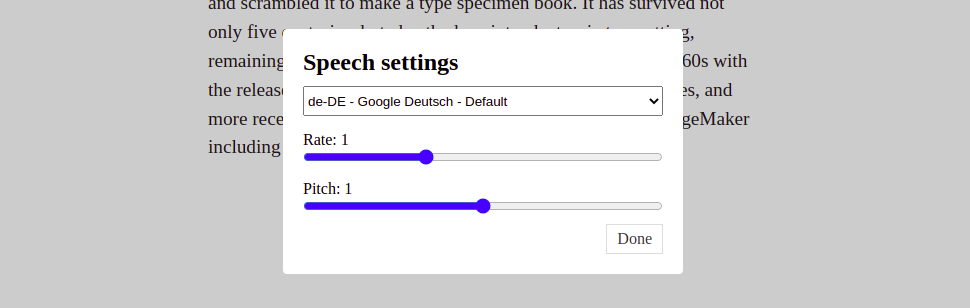
With the above range input, we can customize the speed and tone of the voice used.
Conclusion
As a wrapper to the Web Speech API, React Speech Kit makes it easy to convert text to speech in a React app, which we have covered in this tutorial.