
Mobile push notifications with Firebase

Push notifications are messages to users to build audience relationships and get users back into the mobile app. In this article, you will learn how to set this feature up in React Native with Firebase. I will be using a simple app, and on that app, I will add the push notification functionality for Android and iOS.
You can also get the source code for this tutorial already on Github.. To follow up with this tutorial:
- you need a Google account
- you should be familiar with React Native, which we’ll use to write our app
- For Android, you need an Android emulator, which will be used to test the push notification. You can find out how to install React Native and set up the emulators here.
- For iOS, Xcode should be set up. An Apple developer account is necessary to enable this push notification feature in the iOS App. An iOS emulator should be set up for testing the iOS application. Still, an actual iOS device must be available to test the push notifications as they won’t be delivered on an iOS emulator. You can also learn how to set up an emulator here.
Creating our React Native project
First, you will need to initiate a React Native project. Run the following command.
npx react-native init pushnotificationtest && cd pushnotificationtestRunning this operation will create a React Native project and install a template in the pushnotificationtest folder and then navigate the terminal into the folder. You can now open that folder in your code editor. We will create a simple UI where we will land when our app is opened, so to do that, we edit the App.js file with the code below:
import React from 'react';
import type {Node} from 'react';
import { SafeAreaView, ScrollView, StatusBar, StyleSheet, Text, useColorScheme, View,} from 'react-native';
import { Colors, Header,} from 'react-native/Libraries/NewAppScreen';
const Section = ({children, title}): Node => {
  const isDarkMode = useColorScheme() === 'dark';
  return (
    <View style={styles.sectionContainer}>
      <Text style={[ styles.sectionTitle, { color: isDarkMode ? Colors.white : Colors.black, }, ]}> {title} </Text>
      <Text style={[ styles.sectionDescription, { color: isDarkMode ? Colors.light : Colors.dark,  },]}> {children} </Text>
    </View>
  );
};

class App extends React.Component {
render () {
  return (
    <SafeAreaView>
      <StatusBar barStyle={'light-content', 'dark-content'} />
      <ScrollView contentInsetAdjustmentBehavior="automatic">
        <Header />
        <View style={{ backgroundColor: Colors.white, }}>
          <Section title="Welcome">This is a simple <Text style={styles.highlight}> App Interface</Text> to test our Push notification App.
          </Section>
        </View>
      </ScrollView>
    </SafeAreaView>);
  };
};
export default App;
Adding the code above renders the UI of the app but will crash because some styles have been declared on there but are not added yet. Therefore, you should add the following code above the export default app statement.
const styles = StyleSheet.create({
  sectionContainer: {
    marginTop: 32,
    paddingHorizontal: 24,
  },
  sectionTitle: {
    fontSize: 24,
    fontWeight: '600',
  },
  sectionDescription: {
    marginTop: 8,
    fontSize: 18,
    fontWeight: '400',
  },
  highlight: {
    fontWeight: '700',
  },
});
You can now compile and run your app on the emulators. To run the app on Android, you will run:
npx react-native run-androidOnce the Android Emulator has started and rendered the app, we will compile and run the iOS Emulator.
npx react-native run-iosAfter a successful build, you should have iOS and Android displays like this:
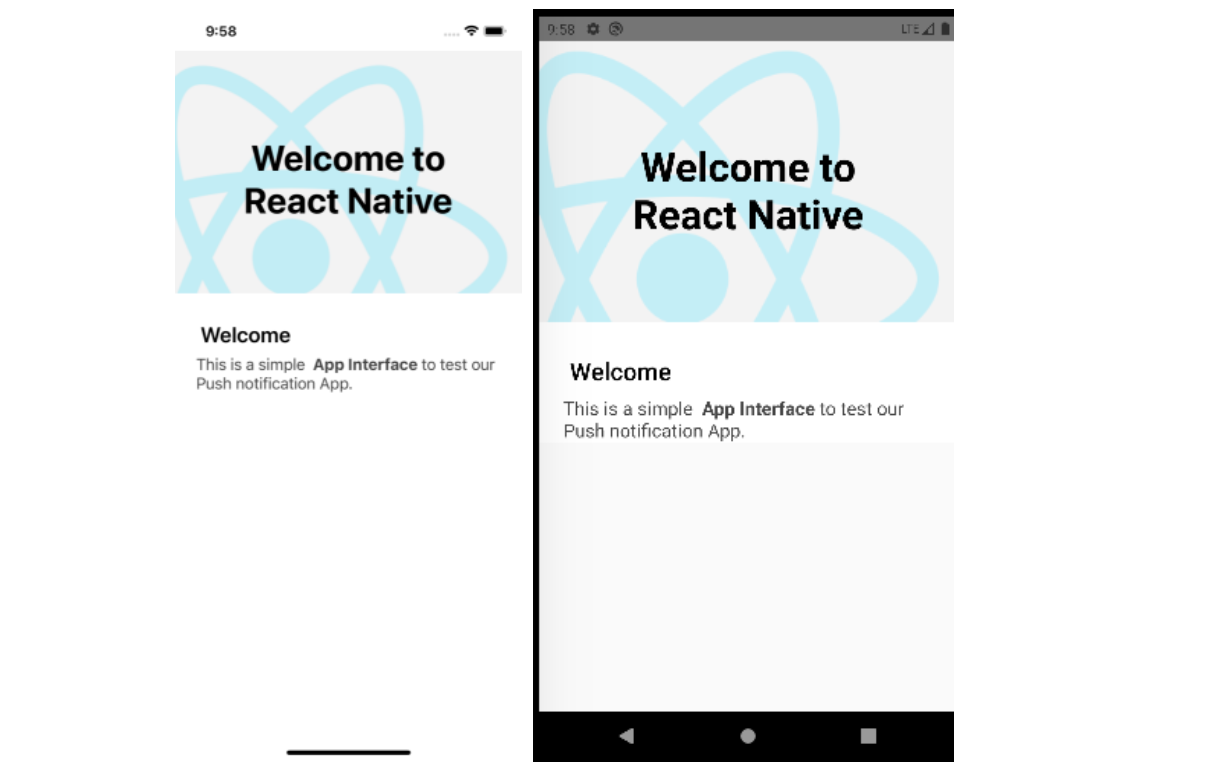
Now that you have the UI set, let’s take the next step to set up push notifications.
Setting up Firebase
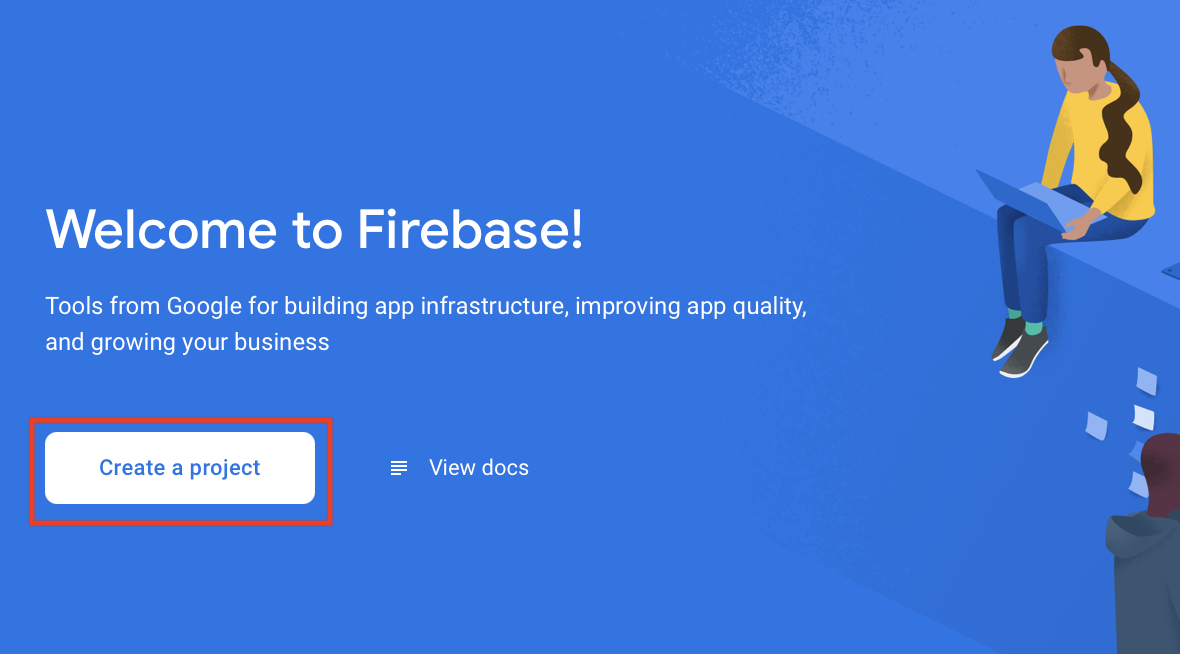
We will be using Firebase Cloud Messaging to set up push notifications hence the importance of linking our app with Firebase Console. You can open up your browser and follow the link to Firebase Console, Get Started, and log in with your Google account. Then, you should land on a page like this on which you should click Create a Project.
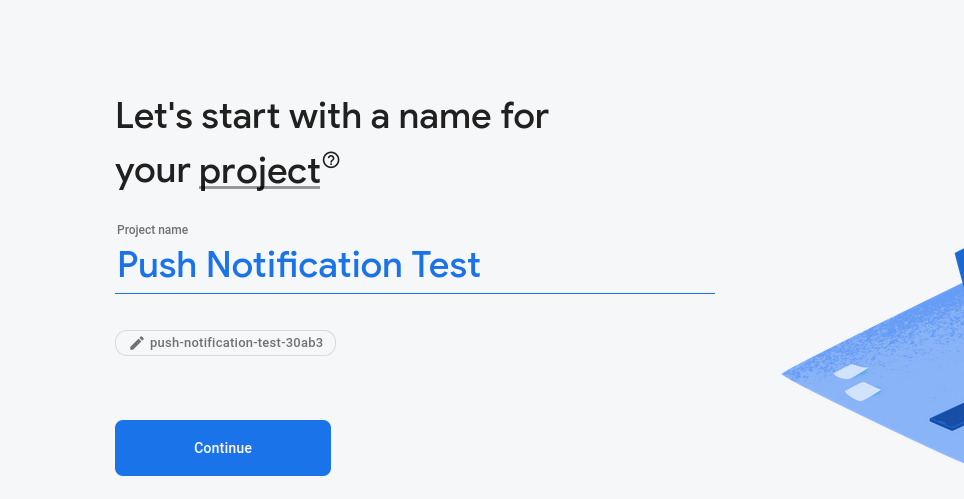
To create a Project, you need to input the Project name of which I am using pushnotificationtest. Then, continue.
On the next screen, you can Enable Google Analytics and click continue. After that, you will be directed to select an analytics account on the final screen. Select an account and click Create Project. Once your project is successfully created, you will get to a screen like this:
Adding the Android app to the Firebase project
You need to add the Android and iOS React Native Project to the Firebase project. To add the Android app to the project, click on the Android logo there; it will take you to a screen like this:
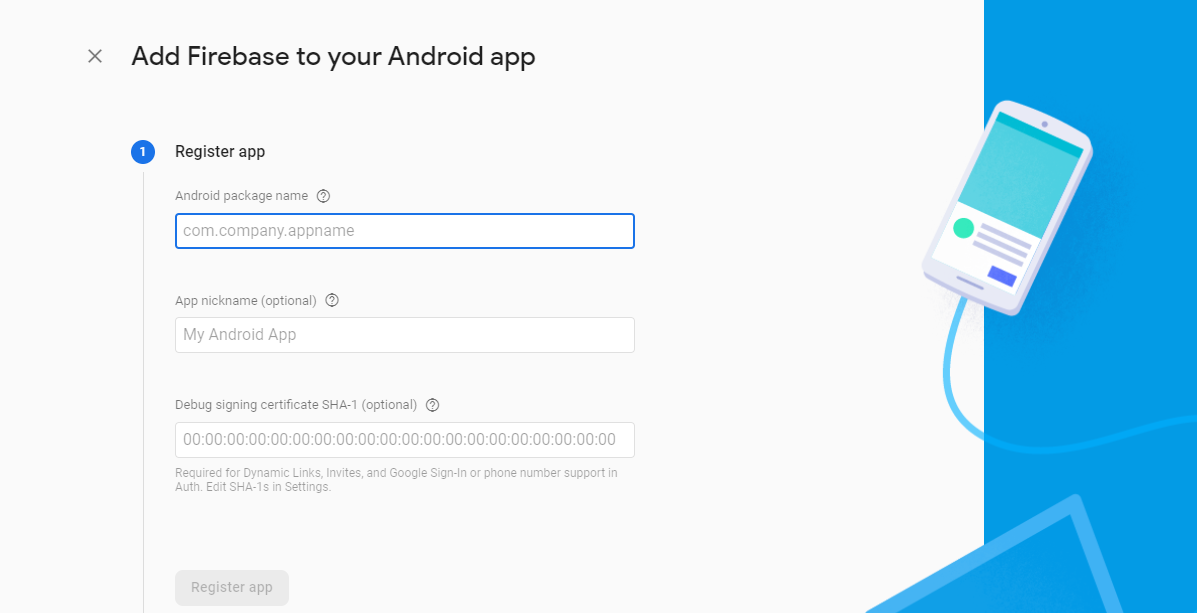
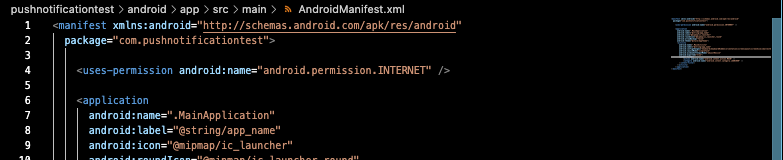
So to add the Android App to the project, the first is to add the Android Package Name. The Android Package name is on default when the app is being created; therefore, you should go over to the project and grab it from the AndroidManifest.xml file, which is located at Android/app/src/main/androidmanifest.xml, and on the top of the document, you will find the package name.
Copy the package name to the console. Add a nickname to the app. I used Android Push Notification as my nickname. Leave the SHA-1 field blank and continue. On the following screen, download the google-services.json file and copy it to the Android/App directory for the project.

Next, you will find some dependencies and plugins to link the app with Firebase. Copy the following dependency and add it to the dependencies block in the build.gradle file in the pushnotificationtest/Android directory:
classpath 'com.google.gms:google-services:4.3.10'Then to the build.grade file in the pushnotificationtest/Android/App, add this plugin at the top of the page, directly under the com.android.application line.
apply plugin: 'com.google.gms.google-services'After that is set, return to the console, click Next, and then Continue to Console. You have just created your Android App on the Firebase project and linked it to the React Native project. Next, you need to Add the iOS App.
Adding the iOS app to the Firebase project
Navigate to the dashboard and click on the iOS icon to Add the iOS App. You should be brought to this page.
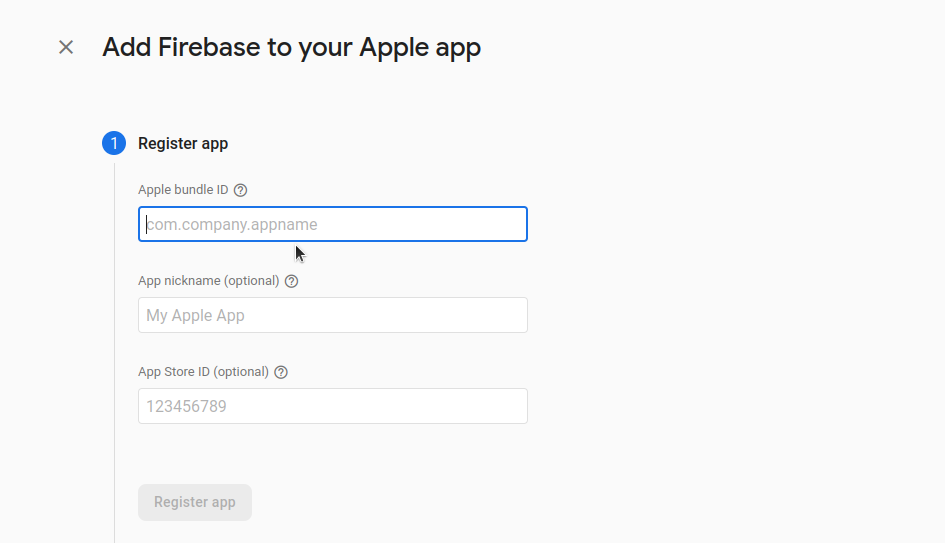
Here’s where you need to add the Apple Bundle ID. It is also generated at the creation of the project, but you can register a new one if you don’t want the default one. I set it to com.mynewproject.pushnotificationtest for this project. To get the default Apple Bundle ID, open your Xcode by running the command below from your terminal.
cd ios && open pushnotificationtest.xcworkspaceOnce Xcode is open, click on the name of the project, and on the screen, you will see the bundle ID on the other side.
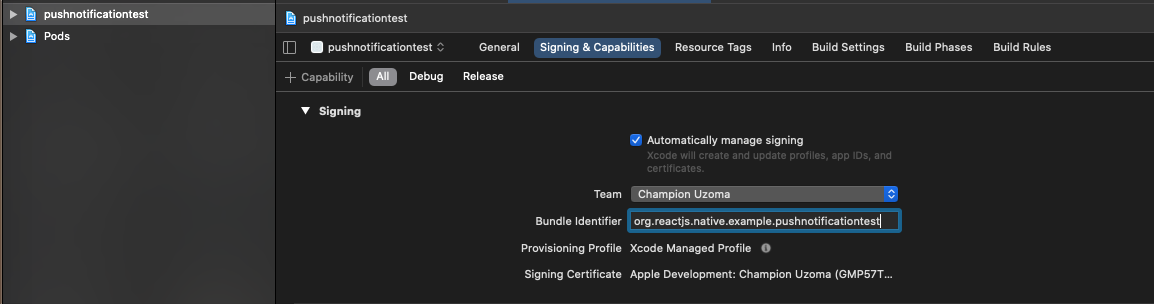
Now, copy it to the Apple bundle ID field above and add the set nickname for the app. You can leave your Apple Store ID for now and click next. Leave out downloading GoogleService-Info.plist for now and continue. Now we need to add the Firebase SDK, and just like it’s stated in the documentation, you need to navigate back to Xcode, open your AppDelegate.mm file, and add the following at the top of the file to import the Firebase SDK:
#import <Firebase.h>Then, within your didFinishLaunchingWithOptions method, add the following to the top of the method:
- (BOOL)application:(UIApplication *)application didFinishLaunchingWithOptions:(NSDictionary *)launchOptions {
  // Add only this below \\
  [FIRApp configure];
Return to the browser, then click next and Continue to Console. iOS requires you to enable push notifications on the app. You will need to add push notification capacity to the app to achieve this. Then, on the Apple Developer Account, you will need to generate an APN (Apple Push Notification) key that you will add to the cloud messaging area on Firebase to complete the linking of the iOS App to Firebase. Now, you should open up Xcode and select the right team on which you are registering the app.
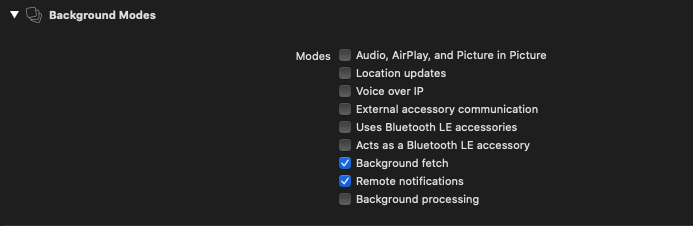
Next, click on add + Capability and scroll down to find Background Modes. Double click on that and select the Background Fetch and Remote Notifications options.
After that, click on the + Capability again and scroll to find Push Notifications. Double click on it also. Next, log in to your developer account and click on the Certificates, Identifiers, and Profile section.
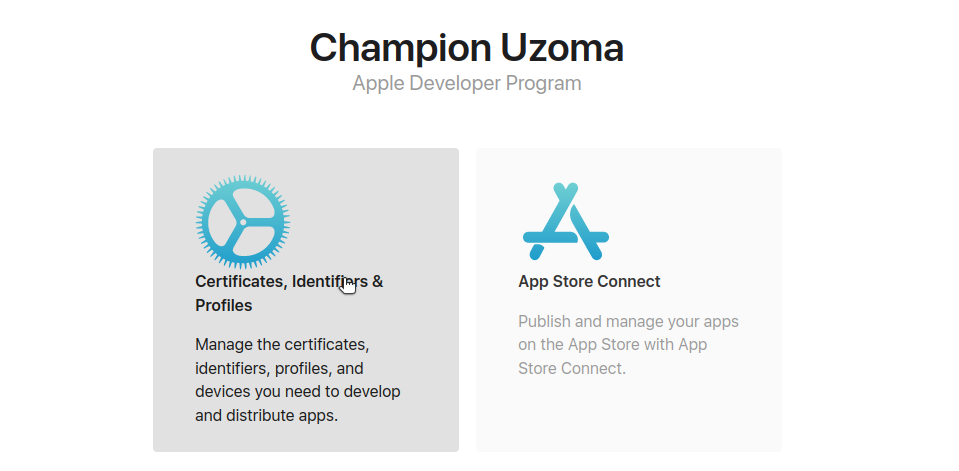
Click on Identifiers from the menu on the left. Now, look for the bundle ID of your app. Once you find it, click to open it. Once it’s open, under capabilities, scroll down and ensure Push Notifications is checked. Next, return to the previous page and select Keys among the menu items on the left.
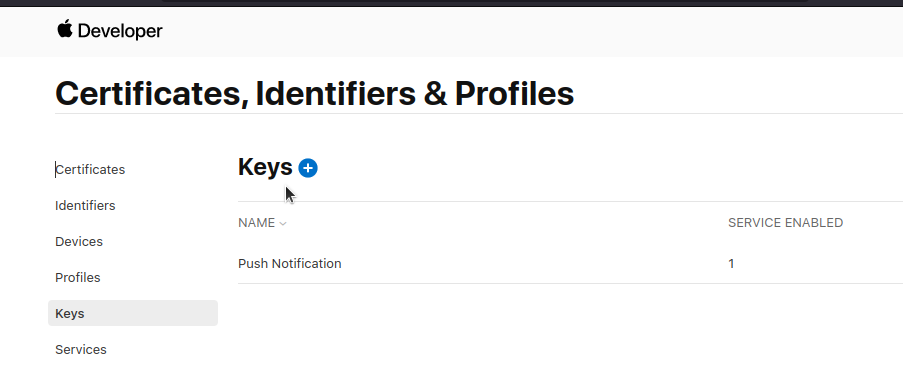
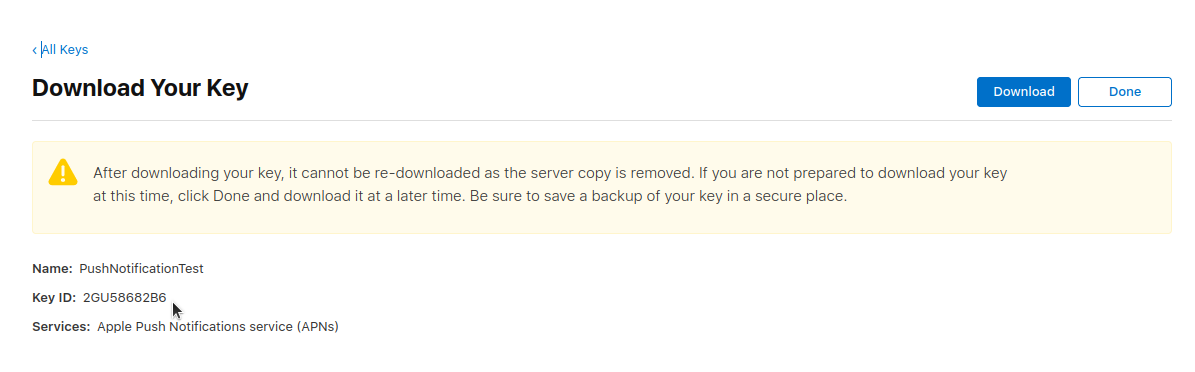
Click on the + icon next to Keys and add a key name. For this project, I used PushNotificationTest. Then, check the box for Apple Push Notification Service and continue. On the next page, click on Register and then download the key. Endeavor to copy the Key ID.
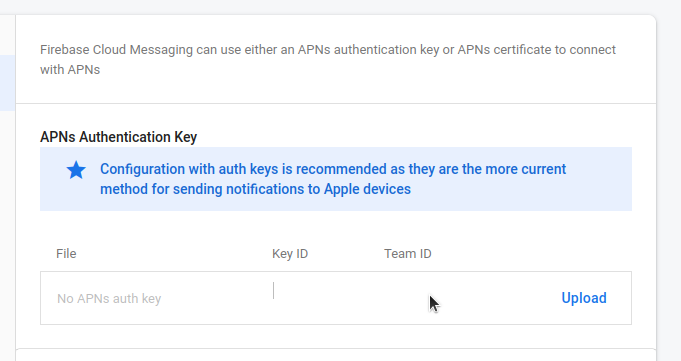
Go back to the Firebase Console and click on the iOS App settings. From the Tabs, click on Cloud Messaging,

Scroll down to iOS App Configuration and under the APNs Authentication Key, click on upload.
Paste the Key ID you copied into the Key ID field, then click on the browser from which you should add the key that you generated and downloaded from your Apple Developer Account.
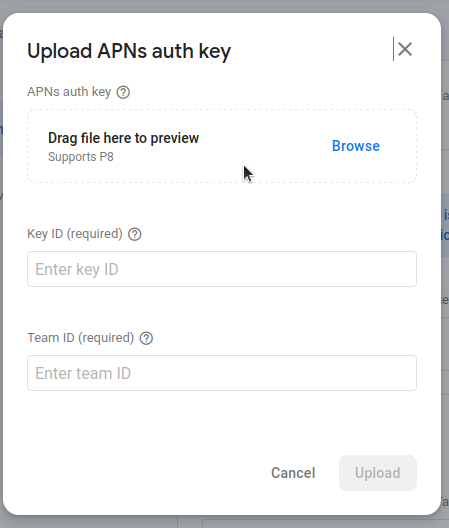
You may also need to add your Apple Developer Team ID. You can grab it from your Apple Developer Dashboard. Then upload. After this upload, navigate to General among the Tabs, scroll down and under the Your Apps section, click on GoogleService-Info.plist to download it.
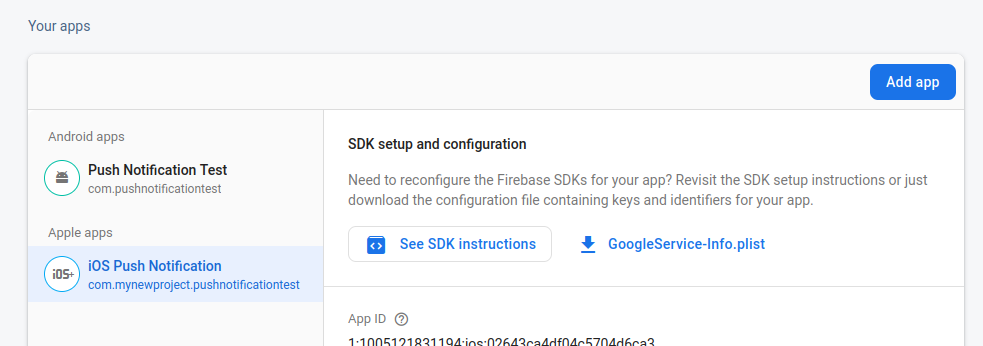
Once it’s downloaded, go to Xcode, right-click on the project name, and select add file to project. A dialogue box should open where you should grab the GoogleService-Info.plist file and ensure that “Copy items if needed” is selected, then click Add. Since you have successfully added the iOS Apps to your console, you can move on to add the push notification functionality on our app.
Open Source Session Replay
OpenReplay is an open-source, session replay suite that lets you see what users do on your web app, helping you troubleshoot issues faster. OpenReplay is self-hosted for full control over your data.

Start enjoying your debugging experience - start using OpenReplay for free.
Adding Push Notification Functionality
Now, you need to add the push notification functionality to the app. Moving forward, we will get back to the terminal. Please ensure you are in the root folder, the pushnotificationtest folder. You will need to install some dependencies: Firebase Core and Firebase Messaging. Key in the command below to perform the installation.
npm install @react-native-firebase/app && @react-native-firebase/messagingThen go back to the terminal and key in the following command.
cd ios && pod install && cd ..The above command will install all the necessary files for the iOS push notification to work. You need to add some code to the index.js and the app.js in the root folder. The code you will be adding is for receiving the push notification and handling it both in the background and foreground state. You should start by adding some import statements to the index.js file to import the necessary modules before the code.
    import React from 'react';
    import messaging from '@react-native-firebase/messaging';
After that, you should add the code to invoke the setBackgroundMessageHandler method to define the background message handler. You will simply console.log() the received message in the handler. This piece of code should be added after the import statements.
messaging().setBackgroundMessageHandler(async remoteMessage => {
  console.log('Message is handled in the background!', remoteMessage);
});
Following that, you should set the isHeadless function and return to the app. This isHeadless parameter will only be true if the app is started by iOS when the Push Notification arrives. On Android, this parameter will be undefined. Add the function after the previous piece of code.
function HeadlessCheck({ isHeadless }) {
  if (isHeadless) {
    console.log('App launched by iOS in background, ignore it' );
    // App has been launched in the background by iOS, ignore
    return null;
  }
  return <App />;
}
AppRegistry.registerComponent(appName, () => HeadlessCheck)
Next, in the App.js file, you should import the messaging module by adding the import statement below among the imports at the top of the page.
import messaging from '@react-native-firebase/messaging'Below is a piece of code to check for permission and request user permission to receive push notifications on the app. For iOS, the user has to allow permission before it is delivered to them, but for Android, it will always return permission granted. After checking the permissions, to get the unique device token which is the address the FCM uses to send notifications to individual devices, you will need to add the getToken method as shown. You will also notice the onTokenRefresh handler. This method is basically to get the new token of a device whose token has changed. You need to define the onMessage handler to handle the received notification when the app is running in the foreground.
componentDidMount(){
    messaging()
  .requestPermission()
  .then(authStatus => {
console.log('APNs Status: ', authStatus);

if (authStatus === messaging.AuthorizationStatus.AUTHORIZED || authStatus == messaging.AuthorizationStatus.PROVISIONAL) {
  messaging()
  .getToken()
  .then(token => {
    console.log('messaging.getToken: ', token);
  });
  messaging().onTokenRefresh(token => {
    console.log('messaging.onTokenRefresh: ', token)
  });
  fcmUnsubscribe = messaging().onMessage(async remoteMessage => {
    Alert.alert(
        remoteMessage.notification.title,
        remoteMessage.notification.body)
  });
}
})
  .catch(err => {
console.log('messaging.requestPermission Error: ', err);
  });
}
This line of code is used to declare the fcmUnsubscribe variable null until the app runs. It should be added at the top of the page, right after the imports.
var fcmUnsubscribe = nullBased on the code, when the app runs in the foreground, it will display the notification using an alert, but when it’s in the background, you will find the notification in the notification pane of the device. After adding all the codes above, send a test Push Notification.
Sending a Test Push Notification
Before sending a test push notification, you must first build the app. Use the commands stated above to run the Android app. For iOS, connect your actual device to use it, then state the name of the device when building the iOS App as such:
npx react-native run-ios "Name of Device"Once your Android and iOS apps have been built into the app, navigate to the Firebase console as we will be sending push notifications from the console. From the menu items on the left, scroll to the Engage section, and under it, click on Messaging.
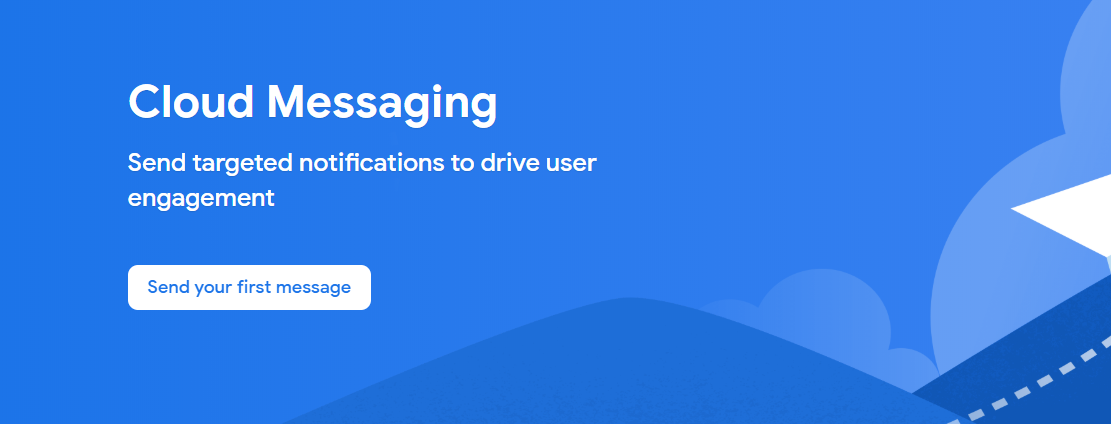
On the dashboard, click on Send your first message. It will land you on a page where you must compose your notification.
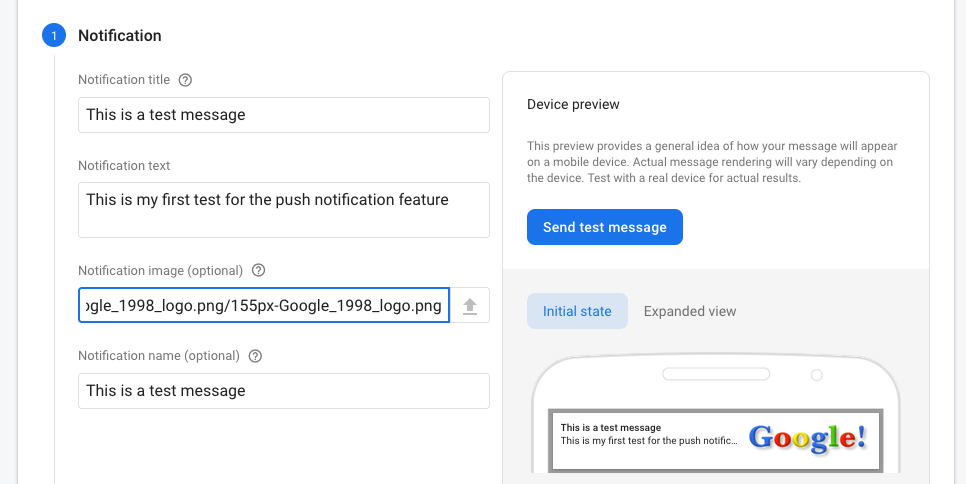
Now, you need to add your notification title, text, and image just like I’ve done, then click next.
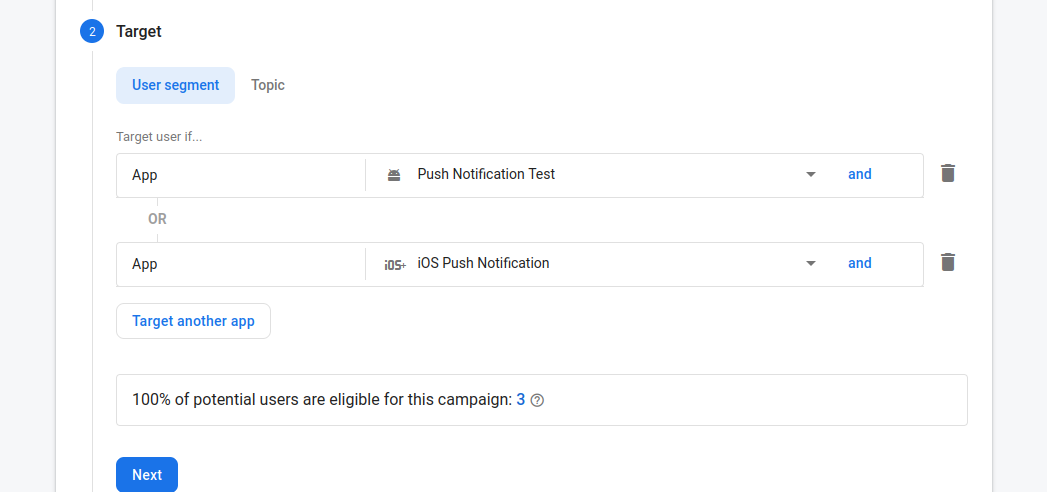
Here, add your Android and iOS apps as targets to receive this notification, then click next. Set a schedule for now and ignore the analytics fields, and click next. Ignore the data fields and enable sound. You can leave the badge area to be disabled.
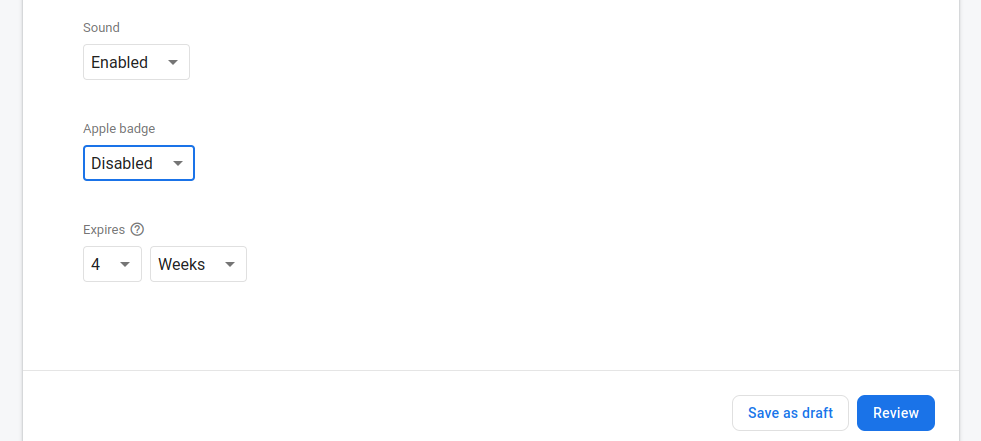
You can then click review and submit. The notification displays as an Alert when the app is in the foreground state, and when it’s in the background state, it stays in the device’s notification area. Here’s an example for Android.

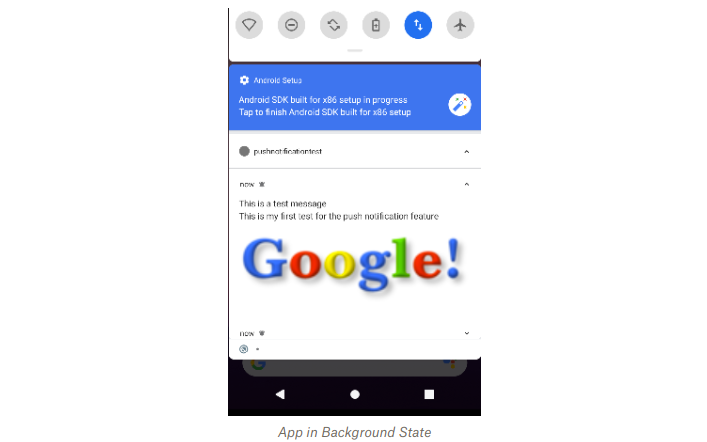
On iOS, this is the output:
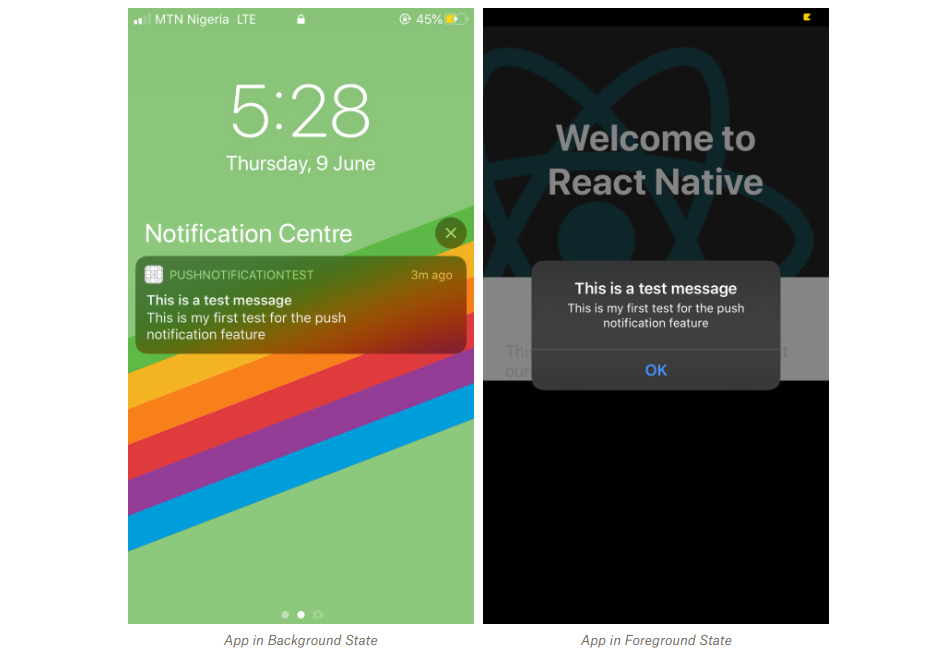
If you followed this tutorial, you should receive a push notification as shown above on your Android emulator and your iOS device.
Conclusion
Push Notifications is an exciting feature that can be used to engage app users on iOS and on Android. With React Native, we can easily set that functionality for our apps as we’ve just done. I hope you found this tutorial educational!