Modern web animations with Gsap and Vue 3
Learn how to bring your website to life with Gsap's animations

Hey, and welcome to this tutorial! Today you’ll learn how to create beautiful animations that really bring your websites to life. We’ll be using the powerful gsap animation library to animate our Vue 3 application using JavaScript. By the end, you’ll know how to set up a modern web application and create slick animations that take your websites to the next level.
Introduction
I always find that the best learning happens when building something practical - so that’s what we’re gonna do in this tutorial.
We’ll be using several modern tools like Vite to scaffold our project, Vue 3 as our JavaScript framework, TailwindCSS for styling, and then, of course, Gsap for the animations. Our focus will be on learning to create the animations, but you might also pick up a trick or two about Vue and Tailwind - so see that as a bonus.
We’re going to build an example hero section for a nature-based website, complete with a heading, description text, call to action buttons, and some imagery. And then we’ll use Gsap to animate everything in sequence for extra “wow-effect”.
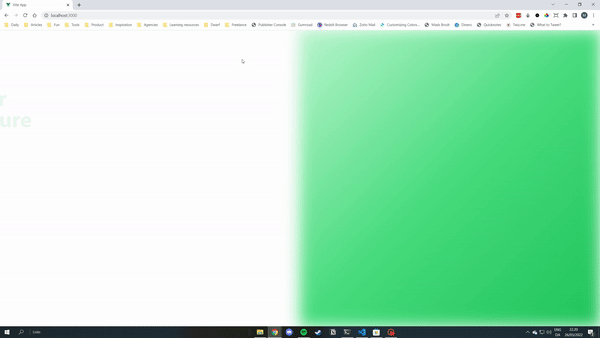
Here’s what the end product will look like:
By using Vite, Vue 3, Tailwind, and Gsap together, you’ll be well-equipped to build modern web applications that provide a great user experience (UX). You’ll also realize the great developer experience (DX) that these tools provide when building your application.
The power of animations
You might be wondering why we need animations at all, and the answer is quite simple:
It makes our websites and apps feel more alive.
Think about how humans perceive things in the real world. Nothing just “appears” out of nowhere; it is always naturally transitioning from somewhere else. Our eyes are used to objects moving at different speeds, so animating things on the web makes our pages feel more natural.
Animations also serve as a way to guide the user’s focus. By animating things one by one, like in the example we’ll be building, we can control what the user pays attention to - rather than showing them everything at once.
Finally, animations are an excellent way to delight our users with something unexpected. If used right, animations create a better user experience that makes people more likely to remember our site. And of course, they just look hella good! 😎
Initial setup
Alright, that’s enough talk. Let’s get into building our application.
We’ll start by setting up a sample Vue 3 project using Vite. Open your favorite terminal and run the command:
npm create vite@latestThis will prompt you with a few questions. Feel free to name the project whatever you want, but make sure you choose Vue as your framework and variant:

When the project has been scaffolded, follow the instructions:
cd gsap-nature-site
npm install
npm run dev
Open the project in your code editor and have a look around. If you already know Vue, everything should look pretty familiar. And if not, don’t worry - we’ll be writing all our code in the App.vue file for simplicity. Let’s start by removing all the boilerplate code and just doing a basic “Hello world” example:
<script setup></script>

<template>Hello world!</template>

<style></style>
Then navigate to localhost:3000 (or whatever port you started Vite on) and see your blank page with just “Hello, world!” on it.
Next up, we’ll add TailwindCSS. Since this isn’t a Tailwind tutorial, we’ll just import it using the official CDN. Open the index.html file in the root of your project and add the script right above the title tag:
<script src="https://cdn.tailwindcss.com"></script>That’ll remove the standard browser styling and allow us to use the Tailwind utility classes for our own styling.
Now we need to install Gsap. Run the following in your terminal:
npm install gsapAnd that’s it! Now you can import Gsap in any file and get right to animating:
import gsap from 'gsap'Since the point of this tutorial is to learn about animations, I’ve included the basic markup and styling for you to copy and paste here (instead of walking through it step-by-step): GitHub repo with markup. The code to copy is in the src/App.vue file. Make sure to also copy the two images from the public folder into your own project. If you get stuck, the with-animations branch contains the fully completed example code. And, of course, feel free to tweak anything you like!
Your first animation
Now that we’re all set up, let’s get started with the basics of Gsap. At its core, Gsap is an engine for tweening properties on an object between different states. This can be any JavaScript object but will most often be an HTML element.
Think of it like this: if you have a heading that’s initially invisible (opacity:0), we can use Gsap to transition it to a different state, like being fully visible (opacity:1). The only thing Gsap needs to know is:
- Which object to animate
- Which properties to animate on that object
We can tell Gsap this using its most basic function: the gsap.to() function.
This function takes two arguments. The first one is an HTML element or a CSS selector to fetch an element. The second argument is an object with the properties we’d like to animate. Example below:
  gsap.to("#heading", {
    duration: 1.5,
    x: 100,
  });
This code will select the DOM element with id=“heading” and animate its x position 100 pixels to the right over 1.5 seconds. To test this out in our project, import gsap from “gsap” and the onMounted lifecycle hook from Vue. Then run the gsap code inside of the onMounted callback function:
import gsap from "gsap";
import { onMounted } from "vue";

onMounted(() => {
  gsap.to("#heading", {
    duration: 1.5,
    x: 100,
  });
}
Save the file, and you should see the heading text animate to the right. Congrats! You’ve just implemented your first animation. Try adding a “y: 100” or changing the duration to play around. If you don’t specify a duration, Gsap will default to 1 second.
You’ll notice that the element is moving from its initial position in the DOM towards the x: 100 we told it to. But maybe we actually want it to start off-screen on the left and then move into its “correct” position. We can accomplish this using another Gsap function: the gsap.fromTo().
This function also takes an HTML element or selector as its first argument, but the second argument is now used to specify where the element should animate from. The third argument is then our end position - where the element should animate to.
Update the example to this:
  gsap.fromTo(
    "#heading",
    {
      opacity: 0,
      x: "-100%",
    },
    {
      duration: 1.5,
      opacity: 1,
      x: 0,
    }
  );
Now the element starts invisible and off-screen (with x: "-100%") and animates to its starting position of opacity:1 and x:0. Much better!
Let’s add the same kind of effect to our description text:
  gsap.fromTo(
    "#description",
    {
      opacity: 0,
      x: "-100%",
    },
    {
      duration: 1.5,
      opacity: 1,
      x: 0,
      ease: "power3.inOut",
      delay: 0.5,
    }
  );
You’ll notice 2 additions here: we’ve added a delay: 0.5 property as well as an ease: "power3.inOut". The delay tells Gsap to wait with the execution of this animation for 0.5 seconds, which makes it run right after the heading animation. This creates a nice “layering” effect.
The ease key tells Gsap how we would like the properties to be tweened. Gsap comes built-in with a bunch of different eases to choose from, and they all impact how our object animates.
Check out the official documentation to learn more about eases. The docs also feature an amazing ease visualizer to give you an idea of how the different values will impact your animations. If you don’t specify an ease, Gsap will default to a linear easing function, which is typically not what you want. Again, think about how things move in real life: very few things move at a constant speed from start to finish. Almost everything has an acceleration time so it starts slowly, then moves at full speed, and then stops slowly again.
Eases tend to have different use cases (as we’ll see later), but when in doubt, I like to go with power3.inOut. It’s a great general-purpose ease that almost always looks nice. Feel free to add it to the heading animation we created earlier too.
Open Source Session Replay
OpenReplay is an open-source, session replay suite that lets you see what users do on your web app, helping you troubleshoot issues faster. OpenReplay is self-hosted for full control over your data.

Start enjoying your debugging experience - start using OpenReplay for free.
Animating the buttons and arrow
Now that our text is animating, let’s work on the buttons. As you saw in the initial gif, the buttons fade in from the bottom one after another. There are two ways we could do this:
- Add an animation to each button (like we did for the text) and give the second one a bigger delay
- Use another cool Gsap property called
stagger
Both approaches would work in this case, but the stagger is generally preferred as you can then reuse the same animation code, regardless of how many elements you are animating. If you had more than 2, the first approach would quickly result in a lot of duplication.
Let’s select both our buttons with a class of main-btn. Pay attention to how we previously selected the texts using id’s. But since we can use any CSS selector, the class selector will now give Gsap access to all the elements with that class (our 2 buttons in this case). Add the following code:
  gsap.fromTo(
    ".main-btn",
    {
      opacity: 0,
      y: "100%",
    },
    {
      duration: 1.5,
      opacity: 1,
      y: 0,
      delay: 1.3,
      ease: "power3.inOut",
      stagger: 0.1,
    }
  );
Notice the stagger there at the end, which tells Gsap to wait 0.1 seconds with the second button. Sweet! This works really well when animating large arrays of items, too. 🔥
With the buttons in place, let’s tackle the downward pointing arrow. We’re gonna apply 2 different animations to this element. The first one will be similar to the buttons, animating the arrow from below:
  gsap.fromTo(
    "#downArrow",
    {
      opacity: 0,
      y: "100%",
    },
    {
      duration: 1.5,
      opacity: 1,
      y: 0,
      delay: 2,
      ease: "power3.inOut",
    }
  );
So that works, but let’s take it up a notch. Gsap also has support for running custom code on different events in an animation’s lifecycle. One of these events is the onComplete hook, allowing us to provide a function that Gsap will execute when an animation has finished. We can use this to run any code we want - like starting another animation!
Update the above “to” animation object to include an onComplete function like so:
    {
      duration: 1.5,
      opacity: 1,
      y: 0,
      delay: 2,
      ease: "power3.inOut",
      onComplete: () => {
        gsap.to("#downArrow", {
          y: 50,
          duration: 2,
          ease: "sine.easeInOut",
          repeat: -1,
          yoyo: true,
        });
      },
    }
In this new animation, you’ll notice 2 new properties:
repeat: -1. This instructs Gsap to restart the animation on completion and to keep doing that forever. You could also pass a positive number to have the animation run that amount of times.yoyo: true. This makes the animation run in reverse when repeating, so it goes back and forth naturally instead of jumping back to its initial position when restarting. Try to remove this and see what happens.
Remember how I talked about different eases earlier and how some eases are better suited for specific use cases? Well, the sine based easings just happen to work great for floating/bouncing objects. Try another ease to see how unnatural it looks.
Now we’ve successfully added the first animation to fade in our downwards pointing arrow, and when that finishes, start another animation. This second animation moves the arrow up and down, repeating for infinity, and using the yoyo effect to run in reverse when going back.
Rotating images
Alright, let’s get to the final piece of the puzzle: rotating our images into their correct position. I’ve already given the left image an id of imageLeft and the right one imageRight. Following the same procedure as before, add the following code:
  gsap.fromTo(
    "#imageLeft",
    {
      opacity: 0,
      y: 100,
      rotation: 10,
    },
    {
      duration: 1.5,
      opacity: 1,
      y: 0,
      rotation: -3,
      ease: "power3.inOut",
      delay: 2.5,
    }
  );
Remember that Gsap can animate any CSS property, not just the x/y position and opacity. So here we’re telling Gsap to rotate our image from a starting rotation of 10 (meaning the image is rotated 10 degrees clockwise from its origin point in the top left) to its final rotation of -3 degrees. This creates a nice “swinging” effect. Remember to also animate the opacity at the same time, or the image will be visible from the beginning of the animation.
We’ll do something very similar for the right image:
  gsap.fromTo(
    "#imageRight",
    {
      transformOrigin: "bottom right",
      rotation: 20,
      opacity: 0,
      y: -100,
    },
    {
      duration: 1.5,
      opacity: 1,
      y: 0,
      rotation: 3,
      ease: "power3.inOut",
      delay: 3,
    }
  );
Here we’re starting from an original rotation of 20 degrees and animating to an end rotation of 3 degrees. We’re also using the transformOrigin CSS property to make the rotation take place from the bottom right corner of the image instead of the default top left (as with the left image). You can read more about transform-origin in the MDN docs here.
Conclusion / final product
And that’s it! Now you’ve got a cool looking hero section that naturally animates all of it’s elements to feel more alive and better engage the user 🔥
Let’s do a quick review of what you’ve learned:
- How to set up a modern web app with Vite, Vue 3 and TailwindCSS
- Installing and using Gsap to animate any DOM element
- The basic functions of Gsap like
to()andfromTo() - Animating properties like the position, opacity, and rotation of elements
- Using Gsap eases, durations, and delays to control your animations
- Using features like stagger, repeat, and yoyo to chain animations and run them multiple times
- Hooking into different events during an animation’s lifecycle like
onComplete
This is obviously only the beginning of creating awesome animations on the web. We’ve scratched the surface on the core features offered by Gsap, but a big part of working with animations is also getting a feel for what works and what doesn’t. Below is a list of steps you can take to continue learning about web animations with Gsap and further improve your websites:
Next steps
- Refactor the code to make use of Gsap’s Timeline feature. Timelines are a powerful way to sequence your animations, instead of having to manually calculate different delays between animations. In our example, all the delays start from the load of the page. But if we later decided that the text should come a bit later, the whole chain of animations would need to be updated. Timelines are a great solution to this problem.
- Dig into the many Gsap plugins. Gsap offers tons of nice plugins (some free, some paid) to create even more cool functionality. One of these is ScrollTrigger that allows you to animate objects based on the user’s scroll position. Another is the MotionPath plugin that enables you to animate any object along a given SVG path. Check out the Plugins page to learn more.
- Play around with the animations! The best way to learn something is to play around. Try to get a feeling for which animations you think work well. Play around with different values, eases, and durations to see if you can make the example hero section work even better!
Thanks for reading ✌