

Our chances of converting visitors into clients considerably rise if our website is translated into the user’s native language. This article will explain implementing the multilingual feature in a website using React. Hopefully, by the end of this article, we will be able to translate any website into any language we want. The multilingual functionality makes navigating sites in different languages easier for our readers.
Getting Started
At first, we create a React app using the following:
npx create-react-app app-nameThis command lets us create a basic react app.
After that, we change the working directory using the following command -
cd app-nameThen we start the React application using -
npm startNext, we follow mentioned steps below -
- Create an
i18nfile. - Create a
LanguageSelectorfile enabling us to select the website’s language. - Create a
localesfolder where we store the translations in different languages used by our site. - Map
contentswith languages.
Following are the npm packages used in translation -
- i18next
- react-i18next
Command to install the packages -
npm install react-i18next i18nextLet’s dive deeper now.
Following is the project structure -
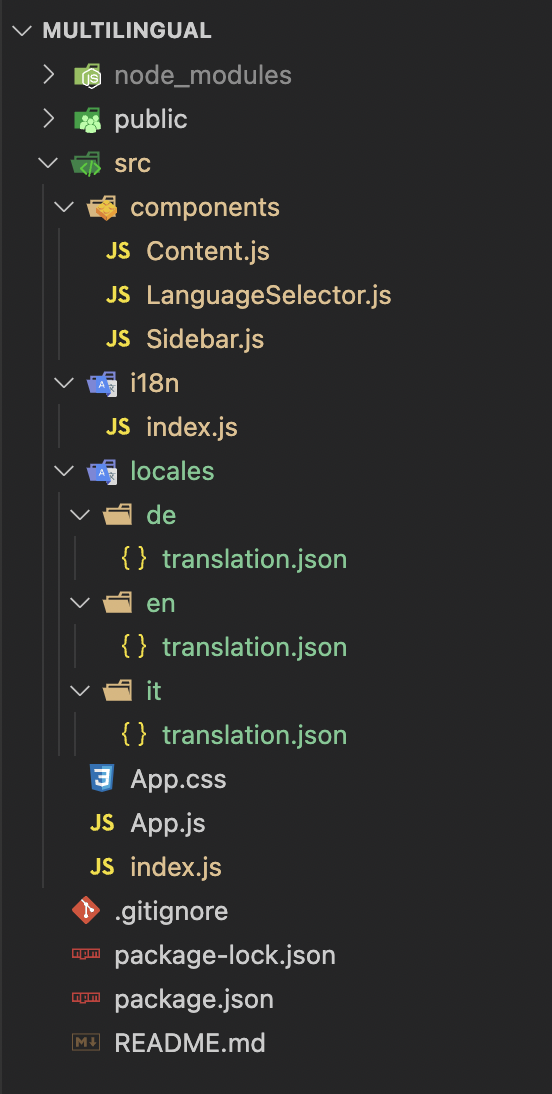
1. Creating i18n file
src > i18n > index.js
import i18n from "i18next";
import { initReactI18next } from "react-i18next";
import translationsInEng from '../locales/en/translation.json';
import translationsInGerman from '../locales/de/translation.json';
import translationsInItalian from '../locales/it/translation.json';
// the translations
const resources = {
en: {
translation: translationsInEng
},
de: {
translation: translationsInGerman
},
it: {
translation: translationsInItalian
},
};
i18n
.use(initReactI18next) // passes i18n down to react-i18next
.init({
resources, // resources are important to load translations for the languages.
lng: "it", // It acts as default language. When the site loads, content is shown in this language.
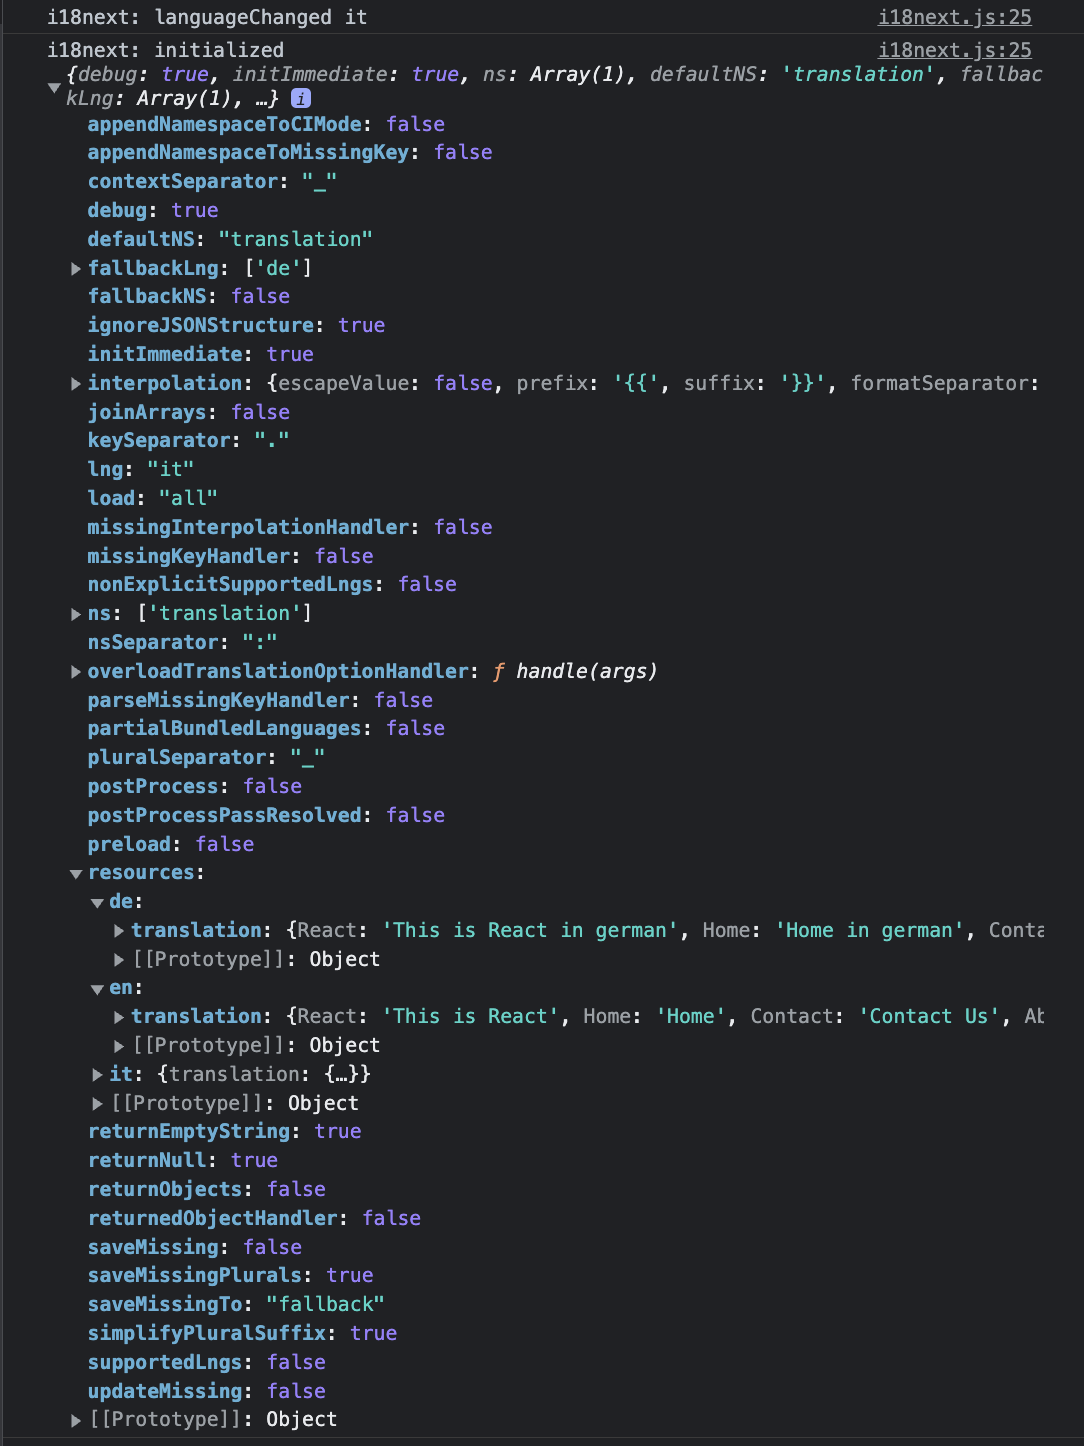
debug: true,
fallbackLng: "de", // use de if selected language is not available
interpolation: {
escapeValue: false
},
ns: "translation", // namespaces help to divide huge translations into multiple small files.
defaultNS: "translation"
});
export default i18n;In this file, we described
a. resources (for translating in different languages): It contains the files helping map the translations with the selected languages. If we interchange translationsInEng and translationsInGerman, then the content available in the translation.json file of the en and de folders will be shown in German and English, respectively. The translations in the en and de folders get mapped in German and English.
b. lng: The default language is responsible for showing the translations when the site loads. If we change it to de, the website will be translated to de on loading the site.
c. debug: It is boolean and gives detailed information on the console if assigned true. It also helps in analyzing the issues(if any occurred). Below is the screenshot attached for more information -
d. fallbackLng: This language is used when the selected language(lng) is unavailable. Acts as default language in the absence of lng.
e. ns (Namespaces): It allows us to break huge translations into multiple small files instead of writing in a single large file.
2. Create a LanguageSelector file enabling us to select the language of the website
The language can be changed by using i18n imported from the i18n.js file.
src > components > LanguageSelector.js
import React, {useState} from "react";
import i18n from '../i18n';

const LanguageSelector = () => {

    const [selectedLanguage, setSelectedLanguage] = useState(i18n.language); // i18n.language contains the language assigned to lng in i18n.js file.

    const chooseLanguage = (e) => {
        e.preventDefault();
        i18n.changeLanguage(e.target.value);   // i18n.changeLanguage() is used to change the language assigned to lng in i18n.js file.
        setSelectedLanguage(e.target.value);
    }

    return (
        <select defaultValue={selectedLanguage} onChange={chooseLanguage}>
            <option value="de">German</option>
            <option value="en">English</option>
            <option value="it">Italian</option>
        </select>
    );
};

export default LanguageSelector;
3. Create a locales folder to store the translations in our site’s different languages.
- de
src > locales > de > translation.json
{
    "React" : "Das ist React",
    "Home": "Daheim",
    "Contact": "Kontaktiere uns",
    "About": "Über uns",
    "username": {
        "label": "Nutzername",
        "placeholder": "Platzhalter..."
    },
    "password": {
        "label": "Kennwort",
        "placeholder": "passwort platzhalter..."
    },
    "location": "Geben Sie den Standort ein",
    "Address": "Gib die Adresse ein"
}- en
src > locales > en > translation.json
{
    "React" : "This is React",
    "Home": "Home",
    "Contact": "Contact Us",
    "About": "About Us",
    "username": {
        "label": "username",
        "placeholder": "placeholder..."
    },
    "password": {
        "label": "password",
        "placeholder": "password placeholder..."
    },
    "location": "Enter the location",
    "Address": "Enter the address"
}- it
src > locales > it > translation.json
{
    "React" : "Questo è React",
    "Home": "Casa",
    "Contact": "Contattaci",
    "About": "Riguardo a noi",
    "username": {
        "label": "nome utente",
        "placeholder": "segnaposto..."
    },
    "password": {
        "label": "parola d'ordine",
        "placeholder": "segnaposto password..."
    },
    "location": "Inserisci la posizione",
    "Address": "Inserisci l'indirizzo"
}
4. Map contents with the languages.
Following is the App.js -
src > App.js
import './App.css';
import LanguageSelector from './components/LanguageSelector';
import Content from './components/Content';
import Sidebar from './components/Sidebar';

function App() {
  return (
    <div className="App">
      <LanguageSelector />
      <Content />
      <Sidebar />
    </div>
  );
}

export default App;
In Sidebar.js, we import useTranslation() hook to implement the translation of the words. We get the t function and i18n instance from useTranslation().
The t function is used to translate our contents while i18n changes the language.
But, we will only use t here.
The following code will translate words like Home, Contact, and About.
src > components > Sidebar.js
import { useTranslation } from 'react-i18next'
import React from 'react'

const Sidebar = () => {
    const { t } = useTranslation();
  return (
    <div style={{marginTop: "10px"}}>
        <button>{t("Home")}</button>
        <button>{t("Contact")}</button>
        <button>{t("About")}</button>
    </div>
  )
}

export default Sidebar
Content.js shows how to translate the content.
src > components > Content.js
import React from 'react'
import { useTranslation } from 'react-i18next'

const Content = () => {
    const { t } = useTranslation();

    return (
        <div>
            <p>{t("React")}</p>
            <hr/>
            <p>{t("username.label")}</p>
            <p>{t("username.placeholder")}</p>
            <hr/>
            <p>{t("password.label")}</p>
            <p>{t("password.placeholder")}</p>
            <hr/>
            <p>{t("location")}</p>
            <p>{t("Address")}</p>
        </div>
    )
}

export default Content;
Translation of contents takes time. As a result, we wrap the <App/> component within Suspense with fallback.
Loading... will be shown on the screen until the translation is done.
src > index.js
import React, { Suspense } from 'react';
import ReactDOM from 'react-dom/client';
import App from './App';

const root = ReactDOM.createRoot(document.getElementById('root'));
root.render(
  <React.StrictMode>
    <Suspense fallback={<div>Loading....</div>}>
      <App />
    </Suspense>
  </React.StrictMode>
);
Session Replay for Developers
Uncover frustrations, understand bugs and fix slowdowns like never before with OpenReplay — an open-source session replay tool for developers. Self-host it in minutes, and have complete control over your customer data. Check our GitHub repo and join the thousands of developers in our community.
Common Mistake
Till this point, everything seems OK, but it’s not.
Once you select a particular language from the dropdown, the contents of the website change accordingly, but on refreshing the webpage, the selected language changes back to that language which is mentioned in lng in the i18n.js file because we assigned i18n.language to selectedLanguage (check 6th line in LanguageSelector.js).
Fun Activity
Change the lng (in i18n.js file) to en and now change the language from the dropdown on the webpage; you’ll see contents change as per the selected language but do refresh the page. This time you’ll notice the content is in English as the selectedLanguage; this time is en.
The problem, as of now, is refreshing the webpage changes the selected language of the website. So, what to do now?
Solution
The solution is to use the localStorage object. This object stores the data in the browser’s key:value pair with no expiration date.
- Let’s see what changes we must introduce in the already available code.
- In
chooseLanguage() in LanguageSelector.js, we set the key as lang and its value equal to the language selected by the user.
src > components > LanguageSelector.js
import React, {useState} from "react";
import i18n from '../i18n';

const LanguageSelector = () => {
    const [selectedLanguage, setSelectedLanguage] = useState(i18n.language); // i18n.language contains the language assigned to lng in i18n.js file.

    const chooseLanguage = (e) => {
        e.preventDefault();
        i18n.changeLanguage(e.target.value);   // i18n.changeLanguage() is used to change the language assigned to lng in i18n.js file.
        setSelectedLanguage(e.target.value);
        localStorage.setItem("lang", e.target.value);
    }

    return (
        <select defaultValue={selectedLanguage} onChange={chooseLanguage}>
            <option value="de">German</option>
            <option value="en">English</option>
            <option value="it">Italian</option>
        </select>
    );
};

export default LanguageSelector;- In
i18n.js,lnggets the value available in thelangkey (in our case, it’sit) because oflng: localStorage.getItem("lang").
src > i18n > index.js
import i18n from "i18next";
import { initReactI18next } from "react-i18next";

import translationsInEng from '../locales/en/translation.json';
import translationsInGerman from '../locales/de/translation.json';
import translationsInItalian from '../locales/it/translation.json';

// the translations
const resources = {
  en: {
    translation: translationsInEng
  },
  de: {
    translation: translationsInGerman
  },
  it: {
    translation: translationsInItalian
  },
};

i18n
  .use(initReactI18next) // passes i18n down to react-i18next
  .init({
    resources, // resources are important to load translations for the languages.
    lng: localStorage.getItem("lang"), // It acts as default language. When the site loads, content is shown in this language.
    debug: true,
    fallbackLng: "de", // use de if selected language is not available
    interpolation: {
      escapeValue: false
    },
    ns: "translation", // namespaces help to divide huge translations into multiple small files.
    defaultNS: "translation"
  });

export default i18n;
Check the Local Storage section under the Application tab in the developer console. The selected language is it. Now if you refresh the browser, the selected language will still be it.

Output
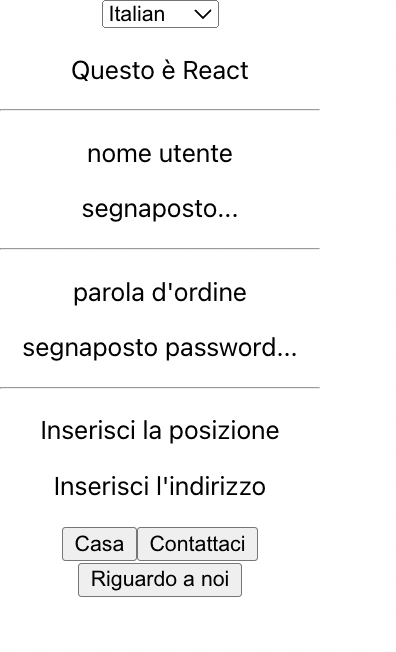
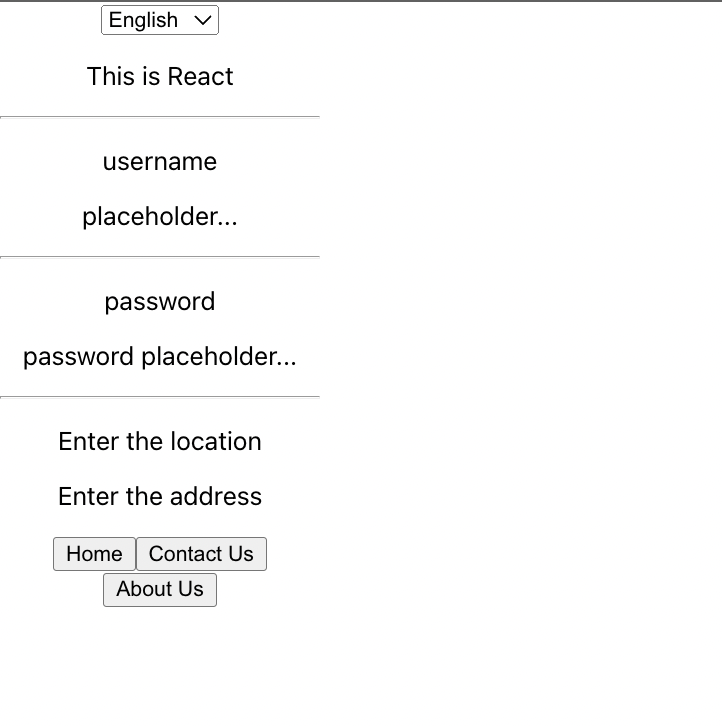
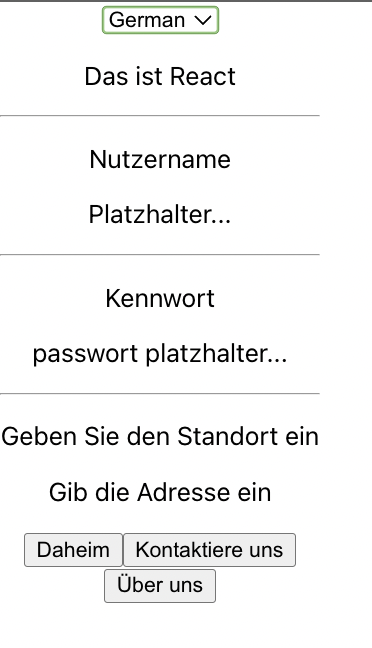
We are focusing on translating, so there is no styling in it. The final output looks like this -
Selected Language is it(Italian)
Selected Language is en(English)
Selected Language is de(German)
Conclusion
With this, we come to the end of this article. I believe you have learned how to implement the multilingual feature in a website.
References
Gain Debugging Superpowers
Unleash the power of session replay to reproduce bugs and track user frustrations. Get complete visibility into your frontend with OpenReplay, the most advanced open-source session replay tool for developers.