Mastering Next.js Authentication with Auth0: A Practical Guide
How to add Auth0 authentication to your NextJS app


Authentication is a crucial aspect of web applications, ensuring that only authorized users can access specific resources or perform certain actions. This article will examine how we can add authentication to a Next.js application using Auth0, a powerful authentication and authorization platform.

Spot abnormal user behaviors and iron out the bugs early with OpenReplay. Dive into session replays and reinforce your front-end against vulnerabilities that hackers search for.
Discover how at OpenReplay.com.
Auth0 is a versatile and flexible platform that provides authentication and authorization services to your applications. Whether you’re building a web application, a mobile application, or any other app, auth0 can be integrated anywhere. It supports various authentication methods, including traditional email & password login, social logins, and multi-factor authentication. The Auth0 identity platform also allows to customize login services according to different project needs and requirements.
Setting Up Auth0 Account
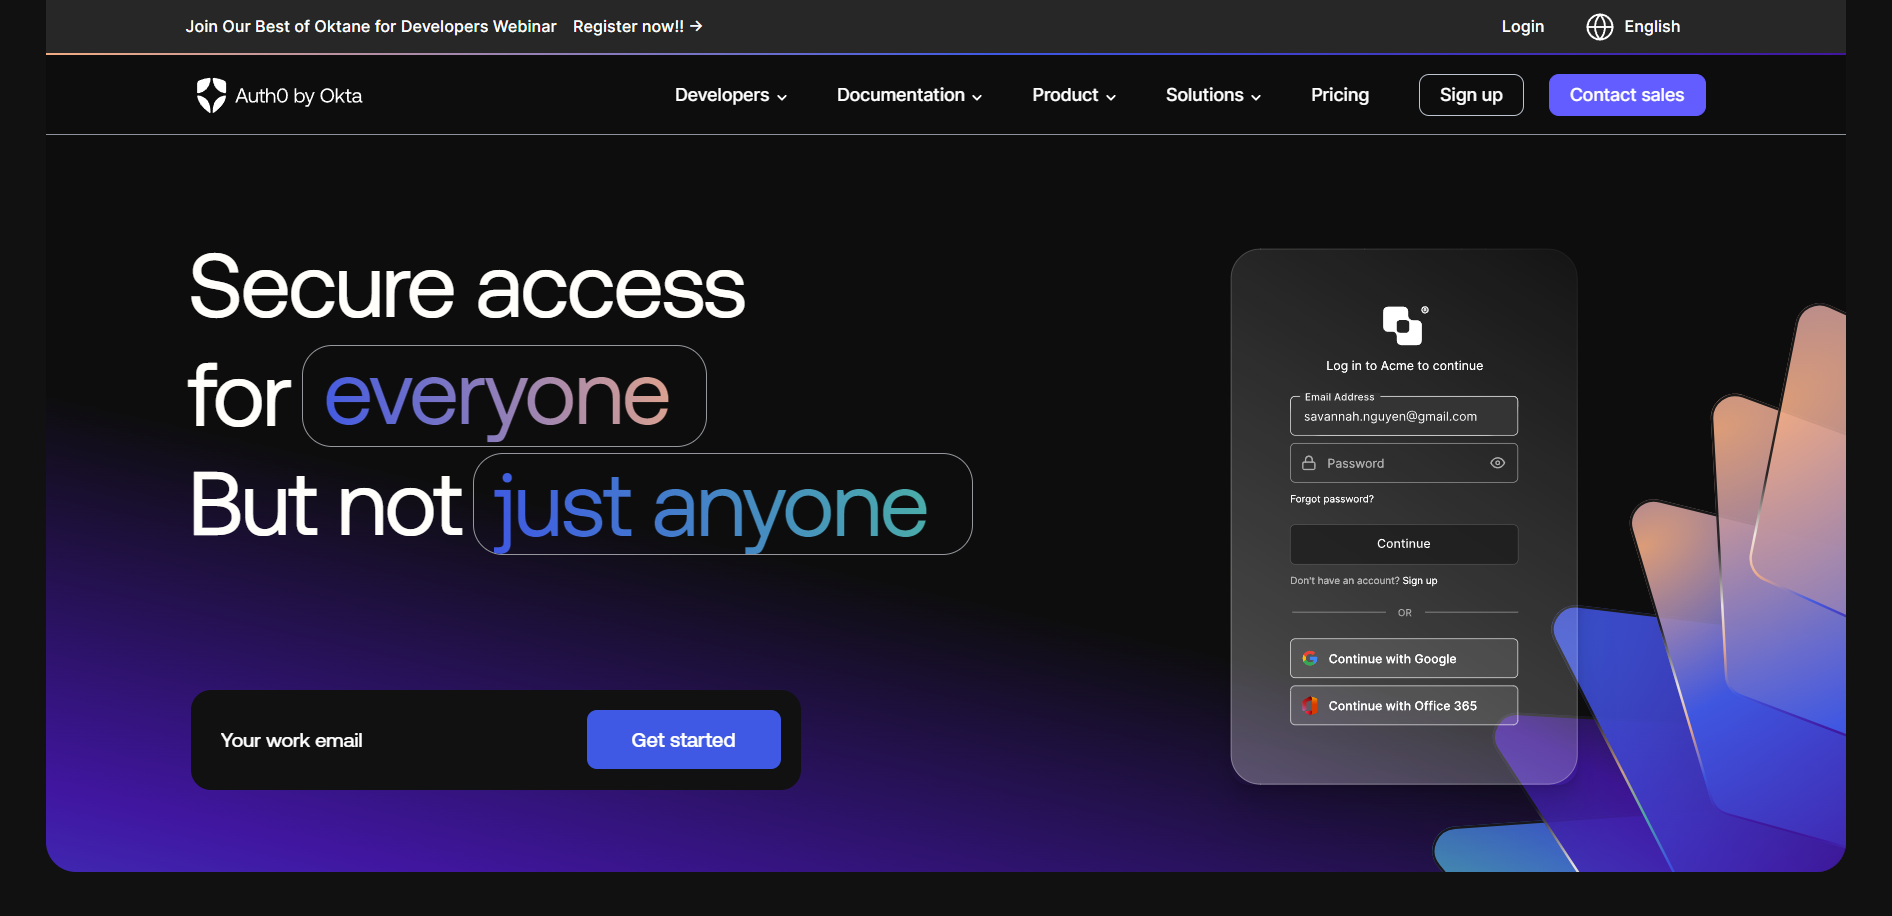
Let’s get started with our example by setting up an Auth0 account. To do this, visit the auth0 website and create a new free account. Start by visiting Auth0’s website. Click on the Signup button and sign up for a new account.
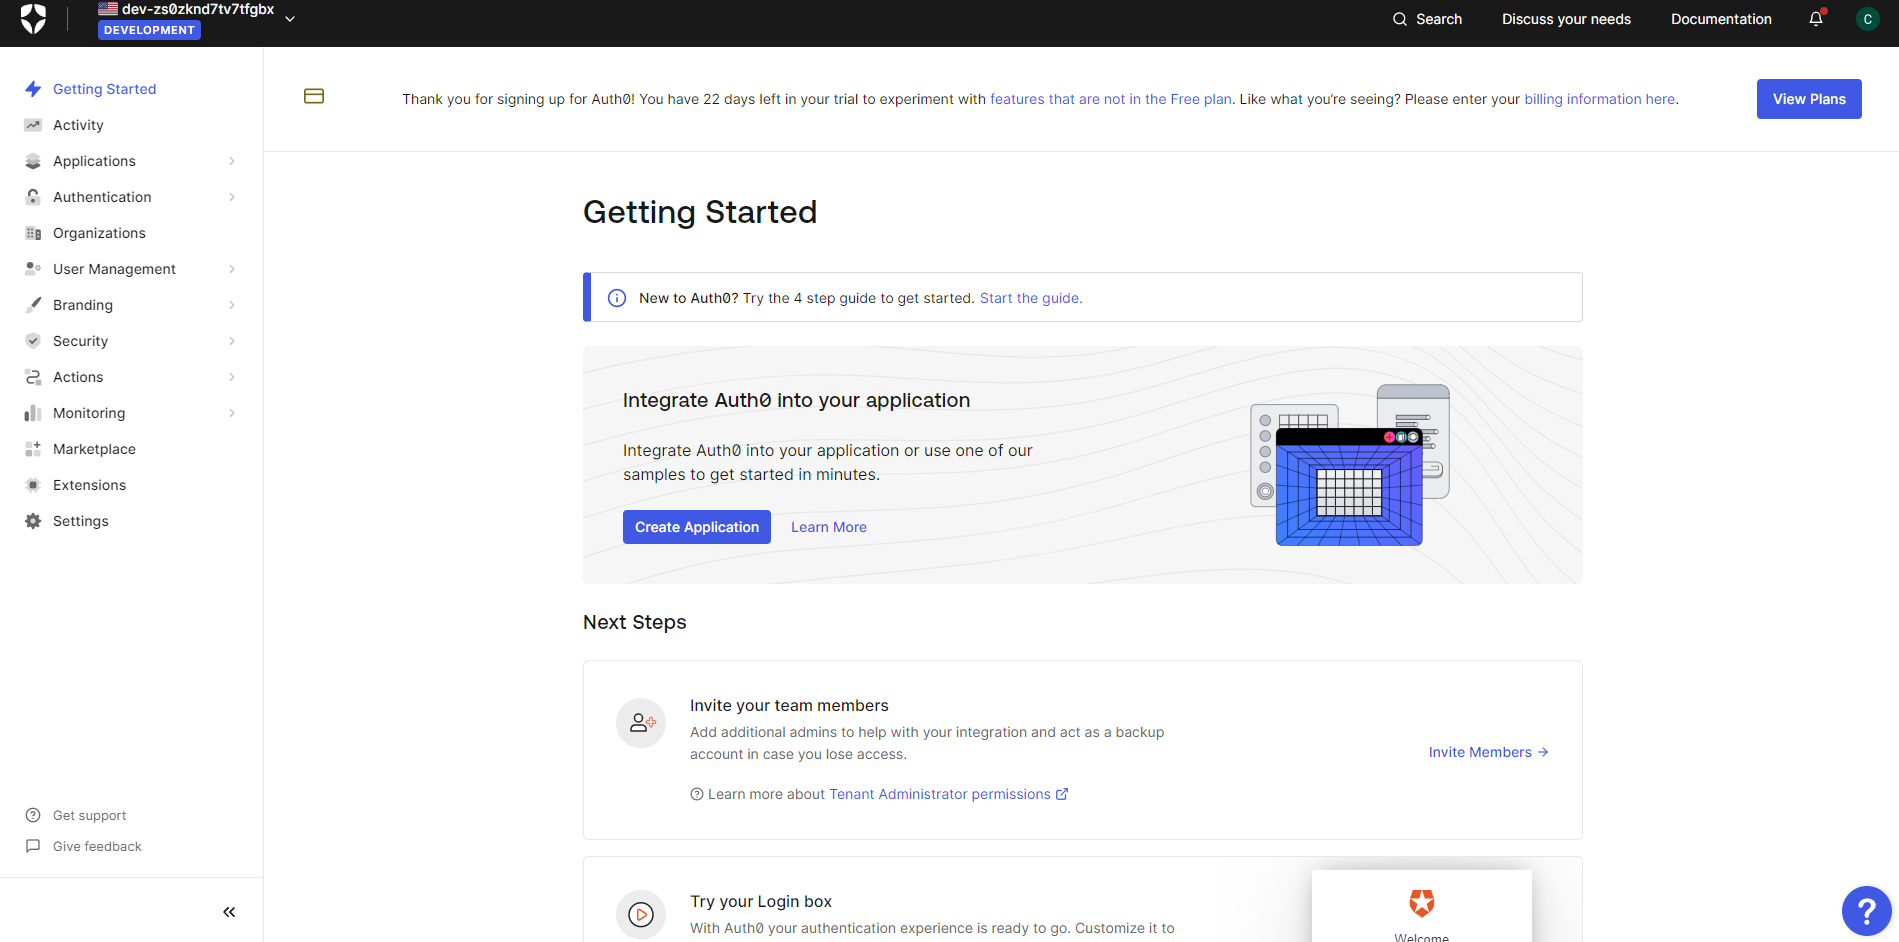
 Once logged in, navigate to the Auth0 Dashboard. Below is how your Auth0 dashboard looks like:

Creating a New Auth0 Application
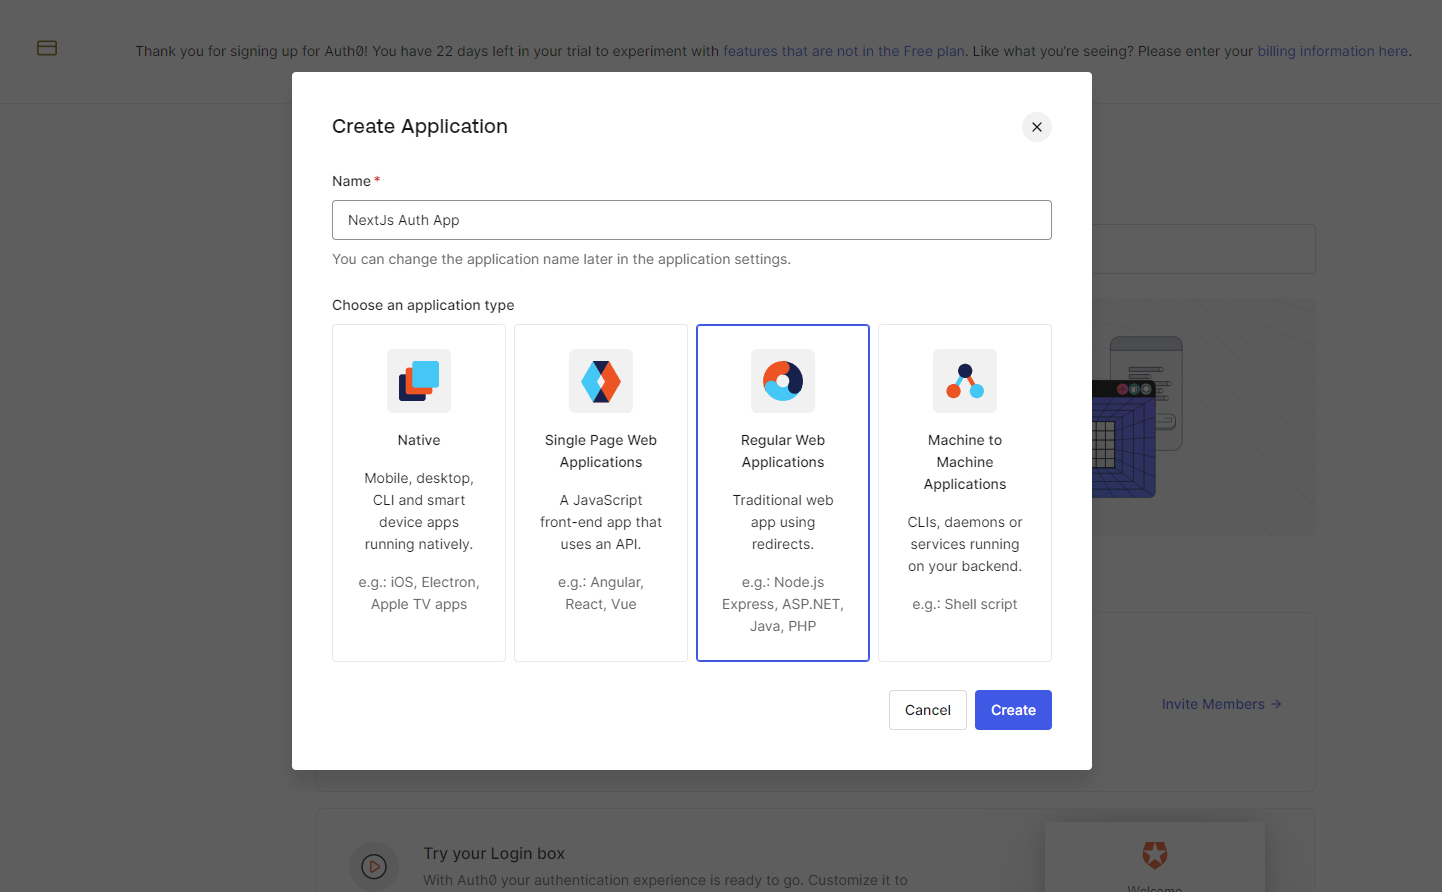
In the Auth0 Dashboard, click on “Create Application”. This will allow us to create a new auth0 application.
 Now choose
 Regular Web Applications as the application type. NextJS comes under the regular web application type as it uses traditional redirects. Lastly, click “Create”.
Configuring Auth0 Settings for the Application
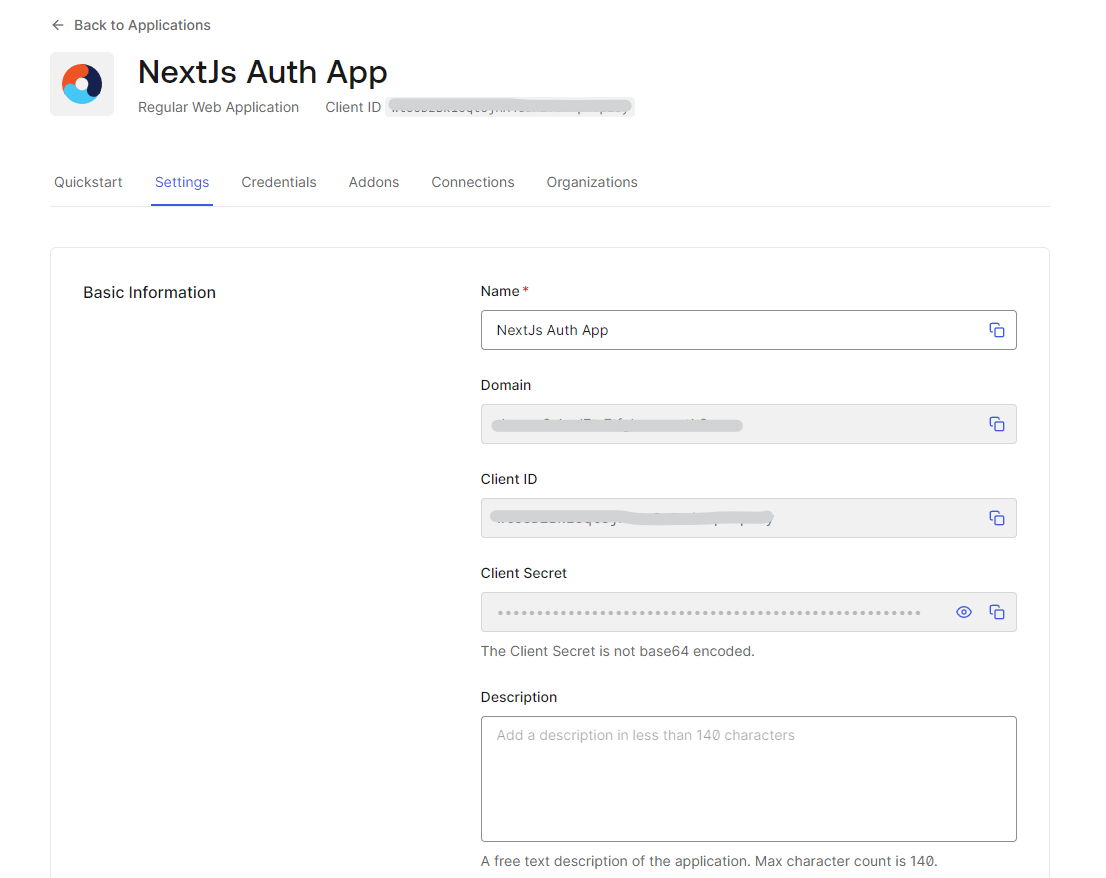
Navigate to the “Settings” tab and note the client ID and Client Secret for later use in the project. Every application created in Auth0 is assigned an alphanumeric client ID unique for your application only and will be used for calling Auth0 APIs through the SDK.
You will also be provided with a unique domain URL, which will be used to access the Auth0 services.
Great! We are done with setting up an Auth0 account. It’s time to integrate it into our next project.
Integrating Auth0 with Next.js
To get started, we will first create a new Next.js project to work further in integrating Auth0 into our application. To create the next app, use the following commands:
Setting Up a Next.js Project
Before we dive into Auth0 integration, let’s set up a Next.js project. Step 1. Create a new Next.js application To create a new next.js project, make sure you have Node.js installed, and then run the following commands:
npx create-next-app mynextjs
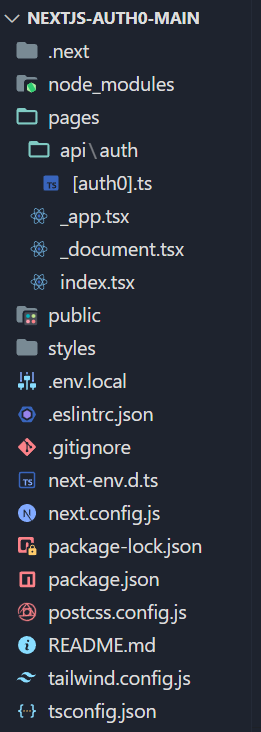
cd mynextjsNote: For demonstrating this article, I will be using Typescript as the default language, and the project structure will be as follows:
 Now that we have created our next project let’s integrate Auth0 into it.
Step 2. Installing necessary dependencies
To integrate Auth0 in the Next.js application, we need to install the Auth0 dependency (SDK). Run the following command within your project directory to install the SDK:
Now that we have created our next project let’s integrate Auth0 into it.
Step 2. Installing necessary dependencies
To integrate Auth0 in the Next.js application, we need to install the Auth0 dependency (SDK). Run the following command within your project directory to install the SDK:
npm install @auth0/nextjs-auth0 next-authStep 3. Setting up Auth0 SDK in the Next.js project
Go to /pages/ and open the file _app.tsx and add the following code:
// pages/_app.tsx
import "@/styles/globals.css";
import type { AppProps } from "next/app";
import { UserProvider } from "@auth0/nextjs-auth0/client";
export default function App({ Component, pageProps }: AppProps) {
 return (
  <UserProvider>
   <Component {...pageProps} />
  </UserProvider>
 );
}
Step 4: Configure Auth0 SDK
The next step is to configure and add some details like AUTH0_SECRET, AUTH0_CLIENT_ID, AUTH0_CLIENT_SECRET, AUTH0_BASE_URL, and AUTH0_ISSUER_BASE_URL to our local environment file.
First, create a new .env.local file in your root directory and add the following:
AUTH0_SECRET=jdsbfjsdbjfbdsgfnmdsfbgfndsbfgmnbsdfgdfbggjh
AUTH0_BASE_URL=http://localhost:3000
AUTH0_ISSUER_BASE_URL='https://yourdomainfromauth0.us.auth0.com'
AUTH0_CLIENT_ID=add_your_client_id
AUTH0_CLIENT_SECRET=add_your_client_secret
Here,
AUTH0_SECRET: This is a confidential piece of information your application uses to authenticate itself with Auth0 when making requests. You can create one usingopenssl rand -hex 32on the command line.AUTH0_BASE_URL: This is the base URL for your application. If you’re running the project on localhost, it will behttp://localhost:3000.AUTH0_ISSUER_BASE_URL: This is the issuer URL of the Auth0 Authorization Server. You can find it in the domain settings.AUTH0_CLIENT_ID: This is your Auth0 application’s Client ID.AUTH0_CLIENT_SECRET: This is your Auth0 application’s Client Secret.
Implementing Authentication in Next.js
After integrating Auth0 in Next.js, let’s create login and logout components and handle user authentication state.
Creating login and logout components
Let’s start building our UI for the application to use the authentication. Head to /pages/index.tsx and add the following code:
// pages/index.tsx
import React from "react";
import { useUser } from "@auth0/nextjs-auth0/client";
function index() {
const { user, error, isLoading } = useUser();
if (isLoading) return <div>Loading...</div>;
if (error) return <div>{error.message}</div>;
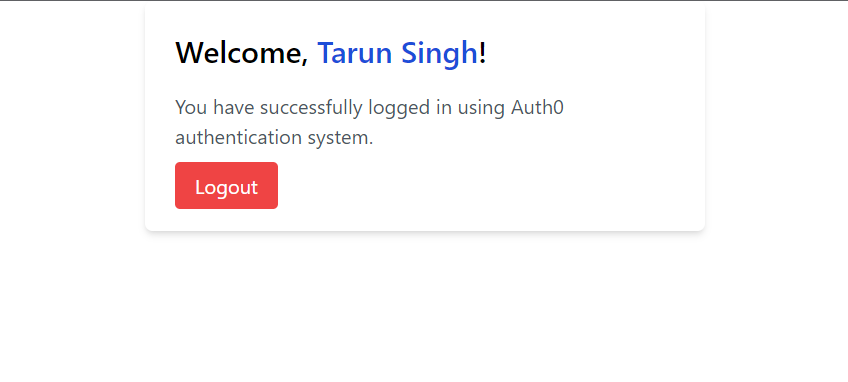
if (user) {
return (
<div className="max-w-md mx-auto bg-white rounded-md overflow-hidden shadow-md p-6">
<h2 className="text-2xl font-semibold mb-4">
Welcome, <span className="text-blue-700">{user.name}</span>!
</h2>
<p className="text-gray-600 mb-4">
You have successfully logged in using the Auth0 authentication system.
</p>
<a
className="bg-red-500 hover:bg-red-600 text-white py-2 px-4 rounded"
href="/api/auth/logout"
>
Logout
</a>
</div>
);
}
return (
<div className="flex flex-col gap-10 items-center p-10">
<h1 className="text-3xl font-bold">Auth0 authentication in Next.js</h1>
<a
href="/api/auth/login"
className="bg-blue-400 text-white p-4 w-20 h-14 text-center rounded-md"
>
Login
</a>
</div>
);
}
export default index;In the code above, we’re creating our main interface for the application. To get the user data, we render Log in and Log out components using conditional statements.
If the user is authenticated, it will display the user details like the user name, a message, and a Logout Button. If not, the user will see the Login button to authenticate themselves for the next process. Lastly, for adding styling, we’re using Tailwind CSS.
Handling user authentication state
The provided index.tsx file already handles the user authentication state using the useUser hook.
Handling Authentication Callbacks
With our implementation complete, let’s add some callbacks to handle the authentication flow. But before we handle the callbacks or write any code for it, it’s important to understand what exactly we are trying to do and how our authentication process flows.
Understanding the authentication flow with Auth0 callbacks
Authentication with Auth0 involves several steps, including redirects to Auth0 for login, authentication callbacks, and handling the authentication state. Here’s a brief overview:
- Login Request: When users initiate the login process, they are redirected to the Auth0 Universal Login Page, where they can enter their credentials.
- Authentication Callback: After successful authentication, Auth0 redirects the user to your application’s specified callback URL (/api/auth/callback in this case). This callback URL is configured in your Auth0 dashboard.
- Token Exchange: The callback route in your Next.js application is responsible for exchanging the authorization code received from Auth0 for an access token and an identity token.
- User Authentication State: The access token is then used to authenticate the user on the server, and the user’s authentication state is maintained using sessions.
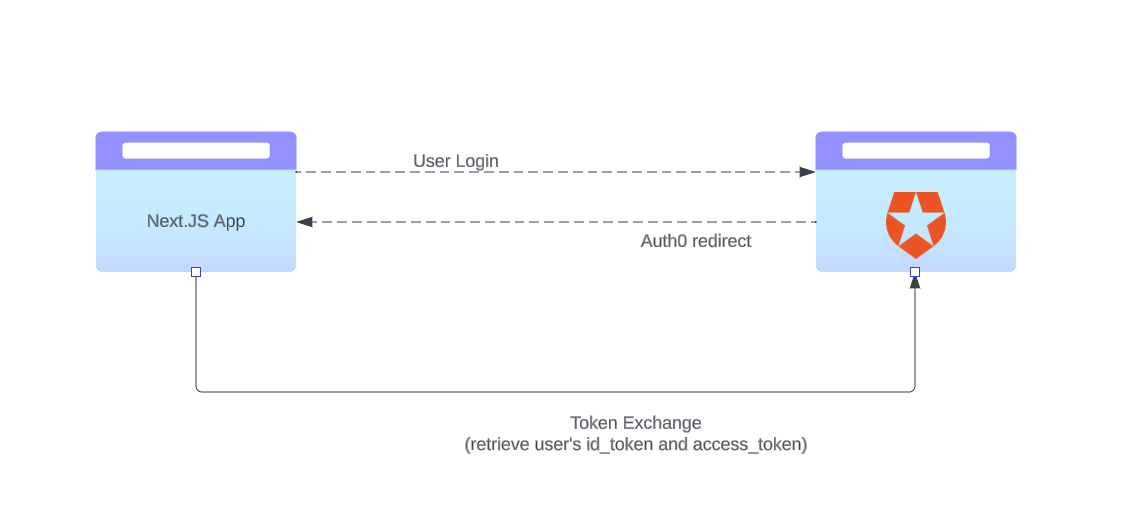
This diagram illustrates the seamless flow of authentication when a user interacts with our Next.js application integrated with Auth0. Understanding this flow is crucial for a clearer grasp of the Auth0 authentication process.
Implementing callback routes in Next.js
To implement the callback routes, go to the pages/api/auth/, create a file called [auth0].ts, and add the following code:
// pages/api/auth/[auth0].ts
import { handleAuth } from "@auth0/nextjs-auth0";
export default handleAuth();
The above file has the handleAuth method from the SDK which will be responsible for all the routes used for handling the authentication callbacks.
Once you have added the above code, the SDK will automatically read and configure these values from the Node.js process environment. Now, the application is complete and is ready to run.
Run the server
To preview the final output, start the development server by running the following command in your terminal:
npm run devVisit http://localhost:3000 in your browser to view your Next.js app.
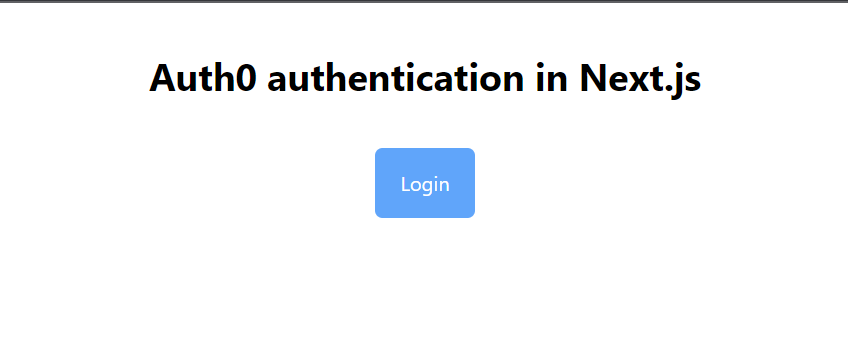
Before Login
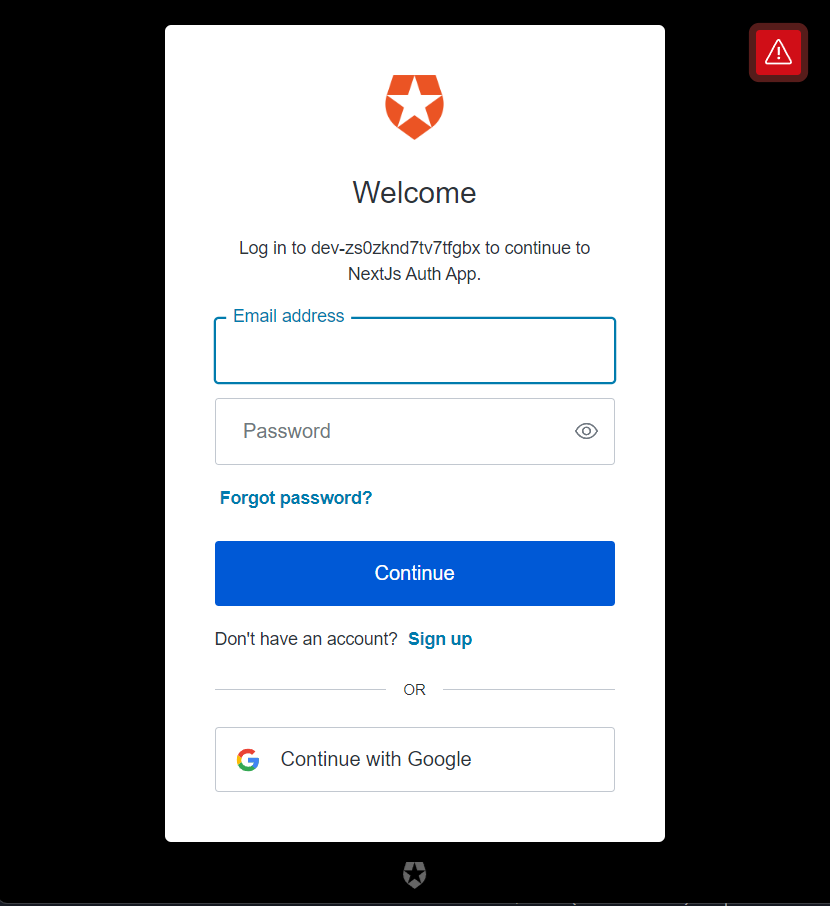
Auth0 Authentication
After Login
Adding Authorization (Optional)
Let’s configure Auth0 for role-based access control and restrict access to certain routes based on user roles. This step is optional, but if you are building an application with multiple members, you can implement this.
Configuring Auth0 for role-based access control
This step involves setting up roles and permissions in your Auth0 dashboard. Step 1: Navigate to the Auth0 Dashboard: https://manage.auth0.com/ and log in with your credentials. Step 2: Add a New User
- Click on “User Management” in the left-hand menu.

- Select “Users” > ”+ Create User” button
Fill in the required information for the new user, such as email and password.
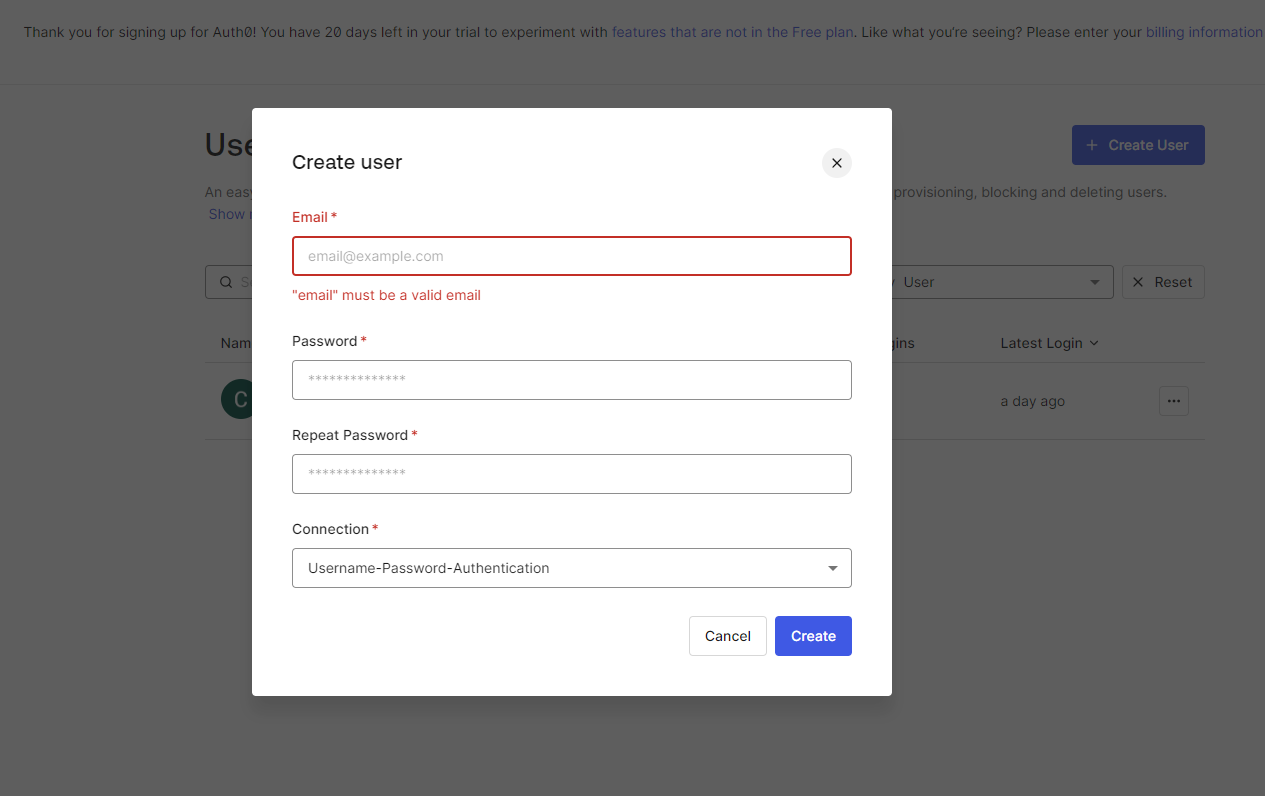
- Finally, click the “Create” button to save the new user. Step 3: Create Roles
- In the Auth0 Dashboard, go to “User Management” and click on “Roles” > ”+ Create Role.”
Provide a name for the role, like admin, etc., and Save it.
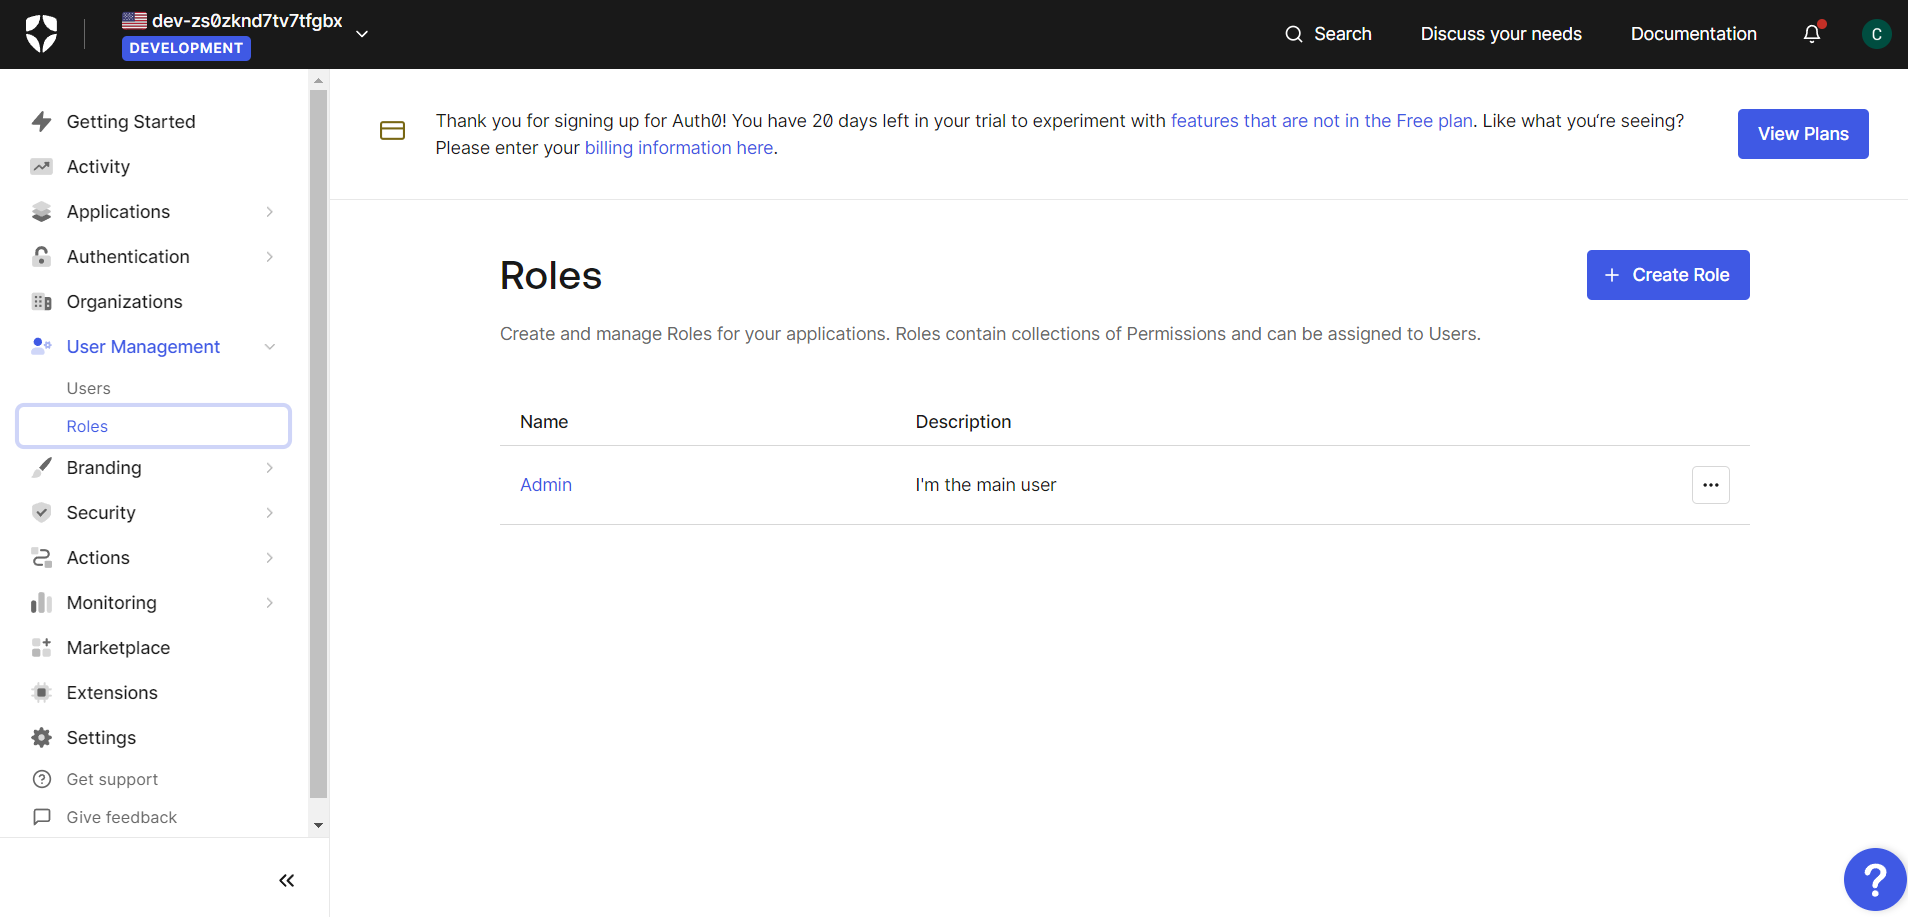
Following the above steps, we can create multiple users with different roles and permissions.
Restricting access to certain routes based on user roles
To restrict access to a specific page, use the withPageAuthRequired function in a higher-order component from @auth0/nextjs-auth0.
This can be easily done by changing our [auth0].ts file as follows:
// pages/api/auth/[auth0].ts
import { handleAuth, withPageAuthRequired } from "@auth0/nextjs-auth0";
export default handleAuth({
 async callback(request, response) {
  try {
   await withPageAuthRequired({ roles: ['admin'] })(request, response);
  } catch (err) {
   res.status(err.status || 500).end(err.message);
  }
 },
});
By adding the above code, the users with proper permissions can access specific routes without restriction, while others will be restricted.
Conclusion
In this article, we have looked at authenticating the Next.js app using Auth0. We have seen the step-by-step implementation for auth0 services to integrate into our application and how to handle the route callbacks in the next application. By leveraging the power of the Auth0 authentication system, you have provided the user with a seamless experience.
Detect, Fix, and Fortify
Spot abnormal user behaviors and iron out the bugs early with OpenReplay. Dive into session replays and reinforce your front-end against vulnerabilities that hackers search for.
Explore DevTools