Optimizing the Performance of Your Vue Apps Using Web Workers
Take advantage of the power of Web Workers to optimize the performance of your Vue applications


Getting a Vue app to perform faster and smoother is one of the issues Vue.js software developers face. One way to do that is by offloading some heavy-duty work to another thread and allowing the main thread to handle the UI. But we can only do that with the help of web workers.
In this article, we will talk about web workers, how to offload a task to a web worker and how to optimize our web application by hooking a web worker into it and the app workflow.
But first, what is a web worker?
Executing scripts on an HTML page can sometimes be something to worry about as the page can become unresponsive depending on how heavy the javascript operations are. A web worker is javascript that runs in the background, not depending on other scripts, without affecting the page’s performance. Meaning you can go about performing normal operations on your site like clicking and basic navigation without experiencing unresponsiveness on the site.
Starting Project
Let’s see how easy it is to offload some of the work that you might be doing today inside your Vue application to a background thread. To do this, we are going to demo this by using the Vue CLI to generate the project, just a barebone project, then we are going to use a web worker to spin up a second thread. And to make that work with a webpack workflow that you might have or that you will have in the project.
Once we have scaffolded our project with the Vue CLI, we will use the worker loader, to subscribe to a post message. The message will be sent within the threads, and to make things better we will be using Comlink created by the chrome labs team.
Let’s get going by first generating our project using the Vue CLI.
vue create vueoptimizeNote: We will be using vue 2 instead of vue 3 for this task. It doesn’t matter which one you choose as it works the same way on both.
Setting up our application
Go into the application folder and open up your IDE.
We have our standard vue application now ready, and we will create our demo app with it. But let’s clean it up a little bit. We don’t need the HelloWorld component, we will also delete where we imported the HelloWorld component, now our App.vue is looking like this
<template>
  <div id="app">
  </div>
</template>
<script>
export default {
  name: 'App'
}
</script>
Now, this looks clean. We won’t have to touch our main.js file as everything is there as it should be.
Service Worker file
What we do next is we create a worker.js file, where we program our workers. In this file, we have:
self.addEventListener('message', e => {
  console.log('worker got, ', e);
})
We use self which represents the global of the worker. We then add an event listener that accepts a message argument and a callback function that logs the message we got from our event to the console
Now to be able to use a worker inside our application, we will need to wrap it or we need to instantiate it somehow. So we will create a worker-api.js file at the root of our application, and our project structure now looks like this.
+— vueoptimize/ | +— Public/ | +— src/ | +— assets | +— components/ | +— App.vue | +— main.js | +— babel.config.js | +— .gitignore | +— package-lock.json | +— package.json | +— README.md | +— worker-api.js | +— worker.js
To make use of the service worker, we need to instantiate it, so we install the worker loader library from npm.
npm install --save-dev worker-loader In our worker-api.js file, we import the worker loader and instantiate it. Do not worry about the weird syntax for importing the worker loader as it’s the way the worker loader is imported according to the docs.
import Worker from 'worker-loader!./worker'
const worker = new Worker()
export function sendMessage(msg){
    worker.postMessage(msg)
}
Now we have our worker ready, and we would like to expose a method that sends messages to the worker. So above we can see we created the sendMessage function and our function forwards the messages that we are getting.
In the App.vue we will import the worker API, that we just exported from our worker-api.js file.
<template>
  <div id="app">
    <input type="text" v-model="message">
    <button @click="postMessage">send message</button>
  </div>
</template>
<script>
import {sendMessage} from '../worker-api'
export default {
  name: 'App',
  data() {
    return {
      message: ''
    }
  },
  methods: {
    postMessage() {
      sendMessage(this.message)
  }
 }
}
</script>
As we can see above, we create a postMessage method that uses the worker we imported to send messages. In our template we create an input field with a type of text and also a send message button, when clicked will run a postMessage function in our methods.
Open Source Session Replay
OpenReplay is an open-source, session replay suite that lets you see what users do on your web app, helping you troubleshoot issues faster. OpenReplay is self-hosted for full control over your data.

Start enjoying your debugging experience - start using OpenReplay for free.
Application Look
Now let’s see how our application looks. We run our project locally by starting our server
yarn serveWe then open up the app at localhost port 8080.

If we type in anything in our input field and press the send message button, the worker will receive our message, and we will receive some data in our console.
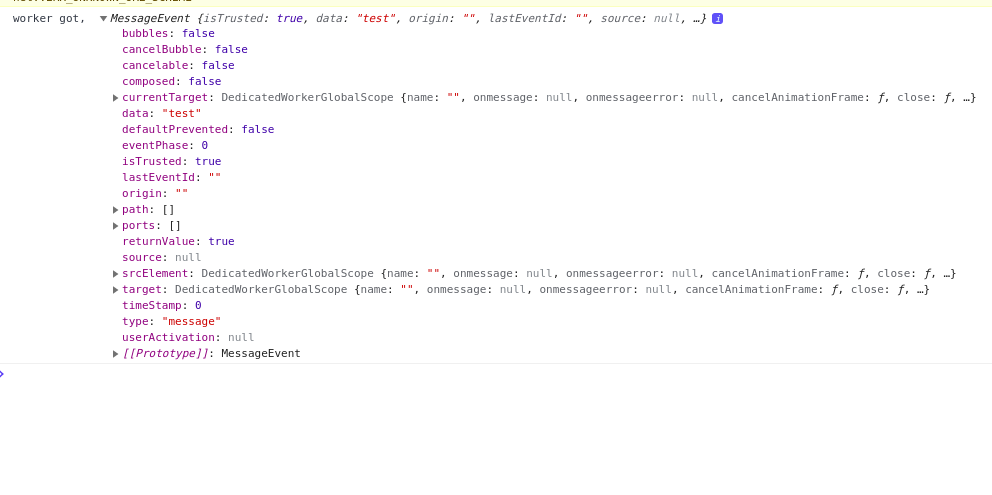
This is not very useful now, but let’s continue, and do something with this and see where it leads.
Back in our worker.js, we will send back the data by doing a postMessage
function from our worker.
self.addEventListener('message', e => {
  console.log('worker got, ', e);

  self.postMessage(e.data.toUpperCase())
})
We can see that the data we are sending is just the data we got but in uppercase format.
In our worker-api.js file, we need to subscribe to the worker also, so we can get the message back.
Rebuild webpack pipeline.
If we add the following code after we instantiate our worker in the worker-api.js file,
worker.addEventListener('message', (e)=>{
    console.log('we got back', e);
})
The worker gets rebuilt using the Webpack pipeline. If we type something in the input field now, we will see that we get it back in uppercase. But we still can’t make postMessage calls back and forth within the main thread. You can build that yourself, but in this tutorial, we are going to use the comlink package that was created by the Google Chrome team.
Install Comlink
According to the official Comlink Github repo and Comlink package on npm, Comlink is an abstraction around Web Workers that allows you to easily call back and forth from the main thread to the worker thread. Comlink makes WebWorkers enjoyable. Comlink is a tiny library (1.1kB), that removes the mental barrier of thinking about postMessage and hides the fact that you are working with web workers.
We can install the comlink package by doing
npm install --save comlinkNow we’ve got that installed, let’s hook it up inside the worker first, we have to do it on both the worker and worker-api file.
// worker.js file
import * as Comlink from 'comlink'
const fns = {
    toUpperCase(msg) {
        return msg.toUpperCase()
    }
}
Comlink.expose(fns)
First, we comment out the old code we have in this file, then we import the comlink package. We then create an fns object that contains the functions we will be exposing as its properties. The first function we will expose is the *toUpperCase* which returns whatever argument we pass it to uppercase.
At the end of the file, we then exposed the fns object using comlink. Now we will be able to use it in our worker-api.js file.
In the worker-api.js file, we also import the comlink package and use it to wrap the worker that we instantiated.
import Worker from 'worker-loader!./worker'
import * as Comlink from 'comlink'

const worker = Comlink.wrap(new Worker())

export const toUpperCase = worker.toUpperCase
Now we expose the toUpperCase method in our worker by exporting it. This is the method we exposed with comlink in the worker.js file.
Using the Worker in our App
In our App.vue file we will test out our worker, so we import the toUpperCase method from our worker file
<template>
  <div id="app">
    <img alt="Vue logo" src="./assets/logo.png">
    <input type="text" v-model="message">
    <button @click="postMessage">send message</button>
  </div>
</template>
<script>
import {toUpperCase} from '../worker-api'
export default {
  name: 'App',
  data() {
    return {
      message: ""
    }
  },
  methods: {
   async postMessage() {
     const result = await toUpperCase(this.message)
     console.log('uppercase result', result);
    }
  },
}
</script>
We can see from above that we have made the postMessage function to be asynchronous and we expect a promise back. We assign a result variable to whatever gets returned from our promise and we log it into the console.
If we reload our server and type in something into the input-form and submit, we can see the uppercase version of whatever we type. Now we have established a base for communication between workers.
Offloading heavy work
You might be wondering why we have done all this and what are the benefits. We will now try to perform some heavy operations that in a normal case scenario will cause performance issues. First, we want to mimic a normal case scenario where our app is working fine. We can do something like showing the current time as every second passes by.
<template>
  <div id="app">
    <img alt="Vue logo" src="./assets/logo.png">
    <input type="text" v-model="message">
    <button @click="postMessage">send message</button>
    {{time}}
  </div>
</template>
<script>
export default {
  name: 'App',
  data() {
    return {
      message: "",
      time: new Date()
    }
  },
  mounted () {
    setInterval(()=>{
      this.time - new Date()
    }, 300);
  },
  methods: {
   async postMessage() {
     const result = await doHardWork()
     console.log('result', result);
    },
      doHardWork() {
      setTimeout(()=>{
        console.log("performed hard work");
      },3000)
  }
  },
}
</script>
Let’s create some heavy work in our app. In our app.vue file above, we created a doHardWork function in our methods that logs the message “performed hard work” to the console. This operation happens each time we click the send message button and the postMessage function runs.
We notice that as we click the button repeatedly the time we display freezes for a few seconds before it continues counting by the seconds. This is proof that the operation is affecting the performance of our site.
Now that we have confirmed it, let us move the doHardWork function from our methods to our service worker file.
// worker.js
import * as Comlink from 'comlink'
const fns = {
    toUpperCase(msg) {
        return msg.toUpperCase()
    },
    doHardWork() {
      setTimeout(()=>{
        console.log("performed hard work");
      },3000)
  }
}
Comlink.expose(fns)
and in our worker-api.js file, we export the doHardWork from the worker
export const doHardWork = worker.doHardWorkWe can now remove the doHardWork function from our methods in app.vue, then import the doHardWork method from the worker-api.js file.
<script>
import {doHardWork} from '../worker-api'
export default {
  name: 'App',
  data() {
    return {
      message: "",
      time: new Date()
    }
  },
  mounted () {
    setInterval(()=>{
      this.time - new Date()
    }, 300);
  },
  methods: {
   async postMessage() {
     const result = await doHardWork()
     console.log('result', result);
    }
  },
}
</script>
Now if we move back to our browser we notice that no matter how much we press the send message button, our browser doesn’t freeze and the time continues counting as usual. This is because of the heavy work, the calculation of the loop has been carried away into the background thread meaning we are not impacting Vue at all, leaving all the CPU power in the main thread to handle the UI.
Resources
Conclusion
We talked about what web workers are and how we can use them to optimize our vue app, we also learned how to offload tasks to our service workers. We discussed how we can hook up our web application to a service worker and leave the main thread to handle only UI related stuff.
Thank you for reading and if you have a question to ask do not hesitate to send me a message on Twitter.