Pan and Double Tap Gesture Animations in React Native
Adding animations to common gestures in mobile apps


Gesture-based controls have, in recent times, given applications much like a real-life experience of the activities carried out on the application. It is one feature that flows naturally with users or can be easily picked. Gesture-based controls working with animations give some liveliness to the application and boost user experience.
In this article, I will demonstrate how Pan Gesture Animation and Double Tab Gesture Animation can be set up in a React Native project. The source code of this tutorial is here on Github.
To follow along with this tutorial, basic knowledge of React Native is essential, and you should have React Native set up on your computer. An Android and an iOS simulator should also be set up for testing the application. You can learn more about how you can set up React Native and the Android and iOS simulators here.
First Steps
The first line of action in this tutorial is to clone a demo project I have set up for this Gesture Animation tutorial. You can run the command below in your terminal to clone the demo project or click here to get it directly from Github.
git clone https://github.com/championuz/GestureAnimTest.gitAfter a successful clone, open it up in your code editor and navigate to the project directory in your terminal. Run the commands below to download the node modules and iOS dependencies, then build the apps on your Android and iOS emulators.
#Install Node Modules
npm install
# Navigate to the ios folder and Install iOS dependencies
cd ios && pod install
#Navigate back to Project root folder
cd ..
#Run on Android Emulator
npx react-native run-android
#Run on iOS Simulator
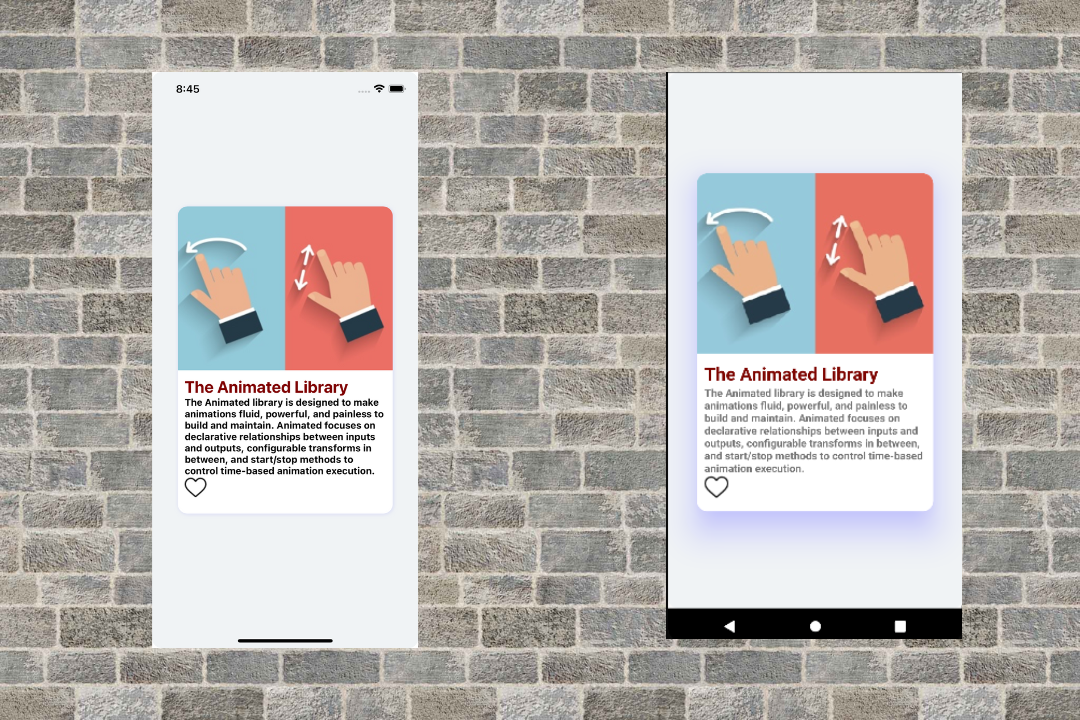
npx react-native run-iosOnce this is successful, your Android and iOS simulators will show up like this:
Setting up Pan Gesture Animation
The first Gesture Animation I will be going over is the Pan Gesture Animation. Every time a user moves one or more fingers across the screen, it makes a Pan Gesture. For this gesture to be active, there must be a gesture handler, and it must follow the path taken by the user’s finger(s) as they move across the screen and incorporate that motion into the component. Finally, the movement across the screen will be made possible by an animation.
Hence, the Pan Gesture Animation involves: Setting up a pan gesture handler. Applying the gesture to a component. Animating the movement across the screen.
The packages I will be using for this tutorial are the React Native Reanimated 2 and the React Native Gesture Handler. These two packages will handle the setting up of the pan gesture and the animation. It won’t require any accessibility setup or permission request.
Moving on, you should install the two packages using the command below.
npm install react-native-reanimated react-native-gesture-handlerOnce the packages have been installed, you should add the following plugin to your babel.config.js file in the project’s root folder.
plugins: ['react-native-reanimated/plugin'],After adding this, stop your metro server and reset it while you start it up again. The command is:
npm start -- --reset-cacheOnce your metro server is restarted, navigate to the ios folder and download the accompanying iOS dependencies, then rebuild the apps on your Android and iOS emulators. The commands for that are stated above. You can learn more about installing the react-native-reanimated package here.
Set up Pan Gesture Handler
Setting up the pan gesture handler, first, you should install the following hooks from the react-native reanimated library using:
import Animated, {useAnimatedGestureHandler, useAnimatedStyle, useSharedValue} from 'react-native-reanimated';
import {
    PanGestureHandler,
    GestureHandlerRootView
} from 'react-native-gesture-handler';
Seeing this is a pan gesture that constantly tracks the movements of the user’s finger on the screen. The next thing to be done is to define shared values for the x and y coordinates, and these shared values will also store the view coordinates. You can learn more about the shared value here.
const pan = useSharedValue(false);
const startingPosition = 0;
const x = useSharedValue(startingPosition);
const y = useSharedValue(startingPosition);
Next, the event handler, which will react to the movements of the user’s finger on the screen, will be added. Note that the useAnimatedGestureHandler is the hook for defining events as it is specifically designed to work seamlessly with the react native gesture handler.
const newPanEvent = useAnimatedGestureHandler({
    onStart: (event, ctx) => {
    pan.value = true;
    ctx.startX = x.value;
    ctx.startY = y.value;
    },
    onActive: (event, ctx) => {
    x.value = ctx.startX + event.translationX;
    y.value = ctx.startY + event.translationY;
    },
    onEnd: (event, ctx) => {
    pan.value = false;
    ctx.startX = x.value;
    ctx.startY = y.value;
    },
});
Now, to apply the tracked movement from the shared value state to the view’s styles, the useAnimatedStyle hook will be used. This means that from the movement of the user’s fingers on the screen, the shared value state updates the style of the view with the current position, thus making the component translate to the updated position.
const animStyle = useAnimatedStyle(() => {
    return {
    transform: [{ translateX: x.value }, { translateY: y.value }]
    };
});
Apply Pan Gesture Animation to Component
The movement of the user’s finger on the screen has been tracked and can update the view’s style, but it will not be effective because you need to apply the gesture and style to your component.
To do this, wrap the component you want to apply the gesture animation to with the GestureHandlerRootView. This acts like a regular view component, but it is built to enclose the component unto which a gesture animation is applied.
Inside the GestureHandlerRootView component, create a PanGestureHandler component. Since the pan gesture is continuous (meaning that it involves more than a tap on the screen), add the onGestureEvent parameter with which the newPanEvent will be passed, and the pan gesture animation will be applied to the enclosed component.
Finally, I will create an Animated.View component that will enclose the target component so that the view is interactive and can be animated. Then, the style applied would be the style created to update the view with the shared value from the movement of the user’s finger.
return (
<View style={styles.sectionContainer}>
<GestureHandlerRootView>
<PanGestureHandler onGestureEvent={newPanEvent}>
<Animated.View style={animStyle}>
.....
</Animated.View>
</PanGestureHandler>
</GestureHandlerRootView>
</View>
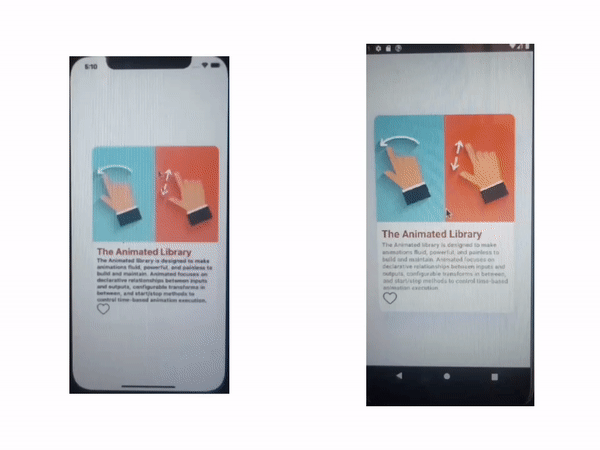
); If you implemented this as directed, you should have the pan gesture applied to your app.
You can modify the onEnd parameter in the event handler to have the component return to the base position after responding to the gesture on the screen. To give it a more natural motion while returning to the base position, add the withSpring event.
onEnd: (event, ctx) => {
    pan.value = false;
    x.value = withSpring(startingPosition);
    y.value = withSpring(startingPosition);
    },
Now, wherever you pan the component on your app, it will return to the base position.

Open Source Session Replay
OpenReplay is an open-source, session replay suite that lets you see what users do on your web app, helping you troubleshoot issues faster. OpenReplay is self-hosted for full control over your data.

Start enjoying your debugging experience - start using OpenReplay for free.
Setting up Double Tap Gesture
To set up the Double Tap gesture, you need to enclose the target component in a Tap Gesture handler component imported from react-native-gesture-handler, format it based on what you want to achieve then assign the operation to it.
In this tutorial, I want the little outlined heart icon replaced with the red-colored heart icon when the image is double-tapped, just like it happens popularly on Instagram. I also want it to loop so that on another double tap, the filled heart icon is replaced with the outlined heart icon.
First, ensure the TapGestureHandler is imported from the gesture handler package. Wrap the Image component with the TapGestureHandler, and update the Image component to Animated.Image to make the image interactive as you apply the double tap gesture.
Next, the numberOfTaps should be set to two (2). Note that the default number of taps is one, so you don’t need to specify the number of taps for a single-tap gesture.
onActivated will be used to set the action that should trigger when a double tap occurs. For now, it should log in ‘Double Tapped! in the console.
return (
<View style={styles.sectionContainer}>
<GestureHandlerRootView>
....
<View style={styles.container}>
<TapGestureHandler
numberOfTaps={2}
onActivated={() => (
console.log('Double Tapped!')
)}>
<Animated.Image style={styles.Image} source={{uri: 'https://uxmag.com/wp-content/uploads/2014/12/gestures-and-animations-small.jpg'}} />
</TapGestureHandler>
....
</View>
....
</GestureHandlerRootView>
</View>
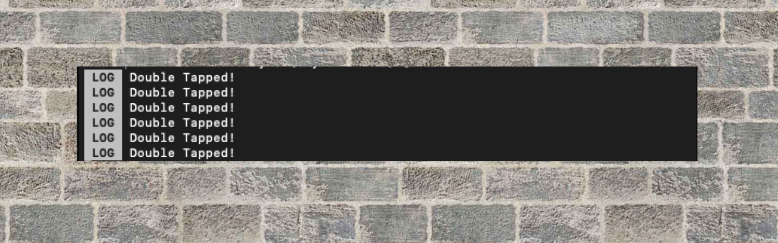
); Double tap on the image, and you should have your console show up like this:
Now, to set the action, which is for the filled heart icon to replace the outlined heart icon on double tap, I will create a state using the React useState hook, and I will set the state "onLiked” to be false by default, and on double tap, it should be the inverse of its current state. This will make the loop possible so that it will take the inverse state on double tap.
const [like, setLike] = React.useState({
  onliked: false,
});

const updateLiked = () => {
  setLike({
    onliked: !like.onliked,
  });
};
Next, I will assign the state to the outlined heart icon and then add the filled heart icon to show up if the heart icon is true.
{like.onliked ?
    <Image style={styles.icon} source={require('./image/heartemp32.png')} />
    :
    <Image style={styles.icon} source={require('./image/heartfilled32.png')} />
}
Finally, I will assign the updateLiked function to onActivated in the TapGestureHandler component so that the function will be triggered on double tap.
<TapGestureHandler
numberOfTaps={2}
onActivated={updateLiked}>
<Animated.Image style={styles.Image} source={{uri: 'https://uxmag.com/wp-content/uploads/2014/12/gestures-and-animations-small.jpg'}} />
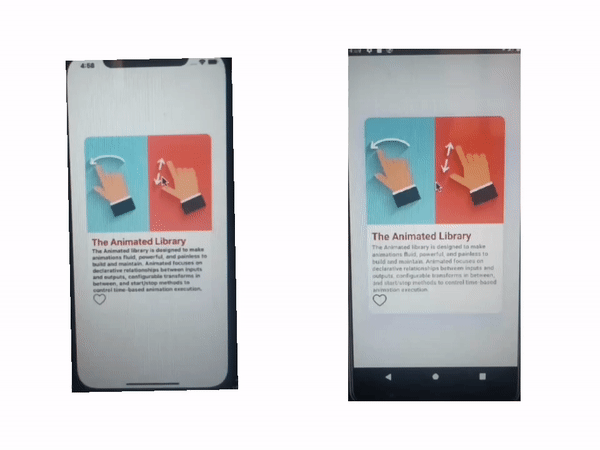
</TapGestureHandler>If you implemented this as shown, double tap on the image running in your emulator, and you should have the filled heart icon and the outlined heart icon looping.
Conclusion
I have gone over two gesture animations that can give your app a natural feel, boosting your user experience. I trust this tutorial will be able to assist you set up Double Tap and Pan Gesture animations in your React Native project. Do well to reach out if you face any challenges while working with this tutorial.
A TIP FROM THE EDITOR: To add another kind of visual effect, do not miss our Adding Shimmer Effects to React Native apps article.