Produce videos in React with Remotion
Use the Remotion library to easily create videos in React


React is a beautiful Javascript framework and has sometimes been described as a “Learn Once, build anything” library. This case is true because the knowledge of React components can be used to develop anything from SPA to MPAs and everything in between. The same also goes for graphics and animations.
In this article, we will learn how to use React components to build and create Videos using Remotion. A demo of what we will be building is below:
What is Remotion?
Remotion is a library suite for programmatically producing videos using React. Remotion enables the creation of actual MP4 videos written in React. It uses web technologies such as CSS, SVG, and WebGL to create fascinating motion graphics. Remotion also allows you to use concepts like functions and variables. You can use JavaScript code to produce video and subsequently render it into an MP4 file with Remotion.
Remotion was created by Jonny Burger to allow anyone with minimal understanding of React, HTML, CSS, and Javascript the ability to create videos with code. Remotion lowers the barrier into the field of video creation by doing away with the complicated tools and training needed to thrive in the video creation field. Remotion does this by leveraging Javascript developers’ current tools and allowing them to use those tools and skills to turn code into animations and videos.
Remotion includes a player called Remotion Player, which simulates the experience of an actual video editor and can be used to play and review your video on your browser.
Getting started
You will need to install two dependencies to use Remotion effectively: Node and FFmpeg. If you are planning on downloading or extracting your video after creation, you need FFmpeg; otherwise, you can choose not to install it. Once you install the dependencies, run the command below in your terminal to bootstrap a new Remotion app.
npm init video
# or
yarn create video
You should see a prompt like below to choose a template for your application:
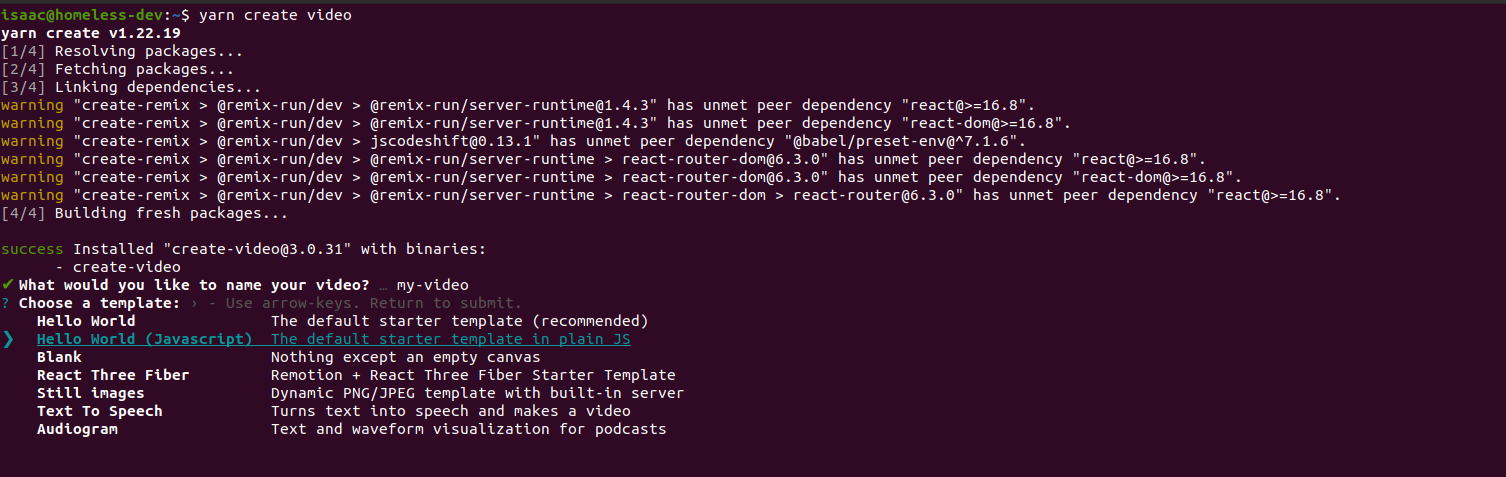
You can choose whichever template you want for the given list in the terminal, but for this article, I will use the blank template and explain as we go.
Once Remotion is installed, open it in the code editor of your choice, and let’s go over the created files.
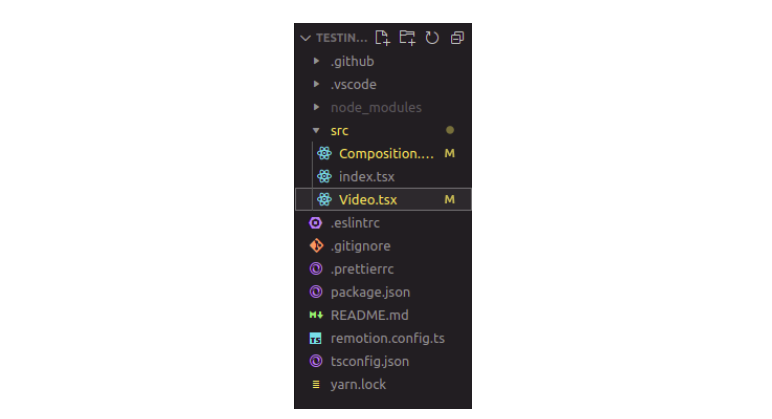
There are three files that we see in the src folder. the index.tsx, the Video.tsx, and the Composition.tsx
- The
index.tsxfile acts like theindex.jsfile in a create-react-app (CRA) application. It takes a React component and, via a render function, outputs it as an mp4 video. We won’t be modifying anything in this file - The
Video.tsxfile acts like theAppcomponent in a React application, which means that it serves as the application’s entry point. In this component, we will stitch together different compositions to create the video. The Video.tsx file shows us the first Remotion component, theComposition. - The
Composition.tsxis a component that holds and registers the videos that we want to render as well as the stylings and the props for the video
Inside the Composition.tsx file, we see the code below, which shows that we are currently returning nothing:
export const MyComposition = () => {
  return null;
};
Inside the Video.tsx file, we see the code block below:
import {Composition} from 'remotion';
import {MyComposition} from './Composition';
export const RemotionVideo: React.FC = () => {
  return (
    <>
      <Composition
        id="MyComp"
        component={MyComposition}
        durationInFrames={60}
        fps={30}
        width={1280}
        height={720}
      />
    </>
  );
};- The
idis used when you want to export the video, and we will get into what it does in the exporting the video section. - The
Componenttakes the importedCompositioncomponent. - The
durationInFramesis the number of frames to be generated. - The
fpsis the rate of the frame per second. ThedurationInFramesdivided by thefpsis used to calculate the length of the video. - The
widthis the width of the video in pixels - The
heightis the height of the video in pixels
When we run yarn start to start up the development server, we see a 2-second long video of an empty canvas on localhost:3000 - not very interesting, for sure!
Creating our video
To get started, navigate to the Composition.tsx file and add the code below:
export const MyComposition = () => {
  return (
    <div
      style={{
        width: '100%',
        height: '100%',
        backgroundColor: '#f2511b',
        color: '#fff',
        textAlign: 'center',
        alignItems: 'center',
        justifyContent: 'center',
        fontSize: '2rem',
      }}
    >
      <h1>
        My name is Isaac Okoro. A fullstack developer and technical writer for the OpenReplay blog
      </h1>

    </div>
  );
};
The code above is pretty basic as we have a div with some inline styles and an h1 tag with some content.
When we save and navigate to the browser, we should see a video that looks like the gif below:
Getting properties
We will use a hook from Remotion to get the properties of our video. The hook is useVideoConfig(). That hook retrieves returns an object with information about the context of the video that we are making. The properties contained in the object include width, height, fps, durationInFrames, etc.
We will use the information exposed to us by the useVideoConfig() hook to render the properties of our video.
import { useVideoConfig } from 'remotion';
export const MyComposition = () => {
  const {width, height, fps, durationInFrames} = useVideoConfig();

  return (
    <div
      style={{
        width: '100%',
        height: '100%',
        backgroundColor: '#f2511b',
        color: '#fff',
        textAlign: 'center',
        alignItems: 'center',
        justifyContent: 'center',
        fontSize: '2rem',
      }}
    >
      <h1>
        My name is Isaac Okoro. A fullstack developer and technical writer for the OpenReplay blog
      </h1>
      <h3>
      This {width} * {height}px video is {durationInFrames / fps}secs long and
      was made to showcase Remotion
      </h3>
    </div>
  );
};
In the code block above, we imported the useVideoConfig() hook from Remotion. Next, we got the information about the video from the hook and rendered it.
When we save and navigate to the browser, we should see a video that looks like the gif below:
Note: We are getting 2 seconds as our time because we didn’t change the number of the durationInFrames in the Video.tsx file. Navigate to the Video.tsx file and change the number of the durationInFrames to 120 as shown below to get 4 secs:
durationInFrames={120}Adding opacity
In the demo gif, we see that the screen starts dark and gets progressively brighter as the video continues. We will implement that feature in this section.
To do that, we will need to know the current frame of the video at every point in time. Thankfully, Remotion gives us a hook for that known as the [useCurrentFrame()](https://www.remotion.dev/docs/use-current-frame) hook. This hook retrieves the current frame of the video.
import { useVideoConfig, useCurrentFrame } from 'remotion';

export const MyComposition = () => {
  const {width, height, fps, durationInFrames} = useVideoConfig();
  const frame = useCurrentFrame();
  const opacity = frame / durationInFrames;
  return (
    <div
      style={{
          // Inline styles remain the same
        opacity,
      }}
    >
      // Nothing changes here
    </div>
  );
};
In the code block above, we imported the useCurrentFrame() hook and stored it in a frame variable. Next, we created an opacity variable, the frame variable divided by the durationInFrames. After that, we passed the opacity to the inline styles.
Save the file and view the results in the browser, which should look like the gif below:

Open Source Session Replay
OpenReplay is an open-source, session replay suite that lets you see what users do on your web app, helping you troubleshoot issues faster. OpenReplay is self-hosted for full control over your data.

Start enjoying your debugging experience - start using OpenReplay for free.
Exporting the video
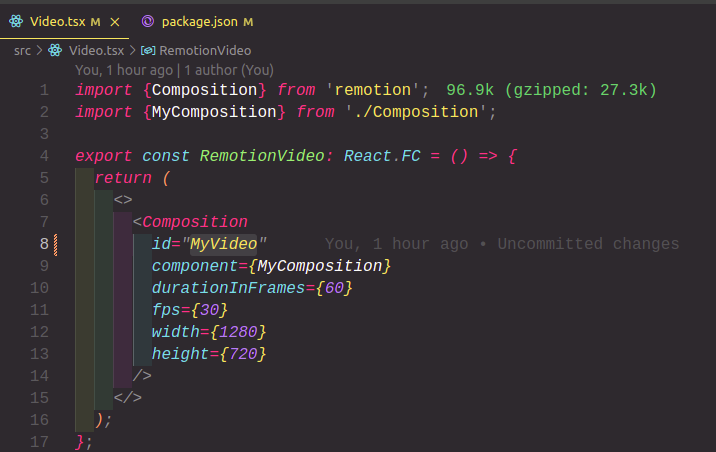
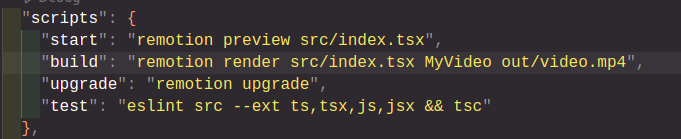
When rendering your video, make use that the id in the video.tsx file matches exactly with the title in the build section of your scripts. I changed the name of my id to “MyVideo” and also changed it in the build section of my script to “MyVideo” as shown in the images below:
With that done, run yarn build to export your video, and you should be presented with the image below:
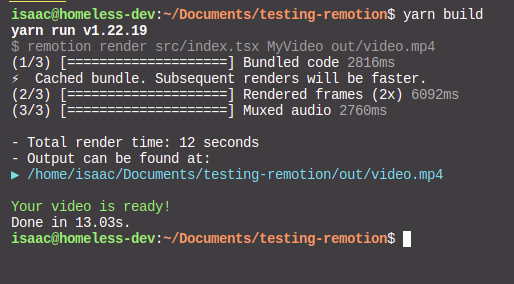
A link to the video on Github can be found here, and the complete code for this tutorial can be found here.
Conclusion
This article has covered Remotion and some of its amazing features. Remotion is still relatively new, but there are pleasant surprises ahead. Remotion also comes with standard features like data fetching and Server-side Rendering capabilities. Feel free to check out the Remotion Docs here and expand on the features found in this article.