

WebAssembly (WASM) code can provide significant speed-ups, and writing and publishing npm packages based on it is now a very interesting goal. This article will show you how to develop and publish WASM packages so you can apply the technique to your own work.

Discover how at OpenReplay.com.
WebAssembly (often abbreviated as Wasm) is a groundbreaking binary instruction format that has transformed the landscape of web development. It allows developers to run code written in languages other than JavaScript at near-native speed in the browser. One of the most exciting applications of WebAssembly is in the realm of npm packages.
Before we delve into the rest of the article, let’s quickly discuss what we aim to achieve with it. Our primary goal is to discover the advantages of implementing npm packages with WebAssembly by building a search index that allows us to efficiently search through a collection of strings and return relevant matches. This will be a simplified version of the Wade.js npm package but implemented using Rust and Wasm. By the end, you’ll know to develop a high-performance search package.
The benefits of writing npm packages with WebAssembly include:
- Performance: WebAssembly modules run at near-native speed, making them significantly faster than equivalent JavaScript implementations.
- Flexibility: Developers can leverage the power and features of languages like Rust, C, and C++ in the web environment.
- Safety: WebAssembly provides a sandboxed execution environment, ensuring that the code won’t harm the host system even if there’s a bug in the code.
To follow along, ensure your development environment includes:
- Node.js: A JavaScript runtime essential for building server-side applications.
- NPM account: Ensure you have an active NPM registry account, as it is necessary for publishing the npm package.
In the following sections, you’ll explore setting up a Rust development environment, implementing the search features in Rust, and compiling and publishing the npm package.
Setting up a New Rust Project
You can follow the instructions here to install Rust on your local machine.
Once you have Rust installed, it is time to get the wasm-pack binary. This little tool helps you compile your Rust code into WebAssembly and package it up for seamless development.
After a successful setup, run the following cargo command to set up a new Rust project:
cargo new --lib refactored-couscousBy adding the --lib, you are instructing cargo to generate a Rust library template. You should change the folder name, ‘refactored-couscous, ’ to your preferred name choice. The folder structure generated by cargo should have the same directory as below:
refactored-couscous/
├── Cargo.lock
├── Cargo.toml
├── LICENSE_APACHE
├── src/
│   └── lib.rs
└── target/
Next, let’s add the necessary dependencies we’ll use through the code implementation. Open the Cargo.toml file, and update its dependencies section:
# file: ./Cargo.toml

[dependencies]
wasm-bindgen = "0.2"
js-sys = "0.3"
The wasm-bindgen crate is essential for facilitating high-level interactions between Rust and JavaScript. It provides the #[wasm_bindgen] attribute that you’ll use to annotate your Rust structs and functions, making them accessible from JavaScript.
The js-sys crate provides bindings for all JavaScript global objects and functions in Rust. It’s part of the wasm-bindgen ecosystem and is designed to be used with wasm-bindgen.
Rewrite a simplified Wade.js npm package in Rust
Let’s start implementing the search package with the setup out of the way.
Before diving into the code, it is essential to understand our primary goal. We aim to build a search index that allows us to efficiently search through a collection of strings and return relevant matches.
// file: src/lib.rs

use std::collections::HashMap;
use wasm_bindgen::prelude::*;
use js_sys::Array;

#[wasm_bindgen]
#[derive(Debug, Clone)]
pub struct Token {
    word: String,
    position: usize,
    frequency: usize,
}
We start by importing the necessary libraries. Then declare the Token struct with three fields: word, position, and frequency. This struct will represent individual words, their positions in the data, and their frequency in a given string.
Next, let’s define the search index structure. The search package’s core is the Index struct, which will store all the strings we want to search through and allow us to quickly find word occurrences.
// file: ./src/lib.rs

#[wasm_bindgen]
#[derive(Debug)]
pub struct Index {
    data: Vec<String>,
    tokens: HashMap<String, Vec<Token>>,
}
In the above snippet, the data field is a vector that will store all the strings. The tokens field is a hashmap where each key is a word, and its value is a vector of Token structs. This structure will enable us to quickly find all occurrences of a word in our data.
Next, let’s implement tokenization for each string. Tokenization is breaking a string into individual words or “tokens”. With the individual tokens, we can analyze and process each word separately. This granularity allows us to focus on specific words, making searching, analyzing, or manipulating the text easier.
// file: ./src/lib.rs

impl Token {
    fn tokenize(s: &str) -> Vec<String> {
        s.to_lowercase()
            .split_whitespace()
            .map(|word| word.to_string())
            .collect()
    }
}
The tokenize function takes a string as input. It converts the string to lowercase to ensure case-insensitive searching. The string is then split into words, and each word is converted to a string. Finally, the words are collected into a vector and returned.
Next, let’s initialize and populate the search Index.
// file: ./src/lib.rs

#[wasm_bindgen]
impl Index {
    #[wasm_bindgen(constructor)]
    pub fn new() -> Self {
        Index {
            data: Vec::new(),
            tokens: HashMap::new(),
        }
    }

    pub fn add(&mut self, s: &str) {
        let position = self.data.len();
        self.data.push(s.to_string());
        let tokens = Token::tokenize(s);
        for token in tokens {
            let frequency = s.matches(&token).count();
            self.tokens.entry(token.clone()).or_insert_with(Vec::new).push(Token {
                word: token,
                position,
                frequency,
            });
        }
    }
 ...
}
The new function initializes an empty Index in the above snippet. Then, the add function allows us to add a new string to the index. To achieve this, it tokenizes the string, calculates the frequency of each token, and updates the tokens hashmap accordingly.
The #[wasm_bindgen(constructor)] attribute indicates that the associated function should be treated as the constructor for the Rust struct when it’s accessed from JavaScript.
Next, let’s implement the search functionality. To search for matches in our index, we’ll define the search function as follows:
// file: ./src/lib.rs

#[wasm_bindgen]
impl Index {
    ...
    pub fn search(&self, query: &str) -> Array {
        let tokens = Token::tokenize(query);
        let mut results = Vec::new();
        for token in tokens {
            if let Some(matches) = self.tokens.get(&token) {
                for match_ in matches {
                    results.push(self.data[match_.position].clone());
                }
            }
        }
        results.sort();
        results.dedup();

        // Convert Vec<String> to js_sys::Array
        results.into_iter().map(JsValue::from).collect()
    }
}
The search function starts by tokenizing the query. For each token in the query, it checks if there are matches in the tokens hashmap. The corresponding strings from the data vector are added to the results if matches are found. The results are then sorted, and duplicates are removed. Finally, the results are converted into a JavaScript array using js_sys::Array and returned.
With this implementation, we have a robust search index built with Rust. In the next section, we’ll delve into compiling this Rust code into WebAssembly, allowing it to be seamlessly integrated into JavaScript environments.
Transpiling Rust Code to WebAssembly
This section delves into the different approaches for transpiling Rust code into WebAssembly, contingent on the specific JavaScript environment in focus. For the scope of this discourse, we will concentrate on two primary compilation targets: the web (pertaining to browser-based applications) and the bundler (relevant to server-side operations).
To transpile down to WebAssembly, you’ll run the below wasm-pack command in the root directory of the project:
wasm-pack build --target webUpon executing the command, a series of processes are initiated. The process begins by transpiling your Rust source code into WebAssembly. Subsequently, the wasm-bindgen tool is executed on the generated WebAssembly, yielding a JavaScript wrapper that facilitates browser compatibility with the WebAssembly module. This procedure also orchestrates the formation of a pkg directory, relocating both the JavaScript wrapper and the original WebAssembly code into this location. Drawing insights from your Cargo.toml, it crafts a corresponding package.json. If a README.md or license file exists, it is replicated into the package. Ultimately, this sequence culminates in creating a consolidated package housed within the pkg directory.
Before we continue with the second target, let’s briefly explore the generated pkg directory:
./pkg
├── LICENSE_APACHE
├── package.json
├── refactored_couscous.d.ts
├── refactored_couscous.js
├── refactored_couscous_bg.js
├── refactored_couscous_bg.wasm
└── refactored_couscous_bg.wasm.d.ts
The refactored_couscous.d.ts is a TypeScript declaration file that offers type safety for TypeScript developers by detailing the types of functions and modules in the package. The refactored_couscous.js is a JavaScript wrapper created by wasm-bindgen, bridging the WebAssembly module with the JavaScript realm for seamless integration. Complementing this, refactored_couscous_bg.js is an auxiliary file that handles some lower-level operations and interactions with the WebAssembly module. The heart of the package lies in refactored_couscous_bg.wasm, a WebAssembly binary derived from Rust, encapsulating the package’s primary logic. Lastly, refactored_couscous_bg.wasm.d.ts is another TypeScript declaration file, akin to the earlier .d.ts file, but tailored for the WebAssembly module’s specifics.
The next wasm-pack command transpiles your Rust code into a WebAssembly module specifically tailored for use with npm-based bundlers like Webpack or Rollup:
wasm-pack build --target bundlerThe -target bundler flag indicates that the output should be compatible with these bundling tools, making integrating the generated WebAssembly module into modern web development workflows easier. This command also generates the same pkg directory with the same number of files as the --target web flag but with slightly different file content.
Integrating WebAssembly Module In a Web Application
Now that we know how to target different JavaScript environments, let’s start with the --target web transpilation and use the generated module in a browser-based application.
Create an index.html file in the root directory and update it with the following content:
<!-- file: ./index.html -->

<!DOCTYPE html>
<html lang="en-US">
  <head>
    <meta charset="utf-8" />
    <title>Wade Search in WebAssembly</title>
    <style>
        /* for the styles, see the https://github.com/Ikeh-Akinyemi/refactored-couscous/blob/main/index.html */
    </style>
  </head>
  <body>
    <input type="text" id="searchInput" placeholder="Search..." />
    <button onclick="performSearch()">Search</button>
    <ul id="results"></ul>

    <script type="module">
      import init, { Index } from "./pkg/refactored_couscous.js";

      let index;

      async function setup() {
        await init();
        index = new Index();
        // Sample data for demonstration purposes
        index.add("Hello world");
        index.add("Start your Rust journey here")
        index.add("Found my empress.");
        index.add("Talkin about systems")
        index.add("Wade in Rust");
      }

      function performSearch() {
        const query = document.getElementById("searchInput").value;
        const results = index.search(query);
        displayResults(results);
      }

      window.performSearch = performSearch;

      function displayResults(results) {
        const resultsElement = document.getElementById("results");
        resultsElement.innerHTML = "";
        results.forEach((result) => {
          const li = document.createElement("li");
          li.textContent = result;
          resultsElement.appendChild(li);
        });
      }

      setup();
    </script>
  </body>
</html>
In the above snippet, the JavaScript code in the <script> element imports the init function and the Index class from the generated JavaScript wrapper (refactored_couscous.js). The init function is crucial as it initializes the WebAssembly module, ensuring it is ready for use.
The setup function is called when the page loads. It first ensures the WebAssembly module is fully initialized using await init(). Following that, an instance of the Index class from the WebAssembly module is created, which will be used to store and search data.
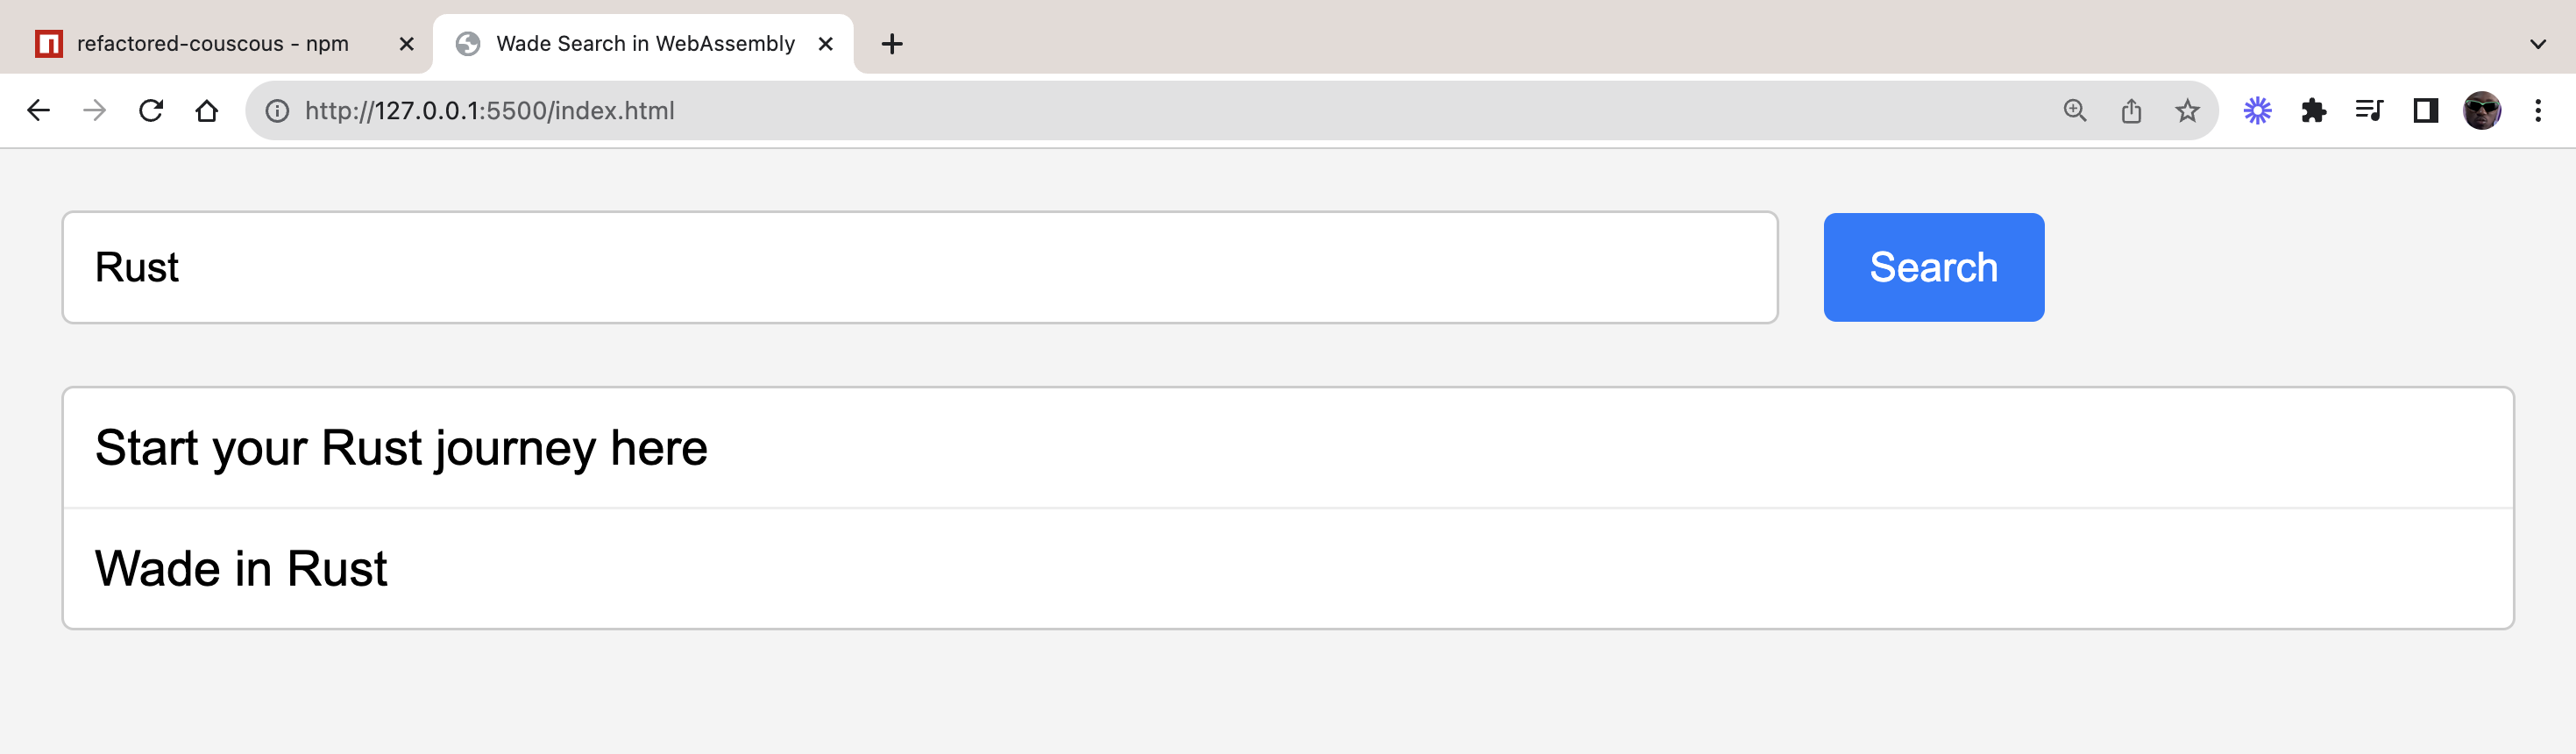
The performSearch function is triggered when the user clicks the “Search” button. It retrieves the user’s input from the text field, uses the search method of the Index class to find matches, and then displays the results using the displayResults function.
The displayResults function takes the search results, creates a list item for each result, and appends it to the results unordered list on the webpage.
Load the index.html file in your browser and conduct a word search as shown in the following image:
How to use the WebAssembly module as an NPM package
In this section, we will start with the --target bundler transpilation and use the generated module with Webpack. Then, we will publish the package to the NPM registry and install and use it with Node.js.
Run the wasm-pack transpilation command with the flag --target bundler. Then change the location into the pkg directory, and run the npm command below:
npm linkRunning npm link command inside the pkg directory makes the package accessible as if it were a globally installed NPM package. This allows you to use the package without actually publishing it to the NPM registry. It is particularly useful for testing and development purposes.
Next, create a new folder in the root directory of the project for the examples we’ll cover:
mkdir -p examples/webpack-implInside the ./examples/webpack-impl folder, create a package.json file and add the configurations below:
// file: ./examples/webpack-impl/package.json

{
  "scripts": {
    "serve": "webpack-dev-server"
  },
  "dependencies": {
    "refactored-couscous": "^0.1.0"
  },
  "devDependencies": {
    "webpack": "^4.25.1",
    "webpack-cli": "^3.1.2",
    "webpack-dev-server": "^3.1.10"
  }
}
Next, run the following npm commands to link the package and install the rest of the packages:
npm link refactored-couscous && npm installAfter the installation, create an index.html file and add the following HTML code:
<!-- file: ./examples/webpack-impl/index.html -->

<!DOCTYPE html>
<html lang="en-US">
  <head>
    <meta charset="utf-8" />
    <title>refactored-couscous example</title>
    <style>
      /* for the styles, see https://github.com/Ikeh-Akinyemi/refactored-couscous/blob/main/examples/webpack-impl/index.html*/
    </style>
  </head>

  <body>
    <div id="loading" style="display: none">
      <div class="spinner"></div>
      Loading...
    </div>
    <input type="file" id="fileInput" />
    <input type="text" id="urlInput" placeholder="Enter URL" />
    <button id="buildIndexButton">Build Index</button>
    <input type="text" id="searchInput" placeholder="Search..." />
    <button id="searchButton">Search</button>
    <ul id="results"></ul>
    <script src="./index.js"></script>
  </body>
</html>
Next, let’s create an index.js file and add the following JavaScript code:
// file: ./examples/webpack-impl/index.js

import("refactored-couscous").then((js) => {
  function splitIntoSentences(text) {
    return text.match(/[^\.!\?]+[\.!\?]+/g) || [];
  }

  const index = new js.Index();
  ...
});
This section begins by dynamically importing the refactored-couscous module. Once the module is imported, the callback function is executed with the imported module as its argument (js).
Next, we define a utility function, split into sentences, to split a given text into individual sentences based on punctuation marks. Then, an instance of the Index class from the imported module is created.
Now, let’s add an event listener to check if a user uploaded a file or a URL to search, then use the content of the resource to build our Index.
// file: ./examples/webpack-impl/index.js

import("refactored-couscous").then((js) => {
  ...
  document
    .getElementById("buildIndexButton")
    .addEventListener("click", async () => {
      const fileInput = document.getElementById("fileInput");
      const urlInput = document.getElementById("urlInput");

      const loadingDiv = document.getElementById("loading");
      loadingDiv.style.display = "block";

      if (fileInput.files.length) {
        const file = fileInput.files[0];
        const content = await file.text();
        const sentences = splitIntoSentences(content);
        sentences.forEach((sentence) => {
          if (sentence.trim()) {
            console.log(sentence);
            index.add(sentence.trim());
          }
        });
      } else if (urlInput.value) {
        try {
          const response = await fetch(urlInput.value);
          const content = await response.text();
          const sentences = splitIntoSentences(content);
          sentences.forEach((sentence) => {
            if (sentence.trim()) {
              index.add(sentence.trim());
            }
          });
        } catch (error) {
          console.error("Error fetching URL:", error);
        }
      }

      loadingDiv.style.display = "none";
    });
  ...
});
In the above snippet, we check if a file has been provided through the fileInput file input element. If so, it reads the content of the file, splits it into sentences using the utility function, and adds each sentence to the index.
If a URL is provided instead of a file, it fetches the content from the URL, splits it into sentences, and adds them to the index.
Next, let’s implement searching the Index and displaying the results:
// file: ./examples/webpack-impl/index.js

import("refactored-couscous").then((js) => {
  ...
  document.getElementById("searchButton").addEventListener("click", () => {
    const loadingDiv = document.getElementById("loading");
    loadingDiv.style.display = "block";

    const query = document.getElementById("searchInput").value;
    const results = index.search(query);

    console.log(results);

    loadingDiv.style.display = "none";

    displayResults(results);
  });

  function displayResults(results) {
    const resultsList = document.getElementById("results");
    resultsList.innerHTML = ""; // Clear previous results

    results.forEach((result) => {
      const listItem = document.createElement("li");
      listItem.textContent = result;
      resultsList.appendChild(listItem);
    });
  }
});
After this, let’s configure Webpack by creating a webpack.config.js file in the root of the examples/webpack-impl folder, and populate its content with the below:
// file: ./examples/webpack-impl/webpack.config.js

const path = require("path");
module.exports = {
  entry: "./index.js",
  output: {
    path: path.resolve(__dirname, "dist"),
    filename: "index.js",
  },
  mode: "development",
};
With the setup complete, it is time to execute the project. Ensure you are using Node.js v16, especially considering the specificities of the Node.js environment.
npm run serveOnce executed, access http://localhost:8080/ in your browser. You’ll have the option to either upload a file directly or input a URL pointing to web-based content.
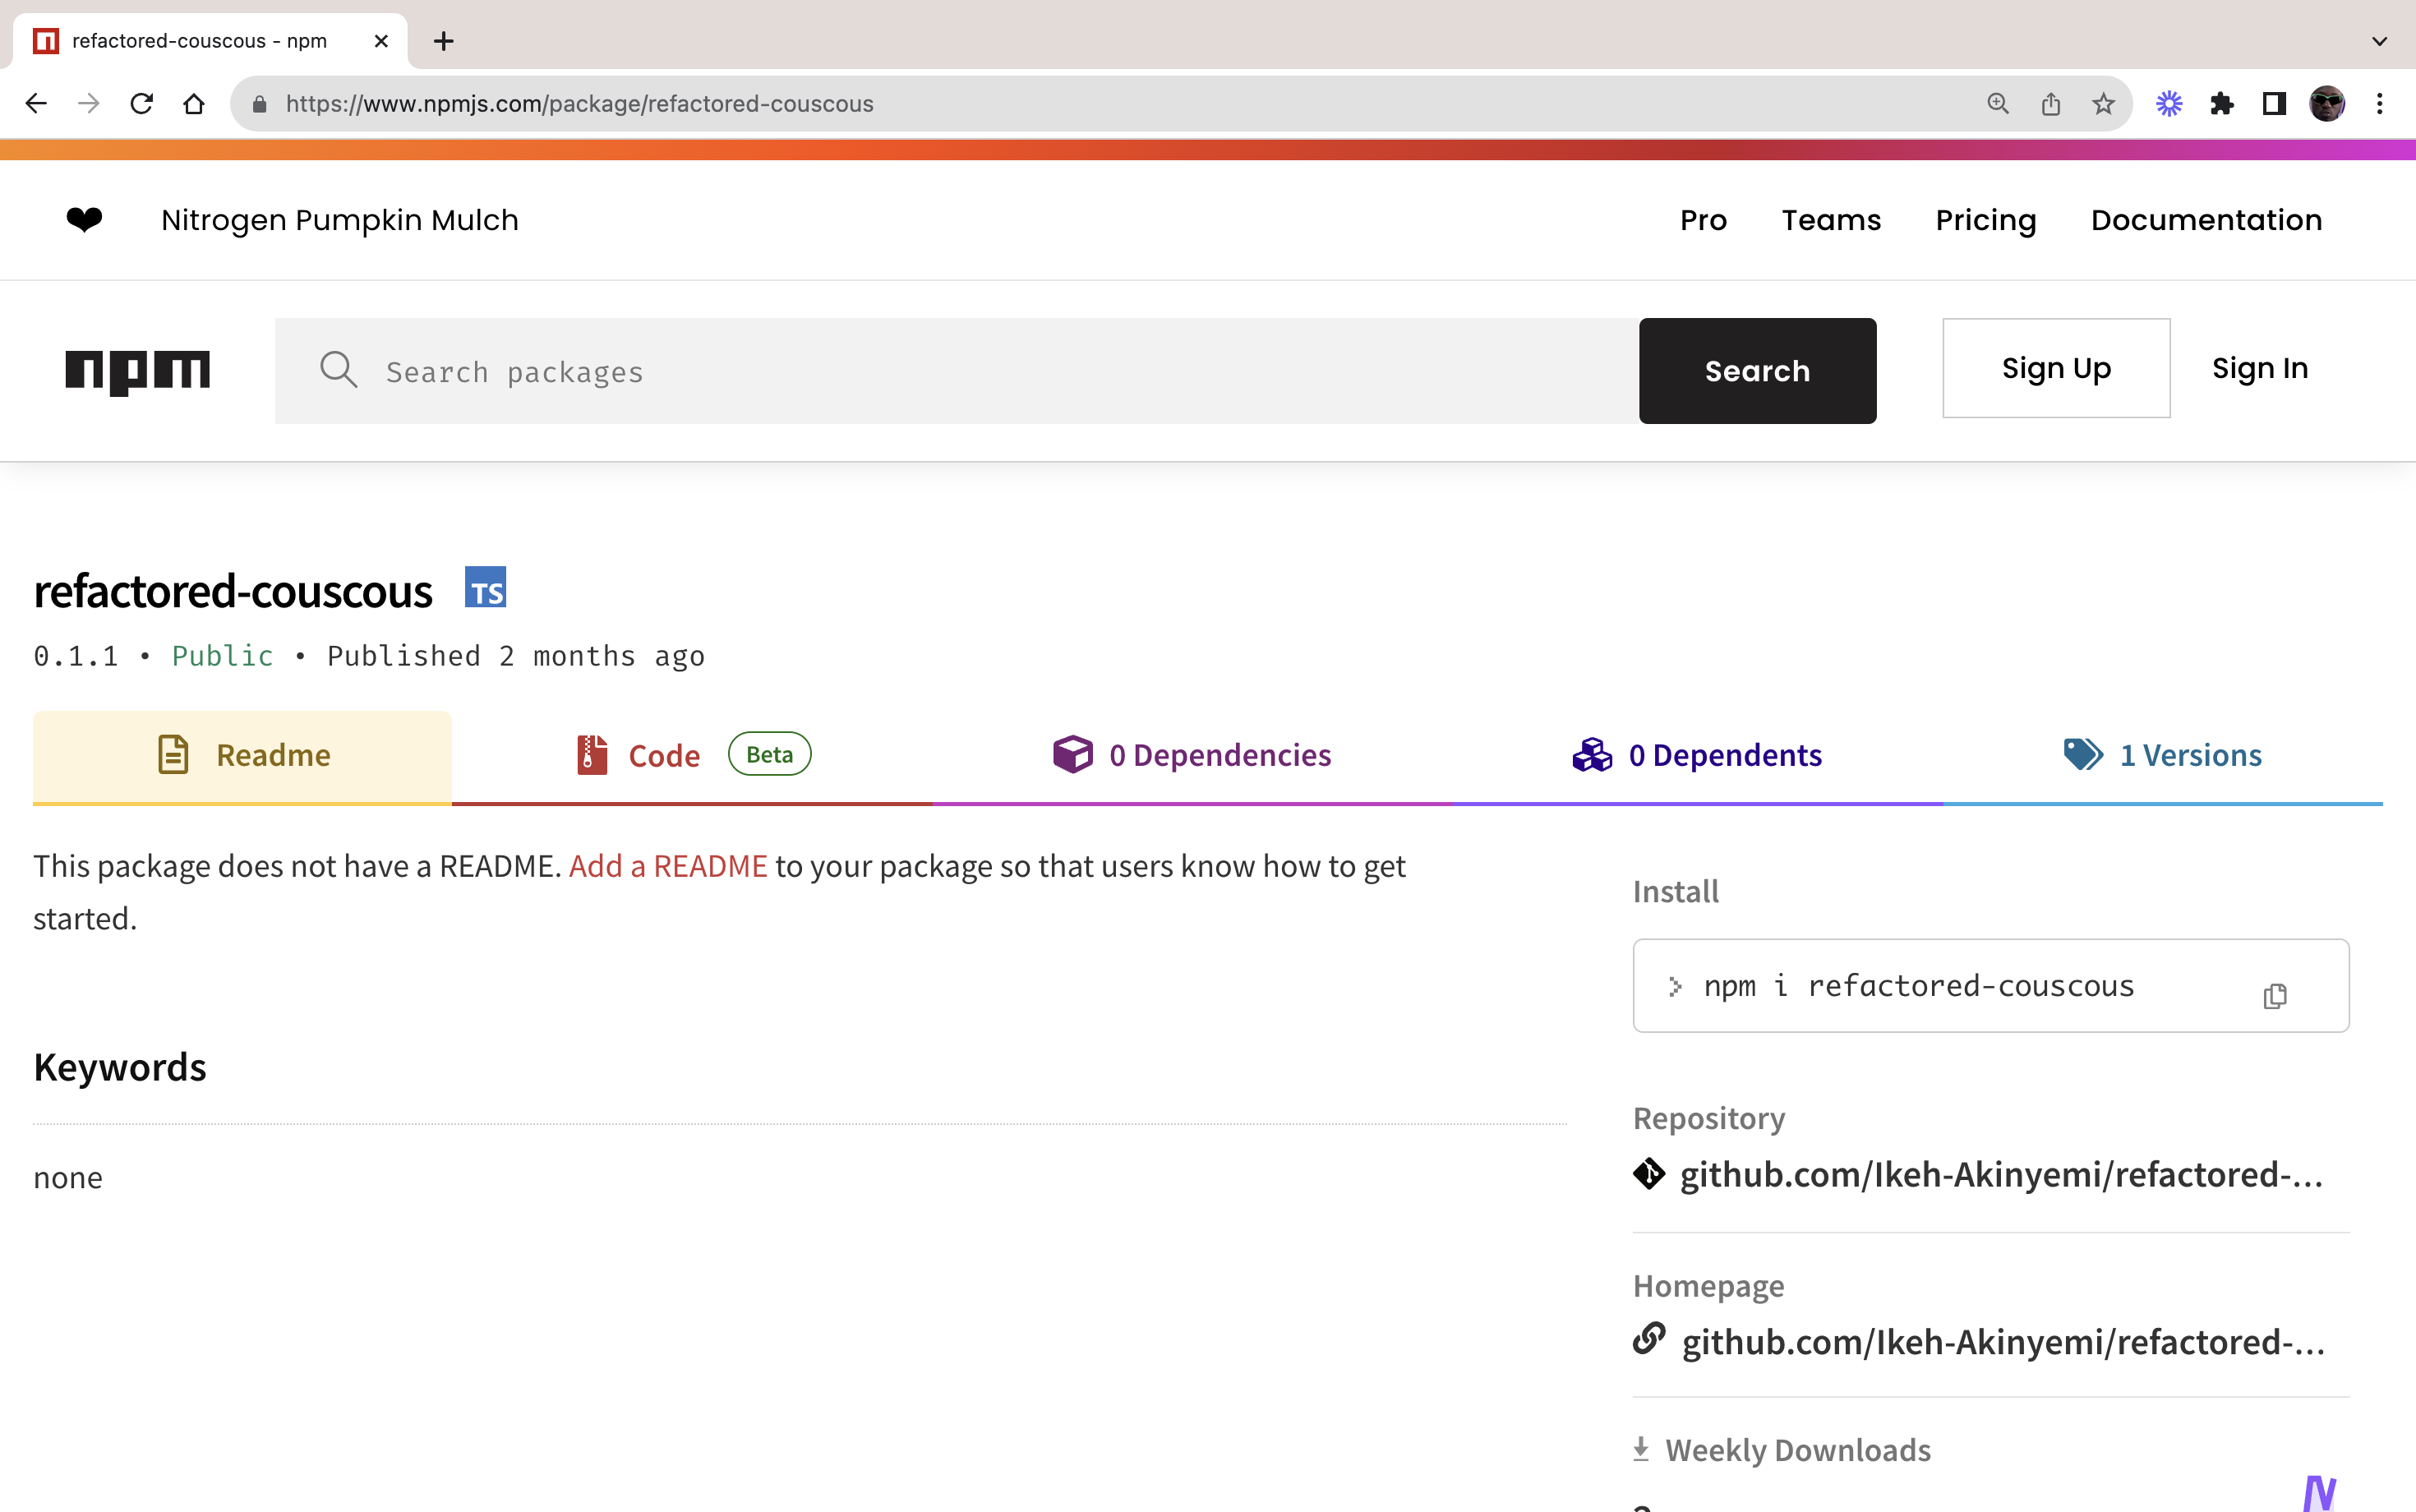
The displayed image confirms the functionality of our package. The next step is to make this package accessible to a wider audience by publishing it to the NPM registry. To do this, switch to the pkg directory and include type: "module" in the package.json configuration. This ensures the package’s compatibility with both CommonJS and ESModule module systems.
npm publishThis will publish the package to your account on npm.com like the example below:
With this published, we can install the package using the npm install refactored-couscous command and import it in a Node.js application using the ESModule system:
// file: ./examples/cli/src/index.js

import { Index } from 'refactored-couscous/refactored_couscous.js';

const index = new Index();
index.add("Hello world");
index.add("Rust is amazing");
index.add("Wade in Rust");

const results = index.search("rust");
console.log(results);
Once the code is set up, you can run the script using Node.js. Ensure you enable the experimental flags for WebAssembly modules:
node --experimental-wasm-modules ./src/index.jsAfter executing the script, you should see the search results printed in the console, indicating which entries contain the word “rust”:
[ 'Rust is amazing', 'Wade in Rust' ]This demonstrates the effectiveness of our package in performing searches on the provided data.
Conclusion
In this article, we successfully rewrote a simplified version of the Wade.js npm package using Rust and WebAssembly. We’ve delved into the intricacies of Rust’s type system, WebAssembly’s performance benefits, and the seamless interoperability between Rust, WebAssembly, and JavaScript. We’ve also explored how to build and index text data, perform searches, and integrate the WebAssembly module into browser- and server-side JavaScript environments. Finally, we took the crucial step of publishing our package to the NPM registry, making it accessible for broader use. This exercise not only showcases the power and flexibility of Rust and WebAssembly but also sets the stage for creating more complex, efficient, and secure web applications in the future.
The link to the GitHub repository is available here.
Gain control over your UX
See how users are using your site as if you were sitting next to them, learn and iterate faster with OpenReplay — the open-source session replay tool for developers. Self-host it in minutes, and have complete control over your customer data.
Star on GitHub12k