
Discover how at OpenReplay.com.
Creating real-time applications has become increasingly essential for providing interactive and engaging user experiences as web development evolves. One powerful combination for building such applications is Angular, a popular front-end framework, and ASP.NET with SignalR, a robust real-time communication library. In this tutorial, we will explore the process of building a real-time chat application using Angular for the front end and .NET with SignalR for the back end.
Understanding SignalR
SignalR, a library developed by Microsoft, streamlines the seamless integration of real-time web functionality into applications. It serves as a powerful tool for developers aiming to construct interactive and responsive web applications by establishing bidirectional communication between the server and connected clients. This communication occurs over diverse transports, including WebSockets, Server-Sent Events (SSE), and long polling. The hallmark of SignalR lies in its ability to enable instantaneous data transmission from the server to clients, eliminating the need for incessant client-side polling.
At its core, SignalR operates on a hub-based architecture. Hubs, defined as classes deriving from the Hub class, serve as high-level pipelines facilitating communication between server-side code and clients. Clients establish connections using different transport mechanisms, and SignalR intelligently selects the most suitable method based on client and server capabilities. The persistence of connections between the server and clients is a crucial feature, enabling instant communication without the overhead of continuous polling.
Implementing SignalR in .NET Back-end
- Create a new project in Visual Studio 2022.
- Select the
Asp.Net Core Web APIproject template. - Choose your application name and click “Create.”
- In the controller section, delete the
WeatherForecastController.csfile. - Navigate to the app parent folder and delete the
WeatherForecast.csfile.
Creating the Hub
Hubs play a pivotal role in SignalR, serving as high-level pipelines that facilitate communication between the server and connected clients. They act as centralized communication points, allowing the server to send messages to clients and vice versa. Hubs simplify the complexities of real-time communication, providing a streamlined and organized approach to building interactive applications. To create a Hub, follow these steps:
- Right-click on the parent file’s name to reveal a dropdown menu. Select
Add. - On the hamburger menu, click
Folder. Name this folderHub. - Right-click on the
Hubfolder, selectAdd, then clickClass. Name this classChatHub.cs - Repeat step 2, renaming the class to
UserGroupConnection. - Install the
Microsoft.AspNet.SignalRpackage (version 2.4.3) from the NuGet Package Manager.
The purpose of UserGroupConnection.cs file is to represent a connection between a user and a chat group in the context of a chat application.
In this file, we define 2 parameters one for the User and the other for the Group both are strings using the code below.
public string? User { get; set; }
public string? ChatGroup { get; set; }
The ChatHub.cs file
This file is designed to handle real-time communication for a chat application. In this file, we inherit Microsoft.AspNetCore.SignalR.Hub.
public class ChatHub : Microsoft.AspNetCore.SignalR.Hub
{
    // Hub-specific code
}
ChatHub class serves as a SignalR hub class, enabling bidirectional communication between clients and the server. This class includes a dictionary and various essential functions such as JoinGroup(), SendChatMessage(), NotifyConnectedUsersInGroup(), and onDisconnect() to enhance the interactive capabilities of the application.
The Dictionary
ChatHub instance leverages a dictionary to track user connections, effectively managing the state of connected clients within SignalR hub. This dictionary operates as a vital repository, associating each client with a unique identifier known as the connection ID. Each entry in the dictionary corresponds to a UserGroupConnection object, covering essential information about the user and the specific chat group they are presently engaged in.
public class ChatHub : Microsoft.AspNetCore.SignalR.Hub
{
    private readonly IDictionary<string, UserGroupConnection> _connection;

    public ChatHub(IDictionary<string, UserGroupConnection> connection)
    {
        _connection = connection;
    }
}
The _connection is set up as a dictionary linking connection IDs to UserGroupConnection objects. Also, a constructor is created to set up this field when a new instance of the ChatHub class is made.
The JoinGroup method
JoinGroup method in ChatHub class is tasked with managing the logic when a user joins a chat group. This method orchestrates several key actions such as adding a user to a group, updating connection details, notifying existing users, and sending user information.
public class ChatHub : Microsoft.AspNetCore.SignalR.Hub
{
    // Dictionary code from above goes here

    // Method to join a group
    public async Task JoinGroup(UserGroupConnection userConnection)
    {
        // Adds the current user's connection (identified by Context.ConnectionId) to a specified group indicated by userConnection.Group.
        await Groups.AddToGroupAsync(Context.ConnectionId, userConnection.ChatGroup!);

        // Updates a dictionary _connection with the user connection information.
        _connection[Context.ConnectionId] = userConnection;

        // Notifies all members of the group that a new member has joined.
        await Clients.Group(userConnection.ChatGroup!)
                     .SendAsync("ReceiveMessage", "OpenReplay", $"{userConnection.User} has joined the group", DateTime.Now);

        // Notifies connected users in the group about the new member.
        await NotifyConnectedUsersInGroup(userConnection.ChatGroup!);
    }
}
The SendChatMessage method
SendChatMessage method manages the process of dispatching a message to a chat group within a SignalR hub. Initially, it verifies the user’s connection by checking their connection ID. If the user is confirmed as connected, the method proceeds to transmit the message to the specified group utilizing the Clients.Group method.
public class ChatHub : Microsoft.AspNetCore.SignalR.Hub
{
    // Dictionary code from above goes here

    // JoinGroup method

    // Method to send a chat message
    public async Task SendChatMessage(string message)
    {
        if (_connection.TryGetValue(Context.ConnectionId, out UserGroupConnection userGroupConnection))
        {
            // Checks if the current user's connection ID exists in the _connection dictionary.

            await Clients.Group(userGroupConnection.ChatGroup!)
                         .SendAsync("ReceiveMessage", userGroupConnection.User, message, DateTime.Now);
            // Sends a message to all clients in the specified chat group.
        }
    }
}
The OnDisconnectedAsync method
This built-in method in the SignalR hub class is designed to manage user disconnections. It is overridden to handle the logic when a user disconnects from the hub. The method first checks if the user’s connection ID is present in the _connection dictionary.
If the user is found in the _connection dictionary (indicating an active connection), the base method is invoked. If the user is not found (indicating a disconnection), the method takes charge by notifying the group about the user’s departure and sending an updated list of connected users to the group.
public class ChatHub : Microsoft.AspNetCore.SignalR.Hub
{
    // Dictionary code from above goes here

    // JoinGroup method

    // SendChatMessage method

    // Method called when a connection is disconnected
    public override Task OnDisconnectedAsync(Exception? exception)
    {
        // Check if the user's connection ID exists in the _connection dictionary
        if (_connection.TryGetValue(Context.ConnectionId, out UserGroupConnection groupConnection))
        {
            // If the user's connection is found, execute the following code
            Clients.Group(groupConnection.ChatGroup!)
                   .SendAsync("ReceiveMessage", "OpenReplay", $"{groupConnection.User} has left the group", DateTime.Now);
            // Notify all clients in the specified chat group that the user has left

            NotifyConnectedUsersInGroup(groupConnection.ChatGroup!);
        }

        // Call the base implementation of OnDisconnectedAsync
        return base.OnDisconnectedAsync(exception);
    }
}
The NotifyConnectedUsersInGroup method
This method plays a crucial role in retrieving and broadcasting information about users in a particular chat group. This method takes the name of the group as input, then queries _connection dictionary to obtain a list of users belonging to the specified chat group. Subsequently, it sends a message containing the details of connected users to all clients within the specified chat group.
public class ChatHub : Microsoft.AspNetCore.SignalR.Hub
{
    // Dictionary code from above goes here

    // JoinGroup method

    // SendChatMessage method

    // OnDisconnectedAsync method

    public Task NotifyConnectedUsersInGroup(string group)
    {
        // Retrieve a list of connected users in the specified group from the _connection dictionary
        var connectedUsers = _connection.Values
            .Where(connection => connection.ChatGroup == group)
            .Select(connection => connection.User);

        // Send an update message to all clients in the specified chat group with the list of connected users
        return Clients.Group(group).SendAsync("ConnectedUser", connectedUsers);
    }
}The Program.cs file
Program.cs file holds a pivotal role in configuring the hosting environment and specifying the startup procedure for an ASP.NET Core application. Serving as a vital entry point for execution, it establishes essential configurations to define the application’s host environment. Within this file, various configurations are added, outlining how the application’s host environment should be set up and managed.
builder.Services.Add`SignalR`();This ensures that the necessary SignalR services, including hubs and associated infrastructure, are available for use in your application.
builder.Services.AddSingleton<IDictionary<string, UserGroupConnection>>(opt => new Dictionary<string, UserGroupConnection>());This code registers a singleton service in the dependency injection container, providing an instance of IDictionary<string, UserGroupConnection>. This service can be injected into other components of the application that need to manage user connections to chat groups. Dictionary<string, UserGroupConnection> stores and retrieves user connection information throughout the application’s lifetime.
builder.Services.AddCors(options =>
{
    // Configure CORS policies
    options.AddDefaultPolicy(builder =>
    {
        // Set the allowed origins, headers, methods, and credentials
        builder.WithOrigins("http://localhost:4200")
            .AllowAnyHeader()
            .AllowAnyMethod()
            .AllowCredentials();
    });
});
This configuration is vital when your client-side application operates in a distinct domain and needs to send requests to your ASP.NET Core server. Without CORS configuration, browsers would prevent such requests as a security precaution. This arrangement explicitly permits requests from the designated origin, establishing lenient rules for headers, methods, and credentials to facilitate smooth communication between the client-side application and the ASP.NET Core server.
app.UseRouting();This configuration establishes the groundwork for routing and endpoint handling, providing the framework to specify how incoming requests should be processed and mapped to particular endpoints within your application.
app.UseCors();UseCors middleware enables you to set up CORS policy for your application. By default, it applies a CORS policy that permits all origins, headers, and methods, while disallowing credentials.
app.UseEndpoints(endpoints =>
{
    // Map the ChatHub to the "/chat" endpoint
    endpoints.MapHub<ChatHub>("/chat");
});
This configures the routing for SignalR in your application. Specifically, it sets up a mapping for ChatHub class to a specific URL endpoint, /chat.
The launchSettings.json file
This file serves as a configuration file, defining settings for launching and debugging applications. To make specific modifications, navigate to the profiles property within this file. Ensure that launchBrowser is set to false and applicationUrl is configured as http://localhost:5000.
"profiles": {
  "http": {
    "commandName": "Project",
    "dotnetRunMessages": true,
    "launchBrowser": false,
    "launchUrl": "swagger",
    "applicationUrl": "http://localhost:5000",
    "environmentVariables": {
      "ASPNETCORE_ENVIRONMENT": "Development"
    }
  }
}
Run the back end by simply clicking the “run” button within the application.
Building the Angular Frontend
Open a command prompt file and navigate to the project you created earlier. Create a new angular file.
ng new <filename>Move into the newly created Angular project directory.
cd <filename>Open the project in VSCode.
code .Install Microsoft SignalR and Angular popup dependencies.
npm install @microsoft/signalr
npm install ng-angular-popup
Create two components: join-group and chat.
ng generate component join-group
ng generate component chat
Run the Angular app.
ng serveIn app.route.ts file, we specify the path for each component.
// Define the routes for the Angular application
export const routes: Routes = [
  // Redirect empty path to 'join-group' path
  { path: '', redirectTo: 'join-group', pathMatch: 'full' },

  // Route to the 'JoinGroupComponent' when the path is 'join-group'
  { path: 'join-group', component: JoinGroupComponent },

  // Route to the 'ChatComponent' when the path is 'chat'
  { path: 'chat', component: ChatComponent },
];
Import JoinGroupComponent and ChatComponent to app.route.ts file.
import { JoinGroupComponent } from './join-group/join-group.component';
import { ChatComponent } from './chat/chat.component';
In app.component.html file, delete all the code in the file and include <router-outlet />. This dynamic component container collaborates with the Angular Router to dynamically load and display the appropriate component based on the current route.
<router-outlet />To style our app, we use plain CSS and Bootstrap. To integrate Bootstrap, include the following CDN links in index.html file.
In the head tag, link to the Bootstrap CSS file:
<link
  href="https://cdn.jsdelivr.net/npm/bootstrap@5.3.3/dist/css/bootstrap.min.css"
  rel="stylesheet"
  integrity="sha384-QWTKZyjpPEjISv5WaRU9OFeRpok6YctnYmDr5pNlyT2bRjXh0JMhjY6hW+ALEwIH"
  crossorigin="anonymous"
/>
In the body tag, include the Bootstrap JavaScript bundle:
<script
  src="https://cdn.jsdelivr.net/npm/bootstrap@5.3.3/dist/js/bootstrap.bundle.min.js"
  integrity="sha384-YvpcrYf0tY3lHB60NNkmXc5s9fDVZLESaAA55NDzOxhy9GkcIdslK1eN7N6jIeHz"
  crossorigin="anonymous"
></script>
Setting up SignalR Connection and Methods in Angular Chat Service
Run the following command in your terminal to generate a service named chat:
ng generate service chatIn the chat.service.ts file, add the following import statement.
import * as signalR from '@microsoft/signalr';Configure a SignalR hub connection in ChatService class, specifying the URL with logging enabled. Store the resulting connection instance in connection property. Ensure that the provided URL corresponds to SignalR server’s listening URL; it should be http://localhost:5000/chat.
// Create a `SignalR` HubConnection and configure it
public connection: signalR.HubConnection = new signalR.HubConnectionBuilder()
  // Specify the URL of the `SignalR` hub
  .withUrl('http://localhost:5000/chat')

  // Configure the logging level for `SignalR` (optional)
  .configureLogging(signalR.LogLevel.Information)

  // Build the HubConnection instance
  .build();
Once the hub connection is configured, initiate the connection by defining an asynchronous method named start(). This method incorporates a try-catch block, commencing SignalR connection asynchronously. In the event of errors during this process, the method throws the error to the console for further analysis.
public async start() {
  try {
    // Attempt to start the `SignalR` connection
    await this.connection.start();

    // If successful, log a message indicating the connection is established
    console.log("Connection is established");
  } catch (error) {
    // If an error occurs during connection startup
    console.error("Error during connection startup:", error);
  }
}
Next, we’ll implement three methods corresponding to the backend functionalities: joinGroup(), SendChatMessage(), and LeaveChat. Let’s start with joinGroup() method.
This function requires two parameters: a user and the name of the chat group. It triggers the JoinGroup function on the back end by using the SignalR connection’s invoke method, passing an object containing the specified user and chat group parameters. The result of this invocation is returned from the function.
public async joinGroup(user: string, chatGroup: string) {
  // Use the `SignalR` connection to invoke the "JoinGroup" method on the server
  // The method takes an object with user and chatGroup parameters
  return this.connection.invoke("JoinGroup", { user, chatGroup });
}
Create an asynchronous function named SendChatMessage that accepts a message parameter. This function triggers the SendChatMessage function on the backend, passing the specified parameters to it.
public async SendChatMessage(message: string) {
  // Use the `SignalR` connection to invoke the "SendChatMessage" method on the server
  // The method takes a message parameter
  return this.connection.invoke("SendChatMessage", message);
}
Define an asynchronous function called leaveChat. This function stops the connection, signaling the user has left the chat group.
public async leaveChat() {
  // Stop the `SignalR` connection to leave the chat
  this.connection.stop();
}
Below the declaration of connection variable, define two BehaviorSubjects and two local array variables. These BehaviorSubjects keep track of and notify subscribers about the most recent arrays of messages and connected users separately. Simultaneously, two local array variables are maintained to store messages and connected users locally.
public messages$ = new BehaviorSubject<any>([]);
public activeUsers$ = new BehaviorSubject<string[]>([]);
public messages: any[] = [];
public users: string[] = [];
Import BehaviorSubject dependency at the beginning of your chat.service.ts file.
import { BehaviorSubject } from 'rxjs';We’ll define a constructor, which executes when an instance is created. In this constructor, initiate SignalR connection by invoking start method.
Set up hub events to listen to ReceiveMessage and ConnectedUsers events using the this.connection.on() method. Specify the method names, which must correspond to the backend chat hub methods. Lastly, update the local array and notify subscribers.
// Constructor for the ChatService class
constructor() {
  // Start the `SignalR` connection when the service is instantiated
  this.start();

  // Subscribe to the "ReceiveMessage" hub event
  this.connection.on("ReceiveMessage", (user: string, message: string, messageTime: string) => {
    // Update the local messages array with the received message and notify subscribers
    this.messages = [...this.messages, { user, message, messageTime }];
    this.messages$.next(this.messages);
  });

  // Subscribe to the "ConnectedUser" hub event
  this.connection.on("ConnectedUser", (users: any) => {
    // Log the connected users to the console
    console.log("Connected Users:", users);

    // Update the local users array and notify subscribers
    this.activeUsers$.next(users);
  });
}
Creating and Styling join-group component
Copy and paste the provided code into join-group.component.html file.
<div class="container">
  <div class="row">
    <div class="col-md-6 offset-md-3">
      <!-- Page Title -->
      <h2 class="text-center text-dark mt-5">
        Welcome to OpenReplay Workers Chat
      </h2>

      <!-- Introduction Text -->
      <div class="text-center mb-5 text-dark">
        Join the group to meet fellow workers and chat
      </div>

      <!-- Card containing the Join Form -->
      <div class="card my-5">
        <form class="card-body card_body_color p-lg-5">
          <!-- Display Picture Section -->
          <div class="text-center">
            <img
              src="https://www.finsmes.com/wp-content/uploads/2022/06/openreplay.png"
              class="img-fluid display-picture img-thumbnail rounded-circle my-3"
              width="200ox"
              alt="profile"
            />
          </div>

          <!-- Display Name Input -->
          <div class="mb-3">
            <input
              type="text"
              class="form-control"
              id="displayname"
              aria-describedby="emailHelp"
              placeholder="Display Name"
            />
          </div>

          <!-- Room Name Input -->
          <div class="mb-3">
            <input
              type="text"
              class="form-control"
              id="roomname"
              placeholder="Group Name"
            />
          </div>

          <!-- Join Button -->
          <div class="text-center">
            <button type="submit" class="btn button_color px-5 mb-5 w-100">
              Join
            </button>
          </div>
        </form>
      </div>
    </div>
  </div>
</div>
This generates the basic HTML structure for users to input their names and select the group they wish to join.
To enhance the styling further, you can incorporate the following CSS code by pasting it into join-group.component.css file.
.button_color {
  background-color: red;
  color: white;
}

.card_body_color {
  background-color: blue;
}

a {
  text-decoration: none;
}
In join-group.component.ts file, create a class responsible for creating and managing a reactive form for joining a chat group.
This component utilizes the OnInit lifecycle hook, signifying that the ngOnInit method gets executed during the component’s initialization.
To initiate the component, joinGroupForm property of type FormGroup is established. formBuilder is injected to acquire an instance of FormBuilder service, which facilitates the creation of FormGroup and FormControl instances.
Within ngOnInit method, a FormGroup is generated using this.fb.group(...). This defines two form controls (user and chatGroup) with initial values set to empty strings. Additionally, Validators.required validator is applied, indicating that the fields must be filled out.
export class JoinGroupComponent implements OnInit {

  // Reactive form instance for joining a group
  joinGroupForm!: FormGroup;

  // FormBuilder instance
  formBuilder = inject(FormBuilder);

  ngOnInit(): void {
    // Initialize the form and define its structure with validation rules
    this.joinGroupForm = this.formBuilder.group({
      user: ['', Validators.required],         // User input with required validation
      chatGroup: ['', Validators.required]      // Chat group input with required validation
    });
  }
}
Inject instances of ChatService and Router into chatService and router properties, respectively.
router = inject(Router)
chatService = inject(ChatService)
Create joinGroup() method. In this method, destructure the value property of the joinGroupForm FormGroup, extracting the user and chatGroup values. Store these values in sessionStorage.
Invoke joinGroup method of ChatService, passing the extracted user and chatGroup values as parameters. This method interacts with SignalR service to facilitate joining a chat group and returning a promise. If the joinGroup operation is successful, navigate to the chat route using Angular Router. Log the error message in the console if one exists.
joinGroup() {
  // Extract user and chatGroup values from the form
  const { user, chatGroup } = this.joinGroupForm.value;

  // Store user and chatGroup values in sessionStorage for future use
  sessionStorage.setItem("user", user);
  sessionStorage.setItem("chatGroup", chatGroup);

  // Call the joinGroup method from the chat service
  this.chatService.joinGroup(user, chatGroup)
    .then(() => {
      // If the joinGroup operation is successful, navigate to the 'chat' route
      this.router.navigate(['chat']);
    })
    .catch((error) => {
      // If there's an error during the joinGroup operation, log the error
      console.log(error);
    });
}
Make sure you’ve imported the necessary dependencies correctly.
import { FormBuilder, FormGroup, ReactiveFormsModule, Validators } from '@angular/forms';
import { Router } from '@angular/router';
import { ChatService } from '../chat.service';
In the component class, ensure you import ReactiveFormsModule.
imports: [ReactiveFormsModule]To implement the form in join-group.component.html file, add [formGroup] directive to bind FormGroup instance to the form element.
<form
  [formGroup]="joinGroupForm"
  class="card-body card_body_color p-lg-5"
></form>
In input fields of the form, include formControlName directive to link each input field with its respective control in the form group.
<!-- Input field for the user's display name -->
<input
  formControlName="user"
  type="text"
  class="form-control"
  id="displayname"
  aria-describedby="emailHelp"
  placeholder="Display Name"
/>

<!-- Input field for the chat group name -->
<input
  formControlName="chatGroup"
  type="text"
  class="form-control"
  id="roomname"
  placeholder="Group Name"
/>
Include a click event that triggers joinGroup() function when Join button is clicked. Additionally, disable the button when the form is in an invalid state.
<div class="text-center">
<button
[disabled]="joinGroupForm.invalid"
(click)="joinGroup()"
type="submit"
class="btn button_color px-5 mb-5 w-100"
>
Join
</button>
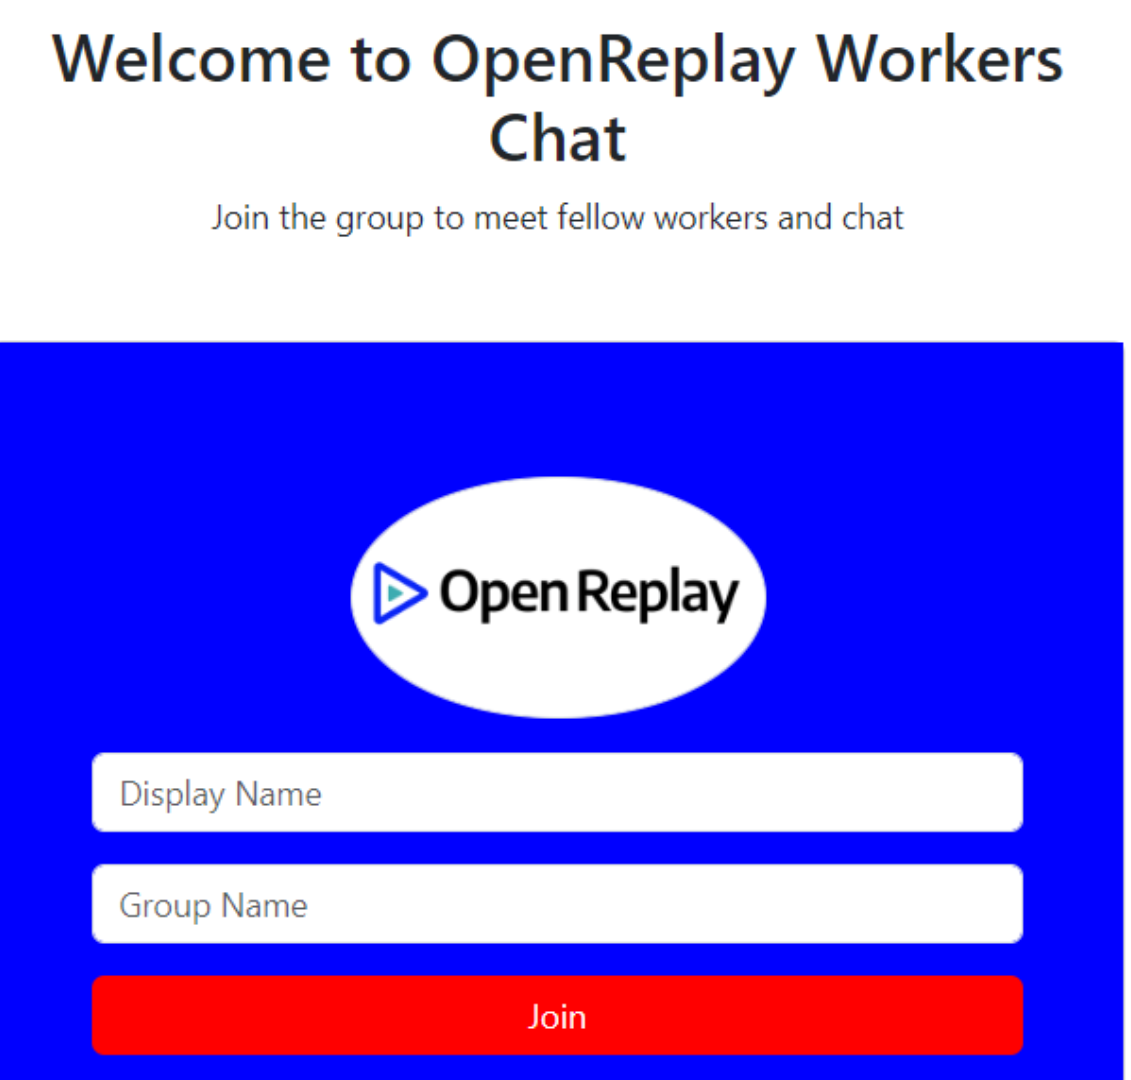
</div>Here’s a preview of our join-group page, showcasing the form that captures the user’s name and the group’s name.
Creating and styling chat component
Copy and paste the following code into the chat.component.html file.
<!-- Main container for the chat interface -->
<div class="container mt-5">
  <!-- Chat header section -->
  <div class="chat_header">
    <h3 class="text-center my-2">
      Welcome to <span class="text-warning">Group Name</span> OpenReplay Group
    </h3>
    <button class="btn btn-danger">Leave Chat</button>
  </div>

  <!-- Main messaging section -->
  <div class="messaging">
    <!-- Sidebar with connected users -->
    <div class="inboxMessage">
      <div class="usersInbox">
        <div class="headerSearch">
          <div class="recent_heading">
            <h4>Connected Users</h4>
          </div>
          <div class="search">
            <div class="stylish-input-group">
              <input type="text" class="search-bar" placeholder="Search" />
              <span class="input-group-addon">
                <button type="button">
                  <i class="fa fa-search" aria-hidden="true"></i>
                </button>
              </span>
            </div>
          </div>
        </div>
        <div class="inbox_chat">
          <!-- Example connected user in the chat list -->
          <div class="active_user_list">
            <div class="usersChat">
              <div class="inChatImage">
                <img
                  src="https://media.istockphoto.com/id/1495088043/vector/user-profile-icon-avatar-or-person-icon-profile-picture-portrait-symbol-default-portrait.jpg?s=612x612&w=0&k=20&c=dhV2p1JwmloBTOaGAtaA3AW1KSnjsdMt7-U_3EZElZ0="
                  alt=""
                />
              </div>
              <div class="chat_ib mt-3">
                <h5>Dummy User Connected</h5>
              </div>
            </div>
          </div>
        </div>
      </div>

      <!-- Main messaging area -->
      <div class="messages">
        <div class="messageHistory"></div>

        <!-- Input area for typing messages -->
        <div class="messageInput">
          <div class="typeInputMessage">
            <input
              type="text"
              class="typeMessage"
              placeholder="Type a message"
            />
            <button class="sendMessageButton" type="button">
              <i class="fa fa-paper-plane-o" aria-hidden="true"></i>
            </button>
          </div>
        </div>
      </div>
    </div>
  </div>
</div>
This generates the basic HTML file for the chat screen, allowing users to exchange messages after joining the group.
To style the page, you can find the CSS code here. Paste the code into the chat.component.css file.
Here’s a quick preview of the chat page.

In chat.component.ts file, define a ChatComponent class that functions as the user interface for a chat group. This class utilizes ChatService to handle real-time communication with a SignalR hub, displaying messages and connected users.
Inject instances of ChatService and Router into chatService and router variables, respectively.
chatService = inject(ChatService)
router = inject(Router);
Initialize a variable named inputMessage with an empty string in ChatComponent class. This variable will capture the message inputted by the user.
inputMessage = "";This component employs OnInit lifecycle hook to subscribe to two observable streams provided by ChatService.
It subscribes to messages$ and activeUsers$ observable streams from ChatService. These streams represent incoming messages from SignalR hub and updates to the list of connected users in the chat, respectively.
export class ChatComponent implements OnInit {
  // Inject the ChatService
  chatService = inject(ChatService);

  // Inject the Router
  router = inject(Router);

  // Array to store chat messages
  messages: any[] = [];

  // Variable to capture user input message
  inputMessage: string = ''; // Initialize with an empty string

  // OnInit lifecycle hook
  ngOnInit(): void {
    // Subscribe to messages from the chat service
    this.chatService.messages$.subscribe((res) => {
      // Update the local messages array and log to console
      this.messages = res;
      console.log(this.messages);
    });

    // Subscribe to connected users updates from the chat service
    this.chatService.activeUsers$.subscribe((res) => {
      // Log connected users to console
      console.log(res);
    });
  }
}
Define properties in ChatComponent class to retrieve values of user and chatGroup items from sessionStorage in the browser.
userDisplayName = sessionStorage.getItem("user");
groupName = sessionStorage.getItem("chatGroup");
Create a SendChatMessage method in ChatComponent class to facilitate the process of sending a message. This method invokes SendChatMessage method of ChatService, passing the content of inputMessage variable as the message sent. After successfully sending the message, it resets inputMessage variable to an empty string. In case of an error during SendChatMessage operation (rejected), it logs the error to the console.
SendChatMessage() {
  // Call the SendChatMessage method from the chat service with the inputMessage
  this.chatService.SendChatMessage(this.inputMessage)
    .then(() => {
      // If the message is sent successfully, reset the inputMessage variable
      this.inputMessage = '';
    })
    .catch((err) => {
      // Log any errors that occur during the SendChatMessage operation
      console.log(err);
    });
}
Define a leaveChat method in ChatComponent class responsible for handling the process when a user decides to leave the chat. This method calls leaveChat method of ChatService. If the operation is successful, it navigates the user to the join-group route and reloads the page. If there’s an error during the operation, it is logged to the console for debugging purposes.
leaveChat() {
  // Call the leaveChat method from the chat service
  this.chatService.leaveChat()
    .then(() => {
      // If leaving the chat is successful, navigate to the 'join-group' route
      this.router.navigate(['join-group']);

      // Reload the location after a short delay to ensure a fresh start
      setTimeout(() => {
        location.reload();
      }, 0);
    })
    .catch((error) => {
      // Log any errors that occur during the leaveChat operation
      console.log(error);
    });
}
Ensure you’ve imported the dependencies correctly.
import { Component, OnInit, inject } from '@angular/core';
import { ChatService } from '../chat.service';
import { FormsModule, ReactiveFormsModule } from '@angular/forms';
import { Router } from '@angular/router';
import { CommonModule } from '@angular/common';
In the component class, ensure you import FormsModule, ReactiveFormsModule, and CommonModule.
imports: [FormsModule, ReactiveFormsModule, CommonModule]In chat.component.html file, employ ngModel to capture the user’s input message. Add an event listener to detect when the enter key is pressed or when the send button is clicked to trigger the message-sending process.
<div class="typeInputMessage">
  <!-- Input field for typing a message -->
  <input
    (keydown.enter)="SendChatMessage()"
    [(ngModel)]="inputMessage"
    type="text"
    class="typeMessage"
    placeholder="Type a message"
  />

  <!-- Button to send the message -->
  <button
    (click)="SendChatMessage()"
    class="sendMessageButton text-white"
    type="button"
  >
    <i class="fa fa-paper-plane-o" aria-hidden="true"></i>
  </button>
</div>
Include a click event listener for the leave chat button, passing leaveChat() method.
<button (click)="leaveChat()" class="btn btn-danger">
  <!-- Button to initiate leaving the chat -->
  Leave Chat
</button>
Now that we have everything set up, let’s render chat messages in the user interface. Paste the following template into the div with class msg_history.
<ng-container *ngFor="let message of this.chatService.messages$ | async">
  <!-- Container for displaying chat messages using ngFor -->
  <div
    [ngClass]="{
      incoming_msg: message.user != userDisplayName,
      outgoing_msg: message.user === userDisplayName
    }"
  >
    <!-- Individual message container with dynamic classes -->

    <!-- Display the user's profile image for incoming messages -->
    <div *ngIf="message.user != userDisplayName" class="incomingMessageImage">
      <img src="https://ptetutorials.com/images/user-profile.png" />
    </div>

    <!-- Container for received messages -->
    <div *ngIf="message.user != userDisplayName" class="receivedMessage">
      <div class="received_withd_msg">
        <!-- Display the received message and timestamp -->
        <p>{{ message.message }}</p>
        <span class="time_date"
          >{{ message.user }} |
          {{ message.messageTime | date : "medium" }}</span
        >
      </div>
    </div>

    <!-- Container for sent messages -->
    <div *ngIf="message.user === userDisplayName" class="sentMessage">
      <!-- Display the sent message and timestamp -->
      <p>{{ message.message }}</p>
      <span class="time_date"
        >{{ message.user }} | {{ message.messageTime | date : "medium" }}</span
      >
    </div>
  </div>
</ng-container>
The code utilizes ng-container to iterate over messages retrieved from chatService's messages$ observable, using the *ngFor directive. Inside this loop, each message is processed and displayed within a div element.
The dynamic styling of each message container is achieved through [ngClass] directive, which conditionally applies CSS classes based on whether the message is incoming or outgoing. The classes are determined by comparing the message’s user with the current user’s display name.
For incoming messages (where message.user is different from userDisplayName), an additional container is used to display the user’s profile image, and another container is dedicated to presenting the received message along with its timestamp.
For outgoing messages (where message.user matches userDisplayName), a separate container is employed to display the sent message and its corresponding timestamp.
Finally, show names of the connected users in the UI. To achieve this, enclose the div with the class active_user_list within ng-container.
<ng-container
  *ngFor="let user of this.chatService.activeUsers$ | async"
></ng-container>
This uses the ngFor directive to loop through the list of connected users from the this.chatService.activeUsers$ observable stream. The async pipe is applied to unwrap the observable and retrieve the most up-to-date connected users.
Substitute hardcoded ‘Dummy User Connected’ with user retrieved from session storage.
Additionally, replace Group Name in <h3> element that displays ‘Welcome To Group Name OpenReplay Group’ with the groupName obtained from session storage.
<!-- Display user name with an online status indicator -->
<h5>{{ user }} <span class="online"></span></h5>

<!-- Welcome message to the OpenReplay Group with dynamic group name -->
<h3 class="text-center my-2">
  Welcome to <span class="text-warning">{{ groupName }}</span> OpenReplay Group
</h3>
Here’s a preview of the chat app showing real-time messaging
Conclusion
In conclusion, the integration of Angular and .NET (SignalR) for a real-time chat application delivers a robust solution to modern communication needs. By seamlessly combining Angular's frontend capabilities with SignalR's real-time functionality in the .NET framework, developers can create engaging, interactive, and responsive chat applications. This powerful synergy ensures smooth and instant communication, enhancing the overall user experience. Following the outlined steps in this article empowers developers to unleash the full potential of these technologies, resulting in feature-rich and efficient chat applications that prioritize real-time communication in their projects.
Additional Resources
Read more about SignalR. Repositories containing Front-end and Back-end code.
Gain Debugging Superpowers
Unleash the power of session replay to reproduce bugs, track slowdowns and uncover frustrations in your app. Get complete visibility into your frontend with OpenReplay — the most advanced open-source session replay tool for developers.
Star on GitHub12k