Real-time Chat Application with Firebase and Material UI

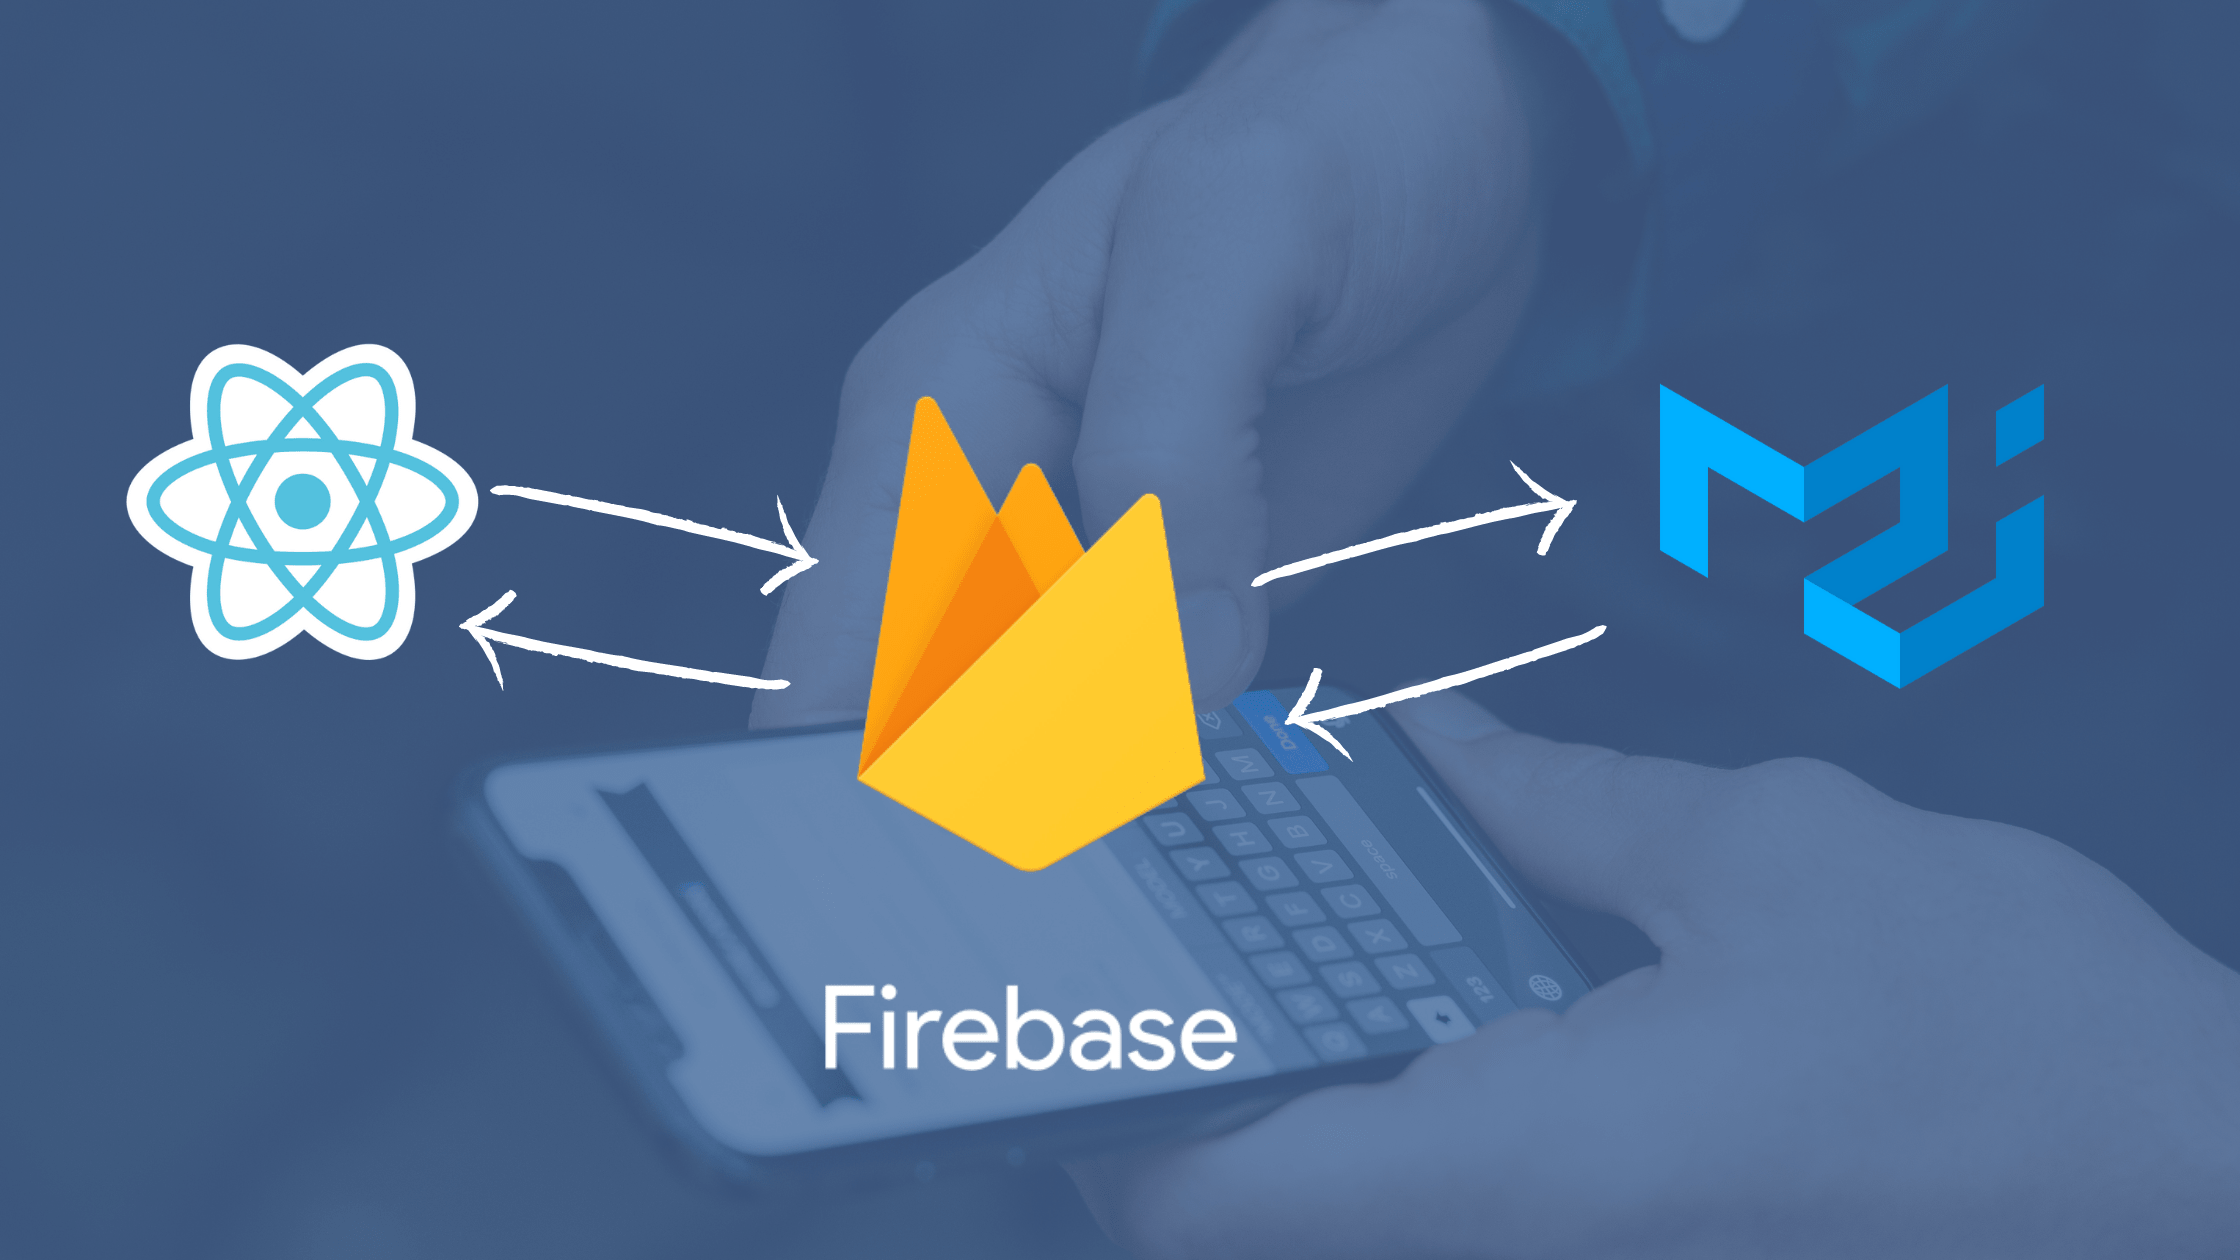
The need to make our web application faster for people to communicate has made it imperative for real-time features to be implemented in our chat applications. In this tutorial, we will learn how to build a real-time chat application using React.js and material UI. We set up Firebase, record, and send voice notes, and create custom users login, great right? So let get started!
Creating the project
First, let’s create a React application using the create-react-app. Which will download and installs the necessary packages required for a React application.
npx create-react-app realChat
cd realChat
Now, let’s look at the folder structure our application.
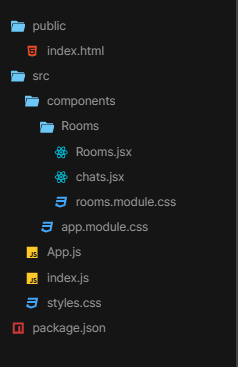
/components: contains our reusable widgets.App.js: the root component, which will connect our components together.
Installing packages
Now, we have created a react application for our project. let go ahead and install firebase, react-audio-player, audio-react-recorder, which are the packages we will be using for this project.
npm install firebase react-audio-player, audio-react-recorderSetting up Firebase
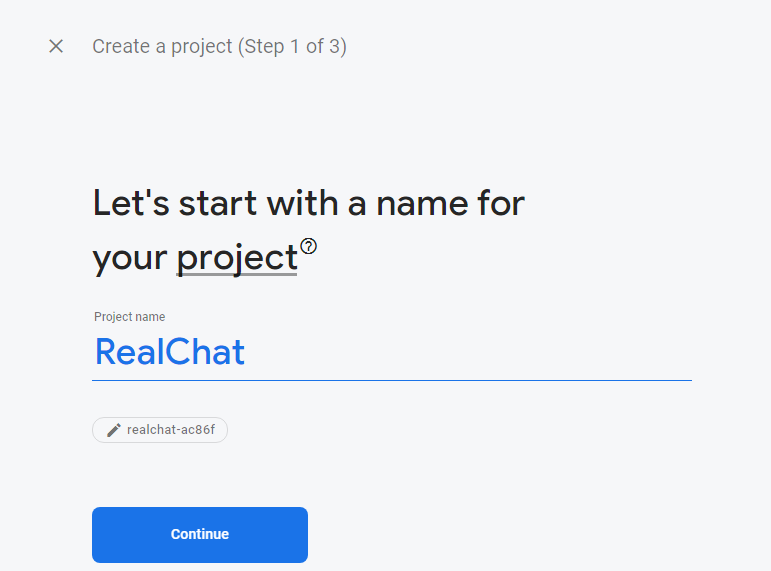
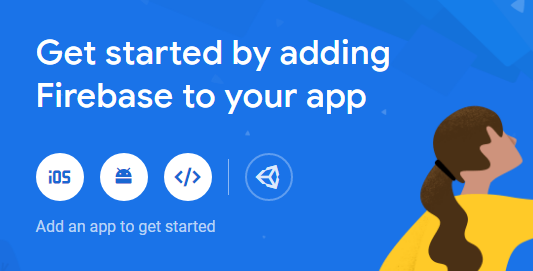
We need to create a Firebase project for our application. Firebase is a platform developed by Google for creating mobile and web applications, which helps you build and run successful apps. First, head over to the Firebase Console and create a new project by clicking add project.

Next, enter the name of the project. in this case, RealChat and hit the continue button.
After creating the project, we are redirected to the dashboard. Perhaps, we need to connect our app to Firebase, so copy the configuration details for our project by clicking on the web icon (</>) in the dashboard.
Next, we are prompted to register your application. Type in realchat on the text box and register.
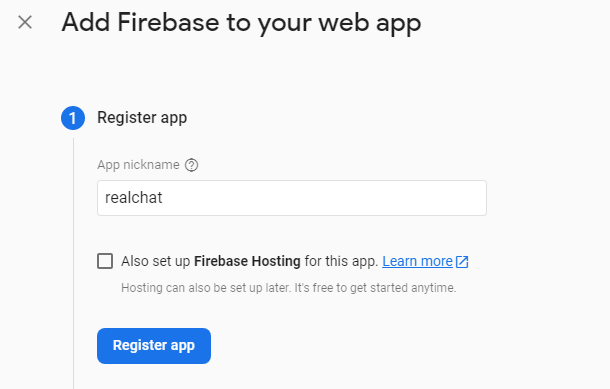
Firebase generates configuration details for our project. Leave this page open for now, we will be needing these credentials later in our project.
Creating the Material UI
We will create our user’s interface using Material UI. First, we need to get it installed in our application.
npm install @material-ui/coreWe will also need some icons, Material UI has a lot of cool icons we can use. Let’s go ahead and install material-ui/icons.
npm install @material-ui/iconsSo, now that we have Material UI and material-ui/icons installed in our application. Let’s go ahead and create our user interface.
Creating Users Login Component
Let’s add some code to App.js to create our login component.
We will import React and Material UI components required for our login page. Then we imported the **Rooms** component, which we will be creating later in a subsequent section.
import React from "react";
import Button from "@material-ui/core/Button";
import CssBaseline from "@material-ui/core/CssBaseline";
import TextField from "@material-ui/core/TextField";
import Box from "@material-ui/core/Box";
import Typography from "@material-ui/core/Typography";
import { makeStyles } from "@material-ui/core/styles";
import Container from "@material-ui/core/Container";
import Rooms from "./components/Rooms/Rooms";
import "./styles.css";
Next, we will create our login component with a username field to enable us to get the user’s names. Then we create a useStyles function to override some of the Material UI styles.
function LoginPage() {

 //states definitions
 //methods definition

 const useStyles = makeStyles((theme) => ({
  paper: {
   marginTop: theme.spacing(8),
   display: "flex",
   flexDirection: "column",
   alignItems: "center"
  },
  form: {
   width: "100%", // Fix IE 11 issue.
   marginTop: theme.spacing(1)
  },
  submit: {
   margin: theme.spacing(3, 0, 2)
  }
 }));
 const classes = useStyles();
 return (
  <Container component="main" maxWidth="xs">
   <CssBaseline />
   <div className={classes.paper}>
    <Typography component="h1" variant="h5">
     Sign in
    </Typography>
    <form
     className={classes.form}
     onSubmit={(e) => {
      e.preventDefault();
      handleSubmit();
     }}
    >
     <TextField
      variant="outlined"
      margin="normal"
      required
      fullWidth
      id="name"
      label="Name"
      name="name"
      autoComplete="name"
      onChange={handleChange}
      value={name}
     />
     <Button
      type="submit"
      fullWidth
      variant="contained"
      color="primary"
      className={classes.submit}
      type="submit"
     >
      Sign In
     </Button>
    </form>
   </div>
   <Box mt={8}></Box>
  </Container>
 );
}
Next, we need to save the values from the input field to a state. So let’s create the name state and set the initial value to an empty string.
const [name, setName] = React.useState("");Now, let’s create two methods, to save the input values to our state and to handle the submit event when a user tries to log in.
function handleSubmit() {
  props.setUser(() => name);
  props.setLogged((prev) => !prev);
}

function handleChange(e) {
  const { value } = e.target;
  setName(() => value);
}
Next, let’s render our login component.
Since we are not storing the logged-in users in the database, we will create a state in our App ****component to save the name of the logged in user and their current log status.
Then create handleLog function which will reset the state, and pass it as a prop to the Login component.
Next, we need to only give users who are recognized to have access to the Room component to chat. So we check the current logged state which returns either true or false and sends them to the appropriate page.
For now, our Room component is not yet ready, we will drop a comment for now till later in the section when it will be created.
function App() {
 const [logged, setLogged] = React.useState(false);
 const [user, setUser] = React.useState(null);

 function handleLog(){
   setLogged(prev => !prev)
   setUser(()=>null)
 }
 return (
  <div>
   {logged ? (
    //Show the chat Room component
   ) : (
    <LoginPage setLogged={setLogged} setUser={setUser} />
   )}
  </div>
 );
}
module.exports = App;
Creating Chat Rooms Component
We now successfully created our Login page. Now, let’s create our chat rooms component. First, we have to import React, Firebase, the required Material UI components, and import the Chats component which we will create later. Add this code to components/Rooms/Rooms.
import React, { Component } from "react";
import firebase from "firebase/app";
import "firebase/firestore";
import AudioReactRecorder, { RecordState } from "audio-react-recorder";
import AppBar from "@material-ui/core/AppBar";
import Toolbar from "@material-ui/core/Toolbar";
import Typography from "@material-ui/core/Typography";
import Button from "@material-ui/core/Button";
import Container from "@material-ui/core/Container";
import TextField from "@material-ui/core/TextField";
import MicIcon from "@material-ui/icons/Mic";
import MicOffIcon from "@material-ui/icons/MicOff";
import styles from "./rooms.module.css";
import Chats from "./Chats";
Next, we create our header section with a brand and a logout button, then we create a form for sending text chats and a record icon to record and send voice notes.
We create two different icons, one to record a voice message and the other to stop and send. Then a state to know if the user is recording or done recording.
Next, we created some states for our component and set their initial values. To enable us to style them in our own way, we created a custom CSS style. Then we create a state object to store the chats, form input, recording status, Error message, and record state.
class Rooms extends Component {
 constructor(props) {
  super(props);
  this.state = {
      activeUser: this.props.activeUser,
      value: "",
      isRecording: false,
      chats: [],
      Error: null,
      recordState: null,
  };
 }
 render() {
  const { recordState } = this.state;
  return (
   <Container maxWidth="lg">
    <AppBar position="absolute">
     <Toolbar className={styles.navRow}>
      <Typography component="h1" variant="h6" color="inherit" noWrap>
       Real Chat
      </Typography>
      <Button
       variant="contained"
       color="secondary"
       onClick={this.props.handleLogout}
      >
       Logout
      </Button>
     </Toolbar>
    </AppBar>
    <main className={styles.main}>
       //chats conponents gose here!
    </main>
    <form
     className={`${styles.form}`}
     noValidate
     autoComplete="off"
    >
     <div className={styles.formCol}>
      <TextField
       id="outlined-textarea"
       placeholder="Say somthing.."
       multiline
       variant="outlined"
       className={styles.text}
       name="value"
      />
      {this.state.isRecording ? (
       <MicOffIcon className={styles.mic} />
      ) : (
       <MicIcon className={styles.mic}/>
      )}
      <Button
       variant="contained"
       color="primary"
       className={styles.textBtn}
       type="submit"
      >
       Send
      </Button>
     </div>
    </form>
    <div>
     <AudioReactRecorder
      state={recordState}
      canvasWidth="0"
      canvasHeight="0"
     />
     );
    </div>
   </Container>
  );
 }
}
module.exports = Rooms;
Add these styles to component/Rooms/rooms.module.css.
.navRow {
 display: flex;
 justify-content: space-between;
}
.main {
 padding: 10px;
 height: 80vh;
 margin: 10vh 0 10vh;
 overflow-y: scroll;
 display: flex;
 flex-direction: column;
}
.main::-webkit-scrollbar {
 width: 0.3rem;
}
.main::-webkit-scrollbar-track {
 background: #0b93f6;
}
.main::-webkit-scrollbar-thumb {
 background: #3f51b5;
}
.text {
 max-width: 500px;
 margin-bottom: 12px;
 line-height: 24px;
 padding: 10px 7px;
 border-radius: 10px;
 position: relative;
 color: white;
 text-align: center;
}
.audio {
 max-width: 500px;
 margin-bottom: 12px;
 line-height: 24px;
 padding: 7px 7px;
 border-radius: 10px;
 position: relative;
 color: black;
 text-align: center;
 background-color: #f1f1f1fd;
}
.message {
 display: flex;
}
.sent {
 flex-direction: row-reverse;
}
.sent .text {
 color: white;
 background: #0b93f6;
 align-self: flex-end;
}
.received .text {
 background: #e5e5ea;
 color: black;
}
.form {
 position: fixed;
 bottom: 0;
 display: flex;
 align-items: center;
 font-size: 1.5rem;
 background-color: white;
}
.mic {
 cursor: pointer;
 font-size: 40px;
}
.textBtn {
 padding: 10px;
 margin: 6px;
}
.formCol {
 display: flex;
 align-items: center;
}
Next, let’s create our handler functions. We’ll import and initialize Firebase using the configuration details generated earlier when registering the app in the Firebase dashboard.
Then, initialize firestore, which will enable us to save our chats to Firebase in real-time.
Add this code after the imports.
const firebaseConfig = {
 //Your firebase configuration objects
};
// Initialize Firebase
if (!firebase.apps.length) {
 firebase.initializeApp(firebaseConfig);
}
const db = firebase.firestore();
Creating Voice Message
Then, we will create methods for the AudioReactRecorder component to handle the start, and stop of the recording.
start = () => {
  this.setState({
   recordState: RecordState.START,
   isRecording: !this.state.isRecording
  });
 };
 stop = () => {
  this.setState({
   recordState: RecordState.STOP,
   isRecording: !this.state.isRecording
  });
 };
Now, we need to save the message to the database. To do that that we will create a function to handle the submitting of forms to the database since we have two types of messages to send.
The function accepts the user message, and the category then submits to Firestore to perform a write to the database.
Then we listen to the onstop event, which is triggered when the user hits the stop button which returns an audio record.
async sumitData(msg, cate) {
  await db.collection("chats").add({
   message: msg,
   createdAt: firebase.firestore.FieldValue.serverTimestamp(),
   user: this.state.activeUser,
   cate: cate
  });
}
//audioData contains blob and blobUrl
 onStop = async (audioData) => {
  console.log(audioData);
  try {
   await this.sumitData(audioData, "voice");
  } catch (error) {
   console.log(error);
   this.setState({ Error: error.message });
  }
 };
};
Open Source Session Replay
OpenReplay is an open-source, session replay suite that lets you see what users do on your web app, helping you troubleshoot issues faster. OpenReplay is self-hosted for full control over your data.

Start enjoying your debugging experience - start using OpenReplay for free.
Creating Text Message
Next, let’s now create handler functions to enable the users to send text messages.
We create a handleChange method to save the user’s message to our state. Then the handleSubmit method, which will get the message stored in our state when the users entered their details, and save to the Firebase by calling the sumitData method.
handleChange(e) {
    this.setState({ value: e.target.value });
 }

async handleSubmit(e) {
  e.preventDefault();
  const { value } = this.state;
  try {
   await this.sumitData(value, "text");
   this.setState({ value: "" });
  } catch (error) {
   console.log(error);
   this.setState({ Error: error.message });
  }
 }

 componentDidMount() {
  if (db) {
   db.collection("chats")
    .orderBy("createdAt")
    .onSnapshot((querySnapShot) => {
     const chats = querySnapShot.docs.map((docs) => ({
      ...docs.data(),
      id: docs.id
     }));
     this.setState({ chats });
    });
  }
 }
Next, we create a hook to fetch our message from Firebase. This data is fetched when our components load and reload when a user sends a new message without the user refreshing the browser.
We then loop through the messages using a map function. Then pass chats and the active user as props to the Chats components
<main className={styles.main}>
 {this.state.chats.map((el) => (
    <Chats
       styles={styles}
       chat={el}
       key={el.id}
       activeUser={this.props.activeUser}
      />
    ))}
</main>
Next, let’s bind the handleChange and handleSubmit to our class and, then chain the methods to their respective component to listen to events.
this.handleChange = this.handleChange.bind(this);
this.handleSubmit = this.handleSubmit.bind(this);
Lastly, we need to render our Room component in our App component.
Modify App.js component, replace the //Show the chat Room component with this code.
<Rooms activeUser={user} handleLog={handleLog}/>Creating Chat Component
Next, we need to create a component to display the user’s chats. We will import React, ReactAudioPlayer, and the required Material UI components, then import our custom styles.
Then, we destruct the props to get the message, user and the category of the message fetch from Firebase. Since the message sent by the user has a special style to other users, we will check if the messages are sent by active users and apply the styles.
Next, we check if the chat category is a voice message or a text, to either load the voice note to the audio player or display the messages.
Add these codes to component/Rooms/Charts
import React, { Component } from "react";
import ReactAudioPlayer from "react-audio-player";
import styles from "./rooms.module.css";
class Chats extends Component {
 render() {
  const {
   chat: { cate, user, message }
  } = this.props;
  const activeUser = this.props.activeUser;
  return (
  <>
    {this.props.chat.cate === "text" ? (
     <div
      className={`${styles.message} ${
       user === activeUser ? styles.sent : styles.received
      }`}
     >
      <div className={styles.text}>
       <h4 style={{ textAlign: "left" }}>{user}</h4>
       <span>{message}</span>
      </div>
     </div>
    ) : (
     <div
      className={`${styles.message} ${
       user === activeUser ? styles.sent : styles.received
      }`}
     >
      <div className={styles.audio}>
       <h4 style={{ textAlign: "left" }}>{user}</h4>
       <ReactAudioPlayer controls src={message}/>
      </div>
     </div>
    )}
   </>
  );
 }
}
module.exports = Chats;
Resources
Conclusion
Throughout this tutorial, you’ve learned how to build a React real-time chat application. You’ve also experienced setting up Firebase, creating a user interface with Material, and Sending text messages as well as voice notes. Now, how would you implement real-time features in your next project? Perhaps creating your chat system with more features?