Real-time features in React using WebSockets
Allow instant, real-time communication by using websockets


Real-time features in web applications make it possible for users to be updated in the present moment of events by instigating communication between users and the server. They are important for improving the user’s experience and providing them with actionable insights. This article will show you how to implement this feature in React by using WebSockets.
Why are real-time features important?
- An instant and interactive experience for users.
- Provides better customer support to users by using instant messaging to attend to questions or proffer solutions.
- Keeps users updated to make informed decisions with the data and analytics provided.
- Makes users aware of newly added features to the app through push notifications.
WebSocket API is a technology that enables instant communication and data exchange between client and server. It is used to create real-time features such as chat applications, real-time collaboration tools, and live streaming.
It is supported by most browsers, including Firefox, Chrome, and Safari, which makes it a widely adopted technology for creating real-time features in web applications.
WebSockets libraries are available to be implemented in a React app to enable data exchange between client and server and create real-time features in an application. This is done by establishing a connection between the React app and the server using the WebSocket API.
Definition of WebSockets and how they differ from traditional HTTP requests
WebSockets is a communication protocol that enables real-time communication between a client and a server. It uses a standard WebSocket protocol that goes through TCP or IP to enable the connection between the client and the server.
WebSocket provides a persistent bi-directional communication channel between a client and a server. This means that data can be sent back and forth between the client and server without having to initiate a new connection each time to send a request.
Unlike HTTP requests, each new request requires a response, after which it is terminated before a new request can be sent again. WebSockets work differently; it uses a stateful protocol. Once a connection is established, communication will continue until the connection is terminated by either the client or the server.
How WebSockets work and enable real-time communication
The WebSocket handshake system is similar to an HTTP system but has few differences. The client sends an HTTP request to the server with the “Upgrade” header specifying “WebSockets” to create a WebSocket connection. After the connection is established, data is sent back and forth between the client and server in real-time. Then either the client or server will initiate the “close” handshake to terminate the connection.
Due to this persistent connection, WebSockets are used to build real-time applications. It is a powerful technology for building engaging and interactive web applications.
Different WebSocket libraries available for React
There are various libraries used with Websockets to manage WebSocket connections between the browser and server. They provide the features that enable WebSocket connections, like handling events and sending and receiving messages.
To use these libraries, you must have installed npm and Node.js on your system and then npm install any of the libraries.
Some WebSockets libraries available with React are:
The specific library to use depends on your project and its use case. Some libraries, like Socket.IO and uWebSockets.js, provide more advanced real-time communication features, while others provide a simpler API.
A step-by-step guide to integrating WebSockets into a React app
Now let’s see how to integrate WebSocket into a React app. For the sake of this tutorial, Socket.IO will be used to create real-time features in React.
Prerequisite
You should have Node.js installed on your local machine.
Integrating WebSockets into your React app
In your React app, install the Socket.IO library by typing in the following command in your terminal:
npm install socket.io-clientNext, you will create a WebSockets server using a Node.js HTTP server to manage the incoming connections.
Create a new file in your app and input the following code. Create a folder for the server and a server.js file. On your terminal, cd into the server folder and run npm.io.
Input the following code in your server.js file.
const http = require("http");

const { Server } = require("socket.io");

const httpServer = http.createServer();

const PORT = 8080,
  HOST = "localhost";

const io = new Server(httpServer, {
  cors: {
    origin: "*", // or a list of origins you want to allow, e.g. ["http://localhost:3000"]
    credentials: true,
  },
});

io.on("connection", (socket) => {
  console.log(socket.id);
});

httpServer.listen(PORT, HOST, () => {
  console.log("Server running on port:", PORT);
});
This would create the WebSockets server listening on port 8080, which logs incoming client connections. It logs the socket ID to the console, which should be the same on the front end.
Now connect the WebSockets server to your React app. In your App.js file, add the following code:
import React, { useState, useEffect } from 'react';
import io from 'socket.io-client';

function App() {
  const [message, setMessage] = useState('');
  const [socket, setSocket] = useState(null);

  useEffect(() => {
    // connect to WebSocket server
    const newSocket = io("http://localhost:8080");
    setSocket(newSocket);

    newSocket.on('connect', () => {
      console.log('Connected to server', newSocket.id);
    });

      newSocket.on('disconnect', () => {
      console.log('Disconnected from server');

    });
  }, []);
}
  export default App;
This code creates a connection to the WebSockets server with the io() method from the Socket.IO library. It listens to connect and disconnect events with the event listeners. Once this is done, a connection has been created, and you can listen to events. newSocket.id should be the same as the newSocket.id created on the server side.
Real-time features that can be created using WebSocket
Several real-time features can be created using WebSocket. Some examples of these features are:
-
Chat applications: Chat applications allow users to communicate with each other instantly. Users can send messages, which are immediately sent to the server, and a response is sent back, all of which happens over the WebSocket connection. This allows for fast and efficient communication between users in real time.
-
Live notification: This feature provides users immediate updates when new events occur. It notifies the users of certain developments.
-
Real-time data visualization: Real-time data visualization provides users with real-time information. An example is a dashboard that displays the performance of a company’s website in real-time.
-
Live streaming: This allows users to watch events, broadcasts, or other video content as it is happening in real-time.
Session Replay for Developers
Uncover frustrations, understand bugs and fix slowdowns like never before with OpenReplay — an open-source session replay tool for developers. Self-host it in minutes, and have complete control over your customer data. Check our GitHub repo and join the thousands of developers in our community.
Implementing the chat application using WebSocket
After successfully installing WebSocket, creating the server, and connecting the WebSocket server from the React app, you will now implement the chat application feature using WebSocket.
To build the chat application, add the following code in your server.js file for the connection event listener:
io.on("connection", (socket) => {
 console.log(socket.id);
 socket.on("message", (message) => {
   console.log(`Received message: ${message}`);
   socket.emit("message", message);
 });
});
This should go into your ChatRoom component, which you must have created.
import React, { useState, useEffect } from "react";
import io from "socket.io-client";
const ChatRoom = () => {
const [message, setMessage] = useState("");
const [messages, setMessages] = useState([]);
const [socket, setSocket] = useState(null);
useEffect(() => {
// connect to WebSocket server
const newSocket = io("http://localhost:8080");
setSocket(newSocket);
// set up event listeners for incoming messages
newSocket.on("connect", () => console.log("Connected to WebSocket"));
newSocket.on("disconnect", () =>
console.log("Disconnected from WebSocket")
);
newSocket.on("message", (data) => {
setMessages((msgs) => [...msgs, data]);
});
// clean up on unmount
return () => {
newSocket.disconnect();
};
}, []);
const handleSend = (e) => {
e.preventDefault();
if (message.trim() !== "") {
// send message to WebSocket server
socket.emit("message", message);
setMessage("");
}
};
return (
<div>
<h1>Chat Room</h1>
<div>
{messages.map((msg, index) => (
<div key={index}>{msg}</div>
))}
</div>
<form onSubmit={handleSend}>
<input
type="text"
value={message}
onChange={(e) => setMessage(e.target.value)}
/>
<button type="submit">Send</button>
</form>
</div>
);
};
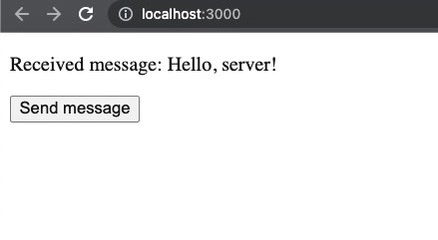
export default ChatRoom;This code sets up a WebSocket connection to a server running on http://localhost:8080. It uses the useState hook to manage the state of the chat messages and the current message being typed. The useEffect hook is used to set up the WebSocket connection and event listeners for incoming messages. When the user types a new message and clicks the send button, the handleSend function sends the message to the WebSocket server using the emit method. The incoming messages are added to the messages array in the component’s state, which is then displayed in the chat interface.
You should see something like this:
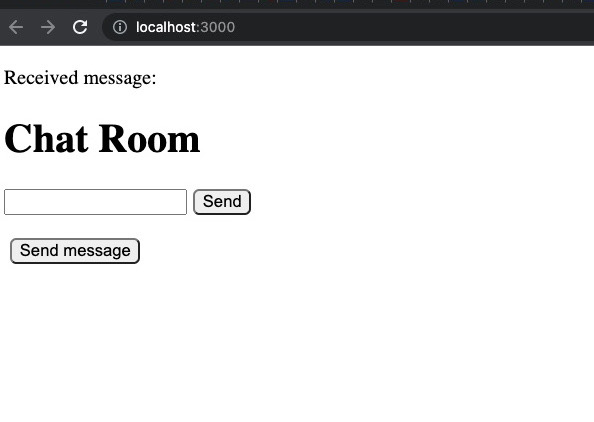
And also:
The second example of implementing a real-time feature using WebSocket will be live notification.
For the server side, you also need to emit the notification event to send notifications to all connected clients. The following code gives an example:
io.on("connection", (socket) => {
  console.log(socket.id);
  socket.on("message", (message) => {
    console.log(`Received message: ${message}`);
    io.emit("notification", message);
  });
});
This should go into a component for the live notification:
import React, { useState, useEffect } from "react";
import io from "socket.io-client";

const socket = io("http://localhost:8080");
function App() {
  const [notifications, setNotifications] = useState([]);

  useEffect(() => {
    // Listen for incoming notifications from the server
    socket.on("notification", (notification) => {
      setNotifications([...notifications, notification]);
    });

    // Clean up event listeners on unmount
    return () => {
      socket.off("notification");
    };
  }, [notifications]);

  return (
    <div>
      <h1>Live Notifications</h1>
      <ul>
        {notifications.map((notification, index) => (
          <li key={index}>{notification}</li>
        ))}
      </ul>
    </div>
  );
}

export default App;
The useEffect hook sets up a listener for incoming notifications from the server. When a new notification is received, the notification state gets updated with the new notification. The user interface then gets updated to show the notification to the user.
This code listens for incoming message events from clients. When a new message is received, the message is broadcast to all connected clients by emitting the notification event to each client. This sends the notification message to all connected clients, including the React app we created earlier.
Best Practices for Using WebSockets in a React App
Consider a few best practices for using WebSockets in a React app.
-
Use efficient data formats: Employ the use of efficient data formats such as JSON when sending data over a WebSocket connection for improved performance.
-
Manage WebSocket connections: WebSocket connections should be properly maintained to ensure performance and reliability. It is advisable to create and maintain one WebSocket connection for the duration of your app.
-
Use a WebSocket library: Use a WebSocket library such as Socket.IO or SockJS for the features they provide instead of implementing WebSocket functionality from scratch.
-
Test in detail: Finally, make sure to test your WebSocket implementation in detail for performance and reliability.
Conclusion
In this article, you learned about WebSockets, their role in creating real-time features in applications, and how they differ from traditional HTTP requests. Then you went ahead to create a WebSocket server and connect it to your React app before finally implementing some real-time features in the application.
You can play around and explore with WebSockets and implement other real-time features to further deepen your understanding. For further reading on WebSocket and Socket.IO libraries. The source code for implementing the live features is available on my GitHub repository.
Gain Debugging Superpowers
Unleash the power of session replay to reproduce bugs and track user frustrations. Get complete visibility into your frontend with OpenReplay, the most advanced open-source session replay tool for developers.