
When it comes to the data retrieval and communications landscape, two distinct methods have emerged as stalwarts: polling and webhooks. Each approach offers a unique way to fetch and deliver data from one system to another. Choosing between them can significantly impact your applications’ efficiency, real-time capabilities, and overall user experience. This article will compare polling to webhooks, examining the benefits and drawbacks of each method, and discuss when to use one over the other.

Discover how at OpenReplay.com.
What is Polling?
Polling, often called API polling, is the process where a client requests a particular piece of data at regular intervals (every x seconds), and the server responds with the required data.
Think of it as repeatedly asking, “Is there any new data?” regularly. Polling can be implemented using HTTP requests where the client sends a GET request to the server, and the server responds with the requested data.
Let’s look at an example of how to use API polling for location searches using the RapidAPI RealtorAPI. The Realtor API is a RapidAPI endpoint that provides access to a comprehensive database of real estate data, including property listings, market trends, and demographic information.
Polling this API is useful in scenarios where we need to fetch fresh data at regular intervals. For example, it can be used to retrieve property details, search for listings based on various criteria, and access market insights.
In this example, we use the RealtorAPI to fetch real estate data dynamically based on a given location. The API provides comprehensive location information, making it a suitable candidate for our real-time location search.
Getting Started
Before we begin, you’ll need to sign up for a free account with RapidAPI, which provides access to the RealtorAPI. Once you’ve signed up, you can obtain your API key to authenticate your requests.
Setting Up the Backend
The backend will handle API requests to the RealtorAPI and send the data to the front.
Navigate to the folder where you want the node.js application installed and run:
npm init -yInstall the necessary node.js packages needed for this project:
npm install express axios corsNext, create a file called index.js and paste this:
const express = require("express");
const axios = require("axios");
const cors = require("cors");

const app = express();
const port = 3001;

app.use(cors());

const apiKey = "your api key";

const makeApiRequest = async (location) => {
  const options = {
    method: "GET",
    url: "https://realtor.p.rapidapi.com/locations/v2/auto-complete",
    params: {
      input: location,
      limit: "10",
    },
    headers: {
      "X-RapidAPI-Key": apiKey,
      "X-RapidAPI-Host": "realtor.p.rapidapi.com",
    },
  };

  try {
    const response = await axios.request(options);
    return response.data;
  } catch (error) {
    console.error(error);
    throw error;
  }
};

app.get("/api/real-estate/:location", async (req, res) => {
  try {
    const location = req.params.location;
    const data = await makeApiRequest(location);
    res.json(data);
  } catch (error) {
    console.error(`Error: ${error}`);
    res.status(500).json({ error: "An error occurred while fetching data" });
  }
});

app.listen(port, () => {
  console.log(`Server is running at http://localhost:${port}`);
});
In the code above, we have an API endpoint (/api/real-estate/:location) responsible for handling requests based on location parameters. The makeApiRequest function utilizes Axios to make requests to the RealtorAPI, fetching real estate data for the specified location. The backend ensures security by concealing the API key and enhances flexibility by allowing location-specific requests.
Don’t forget to replace your api key with your actual API key from Rapid API.
Start up the server using this command:
node indexImplementing API Polling in React
Let’s move on to the React front end, where we’ll handle the API polling logic.
Navigate to the folder where you want React installed (I’ll be installing React using Vite) and run this command:
npm create vite@latest

npx: installed 1 in 0.969s
✔ Project name: … my-project-name
✔ Select a framework: › React
✔ Select a variant: › JavaScript
Navigate to the project directory and start up the development server:
cd my-project-name
npm run dev
Inside the app.jsx, paste this:
import React, { useState, useEffect } from "react";
import axios from "axios";
const App = () => {
const [data, setData] = useState(null);
const [loading, setLoading] = useState(false);
const fetchData = async () => {
if (!loading) {
setLoading(true); // Set loading state to true before making a request
console.log("Fetching data...");
try {
const response = await axios.get(
"http://localhost:3001/api/real-estate/new-york"
);
setData(response.data);
console.log("Data retrieved:", response.data);
} catch (error) {
console.error(error);
} finally {
setLoading(false); // Set loading state to false after the request completes
}
}
};
useEffect(() => {
fetchData();
const intervalId = setInterval(() => {
fetchData();
}, 5000);
return () => clearInterval(intervalId);
}, []); // Run effect only on mount
return (
<div>
<h1>Real Estate Data for New York</h1>
{loading ? (
<p>Loading data...</p>
) : (
data && <pre>{JSON.stringify(data, null, 2)}</pre>
)}
</div>
);
};
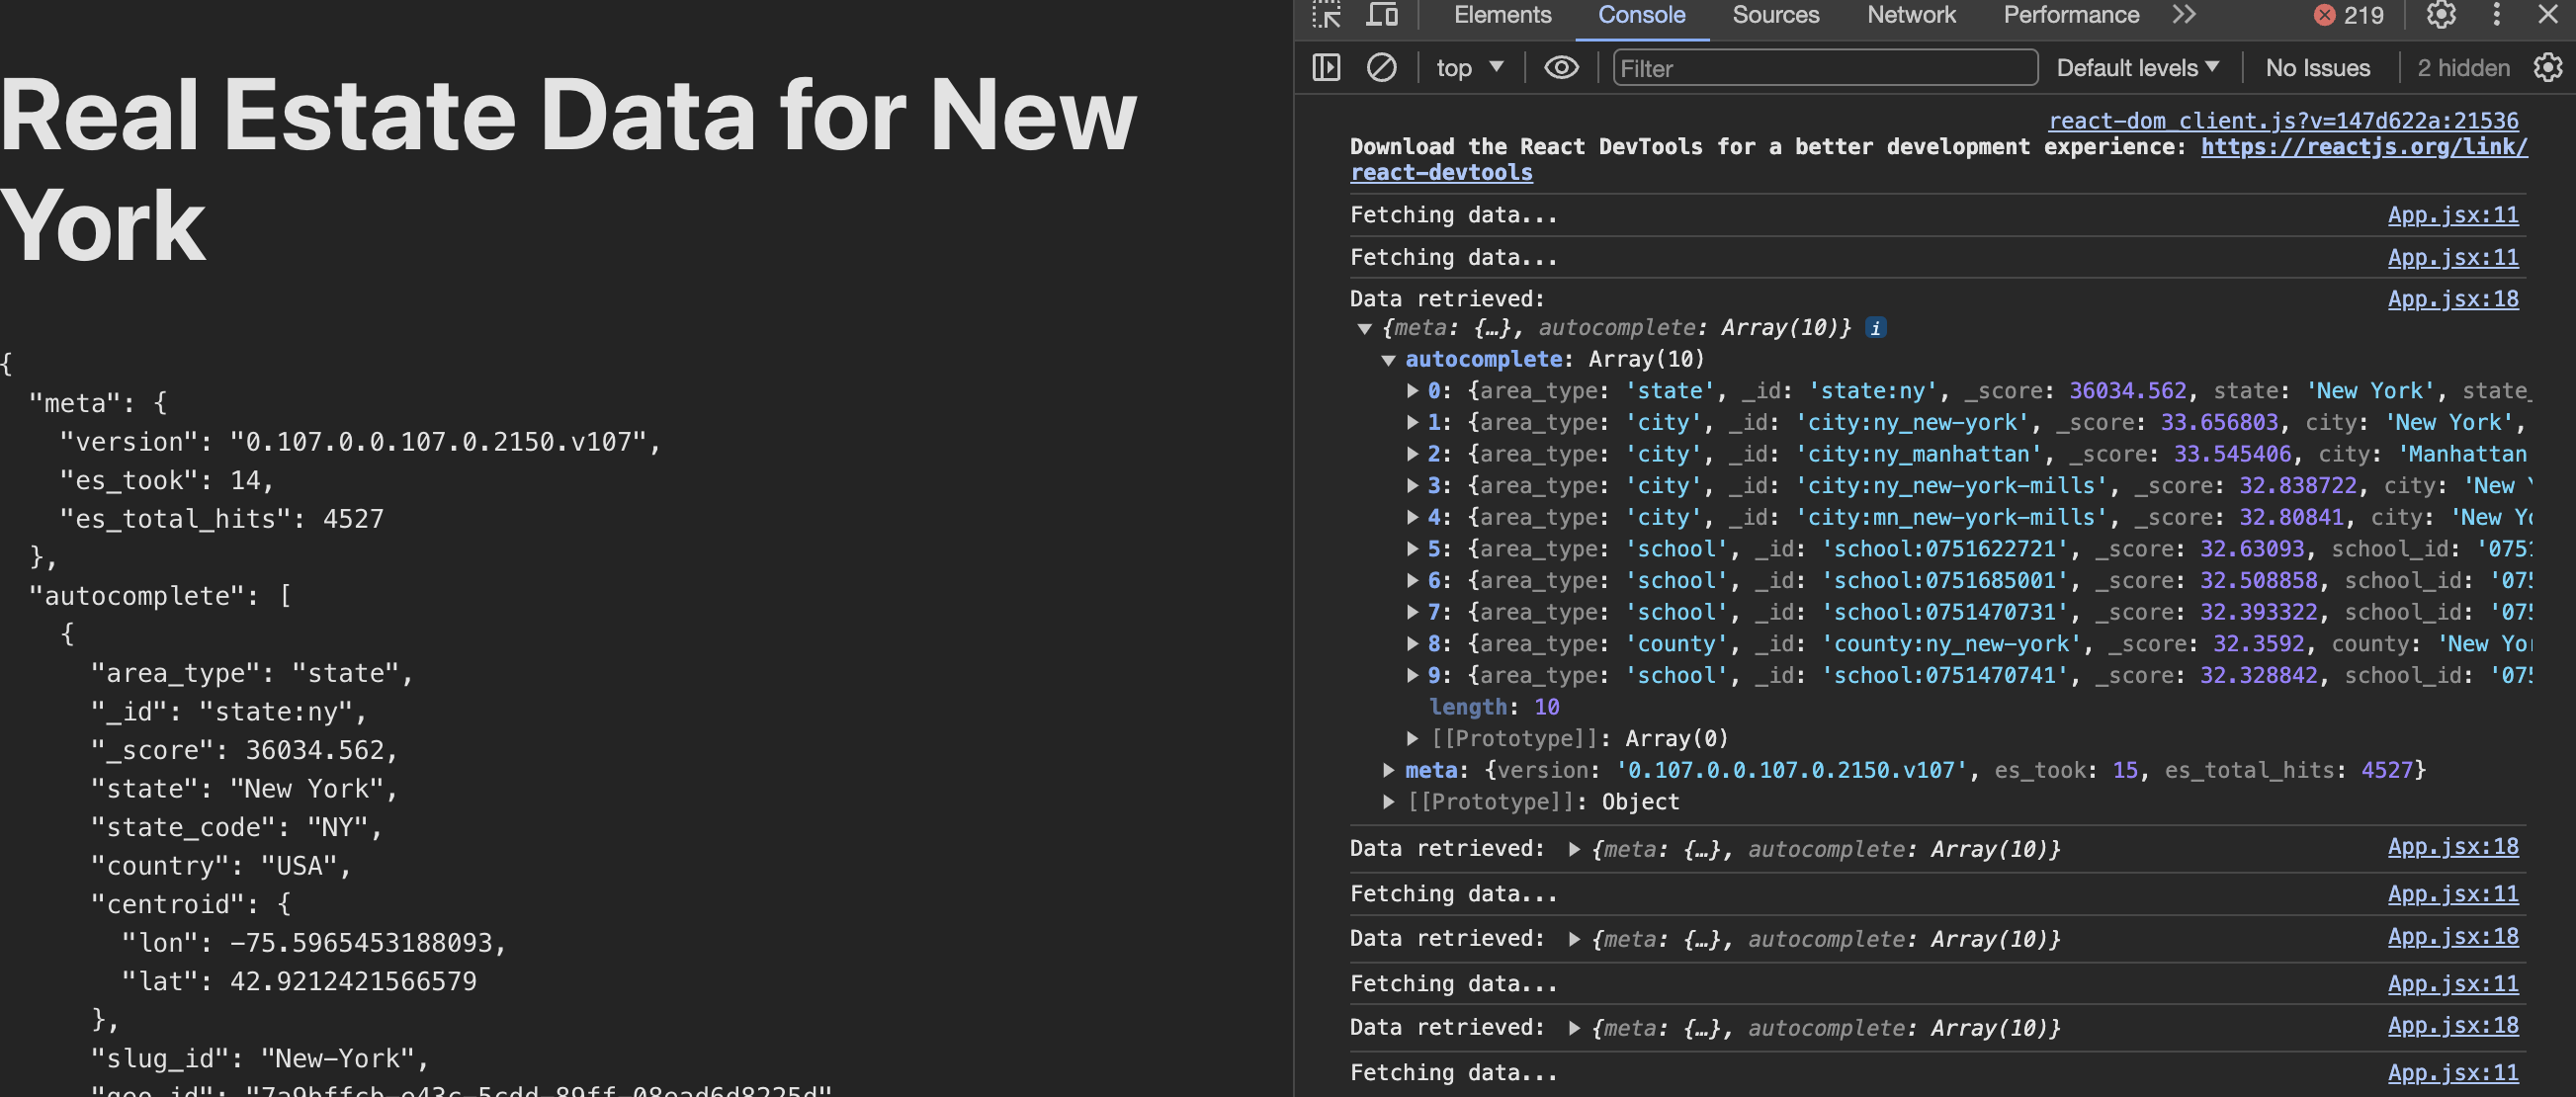
export default App;In the code above, the useEffect hook initiates data fetching from our backend upon the component mount. The fetchData function sends a GET request to the backend API endpoint, retrieving real estate data for New York.
The implementation includes a polling mechanism, triggered every 5 seconds, to continuously fetch updates. The loading state prevents overlapping requests, improving data retrieval efficiency and offering real-time updates to the user interface.
When we check our browser and the browser console for logged messages and data updates, we should see something similar to this:
Use Cases of Polling
Below are some use cases of polling:
-
Monitoring Systems: API polling can continuously check the health of servers, network performance, or application logs. This can be done by periodically sending requests to the server to retrieve the latest status information.
-
Data Aggregation: API polling can be used for regular data compilation to create reports or dashboards. This is done by periodically sending requests to the server to retrieve updated data from various sources.
-
Social Media Feed Refresh: API polling can be used to refresh social media feeds at acceptable intervals. This allows users to see new posts or updates from their social media platforms in real time.
-
Background Processes: API polling can be used in controlled-paced data fetching scenarios where the client doesn’t need to interact with the server constantly. This can be useful in long-running processes where data needs to be fetched at a controlled rate.
Advantages of Polling
-
Simple to implement: Polling requires no complicated setup or configuration. It is simple to implement with standard HTTP requests.
-
Control over request frequency: The client has complete control over how frequently it checks for updates, which can be changed to meet the application’s needs.
-
Wide Browser Support: Polling works across various browsers with no compatibility issues.
Limitations and Drawbacks of Polling
-
Inefficient use of resources: If updates are infrequent, polling might result in unnecessary network traffic and server load due to constant requests.
-
Not real-time: Since polling is done at regular intervals, there can be a delay between when an update occurs and when the client becomes aware of it.
-
Latency: With polling, clients regularly send requests to the server, which responds only when queried. This inherent delay can impact the real-time nature of the application, as critical updates may only reach users after some time.
What are Webhooks?
Webhooks, also known as “HTTP callbacks” or reverse API, are a method of real-time data communication where the server sends data to the client as soon as an event occurs. Instead of the client asking for data, the server pushes data to the client automatically whenever there’s an update.
Think of it as a doorbell for your application. When certain events occur, such as a new user signing up or a payment being processed, the webhook “rings the bell” to inform your application that something has happened.
Let’s look at a simple example of how webhooks can be used. Our goal will be to develop a simple example in which the front end communicates with the backend via webhooks. Users can enter messages, resulting in a real-time data interchange between the front and back end.
We’ll be setting up the same way we did for polling.
Setting Up the Backend
Navigate to the folder you want your backend and create a package.json using this command:
npm init -yInstall the necessary node.js packages needed for this project:
npm install express cors body-parserNext, create a file called index.js and paste this:
const express = require("express");
const bodyParser = require("body-parser");
const cors = require("cors");

const app = express();
const port = 3001;

app.use(cors()); // Enable CORS for all routes
app.use(bodyParser.json());

app.post("/webhook", (req, res) => {
  const data = req.body;

  // Validate payload
  if (!data.message || !data.senderID || !data.timestamp) {
    console.error("Invalid payload received.");
    res.status(400).send("Invalid payload received.");
    return;
  }

  console.log("Webhook received:", data);


  if (data.message.toLowerCase() === "error") {
    console.error("Simulated webhook delivery failure.");
    res.status(500).send("Simulated webhook delivery failure.");
    return;
  }

  res.status(200).send("Webhook received successfully.");
});

app.listen(port, () => {
  console.log(`Server is running on http://localhost:${port}`);
});
In the code above, we’ve set up a server with a /webhook endpoint to handle incoming POST requests. The server validates the payload, processes the webhook data, and simulates actions based on the content. Additionally, it simulates an unsuccessful delivery scenario for demonstration purposes.
Implementing WebHooks in React
Let’s now implement webhooks into the React application.
Just like how we installed React earlier for Api polling, navigate to the folder where you want React installed and run this command:
npm create vite@latest

npx: installed 1 in 0.969s
✔ Project name: … my-project-name
✔ Select a framework: › React
✔ Select a variant: › JavaScript
Navigate to the project directory and start up the development server:
cd my-project-name
npm run dev
Inside the app.jsx, paste this:
// React Frontend with Enhanced Webhooks
import React, { useState } from "react";
import axios from "axios";

function App() {
  const [message, setMessage] = useState("");
  const [userInput, setUserInput] = useState("");

  const sendMessage = async () => {
    try {
      // Validate user input
      if (!userInput.trim()) {
        console.error("Please enter a message.");
        return;
      }

      const response = await axios.post("http://localhost:3001/webhook", {
        message: userInput,
        // Include additional payload fields (e.g., senderID, timestamp)
        senderID: 123,
        timestamp: new Date().toISOString(),
      });

      // Display server's response
      setMessage(response.data);
    } catch (error) {
      // Handle errors gracefully
      console.error("Error sending message:", error.message);
      setMessage("Error sending message. Please try again.");
    }
  };

  return (
    <div className="App">
      <h1>WEBHOOKS</h1>

      {/* Form for user input */}
      <form
        onSubmit={(e) => {
          e.preventDefault();
          sendMessage();
        }}
      >
        <label>
          Enter Message:
          <input
            type="text"
            value={userInput}
            onChange={(e) => setUserInput(e.target.value)}
          />
        </label>
        <button type="submit">Send Message</button>
      </form>

      {/* Display server's response */}
      <p>{message}</p>
    </div>
  );
}

export default App;
In the code above, we’ve created a simple interface that allows users to enter messages. Upon submitting a message, a POST request is made to the backend’s /webhook endpoint, simulating the sending of real-time data. The server’s response is then displayed on the front end, showcasing the successful interaction and communication facilitated by webhooks. If we take a look at the result in our browser, we should have something like this:

And in our terminal, we should have something like this:
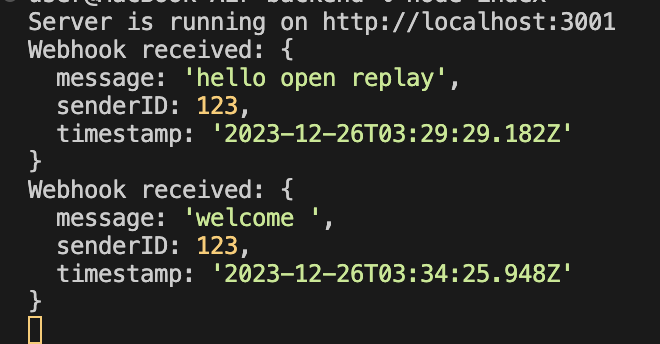
This is a foundation for incorporating webhooks into your applications for event-driven workflows.
Use Cases of Webhooks
Webhooks can be used in real-time applications where updates must be reflected immediately. They’re commonly used in integrations between third-party APIs and services. For example, a webhook can immediately notify a user when they receive a new purchase issue or a payment transaction on a Stripe account.
Advantages of Webhooks
-
Real-time data delivery: Unlike traditional polling methods where the client has to constantly ask the server if there is new data, webhooks provide real-time updates by pushing data to the client as soon as an event occurs. This ensures the client is immediately aware of any changes, which can be crucial for applications where real-time updates are important.
-
Efficiency: Webhooks can lead to cost savings and better use of server resources by eliminating unnecessary API calls. In a polling setup, the client must send a request to the server at regular intervals, even if there’s no new data. This can lead to a lot of unnecessary network traffic and server load. With webhooks, data is only sent when there’s an update, making them more efficient regarding network usage and server load.
-
Customizability: Webhooks are highly customizable. It allows you to set up triggers for specific events and control what data you receive and when. This feature allows you to tailor the integration to your specific needs.
Limitations and Drawbacks
-
Reliability: Webhooks rely on the server hosting the webhook endpoint to be available and running at all times. If the server is down, updates can be missed. It’s like a courier attempting to deliver a package to a firm. The package can only be delivered if the business is open.
-
Limited functionality: Webhooks only support sending data from the server to the client. Unlike APIs, they do not support other
HTTPmethods likePATCHorDELETE. Think of it as a one-way street where traffic can only flow in one direction. If you need to update or delete data on the server, you’ll need to use an API or some other method. -
Complex Implementation: Setting up and maintaining webhooks can be more complex than traditional APIs, as they require additional configuration on the server. This ranges from setting up the endpoint to receive incoming requests, configuring the server to send data when certain events occur, and implementing security measures like verifying the incoming data.
Polling vs Webhooks
Let’s compare various aspects of polling and webhooks.
-
Performance and Efficiency: Regarding performance and efficiency, polling can lead to excessive network traffic and server load, especially when updates are not frequent. On the other hand, webhooks only transmit data when there’s an update, making them more efficient regarding network usage.
-
Real-Time Data Delivery: Polling can only provide near-real-time data, as their latency can occur when an update occurs and the client becomes aware of it. Webhooks, on the other hand, provide real-time data delivery by pushing updates to the client as soon as they happen.
-
Scalability: Both polling and webhooks can be scaled up to handle more clients or more frequent updates. However, they require different approaches: scaling up polling involves increasing the frequency of requests or using more servers to handle the requests, while scaling up webhooks involves increasing the capacity of the server to handle more incoming requests.
-
Security Considerations: Both polling and webhooks use
HTTPorHTTPSfor data transfer. Therefore, they can both benefit from the standard security features of these protocols, such asSSL/TLSencryption. However, webhooks might require additional security measures, such as validating the incoming data to ensure it’s coming from the expected server. -
Cost Implications: Polling can lead to higher costs if you’re paying per API call, as many requests might return no new data. Conversely, Webhooks only send data when there’s an update, which can lead to cost savings.
-
Developer Experience: Polling is often easier to implement, as it doesn’t require setting up a server to receive incoming requests. Webhooks, while more complex to set up, can provide a better experience once running, as they deliver updates automatically and in real time.
When to Use Polling
Polling can be better when real-time data isn’t critical or data updates are infrequent and unpredictable. For example, it can be used to check for new emails in an inbox or monitor the status of a long-running task.
When to use Webhooks
You should use webhooks:
- In applications where real-time updates are critical for user experience.
- Minimizing server load and maximizing efficiency are essential.
- When you need effective communication between systems
- Automation of tasks between different systems.
Conclusion
In this article, we discussed what API polling and webhooks are, as well as an example of each. We also compared them regarding performance, scalability, data delivery, and other factors.
Because of its simplicity, polling may suffice for less crucial real-time updates. Webhooks, on the other hand, shine when rapid data delivery is critical. By understanding the strengths and weaknesses of both approaches, developers can make informed decisions to create more responsive and efficient web applications.