Enhancing User Engagement: Seamless User Onboarding in React with Intro.js

User onboarding is the pivotal first impression your web application makes on its users. It’s the welcoming handshake, the guided tour of your digital domain, and the introduction to your application’s unique experience. Essentially, it’s your chance to make a lasting impact and keep users engaged. This comprehensive article will delve into user onboarding in React applications and explore how Intro.js, a powerful tool, can help you create interactive, user-friendly product tours that introduce your new users to your application’s features and functionality.

Discover how at OpenReplay.com.
User engagement is at the heart of every successful web application. The more engaged your users are, the more likely they will become long-term customers or avid users. To achieve high user engagement, you must ensure the onboarding process is smooth, informative, and enjoyable. This is where Intro.js comes into play.
By the end of this guide, you’ll be well-equipped to enhance user engagement, improve user retention, and create a more welcoming and informative experience for those using your React-based web application. So, let’s dive in and uncover the secrets of seamless user onboarding flow with Intro.js.
Importance of a Smooth Onboarding Process
The importance of a smooth onboarding process in web development cannot be overstated. Whether you’re a web developer welcoming new team members or the end user experiencing a new website or web application, a well-executed onboarding process is crucial for a successful and positive experience. Here are several key reasons why a smooth onboarding process is essential in web development:
- User Engagement: A seamless onboarding process can greatly enhance user engagement. When users are introduced to a new website or application in a user-friendly and intuitive manner, they are more likely to explore its features and spend more time on the platform. This can lead to higher user retention and increased user satisfaction.
- Positive First Impressions: The initial experience with a website or application can shape the user’s perception of the brand. A smooth onboarding process creates a positive first impression, which can lead to brand loyalty and advocacy. On the other hand, a confusing or frustrating onboarding experience can turn potential users away.
- Reduced Friction: An effective onboarding process reduces friction and frustration for users. It helps them understand how to navigate the site, utilize its features, and achieve their goals. This leads to a more positive initial experience, which can influence their perception of the product or service.
- Lower Support Costs: A smooth onboarding process can reduce the need for customer support and troubleshooting. Users with clear instructions and guidance during onboarding are less likely to encounter issues and seek help. This, in turn, lowers support costs and frees up resources for other development tasks.
Intro.js is an open-source vanilla Javascript/CSS library to add step-by-step introductions or hints. The simplicity of the Intro.js API helps you develop an advanced onboarding tour for your products. Intro.js is lightweight, 10 kB, and has no external dependencies.
Setting Up Your React Project
For this guide, we’ll use an already existing React app that you can find here. This approach lets you see how user onboarding can seamlessly be added to an existing application.
Installing Dependencies
With our project initialized, it’s time to install the necessary dependencies that will enable us to onboard our users. These dependencies include intro.js and intro.js-react.
- intro.js: This is an open-source vanilla Javascript/CSS library to add step-by-step introductions or hints. The simplicity of the Intro.js API helps you develop an advanced onboarding tour for your products. Intro.js is lightweight, 10 kB, and has no external dependencies.
npm install intro.js --save- intro.js-react: A small React wrapper around Intro.js. The wrapper provides support for both steps and hints.
npm install intro.js-reactCreating User Onboarding Tour
To create a user-onboarding tour, we’ll do the following:
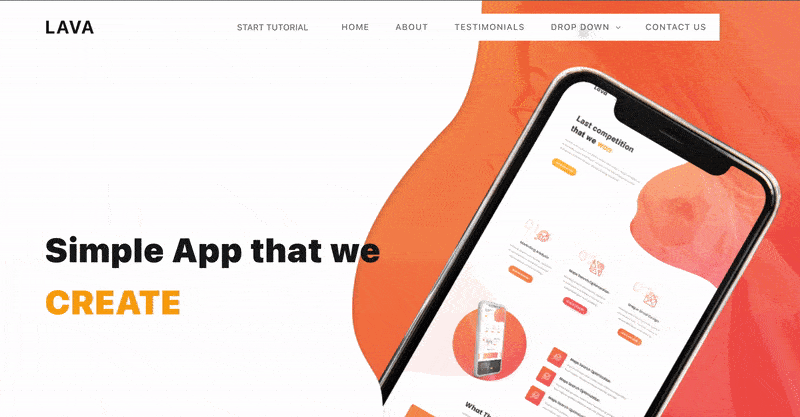
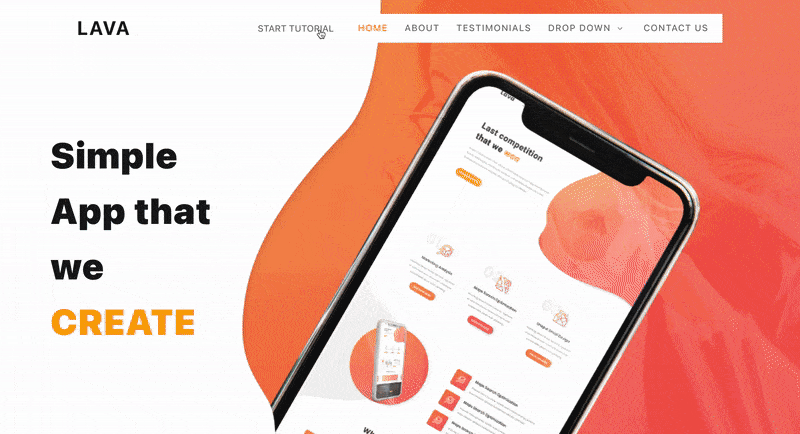
- Identify the Entry Point Component: Start by identifying the component or page where you want to initiate the user onboarding tour. Consider which part of your application should serve as the starting point for introducing users to your application. This could be the dashboard, a landing page, a settings page, or any other critical section of your application. I’ll use a simple landing page for this project, so I’ll implement the user onboarding in my
LandingPage.jsxfile. - In your selected entry point component, import the intro.js and
intro.js-reactlibraries.
import "intro.js/introjs.css";
import { Steps, Hints } from "intro.js-react";
Steps form the core of an Intro.js tour. Each step represents a specific point of interest on the page and provides a customizable tooltip with an explanation or instruction. Steps can be defined using the <Steps> component in React, and each step object contains properties like element, title, intro, and position.
Hints are optional elements that can be added to Steps to provide additional context or guidance. They are typically smaller, less intrusive popups that appear alongside the main step tooltip. Hints can be defined using the <Hints> component in React, and each hint object contains properties like element, hint, and position.
- Define the Initial Tour Steps: For this project, I want to explain to the user what the navigation buttons do and how they work;
// Importing Steps and Hints from the intro.js-react library
import { Steps, Hints } from "intro.js-react";
// Importing the Intro.js CSS styles
import "intro.js/introjs.css";
// Importing the useState hook from React
import { useState } from "react";

const LandingPage = () => {
 // State variable for enabling/disabling the user onboarding steps
 const [stepEnabled, setStepEnabled] = useState(true);
 // State variable for defining the user onboarding steps as an array of objects
 const [steps, setSteps] = useState([
   {
     element: "#home", // CSS selector for the first step
     intro: "Click to return home", // Message or tooltip for the first step
   },
   {
     element: "#aboutt", // CSS selector for the second step
     intro: "Learn more about us", // Message or tooltip for the second step
   },
   {
     element: "#test", // CSS selector for the third step
     intro: "Click to see testimonials from others", // Message or tooltip for the third step
   },
   {
     element: "#contact", // CSS selector for the fourth step
     intro: "Click to contact us", // Message or tooltip for the fourth step
   },
 ]);

 // Define a function to handle user exit from the onboarding tour
 const onExit = () => {
   setStepEnabled(true); // Resetting the stepEnabled state variable to allow restarting the tour
 };

 return (
   <div className="App">
     <Steps
       enabled={stepEnabled} // Enabling or disabling the user onboarding steps based on the stepEnabled state variable
       steps={steps} // Providing the array of defined steps for the onboarding tour
       initialStep={0} // Starting the tour from the first step
       onExit={onExit} // Specifying the function to execute when the user exits the tour
     />

     // rest of the landing page component
   </div>
 );
}

export default LandingPage;
Let’s test our application;
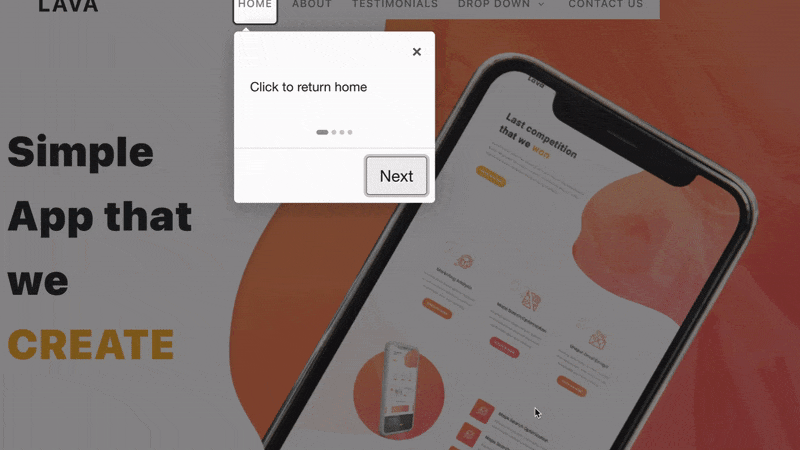
In the video above, we can see the output of our steps that start the onboarding process immediately after our site is loaded, showing the user how to use our navigation buttons.
Having seen how to create steps, let’s create a hint for our users so they know that the drop-down button has other features. To do this, we’ll add the following to our LandingPage.jsx:
const LandingPage = () => {
 //rest of the code
 const hintsEnabled = useState(true);
 const [hints, setHints] = useState([
   {
     element: "#dropdown",
     hint: "Hover here to view more features",
     hintPosition: "bottom-middle",
     hintAnimation: true,
     hintShowButton: true,
   },
 ]);

 return (
   //rest of the code
   <Hints enabled={true} hints={hints} />
 );
}

export default LandingPage;
Let’s test our application;
In the video above, we see the hint created earlier, with an animation drawing the user’s attention. Our message is displayed when clicked, telling the user how to use the drop-down button.
Triggering the Onboarding Tour
Currently, upon users loading our webpage, We automatically commence the onboarding tutorial. Consequently, users have limited control over the timing and manner in which they receive this information. Enabling users to initiate the onboarding process at their discretion when they feel prepared or curious grants them a greater degree of agency and control over their overall experience. Let us now focus on developing the function and button to empower users to begin the tutorial when they are ready.
import { Steps, Hints } from "intro.js-react";
import "intro.js/introjs.css";
import { useState } from "react";
const LandingPage = () => {
 //default stepEnabled to false
 const [stepEnabled, setStepEnabled] = useState(false);

 // steps and hints code

 //function to start onboarding
 const toggleOnboarding = () => {
   setStepEnabled(!stepEnabled); // Toggle the stepEnabled state
 };

 return (
   <div>
     //component code //button to start onboarding
     <button className="onboarding-button" onClick={toggleOnboarding}>
       START TUTORIAL
     </button>
     //rest of the code
   </div>
 );
};

module.exports = LandingPage;
Let’s test our application;
In the video above, we can see that for the onboarding process to begin, the user has to click the “start tutorial” button on the navigation panel. This way, users have full control of the onboarding process.
Features and Customization
Customizing the user onboarding experience in your React application can help you tailor it to your specific audience and the application’s needs. Intro.js provides various features and options for creating a highly interactive and visually appealing onboarding tour. In this section, we’ll explore some key features and customization options that you can leverage to enhance the user onboarding experience.
Using Events and Callbacks:
Events and callbacks in Intro.js allow you to add custom logic and interactivity to your onboarding tour. Here are a few common events and callbacks:
onbeforechange: This event is triggered before moving on to the next step. You can use it to perform actions or validations before moving on to the next step. This event will show our users how to use our contact form. All we need to do is add new elements to our Steps state with the IDs of our desired fields.
import { Steps, Hints } from "intro.js-react";
import "intro.js/introjs.css";
import { useState } from "react";
const LandingPage = () => {
 //states and other functions defined earlier
 const [steps, setSteps] = useState([
   {
     element: "#home",
     intro: "Click to return home",
   },
   {
     element: "#aboutt",
     intro: "Learn more about us",
   },
   {
     element: "#test",
     intro: "Click to see testimonials from others",
   },
   {
     element: "#contact",
     intro: "Click to contact us",
   },
   {
     element: "#contactName",
     intro: "Input your name here",
   },
   {
     element: "#contactEmail",
     intro: "Input your email here so we can reach you",
   },
   {
     element: "#contactMessage",
     intro: "Type your message here",
   },
 ]);

 //function to run after step moves to element with id as contact
 const onbeforeChange = (targetid, targetElement) => {
   // Perform custom logic before changing to the next step
   if (targetElement.id === "contactName") {
     alert("Would you like to contact us?");
   }
 };
 return (
   <div>
     //update steps with the onAfterChange property
     <Steps
       enabled={stepEnabled} // Enabling or disabling the user onboarding steps based on the stepEnabled state
       steps={steps}
       initialStep={0}
       onExit={onExit}
       onBeforeChange={onbeforeChange}
     />
     //rest of the code
   </div>
 );
};

module.exports = LandingPage;onafterchange: Triggered after changing to the next step. It’s useful for adding post-step logic, animations, or UI changes. We’ll be using this event to show our users our social media icons with which they can access us.
import { Steps, Hints } from "intro.js-react";
import "intro.js/introjs.css";
import { useState } from "react";
const LandingPage = () => {
 //states and other functions defined earlier
 const [steps, setSteps] = useState([
   {
     element: "#home",
     intro: "Click to return home",
   },
   {
     element: "#aboutt",
     intro: "Learn more about us",
   },
   {
     element: "#test",
     intro: "Click to see testimonials from others",
   },
   {
     element: "#contact",
     intro: "Click to contact us",
   },
   {
     element: "#contactName",
     intro: "Input your name here",
   },
   {
     element: "#contactEmail",
     intro: "Input your email here so we can reach you",
   },
   {
     element: "#contactMessage",
     intro: "Type your message here",
   },
   {
     element: "#facebookIcon",
     intro: "Click here to connect with us on facebook",
   },
   {
     element: "#twitterIcon",
     intro: "Click here to connect with us on twitter",
   },
   {
     element: "#linkedinIcon",
     intro: "Click here to connect with us on linkedIn",
   },
 ]);

 //function to run after step moves to element with id as contact
 const onAfterChange = (targetid, targetElement) => {
   // Custom logic after changing to the next step (e.g., animations)
   if (targetElement.id === "facebookIcon") {
     return alert("Here are our socials");
   }
 };
 return (
   <div>
     //update steps with the onAfterChange property
     <Steps
       enabled={stepEnabled} // Enabling or disabling the user onboarding steps based on the stepEnabled state
       steps={steps}
       initialStep={0}
       onExit={onExit}
       onBeforeChange={onbeforeChange}
       onAfterChange={onAfterChange}
     />
     //rest of the code
   </div>
 );
};

module.exports = LandingPage;oncomplete: Fired when the user completes the onboarding tour. You can use it to show a congratulatory message or offer further assistance.
import { Steps, Hints } from "intro.js-react";
import "intro.js/introjs.css";
import { useState } from "react";
const LandingPage = () => {
 //states and other functions defined earlier

 //function to run at the end of tour
 const onComplete = () => {
   return alert("Congratulations you're ready to use our app");
 };

 return (
   <div>
     //update steps with the onComplete property
     <Steps
       enabled={stepEnabled} // Enabling or disabling the user onboarding steps based on the stepEnabled state
       steps={steps}
       initialStep={0}
       onExit={onExit}
       onBeforeChange={onbeforeChange}
       onAfterChange={onAfterChange}
       onComplete={onComplete}
     />
     //rest of the code
   </div>
 );
};

module.exports = LandingPage;options: Theoptionsevent in Intro.js lets you set a wide range of configuration options to control the behavior and appearance of your user onboarding tour. These options allow you to fine-tune the tour’s behavior, layout, and interactivity. You can create a highly customized and user-friendly tour using the’ options’ event.
import { Steps, Hints } from "intro.js-react";
import "intro.js/introjs.css";
import { useState } from "react";
const LandingPage = () => {
 //states and other functions defined earlier

 //function to run at the end of tour

 const options = {
   showProgress: true,
   showBullets: true,
   exitOnOverlayClick: true,
   exitOnEsc: true,
   nextLabel: "Next",
   prevLabel: "Prev",
   // skipLabel: 'Skip',
   hidePrev: true,
   doneLabel: "Done",
   overlayOpacity: 0.5,
   overlayColor: "#000",
   showStepNumbers: true,
   keyboardNavigation: true,
   scrollToElement: true,
   helperElementPadding: 10,
   showButtons: true,
 };

 return (
   <div>
     //update steps with the onComplete property
     <Steps
       enabled={stepEnabled} // Enabling or disabling the user onboarding steps based on the stepEnabled state
       steps={steps}
       initialStep={0}
       onExit={onExit}
       onBeforeChange={onbeforeChange}
       onAfterChange={onAfterChange}
       onComplete={onComplete}
       options={options}
     />
     //rest of the code
   </div>
 );
};

module.exports = LandingPage;
You can create a more dynamic and engaging onboarding experience by leveraging these events and callbacks. For example, you can provide feedback to the user when they complete specific steps or customize the behavior of your application based on their progress.
Custom CSS Styling for the Tour
Customizing the visual aspects of the onboarding tour can be achieved through CSS. Here’s an example of how to apply custom styles to specific elements within the tour:
/* App.css */
.introjs-tooltipbuttons {
    background-color: #27ae60;
   /* Green background color */
    color: #fff;
   /* White text color */
    border: none;
   /* Remove the button border */
    border-radius: 4px;
   /* Rounded corners */
    padding: 10px 20px;
   /* Adjust button padding */
}
.introjs-hint {
    border: 2px solid #ff5733;
    background-color: #fff;
    color: #ff5733;
    font-size: 14px;
}
To ascertain the class names that can be utilized to modify intro.js elements, you’ll have to examine the “intro.js/introjs.css” file in the node modules directory. It is imperative not to make any alterations to these classes in that location. Instead, it is recommended that you reconfigure these classes with your preferred CSS code within your App.css file.
With all these changes, let’s test our application.
In the video above, we can see the effect of the events and callbacks we created earlier on our sites and the CSS styling on our tooltips.
Conclusion
In the ever-evolving world of web development, user engagement is a critical metric. A well-executed user onboarding experience can capture your users’ attention and set the stage for a long and fruitful relationship with your application. With the tools and techniques explored in this guide, you are well-equipped to create an exceptional user onboarding process that delights your users and keeps them coming back for more. As you apply these concepts to your React projects, remember that user onboarding is an ongoing journey of optimization. Continuously collect feedback, monitor user interactions, and adapt your onboarding process to ensure it remains effective and user-centric. In the end, the success of your application is intrinsically tied to the success of your users, and a well-crafted onboarding experience can be the key to unlocking their full potential.
Resources
intro.js
intro.js-react
github repo
Understand every bug
Uncover frustrations, understand bugs and fix slowdowns like never before with OpenReplay — the open-source session replay tool for developers. Self-host it in minutes, and have complete control over your customer data. Check our GitHub repo and join the thousands of developers in our community.