Security: How to deal with CSP in React
How to implement Content Security Policies in React


Security has become a critical aspect of web development in recent years, and new best practices and protocols have been developed. CSP is part of this phenomenon to protect web applications against attacks. Your application is inevitably subject to web-related security issues, and this article will explain how to use CSP in React with the React Helmet library.
CSP (Content Security Policy) is a security mechanism for specifying the resources that browsers are allowed to load for a given page. In detail, it is a policy that defines a set of approved content sources, such as scripts, style sheets, images, and fonts. This is enforced by the browser, ensuring only resources from trusted sources are executed or displayed. CSP is defined via a header returned by the server or an appropriate <meta> HTML tag in the page:
<meta
  http-equiv="Content-Security-Policy"
  content="..." <!-- the set of CSP rules... -->
/>
Regarding React, implementing CSP is crucial to protect your SPA from several malicious attacks. By imposing strict CSP rules, you can prevent the execution of unauthorized scripts or the loading of external resources that may pose a security risk. This helps mitigate the risk of XSS (Cross-Site Scripting), clickjacking, data injection attacks, and many other common security vulnerabilities. Adopting a CSP policy makes your React app more secure and reliable for end users.
Now the question is, how can you deal with CSP in React? With React Helmet!
What is React Helmet?
React Helmet is a document head manager library for React-based applications. Specifically, it makes it easier to modify the <head> section of the web app pages, allowing you to dynamically update the title, meta tags, scripts, and style sheets.
React Helmet can be used for various purposes, such as optimizing SEO, handling page metadata, and configuring a content security policy.
Please note that the original react-helmet library has not been updated in years and should now be considered deprecated. Instead, you should use react-helmet-async, the maintained fork of the original project.
Configuring CSP in React With React Helmet
In the next sections, you will see how to set up CSP with React. The real-world example below will show you how to use CSP to prevent a React page from loading images, media files, and scripts from undesired domains.
Let’s get started!
Initialize a React App
First, you need a React project. You can use Create React App to initialize a new one called react-csp-demo with the command below:
npx create-react-app react-csp-demoWait for the creation process to end. Then, launch your app locally with the following:
cd react-csp-demo
npm start
Open htpp://localhost:3000 in your browser, and you should get the following:
Great! You now have a React app ready to be secured!
Create a Page with React
Turn your App.js component into a page that relies on media files and external resources as below:
import React from "react";
import "./App.css";

function App() {
  return (
    <div>
      <div className="container">
        <h1 className="title">Welcome to my Page!</h1>
        <img
          src="/logo512.png"
          alt="React Logo"
          className="image"
          loading="lazy"
        />
        <p className="text">
          This is a sample page with an image, a Google font, and a video.
        </p>
        <video controls className="video">
          <source
            src="https://commondatastorage.googleapis.com/gtv-videos-bucket/sample/ElephantsDream.mp4"
            type="video/mp4"
          />
        </video>
      </div>
    </div>
  );
}

export default App;
Note that the image is from a local path, while the video and character are from external sources.
Here is what the relative App.css style file looks like:
/* App.css */

.container {
  text-align: center;
  margin: 0 auto;
  max-width: 600px;
}

.title {
  font-size: 24px;
  color: #333;
}

.image {
  max-width: 100%;
  height: 180px;
  margin-bottom: 20px;
}

.text {
  font-size: 16px;
  color: #666;
  margin-bottom: 20px;
}

.video {
  width: 100%;
  max-height: 400px;
  margin-bottom: 20px;
}
At the moment, this is what the page looks like:

Whenever a web application relies on external scripts, style sheets, images, or data, it becomes prone to security vulnerabilities.
External resources include third-party libraries, content delivery networks (CDNs), external APIs, and user-generated content. While these elements can enhance your web app’s functionality and user experience, they also introduce the possibility of security risks.
Fortunately, there are React Helmet Async and CSP!
Session Replay for Developers
Uncover frustrations, understand bugs and fix slowdowns like never before with OpenReplay — an open-source session replay tool for developers. Self-host it in minutes, and have complete control over your customer data. Check our GitHub repo and join the thousands of developers in our community.
Setting Up React Helmet Async
Add react-helmet-async to your project dependencies with:
npm i react-helmet-asyncThen, wrap your <App> component with <HelmetProvider> in index.js:
// index.js

import React from "react";
import ReactDOM from "react-dom/client";
import "./index.css";
import App from "./App";
import reportWebVitals from "./reportWebVitals";
import { HelmetProvider } from "react-helmet-async";

const root = ReactDOM.createRoot(document.getElementById("root"));
root.render(
  <React.StrictMode>
    <HelmetProvider>
      <App />
    </HelmetProvider>
  </React.StrictMode>
);

// If you want to start measuring performance in your app, pass a function
// to log results (for example: reportWebVitals(console.log))
// or send to an analytics endpoint. Learn more: https://bit.ly/CRA-vitals
reportWebVitals();
This will enable the React Helmet capabilities in client-side and server-side components.
Fantastic! You can now use it to define a CSP policy and protect your React pages!
Defining the CSP Policy With React Helmet
Suppose you want to instruct browsers so the React page can only execute scripts on the current domain and render media files from a trusted S3 URL. You can achieve that by updating App.js as follows:
import React from "react";
import { Helmet } from "react-helmet-async";
import "./App.css";

function App() {
  return (
    <div>
      <Helmet>
        <meta
          httpEquiv="Content-Security-Policy"
          content={`
                      default-src 'self';
                      script-src 'self';
                      img-src https://*.my-s3-endpoint.com;
                      media-src https://*.my-s3-endpoint.com;
                `}
        ></meta>
      </Helmet>
      <div className="container">
        <h1 className="title">Welcome to my Page!</h1>
        <img
          src="/logo512.png"
          alt="React Logo"
          className="image"
          loading="lazy"
        />
        <p className="text">
          This is a sample page with an image, a Google font, and a video.
        </p>
        <video controls className="video">
          <source
            src="https://commondatastorage.googleapis.com/gtv-videos-bucket/sample/ElephantsDream.mp4"
            type="video/mp4"
          />
        </video>
      </div>
    </div>
  );
}

export default App;
As you can see, <Helmet> involves a <meta> tag defining a CSP policy that enforces the following rules:
default-src 'self';: Specifies that, by default, the page can only have resources from the same origin.script-src 'self';: Allows the execution of JavaScript code only from the same origin.img-src https://*.my-s3-endpoint.com;: Determines that only images from the specified S3 endpoint and its subdomains are allowed to be loaded.media-src https://*.my-s3-endpoint.com;: Enables audio and video files to be loaded only from the specified S3 endpoint and its subdomains.
The provided CSP configuration helps mitigate XSS attacks by limiting the execution of scripts to the same origin and allowing only trusted image and media files. XSS attacks involve injecting malicious scripts into a web page, but this CSP configuration prevents the execution of such JavaScript code from external sources.
These are only some possible CSP directives. You can find them all in the MDN documentation.
Remember that <Helmet> is not limited to page-level components and can also be used in child components. If two or more of them in the hierarchy tree set the same meta tag, the more nested one will override all others.
Time to see the effects of those CSP rules on the page!
CSP in Action
If you visit htpp://localhost:3000 in the browser, you will now see:
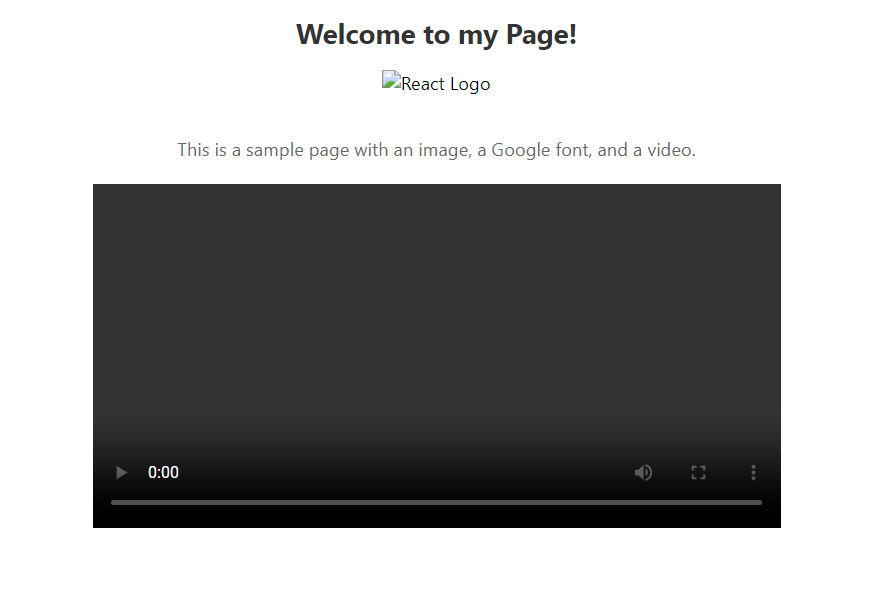
As expected, both the image and the video have not been loaded.
Take a look at the browser console to find out why:
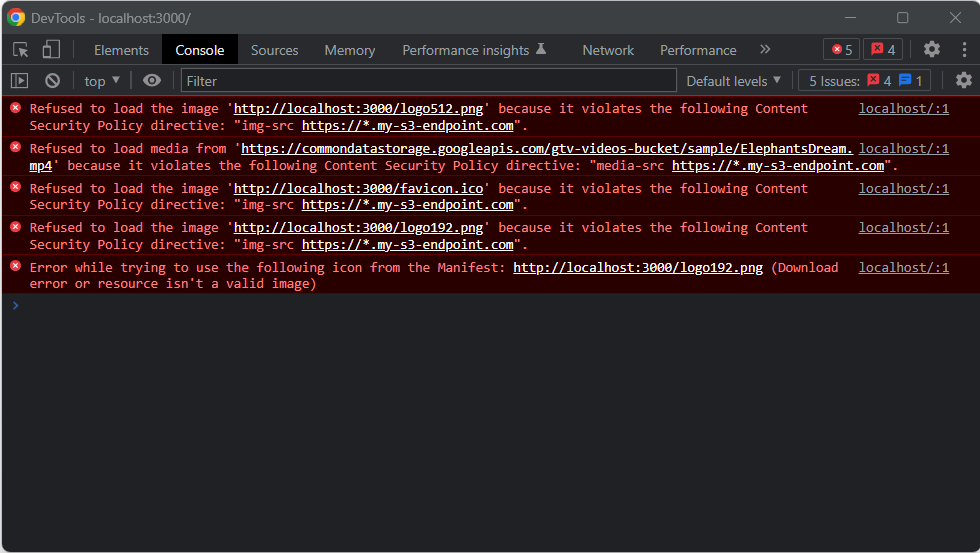
Here you can notice the effects of the security policy defined earlier. If you inspect the DOM of the page, you will find the CSP definition <meta>:
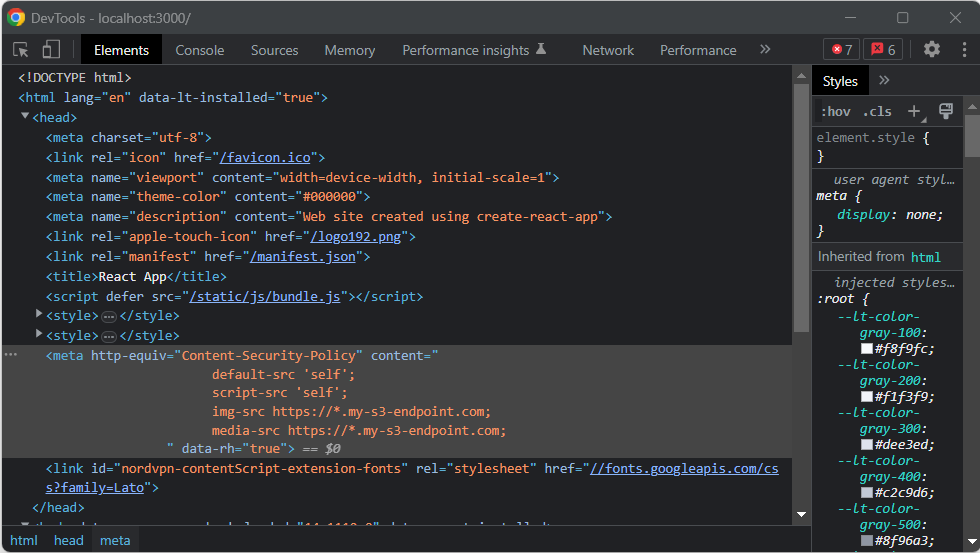
Play with the CSP rules to see the effects on the page. For example, by removing the img-src policy, the browser will render the React image again.
Et voilà! You just secured your React app with CSP!
Conclusion
This tutorial is over! Now you know what CSP is, what it has to do with React, how it can help you protect your web applications, and how to set it up in React. Here, you saw how browsers behave under different CSP policies when rendering React pages.
As shown above, defining a set of security CSP rules is easy. Thanks to react-helmet-async, it only takes a few lines of code. Securing React has never been easier!
Gain Debugging Superpowers
Unleash the power of session replay to reproduce bugs and track user frustrations. Get complete visibility into your frontend with OpenReplay, the most advanced open-source session replay tool for developers.