

Have you ever pondered the process behind displaying a web page on a browser? When a web page loads, its components render onto the browser’s Document Object Model (DOM), which shows these components on the screen for users. The DOM is a hierarchical representation of the elements and content of a webpage. The DOM connects the different parts of a web page to the browser, and this allows JavaScript to change and interact with the content of the page. This article will discuss the stages of a DOM element’s life, from creation to removal.
The life cycle of DOM elements
This refers to the various stages an element goes through during its existence on a web page. The first stage is the creation stage when an element is first added to the DOM. The next stage is the initialization stage, when the element becomes visible, and any properties or event listeners take effect. The update stage is when properties or event listeners get updated. The final stage is the destruction stage, when the element gets removed from the DOM. During the rendering process, the browser goes through the layout and painting of elements in the DOM in a specific order and tries to optimize the process as much as possible.
DOM elements are the individual components of an HTML or XML document. These elements, i.e., nodes, are the building blocks of a webpage. They include headings, paragraphs, images, buttons, and information about their properties and attributes.
There are numerous benefits to understanding the DOM element life cycle, such as:
- It helps developers optimize the performance of their web pages by ensuring the DOM makes only necessary changes.
- It aids in identifying and resolving bugs related to manipulating DOM elements.
- It allows a better understanding of how JavaScript and other web development tools interact with the browser.
- It can help developers create more efficient code by understanding when and how to properly update and remove elements from the DOM.
Creating DOM Elements
This can be accomplished by using markup languages, such as HTML, or scripting languages, such as JavaScript. To create a DOM element using JavaScript, we can use various methods, such as
- Using the
document.createElement()method allows us to create a new element by passing in the tag name. The following code, for example, generates a new paragraph (< p>) element.
const paragraphEL = document.createElement("p");Logging our paragraphEL variable to the console gives;

- Using the
innerHTMLproperty: This property allows us to alter an HTML element’s content without changing it in our markup. For example, we can use the elementparagraphELto set the content using this property.
paragraphEL.innerHTML = "Hello there 😅";Logging our result to the console gives;

DOM Traversing
DOM traversing is the process of navigating and manipulating the elements of a web page by moving through the nodes of the DOM tree. Remember that DOM nodes are objects containing properties and methods of elements in the DOM. To traverse the DOM, we use one of the following methods.
- Upward Traversing: This method allows us to move up the DOM tree, accessing the parent of a child node. Using a simple example to illustrate, first we nest one element inside another in our HTML.
<div id="parent-element">
      <h2 id="child-element"></h2>
 </div>
Then we select our child element with JavaScript.
const childEl = document.getElementById("child-element");Finally, we use an upward traversing method, the .parentElement to select our child element’s parent.
const parentEl = childEl.parentElement;Logging our child and parent elements to the console, we have;
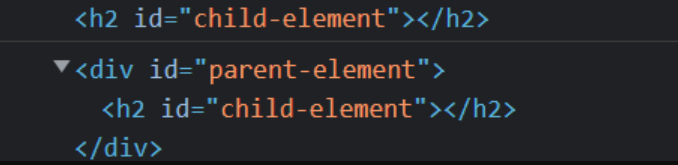
And yeah! We’ve traversed up the DOM tree from a child element to its parent.
- Downward Traversing: This method allows us to move down the DOM tree and access the child of a parent node. We first select the parent element using our previous HTML to build an example.
const parentEl = document.getElementById("parent-element");Next, we use a downward traversing method .firstElementChild to select the first element nested in its parent.
const childEl = parentEl.firstElementChild;Logging our results to the console gives

And with that, we’ve successfully moved down the DOM tree.
- DOM search method: This method allows us to select elements from the DOM based on a CSS selector (i.e., class or id). This method enables us to select elements without moving up/down the DOM tree by using the
querySelectororquerySelelectorAllmethod.
const parentEl = document.querySelector("#parent-element");Taking a look at our element in the console yields;

Note: When selecting elements using querySelector, the prefix character determines what element we want to select (i.e., a (#) for IDs, (.)for classes, and no prefix for element tags).
Best practices for effective DOM traversing.
With DOM traversal crucial to web development, the right techniques are required to write more efficient and maintainable code. Some of these practices include.
- Use the appropriate method for the task: Each DOM traversal method has its own purpose and uses. For example, use
.parentNodeto get the parent of an element and.childrento get the child elements. Using the wrong method can make your code less efficient and harder to understand. - Minimize DOM manipulation: To minimize the cost of DOM manipulation, it is best to make one large change instead of many small ones and then update the DOM accordingly.
- Cache nodes: This involves storing a reference to the element in a variable and using the variable in your code. This will improve the performance of your code.
Session Replay for Developers
Uncover frustrations, understand bugs and fix slowdowns like never before with OpenReplay — an open-source session replay tool for developers. Self-host it in minutes, and have complete control over your customer data. Check our GitHub repo and join the thousands of developers in our community.
Rendering DOM elements
To render a DOM element with JavaScript, we follow the following steps.
- First, we select an element that will serve as the parent for the element we want to create
const parentEl = document.querySelector("#parent-element");- Next, we create our element with JavaScript
const newParagraph = document.createElement("p");- Finally, we call the
.appendChildmethod on the parent and pass in our newly created element to create our element inside its parent.
parentEl.appendChild(newParagraph);Taking a look at the elements in the browser dev tools becomes;
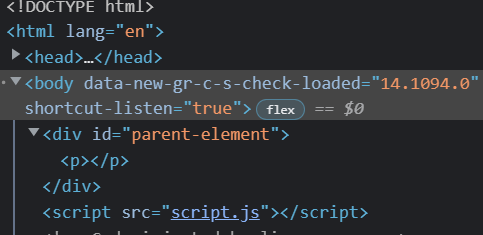
And with that, we’ve successfully created and rendered an element on the DOM.
Active Phase of DOM Elements
The active phase of DOM elements begins when a user interacts with a page, such as by clicking on a button or submitting a form. These interactions can trigger an event to which JavaScript responds via event handlers, and make changes to the page in real-time.
Attaching event handlers to elements
An event handler is a function executed when a specific event occurs on an element. These events include clicking or hovering on an element. When we attach event handlers to elements, we want to control the behavior of that element on the browser. Let’s use an instance where we want to change the color of an element whenever we click on it.
- First, we select the element
const parentEl = document.querySelector("#parent-element");- Next, we attach an event handler to our element
parentEl.addEventListener();Keep in mind that this event handler addEventListener takes in 2 arguments – the event we want to target and a callback function that holds the behavior of our element when that event occurs.
In our case, we want to change the element’s color when we click on it.
parentEl.addEventListener("click", function () {
  parentEl.style.color = "red";
});
Taking a look at our page, we have

And with that, we’ve successfully built our first event handler, Kudos 😉!
Removal of DOM Elements
This occurs when we no longer want an element to be part of our browser’s content or we want to delete an element from the DOM based on a user event.
Methods of Removing Elements
A method we can use to remove DOM elements is the remove method. We call this method on any element we want to remove, deleting that element and all its child elements from the DOM. Let’s test it out by removing our created element from the DOM. Recalling our element
const newParagraph = document.createElement("p");Next, we call the remove method on our element.
newParagraph.remove();Taking a look at the DOM for confirmation

As we can see, the paragraph element is now deleted from the DOM.
Other methods of removing DOM elements include
removeChild: This method removes child elements from a parent element.Display method: This involves setting the display property of an element to none, removing that element from the DOM.
Elements no longer part of the DOM
When removed, an element is no longer part of the document’s structure and can’t be modified using JavaScript. Additionally, this process also eliminates any data or event handlers associated with the element. Furthermore, the element is no longer visible to the user and will not be on the page. It is important to note that removing unnecessary DOM elements improves performance by freeing up memory in the browser.
Conclusion
In conclusion, the life cycle of DOM elements is a fascinating and dynamic process essential for every front-end developer. From the creation and insertion of elements to the manipulation and removal, it is a never-ending puzzle that requires a keen understanding of the intricacies of the DOM. Mastering the art of handling these elements can lead to the creation of truly mesmerizing and responsive web applications that will leave users in awe. So, dive into the world of DOM and unlock the true potential of your web development skills 😉.
Gain Debugging Superpowers
Unleash the power of session replay to reproduce bugs and track user frustrations. Get complete visibility into your frontend with OpenReplay, the most advanced open-source session replay tool for developers.