UseTransition() Vs UseDeferredValue() In React 18
New concepts in React related to concurrency and efficient updates

React 18 has introduced a key new concept known as “concurrency”. Concurrency involves the simultaneous execution of multiple state updates, which is arguably the most important feature in React 18. Along with concurrency, there are two new hooks introduced by React 18 known as the UseTransition() and the UseDeferredValue() hook. They both help with de-prioritizing state updates, but the question is, when should they be used?
For this article, you should have Node.Js and React 18 installed in your system. You can check out how to install React 18 in this video here.
What is Concurrent React?
According to the Official React18 Docs, concurrent React is
a new behind-the-scenes mechanism that enables React to prepare multiple versions of your UI simultaneously. You can think of concurrency as an implementation detail — it’s valuable because of its features.
Concurrency can be defined as the ability to do numerous tasks at the same time. Concurrency isn’t precisely a feature; instead, it’s a behind-the-scenes function that allows React to prepare many instances of your UI simultaneously (concurrently). React creates APIs in a way that hides implementation specifics from developers. React creators believe that React developers should concentrate on how React features will help them accomplish the user experience they desire for their clients, and that React will figure out how to deliver that experience.
Concurrent React is more than just an implementation detail. Rather, it is a significant upgrade that updates the framework’s core rendering architecture. Thus, it’s essential to understand how it works in React 18.
Setting up the project
For this article, I have created a Github repo in which I built a simple demo product app that allows a user to view a product by inputting the product number. To get started, you have to clone the Github repo, which contains all the project starter files. To clone the Github repo, go to your terminal and run the following command:
git clone https://github.com/Danielita473/React18-App.gitOnce you are done with the cloning process, go to your project folder, open it on your code editor, go to your editor terminal, and install the scripts and dependencies by running npm install or yarn install. Then, to start the project, do npm start. After the app app starts, it should look like this:

We will be working with this in this tutorial.
Implementing the useTransition()
When you first type in a product number to get a product, you will notice that it updates almost instantly even though it is a super long list of 10,000 items to navigate through. Now, problems begin when you go to the developer tools section of your Chrome browser, go to the performance tab, turn on CPU throttling, and slow down the CPU 4 times.
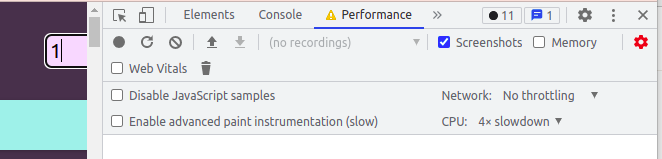
If you are now trying to type in a product number after slowing down the CPU, you will notice that updates get a lot slower and clunky. Even the overall interface looks and feels laggy, especially the input fields, which now feel unresponsive as we are typing and deleting. And this is definitely not a good user experience.
You can’t see me typing, but the interface is very slow in response, as you can see above. Even before React18, a standard solution was not to work on 10,000 items or products (in our case) at a time. You may use pagination or any other technique or do the filtering on the server side instead of the client side. These are all possible solutions you can consider when encountering problems like this.
However, if you need to perform this kind of operation on the client-side, i.e., on your client side code, then with React18, you now have some tools that can give the user a better-perceived performance by delaying some state updating operations by telling React that some updating operations have a higher priority than others. This is the idea behind the concurrency introduced by React 18 and the related hooks and functions.
useTransition() tells React that some state updates have a lower priority,, i.e., every other state updates or UI rendering trigger has a higher priority. When we call useTransition(), we get an array with exactly two elements: an isPending boolean value that indicates if the low-priority state update is still pending, and a startTransition() function that you can wrap around a state update to tell React that it’s a low-priority update.
Check out how the useTransition() hook can be used. First, go to the App.js file and edit the code as seen below:
function App() {
  const [isPending, startTransition] = useTransition();
  const [filterTerm, setFilterTerm] = useState('');

  const filteredProducts = filterProducts(filterTerm);

  function updateFilterHandler(event) {
    startTransition(() => {
      setFilterTerm(event.target.value);
    });
  }

  return (
    <div id="app">
      <input type="text" onChange={updateFilterHandler} />
      <ProductList products={filteredProducts} />
    </div>
  );
}
Because startTransition() wraps the setFilterTerm() state updating function, React gives this state updating code a lower priority. This ensures that the input field remains responsive and responds to keystrokes instantly in the demo app. The application may become unresponsive if useTransition() is not used, especially on slower devices. When you type in the product numbers, you will see that the code is now more responsive and far less laggy, even though the CPU has been slowed down 4 times. You can try this out on your system and see the results.
However, you should not start wrapping up all your state updates with startTransition. Only use it when you have a slow user interface, especially on older devices, or in a situation where you have no other solution to use. This is because it takes up extra performance.
What does isPending do?
isPending tells you whether there are currently some state updates that are still pending (hasn’t been performed yet by React, and is treated with lower priority. You can use isPending to update the UI to show some fallback content while waiting for the main state update to complete. You can see this in the code below in your App.js file:
return (
    <div id="app">
      <input type="text" onChange={updateFilterHandler} />
      {isPending && <p style={{color: 'white'}}>Updating list..</p>}
      <ProductList products={filteredProducts} />
    </div>
  );
}
After implementing the code, you should be able to see something like this when you run the app:
So, this is also a feature that you can use when using useTransition(). Also, note how much faster it responds after implementing the useTransition() feature.
Open Source Session Replay
OpenReplay is an open-source, session replay suite that lets you see what users do on your web app, helping you troubleshoot issues faster. OpenReplay is self-hosted for full control over your data.

Start enjoying your debugging experience - start using OpenReplay for free.
Implementing useDeferredValue()
useDeferredValue() does the same thing as useTransition(), making a slow and laggy interface faster. However, it is used in a slightly different way. According to React team member Dan Abramov, useDeferredValue() is mainly
useful when the value comes “from above” and you don’t actually have control over the corresponding
setStatecall.
useTransition() gives you complete control since you can decide which code should be wrapped and treated as “low priority”. However, in some cases, you may not have access to the actual state updating code (for example, if a third-party library handles it), or you can’t use useTransition() for some reason. This is when useDeferredValue can be used instead. You don’t wrap the state updating code with useDeferredValue(). Instead, you wrap the value generated or updated as a result of the state update (either the state value itself or a value computed based on the state value, for example).
On your ProductList.js file, you can edit the code to the one below:
import {useDeferredValue} from 'react'

function ProductList({ products }) {
  const deferredProducts = useDeferredValue(products);
  return (
    <ul>
      {deferredProducts.map((product) => (
        <li>{product}</li>
      ))}
    </ul>
  );
}
Here, we use useDeferredValue() to wrap products. This will result in React performing other state or UI updates with a higher priority than updates related to the products. If you comment out the isPending feature and the startTransition feature in the App.js file and use the setFilterTerm as it was before we added useTransition, and use useDeferredValue as we have done in the code above in the Product.js file, then when you go back to your app and try to type in some product numbers, you will see similar results, as we did with useTransition.
When should they be used, and when not?
As previously stated, useTransition() wraps the state updating code, whereas useDeferredValue() wraps a value affected by the state change. You don’t have to (and shouldn’t) utilize both at the same time because they accomplish the same thing.
Instead, if you have access to the state updating code and have some state updates that should be treated with a lower priority, it makes sense to use useTransition(). Use useDeferredValue() if you don’t have that access.
UseTransition() and useDeferredValue() should not be used to wrap up all of your state updates or values. If you have a complex user interface or component that can’t be optimized any other way, you should use the hooks. Other performance enhancements, such as lazy loading, pagination, and performing work in worker threads or on the back end, should always be considered.
Conclusion
In this article, we went through the similarities and differences between the useTransition and useDeferredValue hook and how they can help improve the overall user experience.