
This article will show you how to use SuperTokens to provide authentication to a VueJS application utilizing a custom user interface. supertokens-web-js will be used to power our custom authentication forms, which we will create ourselves.
What is SuperTokens?
An open-source tool called SuperTokens makes it simple to add authentication to your app. It provides a number of authentication options (called recipes).
It provides a prebuilt UI in addition to a supertokens-web-js vanilla JS SDK that you may use to create your own UI. This tutorial will teach you how to implement authentication to a VueJS application using supertokens-web-js. We’ll concentrate on the social login flow and email password flow, but you can also use another auth method.
OAuth vs. JWT: An In-Depth Comparison
One of the most important features of modern web applications is authentication, which is why so many developers are familiar with it. However, successfully implementing authentication necessitates mastery of a number of standards and protocols.
OAuth and JWT are two of the most significant of these authentication standards (JSON Web Tokens).
OAuth, which stands for “Open Authorization,” is an open access delegation standard that is frequently used by internet users to provide websites or applications access to their information on other websites without providing passwords.
JWT is a protocol for securely exchanging data over the internet. Three parts make up a standard JWT: the header, the payload, and the signature. Which algorithm was utilized to create the signature is indicated in the header.
Let’s start now!
Advantages of using OAuth
Working with OAuth provides many advantages, such as:
- The industry has adopted it as the norm. Consequently, OAuth 2.0 will be used and understood by the majority of authentication providers.
- Numerous plug-and-play OAuth options are available. Including pre-configured login options for your application, such as “Sign in with Google” and “Sign in with Facebook.”
- Almost all languages and web frameworks include client libraries for OAuth that have undergone extensive testing. This implies that OAuth can be used with your preferred language.
Potential considerations for using OAuth
OAuth is a terrific standard, but there are a few considerations to keep in mind when utilizing it:
- If you are unfamiliar, understanding OAuth may be challenging. Choosing the best OAuth flow for your needs can be difficult because there are so many different options available. You could even need to combine many flows at times.
- End-user privacy is less protected. All of the websites that the end-user has logged into are known to the auth server.
- For instance, if a website uses Sign in with Google, Google will be able to monitor when users are logging in or are active on that website.
Advantages of using JWT
There are several reasons why JWT is such a well-liked standard:
- The JWT may include information about the user. Therefore, you do not need to ask a database or authentication server for such information with each request.
- They provide resolute security assurances. Because JWTs are digitally signed, neither the client nor an attacker may alter them.
- JWTs are only kept by the client. JWTs are created on the server, then sent to the client. The JWT is then sent by the client along with each request. This reduces database space usage.
Potential considerations of using JWT
Although JWTs are quite beneficial, it’s important to bear the following in mind:
- They are impossible to revoke without making significant additional engineering efforts. Because there isn’t a db call made while confirming them, this occurs.
- You would need to implement JWT blacklisting, which can take time, in order to implement instantaneous revocation.
- While maintaining security, it is simple to create bottlenecks. The attacker can utilize the signing key if it has been compromised to generate their own authentic JWTs. They would be able to impersonate any user or program, thanks to this.
Front-End Integration
Start by creating New Vue app by using the below command:
npm init vue@latestFor the project, we’ll activate Typescript and Vue Router. For them, select “yes” in the question:
✔ Project name: … <your-project-name>
...
✔ Add TypeScript? … Yes
✔ Add Vue Router for Single Page Application development? … Yes
...

Scaffolding project in ./<your-project-name>...
Done.
Afterward, enter the project and install the aforementioned dependencies.
npm i supertokens-node supertokens-web-js cors dotenv express npm-run-allThe supertokens-node library will be used on the backend to expose the auth API routes, while the supertokens-web-js library will be used on the front end to offer authentication and reset password capabilities to your custom UI.
Call the super tokens-web-js with the init function
We’ll initialize the supertokens-web-js SDK in our Vue app’s root file, i.e., /src/main.ts:
import ThirdPartyEmailPassword from "supertokens-web-js/recipe/thirdpartyemailpassword";
import Session from "supertokens-web-js/recipe/session";
SuperTokens.init({
  appInfo: {
    appName: "SuperTokens Vue ThirdPartyEmailPassword Example",
    apiDomain: "http://localhost:3001",
  },
  recipeList: [ThirdPartyEmailPassword.init(),
    Session.init()
  ],
});
The init function in the code above sets up supertokens-web-js on the front end. To use the session management function throughout the entire application, we call this function in the root file of our program. Additionally, it specifies the form of authentication we intend to employ, which in our instance is a social login and an email password (ThirdPartyEmailPassword recipe).
Create an AuthView HTML template
The HTML template that renders the signup and sign in UI will now be created. You can use this HTML template as an example.
The following routines are called by the template file to handle social login and signup/login using an email address and password:
onGithubPressed: This function allows users to authenticate via their Github accountonGooglePressed: This function allows users to authenticate via their Google accountonSubmitPressed: This function is fired when the user enters their email and password to signup or login.
Create AuthView state and template functions
We’ll render this HTML template in an AuthView component inside /src/views/AuthView.vue which will also contain the implementations for the above functions:
<template src="../html/authView.html"></template>In order to keep the information for authentication, including the email, password, and error messages for our template, we’ll start by defining states:
data();
{
  return {
    // we allow the user to switch between sign in and sign up view
    isSignIn: true,

    // this will store the email and password entered by the user.
    email: "",
    password: "",

    // any generic error states
    error: false,
    errorMessage: "Something went wrong",

    // any error states specific to the input fields.
    emailError: "",
    passwordError: "",
  };
}
The signIn function will then be developed using the supertokens-web-js SDK. If authentication is successful, we’ll give the user’s email and password to this function, which will then take them to the "/" route. If the isSignIn state is true, the onSubmitPressed function will call the signIn method.
signIn: async function(_: Event) {
const response = await ThirdPartyEmailPassword.emailPasswordSignIn({
formFields: [{
id: "email",
value: this.email,
},
{
id: "password",
value: this.password,
},
],
});
if (response.status === "WRONG_CREDENTIALS_ERROR") {
// the input email / password combination did not match,
// so we show an appropriate error message to the user
this.errorMessage = "Invalid credentials";
this.error = true;
return;
}
if (response.status === "FIELD_ERROR") {
response.formFields.forEach((item) => {
if (item.id === "email") {
// this means that something was wrong with the entered email.
// probably that it's not a valid email (from a syntax point of view)
this.emailError = item.error;
} else if (item.id === "password") {
this.passwordError = item.error;
}
});
return;
}
// login is successful, and we redirect the user to the home page.
// Note that session cookies are added automatically and nothing needs to be
// done here about them.
window.location.assign("/");
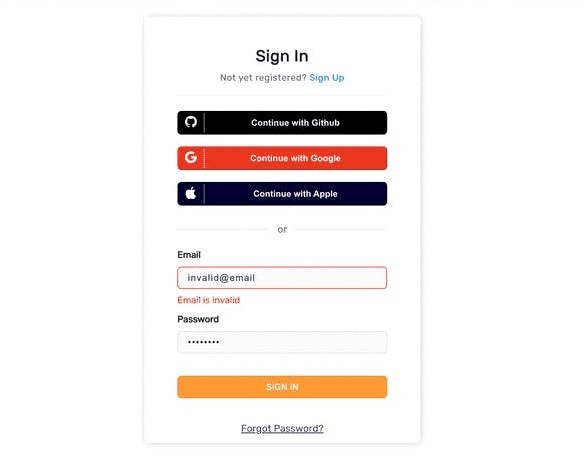
}If the response body’s status field reads “FIELD ERROR” and the response’s id is “email,” it means that the user’s entry failed the backend’s email validation (most likely because it is not a valid email). Therefore, we log the error condition and show the user’s error message on the UI. Here is an illustration of how to display the error message beneath the email field:
To handle the signup flow, we may build the signUp method, which calls the emailPasswordSignUp function from supertokens-web-js.
We use the Google and Github authentication providers for social login. We call the getAuthorisationURLWithQueryParamsAndSetState method and pass the provider name in the arguments when the onGithubPressed or onGooglePressed routines are called. When the authentication procedure is over, the providers will redirect to a callback URL that we give as the authorisationURL argument. In our example, Google is represented by http://localhost:3000/auth/callback/google, and GitHub is represented by http://localhost:3000/auth/callback/github.
Here are the functions for GitHub & Google, respectively.
onGithubPressed: async function () {
  const authUrl = await ThirdPartyEmailPassword.getAuthorisationURLWithQueryParamsAndSetState({
    providerId: "github",

    // This is where github should redirect the user back after login or error.
    // This URL goes on the github dashboard as well.
    authorisationURL: "http://localhost:3000/auth/callback/github",
  });
  window.location.assign(authUrl);
},

onGooglePressed: async function () {
   const authUrl = await ThirdPartyEmailPassword.getAuthorisationURLWithQueryParamsAndSetState({
     providerId: "google",
     // This is where google should redirect the user back after login or error.
     // This URL goes on the google dashboard as well.
     authorisationURL: "http://localhost:3000/auth/callback/google",
  });
  window.location.assign(authUrl);
}
After the user has finished authentication on the provider’s website, they are redirected to the http://localhost:3000/auth/callback/<provider> route. Here we call the thirdPartySignInAndUp function from supertokens-web-js, which consumes the authorization code (that is sent back from the provider) to sign in the user.
Here is the function that handles the above flow in the AuthCallbackView component inside /src/views/AuthCallbackView.vue file:
mounted: async function() {
  try {
    const response = await ThirdPartyEmailPassword.thirdPartySignInAndUp();
    if (response.status !== "OK") {
      // either the user did not complete the login process, or something else went wrong.
      return window.location.assign("/auth?error=signin");
    }
    // sign in successful.
    // The session tokens are handled automatically via our SDK.
    window.location.assign("/");
  } catch (_) {
    window.location.assign("/auth?error=signin");
  }
}
Setup Routing to show the Signup and Login forms
Vue CLI already generates the initial routing for our app inside /src/router.index.ts.
We’ll update this file so that the /auth route loads the AuthView component and the /auth/callback/:provider route loads the AuthCallbackView component we created earlier:
import {
  createRouter,
  createWebHistory
} from "vue-router";
import AuthView from "../views/AuthView.vue";

const router = createRouter({
  history: createWebHistory(import.meta.env.BASE_URL),
  routes: [{
      path: "/auth",
      name: "auth",
      component: () => AuthView,
    },
    {
      path: "/auth/callback/:provider",
      name: "authcallback",
      component: () => AuthCallbackView,
    },
  ],
});

export default router;
Back End Integration
You can copy the code from our sample app or view the backend quick setup portion in our documentation on supertokens.com. As a result:
- The
supertokens-nodeSDK needs to be initialized, and you must provide it therecipeList(similar to how you did on the front end). - The SuperTokens
middlewareanderrorHandlermust then be added to your project, along with the CORS configuration. - All the authentication-related API routes (such as sign-in, sign-up, sign-out, etc.) are made available to the front end through the SuperTokens middleware.
- The connectionURI (location) of the SuperTokens core must also be provided. You can enter
"https://try.supertokens.com"for a quick start (this is a core that we host for demo purposes).
After setting up your server successfully, you may now attempt to register on the front end.
Session Management
After authentication, we’ll render a HomeView component on the page inside /src/views/HomeView.vue. First, we’ll create the HTML template at /src/html/homeView.html:
<div v-if="session">
  <div class="fill">
    <div class="top-bar">
      <div class="sign-out" v-on:click="signOut">
        SIGN OUT
      </div>
    </div>
    <div class="fill home-content">
      <span class="home-emoji">🥳🎉</span>
      Login successful
      <div style="height: 20px" />
      Your user ID is <br />
      {{`${userID}`}}
      <div style="height: 40px" />
      <div class="session-button" v-on:click="callAPI">
        CALL API
      </div>
      <div style="height: 30px" />
      ------------------------------------
      <div style="height: 40px" />
      <a
        href="https://github.com/supertokens/supertokens-web-js/tree/master/examples/vuejs/with-thirdpartyemailpassword"
        target="_blank"
        rel="noreferrer"
      >
        View the code on GitHub
      </a>
    </div>
    <div class="bottom-banner">Vue app. Made using supertokens.com</div>
  </div>
</div>;
Then, using the doesSessionExist method given by the Session recipe from the supertokens-web-js SDK, we’ll determine whether the user has been authorized inside /src/views/HomeView.vue.
We display a logout button with session details for authenticated users. The signOut method from supertokens-web-js is called when a user clicks this button, clearing the user’s session.
For the unauthenticated users, we can redirect them to the /auth page.
<script lang = "ts" >
  import {
    defineComponent
  } from "vue";
import Session from "supertokens-web-js/recipe/session";
import ThirdPartyEmailPassword from "supertokens-web-js/recipe/thirdpartyemailpassword";

const apiPort = import.meta.env.VUE_APP_API_PORT || 3001;
const apiDomain =
  import.meta.env.VUE_APP_API_URL || `http://localhost:${apiPort}`;

export default defineComponent({
  data() {
    return {
      // if session is false, we show a blank screen
      // else we render the UI
      session: false,
      userId: "",
    };
  },
  methods: {
    signOut: async function() {
      await ThirdPartyEmailPassword.signOut();
      window.location.assign("/auth");
    },

    checkForSession: async function() {
      if (!(await Session.doesSessionExist())) {
        // since a session does not exist, we send the user to the login page.
        return window.location.assign("/auth");
      }
      const userId = await Session.getUserId();
      // this will render the UI
      this.session = true;
      this.userId = userId;
    },

    callAPI: async function() {
      const response = await fetch(`${apiDomain}/sessionInfo`);

      if (response.status === 401) {
        // this means that the session has expired and the
        // user needs to relogin.
        window.location.assign("/auth");
        return;
      }

      const json = await response.json();

      window.alert("Session Information:\n" + JSON.stringify(json, null, 2));
    },
  },

  mounted() {
    // this function checks if a session exists, and if not,
    // it will redirect to the login screen.
    this.checkForSession();
  },
});
</script>
<template src = "../html/homeView.html" > < /template>
For the /auth route, we’ll redirect the user to the Home page if a session already exists:
checkForSession: async function () {
    if (await Session.doesSessionExist()) {
     // since a session already exists, we redirect the user to the HomeView.vue component
     window.location.assign("/");
  }
},
Finally, to load the HomeView component on ”/” we’ll update the /src/router/index.ts file:
const router = createRouter({
history: createWebHistory(import.meta.env.BASE_URL),
routes: [
{
path: "/",
name: "home",
component: () => HomeView,
},
// ...
],
});
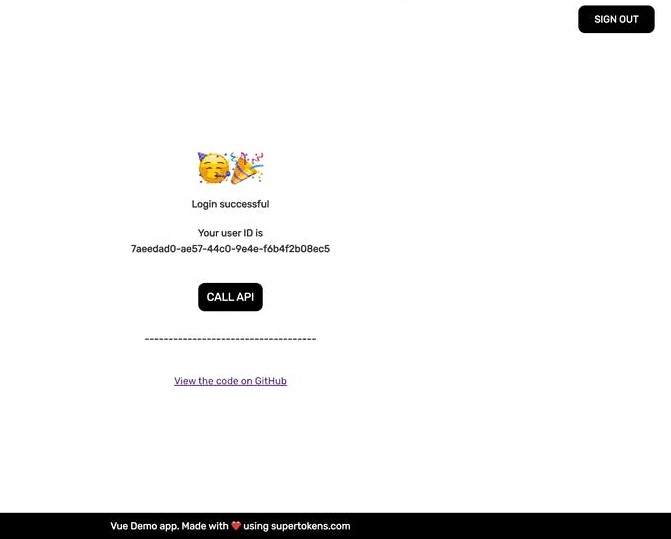
export default router;After successful authentication, you should now see the following screen when you go to http://localhost:3000:
Session Replay for Developers
Uncover frustrations, understand bugs and fix slowdowns like never before with OpenReplay — an open-source session replay tool for developers. Self-host it in minutes, and have complete control over your customer data. Check our GitHub repo and join the thousands of developers in our community.
Forgot the password and the SuperTokens core setup
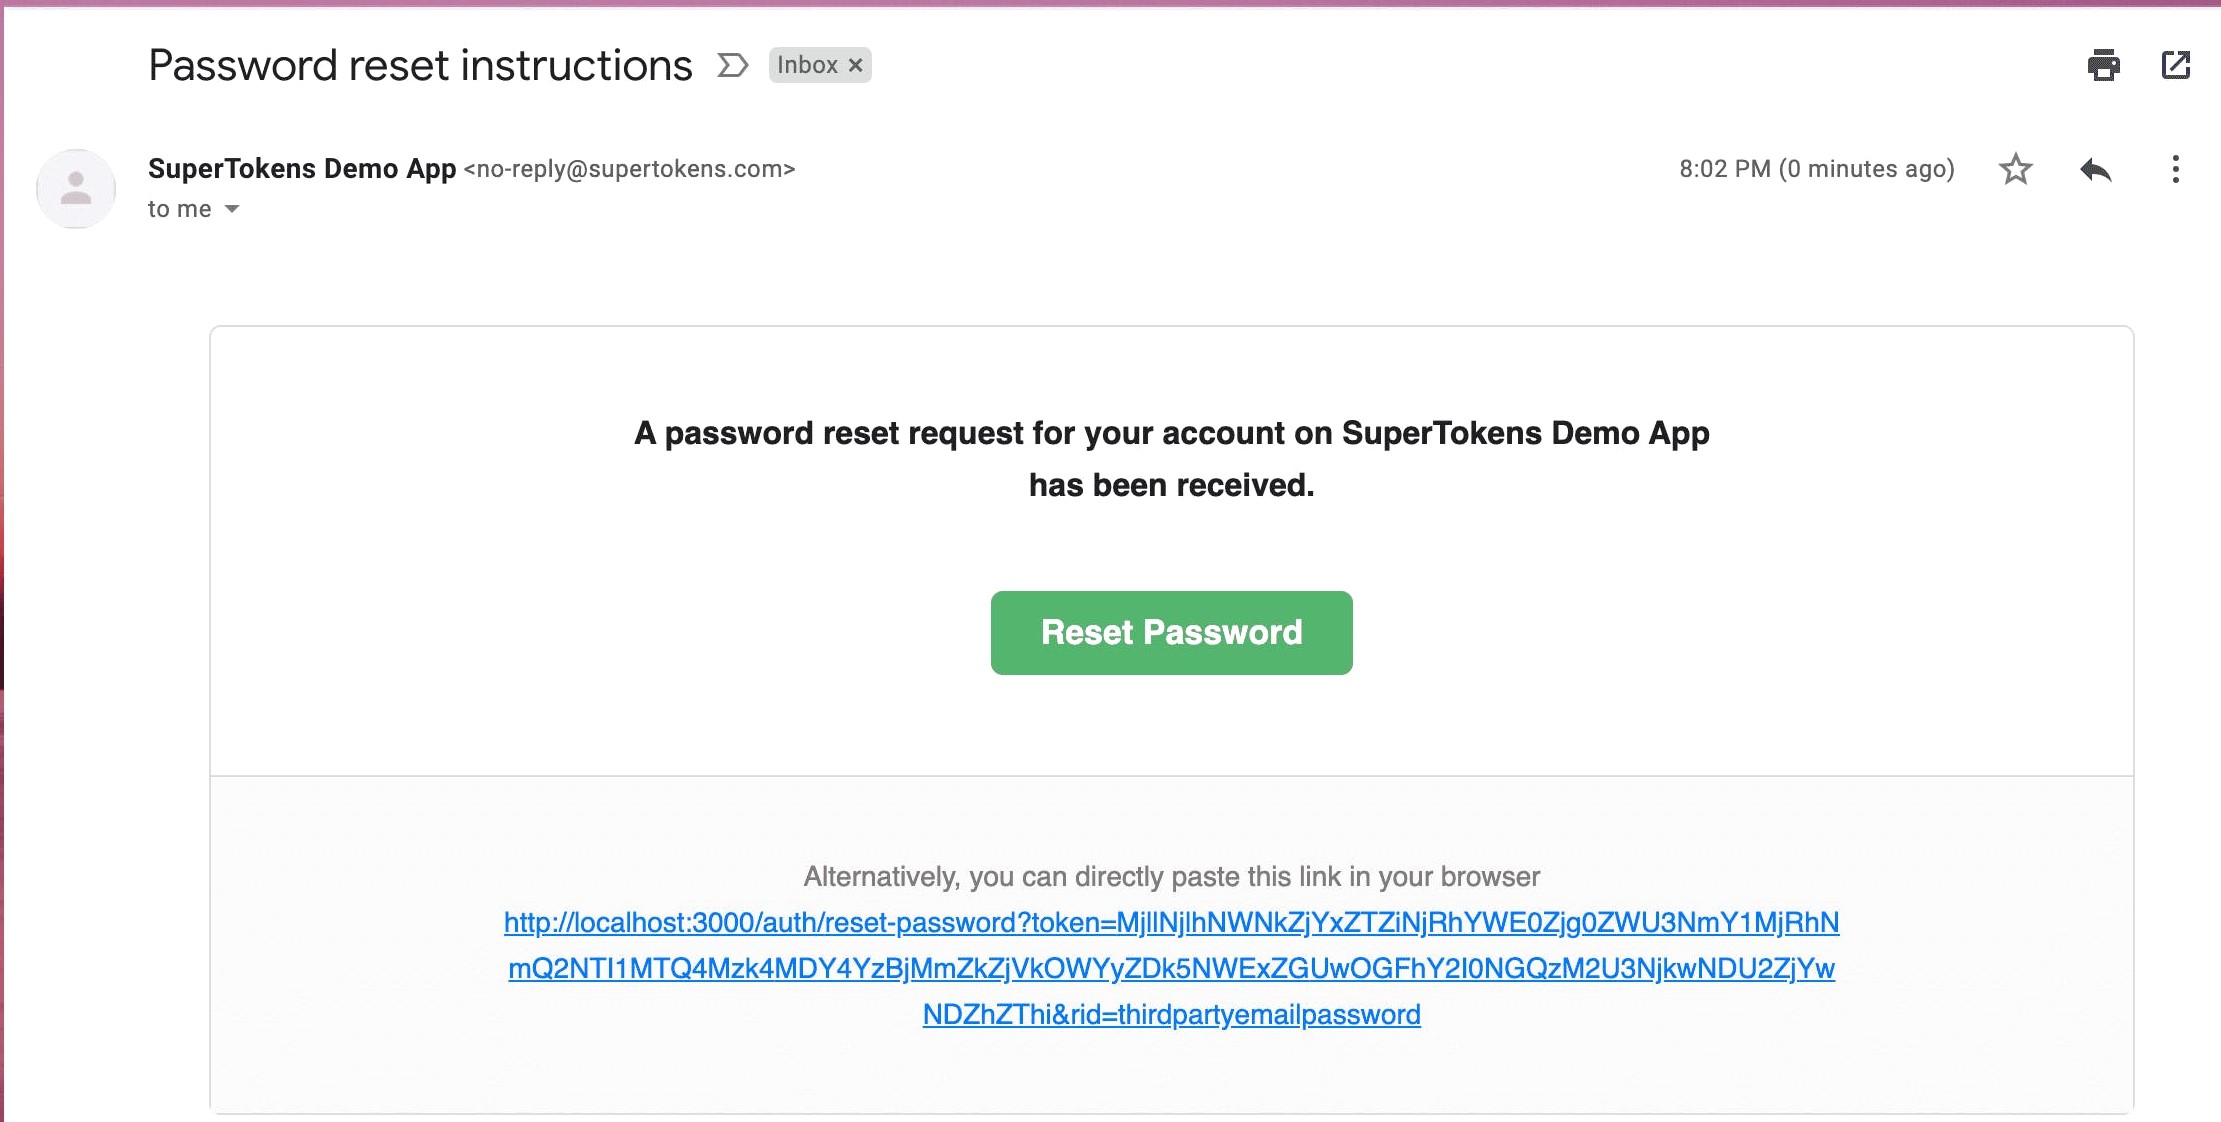
We have a link to the forgotten password page in the Sign In UI. The user can input their email on this page to get a link to reset their password sent to their inbox. They can change their password by clicking that link and entering a new one on the following page.
First, we’ll develop the forgot password HTML template in /src/html. Here is a useful illustration for you.
In the /src/views/ForgotPassword.vue file, we’ll construct a component where we’ll render the aforementioned template:
<template src="../html/forgotPassword.html"></template>Based on a variable named tokenPresent, a state variable that indicates whether or not a password reset token has been generated, we conditionally render a form in the HTML template. Based on the token that is present in the URL’s query parameters, the tokenPresent variable is set. When a user clicks the forgot password link (on the sign-in page), the tokenPresent variable is set to false since the token is missing from the URL’s query parameters.
We render the form where the user will enter their email to receive the reset password link because tokenPresent is false. We execute the sendPasswordResetEmail method from supertokens-web-js and pass in the user’s email when they submit this form with their email entered. If the user’s email address is stored in SuperTokens, this function communicates with a backend API to deliver a password reset link to that address.
http://localhost:3000/auth/reset-password?token=....&rid=thirdpartyemailpassword is the link to reset your password. The path to this link is the same as the one to the forgot password page, but because the URL contains the token query parameter, the form where the user can enter a new password should be displayed.
We use the new password to execute the submitNewPassword function when they enter their new password in the form. The user’s password will be changed by calling the SuperTokens backend API after this function automatically reads the token from the URL.
The function call will return a non-”OK” state if the password reset token has already been used or has expired, in which case we can display a message on the user interface to prompt them to return to the login screen.
<script lang = "ts" >
  import ThirdPartyEmailPassword from "supertokens-web-js/recipe/thirdpartyemailpassword";
import {
  defineComponent
} from "vue";

export default defineComponent({
  data() {
    /**
     * If the URL has a token query param, it means that we should show the
     * "enter new password" screen, else we should ask the user for their email
     * to send the password reset link.
     */
    const urlParams = new URLSearchParams(window.location.search);
    const token = urlParams.get("token");
    return {
      // the email property is used for the enter email screen
      email: "",
      error: false,
      errorMessage: "Something Went Wrong",
      didSubmit: false,
      // if tokenPresent is true, it means that the user has clicked on the
      // reset password link.
      tokenPresent: token !== null,
      password: "",
    };
  },
  methods: {
    onSubmitClicked: async function() {
      if (this.tokenPresent) {
        // we try and change the user's password now by consuming the token
        try {
          const response = await ThirdPartyEmailPassword.submitNewPassword({
            formFields: [{
              id: "password",
              value: this.password,
            }, ],
          });
          if (response.status === "FIELD_ERROR") {
            // this indicates that the password entered by the user
            // did not match the backend password validation logic.
            throw new Error(response.formFields[0].error);
          } else if (response.status === "RESET_PASSWORD_INVALID_TOKEN_ERROR") {
            // the password reset token was consumed already, or has expired.
            // in this case, the user should go back to the login screen or the
            // enter email screen
            throw new Error("Password reset token has expired, please go back to the sign in page");
          }
          // password reset successful.
          window.location.assign("/auth");
        } catch (e: any) {
          this.errorMessage = e.message;
          this.error = true;
        }
      } else {
        // the user has entered an email for whom the password reset link will be sent.
        try {
          const response = await ThirdPartyEmailPassword.sendPasswordResetEmail({
            formFields: [{
              id: "email",
              value: this.email,
            }, ],
          });
          if (response.status !== "OK") {
            // this means that the email validation logic failed.
            throw new Error(response.formFields[0].error);
          }
          // a password reset email was sent successfully.
          if (this.didSubmit !== true) {
            // we change the UI to show that the email has been sent
            this.didSubmit = true;
          }
        } catch (e: any) {
          this.errorMessage = e.message;
          this.error = true;
        }
      }
    },
  },
});
</script>
The user is redirected back to the /auth page so they can log in with their new password if the submitNewPassword function is successful in successfully resetting the user’s password.
The following alterations will be made to the file /src/router/index.ts in order to load the ForgotPassword component on the route /auth/reset-password:
const router = createRouter({
history: createWebHistory(import.meta.env.BASE_URL),
routes: [
// ...
{
path: "/auth/reset-password",
name: "resetPassword",
component: () => ForgotPasswordView,
},
],
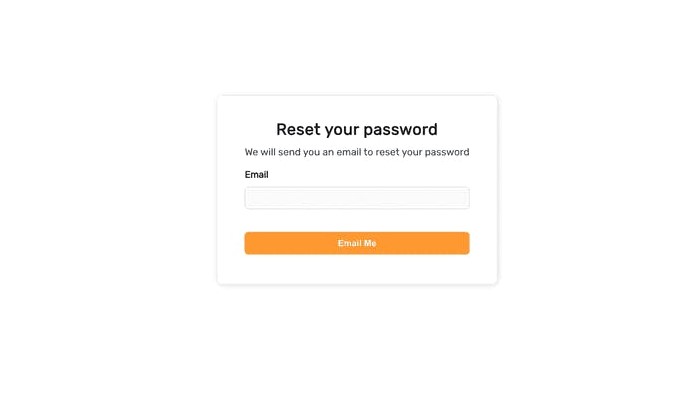
});Once you do that, if you now visit http://localhost:3000/auth/reset-password, you should see the following page:
When you input your email and click “Email Me,” a link to reset your password should be sent to that address:
SuperTokens Core Setup
We are using “https://try.supertokens.com” as the connectionURI for the core while setting up the backend. The SuperTokens team is hosting this sample core instance. While you are free to use this for as long as you like, you should move to a self-hosted or managed version of the core once you have decided to utilize SuperTokens exclusively.
Conclusion
SuperTokens are the newest, most effective way of authenticating and accessing digital resources. By leveraging the power of tokenization, users can quickly and securely authenticate with a system, eliminating the need for complex passwords. SuperTokens provide an easy, one-time authentication process that creates a secure session without any extra steps, making it ideal for users who need to access multiple systems simultaneously.
Additionally, SuperTokens are highly secure and are designed to be tamper-proof, making them an ideal choice for those looking for an extra layer of protection when accessing digital resources.
Gain Debugging Superpowers
Unleash the power of session replay to reproduce bugs and track user frustrations. Get complete visibility into your frontend with OpenReplay, the most advanced open-source session replay tool for developers.