Webhooks play a crucial role in various aspects of web development. You may wonder why they are vital and how to use them. This article will explain webhooks and how to implement them in Next.js. You can integrate webhooks with Node.js and other backend frameworks or services collaborating with the front end, and this article will show you how.

Discover how at OpenReplay.com.
A webhook is a method for web applications to communicate with each other in real time. You can have multiple web applications where one can send HTTP requests to another when a specific event is triggered.
For example, you integrate a payment system into your web application that handles payments, refunds, and cancellations. In this type of integration, you have a payment system or gateway and your web application. When a user completes a payment transaction through the payment gateway, an event occurs, and the payment gateway sends an HTTP request to your application. However, to use that payment request, your web application needs an endpoint that can receive and process the request or send it as a notification to the user.
This endpoint acts as a webhook between the payment gateway and your web application, communicating almost in real time and notifying the user of successful payments, refunds, or unsuccessful payments.
Benefits of webhooks
A web application or system which has a webhook or uses a webhook has several benefits. For instance:
- Real-Time Updates: Webhooks give real-time notifications for every event.
- Security: Most times, before webhook notifications are received, they are verified to confirm the authenticity of incoming requests such as signatures or tokens.
- Automated Workflows: Webhooks help handle automated workflow based on business logic or events that occur or are triggered.
- Improved User Experience: Webhooks provides users with up-to-date information on events such as payments, collaborative features, and messaging notifications.
Project Overview
To show what a webhook is, we will build a payment application using the following:
- Next.js
- Braintree payment gateway
- Ngrok
I will explain in detail how you can make payments, transfers, and refunds. Additionally, I will guide you through setting up the Braintree webhook.
Note: We will be using the Braintree sandbox so that you can simulate the payments, and not all features may be available.
Braintree sandbox is a test environment for development purposes, not production. You can carry out tests in it. It gives you a private key, merchant ID, and public key to use their sandbox API.
Setting up Braintree Sandbox
To set up Braintree Sandbox, head to their website and click the signup button. All you need is:
- Your first and last name.
- Your business name.
- Your Business location.
- And your email.
After signing up, the website will direct you to your control panel. You should also be able to see your merchant ID, private key, and public key. Save them somewhere secure on your PC.
Before starting the project, you must set up Ngrok. If you have it on your PC, you can skip this. If you don’t have Ngrok installed, head to their site and click sign up for free. Then, download and install the version for your PC.
Setting up the project
This project is going to be built using Next.js. Most people may wonder why someone would make a payment system on Next.js. Next.js doesn’t just render pages on the server side but also has API routes that operate similarly to Node.js for the backend, abstracting the API calls from the browser or the client.
Head to my GitHub repo to clone the project and follow along. The instructions for setting up the project on your PC are written there.
Making payments
We must create the payment page first to make payments using the Braintree sandbox. This is done inside the app directory in the root folder. Inside the app directory, create a folder called payment page (you can name it what you want); inside the folder, create a file called page.js. In the updated Nextjs version, this is how pages are created.
After that, write the following code:
"use client";
// pages/payment.js
import { useState, useEffect } from "react";
import styles from "../style/pages.module.css";
import DropIn from "braintree-web-drop-in";
import "../style/dropin.css";
import accounting from "accounting";

const PaymentPage = () => {
  const [paymentResult, setPaymentResult] = useState("");
  const [clientToken, setClientToken] = useState("");
  const [dropInInstance, setDropInInstance] = useState(null);
  const [amount, setAmount] = useState("");

  useEffect(() => {
    const fetchClientToken = async () => {
      try {
        const response = await fetch("/api/braintreeConfig/braintreeConn"); // Adjust the path based on your API route
        const data = await response.json();
        setClientToken(data.clientToken);
      } catch (error) {
        console.error("Error fetching Braintree client token:", error);
      }
    };

    fetchClientToken();
  }, []);

  console.log(clientToken);

  useEffect(() => {
    if (clientToken) {
      // Initialize DropIn instance when clientToken is available
      DropIn.create(
        {
          authorization: clientToken,
          container: "#dropin-container", // Specify the container element
        },
        (error, instance) => {
          if (error) {
            console.error("Error creating DropIn instance:", error);
            return;
          }
          setDropInInstance(instance);
        },
      );
    }
  }, [clientToken]);

  const handlePayment = async () => {
    try {
      if (!dropInInstance) {
        console.error("DropIn instance not available");
        return;
      }

      const { nonce } = await dropInInstance.requestPaymentMethod();
      // Send the nonce to your server for payment processing
      await sendPaymentToServer(nonce);
      setPaymentResult("Payment successful!");
    } catch (error) {
      console.error("Error processing payment:", error);
      setPaymentResult(
        "Payment failed. Please check your information and try again.",
      );
    }
  };

  const sendPaymentToServer = async (nonce) => {
    try {
      const response = await fetch("/api/braintreeConfig/paymentProcess", {
        method: "POST",
        headers: {
          "Content-Type": "application/json",
        },
        body: JSON.stringify({
          nonce,
          amount,
        }),
      });

      if (response.ok) {
        // Payment successful, handle accordingly
        setPaymentResult("Payment successful!");
      } else {
        // Payment failed, handle accordingly
        setPaymentResult(
          "Payment failed. Please check your information and try again.",
        );
      }
    } catch (error) {
      console.error("Error sending payment to server:", error);
    }
  };

  const handleInputChange = (e) => {
    const value = e.target.value;
    const numericValue = value.replace(/[^0-9]/g, "");
    const formattedValue = accounting.formatMoney(numericValue / 100, "$", 2);

    setAmount(formattedValue);
  };
  console.log(amount);
  return (
    <div>
      {clientToken ? <div id="dropin-container"></div> : <div>Loading...</div>}
      {/* Additional form fields */}
      <div className={styles.main}>
        <input
          type="text"
          value={amount}
          placeholder="$0.00"
          onChange={handleInputChange}
          required
        />
        <button
          className={styles.button}
          onClick={handlePayment}
          disabled={!clientToken}
        >
          Submit Payment
        </button>
      </div>
      <div>{paymentResult}</div>
    </div>
  );
};

export default PaymentPage;
Let’s look through the code. The part in the return function contains the code to be rendered on the screen. It includes a condition that runs if the clientToken is true and holds a value; otherwise, it shows loading on the screen. The part not in a conditional block is an input form that will take in the amount value to be paid and the button to send the payment nonce and amount to the server.
The last part will display whether the payment was successful or not. Here is the code part:
return (
  <div>
    {clientToken ? <div id="dropin-container"></div> : <div>Loading...</div>}
    {/* Additional form fields */}
    <div className={styles.main}>
      <input
        type="text"
        value={amount}
        placeholder="$0.00"
        onChange={handleInputChange}
        required
      />
      <button
        className={styles.button}
        onClick={handlePayment}
        disabled={!clientToken}
      >
        Submit Payment
      </button>
    </div>
    <div>{paymentResult}</div>
  </div>
);
The above code is just the part rendered on the screen. The primary function is done by getting the clientToken from the server.
useEffect(() => {
  const fetchClientToken = async () => {
    try {
      const response = await fetch("/api/braintreeConfig/braintreeConn"); // Adjust the path based on your API route
      const data = await response.json();
      setClientToken(data.clientToken);
    } catch (error) {
      console.error("Error fetching Braintree client token:", error);
    }
  };

  fetchClientToken();
}, []);
I put it in a useEffect hook because the clientToken state is used for conditional rendering and forms a part of the application’s life cycle. That is, something is to be rendered when it is true or false. In the code above, the clientToken is gotten from the braintreeConn API route in Nextjs and stored in a state.
The next part of the code creates a drop-in UI for inputting users’ card details. The drop-in UI is just a form for inputting card values such as card number, expiring date, etc. It is initialized in a useEffect hook and created using the DropIn.create function. It is obtained from the Braintree web drop-in package.
import DropIn from 'braintree-web-drop-in';useEffect(() => {
if (clientToken) {
// Initialize DropIn instance when clientToken is available
DropIn.create(
{
authorization: clientToken,
container: "#dropin-container", // Specify the container element
},
(error, instance) => {
if (error) {
console.error("Error creating DropIn instance:", error);
return;
}
setDropInInstance(instance);
},
);
}
}, [clientToken]);For the drop-in UI to be successfully created, you need to add the clientToken for authorization and the name of the UI container, which will be used as the ID for the form to be rendered on the screen. The image below shows what the drop-in UI looks like.
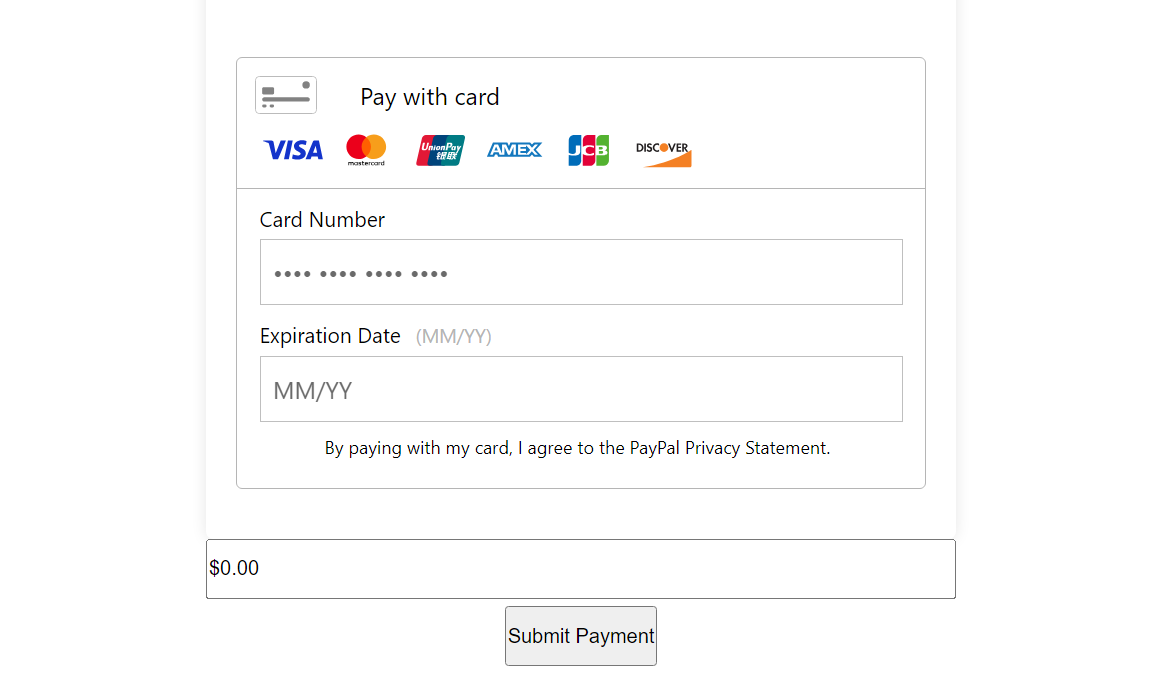
If it returns an error, it logs or sets the instance using the setDropInInstance function. Notice the useEffect hook is run once only when the clientToken is gotten.
After that part, the next part of the code is the part to handle payment:
const handlePayment = async () => {
  try {
    if (!dropInInstance) {
      console.error("DropIn instance not available");
      return;
    }

    const { nonce } = await dropInInstance.requestPaymentMethod();
    // Send the nonce to your server for payment processing
    await sendPaymentToServer(nonce);
    setPaymentResult("Payment successful!");
  } catch (error) {
    console.error("Error processing payment:", error);
    setPaymentResult(
      "Payment failed. Please check your information and try again.",
    );
  }
};

const sendPaymentToServer = async (nonce) => {
  try {
    const response = await fetch("/api/braintreeConfig/paymentProcess", {
      method: "POST",
      headers: {
        "Content-Type": "application/json",
      },
      body: JSON.stringify({
        nonce,
        amount,
      }),
    });

    if (response.ok) {
      // Payment successful, handle accordingly
      setPaymentResult("Payment successful!");
    } else {
      // Payment failed, handle accordingly
      setPaymentResult(
        "Payment failed. Please check your information and try again.",
      );
    }
  } catch (error) {
    console.error("Error sending payment to server:", error);
  }
};
This is another central part of the code that sends the payment nonce and amount to the payment API route when the payment button is clicked.
It has two functions. The first is handlePayment, which gets the payment nonce from the dropInInstance using the requestPaymentMethod and calls the sendPaymentToServer. The second sendPaymentToServer function sends data to the payment route, and the data is the nonce and the amount to be paid.
The nonce is a secure token used only once. It is generated by Braintree on the client side and used to make secure payments. It is sent to the server and used to process payments. Let’s look at how to make the Nextjs API route interact with Braintree, send information to the Braintree sandbox, and process payments.
To do so, you have to install and import Braintree, but since you are using the cloning my GitHub repository, you did;
npm installBut just in case you want to know how it was installed, in your terminal inside your project root directory type;
npm install braintreeThis installs the Braintree package so that you can use the Braintree SDK for the sandbox or production.
After that, create a pages folder in the root directory. Then, create an API folder, inside create a paymentProcess.js file, and write the following code;
import braintree from "braintree";

const gateway = new braintree.BraintreeGateway({
  environment: braintree.Environment.Sandbox,
  merchantId: process.env.MerchantId,
  publicKey: process.env.PublicKey,
  privateKey: process.env.PrivateKey,
});

export default async function handler(req, res) {
  if (req.method !== "POST") {
    return res.status(405).json({ error: "Method Not Allowed" });
  }

  const { nonce, amount: amountValue } = req.body;
  console.log(nonce, amountValue);
  const extractAmount = amountValue.match(/\d+/);
  const amount = extractAmount ? parseInt(extractAmount[0], 10) : null;
  console.log(amount);

  try {
    const result = await gateway.transaction.sale({
      amount,
      paymentMethodNonce: nonce,
      options: {
        submitForSettlement: true,
      },
    });

    if (result.success) {
      res.status(200).json({ success: true });
    } else {
      console.error("Transaction failed:", result.message);
      res.status(500).json({ error: "Transaction failed" });
    }
  } catch (error) {
    console.error("Error processing payment:", error);
    res.status(500).json({ error: "Internal Server Error" });
  }
}
The gateway variable is initialized by connecting to the Braintree sandbox environment and authenticated using your merchantId, privateKey, and publicKey. You have to create a .env.local file that contains these keys.
The API handler function receives a POST request, which contains the body with the nonce and amount of data. The amount of data is formatted to extract only the numbers and not the dollar sign.
Then, inside a try-catch block, the payment transaction is created using the gateway.transaction.sale function.
Note: when passing the parameters inside the function, use the parameters
amount,paymentMethodNonce, andOptions; otherwise, you may receive an error.
Lastly, let’s write the code to get the clientToken. Remember, our client-side drop-in UI cannot be initialized or created without the clientToken.
To do so, in the API folder created earlier, create a braintreeConn.js file and write the following code:
// pages/api/braintree.js
import braintree from "braintree";

export default async function handler(req, res) {
  const gateway = new braintree.BraintreeGateway({
    environment: braintree.Environment.Sandbox, // Change to Production for live environment
    merchantId: process.env.MerchantId,
    publicKey: process.env.PublicKey,
    privateKey: process.env.PrivateKey,
  });

  const clientToken = await gateway.clientToken.generate();

  console.log(clientToken);

  res.status(200).json({ clientToken: clientToken.clientToken });
}
If you see a getSession or session in the GitHub code, please ignore it. It’s not needed.
The image below shows the clientToken, a bunch of strings.
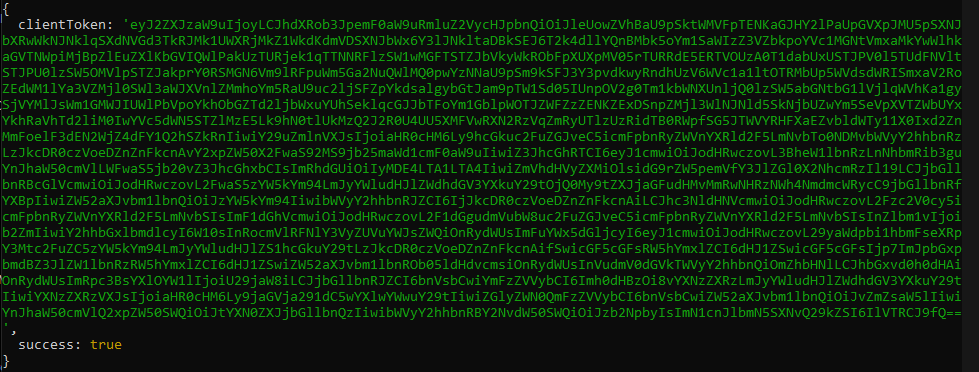
Like the previous code, you have to initialize the gateway with your API keys and ID, then get the clientToken using the function gateway.clientToken.generate() and send it as a response to the client side.
After that, you should be able to make a successful payment using Braintree. I’ll show some screenshots of mine. The image below shows the drop-in UI form with the card details inputted into it.
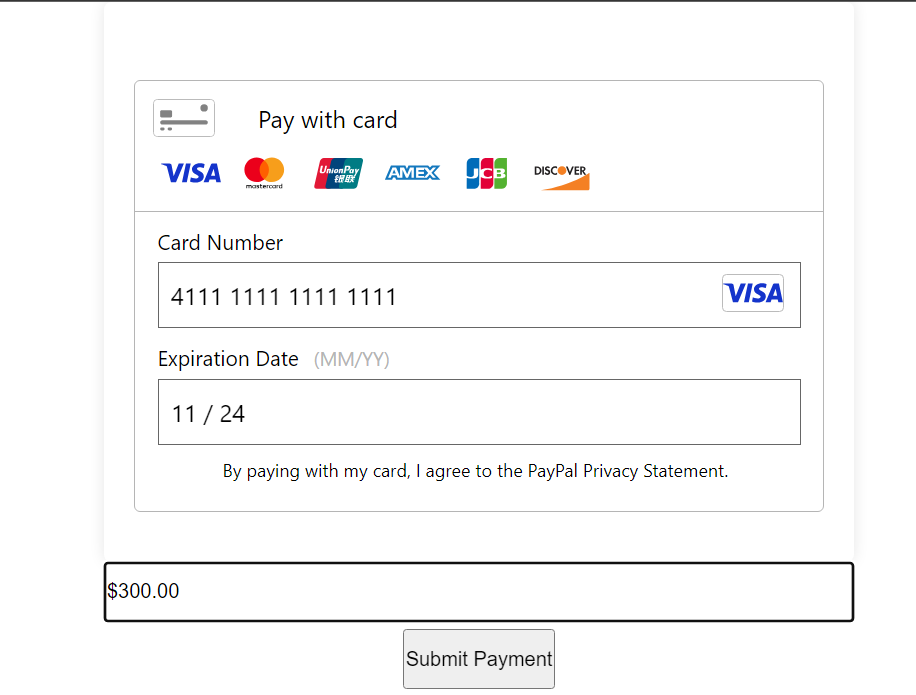
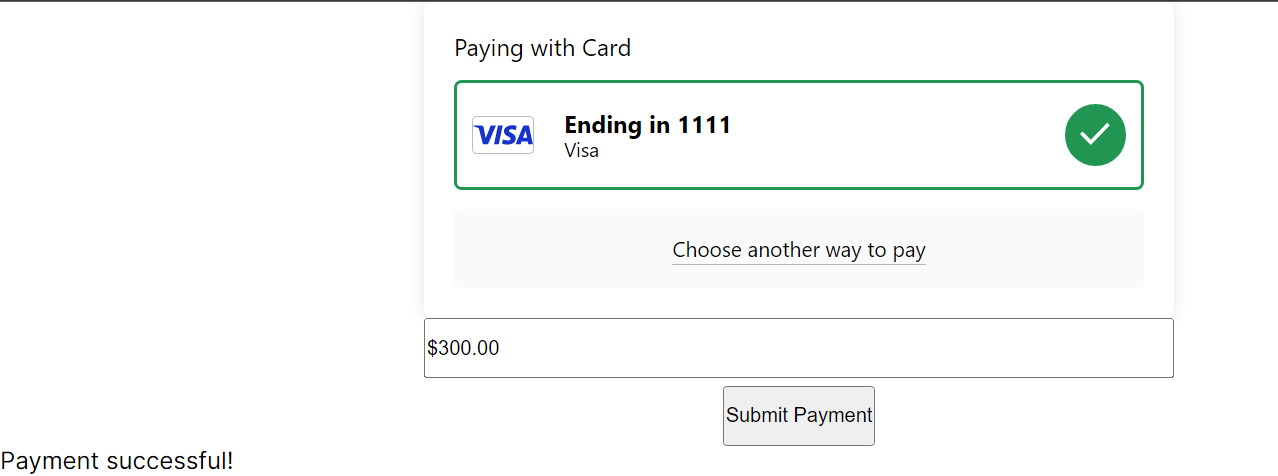
When the payment button is clicked and the payment is successful, you get a screen like the image below.
Inside the Braintree sandbox, if you click on transactions and scroll down to search, you will get to a page similar to the image below.
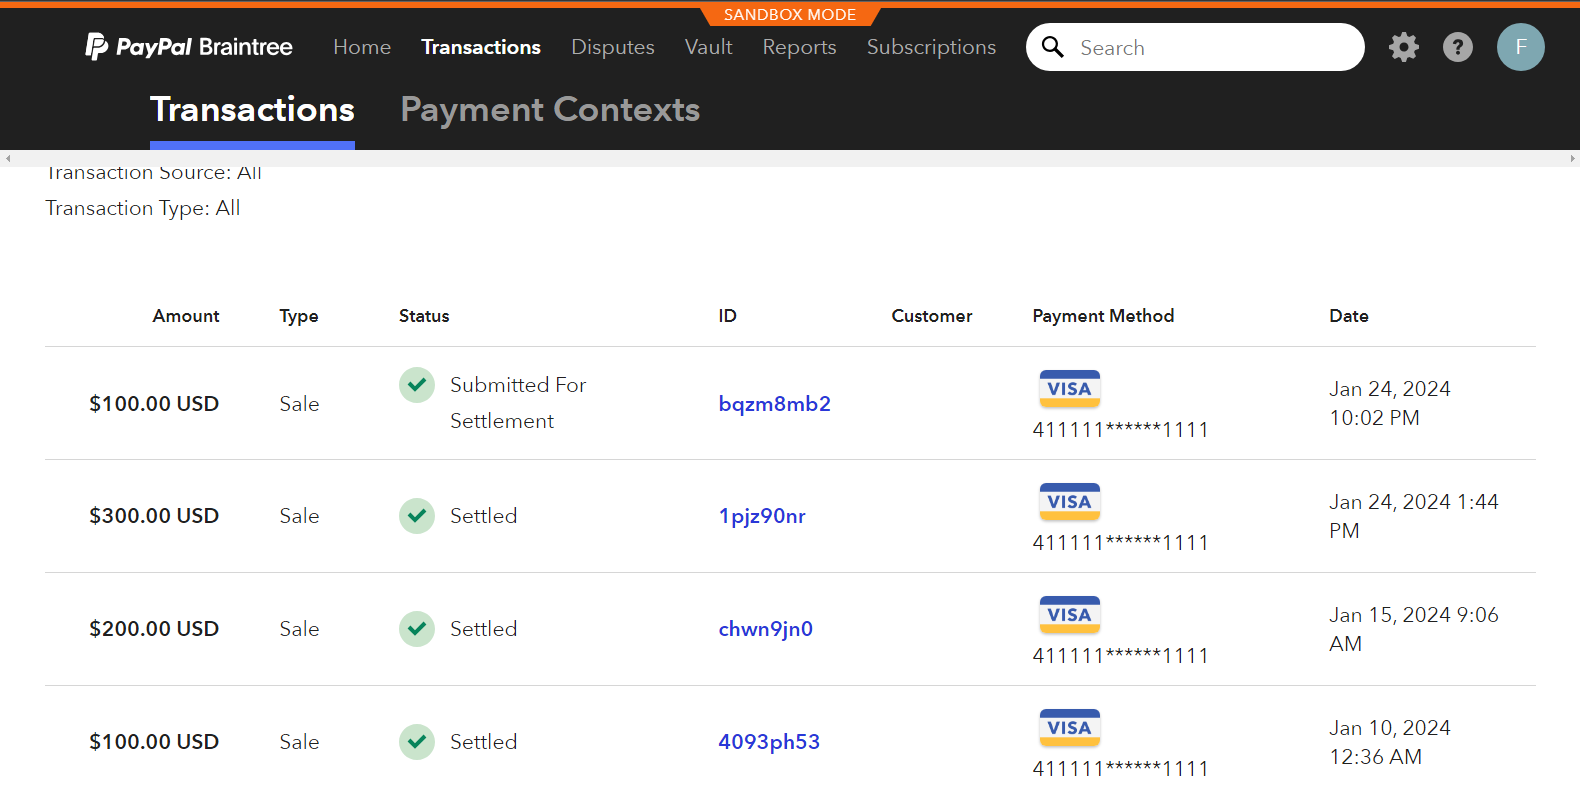
The payment has been successfully disbursed to the payee’s account if the transaction is settled. While submitted for settlement means Braintree is processing it before it is successfully paid. The GIF below shows how the payment works.
Handling Transfer and Refund Payments
To handle transfers, we’ll create a transfer folder:
- Inside the app folder, create a
transferFormfolder. - Inside the folder, create a file called
page.js. After making the necessary folders, write the following codes in them:
// State variables for handling user input and response data
const [amount, setAmount] = useState('');
const [clientToken, setClientToken] = useState('');
const [recipientEmail, setRecipientEmail] = useState('');
const [transferId, setTransferId] = useState('');
const [visible, setVisible] = useState(false);
const [refundMessage, setRefundMessage] = useState('');
const [transactionId, setTransactionId] = useState('');
const [responseMessage, setResponseMessage] = useState('');
The code above handles the states for both the refunds and transfers. The transfer and refund code is written on the transferForm page.
Next, you have to fetch the clientToken.
// Fetches the Braintree client token when the component mounts
useEffect(() => {
  const fetchClientToken = async () => {
    try {
      const response = await fetch("/api/braintreeConfig/braintreeConn");
      const data = await response.json();
      setClientToken(data.clientToken);
    } catch (error) {
      console.error("Error fetching Braintree client token:", error);
    }
  };

  fetchClientToken();
}, []);
The clientToken is fetched using the fetchClientToken function. It connects to the API folder where the clientToken is gotten from the Braintree API gateway.
Next, You have to handle the transfer.
// Handles the payment transfer process using Braintree
const handleTransfer = async (nonce) => {
  try {
    const response = await fetch("/api/braintreeConfig/processTransfer", {
      method: "POST",
      headers: {
        "Content-Type": "application/json",
      },
      body: JSON.stringify({ nonce, amount, recipientEmail }),
    });

    if (response.ok) {
      const data = await response.json();
      setTransferId(data.transactionId);
    } else {
      console.error(
        "Transfer failed. Please check your information and try again.",
      );
    }
  } catch (error) {
    console.error("Error initiating transfer:", error);
  }
};
The code above is used to send transfer amount and recipient email to the API folder that handles transfers. Also, a nonce is sent to the backend in the code above. The nonce is a secure token created randomly and uniquely. It stands for the number used once, hence the name nonce. Like its name, it is used once and created again if the user initiates another payment process.
The next part of the code is the tokenization.
// Tokenizes payment information using Braintree client SDK
const tokenizePaymentInfo = () => {
  return new Promise((resolve, reject) => {
    braintree.client.create(
      { authorization: clientToken },
      (clientErr, clientInstance) => {
        if (clientErr) {
          reject(clientErr);
          return;
        }

        clientInstance.request(
          {
            endpoint: "payment_methods/credit_cards",
            method: "post",
            data: {
              creditCard: {
                number: "4111111111111111",
                expirationDate: "10/23",
              },
            },
          },
          (tokenizeErr, payload) => {
            if (tokenizeErr) {
              console.error("Tokenization error:", tokenizeErr);
              return;
            }
            const nonce = payload.creditCards[0].nonce;
            handleTransfer(nonce);
          },
        );
      },
    );
  });
};
The code above is used to get the payment nonce, which is used to initiate transfers or payments. It is done using the clientToken for authorization and creating a nonce for the payment data or details.
After that, add the code for handling refunds.
// Handles the refund process using Braintree
const handleRefund = async () => {
  try {
    const response = await fetch("/api/braintreeConfig/paymentRefund", {
      method: "POST",
      headers: {
        "Content-Type": "application/json",
      },
      body: JSON.stringify({ transactionId, amount }),
    });

    if (response.ok) {
      const data = await response.json();
      console.log("Transaction ID sent to the server successfully");
      setRefundMessage(data.refundId);
      console.log(data.refundId);
      setResponseMessage("Refund Successful!! Refund ID:");
    } else {
      const data = await response.json();
      console.error(
        "There was an error sending the transaction ID to the server",
        data.error,
      );
      setResponseMessage(data.error || "Refund failed");
    }
  } catch (error) {
    console.error(`Some form of error occured: ${error}`);
  }
};
The code gets the transactionId and amount for that transaction that will be set for refund.
Next, in the API folder, create the processTransfer.js file and add the following code:
// Handles the payment transfer process on the server side
export default async function handler(req, res) {
  if (req.method !== "POST") {
    return res.status(405).json({ error: "Method not allowed" });
  }

  const { nonce, amount, recipientEmail } = req.body;
  try {
    const result = await gateway.transaction.sale({
      amount,
      paymentMethodNonce: nonce,
      options: { submitForSettlement: true },
      customer: { email: recipientEmail },
    });

    if (result.success) {
      res
        .status(200)
        .json({ success: true, transactionId: result.transaction.id });
    } else {
      res.status(500).json({ success: false, error: result.message });
    }
  } catch (error) {
    res.status(500).json({ success: false, error: "Internal server error" });
  }
}
The code above is for processing transfers.
Next, create a file called paymentRefunds.js in the API folder and write the following code:
// Handles the refund process on the server side
export default async function handler(req, res) {
  if (req.method !== "POST") {
    return res.status(405).json({ error: "Method not allowed" });
  }

  const { transactionId, amount } = req.body;
  // console.log(transactionId)
  // console.log(amount)

  try {
    const result = await gateway.transaction.refund(transactionId, amount);

    if (result.success) {
      console.log("Refund ID:", result.transaction.id);
      // Handle success, update database, send confirmation, etc.
      res.status(200).json({ success: true, refundId: result.transaction.id });
    } else {
      console.error("Refund failed:", result.message);
      // Handle failure, send error response, etc.
      res.status(400).json({ success: false, error: result.message });
    }
  } catch (error) {
    console.error("Error processing refund:", error);
    if (error.type === "notFoundError") {
      // Handle specific notFoundError
      res
        .status(404)
        .json({ success: false, error: "Transaction ID not found" });
    } else {
      // Handle other errors
      res.status(500).json({ success: false, error: "Internal server error" });
    }
  }
}
The code above processes refunds. If the transaction ID is invalid, it returns an error, and if the actual amount for that particular transaction is not input correctly, it also returns an error.
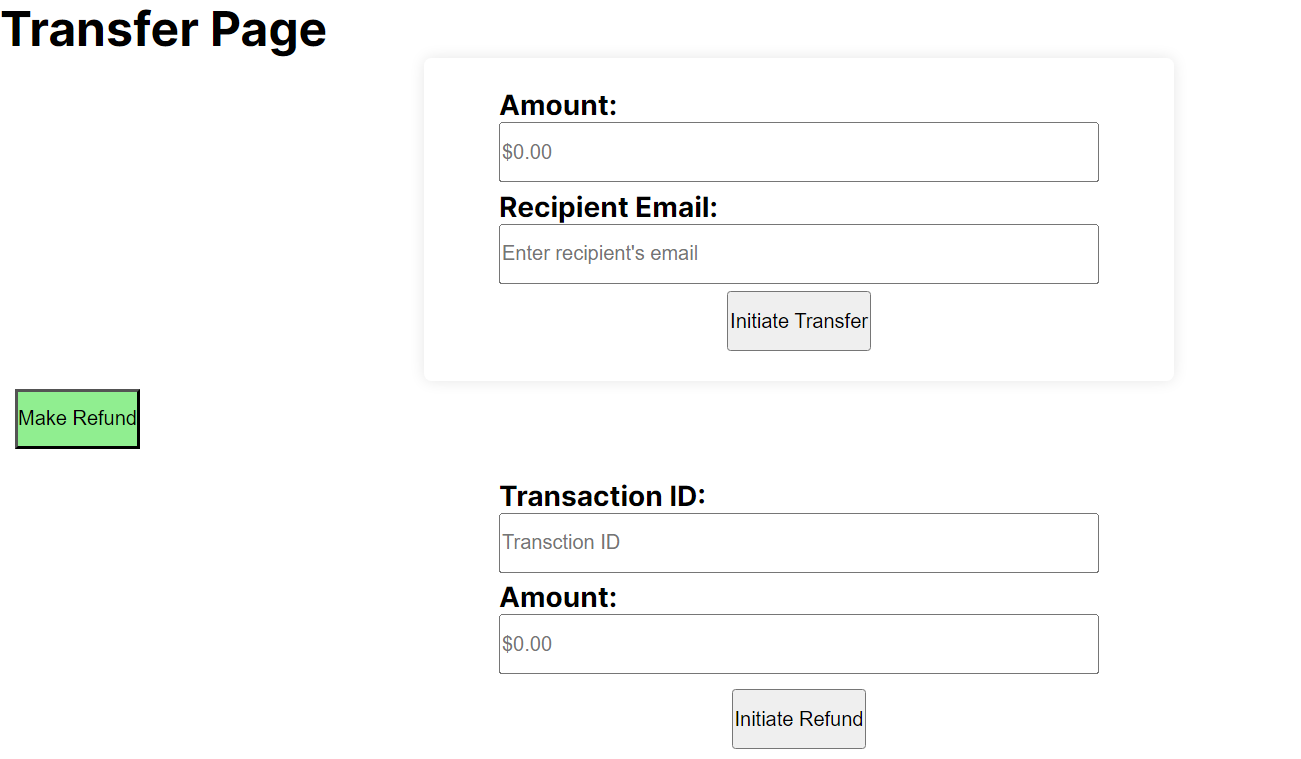
The image above shows the refund and transfer forms. The GIF below shows how the transfer and refund works.
Setting up Webhooks
That is all for making payments, transfers, and refunds, but you may wonder how the webhook works. In a system or when using an API gateway, they usually give you a webhook endpoint you can connect to, using your API endpoint to receive real-time notifications based on the events that occur while using that system. When you receive a notification, you can decide the logic you want to use for users to receive relevant information. Now, based on the Braintree API gateway, to set up a webhook, you have to do the following:
-
If you already have a sandbox account, log in to it.
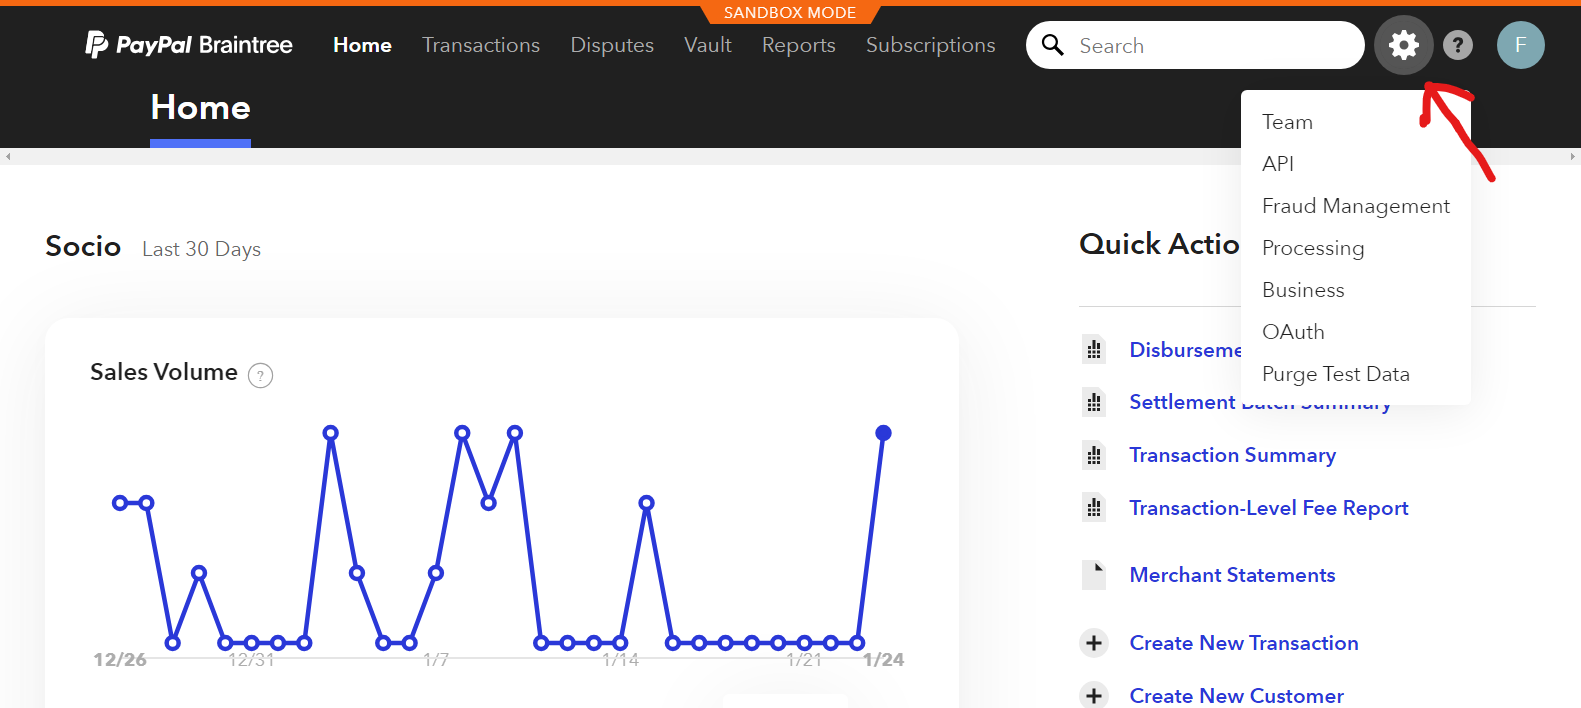
-
Then, inside your sandbox account, click on the gear icon and select API from the dropdown, just like in the image below.
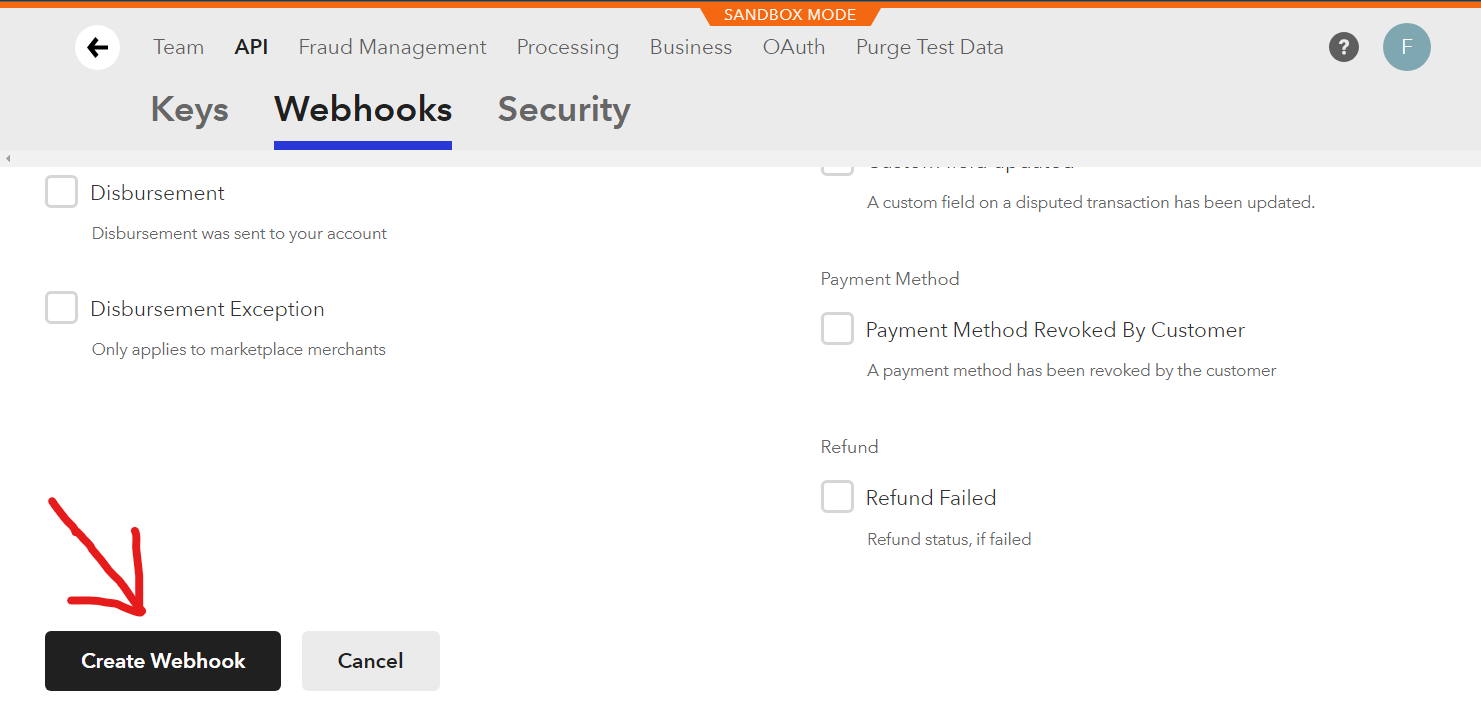
-
On the API page, click on webhooks and then click on create webhook.
-
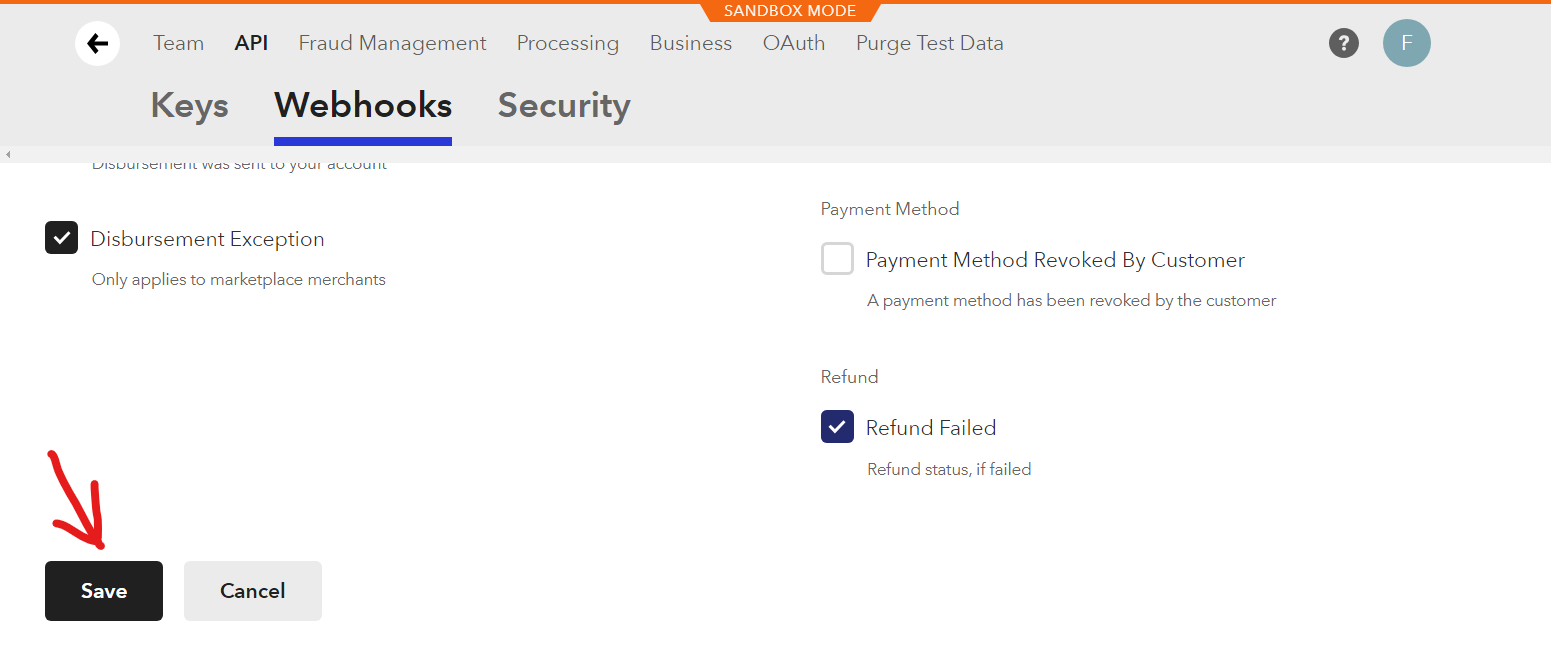
In the webhook page, input the endpoint that will receive the webhook notifications and select the event notifications you want to receive.
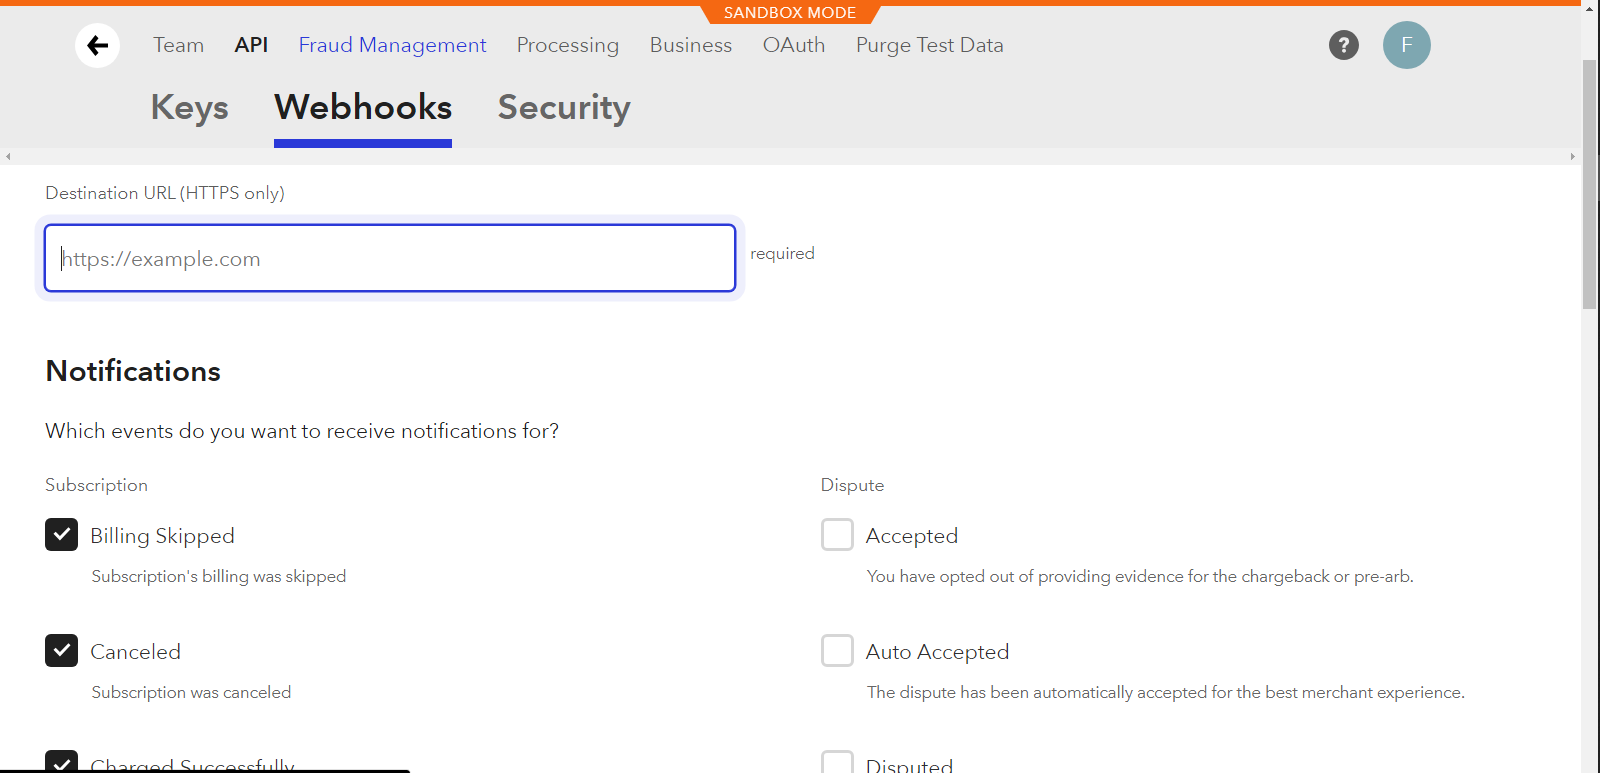
-
Lastly, you click save to save the endpoint.
Note that to use Braintree webhook, your endpoint has to use HTTPS, not HTTP.
To ensure your development server runs on HTTPS, you can go to Ngrok.com, create an account, and download Ngrok onto your PC. After downloading it, install it, open a new terminal, and write the command:
Ngrok http 3000You can replace 3000 with your port number and use the HTTPS URL they give you to run your localhost or test the webhook endpoint in Braintree. Now that Ngrok is live, we need to write the code to receive the webhook notifications from Braintree in our Next.js project.
To do so, you will have to use the API folder. Inside the app folder, create a file called webhookConn.js. Write the following code inside the file.
export default async function handler(req, res) {
  if (req.method === "POST") {
    try {
      // Parse the webhook notification
      const notification = req.body;
      // Add your custom logic to handle different webhook events
      let customResponseMessage;

      if (notification.kind === "TRANSACTION_CREATED") {
        console.log("Transaction successful from webhook");
        // Simulate a failed refund (for testing purposes)
        if (notification.transaction.status === "FAILED") {
          console.log("Refund failed. Handle accordingly.");
          customResponseMessage = "Refund failed!";
        } else {
          console.log("Refund successful. Handle accordingly.");
          customResponseMessage = "Refund processed successfully!";
        }
      }

      res
        .status(200)
        .json({ message: customResponseMessage, payload: notification });
    } catch (error) {
      console.error("Error processing Braintree webhook:", error);
      res.status(500).end("Internal Server Error");
    }
  } else if (req.method === "GET") {
    console.log("Received GET request");
    console.log("Environment Variables:", process.env);
    res.status(200).json({ message: "Hello from the GET endpoint!" });
  } else {
    res.setHeader("Allow", "POST, GET");
    res.status(405).end("Method Not Allowed");
  }
}
The code above listens and receives a webhook notification from Braintree. It handles a POST request from the Braintree webhook and GET when the browser uses the API.
The following body of code logs to the user based on some notification.
if (notification.kind === "TRANSACTION_CREATED") {
  console.log("Transaction successful from webhook");
  // Simulate a failed refund (for testing purposes)
  if (notification.transaction.status === "FAILED") {
    console.log("Refund failed. Handle accordingly.");
    customResponseMessage = "Refund failed!";
  } else {
    console.log("Refund successful. Handle accordingly.");
    customResponseMessage = "Refund processed successfully!";
  }
}
In the code notice, the notification.kind specifies the event notification type.
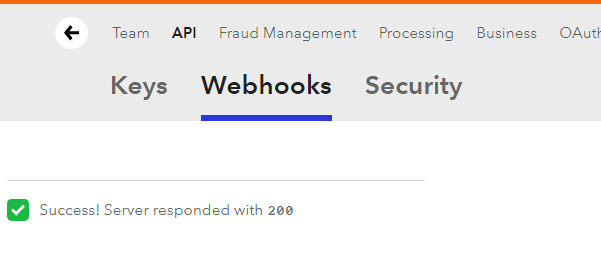
Next, to test your webhook endpoint on your server, go back to your sandbox on the webhook page beside the webhook API endpoint you specified. Click on the ‘Check URL’ button, and it will test your API endpoint URL from your server. If it works, it will return a status code of 200. Else, it will return 500 if it fails.
An image of mine is shown below.
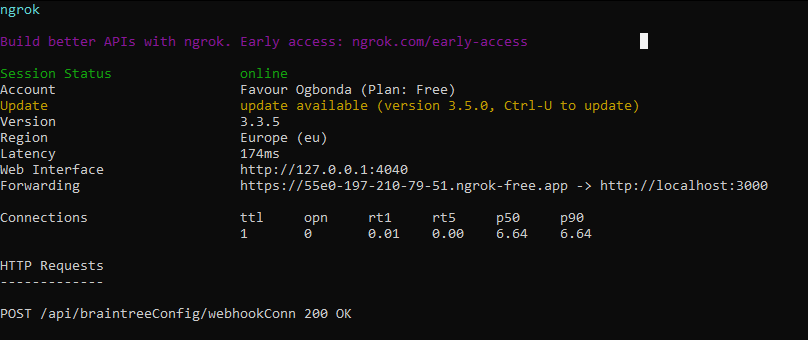
While on the terminal with my Ngrok running, I receive the POST notification and the status 200 with an OK response
Finally, webhooks are real-time notifications of events in your application or from your external API services. These services will provide a webhook to connect your server endpoint API to.
Conclusion
In conclusion, we looked at what webhooks are, their benefits, how to make payments, transfers, and refunds Using Braintree API, and how to use webhooks in Braintree. Here are all the links: Ngrok Braintree sandbox GitHub
Gain control over your UX
See how users are using your site as if you were sitting next to them, learn and iterate faster with OpenReplay — the open-source session replay tool for developers. Self-host it in minutes, and have complete control over your customer data.
Star on GitHub12k