Web Security through Device Authorization and Authentication
Use Redis and Next to add security and access control to your web app


Device authentication and authorization are crucial when it comes to web application security. Due to the increase in device connections, it is critical that only trusted devices can access and interact with the application’s resources. This article will address a real-world concern and provide practical insights for developers to enhance the security of their applications.

Spot abnormal user behaviors and iron out the bugs early with OpenReplay. Dive into session replays and reinforce your front-end against vulnerabilities that hackers search for.
Discover how at OpenReplay.com.
Device authentication and authorization play crucial roles in ensuring the security of web applications. They are essential components of a comprehensive security strategy to protect sensitive data, user accounts, and the overall integrity of the application.
Device authentication is the process of verifying the identity and legitimacy of a device that is attempting to access a system or application. When a device’s identity is verified, device authorization focuses on identifying what operations it can carry out within an application.
The following are some of the reasons for the importance of device authentication and authorization:
- It prevents Unauthorized Access to information and illegitimate users.
- It mitigates account takeover attacks.
- It enhances two-factor authentication.
- It adds an extra layer of security to online activities such as banking or financial transactions.
- It can help in preventing Cross-Site Request Forgery (CSRF) Attacks.
- It safeguards user privacy, thereby reducing the potential exposure of their personal information.
We will demonstrate this using NestJs and Redis. NestJs is a NodeJs framework for building server-side applications. We will be using it on the server side of this project. Redis is an open-source, in-memory data store used as a database, cache, streaming engine, and message broker. For this article, we will make use of the cache. With NestJs as our backend server, Redis for caching, and PostgreSQL for the database, let us perform device authentication and authorization.
Creating our Docker-compose file
Create the project folder device-authentication or whatever you want to call it. Inside it, create a file docker-compose.yaml. Using Docker, we don’t have to install PostgreSQL database or Redis on our local machine.
# device-authentication/docker-compose.yaml
version: "3.7"
services:
postgres:
image: postgres:13-alpine
restart: always
env_file:
- .env
environment:
- POSTGRES_USER=$POSTGRES_USER
- POSTGRES_PASSWORD=$POSTGRES_PASSWORD
ports:
- "$POSTGRES_PORT:$POSTGRES_PORT_DOCKER"
volumes:
- postgres_data:/var/lib/postgresql/data
networks:
- db_network
redis:
image: redis
container_name: our_redis
command: redis-server --save 60 1 --loglevel warning
env_file:
- .env
environment:
- ALLOW_EMPTY_PASSWORD=yes
- REDIS_REPLICATION_MODE=master
ports:
- "6379:6379"
hostname: redis
restart: always
depends_on:
- postgres
volumes:
postgres_data:
networks:
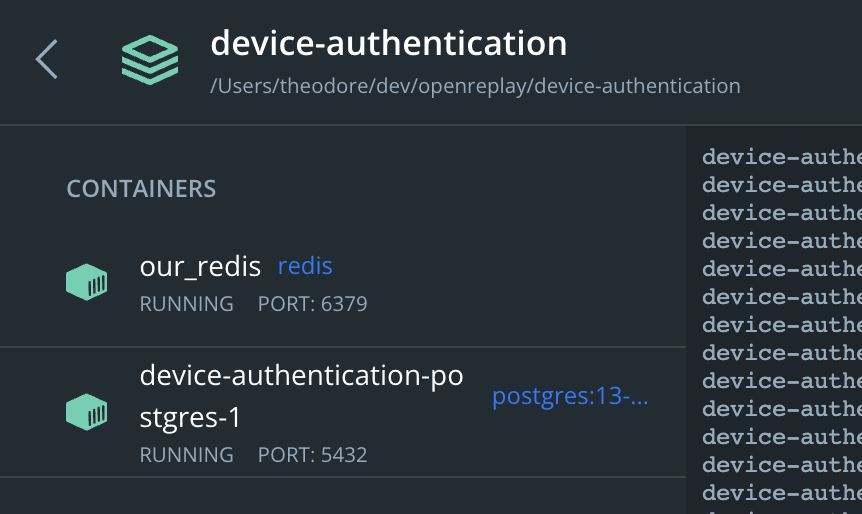
db_network:Overall, the docker-compose.yml file above defines two services: PostgreSQL and Redis. We named the Redis service our_redis. We also set up their configurations, dependencies, environment variables, ports, volumes, and networks.
Creating the .env file
Before we start our container, we need to create a .env to store our environment variables. Now, create the file and add the following:
POSTGRES_USER=postgres

POSTGRES_URL=postgresql://postgres:12345@localhost:5432/device-postgres?schema=public

POSTGRES_PASSWORD=12345

POSTGRES_PORT_DOCKER=5432

POSTGRES_PORT=5432
In the .env file above, we specified the user of our PostgreSQL database. We also set the URL of our database, the ports for our databases, and the PostgreSQL password.
Starting our Container
Run the command below to start our container.
docker compose upWe should see the following:
Installing NestJs
To communicate with our container, we need a backend server.
Install the Nestjs CLI globally by running the command below:
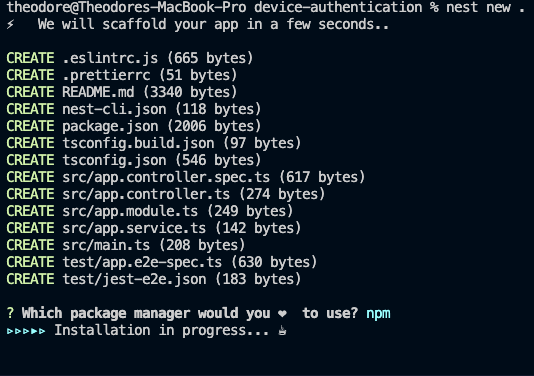
npm i -g @nestjs/cliCD into the device-authentication folder and create a NestJs application by running the following command:
nest new .Installing Other Dependencies
Install the following dependencies:
npm i typeorm @nestjs/typeorm dotenv @nestjs/cache-manager cache-manager cache-manager-redis-store@2 @types/cache-manager-redis-store @nestjs/jwt device-detector-jsIn the dependencies above, we have the following:
@nestjs/cache-manager: This helps to integrate caching functionality into the application.cache-manager: this allows easy wrapping of functions in cache.cache-manager-redis-store@2: This is the caching store implementation for Redis version 2.@nestjs/jwt: This is a JWT utilities module for Nest based on the jsonwebtoken package.device-detector-js: This will parse or detect any user agent and the browser, operating system, device, etc.dotenv: This module helps load environment variables from a.envfile intoprocess.env.typeorm @nestjs/typeorm: Since we use PostgreSQL, we need this as our Object Relational Model.
Starting our Sever
Run the command below to start our server.
npm run start:devWe should see the following in our console:
Creating the User Entity
For this simple project, we need a user entity. The user entity will have the columns id, name, email, and password. Inside the src folder, create a folder called entities, and create inside it a file user.ts. Then, add the following code inside this new file.
// src/entities/user.ts
import { Column, Entity, PrimaryGeneratedColumn } from "typeorm";

@Entity()
export class User {
 @PrimaryGeneratedColumn("uuid")
 id?: string;

 @Column({ type: "varchar", nullable: false })
 name: string;

 @Column({ type: "varchar", nullable: false, unique: true })
 email: string;

 @Column({ type: "varchar", nullable: false })
 password: string;
}

export default User;
The id column in the code above is the primary field.
Creating Redis Provider
At this point, we need to create a Redis provider to handle the caching on a user’s device. It will allow us to get, set, delete, and reset keys in the Redis cache.
Create a folder named providers inside the src folder. Create a folder called redis-cache inside this’ providers’ folder. And inside this new folder, create the files redis-cache.module.ts and redis-cache.service.ts. Now add the following to these new files:
Inside the redis-cache.service.ts file, add the following:
// /src/providers/redis-cache/redis-cache.service.ts
import { Inject, Injectable } from "@nestjs/common";
import { CACHE_MANAGER } from "@nestjs/cache-manager";
import { Cache } from "cache-manager";

@Injectable()
export class RedisCacheService {
 constructor(@Inject(CACHE_MANAGER) private readonly cache: Cache) {}

 async get(key: string): Promise<any> {
   return await this.cache.get(key);
 }

 async set<T>(key: string, value: T) {
   await this.cache.set(key, value);
 }

 async reset() {
   await this.cache.reset();
 }

 async del(key: string) {
   await this.cache.del(key);
 }
}
From the code above, we imported the Inject and Injectable to allow our RedisCacheService to be injectable with dependencies. We also imported the CACHE-MANAGER token for injecting the cache manager instance.
Inside the redis-cache.module.ts file, add the following:
import { Module } from "@nestjs/common";
import { RedisCacheService } from "./redis-cache.service";
import { CacheModule } from "@nestjs/cache-manager";
import * as redisStore from "cache-manager-redis-store";

@Module({
 imports: [
   CacheModule.register({
     isGlobal: true,
     store: redisStore,
     host: "localhost",
     port: "6379",
     ttl: 300, // 5 minutes
   }),
 ],
 providers: [RedisCacheService],
 exports: [RedisCacheService],
})
export class RedisCacheModule {}
In the code above, we register our cache module as redisStore. We specify the host and port as localhost and 6379. Recall that in our docker-compose.yaml file. We set the ttl (time to live) to 300 seconds, which is 5 minutes. So, data stored in our Redis store will expire and get deleted after 300 seconds. And finally, we provided and exported the RedisCacheModule to be available to other modules.
Implementing Auth Module
In the auth module, we will use JSON Web Tokens so that when a user signs up for our application, we can still verify any further requests by verifying the token we gave them.
Also, with this token, we can compare the device they use in making these requests.
Create a folder called modules inside the’ src’ folder. Inside the modules folder, create a folder auth.
Creating Auth Service
We will create our auth service to handle signup and signing functionality. Inside the auth folder, create a file auth.service.ts and add the following:
// src/modules/auth/auth.service.ts
import { HttpException, HttpStatus, Injectable } from "@nestjs/common";
import { JwtService } from "@nestjs/jwt";
import User from "src/entities/user";
import { InjectRepository } from "@nestjs/typeorm";
import { Repository } from "typeorm";

export type TUser = {
 id?: string;
 name?: string;
 email: string;
 password: string;
};

@Injectable()
export class AuthService {
 constructor(
   private jwtService: JwtService,
   @InjectRepository(User) private UserRepo: Repository<User>,
 ) {}

 async signUp(name, email, password) {
   const foundUser: TUser = await this.UserRepo.findOne({
     where: { email },
   });
   if (foundUser) {
     throw new HttpException("user already exists", HttpStatus.BAD_REQUEST);
   }
   const newUser: TUser = this.UserRepo.create({ name, email, password });
   await this.UserRepo.save(newUser);

   const payload = {
     id: newUser.id,
     name: newUser.name,
     email: newUser.email,
   };

   return {
     access_token: await this.jwtService.signAsync(payload),
     statusCode: 200,
   };
 }

 async signIn(email, password) {
   const foundUser: TUser = await this.UserRepo.findOne({
     where: { email },
   });

   if (!foundUser) {
     throw new HttpException("User not registered", HttpStatus.BAD_REQUEST);
   }

   if (foundUser?.password !== password) {
     throw new HttpException(
       "Email or password is incorrect!",
       HttpStatus.BAD_REQUEST,
     );
   }
   const payload = {
     id: foundUser.id,
     name: foundUser.name,
     email: foundUser.email,
   };

   return {
     access_token: await this.jwtService.signAsync(payload),
     statusCode: 200,
   };
 }
}
When a client signs up or signs in, we return an access token, the jwt token, to the client.
NOTE: We can use cookies or sessions by passing the
jwttoken to the request headers. But for simplicity, we will usejwttokens between requests and response bodies.
These tokens contain the payload of the user that makes these requests.
Creating Auth Controller
We haven’t yet created a controller that will call our service. Inside the auth folder, create the file auth.controller.ts.
// src/modules/auth/auth.controller.ts
import { Controller, Post, Req, Res, Body } from "@nestjs/common";
import { AuthService } from "./auth.service";
import { Request, Response } from "express";
@Controller("auth")
export class AuthController {
constructor(private readonly AuthServiceX: AuthService) {}
@Post("signup")
async signup(
@Req() req: Request,
@Res() res: Response,
@Body() body: { name: string; email: string; password: string },
) {
let { name, email, password } = body;
let newUser = await this.AuthServiceX.signUp(name, email, password);
res.status(newUser.statusCode).send(newUser);
}
@Post("signin")
async signin(
@Req() req: Request,
@Res() res: Response,
@Body() body: { email; password },
) {
let { email, password } = body;
let user = await this.AuthServiceX.signIn(email, password);
res.status(user.statusCode).send(user);
}
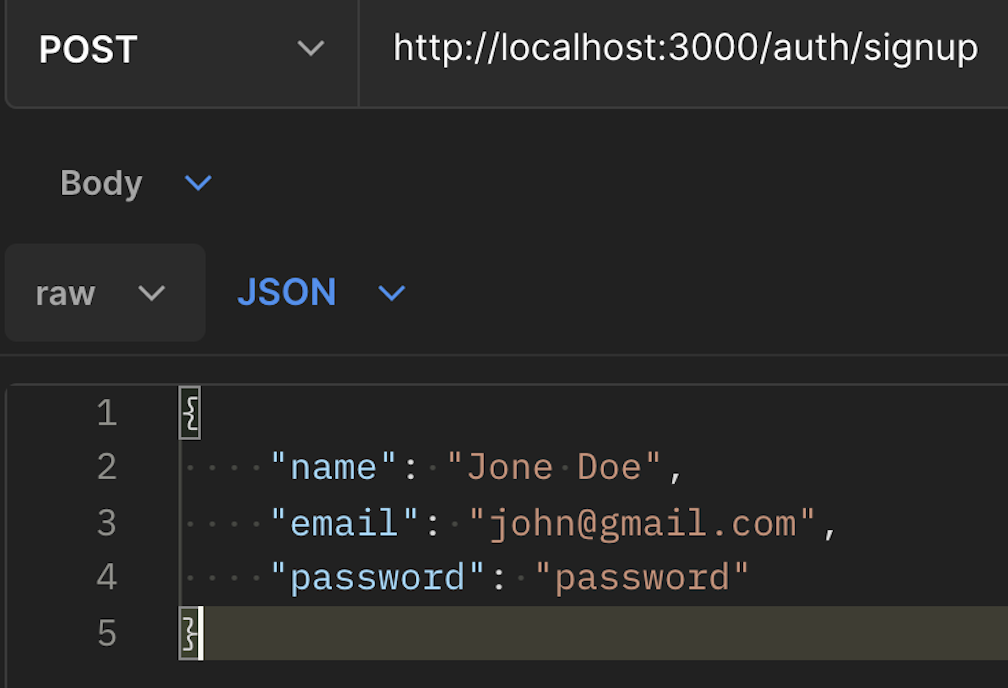
}The controller above handles requests made to the /auth route. The signup route /auth/signup gets the user details from the request body and calls the signUp() function of the AuthServiceX, an instance of the auth service we created previously.
Putting Auth Module Together
We want to import the auth controller and service and the jwt service. So, create the file auth.module.ts inside the auth module and add the following to the file:
// src/modules/auth/auth.module.ts
import { Module } from "@nestjs/common";
import { AuthService } from "./auth.service";
import { AuthController } from "./auth.controller";
import { JwtModule } from "@nestjs/jwt";
import { RedisCacheModule } from "src/providers/redis-cache/redis-cache.module";
import { TypeOrmModule } from "@nestjs/typeorm";
import User from "../../entities/user";

@Module({
 imports: [
   JwtModule.register({
     secret: "skdf234w3mer",
     signOptions: { expiresIn: "5m" },
   }),
   RedisCacheModule,
   TypeOrmModule.forFeature([User]),
 ],
 providers: [AuthService],
 controllers: [AuthController],
})
export class AuthModule {}
In the file above, we imported the JwtModule and the TypeOrmModule because we needed them in our auth module service and controller. Though the RedisCacheModule is yet to be used, we import it. Then we also provided the AuthService and AuthController.
NOTE: We configured the
JWTModuleto make tokens expire after 5 minutes, the expiration time for our Redis cache for every key-value data in the store.
Updating app.module.ts
Furthermore, we need to update the application module of our app to incorporate our auth module and other modules needed in our application. Update the app.module.ts file inside our src folder by adding the following:
// src/app.module.ts
import { Module } from "@nestjs/common";
import { AppController } from "./app.controller";
import { AppService } from "./app.service";
import { RedisCacheModule } from "./providers/redis-cache/redis-cache.module";
import { TypeOrmModule, TypeOrmModuleOptions } from "@nestjs/typeorm";
import { config } from "dotenv";
import User from "./entities/user";
import { AuthModule } from "./modules/auth/auth.module";
config();

export const dbConfig: TypeOrmModuleOptions = {
 url: process.env.POSTGRES_URL,
 type: "postgres",
 entities: [User],
 synchronize: true,
} as TypeOrmModuleOptions;

@Module({
 imports: [TypeOrmModule.forRoot(dbConfig), RedisCacheModule, AuthModule],
 controllers: [AppController],
 providers: [AppService],
})
export class AppModule {}
In the code above, we configured our PostgreSQL database. Also, we imported the TypeOrmModule, RedisCacheModule, and the AuthModule.
Testing Our Authentication Module
So far, we haven’t tested our app. Now, let’s sign up and sign in.
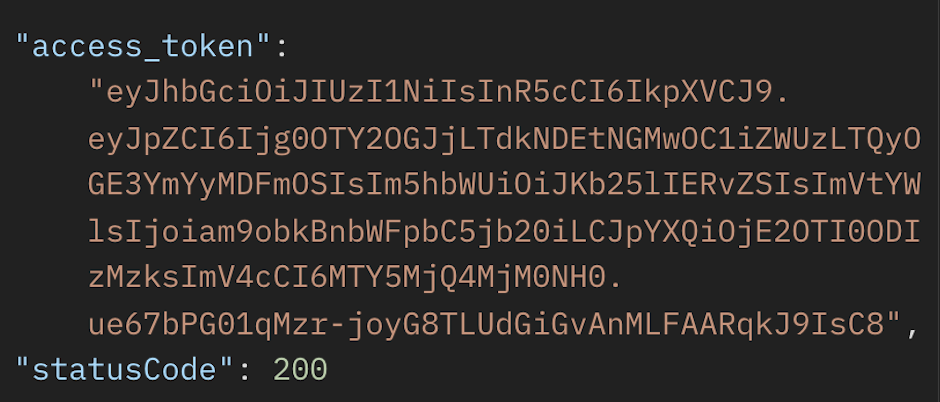
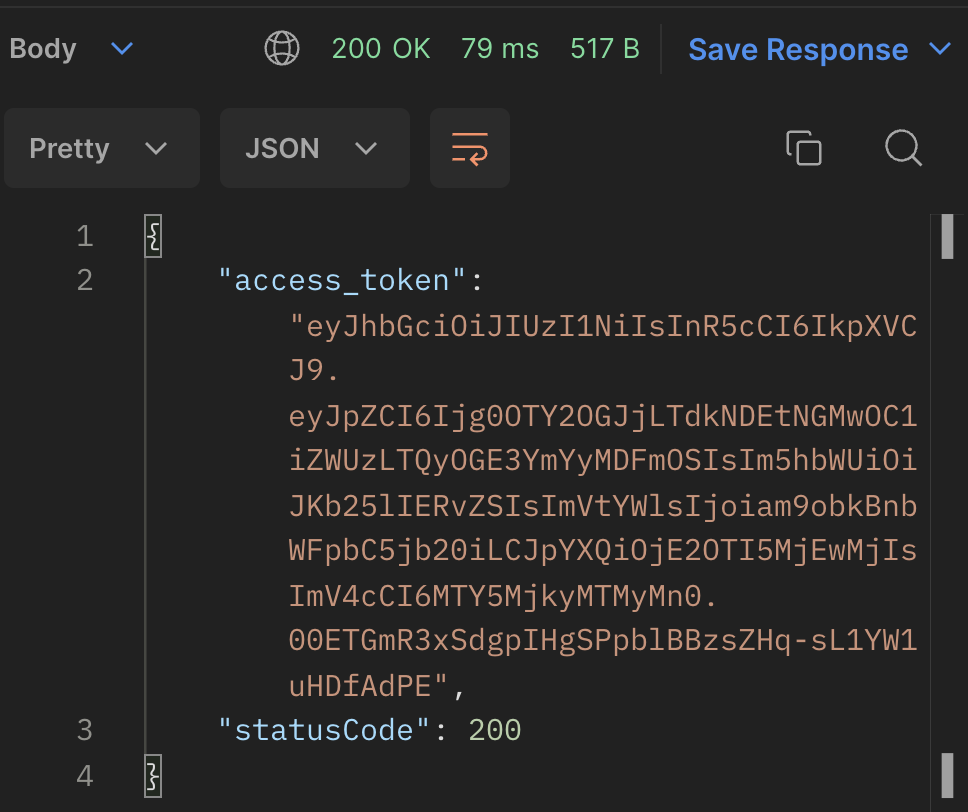
When a user signs up or signs in, they receive an access token, access-token through which they can make requests.
Here is where device authentication and authorization come in. We need to ensure that it is the same user and device that wants to make requests with this same access token, not an unauthorized user or device.
Adding Redis and Device Detector
A user’s token and device must be cached in our Redis store. This is great because it improves the performance of the application. As we will see, we won’t be able to call a route until we have checked the store and validated the user’s device.
Creating Auth Guard
A guard will help us protect endpoints by requiring a valid JWT to be present on the request. Also, we will ensure that it is a valid user’s device making the request. Inside the auth folder, create a file auth.guard.ts and add the following code:
// src/modules/auth/auth.guard.ts
import {
 CanActivate,
 ExecutionContext,
 HttpException,
 HttpStatus,
 Injectable,
 UnauthorizedException,
} from "@nestjs/common";
import { JwtService } from "@nestjs/jwt";
import { Request } from "express";
import * as DeviceDetector from "device-detector-js";
import { RedisCacheService } from "src/providers/redis-cache/redis-cache.service";

@Injectable()
export class AuthGuard implements CanActivate {
 private deviceDetector = new DeviceDetector();

 constructor(
   private jwtService: JwtService,
   private redisCacheService: RedisCacheService,
 ) {}

 async canActivate(context: ExecutionContext): Promise<boolean> {
   const request = context.switchToHttp().getRequest();
   const token = this.extractTokenFromBody(request);
   const clientDevice = this.getUserDevice(request);

   if (!token) {
     throw new UnauthorizedException();
   }
   try {
     const payload = await this.jwtService.verifyAsync(token);

     // add payload information to request object
     request["payload"] = payload;

     // check if user is already logged in
     let deviceToken = await this.redisCacheService.get(payload.email);
     deviceToken = await JSON.parse(deviceToken);

     if (deviceToken) {
       if (
         !(
           deviceToken.token === payload.email &&
           deviceToken.device.client === clientDevice.client.name
         )
       ) {
         // user is not authorized
         throw new HttpException(
           "You are already logged in on another device",
           HttpStatus.UNAUTHORIZED,
         );
       }
     } else {
       // cache user device
       let emailKey = payload.email;
       let newDeviceToken = {
         token: emailKey,
         device: {
           client: clientDevice.client.name,
           type: clientDevice.client.type,
           version: clientDevice.client.version,
         },
       };

       await this.redisCacheService.set(
         emailKey,
         JSON.stringify(newDeviceToken),
       );
     }
   } catch (error) {
     throw new UnauthorizedException(error.message);
   }

   return true;
 }

 private extractTokenFromBody(request: Request): string | undefined {
   const token = request.body["access-token"];
   return token;
 }

 private getUserDevice(request: Request) {
   const device = this.deviceDetector.parse(request.headers["user-agent"]);
   return device;
 }
}
In the code above, in line 17, we created a new device detector instance, deviceDetector, to help us get a client’s device information. We created the execution context canActivate, which will return true or false if the current request can proceed.
NOTE: In
line 36, we added the user payload to the request object. This is so that we can access it in our route handlers. We will see this in the logging out part of this article.
lines 79-82, the extractTokenFromBody() function helps us extract the token from the request’s body. As the name denotes, the getUserDevice() function in lines 84-87 gets the user’s device details. A user’s device information would look like the following:
// A typical device
{
 "client": {
   "type": "browser",
   "name": "Chrome",
   "version": "69.0",
   "engine": "Blink",
   "engineVersion": ""
 },
 "os": {
   "name": "Mac",
   "version": "10.13",
   "platform": ""
 },
 "device": {
   "type": "desktop",
   "brand": "Apple",
   "model": ""
 },
 "bot": null
}
In lines 24-30, we got the token from the user’s request as well as the device of the user. The JWT token has been verified. If there is no token, we throw an unauthorized exception.
In the code above, the following lines 36 and 37 help us get the user’s last active device using their email address from the payload gotten from the user by using the get() method of our redisCacheService instance.
lines 40-51 help verify if the cached user’s device is the same as the current device the user is currently sending the request from. And if not, then lines 47-50 will throw an error that says, "You are already logged in on another device.".
Updating Auth Service
Now, we want to restrict a client trying to sign in using another device and restrict access to resources from our server. Thus, we need to cache a user’s payload and their device when they sign in. And we also need to create a new method called sayHello() that the auth guard will work on. Update the auth.service.ts by adding the function below:
// src/module/auth/auth.service.ts
import {
 HttpException,
 HttpStatus,
 Injectable,
 UnauthorizedException,
} from "@nestjs/common";
import { JwtService } from "@nestjs/jwt";
import { RedisCacheService } from "src/providers/redis-cache/redis-cache.service";
import User from "src/entities/user";
import { InjectRepository } from "@nestjs/typeorm";
import { Repository } from "typeorm";
import { Tuser } from "./auth.dto";
import * as DeviceDetector from "device-detector-js";

export type TUser = {
 id?: string;
 name?: string;
 email: string;
 password: string;
};

@Injectable()
export class AuthService {
 private deviceDetector = new DeviceDetector();

 constructor(
   private jwtService: JwtService,
   @InjectRepository(User) private UserRepo: Repository<User>,
   private redisCacheService: RedisCacheService,
 ) {}

 async signUp(name, email, password) {
   const foundUser: TUser = await this.UserRepo.findOne({
     where: { email },
   });
   if (foundUser) {
     throw new HttpException("user already exists", HttpStatus.BAD_REQUEST);
   }
   const newUser: TUser = this.UserRepo.create({ name, email, password });
   await this.UserRepo.save(newUser);

   const payload = {
     id: newUser.id,
     name: newUser.name,
     email: newUser.email,
   };

   return {
     access_token: await this.jwtService.signAsync(payload),
     statusCode: 200,
   };
 }

 async signIn(email, password, req) {
   const foundUser: TUser = await this.UserRepo.findOne({
     where: { email },
   });

   if (!foundUser) {
     throw new HttpException("User not registered", HttpStatus.BAD_REQUEST);
   }

   if (foundUser?.password !== password) {
     throw new HttpException(
       "Email or password is incorrect!",
       HttpStatus.BAD_REQUEST,
     );
   }
   const payload = {
     id: foundUser.id,
     name: foundUser.name,
     email: foundUser.email,
   };

   try {
     // check if user is already signed in on another device
     const clientDevice = this.deviceDetector.parse(req.headers["user-agent"]);
     let deviceToken = await this.redisCacheService.get(payload.email);
     deviceToken = await JSON.parse(deviceToken);

     // if user is logged in on another device
     if (
       deviceToken &&
       !(
         deviceToken.token === payload.email &&
         deviceToken?.device?.client === clientDevice.client.name
       )
     ) {
       throw new HttpException(
         "You are already logged in on another device",
         HttpStatus.FORBIDDEN,
       );
     } else {
       // cache user's device
       let emailKey = payload.email;
       let newDeviceToken = {
         token: emailKey,
         device: {
           client: clientDevice.client.name,
           type: clientDevice.client.type,
           version: clientDevice.client.version,
         },
       };
       await this.redisCacheService.set(
         emailKey,
         JSON.stringify(newDeviceToken),
       );

       return {
         message: "Signin successful!",
         access_token: await this.jwtService.signAsync(payload),
         statusCode: 200,
       };
     }
   } catch (error) {
     throw new UnauthorizedException(error.message);
   }
 }

 async sayHello() {
   return {
     message: "Hello!",
     statusCode: 200,
   };
 }
}
We imported the RedisCacheService and DeviceDetector in the code above.
From line 77-94, we check if the user is already logged in by passing the request header to the deviceDetector instance. Then, we compare the device to any other that must have logged in. If the devices match along with the email addresses, we throw an error. In some cases, an email may not be used for better security.
In lines 95-114, if the user is not logged in elsewhere, we cache the device.
In lines 121-125, we create the sayHello() service that will return "Hello!" as a response if the device is authorized. This is just to demonstrate when an authenticated or unauthenticated device tries to make a GET request.
Updating Auth Controller
Update the auth controller by importing the auth guard and creating a route /hello for the signUp() service function.
// src/auth/auth.controller.ts
import {
 Controller,
 Post,
 Req,
 Res,
 Body,
 UseGuards,
 Get,
} from "@nestjs/common";
import { AuthService } from "./auth.service";
import { Request, Response } from "express";
import { AuthGuard } from "./auth.guard";

@Controller("auth")
export class AuthController {
 constructor(private readonly AuthServiceX: AuthService) {}

 @Post("signup")
 async signup(
   @Req() req: Request,
   @Res() res: Response,
   @Body() body: { name: string; email: string; password: string },
 ) {
   let { name, email, password } = body;
   let newUser = await this.AuthServiceX.signUp(name, email, password);
   res.status(newUser.statusCode).send(newUser);
 }

 @Post("signin")
 async signin(
   @Req() req: Request,
   @Res() res: Response,
   @Body() body: { email; password },
 ) {
   let { email, password } = body;
   let user = await this.AuthServiceX.signIn(email, password);
   res.status(user.statusCode).send(user);
 }
 // Guard this route
 @UseGuards(AuthGuard)
 @Get("hello")
 async sayHello(@Req() req: Request, @Res() res: Response) {
   let { statusCode, message } = await this.AuthServiceX.sayHello();
   res.status(statusCode).send(message);
 }
}
In the code above, we imported the auth guard to validate a user’s device when they access the /auth/hello route. Recall the signUp() method of the auth service.
Testing with different client devices
To test our application, we need to use Postman, HTTPie, and CURL as client devices. So let us sign into our app with Postman, then use the access token to make a request to the /auth/hello route.
So, we sign in using Postman.
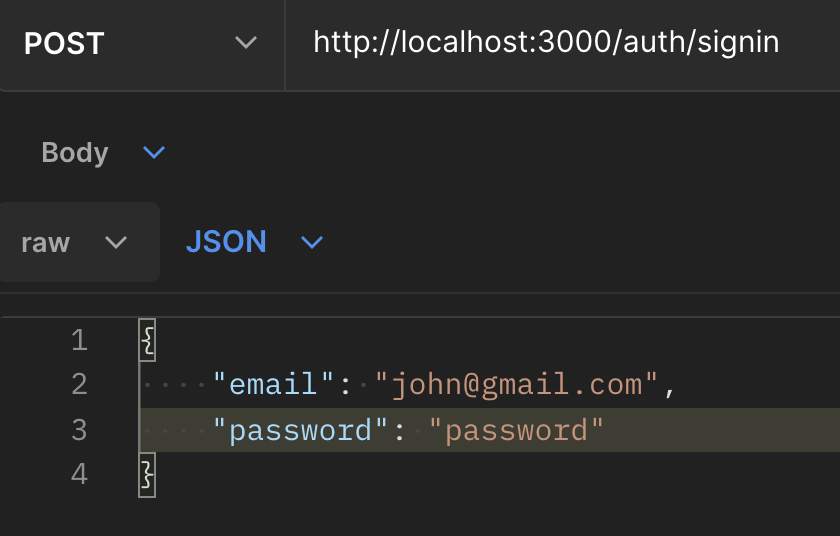
Now, let us access the /auth/hello route with the access token using Postman, CURL, and HTTpie.
Testing With Postman
Knowing that this is the authorized device, let us make a request.
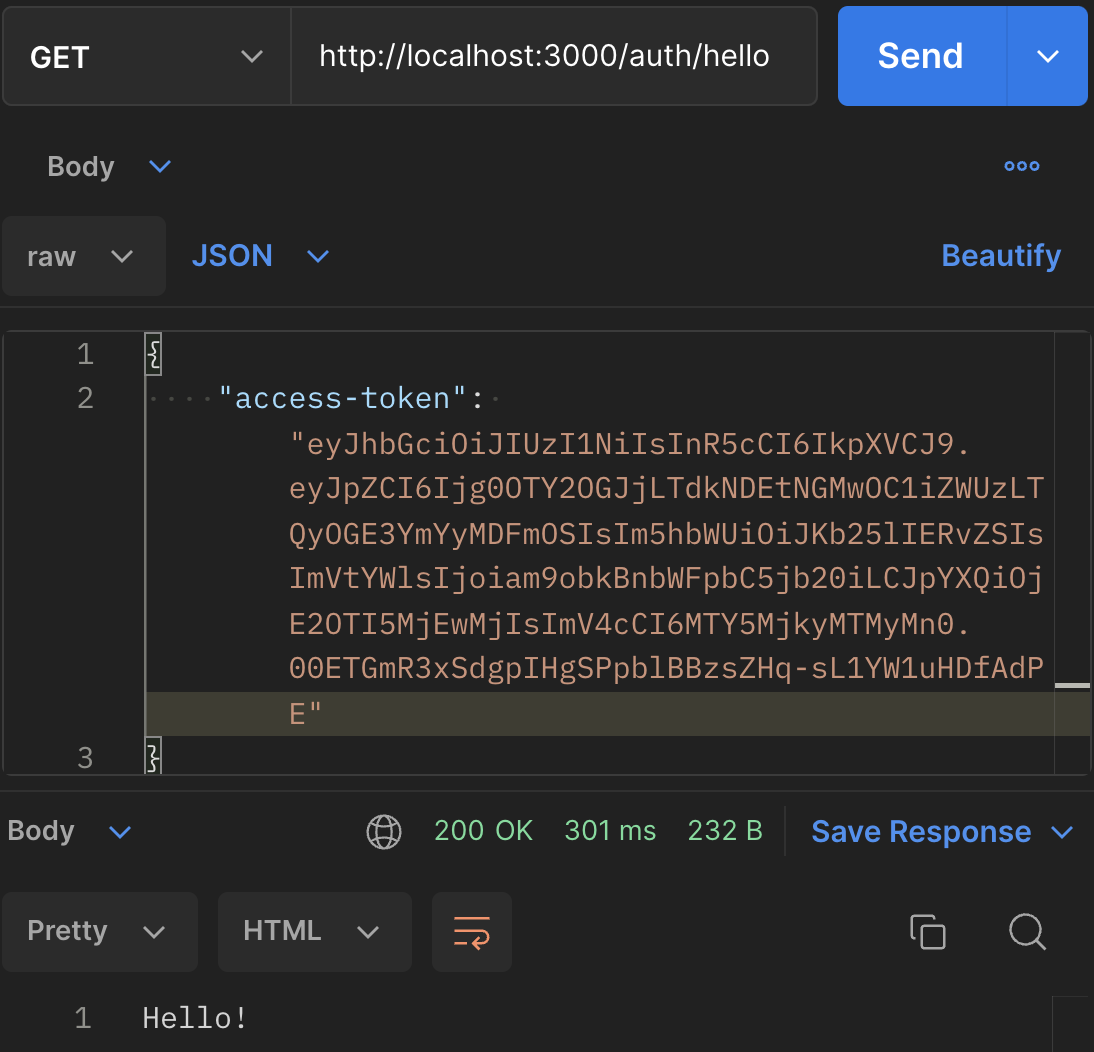
As we can see, the request was successful with a 200 status code and a response of "Hello!". The reason is that we used this device to sign in.
Testing with HTTpie
Now that we have access to the JWT token, which is the returned access-token from Postman when we signed in, Let us make a request using the token on a different device.
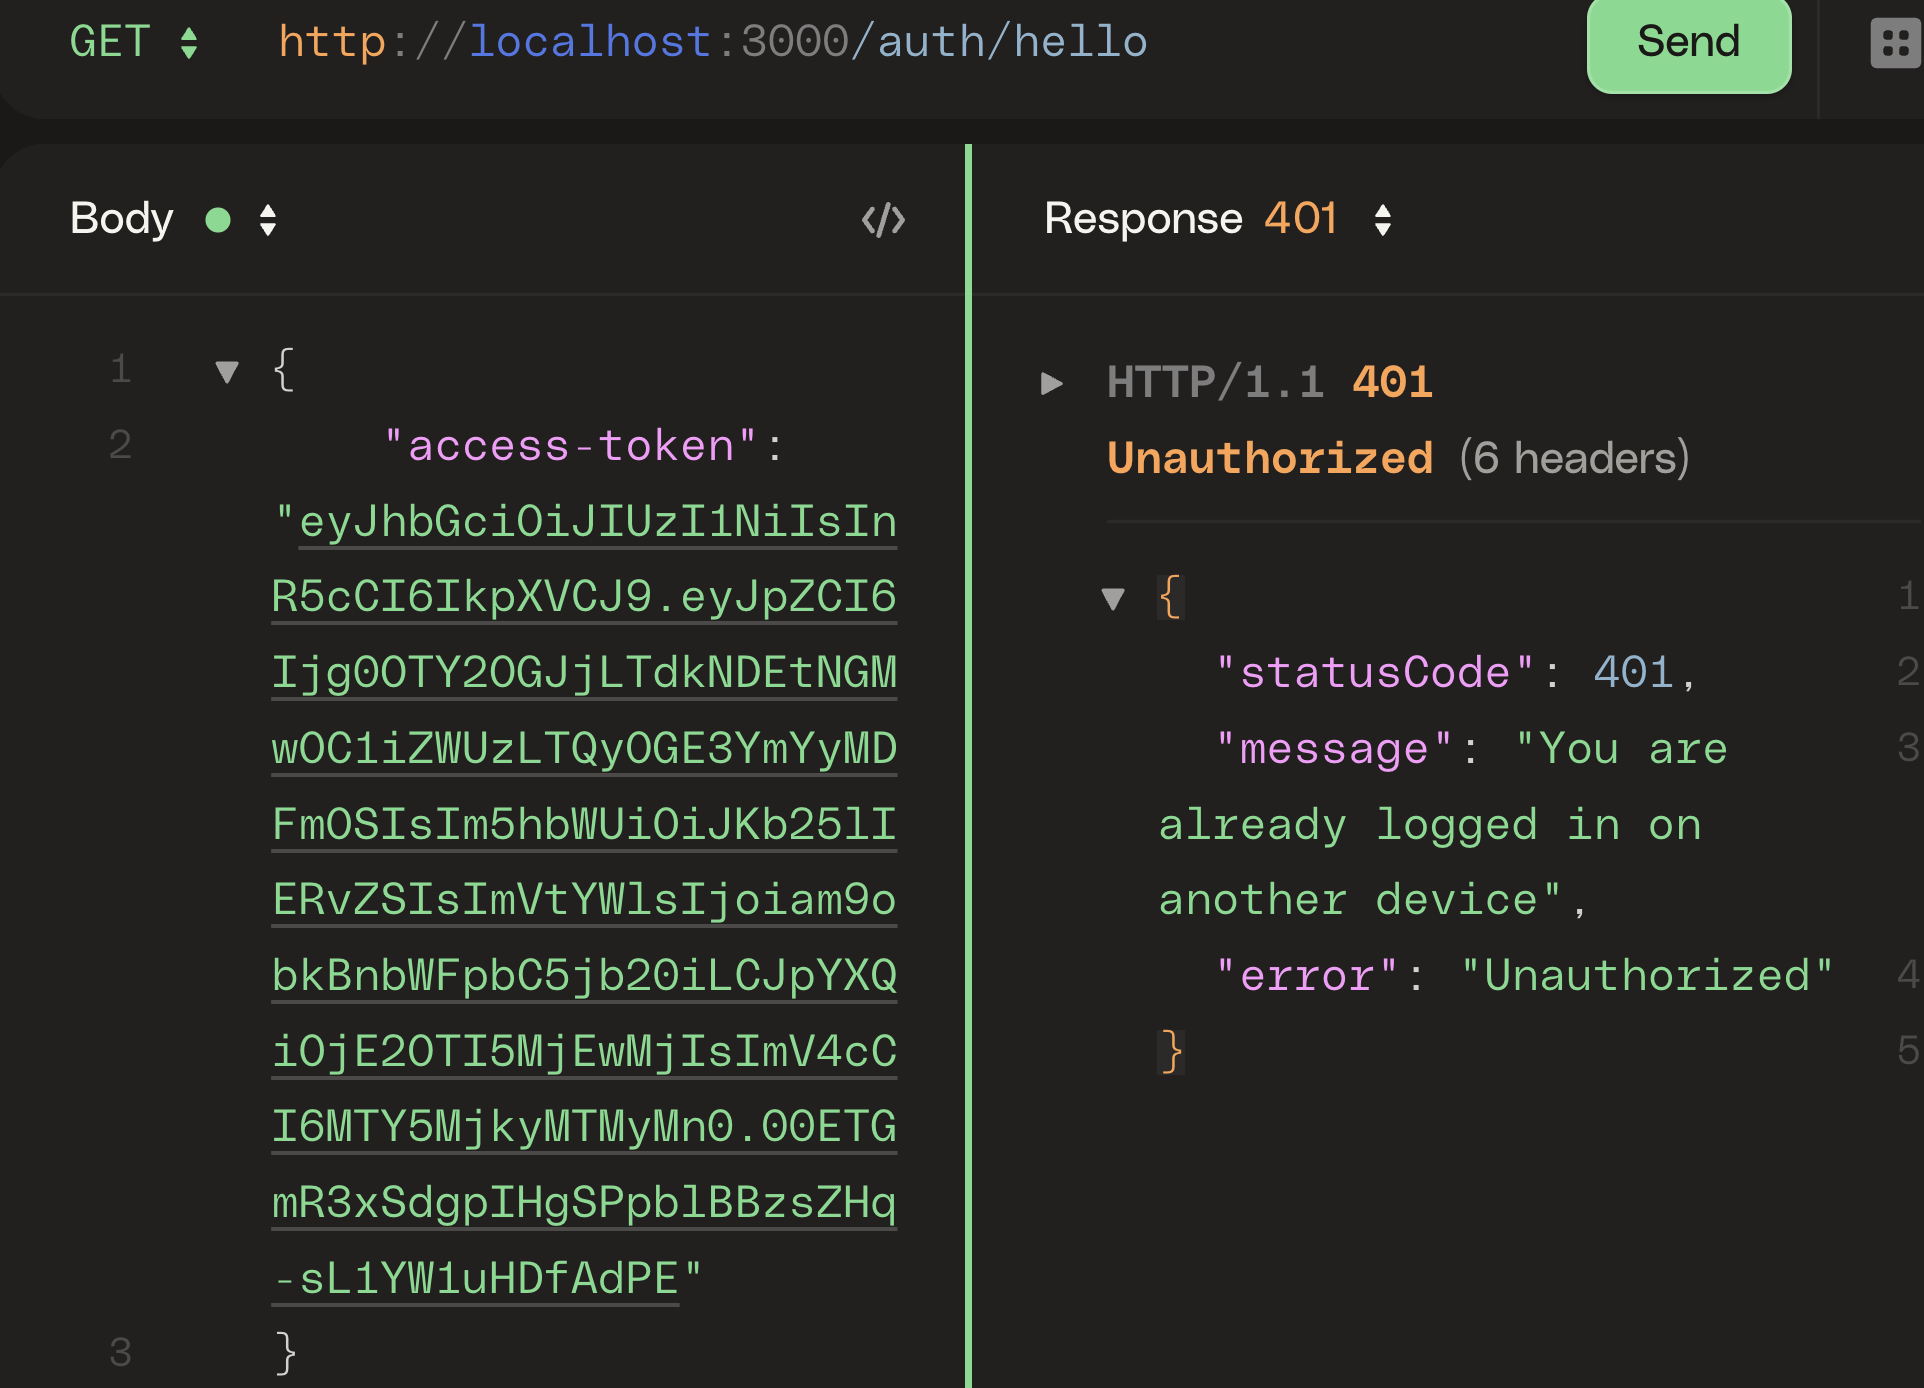
From the image above, the request was unsuccessful because it came from an unauthorized device.
Testing with CURL
Now, let us improvise another device using CURL.
curl --location --request GET 'http://localhost:3000/auth/hello' \ --header
'Content-Type: application/json' \ --data-raw '{ "access-token":
"eyJhbGciOiJIUzI1NiIsInR5cCI6IkpXVCJ9.eyJpZCI6Ijg0OTY2OGJjLTdkNDEtNGMwOC1iZWUzLTQyOGE3YmYyMDFmOSIsIm5hbWUiOiJKb25lIERvZSIsImVtYWlsIjoiam9obkBnbWFpbC5jb20iLCJpYXQiOjE2OTI5MjEwMjIsImV4cCI6MTY5MjkyMTMyMn0.00ETGmR3xSdgpIHgSPpblBBzsZHq-sL1YW1uHDfAdPE"
}'
This also failed to fetch the resource, as we can see below:

Logging Out
When a user signs out, we want to be able to delete their keys or data from the Redis cache. This will be implemented on the auth controller and the auth service. In the auth controller, we will add the guard we created and pass the request object to the service function we will create. In the service, we will create a function that will delete a user’s email key from the Redis cache.
Add the following code to the auth controller:
// src/auth/auth.controller.ts
...
@UseGuards(AuthGuard)
@Get("signout")
async signout(@Req() req: Request, @Res() res: Response) {
 let { statusCode, message } = await this.AuthServiceX.signout(req);
 res.status(statusCode).send(message);
}
...
In the code above, we passed the request object to the signout() function of the authentication service, which we will create shortly. This is because we need the email of the user to be able to delete their key and information from the Redis cache. Remember that our request object has a property payload that we gave this object when we created the authentication guard.
Add the following code to the auth service:
// src/auth/auth.controller.ts
...
async signout(req) {
 const { email } = req.payload;
 await this.redisCacheService.del(email);
 return {
   message: "Signout successful",
   statusCode: 200,
 };
}
...
In the code above, we invoked the del() method of the redisCacheService instance. This will delete the user’s email key from the cache containing the user’s device details.
NOTE: Since the key has been deleted from the Redis cache, we also have to delete the JWT token from the client upon successful signout.
Full Code
You can get all the codes here on GitHub.
Conclusion
As we have seen, device authentication and authorization play an important role in the security of web applications. We used the Redis Cache storage and a device detector package to store key-value information of logged-in devices of users along with their JSON web tokens; thus making sure that when they try to log in, or access resources; their devices are authenticated.
Resources
Detect, Fix, and Fortify
Spot abnormal user behaviors and iron out the bugs early with OpenReplay. Dive into session replays and reinforce your front-end against vulnerabilities that hackers search for.
Explore DevTools