Web3 Authentication with Next.js, React, and Moralis
Blockchain based authentication for your web app

Authentication is essential in providing services to valid users, and it is often accomplished using login and password. User credentials such as passwords, smart cards, token devices, and biometrics can be used to prove one’s identity. In this article, we will be building a Web3 login page using Next, React, and Moralis. You’ll need to have both Node.js and Next.js (version 12) installed on your machine.
What is Moralis, and why should you use it?
If you are new to Web3 or blockchain and read this article, you probably wonder what Moralis is. Well, Moralis is a piece of software that allows you to build cross-chain dApps (decentralized applications) very quickly.
Moralis offers a single workflow for developing high-performance dApps. Your preferred web3 tools and services are fully compatible with Moralis. There are several good facts about it:
-
Moralis is the quickest way to create and deploy decentralized applications (dApps) on Ethereum, BSC, Polygon, Solana, Elrond, etc.
-
By default, all Moralis dApps are cross-chain. Moralis ensures that your dApp will be future-proof. Your dApp will work on any chain, even if additional blockchains are created.
-
Moralis makes it easier to establish, maintain, and grow your blockchain applications, whether you’re a beginner or an experienced developer.
Setting up the Next project
According to the official Next Docs, Next.js is a flexible React framework that gives you building blocks to create fast web applications.
The first thing you need to do is to go to your terminal and create a Next app using the command below:
npx create-next-app@latestOnce you run this command, you will be asked, “what is your project name?”. You can name it whatever you want, but let’s just name it “Sign-In” for this article. The @latest at the end of the command allows you to get the latest version of Next installed: currently, version 12.
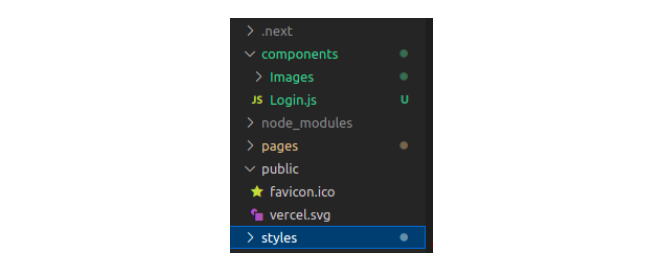
This is what your Next directory should look like:
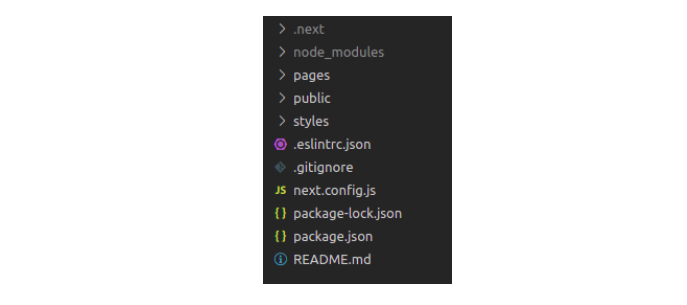
How Next.js works is that public is for public icons, and pages is where all the pages are held.
Building the Front-End
In this article, we will build a beautiful Login page with Moralis, that connects to the Metamask wallet whenever you click the sign-up button. First, edit your index.js file to look like this:
export default function Home() {
  return
    <div></div>
}
Then, go to your styles > globals.css file, and edit it to look like this:
html,
body {
  padding: 0;
  margin: 0;
  font-family: -apple-system, BlinkMacSystemFont, Segoe UI, Figtree, Oxygen,
    Ubuntu, Cantarell, Fira Sans, Droid Sans, Helvetica Neue, sans-serif;
}
a {
  color: inherit;
  text-decoration: none;
}
* {
  box-sizing: border-box;
  margin: 0px;
}
The only thing we did here was adding a margin of 0px at the bottom of the globals.css.
Next, create another folder called components by clicking on the folder symbol at the top of your directory. Anything that is not a page should be in components because we do not want to mix things up. Then, create a new component inside that folder, and name it Login.js.
We also created an images folder to house our Moralis icon, which you can get from my Github attached at the end of this article. This is what your directory should now look like:
The next step is to edit your index.js file to now look like this:
import Login from "../components/Login";

export default function Home() {
  return (
    <div>
      <Login />
    </div>
  );
}
To build out the visuals for our Login page, we have to go over the styles and create a new file called Login.module.css. This is where we will be writing most of our CSS, and it should look like this.

Now, go to the Login.js file and edit the code to look like this:
import styles from "../styles/Login.module.css";
import Image from "next/image";
import icon from "./Images/Moralis-Favicon.svg";

function Login() {

    return (
      <div className={styles.login_container}>
        <div className={styles.login_card}>
          <Image src={icon} width={100} height={100}/>
          <div className={styles.sign_in_container}>
          <button>Login with Moralis</button>
          </div>
        </div>
      </div>
    );
}

export default Login;
Here, we import styles from Login.module.css; then, we create the div and className, which we use to style our Login page in the Login.module.css file.
Next, go into your Login.module.css and input the following css code:
.login_container {
    background-color: rgb(14 165 233);
    height: 100vh;
    display: grid;
    align-items: center;
    justify-content: center;
}
.login_card{
    background-color: white;
    width: 200px;
    height: 250px;
    border-radius: 40px;
    display: flex;
    flex-direction: column;
}
.sign_in_container{
    flex: 1;
    display: flex;
    flex-direction: column;
    align-items: center;
    justify-content: center;
}
.sign_in_container > button {
    padding: 10px;
    border: none;
    border-radius: 40px;
    background-color: rgb(14 165 233);
    color: white;
}
After doing this, run the code using the npm run dev command, and you should be able to see this:

The next step is combining this with Moralis Login.
Open Source Session Replay
OpenReplay is an open-source, session replay suite that lets you see what users do on your web app, helping you troubleshoot issues faster. OpenReplay is self-hosted for full control over your data.

Start enjoying your debugging experience - start using OpenReplay for free.
Setting up Moralis
The first thing you need to do here is going to your editor’s terminal and install Moralis SDK for React. To do this, you need to run the following commands:
npm install moralis --save
npm install react-moralis --save
Now rerun the program using npm run dev; everything should still work.
The next thing is to create a Moralis server. If you do not already know how to do this, follow the steps below.
First, click here to access Moralis’ official website. It should look like this:
The next step is to create an account and log in to your admin dashboard. Your dashboard should look like this:
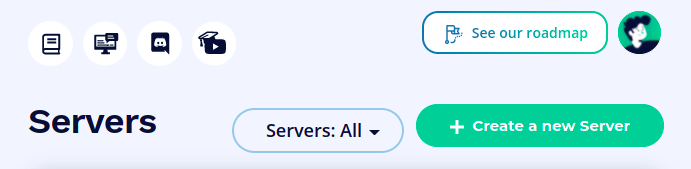
You should then click on “create a new server” and “Local Devchain Server” because this isn’t a Mainnet or Testnet. You should now see this:
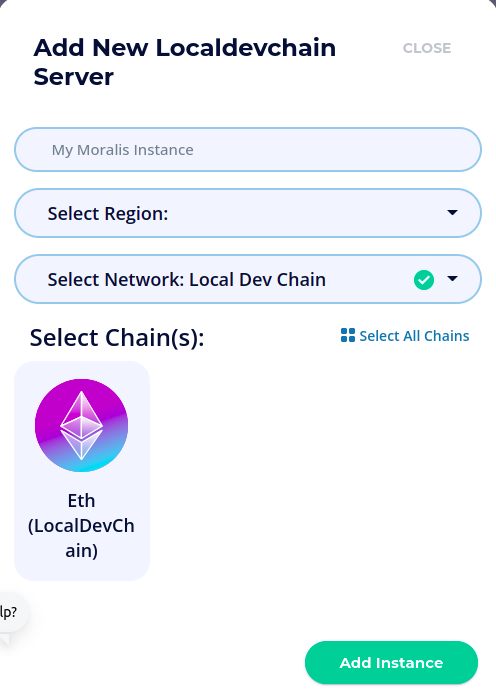
Now put in whatever name you want to give your server. Select your region (if you did not see your region, you might just put in any region closest to you), then click Eth (LocalDevChain), and finally, click “Add Instance”. You should now see this on your dashboard:

Click on view details, and you should now see this pop up:
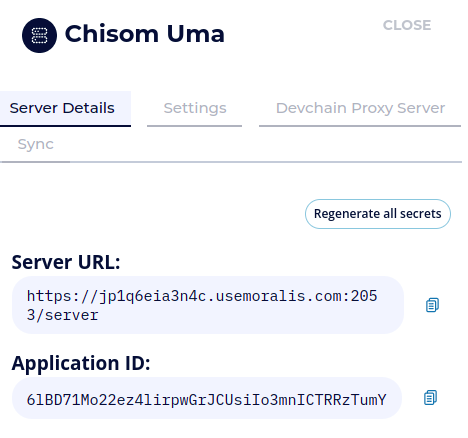
We are done! Now, let’s look at integrating it into our software.
Integrate Moralis
For this to work, go into your App.js file, which is the file that renders your whole component in Next.js, and edit your code to be like this:
import '../styles/globals.css'
import {MoralisProvider} from "react-moralis"
function MyApp({Component, pageProps}) {
  return(

    <MoralisProvider
    appId='6lBD71Mo22ez4lirpwGrJCUsiIo3mnICTRRzTumY'
    serverUrl='https://jp1q6eia3n4c.usemoralis.com:2053/server'>
      {
        <Component {...pageProps} />
      }
    </MoralisProvider>
    );
  }

export default MyApp
Here, we wrapped the whole component with MoralisProvider . MoralisProvider takes in the arguments of appId and severUrl, as you can see in the code above. You should copy the appId and serverUrl from your generated Moralis server and paste them into your App.js file. To implement user authentication, edit your Login.js file to look like this.
import styles from "../styles/Login.module.css";
import Image from "next/image";
import icon from "./Images/Moralis-Favicon.svg";
import {useMoralis}from "react-moralis";

function Login() {
    const {authenticate, authError} = useMoralis();
    return (
      <div className={styles.login_container}>
        <div className={styles.login_card}>
          <Image src={icon} width={100} height={100}/>
          <div className={styles.sign_in_container}>
          <button onClick={authenticate}>Login with Moralis</button>
          </div>
        </div>
      </div>
    );
}
export default Login;
After that, go to your terminal and run the following command:
npm i magic-sdk --save
npm i @walletconnect/web3-provider --save
npm i @web3auth/web3auth --save
The next and most important step is to install the Metamask extension on your browser. Once you run the code, you should be able to get something like this:
Error Handling
Let’s say there is an error with the app, and you want it to be displayed on the Login page. To do this, you have to edit your Login.js file like this:
import styles from "../styles/Login.module.css";
import Image from "next/image";
import icon from "./Images/Moralis-Favicon.svg";
import {useMoralis} from "react-moralis";

function Login() {
    const {authenticate, authError} = useMoralis();
    return (
      <div className={styles.login_container}>
        <div className={styles.login_card}>
          <Image src={icon} width={100} height={100}/>
          <div className={styles.sign_in_container}>
            {authError && (
              <p className={styles.error}>
                {authError.name}
                {authError.message}
              </p>
            )}
            <button onClick={authenticate}>Login with Moralis</button>
          </div>
        </div>
      </div>
    );
}
export default Login;
To make the error messages look nicer, go to your Login.module.css file and add the following css code as the last part of the code:
.error{
    color: red;
    text-align: center;
    font-size: 10px;
    font-style:italic;
    margin: 5px;
}
Whenever you get an error, it should appear like this:
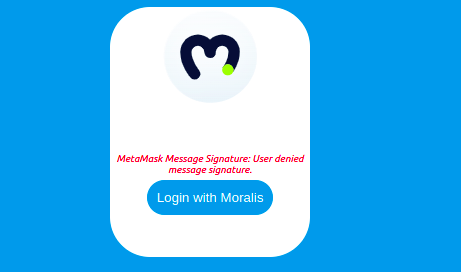
Pretty cool, right?
Logout
Now, let’s say a user is logged in and wants to log out. To do this, go to your index.js file and edit it to look like this:
import Login from "../components/Login";
import {useMoralis} from "react-moralis";

export default function Home() {
  const {isAuthenticated, logout} = useMoralis();
  return <div>{isAuthenticated ? (
  <p>
    You are logged in
    <button onClick= {logout}>Sign Out</button>
  </p>
    ):(
    <Login/>
  )}

  </div>;
}
Once this is implemented and you run the code, you should get this:
That’s it! We are done building our Web3 Login webpage.
Conclusion
This article taught us how to build a beautiful Web3 Login webpage using Next.js, React, and Moralis. Hopefully, you learned more than just using Moralis, but also how to build beautiful web pages.
Here is the link to my Github.