A DIY guide to building a responsive WordPress theme with Bootstrap
Use Bootstrap to create a responsive theme for WordPress.


Over the course of this DIY guide, we’ll learn a simple technique for building our WordPress theme responsive to different devices. This WordPress theme is built on Bootstrap, a responsive framework, and it’s an easy way to achieve a responsive design.
The demo theme we’re building is based on the Basic marketing site example you can find on the Bootstrap examples page. For this demo, templates for these pages will be created:
- Custom homepage
- About us page
- Contact us page
- News section page with comments
Getting started with installations
Here is what you need to do before we can get started: -Install WordPress -Download and Unzip Bootstrap -Install the Theme Test Drive plugin (you should only use this step if you’re building the theme on a live site and don’t want people to see the new theme while it’s being developed)
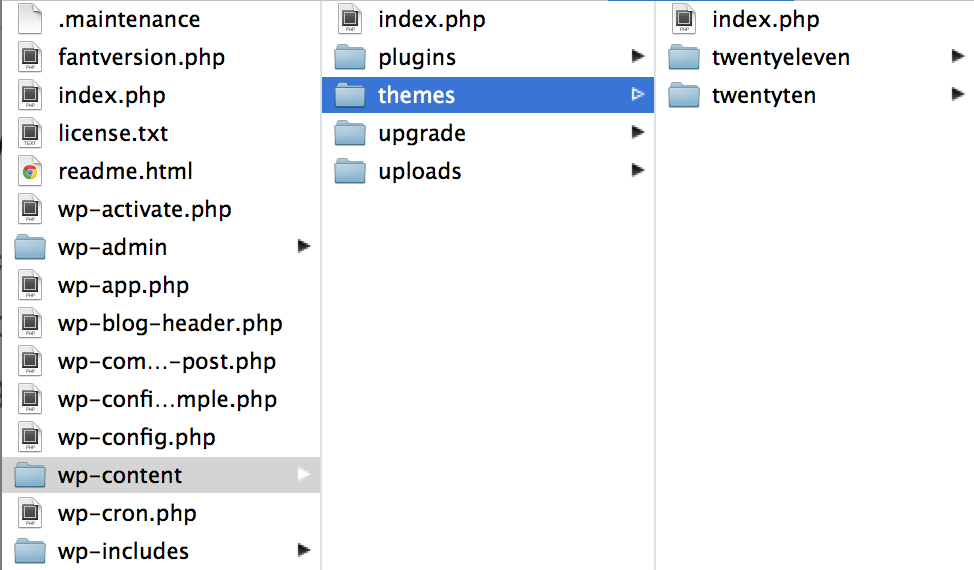
Once these things are ready, open the folder where your WordPress files are located and visit wp-content > themes.
Iwp-content > themes.](https://netstudy.zlabs.be/wp-content/uploads/2016/02/wp-themes-folder-path-e1349280152279.png)
Create a new folder in the “themes” folder and name it “wpbootstrap”. Now, you are to paste the bootstrap folder you unzipped earlier.
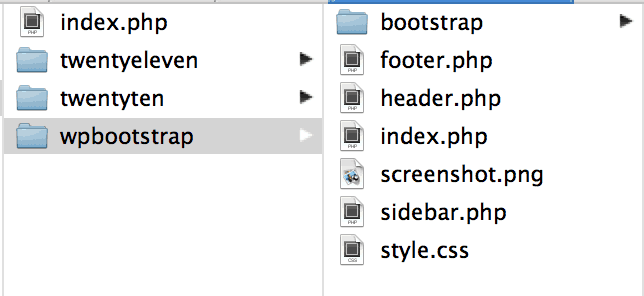
After successfully creating the “wpbootstrap” folder, create a file named index.php. So, in the wpbootstrap folder, you have the bootstrap folder and the index.php file, as seen in the image below;

The next step is to copy the source code from the example basic marketing site and paste it into the index.php file. Here is the source code you need to use: bootstrap-demo-source-code.
Now that we have a static HTML page let’s create the main CSS file. WordPress has a particular comment at the top of the style.css page, allowing it to get all the meta information about our theme.
In the same folder as your index.php file, create a new CSS file named style.css and add this comment to the top so WordPress knows which theme to use.
    /*
    Theme Name: WP Bootstrap
    Theme URI: http://openreplay.com
    Description: A demo theme built to show how to create a responsive WordPress theme using Bootstrap on OpenReplay <a href= "http://openreplay.com">How to Build a WordPress Theme with Bootstrap</a>.
    Author: Ghyoneka Kpee
    Author URI: http://openreplay.com/
    Version: 1.0
    Tags: responsive, white, Bootstrap

    License: Attribution-ShareAlike 3.0 Unported (CC BY-SA 3.0)
    License URI: http://creativecommons.org/licenses/by-sa/3.0/

    This simple theme was built using the example Bootstrap theme "Basic marketing site" found on the Bootstrap website http://twitter.github.com/bootstrap/examples/hero.html
    */
Uploading images
Before we install and start building our new theme, we need to upload an image that will appear in the WordPress admin area. When uploading this file, name it “screenshot.png” and set the dimensions to 300 x 225 px (or something close). You can upload a free PNG from somewhere online, or create your own.

Note that this image is to be uploaded in the same folder where you have the bootstrap folder, index.php file, and style.css file.
Below is an example of what your folder structure should look like:

Now you’re ready to install the new theme. Log in to the admin area and go to Appearances > Theme. You should see WP Bootstrap listed as one of the themes. Click on Install.
If installed successfully, go ahead to activate it. Your homepage is expected to be like a static HTML file without any style.
Note: If you don’t have this as your homepage, it is possible that you missed a step somewhere above. Retrace your steps and follow up from step one.
Converting Bootstrap files to WordPress templates
WordPress themes are designed to help you create a website with ease. Many WordPress themes (except for some starter kits) include the following files: -index.php -style.css -header.php -footer.php -sidebar.php You will usually see more than these files, but we’re going to start with these files and build from there. Create an empty header file, footer file, and sidebar file.

You’ll take all the HTML that usually appears at the top and bottom of every page and cut and paste it into the header.php and footer.php files, respectively.
You can copy and paste the codes from our header, index, and footer files below into your files. We will provide the sidebar file later in the article:
Including WordPress tags in the header and footer files, you will use the tags get header() and get footer(). These WordPress functions locate and include the header.php and footer.php files at the top and bottom of the page. Because we named our files header.php and footer.php, WordPress can do this. This would not work if we named the files my-header.php and my-footer.php or something else.
In your index.php file, we would have;
<?php get_header(); ?>
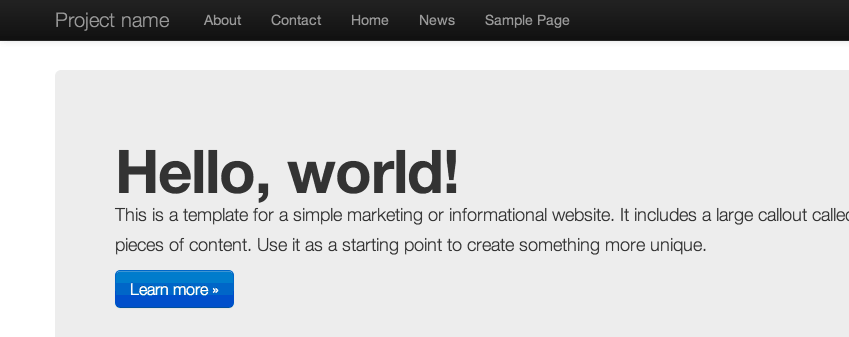
<!-- Main hero unit for a primary marketing message or call to action -->
<div class="hero-unit">
<h1>Hello world!</h1>
<p>This is a template for a simple marketing or informational website. It includes a large callout called the hero unit and three supporting pieces of content. Use it as a starting point to create something more unique.</p>
<p><a class="btn btn-primary btn-large">Learn more »</a></p>
</div>
<!-- Example row of columns -->
<div class="row">
<div class="span4">
<h2>Heading</h2>
<p>Donec id elit non mi porta gravida at eget metus. Fusce dapibus, tellus ac cursus commodo, tortor mauris condimentum nibh, ut fermentum massa justo sit amet risus. Etiam porta sem malesuada magna mollis euismod. Donec sed odio dui. </p>
<p><a class="btn" href="#">View details »</a></p>
</div>
<div class="span4">
<h2>Heading</h2>
<p>Donec sed odio dui. Cras justo odio, dapibus ac facilisis in, egestas ege t quam. Vestibulum id ligula porta felis euismod semper. Fusce dapibus, tellus ac cus us commodo, tortor mauris condimentum nibh, ut fermentum massa justo sit amet risus.</p>
<p><a class="btn" href="#">View details »</a></p>
</div>
</div>
<?php get_footer(); ?>If you have done this successfully, you can proceed with us to fix the CSS and Javascript files.
Starting with your header, locate these links below and change them from this;
<!--Le styles -->
<link href="../assets/css/bootstrap.css" rel="stylesheet">
<style type=" text/css">
  body {
    padding-top: 60px;
    padding-bottom: 40px;
  }
</style>
<link href="../assets/css/bootstrap-responsive.css" rel="stylesheet">
to this,
<!-- Le styles -->
<link href="<?php bloginfo('stylesheet_url'); ?>" rel="stylesheet">
Then add this code in your CSS;
@import url('bootstrap/css/bootstrap.css');
@import url('bootstrap/css/bootstrap-responsive.css');
body {
padding-top: 60px;
padding-bottom: 40px;
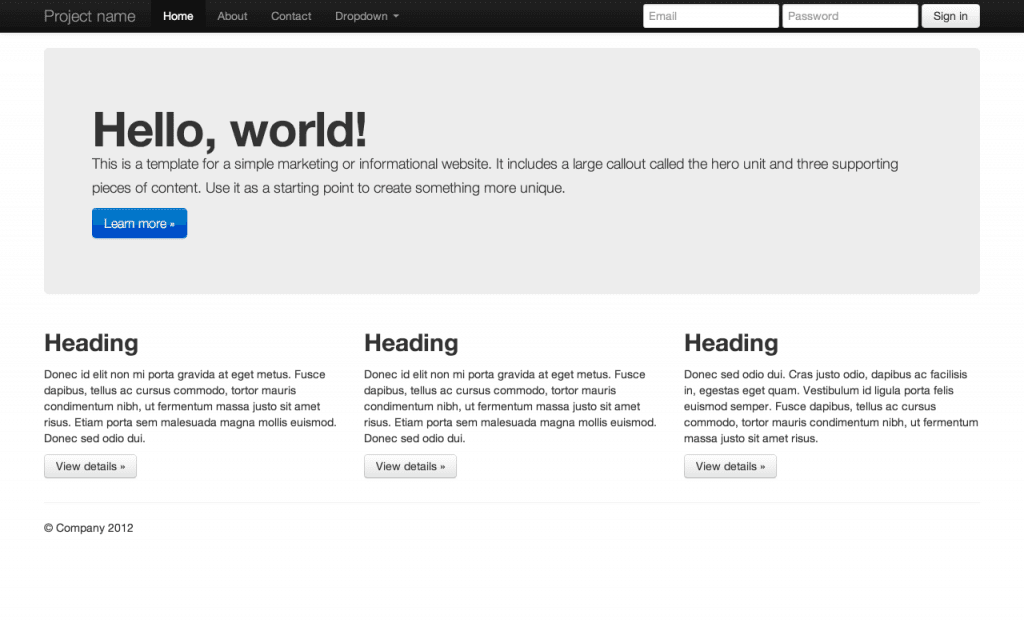
}|You’ve used a special WordPress tag to automatically link to the bootstrap CSS in your theme files regardless of which page of your site you’re on. This bloginfo() function will be used in various ways throughout this tutorial. Then, from your main style.css file, you used the @import tag to link to the Bootstrap CSS files. Your website should now look something like this:
To allow your site to sit well in terms of compatibility with whichever plugin you will like to use, it is imperative that you include the wp_head() function. It is an important hook that allows plugin developers to add CSS or JavaScript to your site dynamically. Some plugins may fail if you do not include this in your template:
<head>
  <meta charset="utf-8">
  <title>Bootstrap, from Twitter</title>
  <meta name="viewport" content="width=device-width, initial-scale=1.0">

  <!-- Le styles -->
  <link href="<?php bloginfo('stylesheet_url');?>" rel="stylesheet">

  <!-- Le HTML5 shim, for IE6-8 support of HTML5 elements -->
  <!--[if lt IE 9]>
          <script src="http://html5shim.googlecode.com/svn/trunk/html5.js"></script>
      <![endif]-->

  <?php wp_enqueue_script("jquery"); ?>
  <?php wp_head(); ?>
    </head>
    <body>

<div class="navbar navbar-inverse navbar-fixed-top">
  <div class="navbar-inner">
    <div class="container">
      <a class="btn btn-navbar" data-toggle="collapse" data-target=".nav-collapse">
        <span class="icon-bar"></span>
        <span class="icon-bar"></span>
        <span class="icon-bar"></span>
    </a>
    <a class="brand" href="<?php echo site_url(); ?>"><?php bloginfo('name'); ?></a>
    <div class=" nav-collapse collapse">
      <ul class="nav">

            <?php wp_list_pages(array('title_li' => 'exclude' => 4)); ?>

          </ul>
    </div><!--/.nav-collapse -->
    </div>
  </div>
</div>

<div class="container">
We have successfully taken care of the header and index files, and now you are to focus on our footer file. Doing the same modification you did to your header and index files, you will add the following code to your footer.php file;
  <hr>
      <footer>
        <p>Ⓒ Company 2012</p>
      </footer>

    </div> <!-- /container -->

    <!-- Le javascript
    ====================================================== -->
    <script src="../assets/js/jquery.js"></script>
    <script src="../assets/js/bootstrap.js"></script>

  </body>
</html>
Then, just as we had the wp_head() tag, we also had the wp_footer() tag. This will go right before the closing body tag. We’ll also change how we load JavaScript files and move them to the header.php file.
So, change your footer.php file to look like this;
<hr>

      <footer>
        <p>© Company 2012</p>
      </footer>

    </div> <!-- /container -->

    <?php wp_footer(); ?>

  </body>
</html>
Now we can go back and add our JavaScript the way WordPress recommends. This method includes the use of the wp_enqueue_script() function.
First, we’ll use this function to load jQuery next to the wp_head(). Insert the following code into your header.php file.
    <?php wp_enqueue_script("jquery"); ?>
      <?php wp_head(); ?>
Next on our list to do is to create a functions.php file. You are expected to place this file where you have the header.php, index.php, and footer.php, as well as the bootstrap folder. The functions.php helps us load our JavaScript files properly. After you have created the file, paste the following code inside;
<?php
function wpbootstrap_scripts_with_jquery()
{
// Register the script like this for a theme:
wp_register_script( 'custom-script', get_template_directory_uri() . '/bootstra
p/js/bootstrap.js', array('jquery'));
// For either a plugin or a theme, you can then enqueue the script:
wp_enqueue_script( 'custom-script');
}
add_action( 'wp_enqueue_scripts', 'wpbootstrap_scripts_with_jquery' );
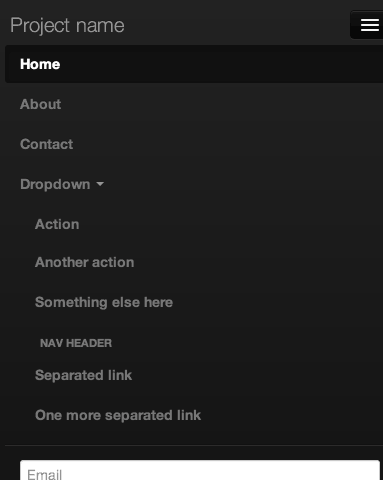
?>The code above takes care of any JavaScript function on your websites, such as the navigation bar and other possible JavaScript functions. If you did this step correctly, your navigation bar should look like this;
Building custom home and landing pages
In this step, we will create our homepage/landing page to display what we want instead of just codes.
To do so, navigate to the WordPress admin area and select Pages > Add New. Create a new page and name it “Home,” then click the HTML tab above the Content Editor. We’ll copy the remaining markup from the index.php file, paste it into this page, and press the “Publish” button.
These codes below are to be included above;
    <?php get_header(); ?>

    <?php get_footer(); ?>
To dynamically include the Home page content that we added in the WordPress admin area back into our template, we will use the loop, which is probably the most well-known WordPress function.
The WordPress Loop does precisely what it says. It loops through a page or post, grabbing the title and content and a slew of other details such as the date it was published, the author who published it, and even any comments associated with the post or page.
The fundamental loop looks like this;
    <?php if (have_posts() ) : while ( have_posts()) : the_post(); ?>
    <?php endwhile; else: ?>
           <p><?php _e('Sorry, no posts matched your criteria.'); ?></p>
    <?php endif; ?>
Here is what your index.php file should look like with the loop in it;
    <?php get_header(); ?>

    <?php if ( have_posts()) while ( have_posts()) the_post(); ?>

    <?php endwhile; else: ?>
          <p><?php _e('Sorry, no posts matched your criteria.'); ?></p>
    <?php endif; ?>
Next is for us to get our page title displayed across our pages, which is achievable by using the the_title() function. The same is applied to our content also. For contents, we use the the_content() function. Then our loop should look like this;
    <?php if ( have_posts() ) : while ( have_posts()) the_post(); ?>

           <h1><?php the_title(); ?></h1>
           <?php the_content(); ?>

    <?php endwhile; else: ?>
          <p><?php _e('Sorry, no posts matched your criteria.'); ?></p>
    <?php endif; ?>
We are done with building a custom WordPress homepage/landing page. But for us to see our homepage, we will need to change our settings to display our “Home” page as the default front page of our site.
To do so, go to Settings > Reading and select the “A static page” radio button under “Front page displays” in the admin area. Next, choose “Home” from the “Front page:” dropdown menu.
Click save changes and then reload the homepage. We should now see the contents of the Home page we added in the admin area.
WordPress allows us to use a file called front-page.php only for the site’s home page. Save the index.php file as front-page.php and remove the get title() function from the template because we don’t want “Home” to appear in an h1 at the top of the page.
This is what your front-page.php file should look like:
    <?php if ( have_posts() ) : while ( have_posts()) the_post(); ?>

           <?php the_content(); ?>

    <?php endwhile; else: ?>
           <p><?php _e('Sorry, no posts matched your criteria.'); ?></p>
    <?php endif; ?>
Session Replay for Developers
Uncover frustrations, understand bugs and fix slowdowns like never before with OpenReplay — an open-source session replay tool for developers. Self-host it in minutes, and have complete control over your customer data. Check our GitHub repo and join the thousands of developers in our community.
Adding a navigation menu, and page and post templates
For our site navigation, we will create some dummy pages like “about,” “news,” and “contact” in the admin area.
The next step is to replace the site’s static navigation menu with one that displays the pages we just added in the admin area. To accomplish this, locate the unordered list with the class “nav” and remove the list items. We’re also removing the sign-in form because we’ll be logging in directly from the WordPress admin login screen.
Inside the div with the class “navbar,” the markup should now look like this:
<div class="navbar navbar-inverse navbar-fixed-top">
  <div class="navbar-inner">
    <div class="container">
    <a class="btn btn-navbar" data-toggle="collapse" data-target=".nav-collapse">
      <span class="icon-bar"></span>
      <span class="icon-bar"></span>
      <span class="icon-bar"></span>
      </a>
      <a class="brand" href="#">Project name</a>
      <div class=" nav-collapse collapse">
      <ul class="nav">

        </ul>
      </div><!--/.nav-collapse -->
    </div>
  </div>
</div>
To list the pages, we will now use the wp_list_pages() function. We won’t go into detail about the options for this tag, but it creates a list item and a link for each page. Inside the empty unordered list with the “nav” class, paste the following code;
    <ul class="nav">

     <?php wp_list_pages (array('title_li' => '')); ?>

    </ul>
After the step, your result should look like this screenshot below;
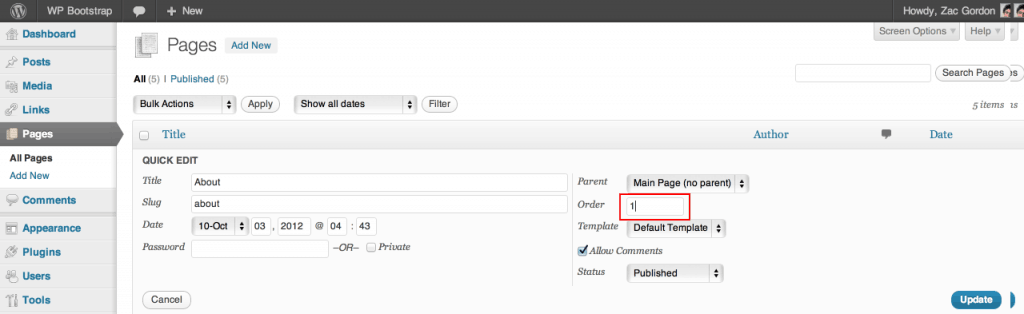
To give order to the navigation menu, first you will need to delete the “sample page,” then in the pages tab in your WordPress admin area, you can rearrange the menu items to look like what we have in the screenshot below:
After rearrangement and deleting of the sample page, you should have a beautiful menu like this below:
Our navigation menu is not active because we haven’t activated the bootstrap CSS. To do that, in your theme folder, go to Bootstrap, css, open the bootstrap.css file, and locate the Bootstrap .active class. Add the following styles to the rule:
.navbar-inverse .nav .active > a,
.navbar-inverse .nav .active > a:hover,
.navbar-inverse .nav .active > a:focus,
.navbar-inverse .nav .current_page_item a,
.navbar-inverse .nav .current_page_item a:hover,
.navbar-inverse .nav .current_page_item a:focus,
.navbar-inverse .nav .current_page_parent a,
.navbar-inverse .nav .current_page_parent a:hover,
.navbar-inverse .nav .current_page_parent a:focus {
This will get your navigation menu working perfectly.
Creating the pages template
Begin by copying the index.php file and saving it as page.php. This will serve as the basis for our pages.
We should start by changing the text that says “Sorry, no posts matched your criteria.” to read “Sorry, this page does not exist.”
Next, we’ll add some Bootstrap markup to make a two-column layout.
Change the page.php template to include the Bootstrap “row” class as well as the “span8” and “span4” classes. The span8 will be used for page content, and the span4 will be used for sidebar content.
<?php get_header(); ?>

<div class="row">
  <div class="span8">

      <?php if (have_posts()) while ( have_posts() ) : the_post(); ?>
              <h1><?php the_title(); ?></h1>
                <?php the_content(); ?>

      <?php endwhile; else: ?>
              <p><?php _e('Sorry, this page does not exist.'); ?></p>
      <?php endif; ?>

  </div>
  <div class="span4">

  </div>
</div>

<?php get_footer(); ?>
Because we’ll be using the sidebar on some of the other templates, we’ll use the WordPress get_sidebar() tag, which works similarly to the get_header() and get_footer() tags.
To accomplish this, we will create a new file called sidebar.php and paste the following code into it:
<h2>Sidebar</h2>Creating the sidebar template
To add a sidebar, return to the page.php file and insert the get_sidebar() code inside the “span4” div, as shown below:
<?php get_header(); ?>

<div class="row">
  <div class="span8">

        <?php if (have_posts()) while ( have_posts()) the_post(); ?>
                <h1><?php the_title(); ?></h1>
                    <?php the_content(); ?>

      <?php endwhile; else: ?>
              <p><?php _e('Sorry, this page does not exist.'); ?></p>
      <?php endif; ?>

  </div>
  <div class="span4">
      <?php get_sidebar(); ?>
  </div>
</div>

<?php get_footer(); ?>
After this, you will notice that we now have the title, main content, and sidebar.
Creating the post listing template
To create a post listing page, also known as the news page or article page, you will first rename the page.php template to home.php. The home.php template in WordPress is reserved for the page that lists posts. This is the template we will use for the news page in our case.
We’ll first hardcode an h1 tag that says “News” at the top of the main content area. This tag should go above the loop.
The loop on this home.php template will go through all blog posts. So, instead of using an h1 tag for the post titles, we’ll use an h2, because the h1 will be used for the page title.
After the above step, we will need to add the the_permalink() tag so that we can use it with an anchor tag to link from the main news page to individual news articles. This is what the markup around the_title() should look like now:
<h2><a href="<?php the_permalink(); ?>"><?php the_title(); ?></a></h2>A few other changes that need to be made are changing the “no results” text to “no post found.” Next, remove the page excerpt. We’ll just list the titles as links to the pages and let the viewers read the content after clicking on the post title.
We will add date and time to our post listing to make it look standard, and we will do that by adding the the_time() function.
We want our date and time to have the format “Monday, December 19th, 2022,” so we will add the following modification to the the_time() function.
the_time('l, F jS, Y')Finalizing these post settings requires adding some code lines to beautify how the posts are displayed. The href tag under the date separates the posts from each other; otherwise, the layout will be ugly. The home.php template should look like this:
<?php get_header(); ?>

<div class="row">
  <div class="span8">
    <h1>News</h1>

    <?php if (have_posts() ) : while (have_posts()) the_post(); ?>
    <h2><a href="<?php_the_permalink(); ?>"><?php the_title(); ?></a></h2>
    <p><em><?php_the_time('l, F jS, Y'); ?></em></p>
    <hr>

    <?php endwhile; else: ?>
      <p><?php _e('Sorry, there are no posts.'); ?></p>
    <?php endif; ?>

  </div>
  <div class="span4">

    <?php get_sidebar(); ?>

  </div>
</div>

<?php get_footer(); ?>
To make our posts page display on the homepage, you will need to go to Settings > Reading, select “News page” from the dropdown next to the “Posts page:” label, and click “Save Changes.” This should make your posts appear on your homepage.
Last but not least, add comments to your post. That can be done by using the comments_template() tag.
How do we achieve this? Create a new file and name it single.php. Save it in the same location as the index.php file. The following step is to include this code:
the_time('l, F jS, Y')To display the date and time on that page. The next thing to do on the single.php file we created is add the code below, right after the content tag.
  <?php get_header(); ?>

<div class="row">
  <div class="span8">
      <?php if (have_posts()) while ( have_posts()) the_post(); ?>
        <h1><?php the_title(); ?></h1>
        <p><em><?php_the_time('l, FjS, Y'); ?></em></p>

        <?php the_content(); ?>

        <hr>
      <?php comments_template(); ?>

    <?php endwhile; else: ?>
            <p><?php _e('Sorry, this page does not exist.'); ?></p>
      <?php endif; ?>
  </div>
  <div class="span4">
      <?php get_sidebar(); ?>
  </div>
</div>

<?php get_footer(); ?>
As you can see, the comments_template() tag appears right after the content tag. This should add comments to your posts. Note that the function of the href tag is to create a line between the content and the comments. If done correctly, then you are good to go.
Conclusion
If you have made it this far without any challenges or made necessary corrections when you had challenges, then Congratulations! You’ve created a Customisable WP Theme.
Gain Debugging Superpowers
Unleash the power of session replay to reproduce bugs and track user frustrations. Get complete visibility into your frontend with OpenReplay, the most advanced open-source session replay tool for developers.

