Add a chat to your React Native app with Firebase and Firestore

Using the services Firebase provides, a chat application or a chat functionality can be built into your application. This ensures sole access to the data from the application and the ability to customize as opposed to depending on third-party integrations, which can pose some restrictions and also gives third-party access to the app data.
In this tutorial, I will be demonstrating how a chat application can be set up on Android and iOS in React Native using Firebase Authentication and Firestore. The source code of this tutorial can be found on GitHub.
To follow this tutorial, basic knowledge of React Native is essential, and you should have React Native set up on your computer. An Android and an iOS simulator should also be set up for testing the application. You can learn more about how you can set up React Native and the Android and iOS simulators here. You should also know how to work with React Navigation. You will find more details about React Navigation here.
First Steps
In this tutorial, Firebase Authentication will be used to register and authenticate users when they want to sign in, while the Database for storing the users’ information and Chats will be stored in the Firestore Database.
Starting, you will be required to clone the demo project I put together for this tutorial. You will find it here. You can also use the command below to clone it directly.
git clone https://github.com/championuz/ChatUIAfter a successful clone, open it up in your code editor and navigate to the project directory in your terminal. Run the commands below to download the node modules and iOS dependencies. Then, build the apps on your Android and iOS emulators.
#Install Node Modules
npm install
# Navigate to the ios folder and Install iOS dependencies
cd ios && pod install
#Navigate back to the Project root folder
cd ..
#Run on Android Emulator
npx react-native run-android
#Run on iOS Simulator
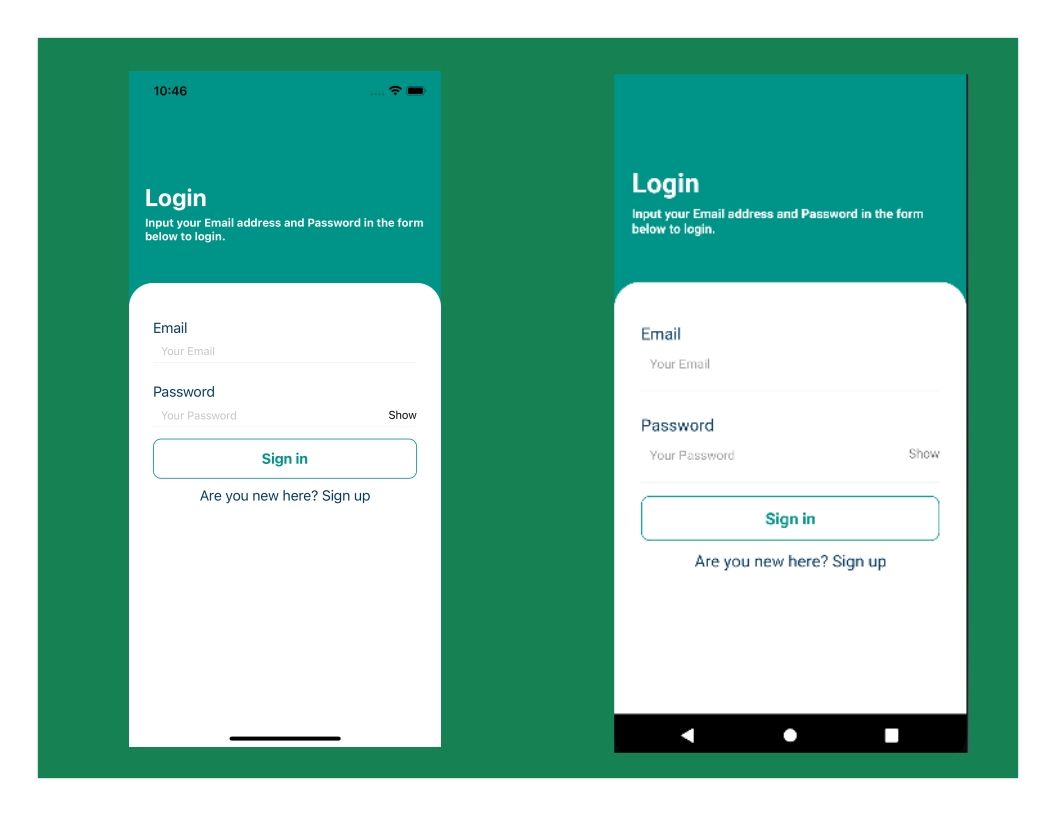
npx react-native run-iosOnce the apps are successfully built on your Android and iOS emulators, you should have them show up like this:
Setting up Firebase Authentication
Firebase Authentication provides several authentication methods, like email and password authentication, to phone, Google, social, and so much more. However, I will be using email and password authentication for this tutorial.
The first thing to set up Firebase authentication in React Native is installing the React Native Firebase packages. Run the commands below in your terminal to install the packages. You can learn more about the React Native Firebase packages here.
npm i @react-native-firebase/app @react-native-firebase/auth @react-native-firebase/firestoreAfter this installation, you will need to add the application to Firebase and set up your Android and iOS projects. Follow the tutorial as detailed here.
Once you add your project to Firebase and set it up for Android and iOS, build your project using the commands displayed above.
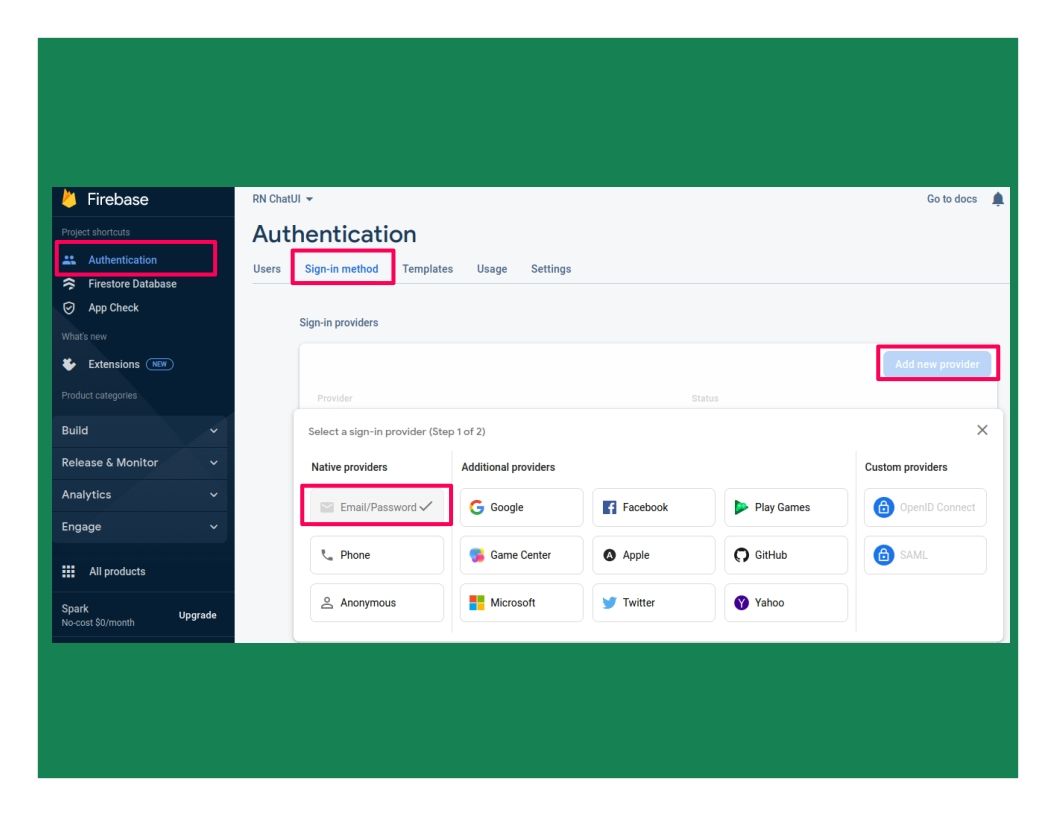
After building your project: Open up the Firebase console and select Authentication from the menu items. Under Authentication, click on “Sign-in Methods”. Click “Add new provider and select Email and Password from the list, then enable.
Next, still on the Firebase console, from the menu items, select Firestore Database. After that, click on Get Started, and under Rules, modify the stated rule from false to true, as shown.

Back to your project, navigate to AuthScreen.js. The first thing to do is import Firebase Auth and Firestore into the project, then declare a function that will handle the user registration and store the user’s details in the Firestore database using the createUserWithEmailAndPassword() method. The code is:
//Import Statements must be at the top of the page
import auth from '@react-native-firebase/auth';
import firestore from '@react-native-firebase/firestore';

//User Registration
  const userRegistration = async () => {
    if(!email || !password || !name) {
      alert("Please fill out the empty fields")
    }
    try{
      const newReg = await auth().createUserWithEmailAndPassword(email,password)
      firestore().collection('users').doc(newReg.user.uid).set({
        name: name,
        email: newReg.user.email,
        uid: newReg.user.uid
      })
        }catch(err){
      alert('Registration Unsuccessful! Try again');

    }
  }
After this, the user registration is done, and the next is to declare another function that will handle the user login using the signInWithEmailAndPassword() method. The code is:
//User Login
const userSignin = async () => {
  if(!email || !password) {
    alert("Please fill out the empty fields")
  }
  try{
    const newReg = await auth().signInWithEmailAndPassword(email,password)

    console.log('Sign in done')
    return newReg

  }catch(err){
    alert('Email or Password incorrect');
  }
}
Finally, once a user is logged in, the app should display the messages screen immediately. Using the onAuthStateChanged() method, the app checks for the presence of a user. Then, using the useState hook, the declared user’s state will be updated with the data from the user’s signed-in status. Next, to ensure the app re-renders once there’s a state change, this process will be run using the useEffect hook. The code is below.
//In app.js
const [user, setUser] = React.useState('');

React.useEffect(()=> {
  const userCheck = auth().onAuthStateChanged(userExist=>{
    if(userExist)
      setUser(userExist)
    else setUser("")
  })
  return () => {
    userCheck()
    console.log(user);
  }
},[])
Session Replay for Developers
Uncover frustrations, understand bugs and fix slowdowns like never before with OpenReplay — an open-source session replay tool for developers. Self-host it in minutes, and have complete control over your customer data. Check our GitHub repo and join the thousands of developers in our community.
Setting up Chat Functionality
The authentication system, which will handle the identification and registration of the users, has been successfully set up. With this in place, the next thing to be done would be to create the user flow. The user flow will involve the user getting navigated to the messages screen, where they can select another user to chat with, and then the chat screen, where all the messaging happens.
The first thing to be done here will be to query the Firestore database and display all registered users except the user who is signed in, then update the users’ state with the details. To fire this process and make for a re-render of the components if there’s any state change, I will call the just declared function within a useEffect hook. See code:
import firestore from '@react-native-firebase/firestore';

const MessageScreen = ({user, navigation}) => {
  const [users, setUsers] = useState(null)

  const getUsers = async ()=> {
  const querySanp = await firestore().collection('users').where('uid','!=',user.uid).get()
  const allUsers = querySanp.docs.map(docSnap=>docSnap.data())
  setUsers(allUsers)
}

useEffect(()=>{
  getUsers()
},[])

return (
...
);
};
Lastly, the updated users’ state details will then be mapped to the screen using the Flatlist component. The code is below:
const MessageScreen = ({user, navigation}) => {
...
return (
<SafeAreaView >
<StatusBar />
<ScrollView>
<View style={styles.Contain}>
<FlatList
data={users}
keyExtractor={(item)=>item.uid}
renderItem={({item}) => (
<TouchableOpacity onPress={() => navigation.navigate('Chats', {name: item.name, uid: item.uid})} >
<View style={styles.card} >
<Image style={styles.userImageST} source={{uri: 'https://placeimg.com/140/140/any'}} />
<View style={styles.textArea}>
<Text style={styles.nameText} >{item.name}</Text>
<Text style={styles.msgContent} >{item.email}</Text>
</View>
</View>
</TouchableOpacity>
)}
/>
</View>
</ScrollView>
</SafeAreaView>
);
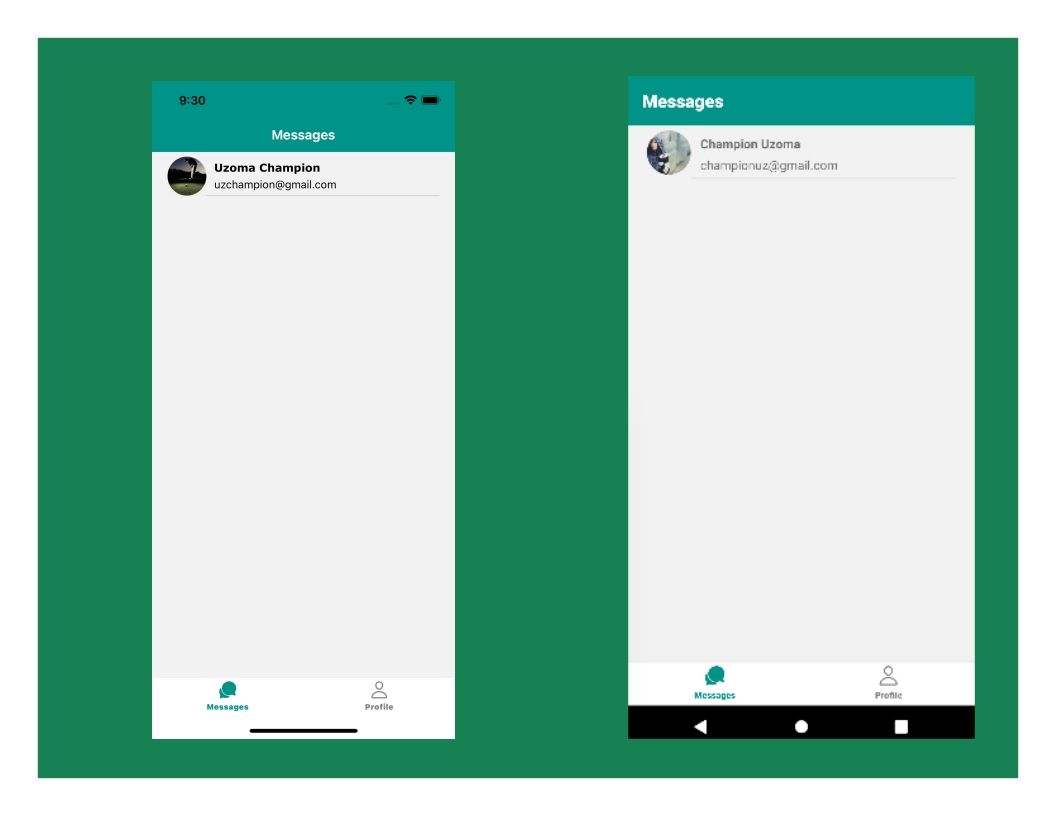
};After this, you should have the messages screen show registered users:
Setting up Gifted Chat
The process run above will make for mapping all registered users to the screen, and on clicking on any of the users, you will be navigated into the Chat screen.
To quickly implement a Chat component, Gifted Chat will be used. The React Native Gifted Chat is a complete chat interface that will save you the time of creating a Chat functionality and flow in your React Native project. In your terminal, run the command below to install it.
npm i react-native-gifted-chatAfter installation, ensure you run pod install in your project folder/ios folder. Then navigate to your project folder and build your project on your Android and iOS emulators. The commands for this process have been stated above.
Once Gifted Chat has been successfully installed, and the project re-built on Android and iOS emulators, in the Chat screen, import Gifted chat and add the code below.
import { GiftedChat } from 'react-native-gifted-chat'
const ChatScreen = ({user, route}) => {
const [messages, setMessages] = useState([]);
useEffect(() => {
setMessages([
{
_id: 1,
text: 'Hello developer',
createdAt: new Date(),
user: {
_id: 2,
name: 'React Native',
avatar: 'https://placeimg.com/140/140/any',
},
},
])
}, [])
const onSend = useCallback((messages = []) => {
setMessages(previousMessages => GiftedChat.append(previousMessages, messages))
}, [])
return (
<GiftedChat
messages={messages}
onSend={messages => onSend(messages)}
user={{
_id: 1,
}}
/>
)
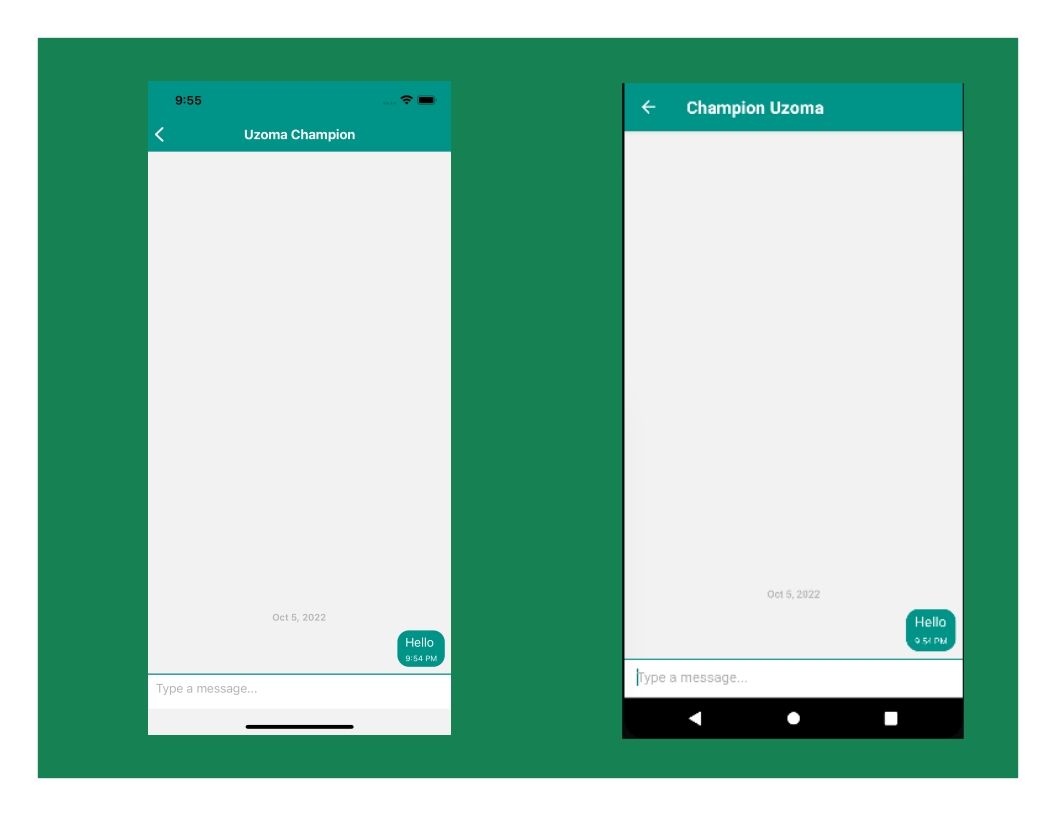
}You should have your Chats screen show up like this:
Storing and Rendering Chats from Firestore
The chat functionality has now been added, but whenever messages are sent, they are not stored; thus, as soon as you navigate out of this screen and back into it, you will lose all the chats, but with Firestore, that won’t be the case as all the messages can be stored and retrieved from Firestore. Also, locally sent messages cannot be used to communicate between two different users.
The first thing to tackle is the issue of sending messages among users. The parameter to identify the user sending the message will be the unique user uid created upon registration.
If you look closely at the messages screen, you will notice that the uid is one of the parameters passed through the route into the Chat screen component. This uid belongs to the selected user. The signed-in user’s details are passed as props to this component upon the user login; hence, the signed-in user’s uid is user.id.
With that being said, you should re-declare the onSend function as shown in the code below:
...
const onSend = (msgArray) => {
    const msg = msgArray[0]
    const usermsg = {
      ...msg,
      sentBy: user.uid,
      sentTo: uid,
      createdAt: new Date()
    }
    setMessages(previousMessages => GiftedChat.append(previousMessages, usermsg))
    const chatid = uid > user.uid ? user.uid+ "-" +uid : uid+ "-" +user.uid

    firestore().collection('Chats')
    .doc(chatid)
    .collection('messages')
    .add({...usermsg,createdAt:firestore.FieldValue.serverTimestamp()})
  }
  return (
  );
};
Then update the Gifted Chat component with the code below:
...
return (
<GiftedChat
style={{flex: 1}}
messages={messages}
onSend={text => onSend(text)}
user={{
_id: user.uid,
}}
/>
);
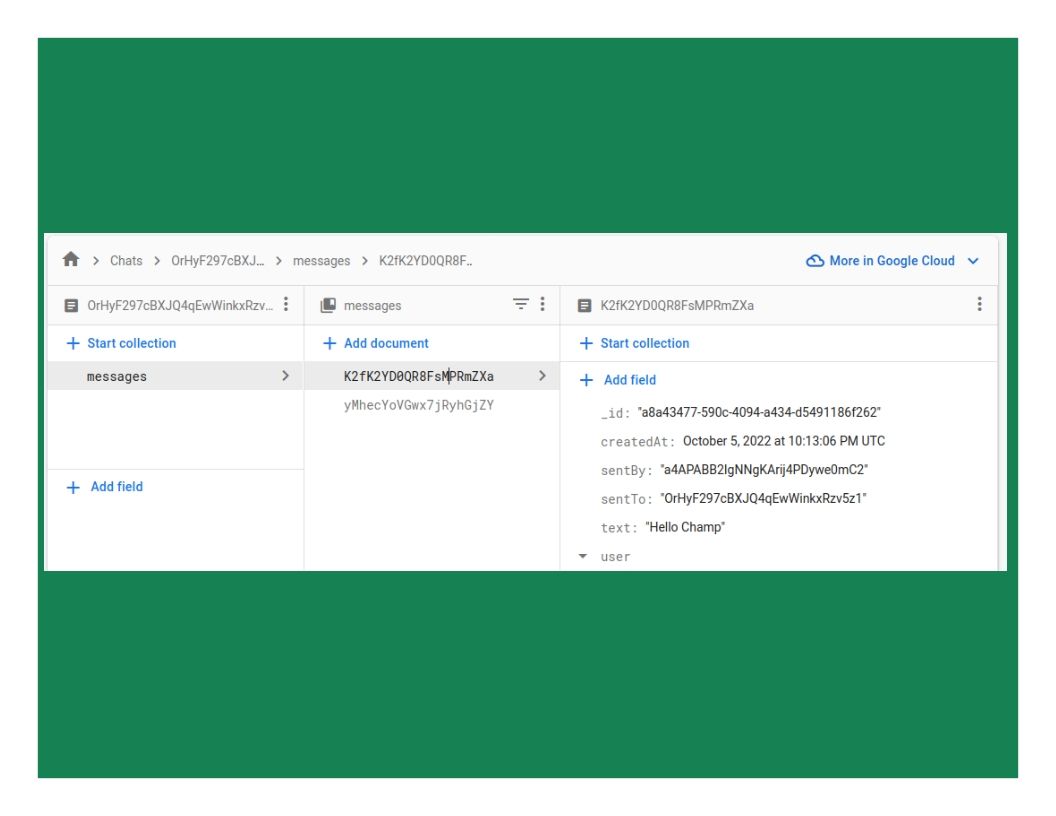
...After this, your messages will be stored in the Firestore database. You just need to navigate to the Firestore database; under the Chats collection, you will find the chats there.
Next, to retrieve the messages from the Firestore database and render them in the Chat screen, I will declare a function to get the messages; then, using the useEffect hook, the function will be run whenever there’s a state change.
const getAllMessages = async () => {
const chatid = uid > user.uid ? user.uid+"-"+uid : uid+"-"+user.uid
const msgResponse = await firestore().collection('Chats')
.doc(chatid)
.collection('messages')
.orderBy('createdAt', "desc")
.get()
const allTheMsgs = msgResponse.docs.map(docSanp => {
return {
...docSanp.data(),
createdAt:docSanp.data().createdAt.toDate()
}
})
setMessages(allTheMsgs)
}
useEffect(() => {
getAllMessages()
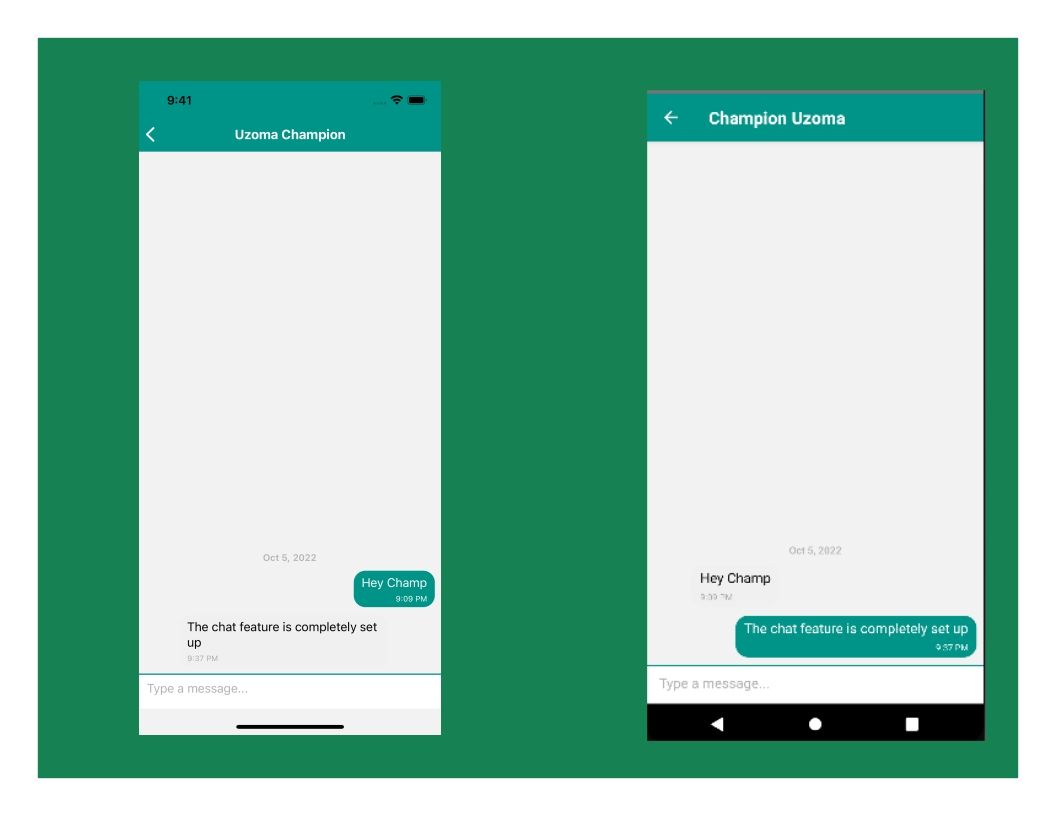
},[]);You should have the messages rendered on the Chat screen just like this:
Conclusion
Power your React Native project with an in-app chat system implemented with Gifted Chat and Firebase services, as shown. If you followed this tutorial, you’d be able to set that up without any problems. If you encounter any problems, kindly reach out to me, and I will be glad to help.
A TIP FROM THE EDITOR: We have many articles on Firebase, such as Mobile Push Notifications With Firebase, Authentication in React using Firebase, and Build A CRUD App With React And Firebase — don’t miss them!
Gain Debugging Superpowers
Unleash the power of session replay to reproduce bugs and track user frustrations. Get complete visibility into your frontend with OpenReplay, the most advanced open-source session replay tool for developers.