
Communicating with WebRTC or WebSocket

Communication is an essential part of our daily lives. Chat applications make it easy to interact with people around the world. These chat applications send chats in real time. This is where WebRTC and WebSockets come into play. They grant us real-time communication, making the sending and receiving of chats done immediately.
In this article, we will learn the difference between WebRTC and WebSockets by building a video chat application.
To follow effectively with the tutorial, be sure you have the following:
- Node.js installed.
- Knowledge of NextJS.
- Code editor, preferably Visual Studio Code.
Now that all is set let’s learn about WebRTC and WebSocket.
What is WebRTC?
Web Real-Time Communication (WebRTC) is a technology that enables real-time communication between/among web applications. It allows these web applications to capture video, audio, and other data without a server. This means WebRTC allows peer-to-peer communication amidst web browsers without needing an intermediary (server).
What is WebSocket?
WebSocket is a communication protocol allowing real-time communication between web browsers where the server is an intermediary. This means that for communication to occur, a user needs to send the message to the server then the server sends that message to other users (Client-Server communication).
Differences between WebRTC and WebSocket
WebRTC and WebSocket grant real-time communication but vary in several ways. The major difference between WebRTC and WebSocket is that WebRTC doesn’t need a server to carry out real-time communication, while WebSocket needs one. This makes WebRTC faster and preferable for video/audio communication.
Despite WebRTC being faster than WebSocket, it primarily sends data over UDP, which causes you to lose some packets of data. Since WebSocket uses TCP, it provides you with data integrity and is preferable for sending valuable information.
Overview of the video chat app
Now that we know the difference between WebRTC and WebSocket, let’s take a step further and learn how to use these technologies to build a video chat app.
To build the video chat app, we will use WebRTC and WebSocket. We will use WebSocket to create the signal. Once they are connected, we can now use WebRTC to share the webcams of the connected users.
How it works
When the user connects, we would request video and audio permission from the user and display their stream on the page. From here, the user can either enter an existing room or create their room. Once the user creates the room, they would be provided with an ID which the other user would use to connect to their room.
What happens in the background
Once the user creates the room, we send an emit function to the server. The server creates the room and sends the user a random string, which will be used as the room ID.
The other user will paste the ID and click on Join Room. We will return an error if the ID provided doesn’t have a room attached or if the room contains another user since we are building a video chat app for two users only.
If no error is returned, we will emit an event to the host, prompting the host to initiate the call. Once the call has been initialized, we will create an offer and send this offer to the server. Then the server will signal the other user, passing the offer as a parameter. The other user receives this offer, sets it as a Remote Description, and then emits its offer (answer) to the server. Once the server receives it, it will emit the answer to the host, and the host will set the answer as its Remote Description and voilà :tada: the connection is made.
We better understand how the video chat app works; let’s write some codes to see it in action.
Setting up the frontend
Create a folder that will contain all the source code for this application. You can name it as desired, but the folder is named video-chat-app in this tutorial. Open this folder in VS Code and run the following command in the integrated terminal to create a NextJS application.
npx create-next-app .Once the app has been created, we can run the command below to spin up the NextJS application.
npm run dev
or
yarn dev
Now, we will install the dependencies used in this application.
npm i nanoid socket.io socket.io-client nanoid - This will be used to create random strings. These random strings will be used as the ID for each user.
socket.io and socket.io-client are used to signal the two different users.
Next, run npm run dev to start the NextJS application. This application can be viewed at localhost:3000.
Setting up the video chat interface
We have our application up and running; we can now create our video chat interface.
Open the index.js file in the pages folder and replace the default code in the index.js file with the one below.
// pages/index.js
import { useEffect, useRef, useState } from 'react';

export default function App() {
  const [errorSetting, seterrorSetting] = useState('');
  const myVideoRef = useRef(); //Your video
  const peerVideoRef = useRef(); //The other users video
  const myStreamRef = useRef(); //Our video stream
  const [done, setdone] = useState(false);


  useEffect(() => {
    //Getting our Video and Audio
    navigator.mediaDevices
      .getUserMedia({
        audio: true,
        video: true,
      })
      .then(stream => {
        myStreamRef.current = stream;
        //Storing our video
        myVideoRef.current.srcObject = stream;
      })
      .catch(err => {
        /* handle the error */
        console.log(err);
      });
  }, []);
  return (
    <>
      <div className="container">
        <div>
          <video autoPlay ref={myVideoRef} muted playsInline width={'500px'} />
          <h1>User</h1>
        </div>
        <div>
          <video autoPlay ref={peerVideoRef} playsInline width={'500px'} />
          {done && <h1>Peer</h1>}
        </div>
      </div>
    <h1>{errorSetting}</h1>
    </>
  );
}
From the above lines of code, We requested the user’s video and audio stream and then stored it in myVideoRef. Once the stream was got, we returned the video with a little style.
This tutorial would focus more on the video chat functionality than beautification. So, feel free to design the video chat app to your taste.
Let’s add a little styling to the application. Open the globals.css file in the styles folder and add the following.
/* styles/globals.css */

.container {
  display: grid;
  grid-template-columns: 3fr 1fr;
}

.div {
  margin: auto;
  width: 30%;
  display: grid;
  grid-template-columns: 1fr;
}

input {
  border-radius: 0;
  padding: 10px 15px;
  width: 100%;
}

.center {
  margin: auto;
  width: 50%;
}

button {
  width: 100px;
  height: 50px;
  border-radius: 10px;
}

html,
body {
  font-family:'Figtree', sans-serif;
  padding: 0;
  margin: 0;
}

* {
  box-sizing: border-box;
}

button:focus {
  outline: 0;
}
Session Replay for Developers
Uncover frustrations, understand bugs and fix slowdowns like never before with OpenReplay — an open-source session replay tool for developers. Self-host it in minutes, and have complete control over your customer data. Check our GitHub repo and join the thousands of developers in our community.
Setting up the server
In this section, we will create the socket server and develop the signaling service for the video chat app.
Create a file named socket.js in the pages/api directory and add the following lines of code.
// pages/api/socket.js

import { Server } from 'socket.io';
import { customAlphabet } from 'nanoid';
const nanoid = customAlphabet('1234567890abcdef', 6);

const SocketServer = (req, res) => {
  if (res.socket.server.io) {
    console.log('Socket is created');
    return res.end();
  }

  const io = new Server(res.socket.server);
  res.socket.server.io = io;

  io.on('connection', socket => {
    let id = nanoid();
    //Creating the room
    socket.on('create-room', () => {
      //Sending the room ID to the host.
      socket.emit('me', id);
      socket.join(id);
      socket.emit('created');
    });
    //Joining a room
    socket.on('join-room', id => {
      const { rooms } = io.sockets.adapter;
      const room = rooms.get(id);
      //Checking if the room existing
      if (room === undefined) {
        socket.emit('not-existing');
      } else if (room.size === 1) {
        //Joining the other user to the room that contains only the host
        socket.join(id);
        //
        socket.broadcast.to(id).emit('ready', id);
      } else {
        // Returns an Error since they are already two in the room
        socket.emit('full');
      }
    });

    //Once we get the offer from the host, we will send it to the other user
    socket.on('offer', (offer, roomId) => {
      console.log('offer', roomId);
      socket.broadcast.to(roomId).emit('offer', offer, roomId);
    });

    //Once we get an icecandidate from the user, we will send it to the other user
    socket.on('ice-candidate', (candidate, roomId) => {
      console.log('icecandidate', roomId);
      socket.broadcast.to(roomId).emit('ice-candidate', candidate);
    });

    //Once we get an answer from the other user, we will send it to the host.
    socket.on('answer', (answer, roomId) => {
      console.log('answer', roomId);
      socket.broadcast.to(roomId).emit('answer', answer);
    });
  });
  return res.end();
};

export default SocketServer;
This is all we need to create the signaling from our server. Next, we would create the signaling from our front end.
Adding the frontend signal
Open your index.js file in the pages folder and add the following to listen to all events emitted from our server.
First, we would initialize the socket for the front end.
//pages/index.js

import { useEffect, useRef, useState } from 'react';
import { io } from 'socket.io-client';

const useSocket = () => {
  const socket = useRef();
  useEffect(() => {
    if (!socket.current) {
      const socketInitializer = async () => {
        await fetch('/api/socket').then(() => {
          console.log('connected');
        });
      };
      try {
        socketInitializer();
        socket.current = true;
      } catch (error) {
        console.log(error);
      }
    }
  }, []);
};

export default function App() {
  //Calling the useSocket function
  useSocket()

  //...
}
The three dots
...in the code block mean missing lines of code.
Next, we will create a useEffect function containing all our socket listening events.
//pages/index.js

import { useEffect, useRef, useState } from 'react';
import { io } from 'socket.io-client';

//...

export default function App() {
  //Calling the useSocket function
  useSocket();
  const [errorSetting, seterrorSetting] = useState('');
  const connectionRef = useRef(null); //The peer connection
  const [roomId, setRoomId] = useState(''); //The roomID
  const socket = useRef(); //The socket instance
  const myVideoRef = useRef(); //Your video
  const peerVideoRef = useRef(); //The other users video
  const myStreamRef = useRef(); //Our video stream
  const host = useRef(false); //Host instance
  const [done, setdone] = useState(false);
  //...

  useEffect(() => {
    socket.current = io();

    //Getting the `roomId` from the server
    socket.current.on('me', roomId => {
      //Saving the roomId got from the server
      setID(roomId);
    });
    //Listening for a `full` event from the server
    socket.current.on('full', () => {
      seterrorSetting('Room is filled');
    });
    //Listening for a `not-existing` event from the server
    socket.current.on('not-existing', () => {
      seterrorSetting("Room doesn't exist");
    });
    //Setting the host
    socket.current.on('created', () => (host.current = true));
    //Starting the video call when we receive a ready event
    socket.current.on('ready', startCall);

    /* WebRTC */

    //Getting the offer
    socket.current.on('offer', receiveOfferHandler);
    //Getting the answer
    socket.current.on('answer', handleAnswer);
    //Getting the icecandidate
    socket.current.on('ice-candidate', newIceCandidate);

    return () => socket.current.disconnect();
  }, [roomId]);
  //...
}
Let’s create the handlers for these listening events.
//page/index.js
import { useEffect, useRef, useState } from 'react';
import { io } from 'socket.io-client';
//...

export default function App() {
  //...

  const startCall = roomiid => {
    console.log('call initiated');
  };
  const receiveOfferHandler = (offer, roomiid) => {
    if (!host.current) {
    }
  };
  const handleAnswer = answer => {
    if (host.current) {
      console.log('receiving answer');
    }
  };
  const newIceCandidate = incomingIce => {
    console.log('receiving new icecandidate');
  };
  //...
}
Creating the Peer Connection
Now let’s get started with WebRTC.
To make use of WebRTC, we need to make use of ICE Servers. An interactive Connectivity Establishment (ICE) Server is a protocol used to establish a peer-to-peer connection between two browsers in WebRTC applications. It majorly makes use of Session Traversal Utilities for NAT (STUN) and Traversal Using Relays around Nat (TURN) for media communication.
Click here to know more about ICE Servers
There are many public ICE Servers you can pick from, but for this tutorial, we will make use of the OpenReplay ICE Servers.
To add this ICE Server, open the index.js file and add the lines of code below.
//pages/index.js

import { useEffect, useRef, useState } from 'react';
import { io } from 'socket.io-client';

//Public IceServer: https://www.metered.ca/tools/openrelay/
const IceServer = {
  iceServers: [
    {
      urls: 'turn:openreplay.metered.ca:443',
      username: 'openreplayproject',
      credential: 'openreplayproject',
    },
  ],
};
//...
Once a user gets the room ID and clicks on the Join Room button, we will create functionality enabling the host to start the video call.
Let’s create the functionality that will enable users to create and join a room in the index.js file.
//pages/index.js

import { useEffect, useRef, useState } from 'react';
import { io } from 'socket.io-client';

//...

export default function App() {
 //Calling the useSocket function
  useSocket();
  const [errorSetting, seterrorSetting] = useState('');
  const [id, setID] = useState(); //Your roomID

  //...

  const roomCreate = () => {
    //Signaling the server to create a room
    socket.current.emit('create-room');
  };
  const joinRoom = () => {
    //Signaling the server to join the user to the room
    socket.current.emit('join-room', roomId);
  };

  return (
    <>
      <div className="container">
        <div>
          <video autoPlay ref={myVideoRef} muted playsInline width={'500px'} />
          <h1>User</h1>
        </div>
        <div>
          <video autoPlay ref={peerVideoRef} playsInline width={'500px'} />
          {done && <h1>Peer</h1>}
        </div>
      </div>
      <div className="div">
        <button onClick={roomCreate} style={{ marginBottom: '10px' }}>
          Create Room
        </button>
        {id && <h2>Copy Id: {id}</h2>}
        <input
          type="text"
          value={roomId}
          onChange={e => setRoomId(e.target.value)}
          style={{ marginBottom: '20px' }}
        />
        <button onClick={joinRoom}>Join Room</button>
        <h1>{errorSetting}</h1>
      </div>
    </>
  );
}
Next, we will create a new function that will handle the creation of a new RTCPeerConnection, which helps to create peer connections.
//pages/index.js

//...
export default function App() {
  //...

  const peerConnection = () => {
    // Creating the Peer Connection
    const connection = new RTCPeerConnection(IceServer);

    //Getting the icecandidate from the IceServer
    connection.onicecandidate = e => {
      console.log('icecandidate');
      if (e.candidate) {
        //when it receives the ice candidate, it sends the ice candidate to the server
        socket.current.emit('ice-candidate', e.candidate, roomId);
      }
    };
    //Getting the streams.
    connection.ontrack = e => {
      console.log('track receiving', e);
      //When it receives the peer's video, it stores the stream in peerVideoref
      peerVideoRef.current.srcObject = e.streams[0];
    };
    return connection;
  };
  //...
}
Starting the video call
After creating the peerConnection function, we will edit the startCall function and create a new peer connection using the peerConnection function.
//pages/index.js

//...
export default function App() {
  //...
  const peerConnection = () => {
    //...
  }
  const startCall = roomiid => {
    console.log('call initiated');

    if (host.current) {
      //Setting the host's peerConnection
      connectionRef.current = peerConnection();

      myStreamRef.current.getTracks().forEach(element => {
        //Storing the stream of the host in the peerConnection
        connectionRef.current.addTrack(element, myStreamRef.current);
      });

      //Creating the offer
      connectionRef.current
        .createOffer()
        .then(offer => {
          connectionRef.current.setLocalDescription(offer);
          //Sending the offer to the server
          socket.current.emit('offer', offer, roomiid);
        })
        .catch(error => {
          console.log(error);
        });
    }
  };
  //...
}
Above, we created a new peer connection, stored our video stream in the peer connection, created an offer using the peer connection, and emitted the offer to the server.
Receiving the offer
Once the server receives the offer, it sends the offer to the other peer. Now, let’s receive the offer and emit the other peer’s answer.
//pages/index.js

//...
export default function App() {
  //...

  const peerConnection = () => {
    //...
  }
  const startCall = roomiid => {
    //...
  }
  //...
  const receiveOfferHandler = (offer, roomiid) => {
    if (!host.current) {
      //Setting the other user's peerConnection
      connectionRef.current = peerConnection();

      myStreamRef.current.getTracks().forEach(element => {
        //Storing the stream of the other user in the peerConnection
        connectionRef.current.addTrack(element, myStreamRef.current);
      });
      //Storing the host's offer that was received.
      connectionRef.current.setRemoteDescription(offer);

      //Create an answer
      connectionRef.current
        .createAnswer()
        .then(answer => {
          connectionRef.current.setLocalDescription(answer);
          //Sending the answer to the server
          socket.current.emit('answer', answer, roomiid);
          setdone(true);
        })
        .catch(error => {
          console.log(error);
        });
    }
  };
  //...
}
As seen above, we got the host’s offer from the server, stored it as the other user’s remote description, created an answer, and sent this answer to the server.
Receiving the answer
Immediately after the server receives the answer, it sends the answer to the host. Let’s receive the answer and set it as the host’s remote description.
//pages/index.js

//...
export default function App() {
  //...

  const peerConnection = () => {
    //...
  }
  const startCall = roomiid => {
    //...
  }
  const receiveOfferHandler = (offer, roomiid) => {
    //...
  }
  const handleAnswer = answer => {
    if (host.current) {
      console.log('receiving answer');
      setdone(true);
      connectionRef.current
        .setRemoteDescription(answer)
        .catch(err => console.log(err));
    }
  };
  //...
}
Adding the ice candidate
Lastly, we need to add the incoming ice-candidate to the peer connection.
//pages/index.js

//...
export default function App() {
  //...

  const peerConnection = () => {
    //...
  }
  const startCall = roomiid => {
    //...
  }
  const receiveOfferHandler = (offer, roomiid) => {
    //...
  }
  const handleAnswer = answer => {
    //...
  }
  const newIceCandidate = incomingIce => {
    console.log('receiving new icecandidate');
    const candidate = new RTCIceCandidate(incomingIce);
    connectionRef.current
      .addIceCandidate(candidate)
      .catch(err => console.log(err));
  };
}
You can view and test the application at localhost:3000.
Deploying the application
It’s time to deploy our application. There are various services out there that we can use to deploy our NextJS application. We can’t use Vercel because it doesn’t support WebSockets at the time of writing this article. We would have used Heroku, but Heroku doesn’t have a free tier anymore.
The best option we can use is Render. Render is a unified cloud to build and run all your apps and websites with free TLS certificates, a global CDN, DDoS protection, private networks, and auto deploys from Git.
Visit the official Render website to create a free account. You can sign up with Google, GitHub, GitLab, or your email address.
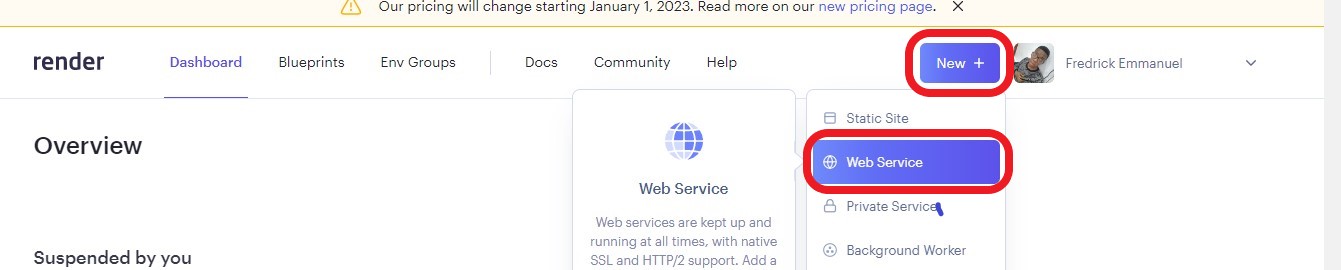
Once you’ve signed up, click the New + button close to your avatar and select Web Service to create a new application.
Ensure you have deployed your source code to GitHub
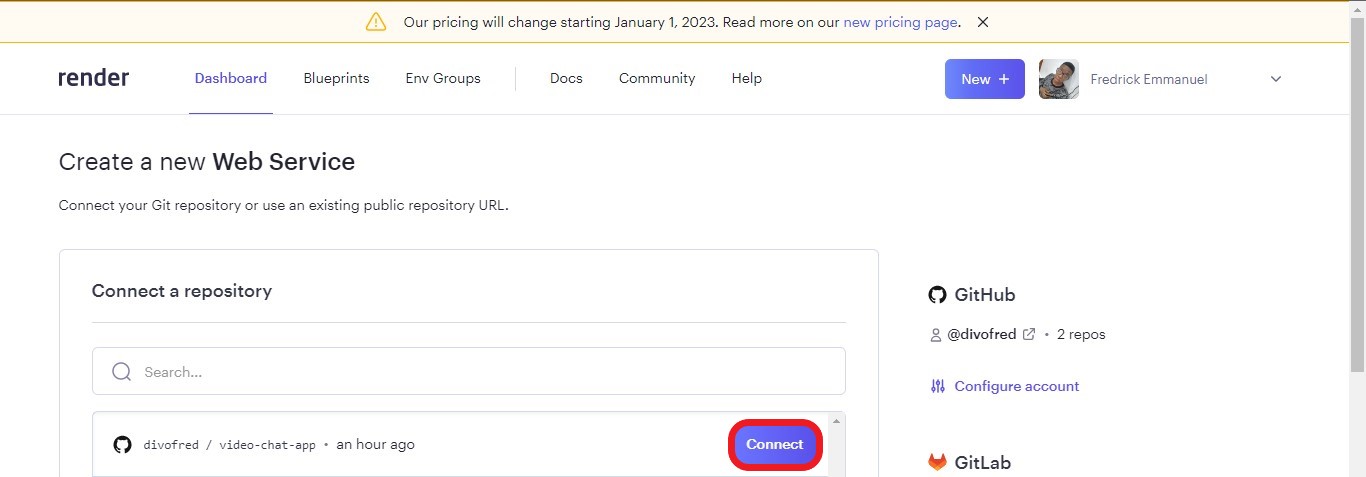
Link your GitHub account and Connect your desired repository.
Next, enter a unique name for the application. In this tutorial, the application’s name is openreplay-video-chat, so choose something different.

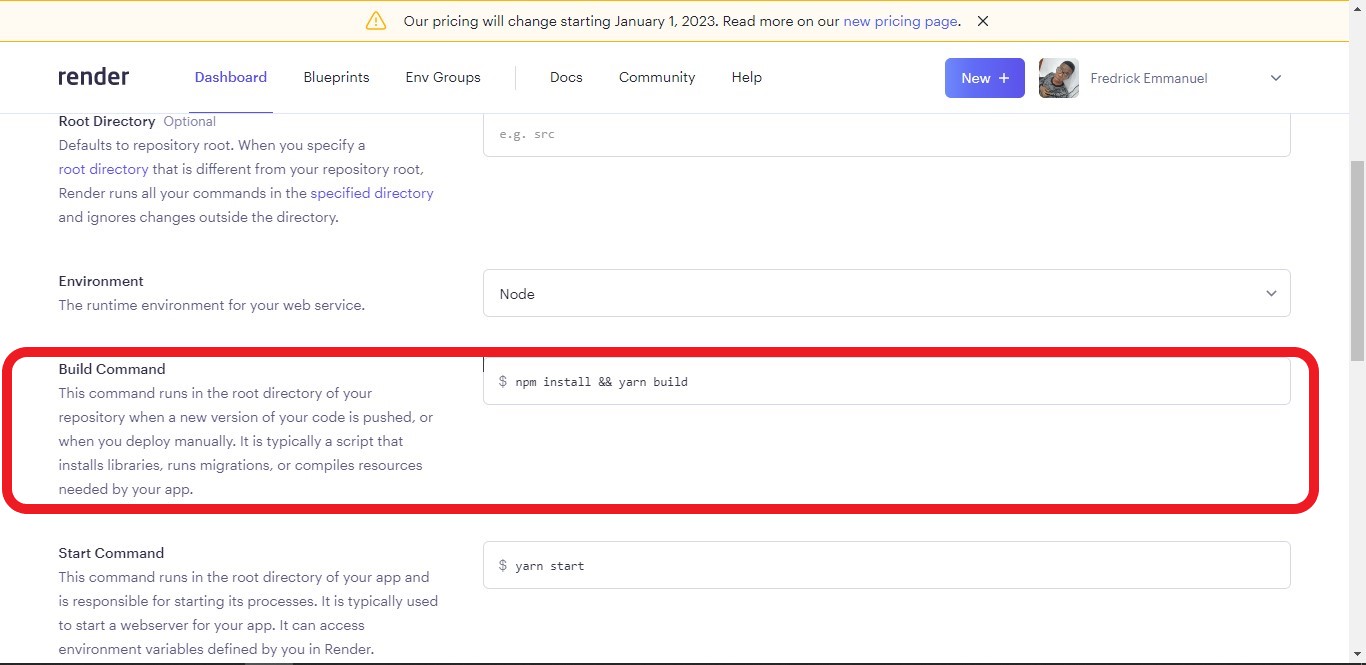
Make sure that your repository root folder is the NextJS folder. If the NextJS application’s folder is in another folder, visit render’s docs for directions.
Scroll down to Build Command and edit the build command using npm install && yarn build.
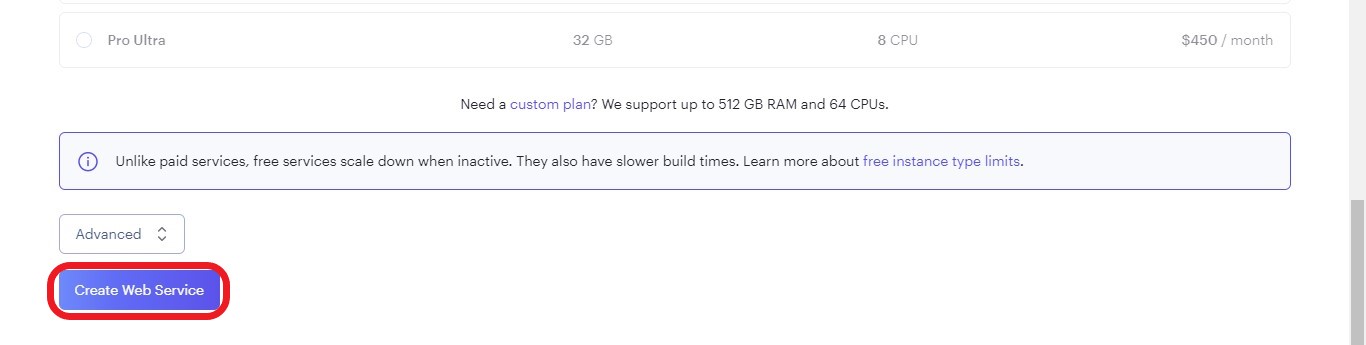
Once that is done, click on the Free tier, scroll to the bottom and click on Create Web Service to deploy the application.
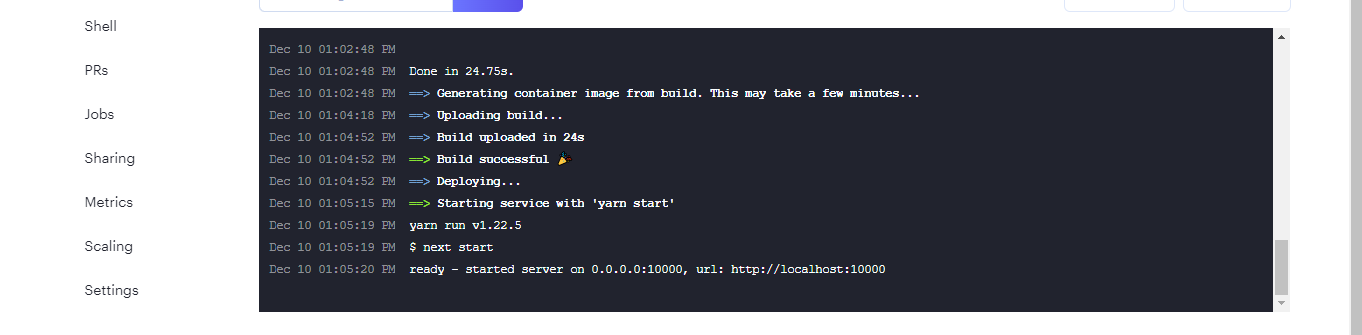
Once it is done installing all dependencies and building the NextJS application, you will get an output similar to the one below.
Conclusion
We have come to the end of this tutorial. In this tutorial, we learned about WebRTC and WebSockets and used this knowledge to create a video chat application.
The complete code for this project can be found here.
Gain Debugging Superpowers
Unleash the power of session replay to reproduce bugs and track user frustrations. Get complete visibility into your frontend with OpenReplay, the most advanced open-source session replay tool for developers.
