
Medusa is a great open-source alternative to something like Shopify, especially for developers on a budget. The Medusa docs do a very good job of showing how to get Medusa set up on Heroku and Vercel but not much is written about how to get it set up with Docker. In this article, I’ll show you how to create a Medusa store with Docker and docker-compose.
Goals
In this tutorial, I’ll show you how to install and set up a Medusa store on your local machine. The store contains the storefront, the admin, and the backend. We will set up all of these using docker and docker-compose, so you don’t have to worry about installing lots of dependencies.
This tutorial assumes you have a working knowledge of git, javascript, typescript, docker, and the terminal.
Overview
The completed project will feature a nextjs front-end application for the store. This will display all the items available for sale and provide options for the user to register/log in, add items to the cart, and buy items. Additionally, we will be setting up a gatsbyjs front-end application that will be the admin panel for our store. Using this admin panel, the user can add new items to the store, remove items, add discounts, add other users, set order status, and much more. Finally, we will set up a backend nodejs server, exposing all APIs needed for the admin panel and the storefront.
This project shows you how to set up a development build of a Medusa store; this should not be used in production.
Installing docker and docker-compose
The steps below will be for a Linux machine running an Arch-based operating system(EndeavourOS), if you’re on Windows, MacOS or another Linux distribution follow the steps on the official docker website.
- First, we will install the Docker package. This will allow us to pull
dockerimages, run containers, and more. Run this command in your terminal.
sudo pacman -S dockerConfirm that docker is now installed by running docker version. If the installation was successful, then your output should be something like
Client:
Version:           20.10.22
API version:       1.41
Go version:        go1.19.4
Git commit:        3a2c30b63a
Built:             Tue Dec 20 20:43:40 2022
OS/Arch:           linux/amd64
Context:           default
Experimental:      true
Cannot connect to the Docker daemon at unix:///var/run/docker.sock. Is the docker daemon running?
Don`t worry about the error at the bottom; we’ll be fixing that in the next step.
- Enable and start the docker service by running the following commands in your terminal.
sudo systemctl enable docker.servicesudo systemctl start docker.serviceNow when you run docker version, you should get a slightly different output.
Client:
Version:           20.10.22
API version:       1.41
Go version:        go1.19.4
Git commit:        3a2c30b63a
Built:             Tue Dec 20 20:43:40 2022
OS/Arch:           linux/amd64
Context:           default
Experimental:      true
Got permission denied while trying to connect to the Docker daemon socket at unix:///var/run/docker.sock: Get "http://%2Fvar%2Frun%2Fdocker.sock/v1.24/version": dial unix /var/run/docker.sock: connect: permission denied
This error occurred because the Docker commands must be run with root privileges. To do this, use the sudo command before each Docker command. We will address this issue in the next step.
- Create the
dockergroup and add your user
# Create the docker group
sudo groupadd docker
If you get groupadd: group 'docker' already exists, don’t worry; you’re fine.
# Add your user to the docker group
sudo usermod -aG docker $USER
# Activate the changes to groups
newgrp dockerNow the docker version command should work without errors. The output should look something like this.
   Client:
    Version:           20.10.22
    API version:       1.41
    Go version:        go1.19.4
    Git commit:        3a2c30b63a
    Built:             Tue Dec 20 20:43:40 2022
    OS/Arch:           linux/amd64
    Context:           default
    Experimental:      true

   Server:
    Engine:
     Version:          20.10.22
     API version:      1.41 (minimum version 1.12)
     Go version:       go1.19.4
     Git commit:       42c8b31499
     Built:            Tue Dec 20 20:42:46 2022
     OS/Arch:          linux/amd64
     Experimental:     false
    containerd:
     Version:          v1.6.14
     GitCommit:        9ba4b250366a5ddde94bb7c9d1def331423aa323.m
    runc:
     Version:          1.1.4
     GitCommit:
    docker-init:
     Version:          0.19.0
     GitCommit:        de40ad0
If you’re running Linux in a virtual machine, it may be necessary to restart the virtual machine for changes to take effect.
- Install docker-compose
sudo pacman -S docker-composeCloning the base project
- Clone the base project from https://github.com/Prn-Ice/medusa-docker.
git clone https://github.com/Prn-Ice/medusa-docker- Navigate to the projects directory.
cd medusa-docker- To initialize the Git submodules within the base project, run the following command
git submodule update --init --recursive --remoteYour directory structure should look like this if you followed the steps correctly
.
├── admin
│   ├── Dockerfile
│   ├── index.html
│   ├── LICENSE
│   ├── netlify.toml
│   ├── package.json
│   ├── postcss.config.js
│   ├── README.md
│   ├── src
│   ├── static
│   ├── tailwind.config.js
│   ├── tsconfig.json
│   ├── tsconfig.node.json
│   ├── vite.config.ts
│   └── yarn.lock
├── backend
│   ├── data
│   ├── develop.sh
│   ├── Dockerfile
│   ├── medusa-config.js
│   ├── package.json
│   ├── README.md
│   ├── src
│   ├── tsconfig.json
│   └── yarn.lock
├── docker-compose.yml
├── README.md
└── storefront
    ├── cypress
    ├── cypress.json
    ├── Dockerfile
    ├── LICENSE
    ├── netlify.toml
    ├── next.config.js
    ├── next-env.d.ts
    ├── next-sitemap.js
    ├── package.json
    ├── postcss.config.js
    ├── public
    ├── README.md
    ├── src
    ├── store-config.js
    ├── store.config.json
    ├── tailwind.config.js
    ├── tsconfig.json
    └── yarn.lock

11 directories, 36 files
Components of the base project
As stated in the overview, a Medusa store is made up of the following components
- The headless backend
- The admin dashboard
- The storefront
Headless Backend
This is the main component that holds all the logic and data of the store. Your admin dashboard and storefront interact with the backend to retrieve, create, and modify data through REST APIs.
The backend is a nodejs server. In the past, setting up the backend required cloning the base Medusa backend from here, installing all the necessary dependencies on your local system, and finally starting the server by running medusa develop.
However, using Docker can simplify this process. With Docker, you only need to update a few configuration files to work with the Docker setup, and you won’t need to install any additional dependencies on your local system.
# Set the base image to Node 17.1.0-alpine
FROM node:17.1.0-alpine

# Set the working directory
WORKDIR /app/medusa

# Copy the necessary files
COPY package.json .
COPY develop.sh .
COPY yarn.* .

# Run the apk update command to update package information
RUN apk update

# Install dependencies
RUN yarn --network-timeout 1000000

# Install the medusa-cli
RUN yarn global add @medusajs/medusa-cli@latest

# Add the remaining files
COPY . .

# Set the default command to run when the container starts
ENTRYPOINT ["sh", "develop.sh"]
The image for the Medusa backend is created from the dockerfile above. It’s a fairly simple single-stage dockerfile that builds a Medusa backend from the node alpine image. Here’s how it works;
Line 2: Use the node:17.1.0-alpine image as a base; this gives us a light Linux environment with Node and a few other dependencies installed by default. I chose version 17.1.0 because that was the version used in medusa’s official repository, but newer versions should work as well.
Line 5: Set a working directory to /app/medusa; this is where all the project files will be stored, and this is where the EntryPoint command is run.
Line 8 - 10: Copy all the files needed to install the project’s dependencies. This includes all the package.json and yarn lock files.
Line 13: Run apk update; this updates the packages on the node alpine image.
Line 16: Install project dependencies; this installs all the dependencies in the project’s package.json file. I added a long timeout because my Internet connection is really poor, and installing dependencies kept timing out.
Line 19: Install the Medusa client. This will allow you to run commands to start up the server and seed the database.
Line 22: Copy the remaining files; this includes the Medusa config files and every other file and folder not specified in the .dockerignore file.
Line 25: Set the default command to run when the container starts. The develop.sh file runs all the migrations to make sure the database is updated and finally starts the development server. When the server is started, it is accessible on http://localhost:9000.
Admin dashboard
The Admin dashboard is a tool used by store operators to view, create, and modify data such as orders and products. It is built with gatsbyjs and can be accessed through a web browser.
Without Docker, setting up the admin dashboard requires cloning the code from here and installing all the necessary dependencies on your local system. To start the server, run yarn serve.
# Set the base image to Node 17.1.0-alpine
FROM node:17.1.0-alpine

# Set the working directory for all subsequent commands
WORKDIR /app/admin

# Copy the package.json and yarn lock files to the working directory
COPY package.json .
COPY yarn.* .

# Run the apk update command to update package information
RUN apk update

# Install sharp to enable image precessing
RUN yarn add sharp --network-timeout 1000000

# Install the dependencies
RUN yarn --network-timeout 1000000

# Copy all files in the current directory (.) to the working directory in the container
COPY . .

# Run the yarn build command to build the application
RUN yarn build

# Set the default command to serve the built application
ENTRYPOINT [ "yarn", "serve"]
The image for the Medusa admin is created from the dockerfile above. It’s a fairly simple single-stage dockerfile that builds a Medusa backend from the node alpine image. Here’s how it works;
Line 2: Use the node:17.1.0-alpine image as a base.
Line 5: Set a working directory to /app/admin. This is where all the project files will be stored, and this is where the EntryPoint command is run.
Line 8 - 9: Copy all the files needed to install the project’s dependencies; this includes all the package.json and yarn lock files.
Line 12: Run apk update; this updates the packages on the node alpine image.
Line 15: Install sharp. This allows for fast image processing in the Admin app. Without installing it, I noticed some images for products added failed to render correctly.
Line 18: Install project dependencies; this installs all the dependencies in the project’s package.json file.
Line 21: Copy the remaining files. This includes the Medusa config files and every other file and folder not specified in the .dockerignore file.
Line 24: Build the application. As stated earlier, the admin is a gatsbyjs, so the development app has to be built before it can be hosted on the local machine.
Line 27: Set the default command to run when the container starts. Here we run yarn serve, which in turn runs vite preview --port 7700 --host. This will host the gatsbyjs app we built in the previous step, making it accessible at http://localhost:7700.
Storefront
Your customers use the Storefront to view products and make orders. Medusa provides two starter storefronts, one built with gatsbyjs and one built with nextjs. We will be using the nextjs storefront in this tutorial, as I think it looks better.
The base storefront can be found here, and as you might have guessed, we will also be automating starting this up with docker.
# Set the base image to Node 17.1.0-alpine
FROM node:17.1.0-alpine

# Set the working directory for all subsequent commands
WORKDIR /app/storefront

# Copy the package.json and yarn lock files to the working directory
COPY package.json .
COPY yarn.* .

# Run the apk update command to update package information
RUN apk update

# Install the dependencies
RUN yarn --network-timeout 1000000

# Copy all files in the current directory (.) to the working directory in the container
COPY . .

# Set the default command to run the application in development mode
ENTRYPOINT [ "yarn", "dev"]
The image for the Medusa admin is created from the dockerfile above. It’s a fairly simple single-stage dockerfile that builds a Medusa backend from the node alpine image. Here’s how it works;
Line 2: Use the node:17.1.0-alpine image as a base.
Line 5: Set a working directory to /app/storefront. This is where all the project files will be stored, and this is where the EntryPoint command is run.
Line 8 - 9: Copy all the files needed to install the project’s dependencies; this includes all the package.json and yarn lock files.
Line 12: Run apk update. This updates the packages on the node alpine image.
Line 15: Install project dependencies; this installs all the dependencies in the project’s package.json file.
Line 18: Copy the remaining files. This includes the Medusa config files and every other file and folder not specified in the .dockerignore file.
Line 21: Set the default command to run when the container starts. Here we run yarn dev, which in turn runs next dev -p 8100. This will build and host the nextjs app, making it accessible at http://localhost:8100.
Docker Compose YAML file
The docker-compose.yaml file is responsible for starting the containers for the backend admin and storefront as well as specifying configs, envs, and dependencies for each.
The compose file is fairly long, so I’ll be explaining its functions service by service. These may not be in order, as I’ll start with the services that have no dependencies and then talk about those with dependencies a little later.
- The Postgres service Lines 30 - 45
postgres:
  image: postgres:10.4-alpine
  restart: always
  healthcheck:
    test: ["CMD-SHELL", "pg_isready -U postgres"]
    interval: 5s
    timeout: 5s
    retries: 5
  expose:
    - 5432
  volumes:
    - postgres_data:/var/lib/postgresql/data
  environment:
    POSTGRES_USER: postgres
    POSTGRES_PASSWORD: postgres
    POSTGRES_DB: medusa-docker
The postgres service serves as persistent storage for our Medusa backend. The Medusa backend depends on it and will connect to it using the DATABASE_URL.
The DATABASE_URL for a postgres database follows the following format
postgres://YourUserName:YourPassword@YourHostname:port/YourDatabaseNameThe database created in this database will have the following URL
postgres://postgres:postgres@postgres:5432/medusa-dockerThis service uses the postgres:10.4-alpine image because this was the version used in the official Medusa repository, but newer versions should work as well.
The service is set to restart: always; this will restart the container if it exits or crashes, ensuring that the container is always available.
The healthcheck from lines 33 - 37 allows us to check that the postgres service is started and available for other containers that depend on it.
We expose port 5432 on line 39 so that the Medusa backend service can connect to it on that port. postgres runs on that port by default.
On lines 40 - 41, we set a volume mapping so that our postgres data is persisted between container restarts.
Lines 42 - 45 specify the env variables for the postgres container, the username, password, and db name.
- The Redis service Line 47 - 54
redis:
  image: redis:7.0.7-alpine
  restart: always
  container_name: cache
  expose:
    - 6379
  volumes:
    - redis_data:/data
The redis service serves as a cache for our Medusa backend, making requests to the backend to return responses faster. The Medusa backend depends on it and will connect to it using the database URL.
The REDIS_URL for a redis database follows the following format
redis://password@host:port/db-numberThe database created in this database will have the following URL
// We don't have a password or custom db number or port
redis://cache
This service uses the redis:7.0.7-alpine image, that’s the latest at the time of writing this article.
The service is set to restart: always. This will restart the container if it exits or crashes, ensuring that the container is always available.
We expose port 6379 on line 52 so that the Medusa backend service can connect to it on that port. redis runs on that port by default.
On lines 53 - 54, we set a volume mapping so that our redis data is persisted between container restarts.
- The Minio service
minio:
  image: quay.io/minio/minio
  restart: always
  ports:
    - "9001:9000"
    - "9090:9090"
  environment:
    MINIO_ROOT_USER: ROOTNAME
    MINIO_ROOT_PASSWORD: CHANGEME123
  command: server /data --console-address ":9090"
  volumes:
    - minio_data:/data
The minio service serves as a file hosting service for the Medusa backend. It enables adding images when creating products on the admin.
Lines 59 - 61 expose the ports 9000 and 9090; 9000 is for the backend while 9090 is for the console for configuring minio.
Lines 62 - 64 Configure the username and password; we’ll need this to log in to the dashboard.
Line 65 sets up the startup command; this command starts up the minio server and sets the data directory to /data.
Line 66 sets a volume mapping so that the data in our minio server will persist between restarts.
- The Medusa
backendservice
backend:
  build:
    dockerfile: Dockerfile
    context: ./backend
  container_name: medusa-server
  restart: always
  depends_on:
    postgres:
      condition: service_healthy
    redis:
      condition: service_started
    minio:
      condition: service_started
  volumes:
    - ./backend:/app/medusa
    - backend_node_modules:/app/medusa/node_modules
  ports:
    - "9000:9000"
  environment:
    NODE_ENV: development
    DATABASE_URL: postgres://postgres:postgres@postgres:5432/medusa-docker
    REDIS_URL: redis://cache
    MINIO_ENDPOINT: <http://minio:9000>
    MINIO_BUCKET: medusa-bucket
    MINIO_ACCESS_KEY: AKAFMGGNe2jOPerG
    MINIO_SECRET_KEY: zD595HUAJS96Hwg8nxoke2ZGJoFj3ryB
This will build the medusa-server container using the instructions in the DockerFile in the backend folder.
The container will restart if it crashes or exits, and it depends on the postgres, redis, and minio services discussed above.
The condition: service_healthy on the postgres dependency will prevent this container from starting until the postgres service is up and running.
Lines 16 - 18 specify volume mappings for the working directory and node_modules; this will cause those directories to persist between container restarts.
Line 20: Exposes the server on port 9000.
Lines 21 - 28: These specify the environment variables used in the backend service. These include the postgres database URL, redis, URL, and minio keys.
- The
adminservice
admin:
  build:
    context: ./admin
    dockerfile: Dockerfile
  image: admin:latest
  restart: always
  depends_on:
    - backend
  container_name: medusa-admin
  ports:
    - "7700:7700"
  environment:
    MEDUSA_BACKEND_URL: <http://backend:9000>
    NODE_OPTIONS: --openssl-legacy-provider
This will build the medusa-admin container using the instructions in the DockerFile in the admin folder.
The container will restart if it crashes or exits, and it depends on the backend service discussed above.
Line 79: Exposes the admin on port 7700.
Lines 80 - 82: Specify environment variables that will be passed to the admin. MEDUSA_BACKEND_URL tells the admin that it can access the server at http://backend:9000, while NODE_OPTIONS: --openssl-legacy-provider tells Node.js to use the legacy OpenSSL provider which is a compatibility layer that allows Node.js to use a specific version of OpenSSL library. This is useful if the Node.js version you are using is not compatible with the default version of OpenSSL that is included in the system.
- The
storefrontservice
storefront:
  build:
    context: ./storefront
    dockerfile: Dockerfile
  container_name: medusa-storefront
  restart: always
  depends_on:
    - backend
  volumes:
    - ./storefront:/app/storefront
    - storefront_node_modules:/app/storefront/node_modules
  ports:
    - "8100:8100"
This will build the medusa-storefront container using the instructions in the DockerFile in the storefront folder.
The container will restart if it crashes or exits, and it depends on the backend service discussed above.
Lines 92 - 94 specify volume mappings for the working directory and node_modules. This will cause those directories to persist between container restarts.
Line 96: Exposes the storefront on port 8100.
Session Replay for Developers
Uncover frustrations, understand bugs and fix slowdowns like never before with OpenReplay — an open-source session replay tool for developers. Self-host it in minutes, and have complete control over your customer data. Check our GitHub repo and join the thousands of developers in our community.
Spin up the project
Yes, finally, we are going to be starting up the project.
To do this, run this command in the root of the Medusa project.
docker compose up --buildThis will pull the images for postgres, minio, and redis. It’s also going to build the images for the backed, admin, and storefront. When all that is done, it will start up all the containers, and we will be able to access the store.
The backend should be available at http://localhost:9000. You can test that it is by running the following
curl -X GET localhost:9000/store/products | python -m json.toolThe admin and storefront should be available at http://localhost:7700 and http://localhost:8100, respectively.
If you try to access the storefront now, you will get errors, and there will be no products, follow the next steps to seed the store with data.
Seed the database
Seeding the database with the seed file provided will populate it with some dummy data, and we’ll finally be able to preview the store.
To seed the database, run the following command
docker exec medusa-server Medusa seed -f ./data/seed.jsonConfigure the Minio server
The environment variables currently passed to the backend service for the minio server are wrong, and you won’t be able to upload images. To fix this you will need to create a new bucket and configure new access keys. To set this up, follow the steps below.
-
Open the
minioserver dashboard: To do this, go to http://localhost:9090 on your browser. You should see a login page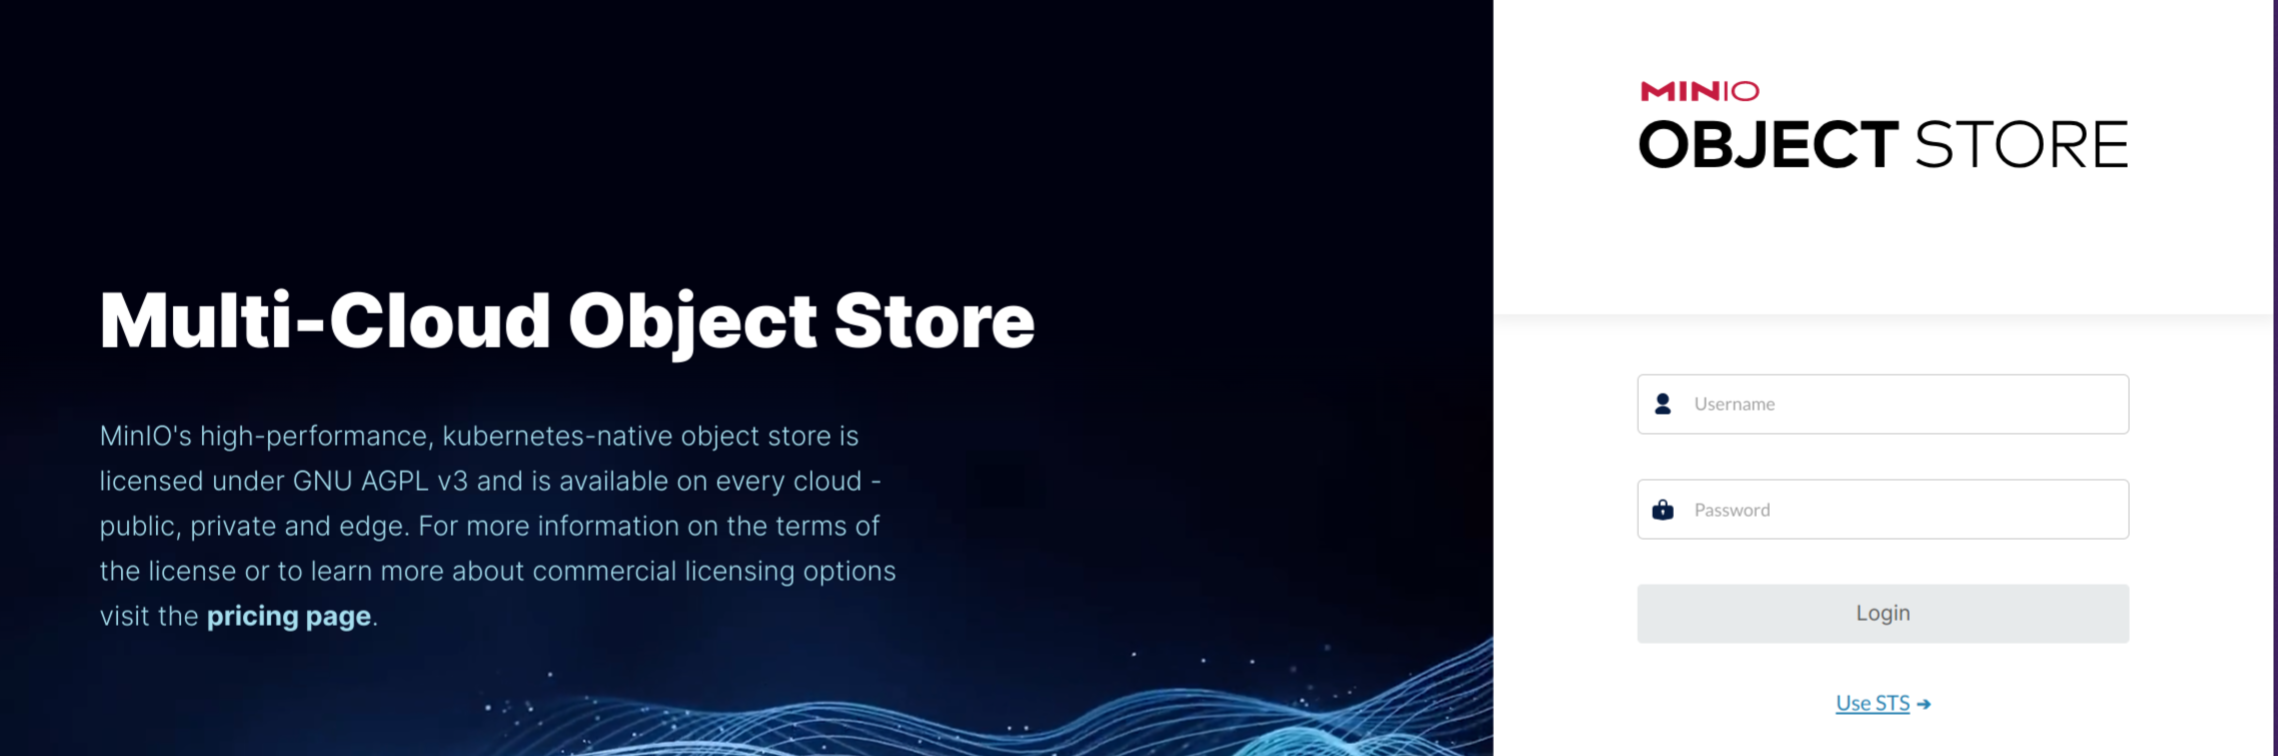
-
Login with these details
- username: ROOTNAME
- password: CHANGEME123
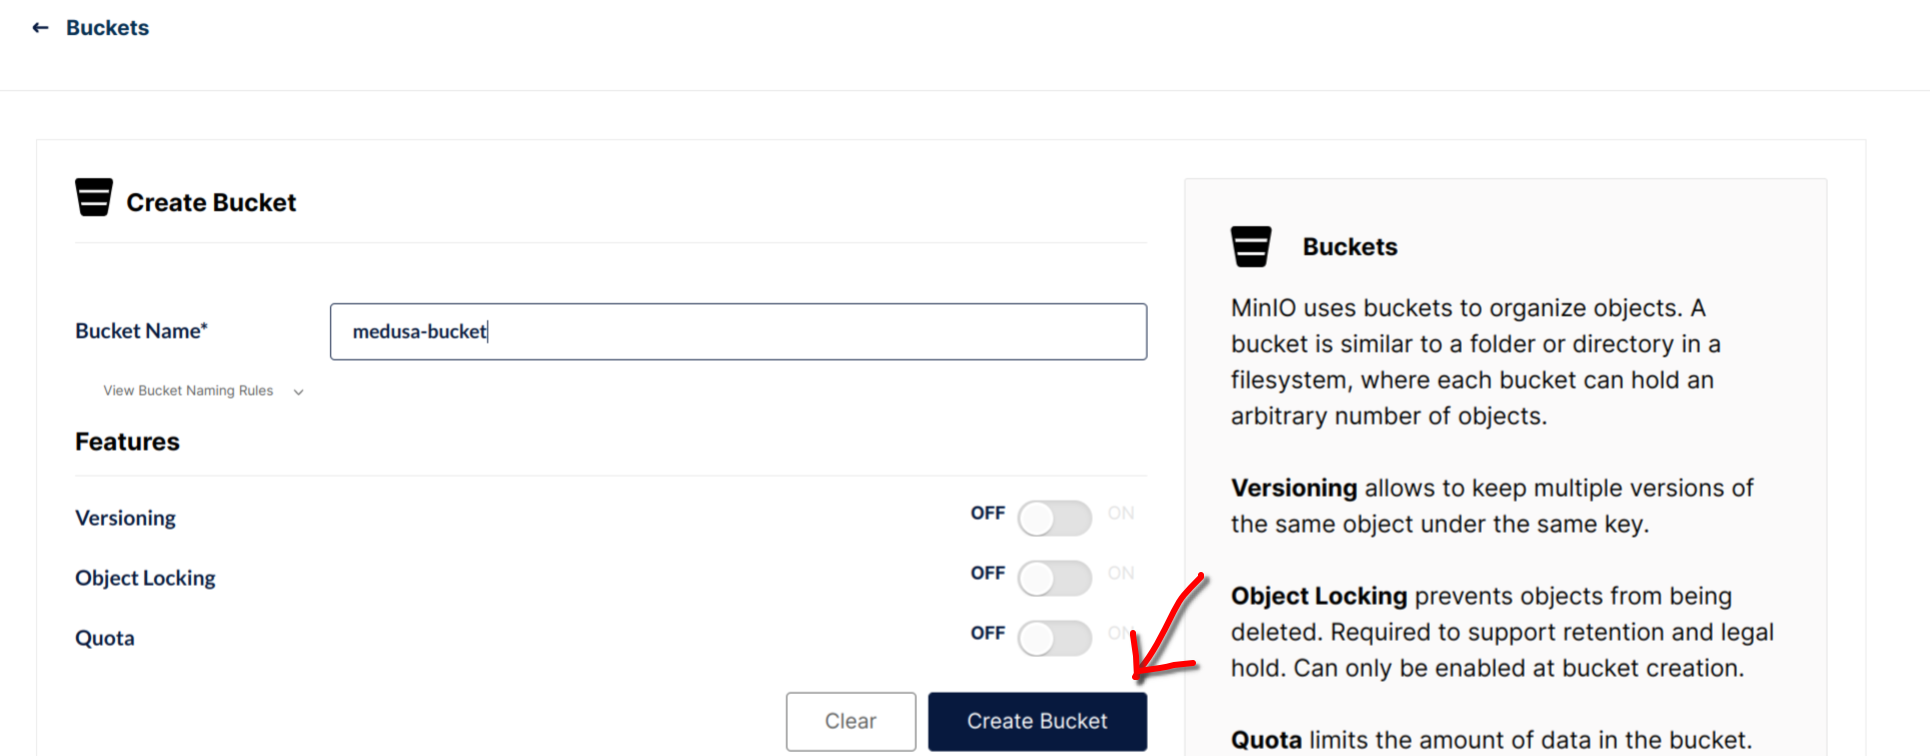
-
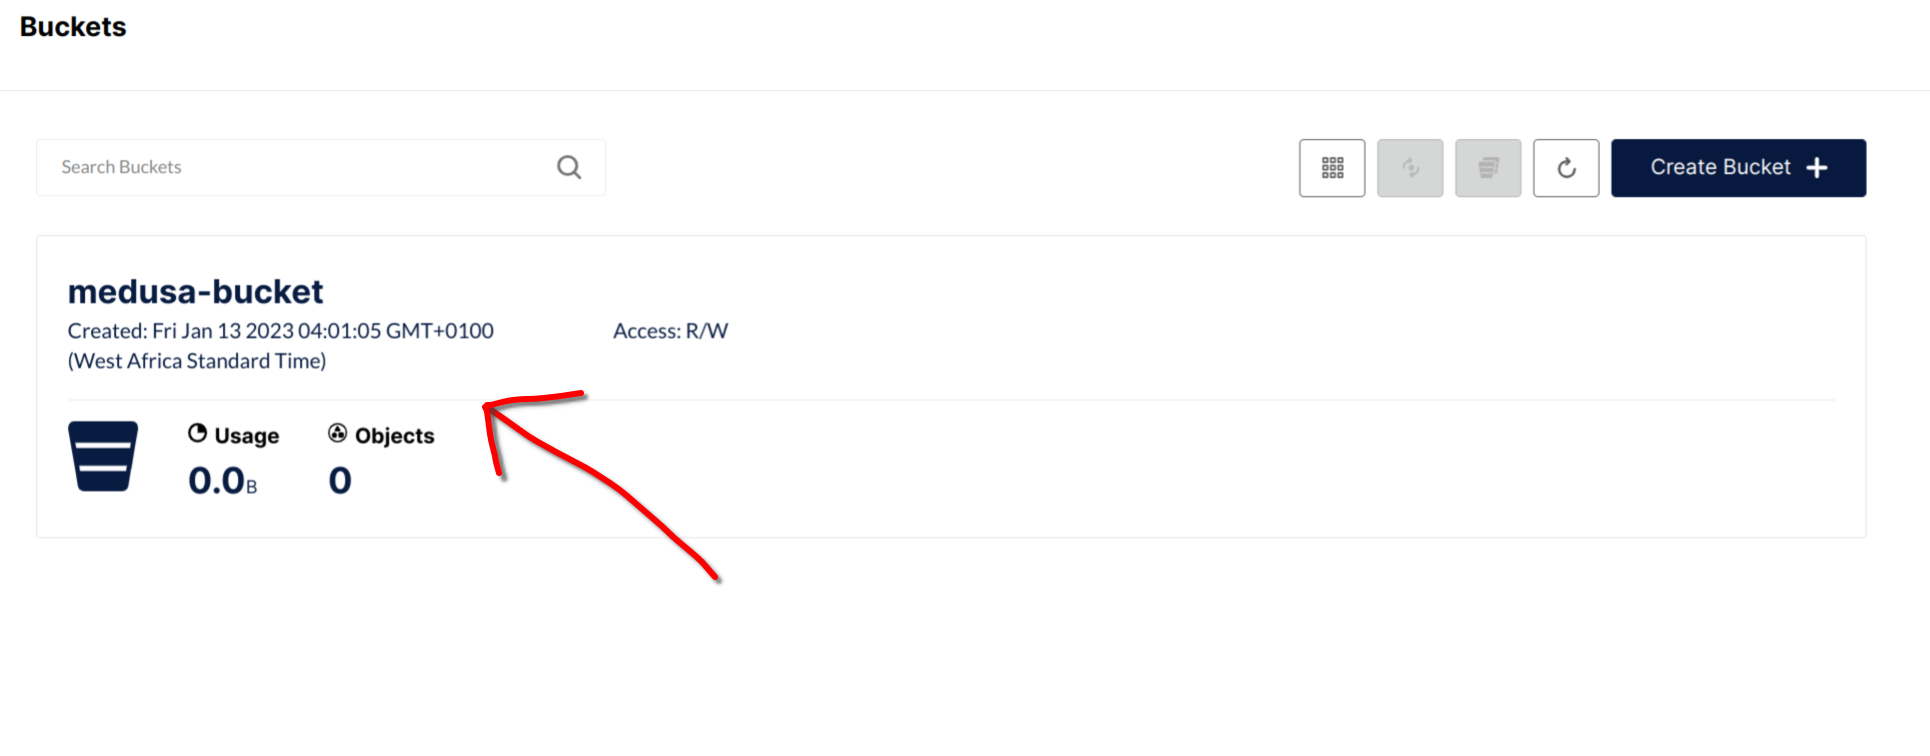
Create a bucket:
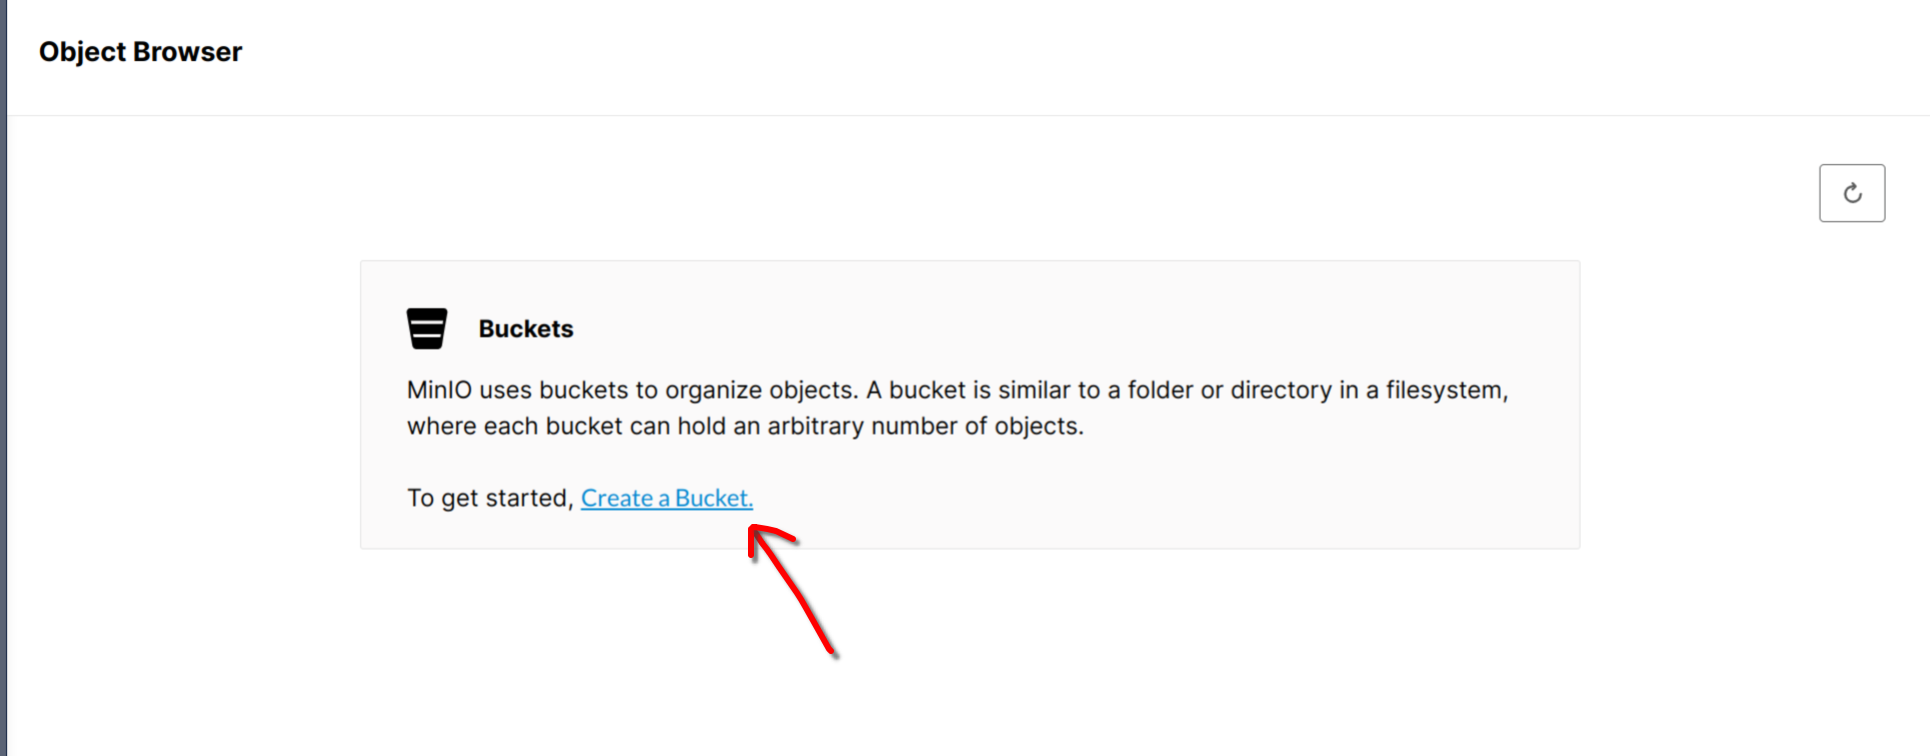
- Set the bucket name to
medusa-bucketand click create.
- Set the bucket name to
-
Set the buckets access policy to public
- Click on the created bucket
- Click on the current access policy
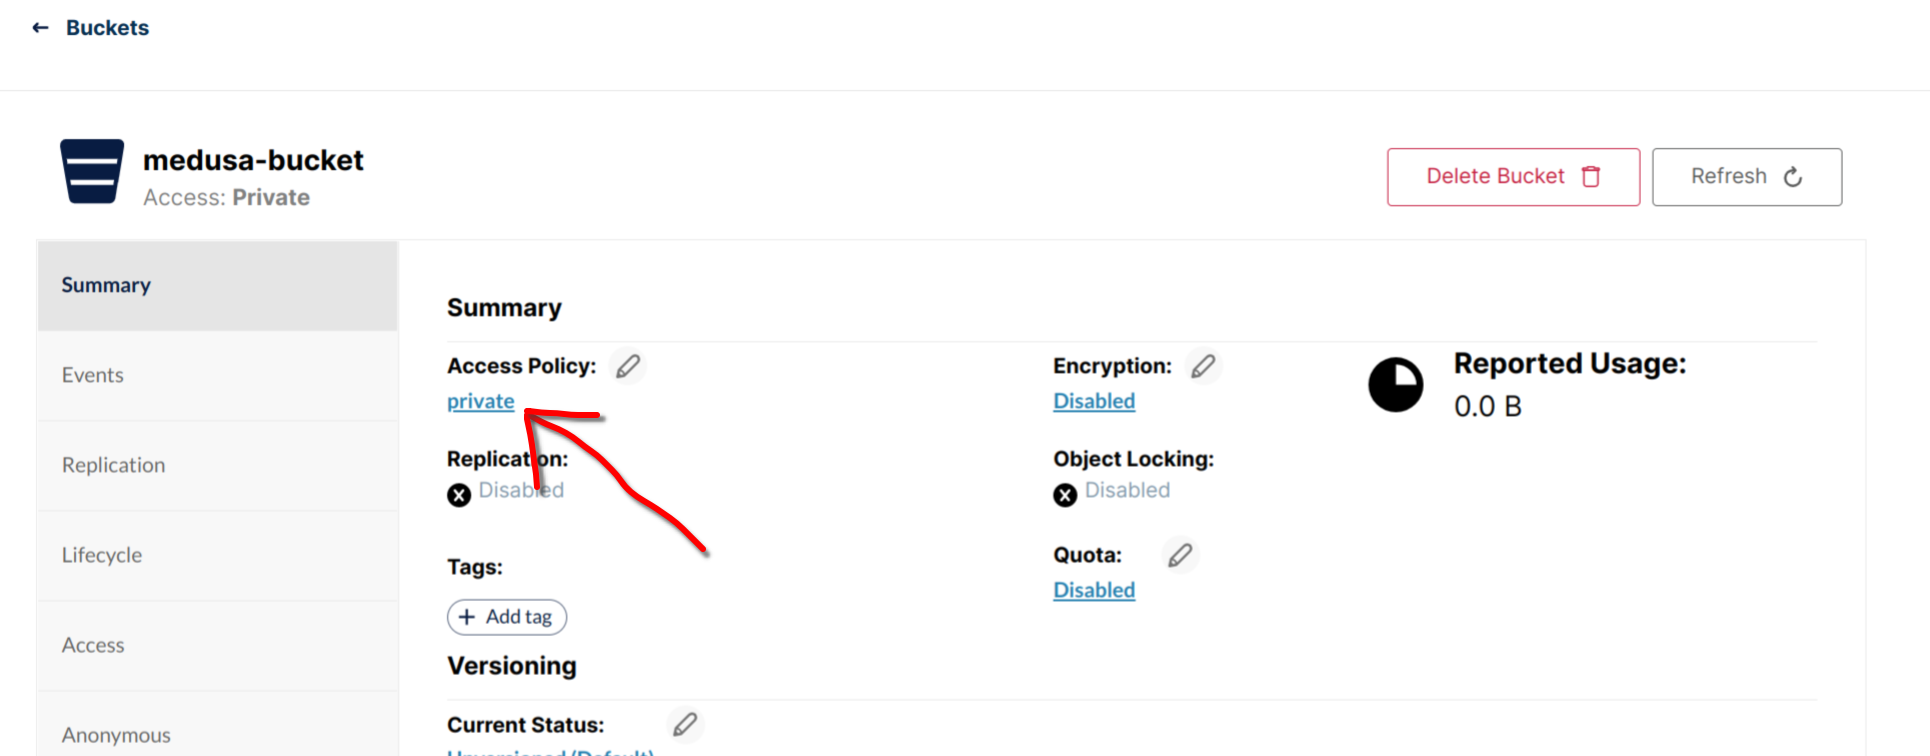
- Select public and click set

-
Generate access keys
- Tap on access keys
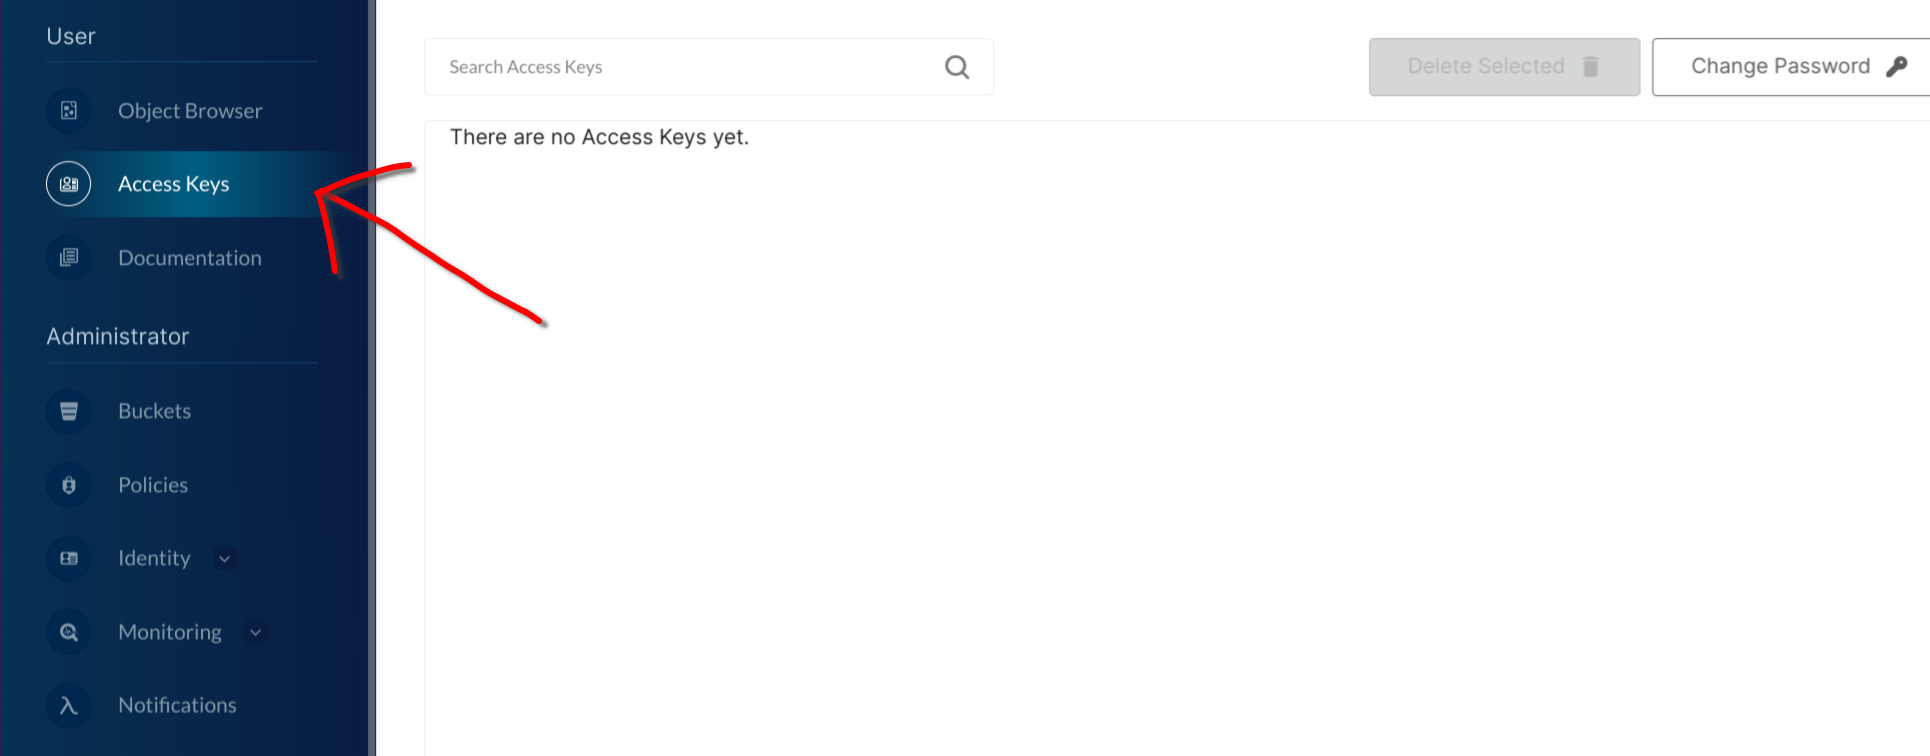
- Tap on create access key, then tap on create

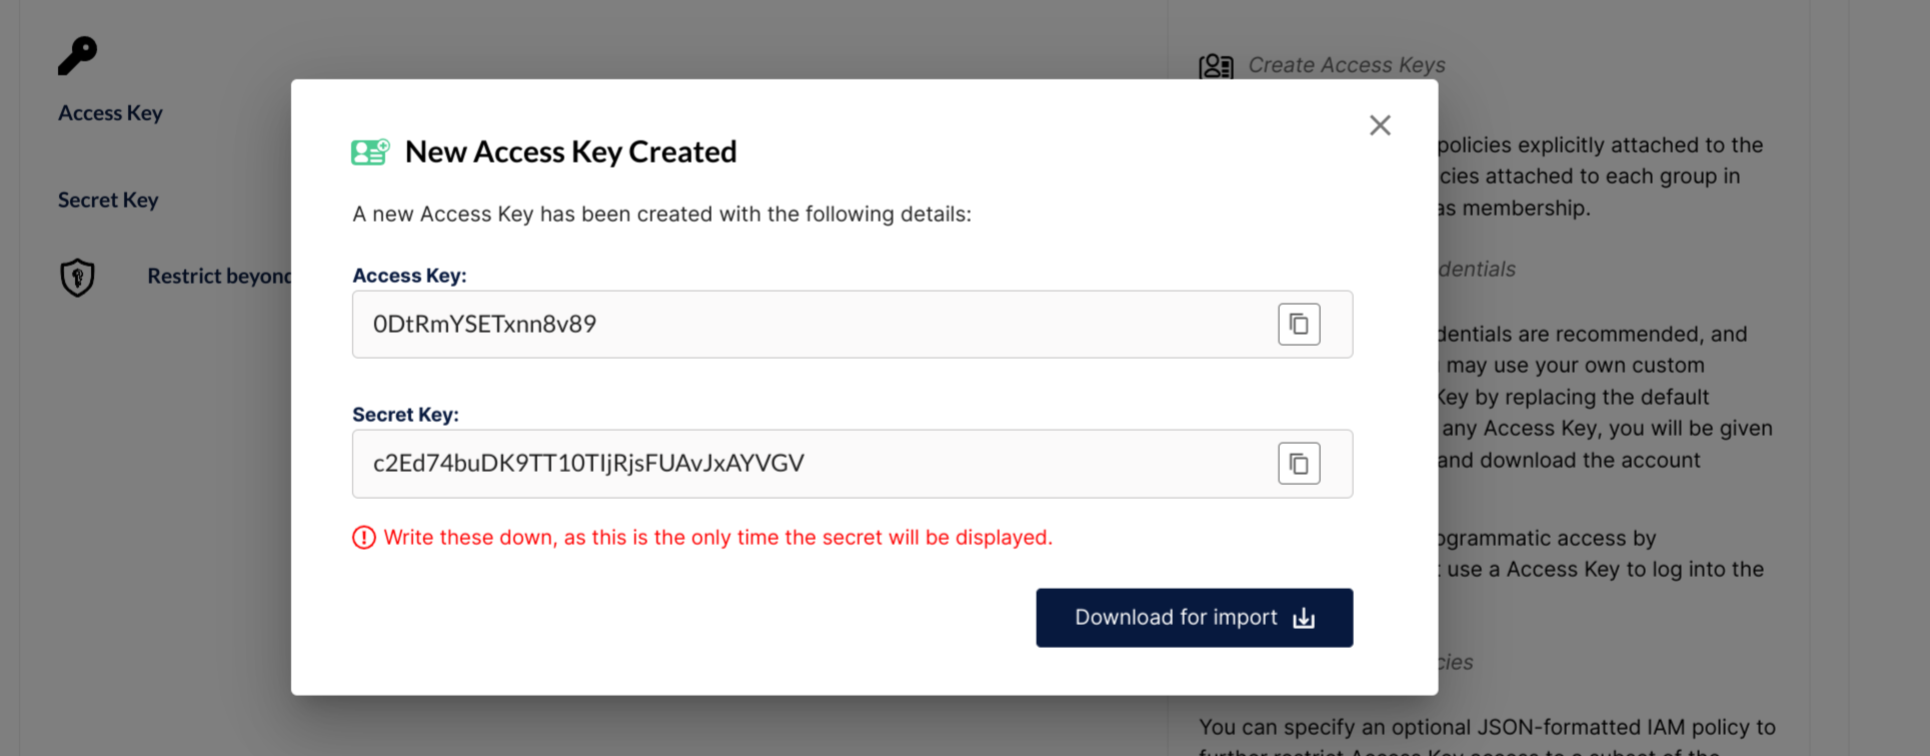
- Copy the new keys and replace the values of
MINIO_ACCESS_KEYon line 27 andMINIO_SECRET_KEYon line 28 of thedocker-compose.yamlwith the access key and secret key
Preview the store
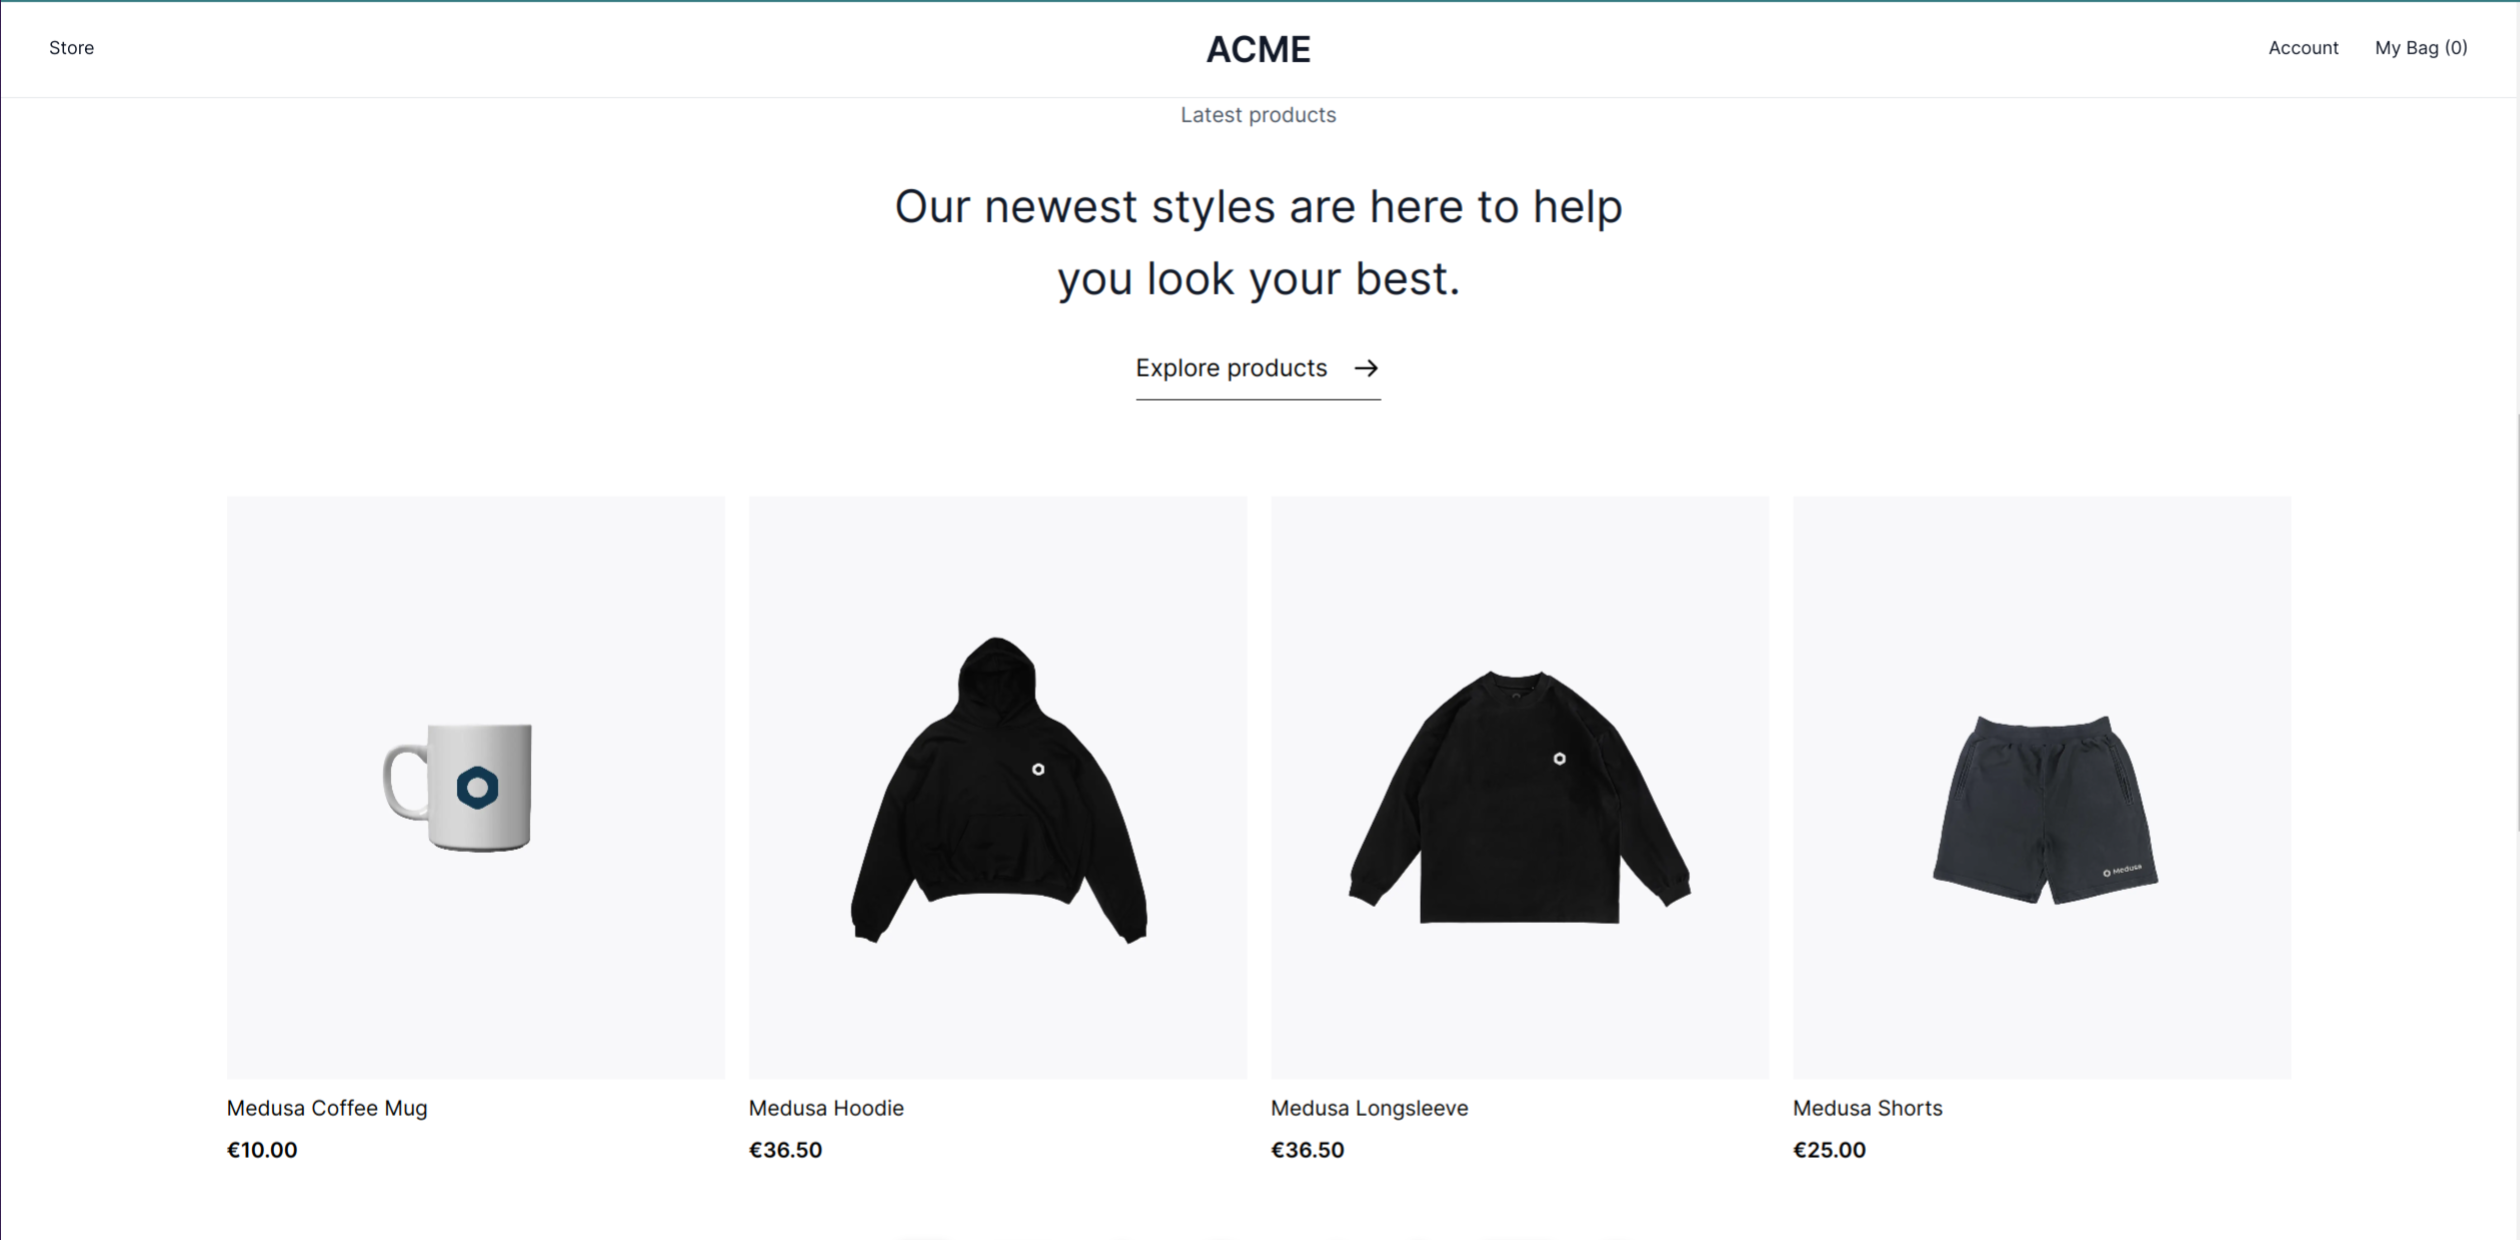
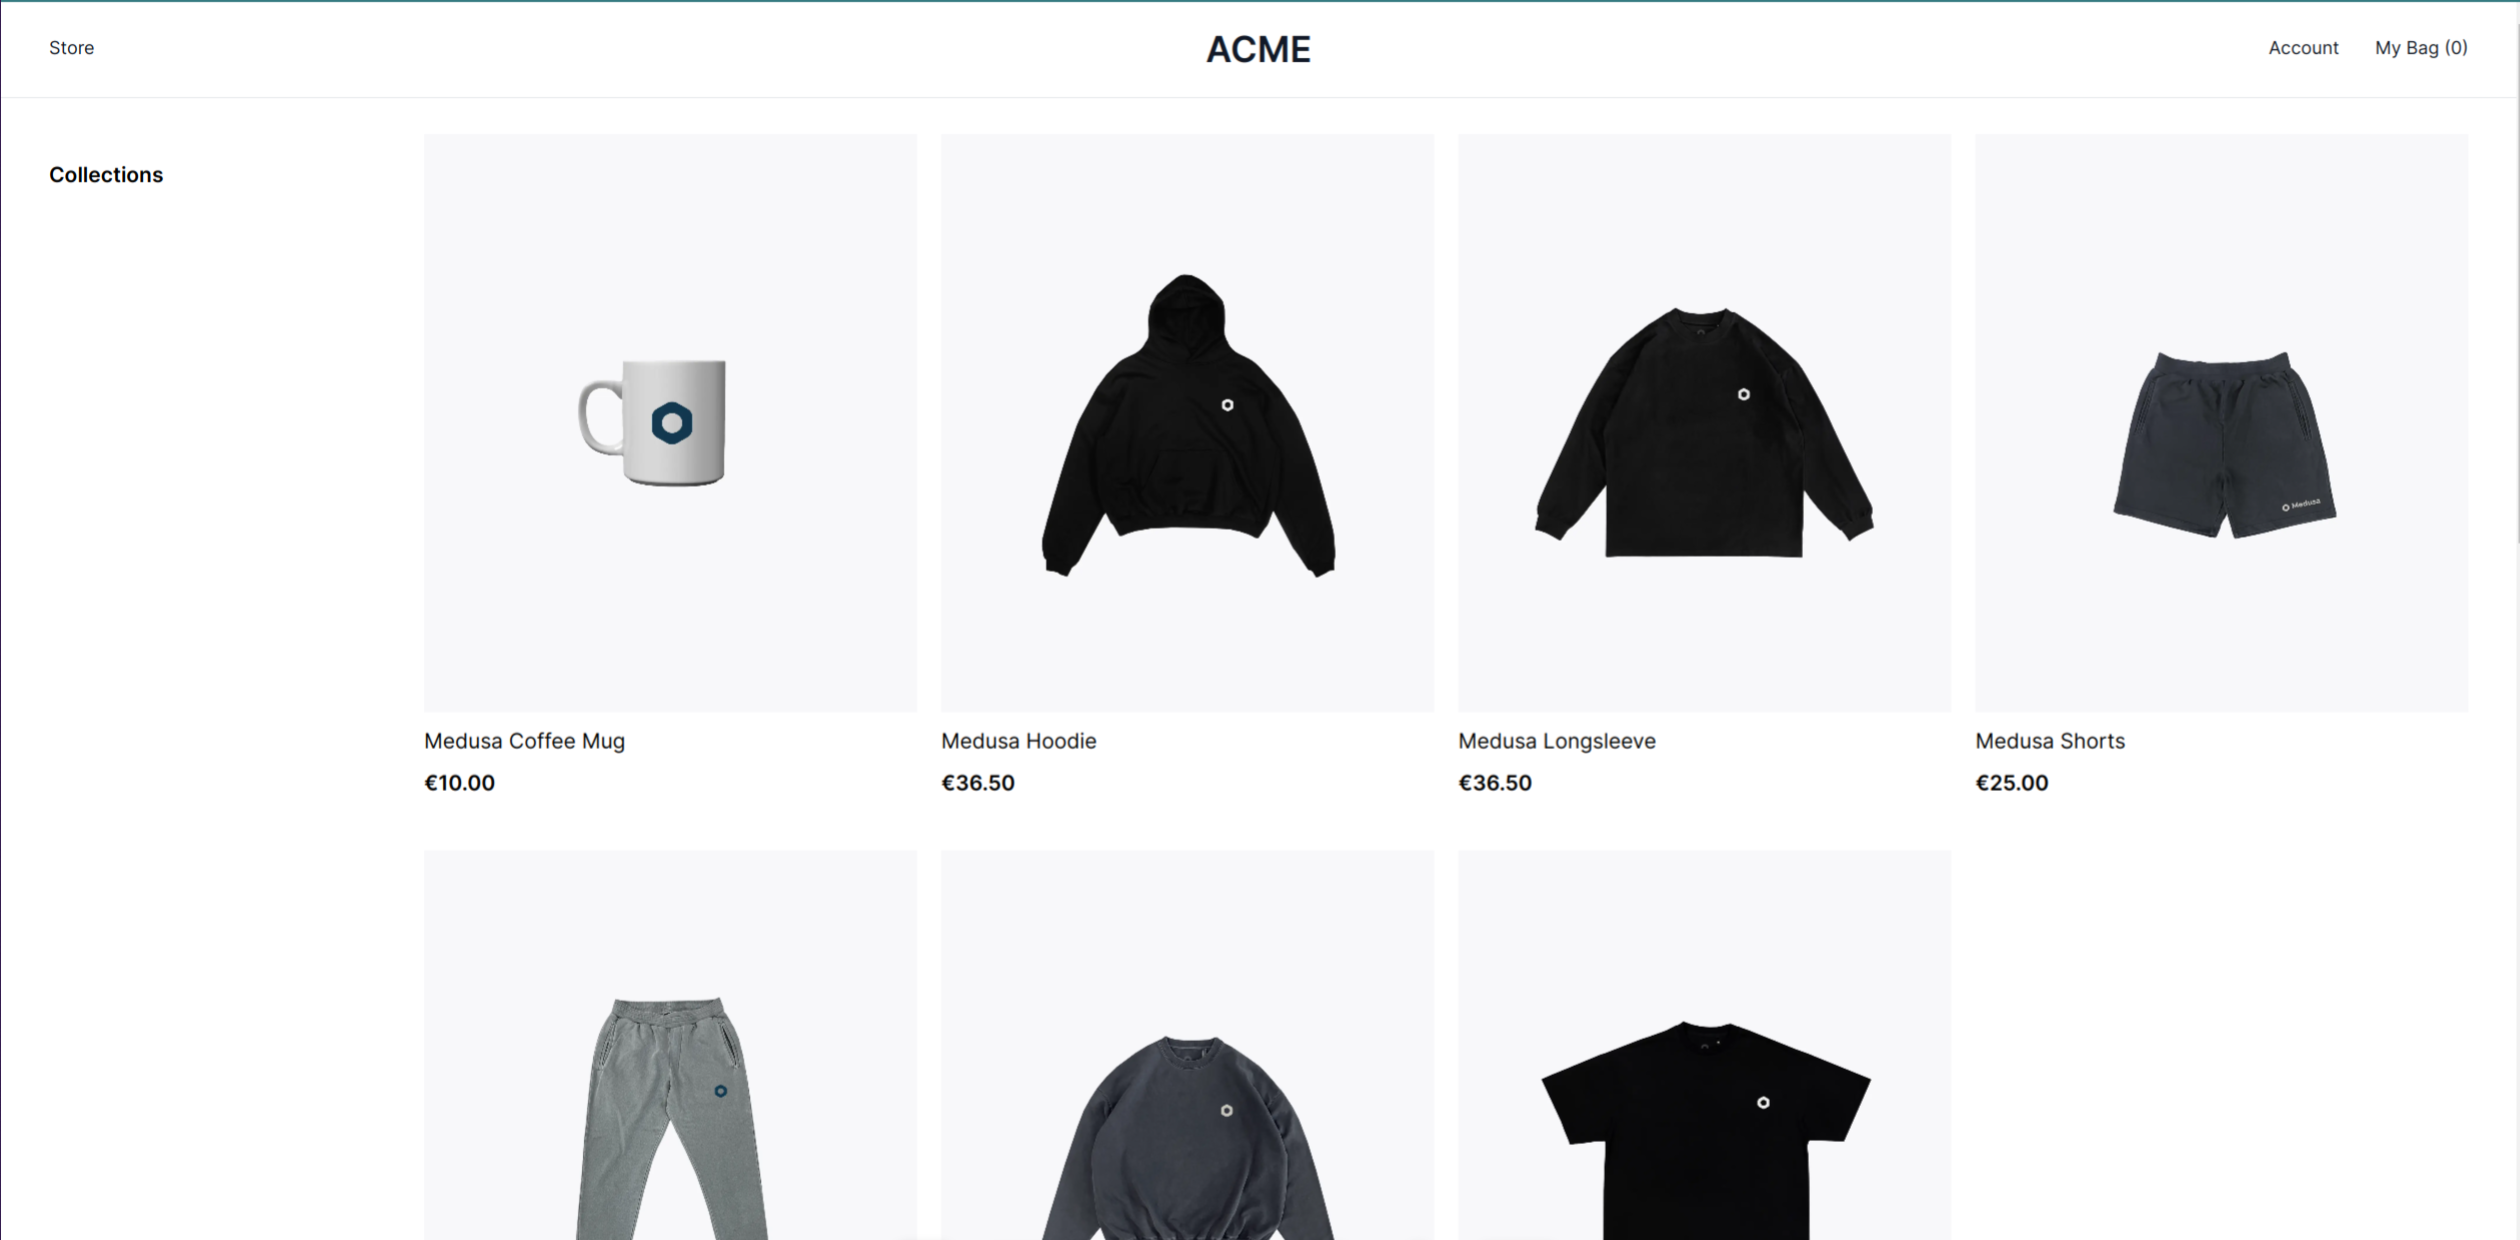
Our store is now ready for use. To access the storefront, open http://localhost:8100 on your browser.
Here are some screenshots of the storefront on my computer.

Add items to the store from the admin
At this point, we have a store with items in the database, and we can see these items on the storefront.
What we will be doing now is using the admin to add a new item to the medusa and confirm that we can see this new item in the storefront.
To do this, follow the steps below:
-
Open the admin. This should be at http://localhost:7700
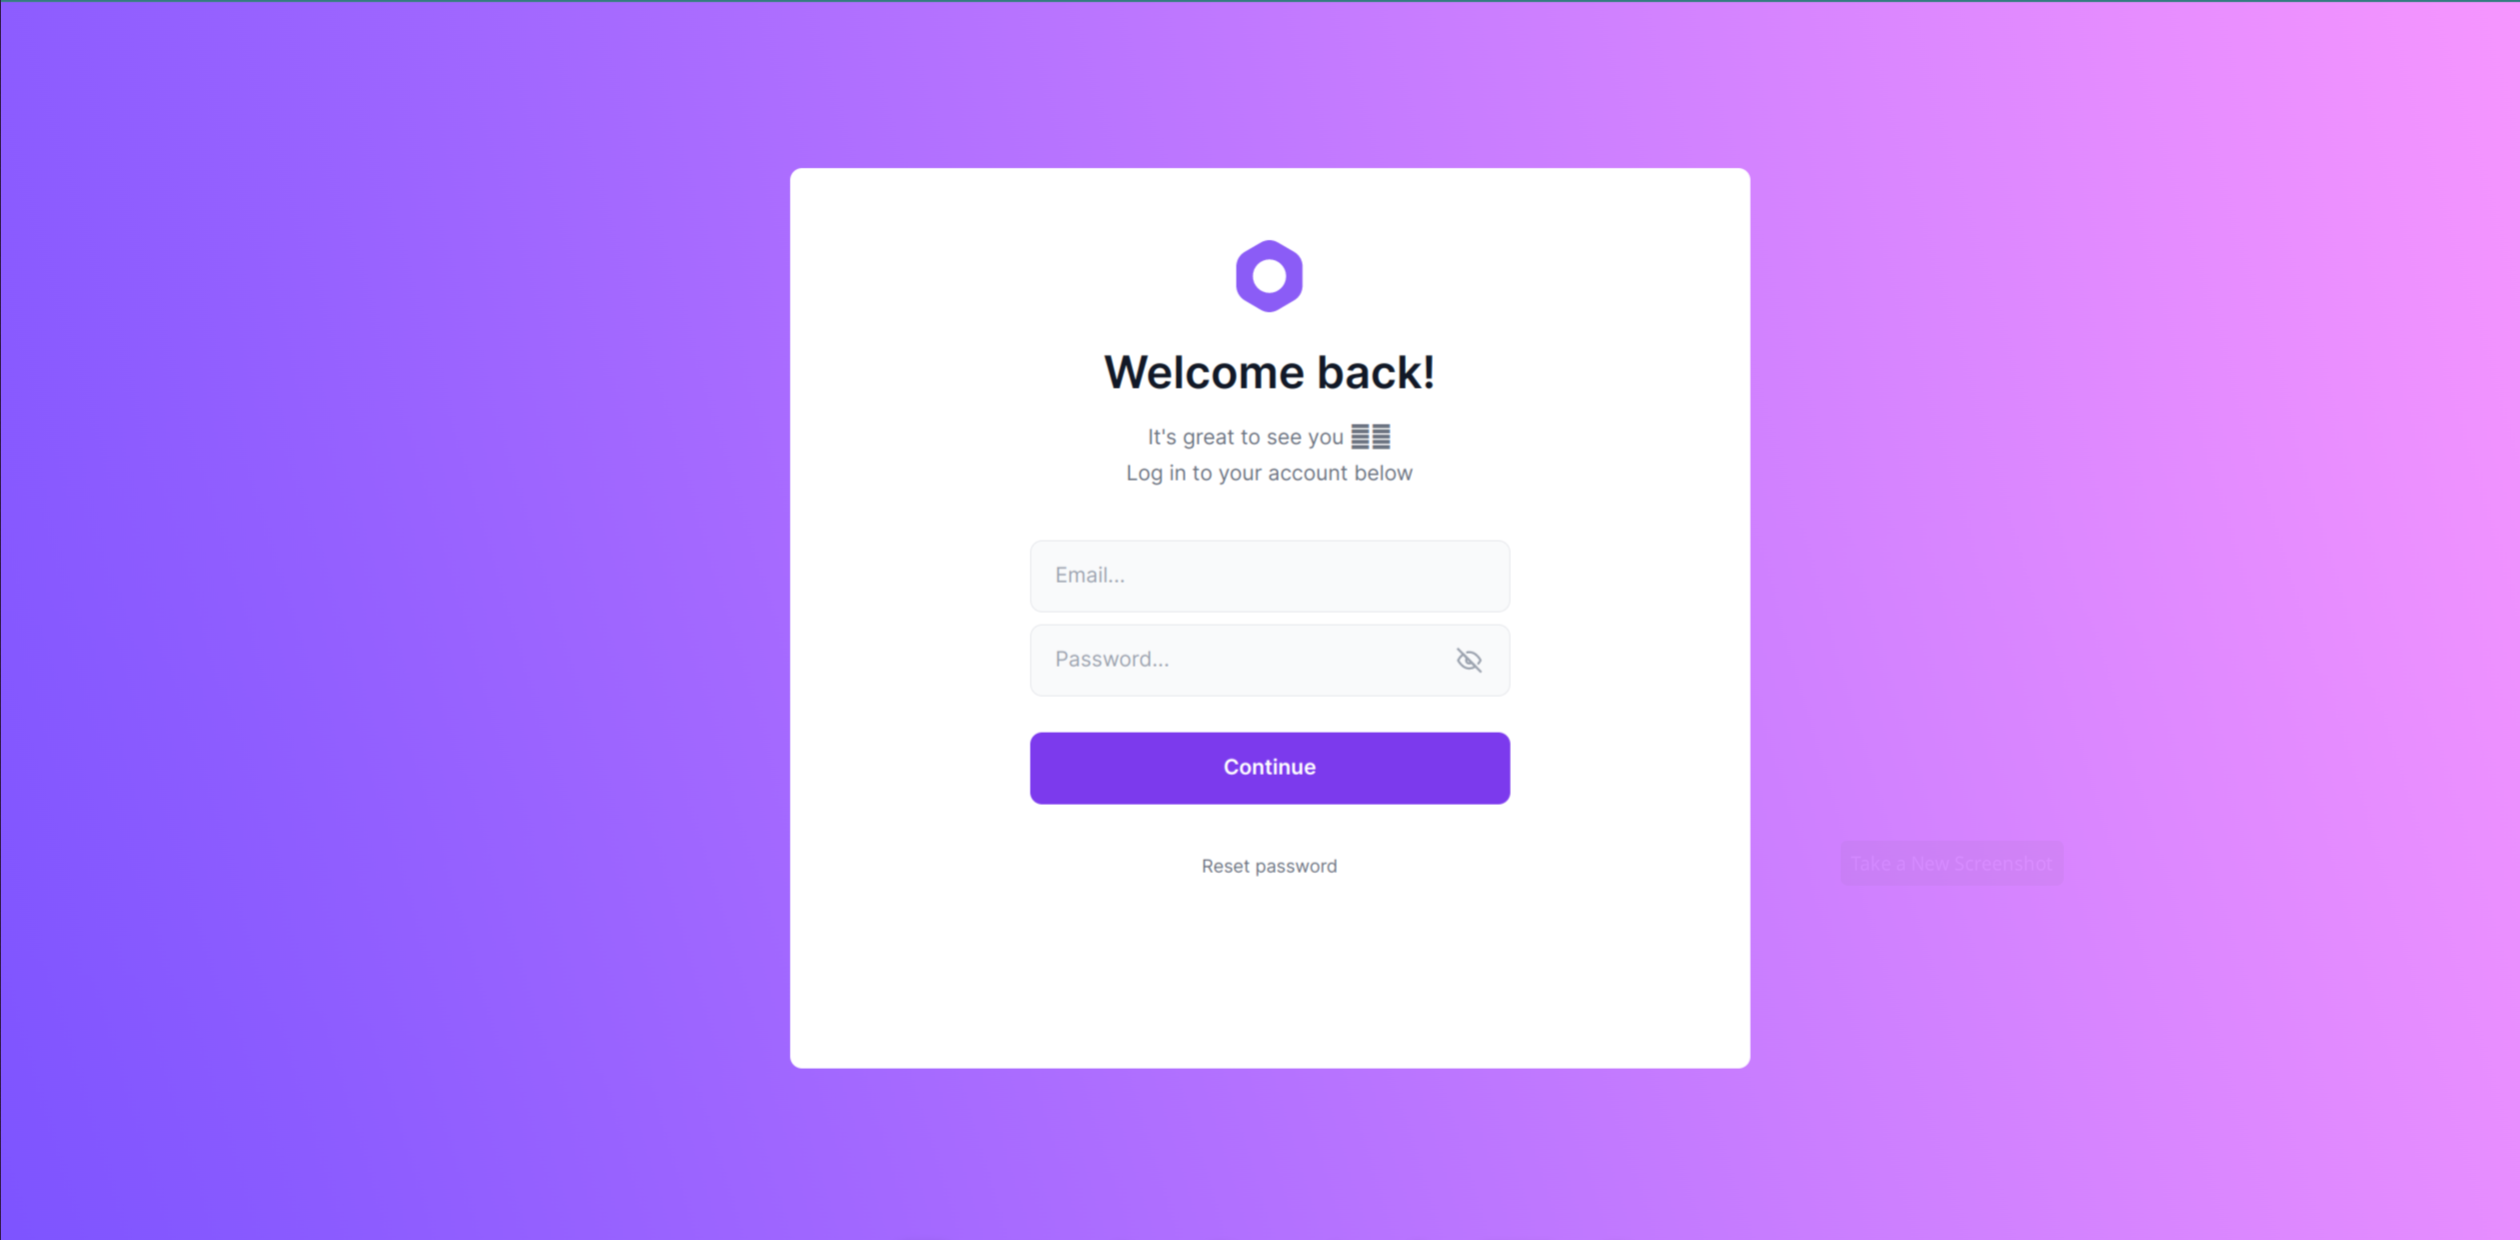
-
Login with these details
- Email: admin@medusa-test.com
- Password: supersecret
These were created when we seeded the database with dummy data, and you can always create, edit and delete admin accounts in the admin.
-
You may see a prompt asking if you want to share usage information. Feel free to read through and choose whether to accept or decline.
-
Head over to the products section.
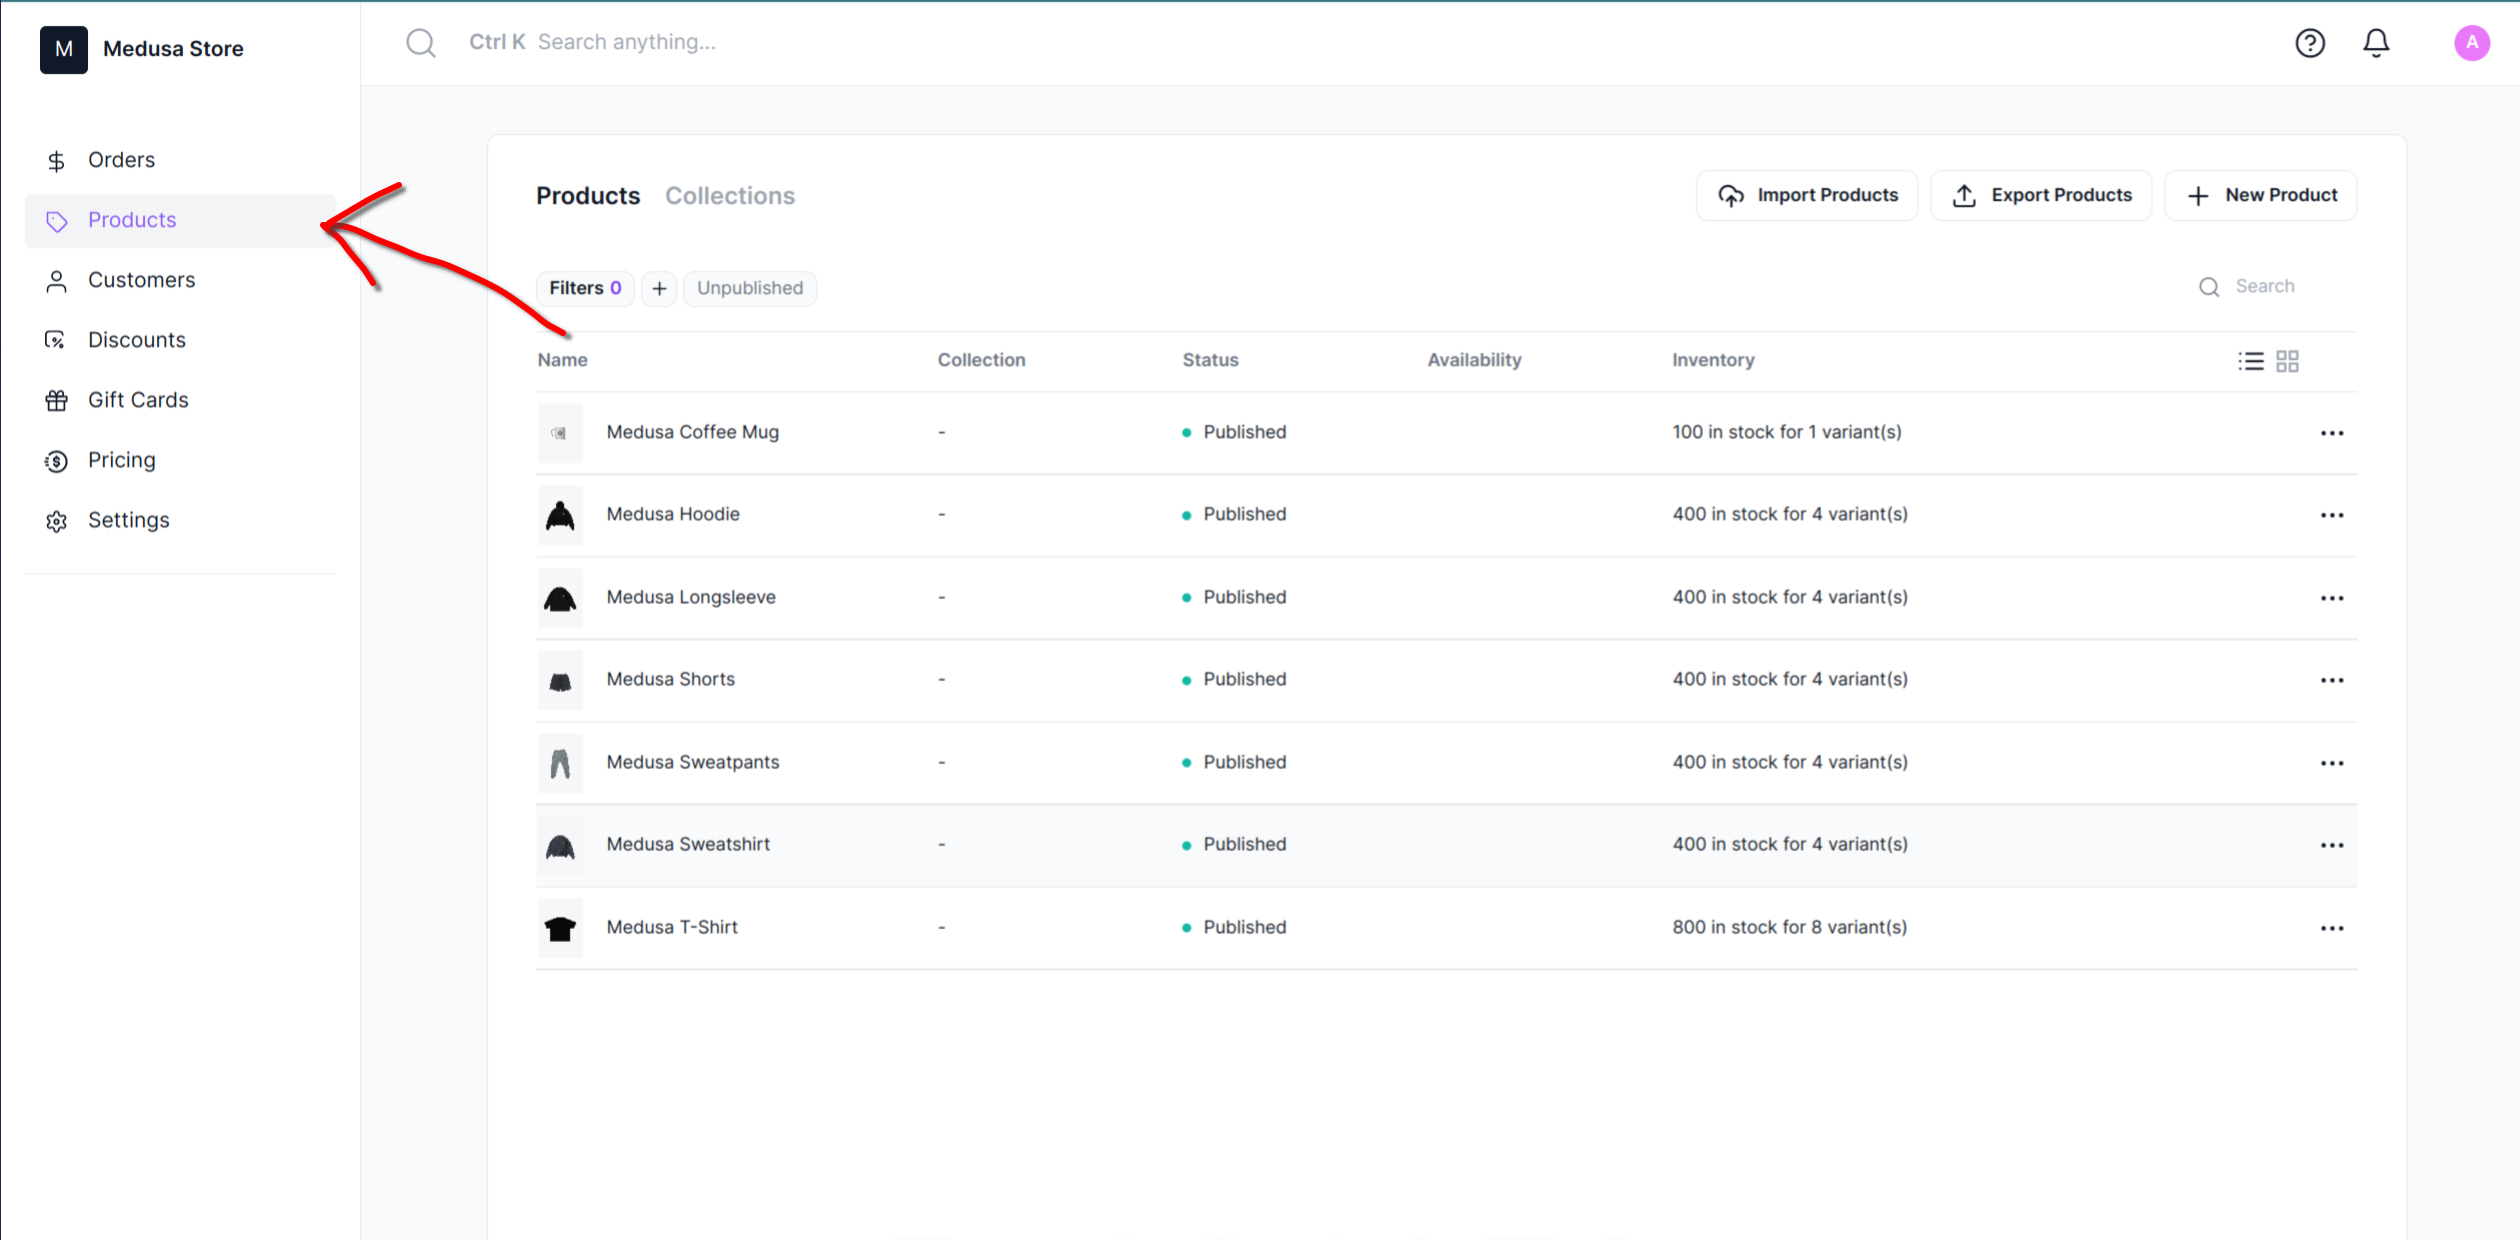
-
Now click on new product.
-
Enter the general information for the product.
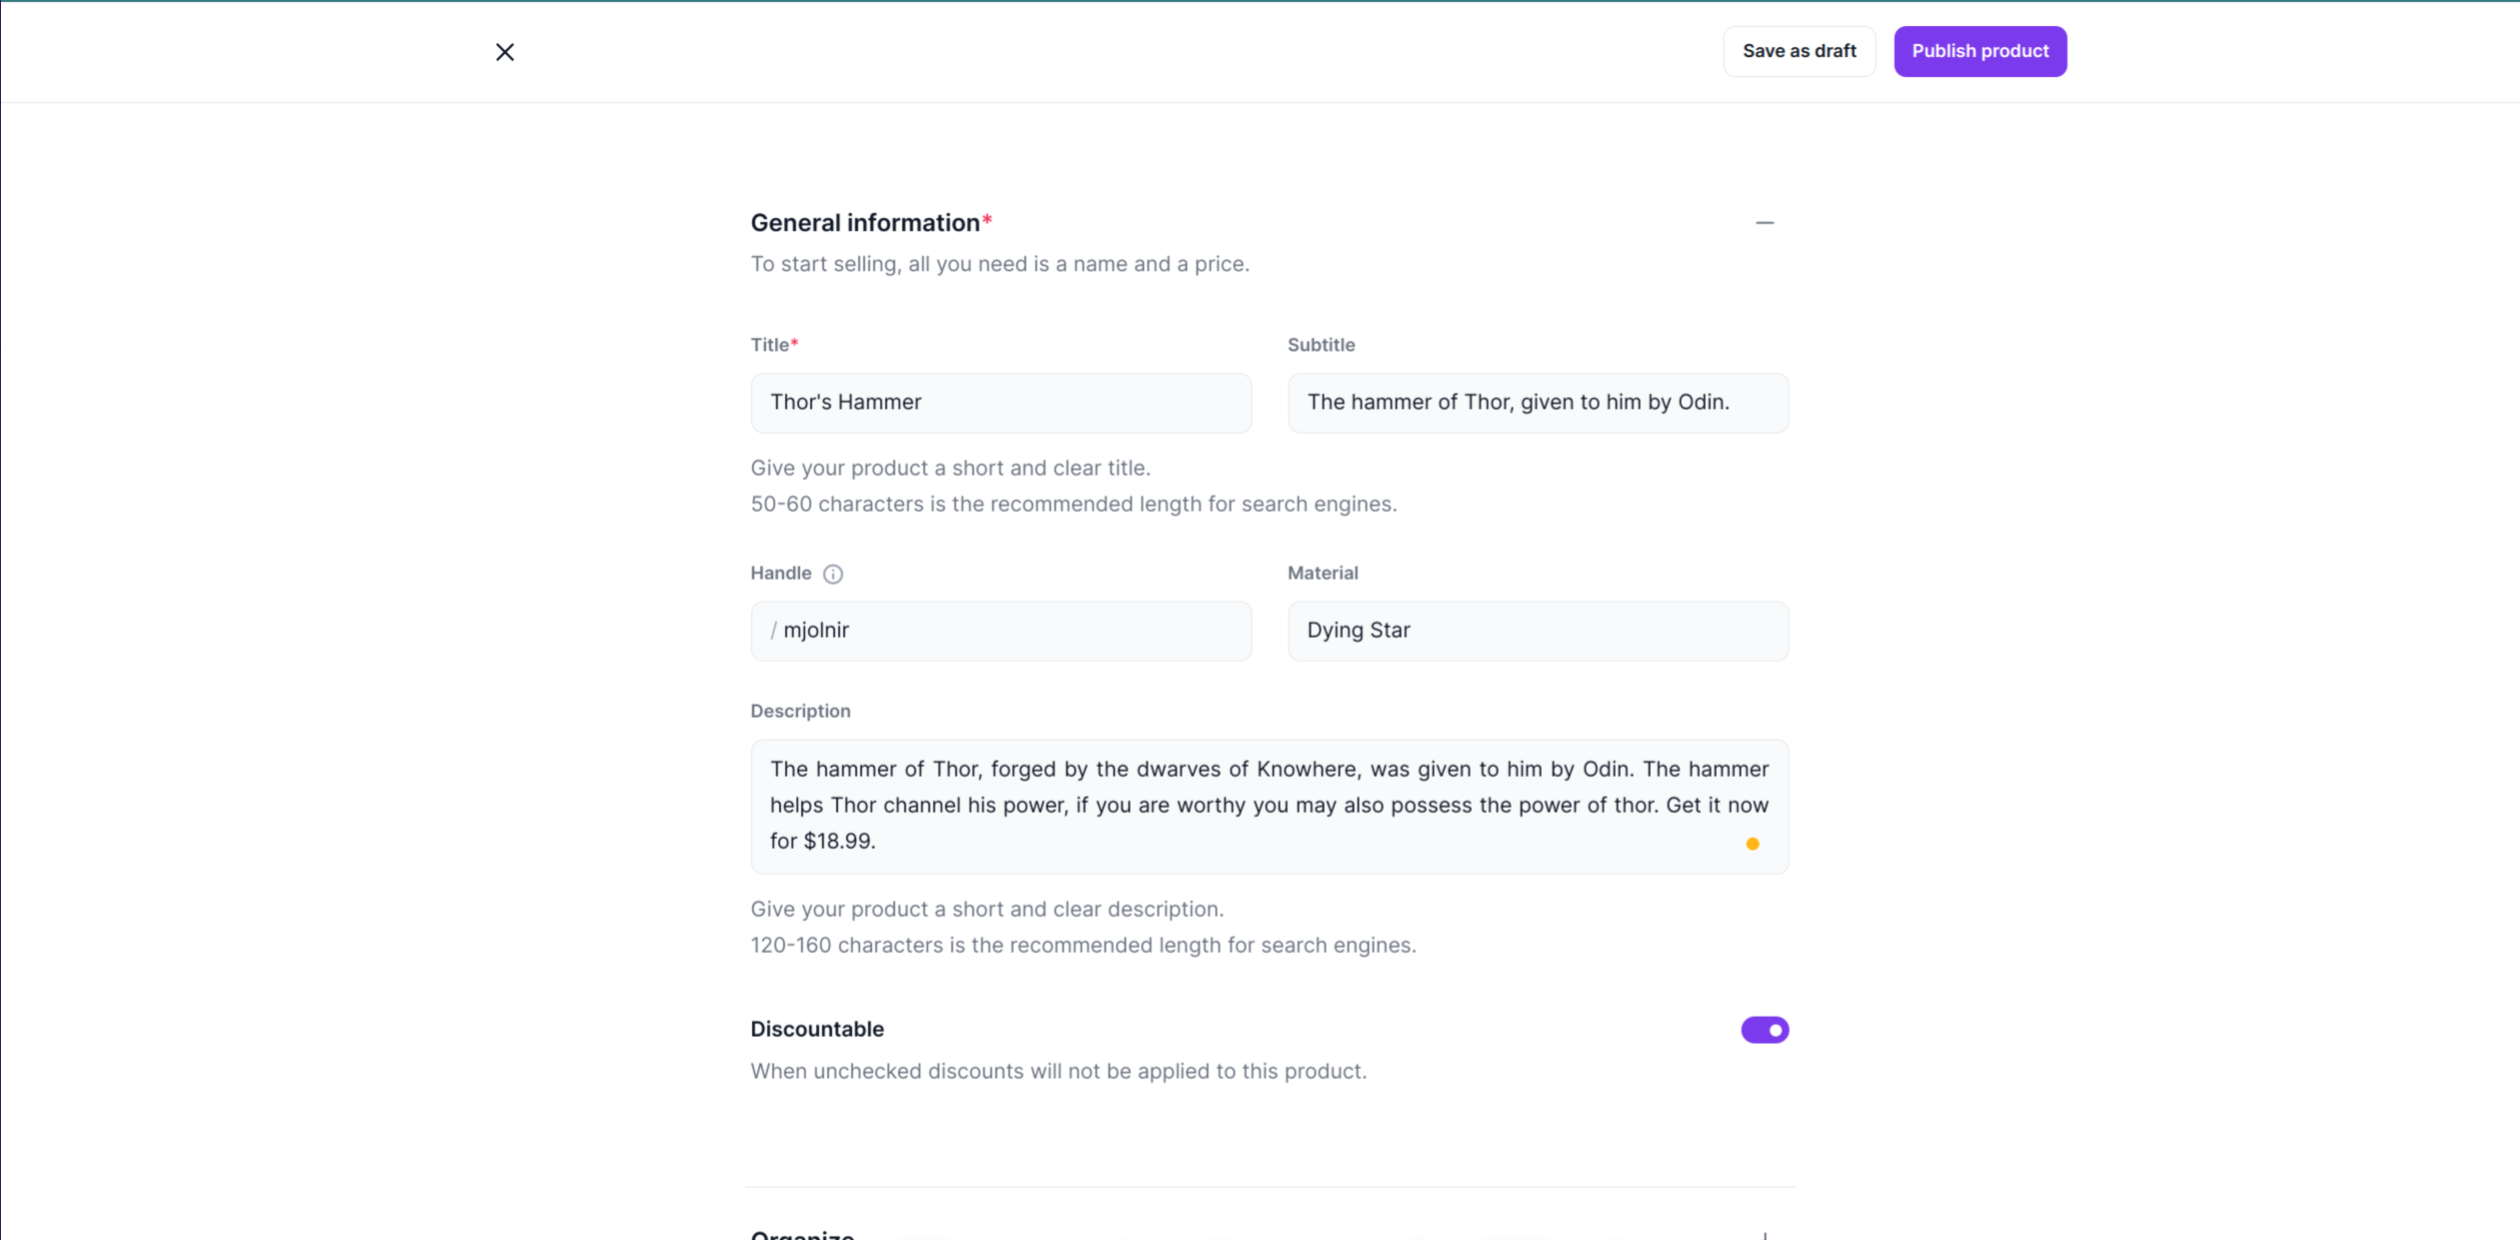
-
Add product variants.
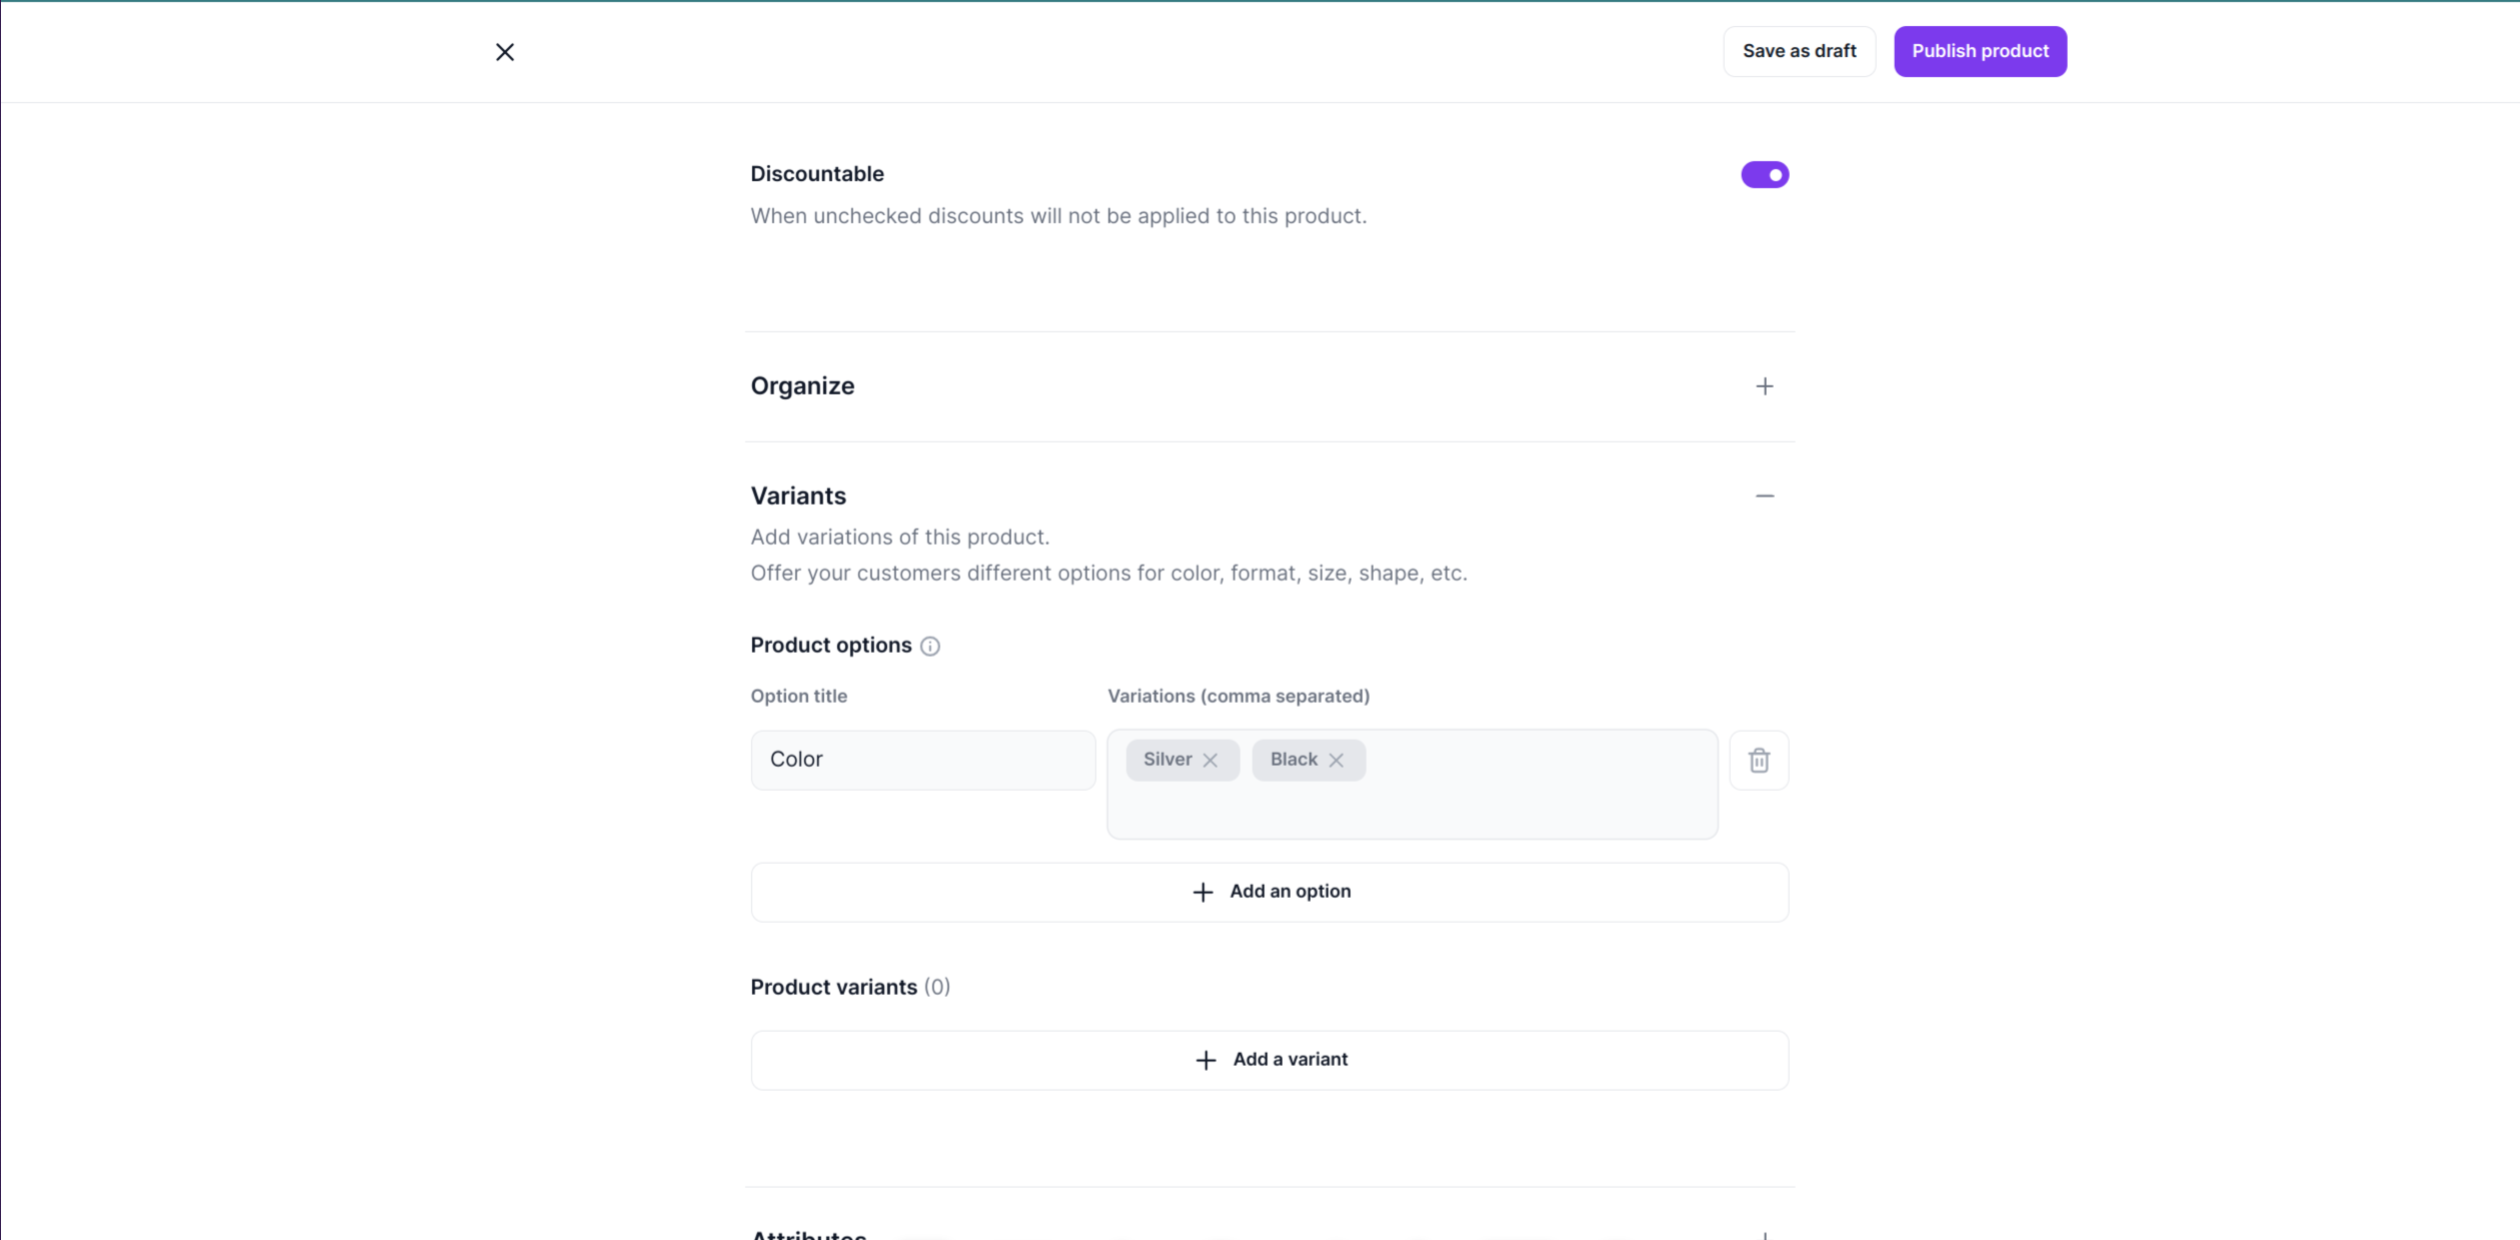
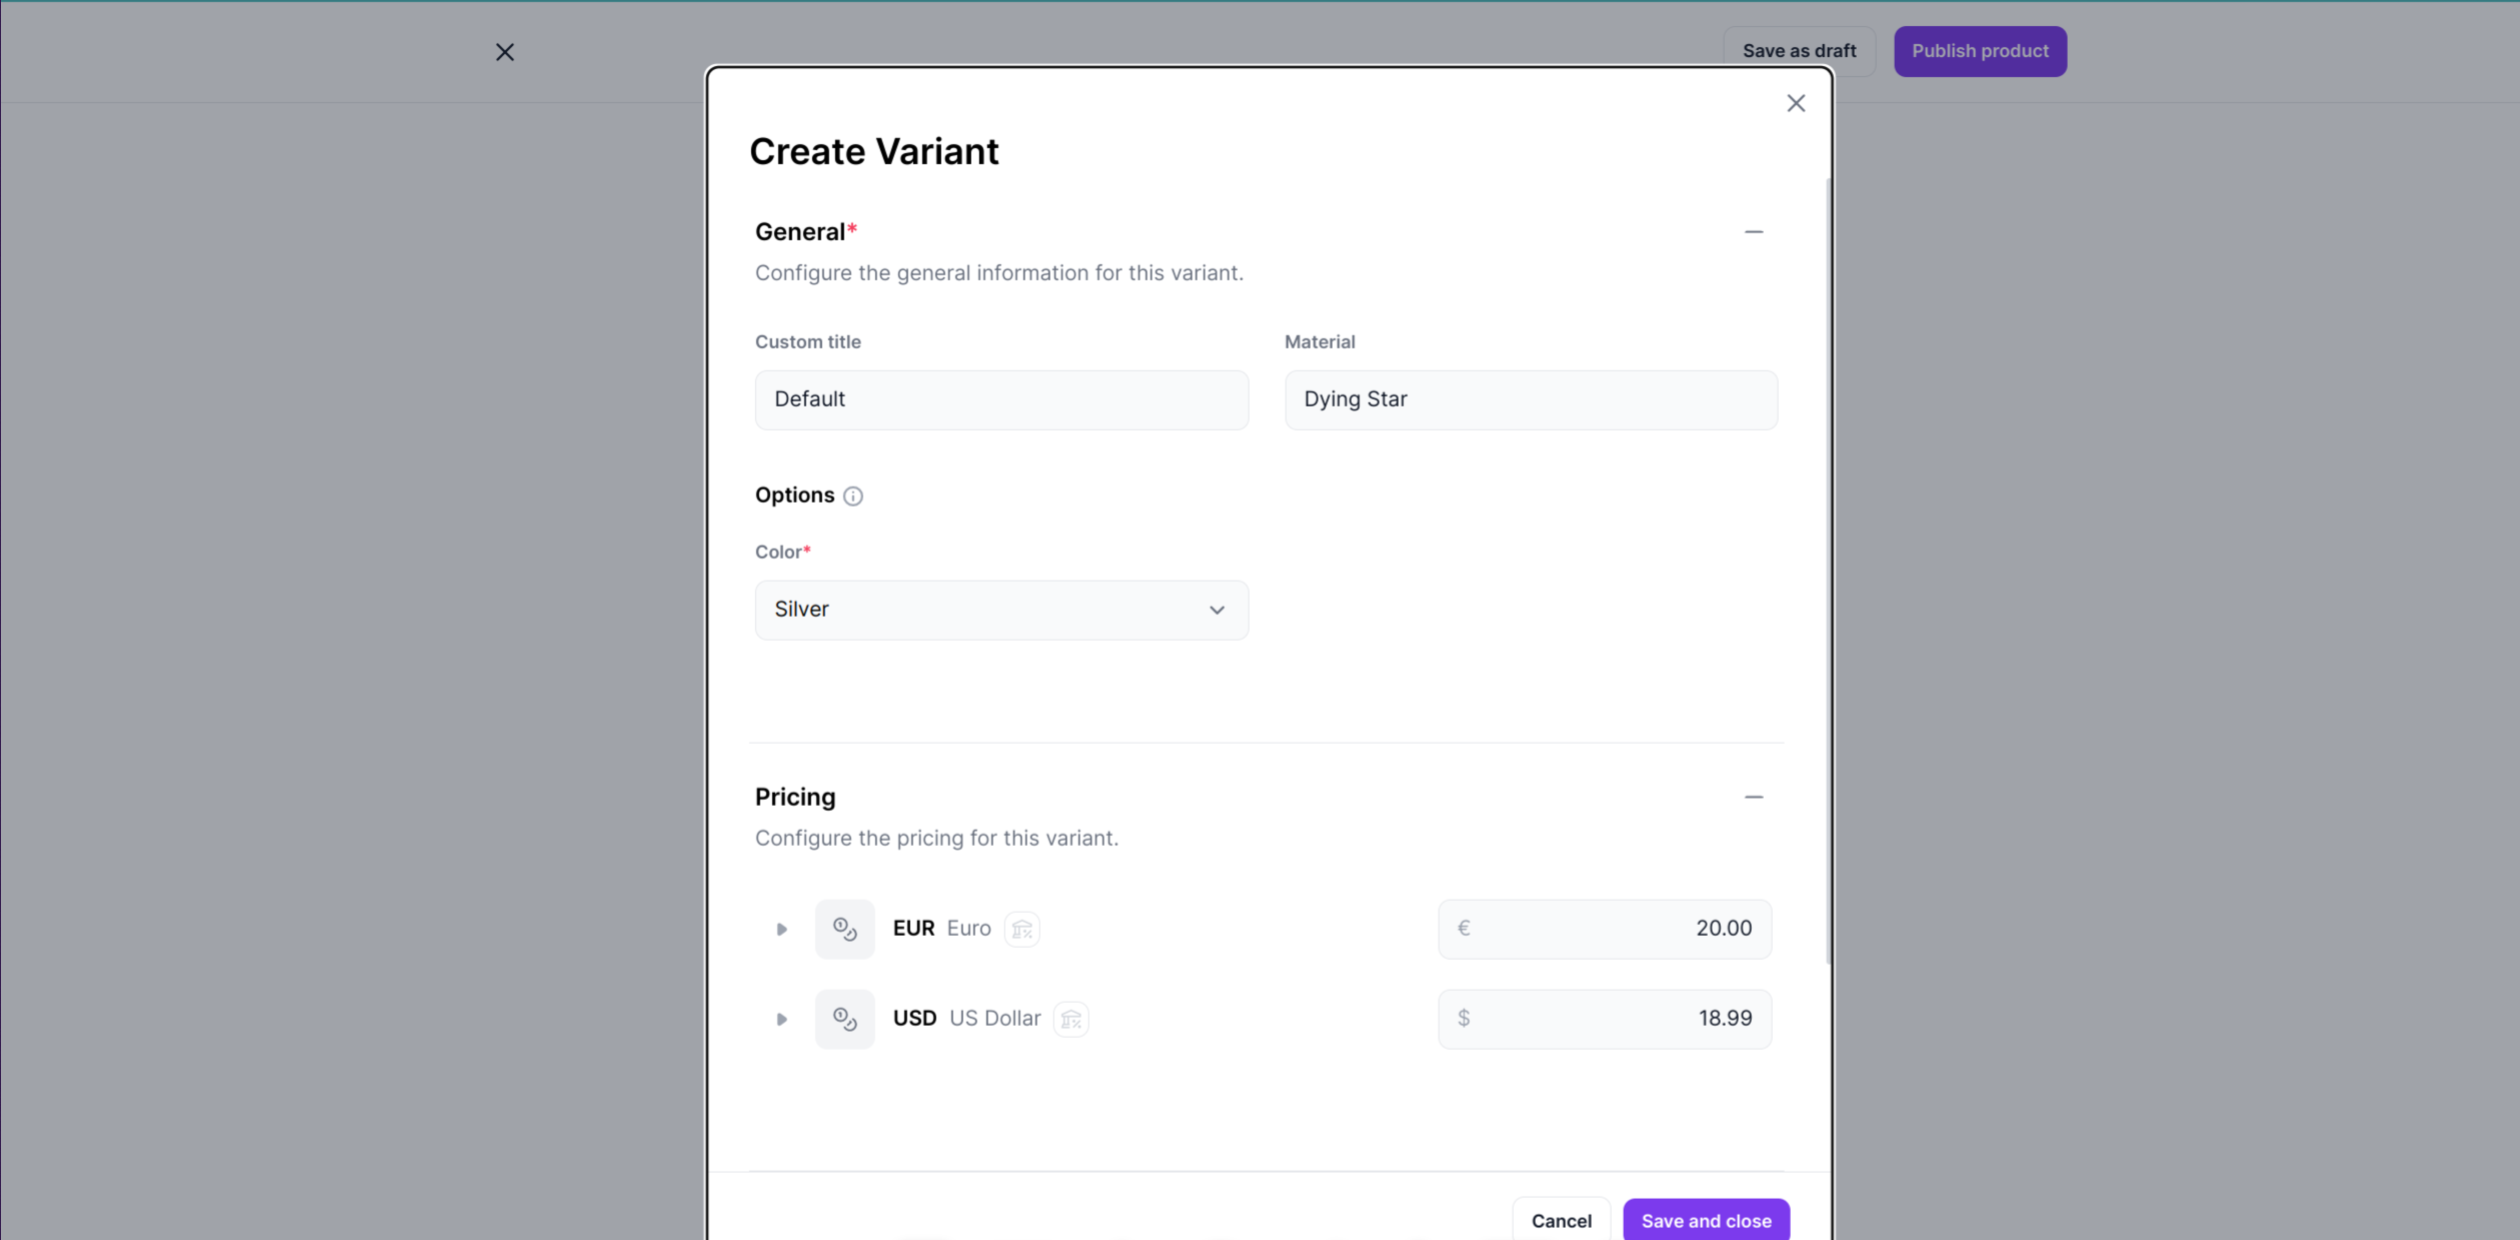
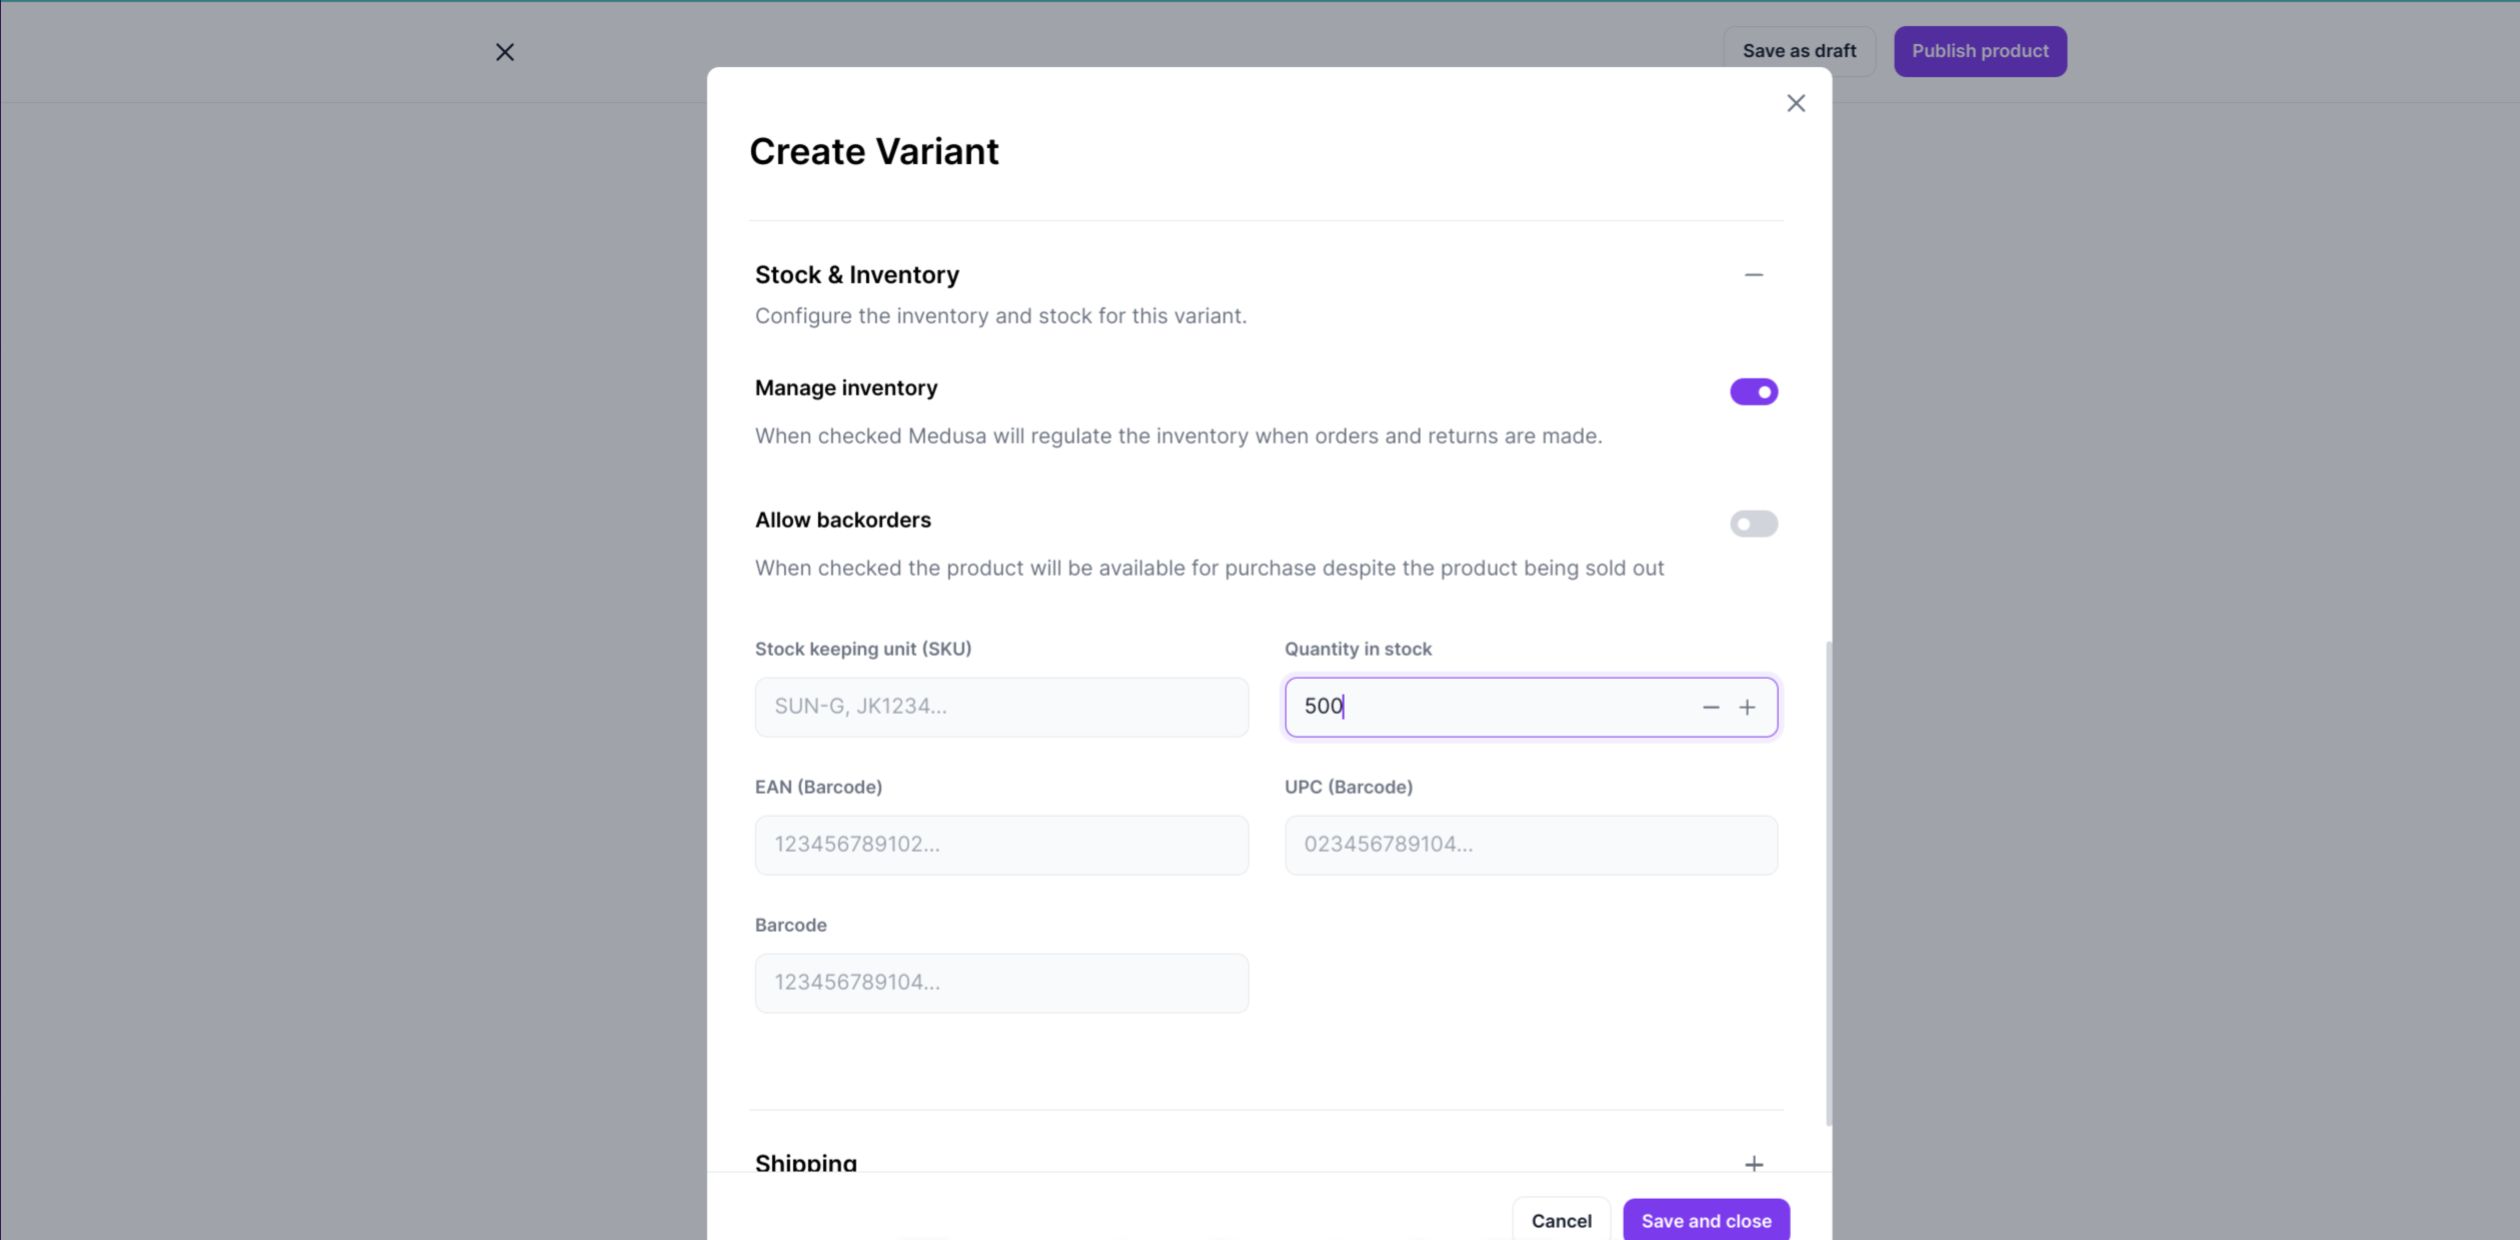
-
Add thumbnails and media.
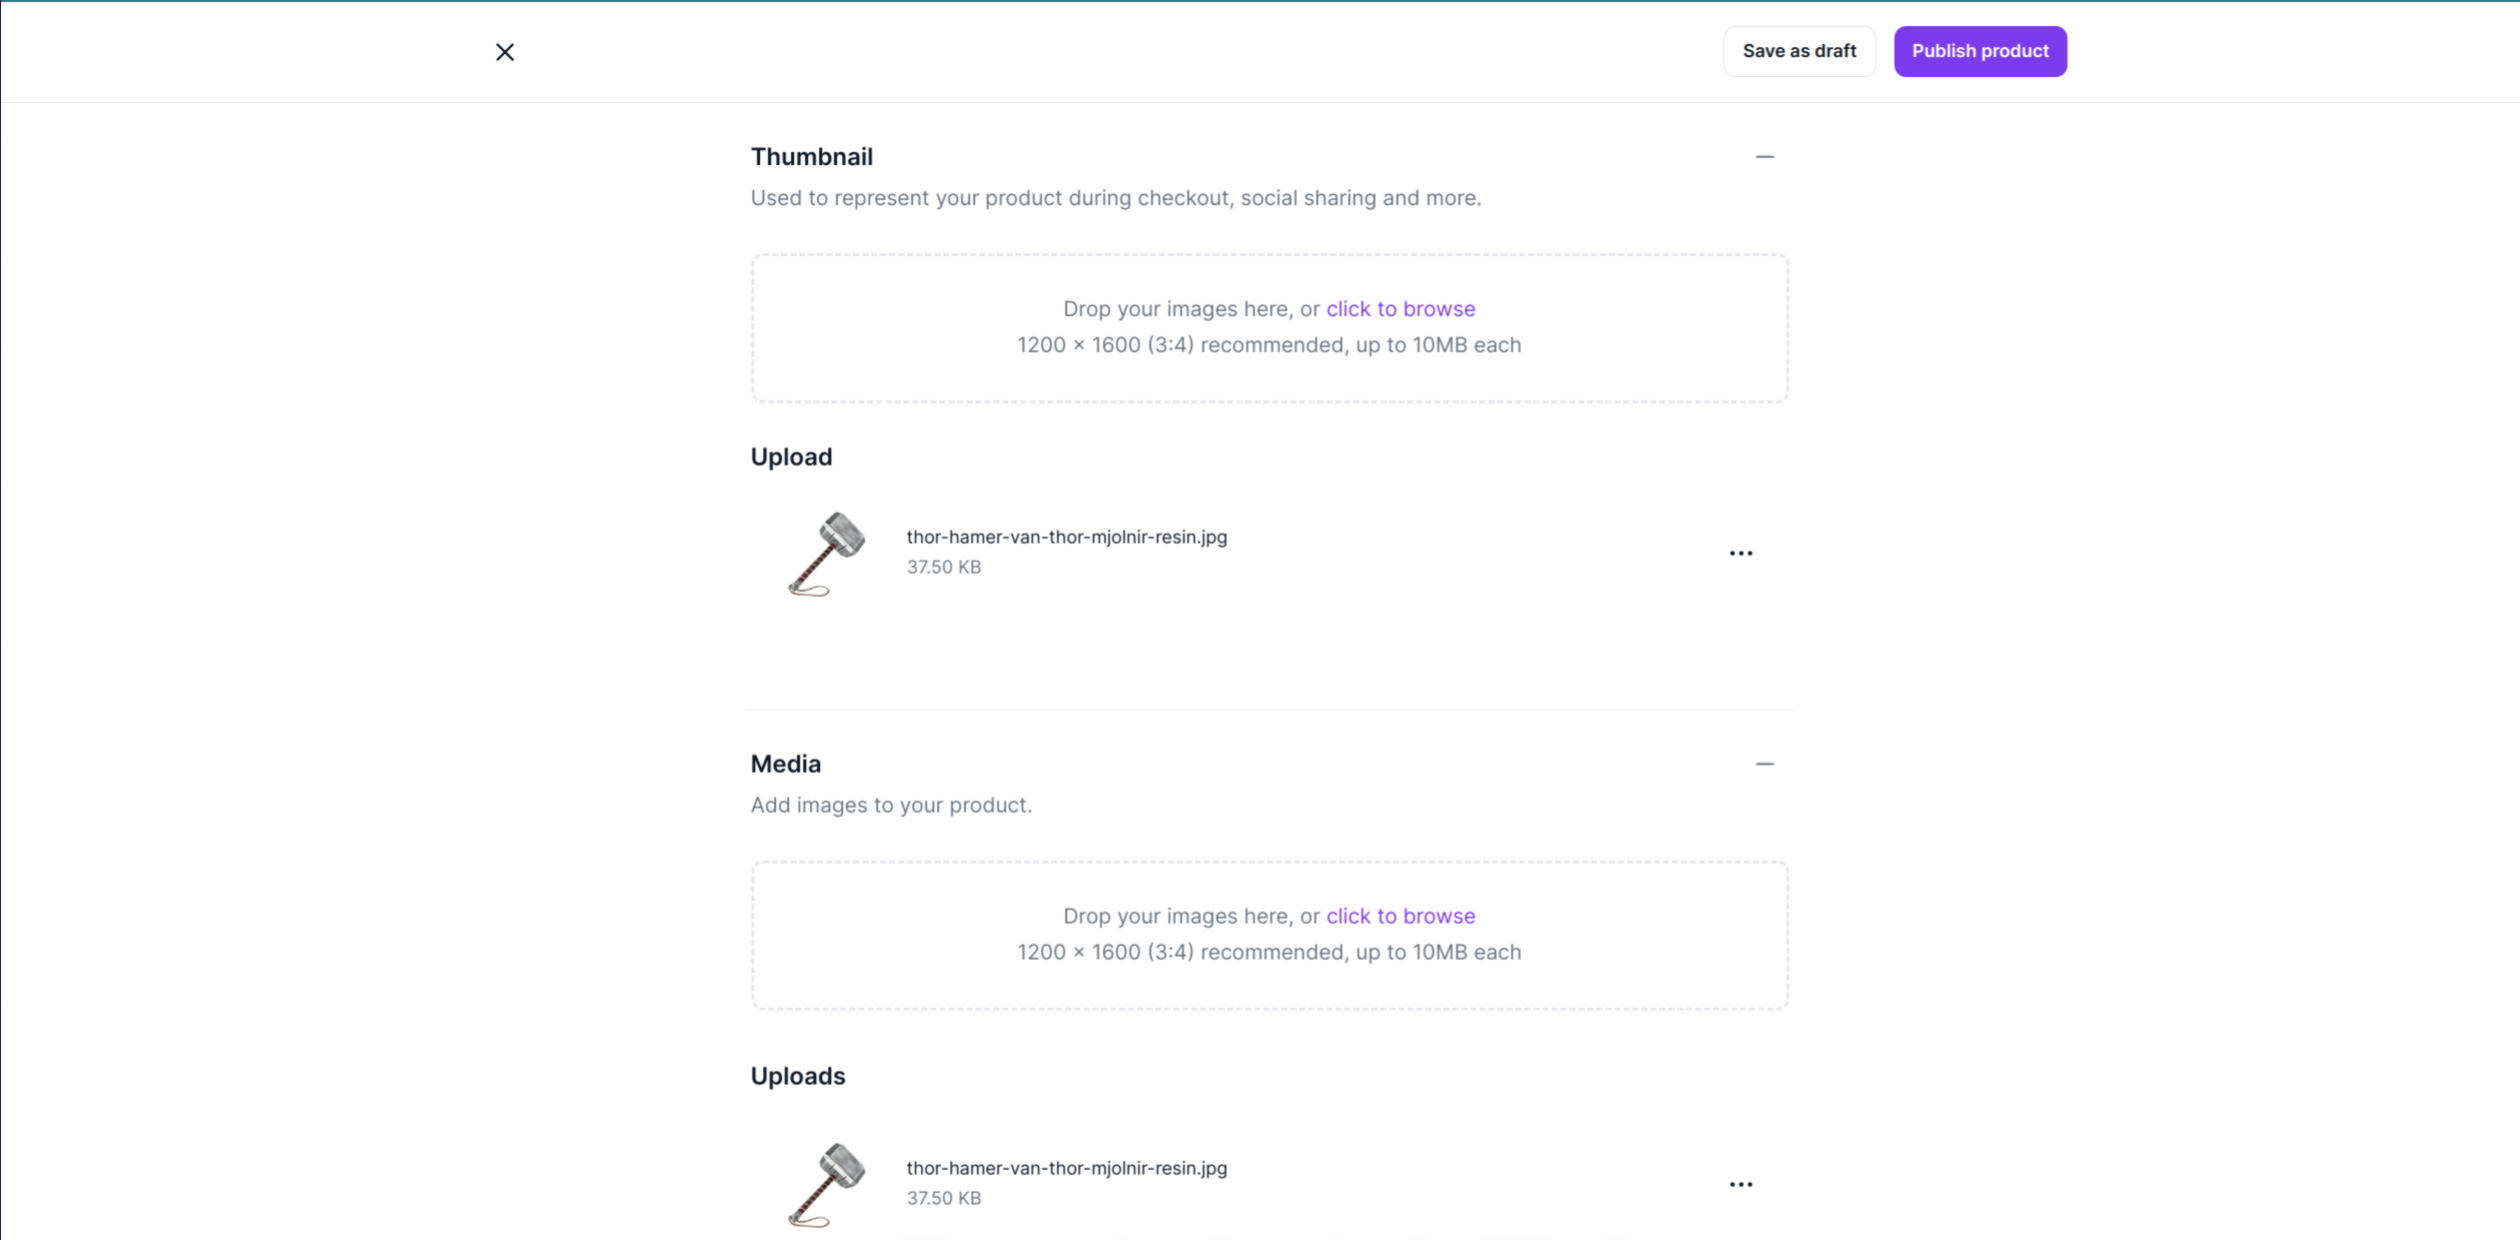
-
Hit publish.
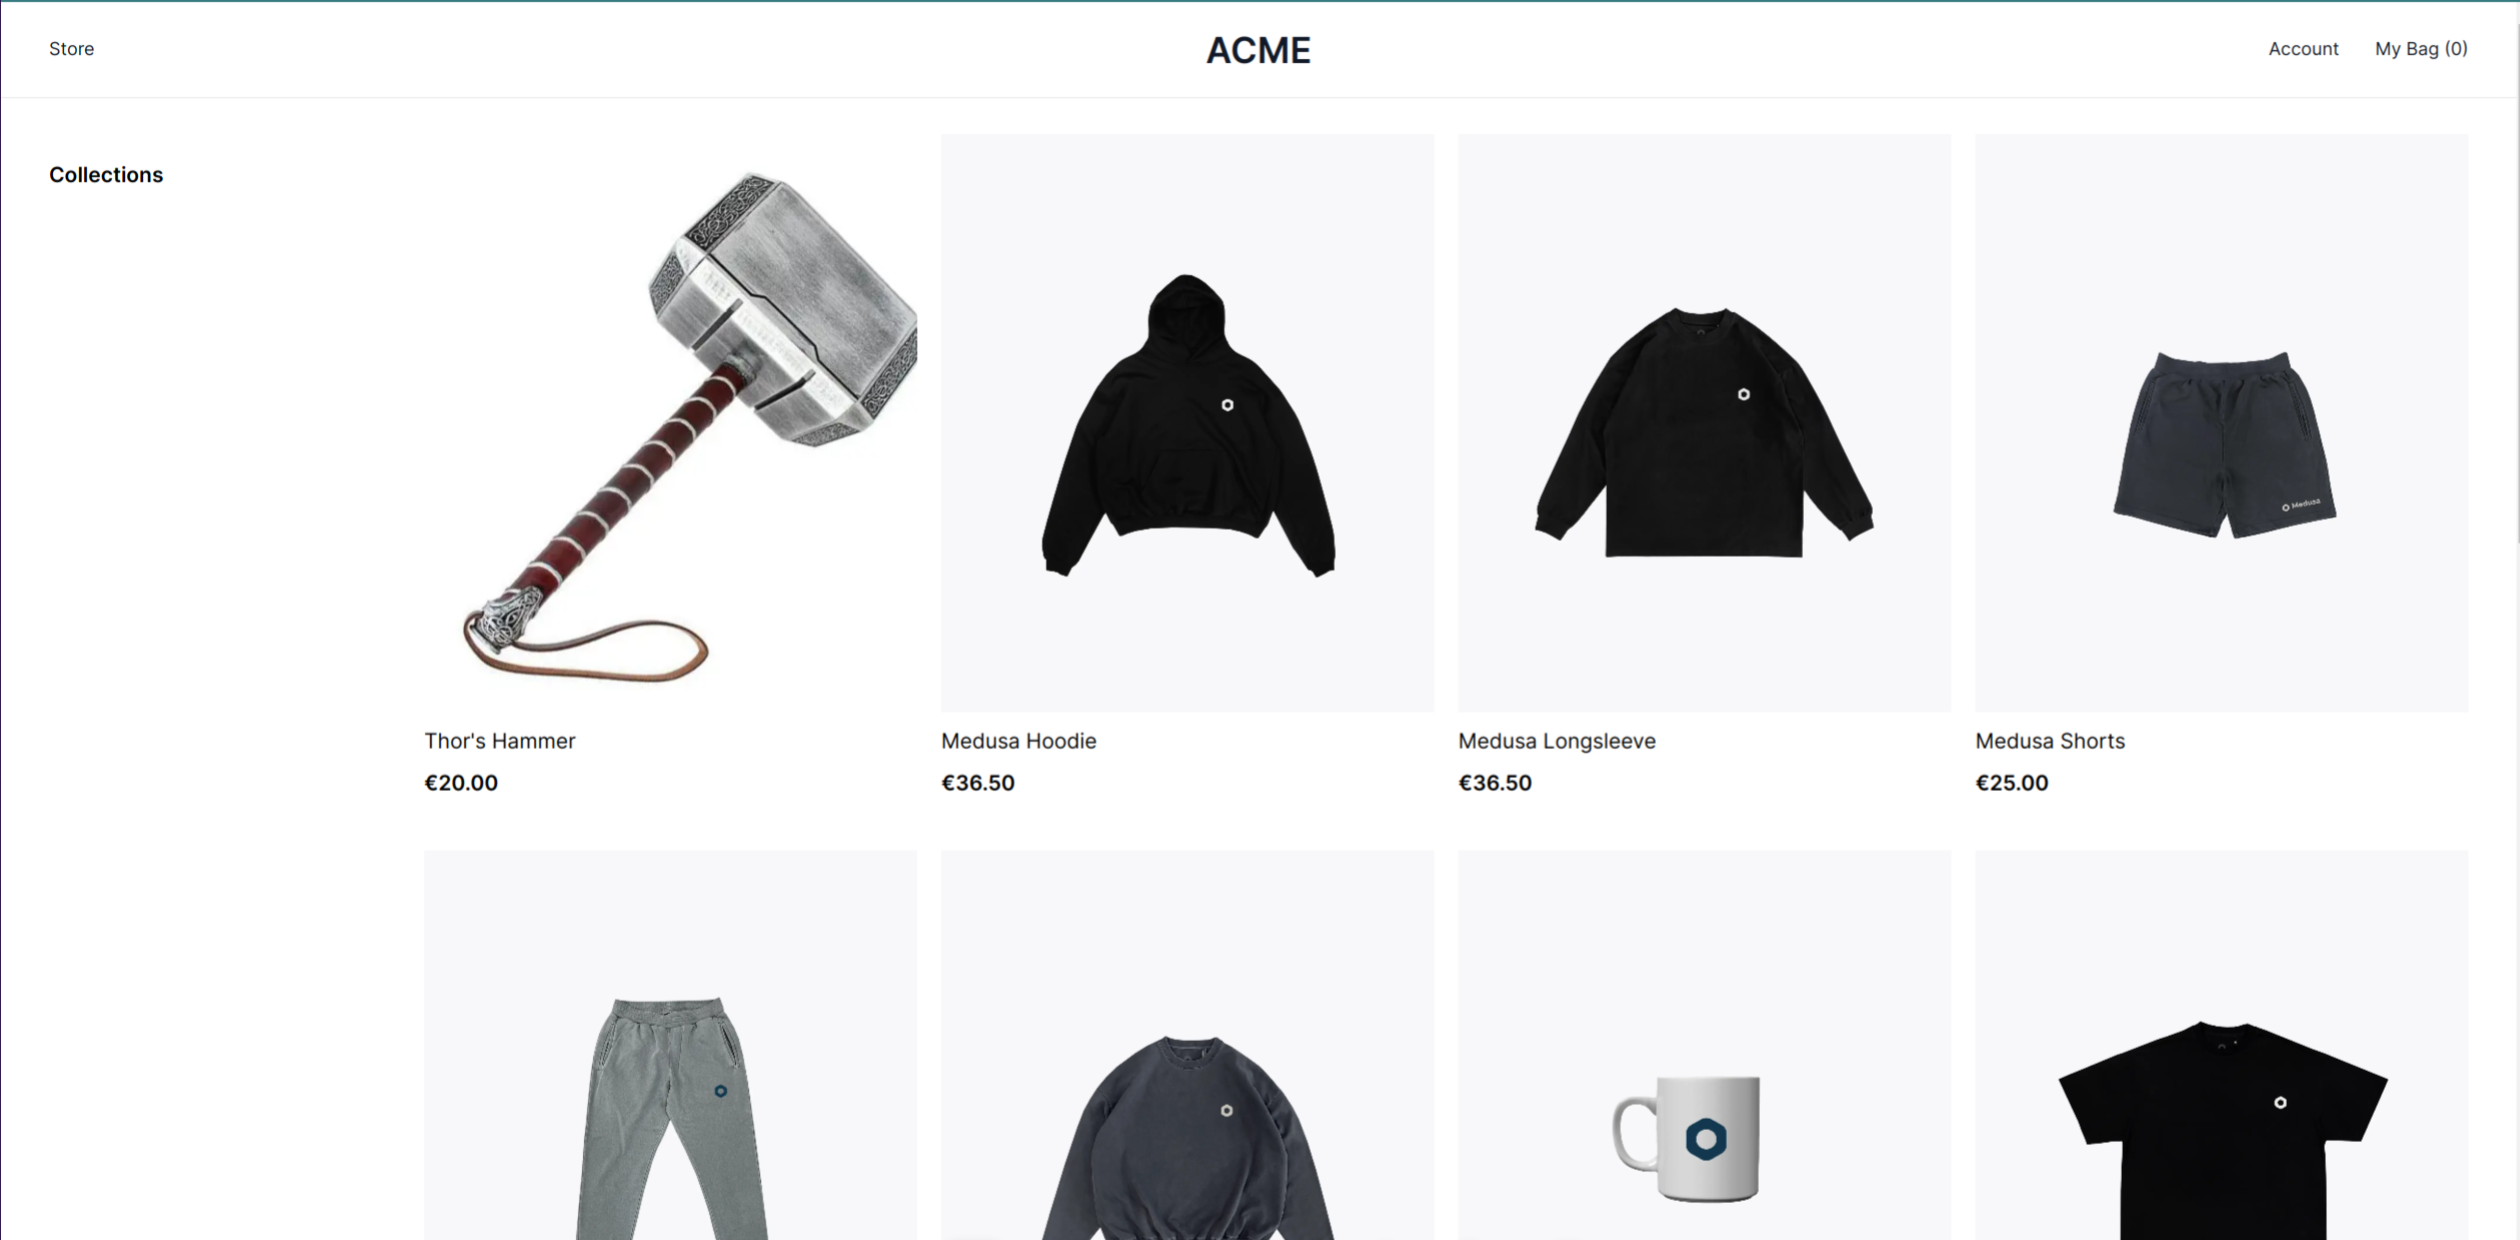
-
Now head back to the storefront, and you should see your newly published products.
Customizing the store
We’ve added a few items to our store. The next step to truly make it our store is to customize. In this section, we’ll be changing the store’s name, title, some colors, and a few images.
Change the store’s name and description
The current store name is ACME; I’m sure you’ve seen it already. We’ll be changing that, as well as the title and description, in this section.
To change the store’s name, update this line in the storefront/src/modules/layout/templates/nav/index.tsx and storefront/src/modules/layout/components/footer-nav/index.tsx files.
<a className="text-xl-semi uppercase">Acme</a>I will be changing mine to
<a className="text-xl-semi uppercase">Prince's Store</a>This will change the store’s name on the navigation bar and footer to Prince's Store.
Here’s what my navigation bar looks like now:

To change the title and description, I will be updating this snippet from the storefront/src/modules/home/components/hero/index.tsx file
<h1 className="text-2xl-semi mb-4 drop-shadow-md shadow-black">
Summer styles are finally here
</h1>
<p className="text-base-regular max-w-[32rem] mb-6 drop-shadow-md shadow-black">
This year, our new summer collection will shelter you from the harsh elements
of a world that doesn't care if you live or die.
</p>with this
<h1 className="text-2xl-semi mb-4 drop-shadow-md shadow-black">
Ohh Yeah
</h1>
<p className="text-base-regular max-w-[32rem] mb-6 drop-shadow-md shadow-black">
Look ma, I've got my own store now. Can you believe it?
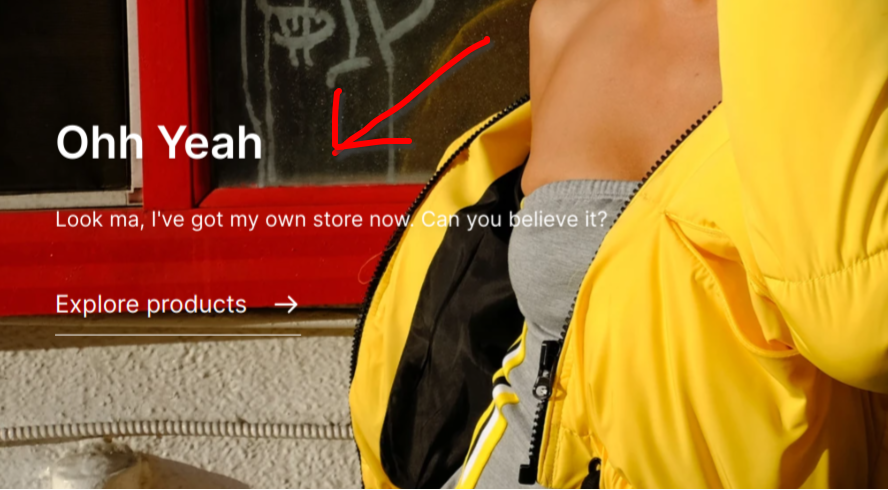
</p>With those changes, that section now looks like this:
Change the top hero image
Changing the top hero image is very easy.
-
First find an image you like; I’ll be using this one from Unsplash.
-
Copy the image to the public folder
storefront/public. -
Update the image
srcURL in this filestorefront/src/modules/home/components/hero/index.tsx.
So if I added a new image called new_hero.jpg I would be updating this snippet from
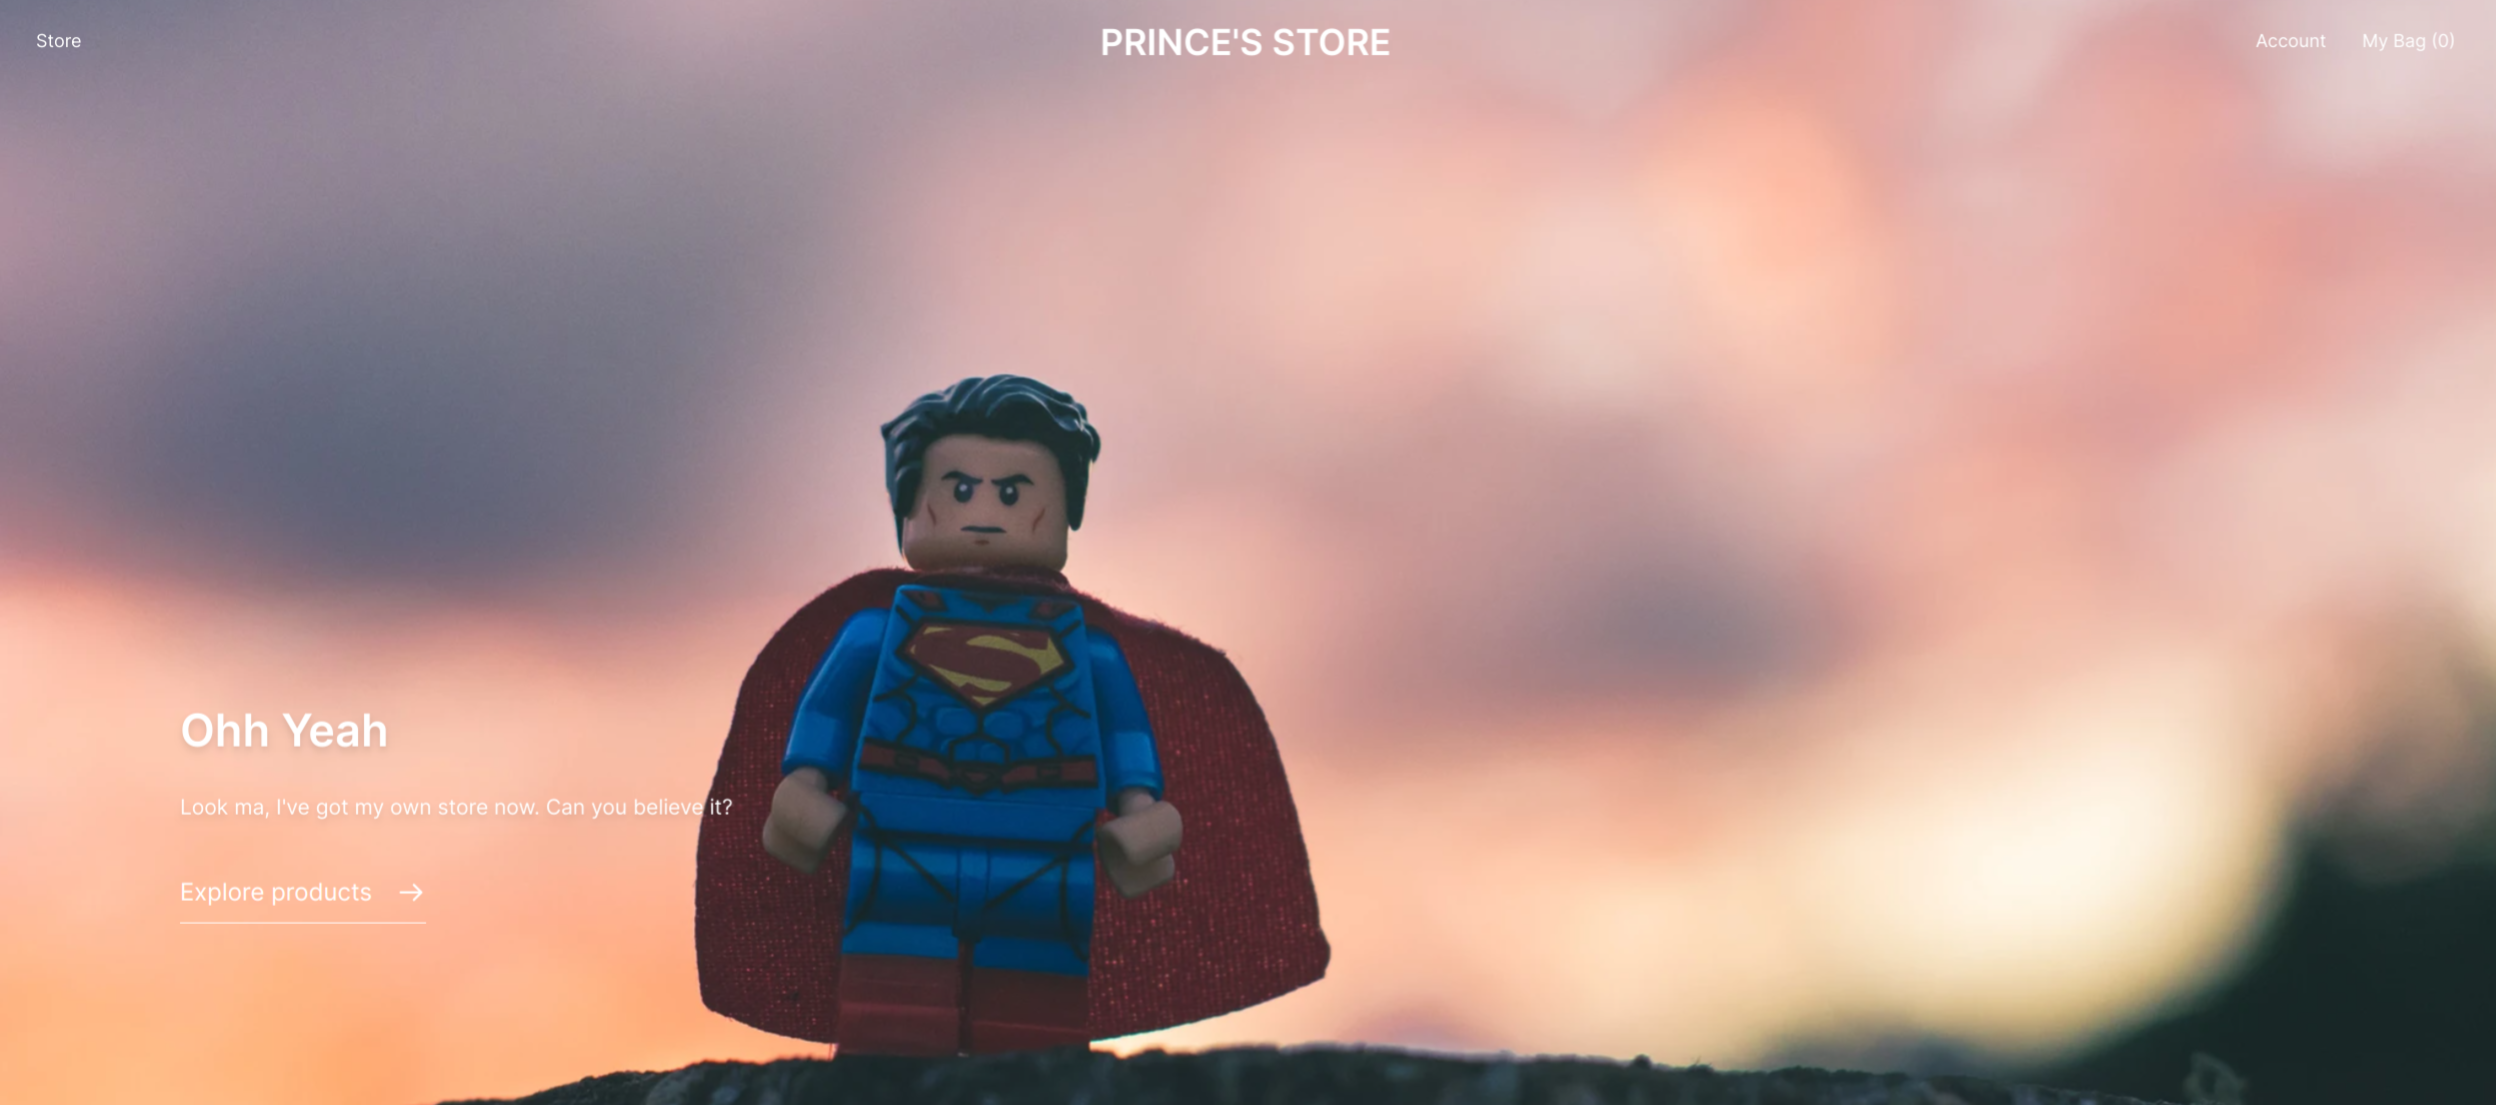
src="/hero.jpg"to
src="/new_hero.jpg"Now my hero image looks like this.
Change the bottom hero image
This is also super easy. The steps involved are very similar to the top hero above.
-
First find an image you like. I’ll be using this one from Unsplash.
-
Copy the image to the public folder
storefront/public. -
Update the image
srcURL in this filestorefront/src/modules/layout/components/footer-cta/index.tsx.So if I added a new image called
new_bottom_hero.jpgI would be updating this snippet from
src="/cta_three.jpg"to
src="/new_bottom_hero.jpg"Now the bottom hero image looks like this.

Conclusion and resources
And that’s that. Congratulations, you now have a fully functional e-commerce platform running on your computer. You can show this off to potential clients, your friends, etc.
Thank you for taking the time to read this article. This is my first article, and I’m also new to web development and Docker. It would mean a lot to me if you could leave a comment about this article, areas I need to improve, what you liked, etc.
You’ll find links to resources and references below.
-
Other materials
- GitHub submodules
- Medusa docs
- Docker Medusa community project
- MinIO container setup
- Install Docker
- Docker networks
Gain Debugging Superpowers
Unleash the power of session replay to reproduce bugs and track user frustrations. Get complete visibility into your frontend with OpenReplay, the most advanced open-source session replay tool for developers.