

Forms are an essential part of modern web development, and creating them can often be a time-consuming and tedious task. That’s where FormKit comes in; it is a powerful modern form-building library designed to help developers create forms easily and efficiently.
In this article, we’ll explore the benefits of using FormKit, and provide a step-by-step guide to building forms with this powerful tool. Read on to discover how FormKit can help you streamline your form-building process and build better forms, faster!
What’s FormKit?
FormKit is a free, open-source, Vue 3-only (if you’re working with Vue 2, check out Vue Formulate) framework that endeavors to provide you with all the tools you need to create production-ready forms. When you install FormKit, out of the box you gain access to a myriad of input types, form generation via a JSON-serializable schema, extensive validation rules and the ability to create your own, and the ability to create custom form inputs and customize the behavior of existing ones.
FormKit doesn’t concern itself much with the layout or aesthetic of the forms you build - that’s up to you. However, it does ship with a minimal styling theme you can use for quick and dirty work. If you want to read an in-depth treatment of FormKit’s features, you can read their docs.
Project setup
If you want to follow along with this guide, you’ll need to do some setup work first.
Your first task is to create a Vue project with Vite. Start by navigating to the location you want your project to live in the terminal. Next, run the following command:
npm create vite@latestThe create-vite command will ask you a few questions. Answer them as shown in the screenshot below:

Then cd into the project folder and install the necessary dependencies:
cd formkit-demo
npm install
Next, start the dev server by running: npm run dev, then visit localhost:5173 to see your application.
Now that you’ve set up your Vue project, it’s time to install FormKit and the default theme. Open another terminal window and run this code:
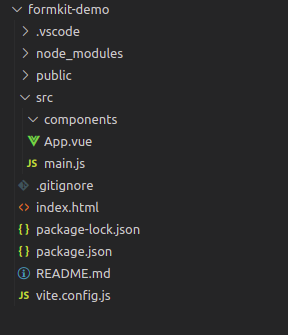
npm i @formkit/vue @formkit/themesYour last setup task is to clean up the boilerplate you don’t need. Delete the src/assets folder, src/components/HelloWorld.vue, and src/style.css. At this point, your project directory should have a structure that looks like this:
Replace the content of src/App.vue with an empty template and script like so:
<script setup></script>

<template></template>
Then import the styling and register Formkit with your Vue app by replacing the content of src/main.js with the following:
import { createApp } from "vue";
import { plugin, defaultConfig } from "@formkit/vue";
import "@formkit/themes/genesis";
import App from "./App.vue";

createApp(App).use(plugin, defaultConfig).mount("#app");
And you’re done with the setup.
Session Replay for Developers
Uncover frustrations, understand bugs and fix slowdowns like never before with OpenReplay — an open-source session replay tool for developers. Self-host it in minutes, and have complete control over your customer data. Check our GitHub repo and join the thousands of developers in our community.
Building forms with FormKit
To demonstrate how easy it is to build forms with FormKit, you’ll be using it to create an appointment request form that looks like this:
Let’s start by creating the form container and headers. Open up src/App.vue and put the following code in it:
<template>
  <FormKit
    type="form"
    #default="{ value }"
    form-class="outer-container"
    :config="{
      validationVisibility: 'dirty',
    }"
  >
    <h1>Appointment Request form</h1>
    <h3>Fill out the form below, and we'll be in touch via email</h3>
  </FormKit>
</template>

<style>
.outer-container {
  width: 400px;
  border: 1px solid #e4e4e4;
  padding: 1.5em;
  border-radius: 1em;
  margin: 0 auto 1em auto;
}

.input-group {
  display: flex;
  gap: 1em;
}

h1,
h3 {
  text-align: center;
}
</style>
FormKit has a unique feature: all form inputs are created using the <FormKit> component. The props you pass to the <FormKit> component determine which input gets rendered, as well as things like labels and styling. Let’s take a closer look at the <FormKit> component. Here’s the code again:
<FormKit
  type="form"
  #default="{ value }"
  form-class="outer-container"
  :config="{
    validationVisibility: 'dirty',
  }"
>
This code uses the type prop to specify that the component should be a form input. The form-class prop specifies what class to apply to the rendered input. The validationVisibility: 'dirty' property of the config prop specifies that any validation errors for the form inputs should show up as soon as the input value fails the validation rule. The default slot is important so we can write logic using the values of the inputs in the form later on.
Next, you’re going to make some form inputs. Add the following code after the <h3> in your template:
<div class="input-group">
<FormKit
type="text"
label="First name"
placeholder="John"
validation="required|length:3"
></FormKit>
<FormKit
type="text"
label="Last name"
placeholder="Doe"
validation="required|length:3"
></FormKit>
</div>
<FormKit
type="date"
label="Date of Birth"
validation="required|date_before:2023-01-01"
></FormKit>
<div class="input-group">
<FormKit
type="text"
label="Gender"
placeholder="Your gender"
validation="required"
></FormKit>
<FormKit
type="text"
label="Phone number"
suffix-icon="telephone"
placeholder="555-5555-555"
validation="required"
></FormKit>
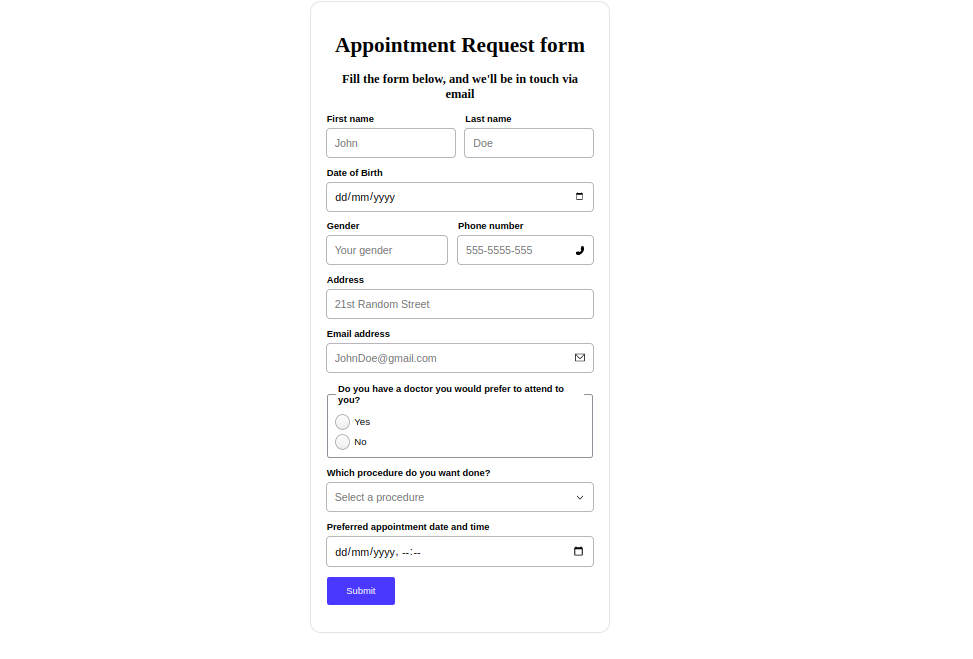
</div>This code introduces how to use FormKit to generate text and date inputs with the type prop. It also shows how validation and icons work.
When you install FormKit, you also install a set of free, MIT-licensed icons. You can use these icons in your forms by specifying the name of the icon in the prefix-icon and suffix-icon props for an input field.
To apply validation to an input, you supply a set of validation rules separated by pipes (”|”) to the validation prop, and arguments are supplied to each validation rule via colons (”:”).
After adding this code, your form should look like this:
And as you fill out each field, once an input violates a validation rule, you’ll see an error displayed. When you try to submit the form, all remaining errors will be displayed regardless of whether the input value has been modified.
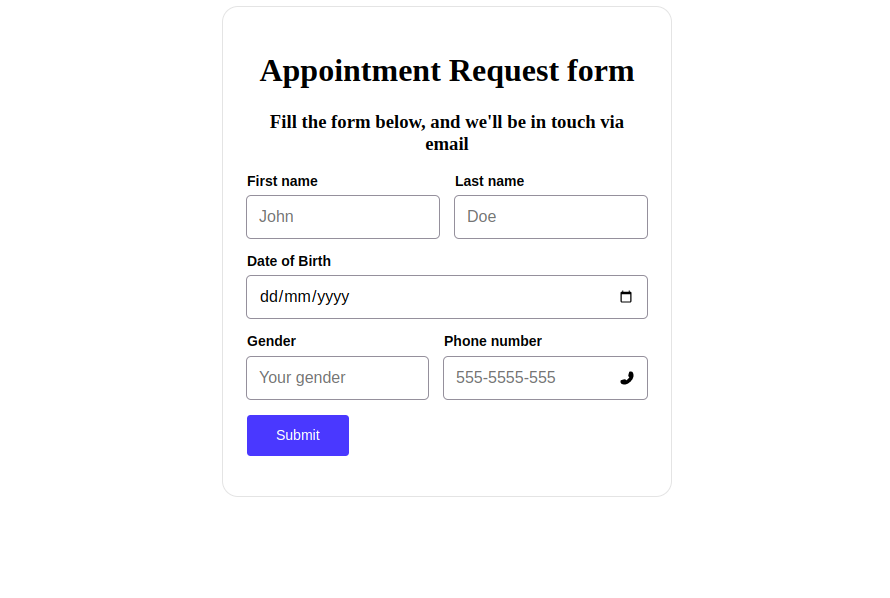
Next, you’ll write similar code to create the address and email address fields. Add the following code to your template:
<FormKit
  type="text"
  label="Address"
  placeholder="21st Random Street"
  validation="required"
></FormKit>

<FormKit
  type="email"
  label="Email address"
  placeholder="JohnDoe@gmail.com"
  suffix-icon="email"
  validation="required|email"
></FormKit>
And the new fields will display like so:

For your next trick, you’re going to build something new: an input that renders conditionally. If a user selects “Yes” on the radio that asks if you have a preferred doctor, we want a text input to pop up asking which doctor you would prefer.
Add the following code to the end of your template:
<FormKit
  type="radio"
  label="Do you have a doctor you would prefer to attend to you?"
  name="preferred"
  :options="['Yes', 'No']"
  validation="required"
></FormKit>

<FormKit
  v-if="value.preferred === 'Yes'"
  type="text"
  label="What's the name of this doctor?"
  validation="required"
></FormKit>
This code uses the value object from the default slot of the form input to access the value of each input field by its name. So on the follow-up input, all you need for the conditional rendering is a v-if that uses the value object to hide the input until the radio’s value is “Yes”.
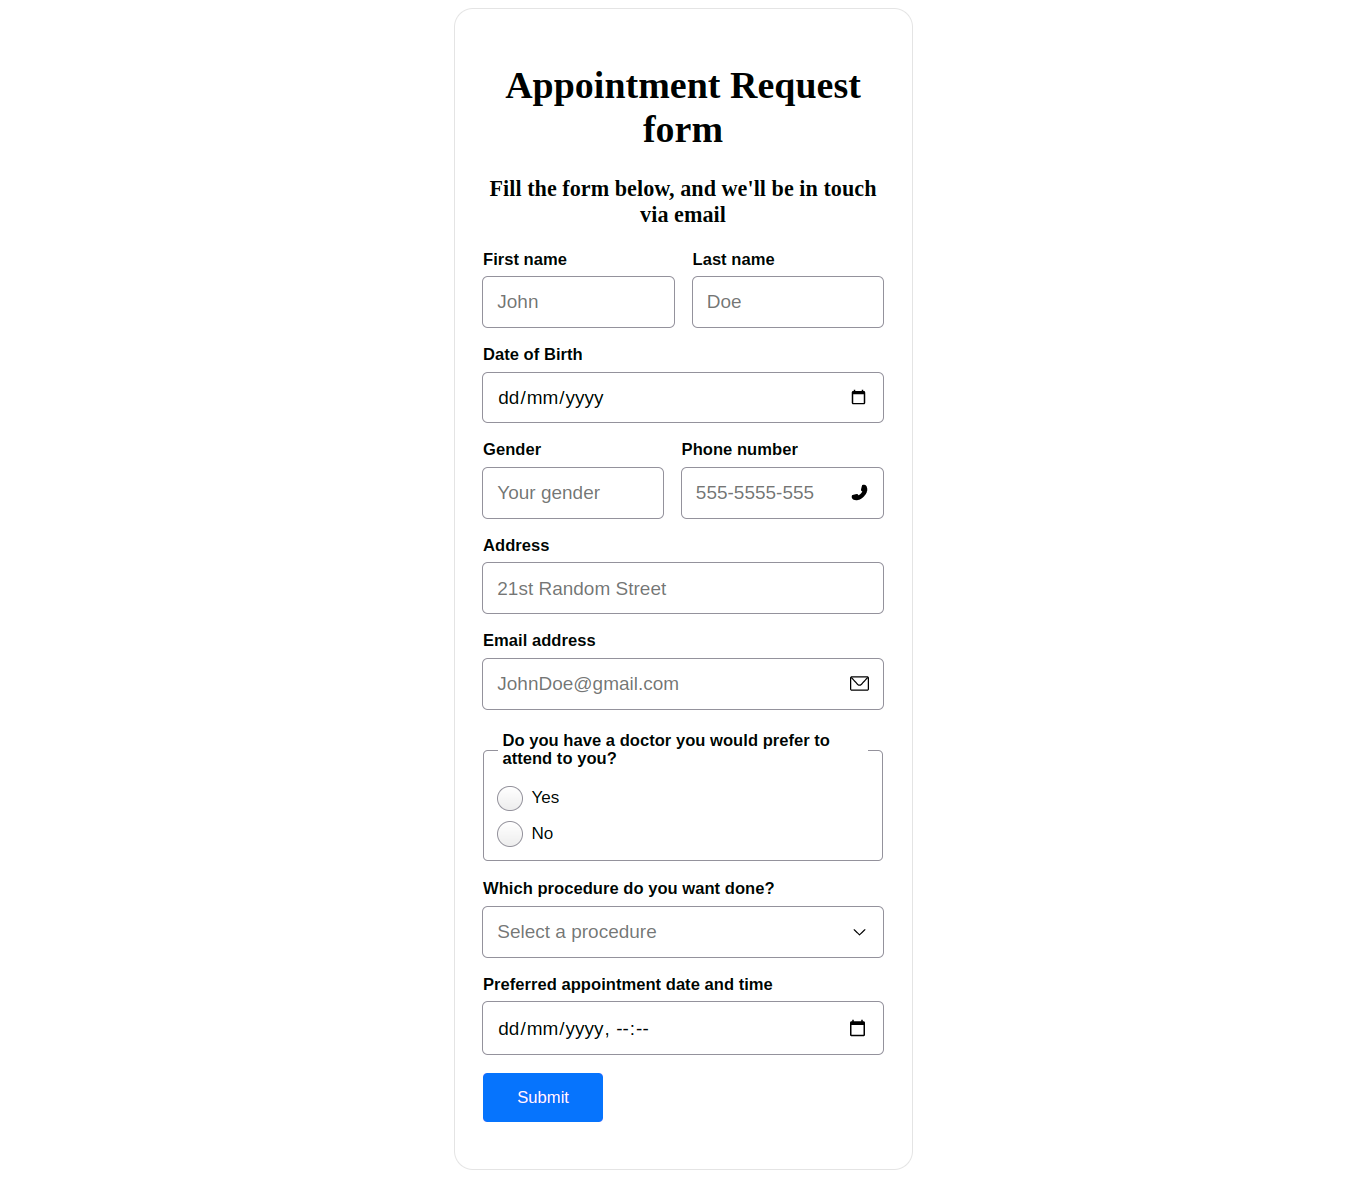
All that’s left to complete your form is a select and a date-time input. Add them like so:
<FormKit
  type="select"
  label="Which procedure do you want done?"
  :options="['Check up', 'Result analysis', 'Medical exam']"
  placeholder="Select a procedure"
  validation="required"
></FormKit>

<FormKit
  type="datetime-local"
  label="Preferred appointment date and time"
  validation="required"
></FormKit>
And you have your complete form!
Conclusion
In conclusion, FormKit provides a powerful and flexible solution for building forms in modern web development. The library makes it easier for developers to create complex forms with ease and has many features and tools to streamline the form-building process.
Gain Debugging Superpowers
Unleash the power of session replay to reproduce bugs and track user frustrations. Get complete visibility into your frontend with OpenReplay, the most advanced open-source session replay tool for developers.