
How to Build your React.js App using Vite


Vite is a JavaScript build tool that simplifies how you build your front-end web applications. Vite is made to speed up the build process and aims to provide a faster development experience for modern web apps.
Vite Features
A few features make Vite outstands its alternatives. These include:
- Hot Module Replacement (HMR)- Creating an application using Vite uses the HMR to run your app. This will make your apps much faster and more powerful with increased application startup performance, and simplify and speed up the build process.
- It allows you to select different frameworks you want your application to work with.
- Bundles your application and makes it ready for production. Vite bundles all the dependencies, modules, and code together for production.
- It uses Native modules (ESM) based dev server. Applications have different modules and routes. When running your applications with Vite, the application is executed based on a single request. This means the server won’t bundle the whole application just to execute a single request. Vite uses ESM to load routes separately, and thus a module is only executed if the request made depends on it. Running your dev server with ESBuild bundler will give your application superpowers compared to other bundles such as Webpack.
Vite vs create-react-app: Why use Vite
With such amazing benefits, as a developer, you want to run front-end applications with Vite. Consider creating an app using React.js (a JavaScript library for creating front-end web apps). You will probably use the create-react-app command to bootstrap your React application. The command creates the project structure required to develop, build and run a basic React.js application.
Here the goal is to create a React app. Vite provides an equivalent of create-react-app. However, you get to make your application more powerful.
- Vite is faster. It takes less time to bootstrap a React app as compared to
create-react-app. - The bundled app varies in size, and Vite tends to create an application with less size bundler.
- The sizes of build output will vary as well. If the initially created application were small, the build output would be smaller.
- It’s faster and more powerful to build an app that runs on Vite. Vite has an optimized build process.
- Vite has an instant server start. Any change to your code is compiled faster and displayed on the browser almost immediately.
Creating a React.js App using Vite
Let’s dive in and run React.js with Vite. Ensure you have Node.js runtime installed on your computer. Navigate to where you want the application to live and open the command prompt that point to that folder. Then initialize Vite as follows.
npm init viteGo ahead and enter a name for your project. This will allow you to select any front-end framework on which you want Vite to run. In this case, go ahead and select React.

Most fronted frameworks run either on JavaScript or Typescript. Vite allows you to set this up right before your project gets created. In this case, we are running the application with JavaScript. If you want to use typescript, go ahead, and select react-ts as the framework variant.

With that, Vite will scaffold a react project within seconds. Go ahead and change to the newly created project using the cd command:
cd vite-projectThen install the project dependencies:
npm installFinally, run your application to test everything out:
npm run devAnd there you have your React app running on Vite. To access the dev server, open http://localhost:3000/ on a browser, and you will be served with your first React-Vite application. Right away, you can go ahead and start building on your application.
npm init vite vs. create-react-app
To fully understand which command to select for your project. Let’s compare the two based on how they scaffold the same project.
Go ahead and create an app using create-react-app:
npx create-react-app my-appWhile executing this command, note how long it takes to scaffold the project. Using this command, it takes some time to create the project structure required to develop, build and run a React.js project.
Now go ahead and run the project. Change to the newly created project using the cd command:
cd my-appFinally, run your application to test everything out:
npm startLet’s now test how long it takes to run each app. So go ahead and the create-react-app server. Then rerun each server using the following time Measure command:
Measure-command {npm start}
This takes about 7845 Milliseconds to start the server. However, this is not the case with Vite.

It took Vite about 825 Milliseconds to set the server up and running. That is considerably faster as compared to create-react-app.
Another thing you should note is the amount of disk size each project takes. Here is a sample of how these two projects compare in terms of disk sizes:
- Vite

- Create-react-app
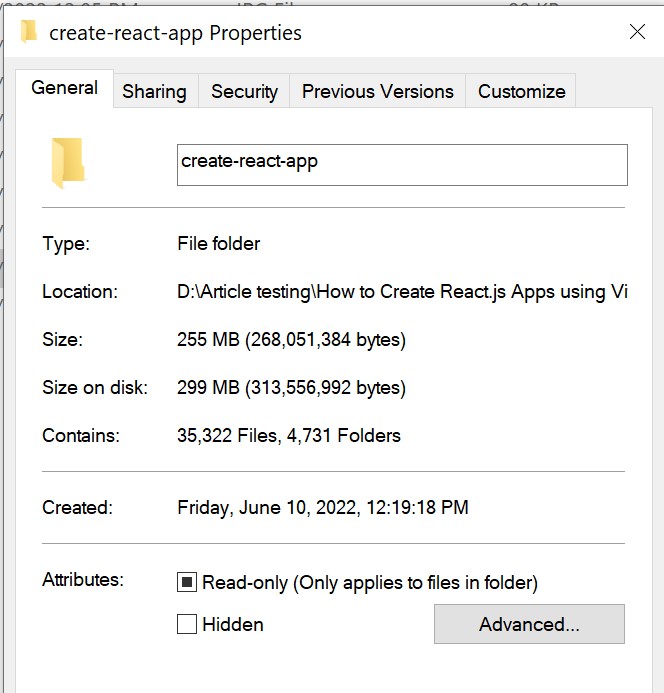
As you can see, Vite is the clear winner here, and the same applies to their build output sizes.
Also, when restarting the applications based on the changes you make. Vite tends to be faster, and changes will immediately reflect on the browser.
Session Replay for Developers
Uncover frustrations, understand bugs and fix slowdowns like never before with OpenReplay — an open-source session replay tool for developers. Self-host it in minutes, and have complete control over your customer data. Check our GitHub repo and join the thousands of developers in our community.
Migrating from create-react-app to Vite
Assuming you have a traditional create-react-app, let’s briefly discuss how you can migrate your existing create-react-app and use Vite instead. This way, you can take advantage of everything that Vite offers. At this point, you should have an existing React app. You can learn how to create a simple one here.
Inside your project, you need to update the package.json file to remove old dependencies and add the new Vite dependencies. create-react-app uses react-scripts to build your project. Therefore, you need to first uninstall its associated dependencies. In your project directory, run:
npm uninstall react-scriptsOnce done, it’s time to introduce your Vite dependencies. Vite is used do development purposes. When adding Vite, ensure you add the needed Vite libraries as devDependencies, as illustrated here. You need two libraries. These are:
- Vite - This is the Vite NPM dev server that serves your source files over native ES modules.
- @vitejs/plugin-react - A Vite plugin for React projects.
To install the above libraries, run the following command, ensuring you have the --save-dev flag to instruct NPM to install them as devDependencies:
npm install vite @vitejs/plugin-react --save-devThe above changes should reflect inside your package.json file as such.
When using react-scripts, it uses the public folder to access assets outside of the module system. Files inside the public folder won’t be processed by Webpack, the default create-react-app build system. They will be copied into the build folder untouched and make the present files a part of the build. It does so by adding the assets with a variable PUBLIC_URL to access all files inside the public folder. This can have the following problems:
- If an asset is missing,
create-react-appwill return a 404 error to the user. - The resulting filenames will not include content hashes. You will be required to add additional query parameters or rename existing ones whenever they change.
- Post-processing or minification are not applied to any files in the public folder.
However, when using Vite, the Asset build system works differently. It treated static assets differently. PUBLIC_URL won’t work in this case. To solve that, Vite uses a Public Base Path (/). To implement this, navigate to the public/index.html file and replace all %PUBLIC_URL% with public Base Path. This should be /, and it should be implemented as follows:
<link rel="icon" href="/favicon.ico" />
<link rel="apple-touch-icon" href="/logo192.png" />
<link rel="manifest" href="/manifest.json" />
This way:
- A missing asset will cause a compilation error instead of returning 404 errors to uses.
- You don’t need to worry about content hashes.
- Assets get minified and bundled together, reducing the number of network requests.
Vite a great fan of .jsx. Ensure you rename your .js files to .jsx. Then edit the index.js entry point to point to the file .jsx file extension. So inside public/index.html add the following just <div id="root"></div>:
<script type="module" src="/src/index.jsx"></script>During development, index.html serves as your application’s entry point on Vite, a server. index.html is handled by Vite as source code and an access point in the module graph. This concept uses a “root directory”, where your server is served from. Therefore, go ahead and move the public/index.html file to the root directory of your project.
At the root directory, create a vite.config.js file ad add the following script:
export default defineConfig({
  plugins: [react()]
})
import { defineConfig } from 'vite'
import react from '@vitejs/plugin-react'
Finally, update the running scripts inside package.json from:
"start": "react-scripts start",
"build": "react-scripts build",
"test": "react-scripts test",
"eject": "react-scripts eject"
To the following Vite commands:
"dev": "vite",
"build": "vite build",
"preview": "vite preview"
To test your application, use the above Vite command. For example, to run your local development server, run:
npm run dev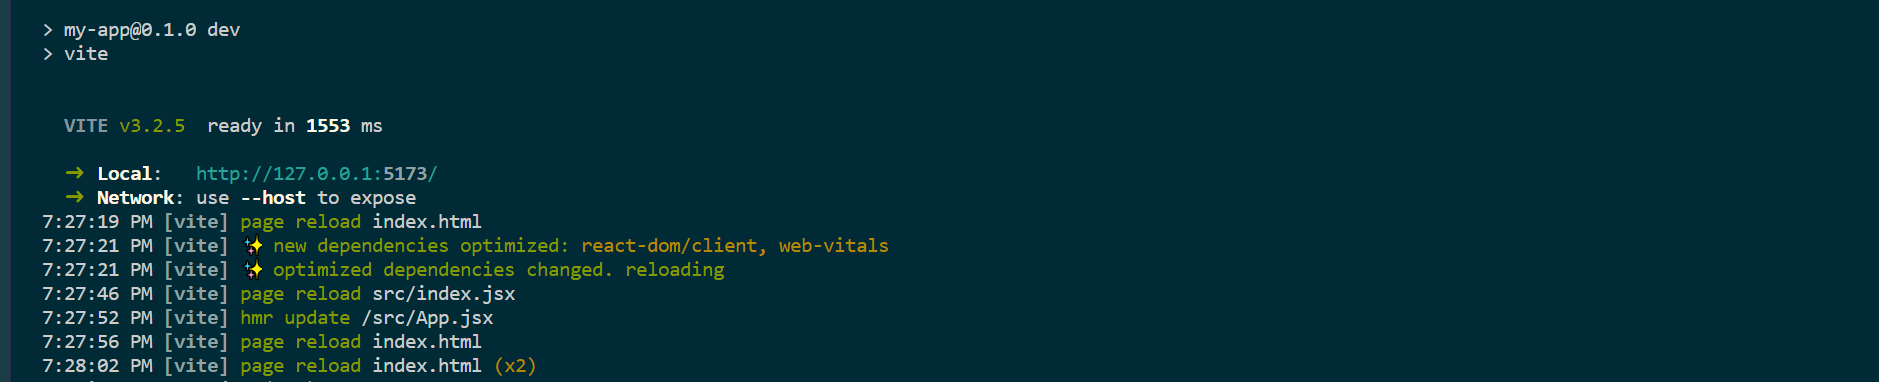
Vite is now ready, and you can use its advantages alongside your React projects.
Conclusion
In summary:
The main reason Vite is faster and more powerful in many aspects is the number of dependencies used to scaffold, build and run the app. If you navigate to each project’s package.json file. You can see a clear picture of the dependencies to run each app.
To conclude, Vite is a fantastic tool that you should consider when creating and building your front-end application. It is compatible with almost every front-end framework. Its powerful features will help you create and build applications faster and more lightweight apps.
A TIP FROM THE EDITOR: Want more on React and Vite? Don´t miss our earlier Building a React Application with Vite article, then!
Gain Debugging Superpowers
Unleash the power of session replay to reproduce bugs and track user frustrations. Get complete visibility into your frontend with OpenReplay, the most advanced open-source session replay tool for developers.
