

Forms are fundamental to web applications, enabling user interaction and data submission. They’re tools for online actions, from basic search bars to complex sign-up forms. This article will show you techniques to optimize their performance in React websites so you can enhance the performance of your apps.

Discover how at OpenReplay.com.
Improving Form Performance in ReactJS
With ReactJS, making good components, especially for forms, can be tricky. Some React developers use useMemo or useCallback to improve components’ performance. The frequent changes in the values of form fields often prevent the memoization of forms.
This article is about tackling that challenge and improving React forms. First, we’ll check out traditional ways to handle forms — the classic approach using:
- controlled inputs
- uncontrolled inputs
After that, we will look at the new player in the React arsenal — server actions — and see how they can level up our form game.
Traditional ways
Handling React forms traditionally involves two main approaches: controlled and uncontrolled inputs. Each method has its pros, and which one you pick usually depends on your application’s needs.
Controlled Inputs
In the controlled input approach, React controls the form’s state through any of these hooks, useState or useReducer. This makes the form’s state the primary data source for the form elements.
When a user interacts with the form, we use our React event handlers to update the form’s state, and the form elements update accordingly.
An input becomes a controlled input when we pass either a value or checked props to the input. We must provide an onChange function to modify the input’s value.
Let’s take a look at a basic example:
const Form = () => {
  // comment 1
  const [profession, setProfession] = React.useState("");

  // comment 2
  const changeProfession = (even) => {
    setProfession(event.target.value);
  };

  // comment 3
  console.count("controlled");

  return <input value={profession} onChange={changeProfession} />;
};
comment 1: We saved the input’s value in a state.comment 2: We used thechangeProfessionfunction to update the state’s value.comment 3: We usedconsole.countto track when the form re-renders. We’ll be using this a lot in this article.
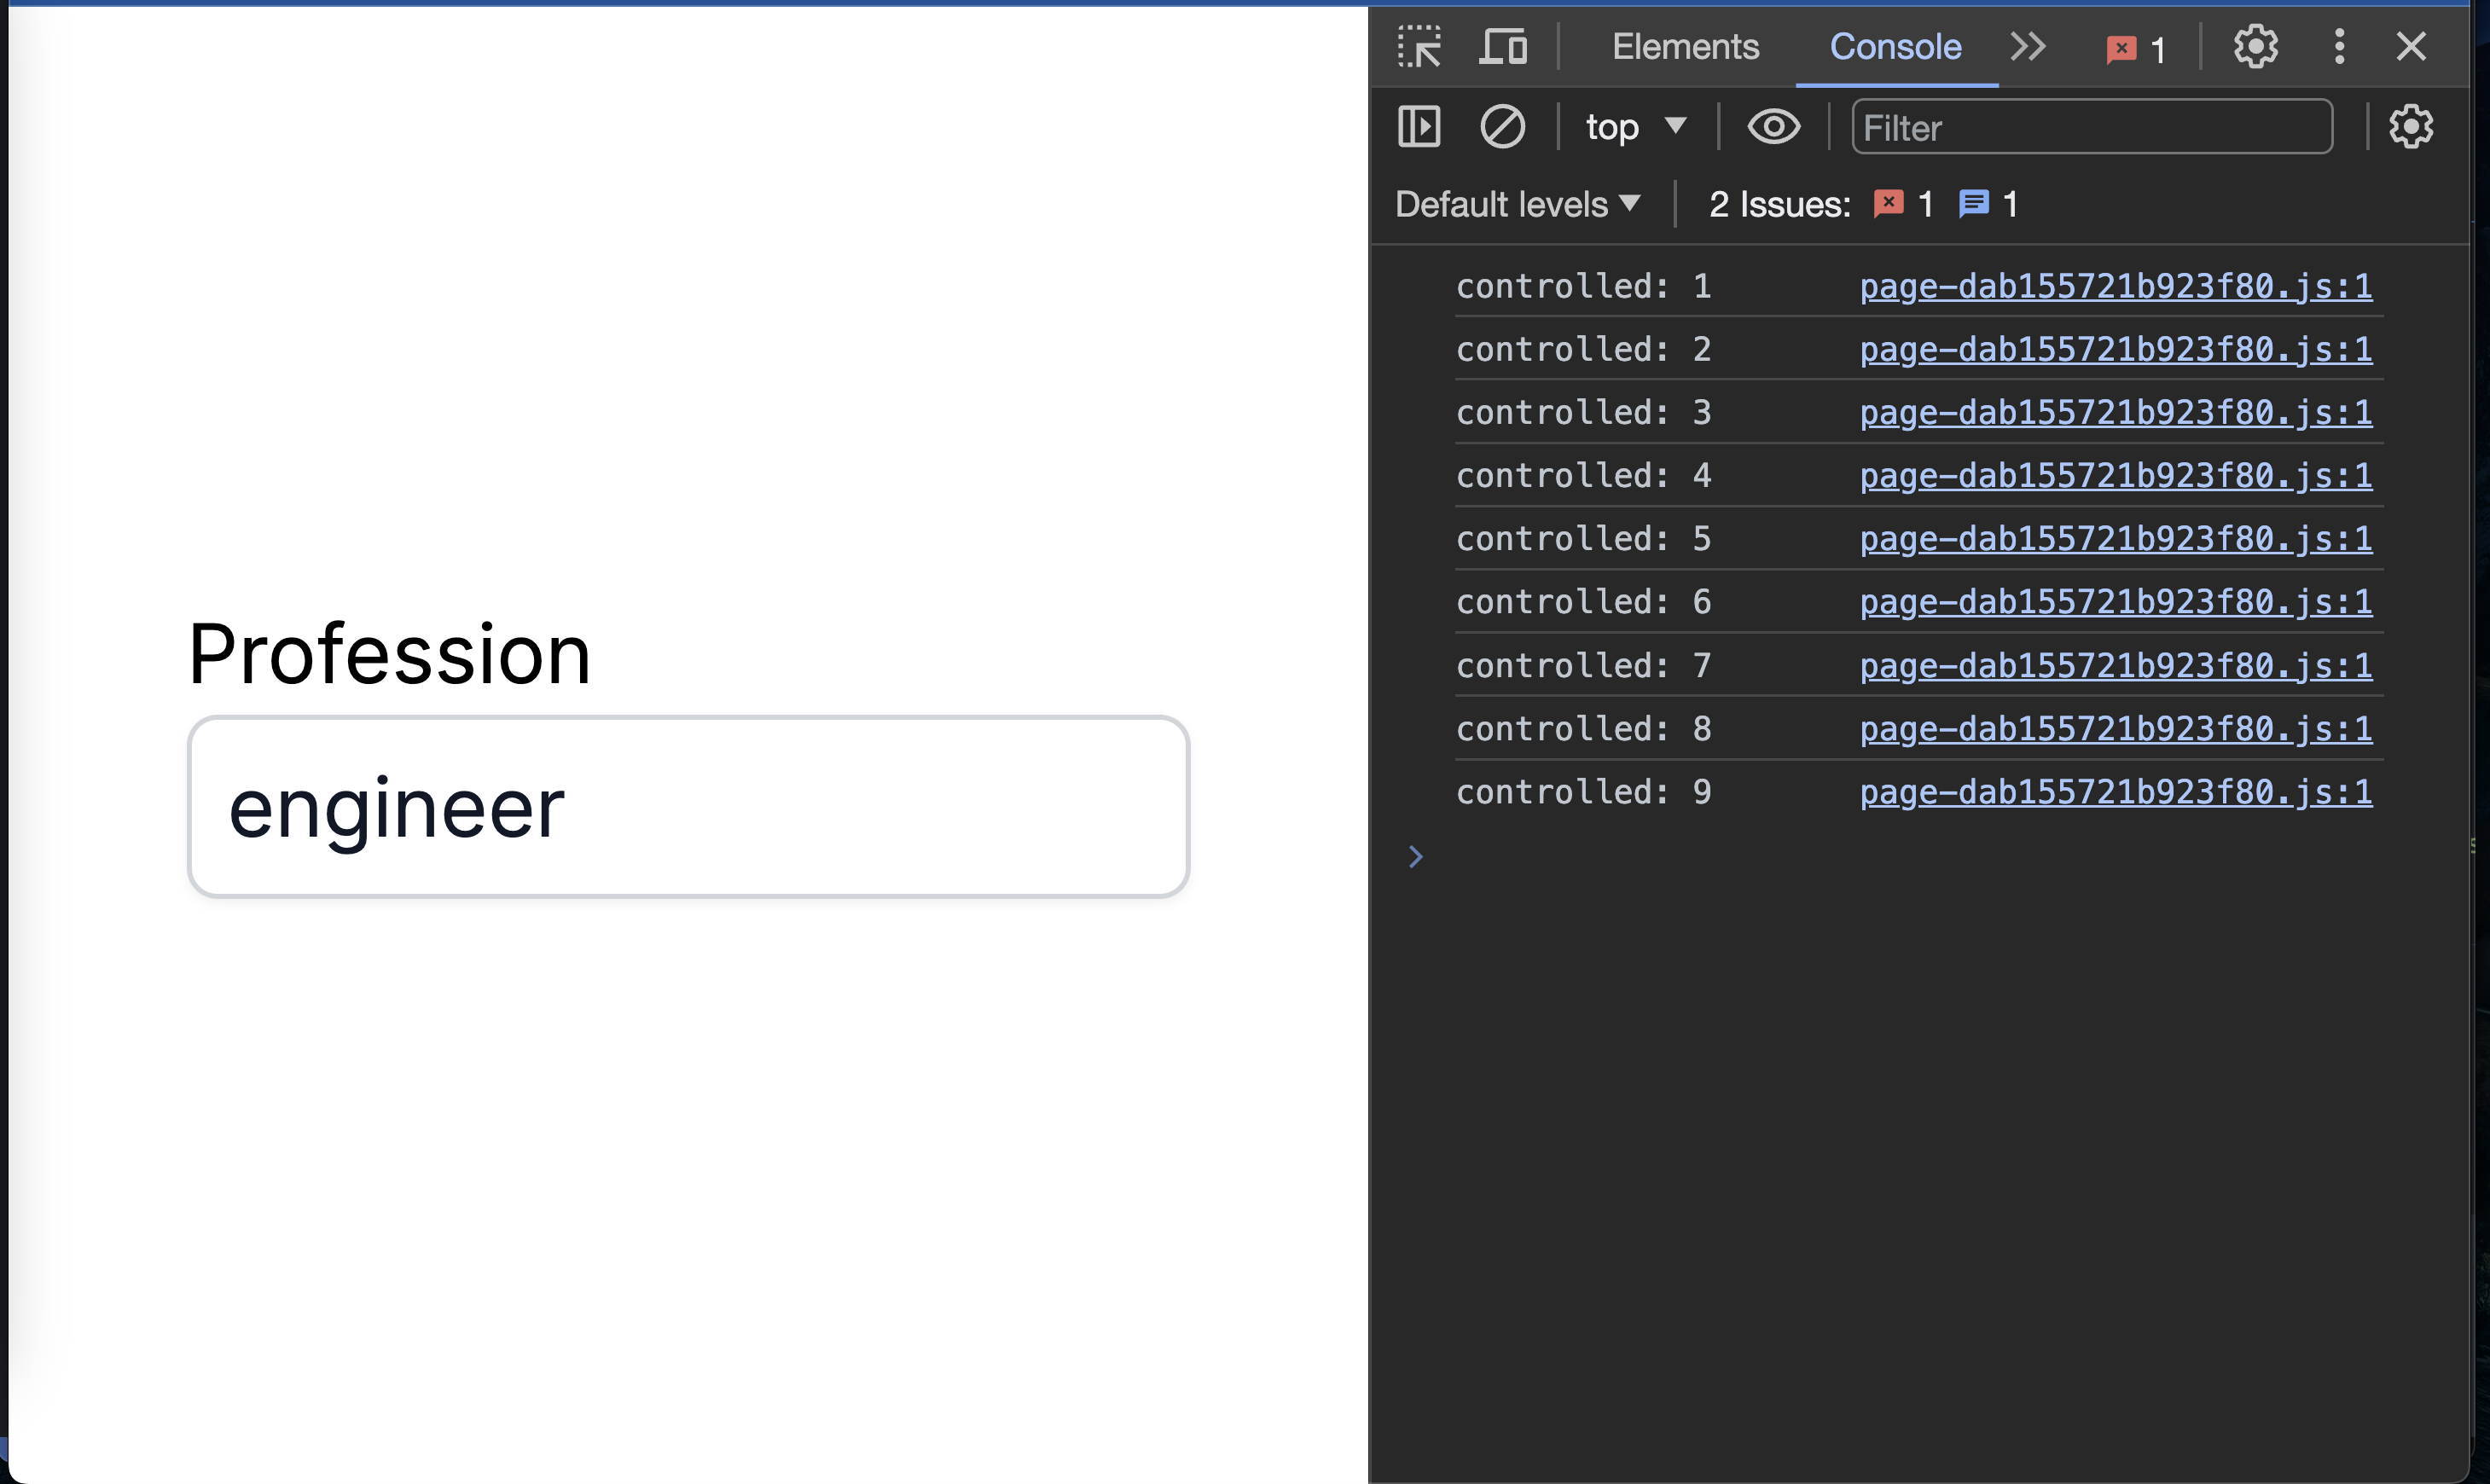
With this controlled input, our form component re-renders each time a user changes the input field. As we can see from the console in the screenshot above, the form component was re-rendered eight times after the initial render.
This doesn’t look like a problem since we only deal with one input and no validation. But what happens when we have a more complex form?
Let’s take a look at another example:
// ControlledInput.jsx
export default function ControlledInput({
  type,
  name,
  value,
  error,
  onChange,
  onBlur,
}) {
  return (
    <div>
      <label htmlFor={name}>{name}</label>
      <input
        type={type}
        name={name}
        id={name}
        value={value}
        onChange={onChange}
        onBlur={onBlur}
      />
      {error && <p>{error}</p>}
    </div>
  );
}
We created a reusable input component named ControlledInput that accepts several props:
type: Specifies the type of form input to render.name: Used dynamically by ouronChangefunction to update the form field value. This is necessary since this component doesn’t have the form’s state.value: Determines the value of the form input. Passing this attribute to our base input element makes it a controlled input.error: Represents the error message associated with the form input.onChange: Works just like our first controlled input.onBlur: Handles the blur event of the form input.
Let’s make use of it in our Form component:
// Form.jsx
export default function Form() {
  // comment 1
  const [values, setValues] = useState({
    name: "",
    email: "",
    age: 0,
  });
  const [errors, setErrors] = useState({
    name: null,
    email: null,
    age: null,
  });

  // comment 2
  // event handler for when a user changes any of the form fields' value
  const handleChange = (e) => {
    const input = e.target;

    setValues({
      ...values,
      [input.name]: input.value,
    });
  };

  // comment 3
  // event handler for when a user leaves a form field
  const handleBlur = (e) => {
    const input = e.target;

    // get the name of the input and value
    const { name, value } = input;

    // set the field error name dynamically
    let error = {
      [name]: "",
    };

    // update the field error
    if (name === "name") {
      error[name] =
        value.length < 3 ? "Name must be at least 3 characters" : "";
    } else if (name === "email") {
      error[name] = !value.includes("@") ? "Email must be valid" : "";
    } else if (name === "age") {
      error[name] = +value < 12 ? "You must be at least 12 years old" : "";
    }

    //Update the form's error state
    setErrors((prev) => ({
      ...prev,
      ...error,
    }));
  };

  // comment 4
  // event handler for when a user submits the form
  const handleSubmit = (e) => {
    e.preventDefault();

    if ("form is invalid") {
      return alert("Correct the errors in the form");
    }

    console.log("Form submitted");
  };

  // comment 5
  const formIsValid = Object.values(errors).every((value) => value === "");

  console.count("controlled"); // keep count of how many times this Form rerenders

  return (
    <main>
      <form>
        <ControlledInput
          type="text"
          name="name"
          value={values.name} // this value and other values are controlled by the React state
          error={errors.name} // this error and other errors are controlled by the React state
          onChange={handleChange}
          onBlur={handleBlur}
        />
        <ControlledInput
          type="email"
          name="email"
          value={values.email}
          error={errors.email}
          onChange={handleChange}
          onBlur={handleBlur}
        />
        <ControlledInput
          type="number"
          name="age"
          value={values.age}
          error={errors.age}
          onChange={handleChange}
          onBlur={handleBlur}
        />
        <button type="submit" aria-disabled={!formIsValid}>
          Submit
        </button>
      </form>
    </main>
  );
}
Comment 1: The ReactuseStatehook manages the state of the form values and errors. Our form’s inputs (ControlledInput) use values and errors.Comment 2: ThehandleChangefunction updates the form values dynamically as the user interacts with the input fields.Comment 3: ThehandleBlurfunction checks if the form input is valid when the user leaves the input field.Comment 4: ThehandleSubmitfunction triggers when the user clicks the submit button.Comment 5: TheformIsValiddetermines whether we should disable the submit button. For simplicity’s sake, we assumed anullerror means the field hasn’t been validated. An empty value means the field has been touched and is valid. Any other value means it’s invalid.
Controlled input is beneficial because it allows:
- Easy access to the form field values.
- Dynamic manipulation of other form elements or fields based on other inputs.
In our example, we disabled the form’s ARIA when there is any error in the form. Our disable variable, formIsValid, depends on the form inputs’ errors.
ARIA is a set of roles and attributes that help to make web applications more accessible.
Performance issues occur with excessive re-renders, particularly when form values change frequently. A change in any of the form fields re-renders the whole form. This can affect performance, especially in complex forms with excessive re-rendering.
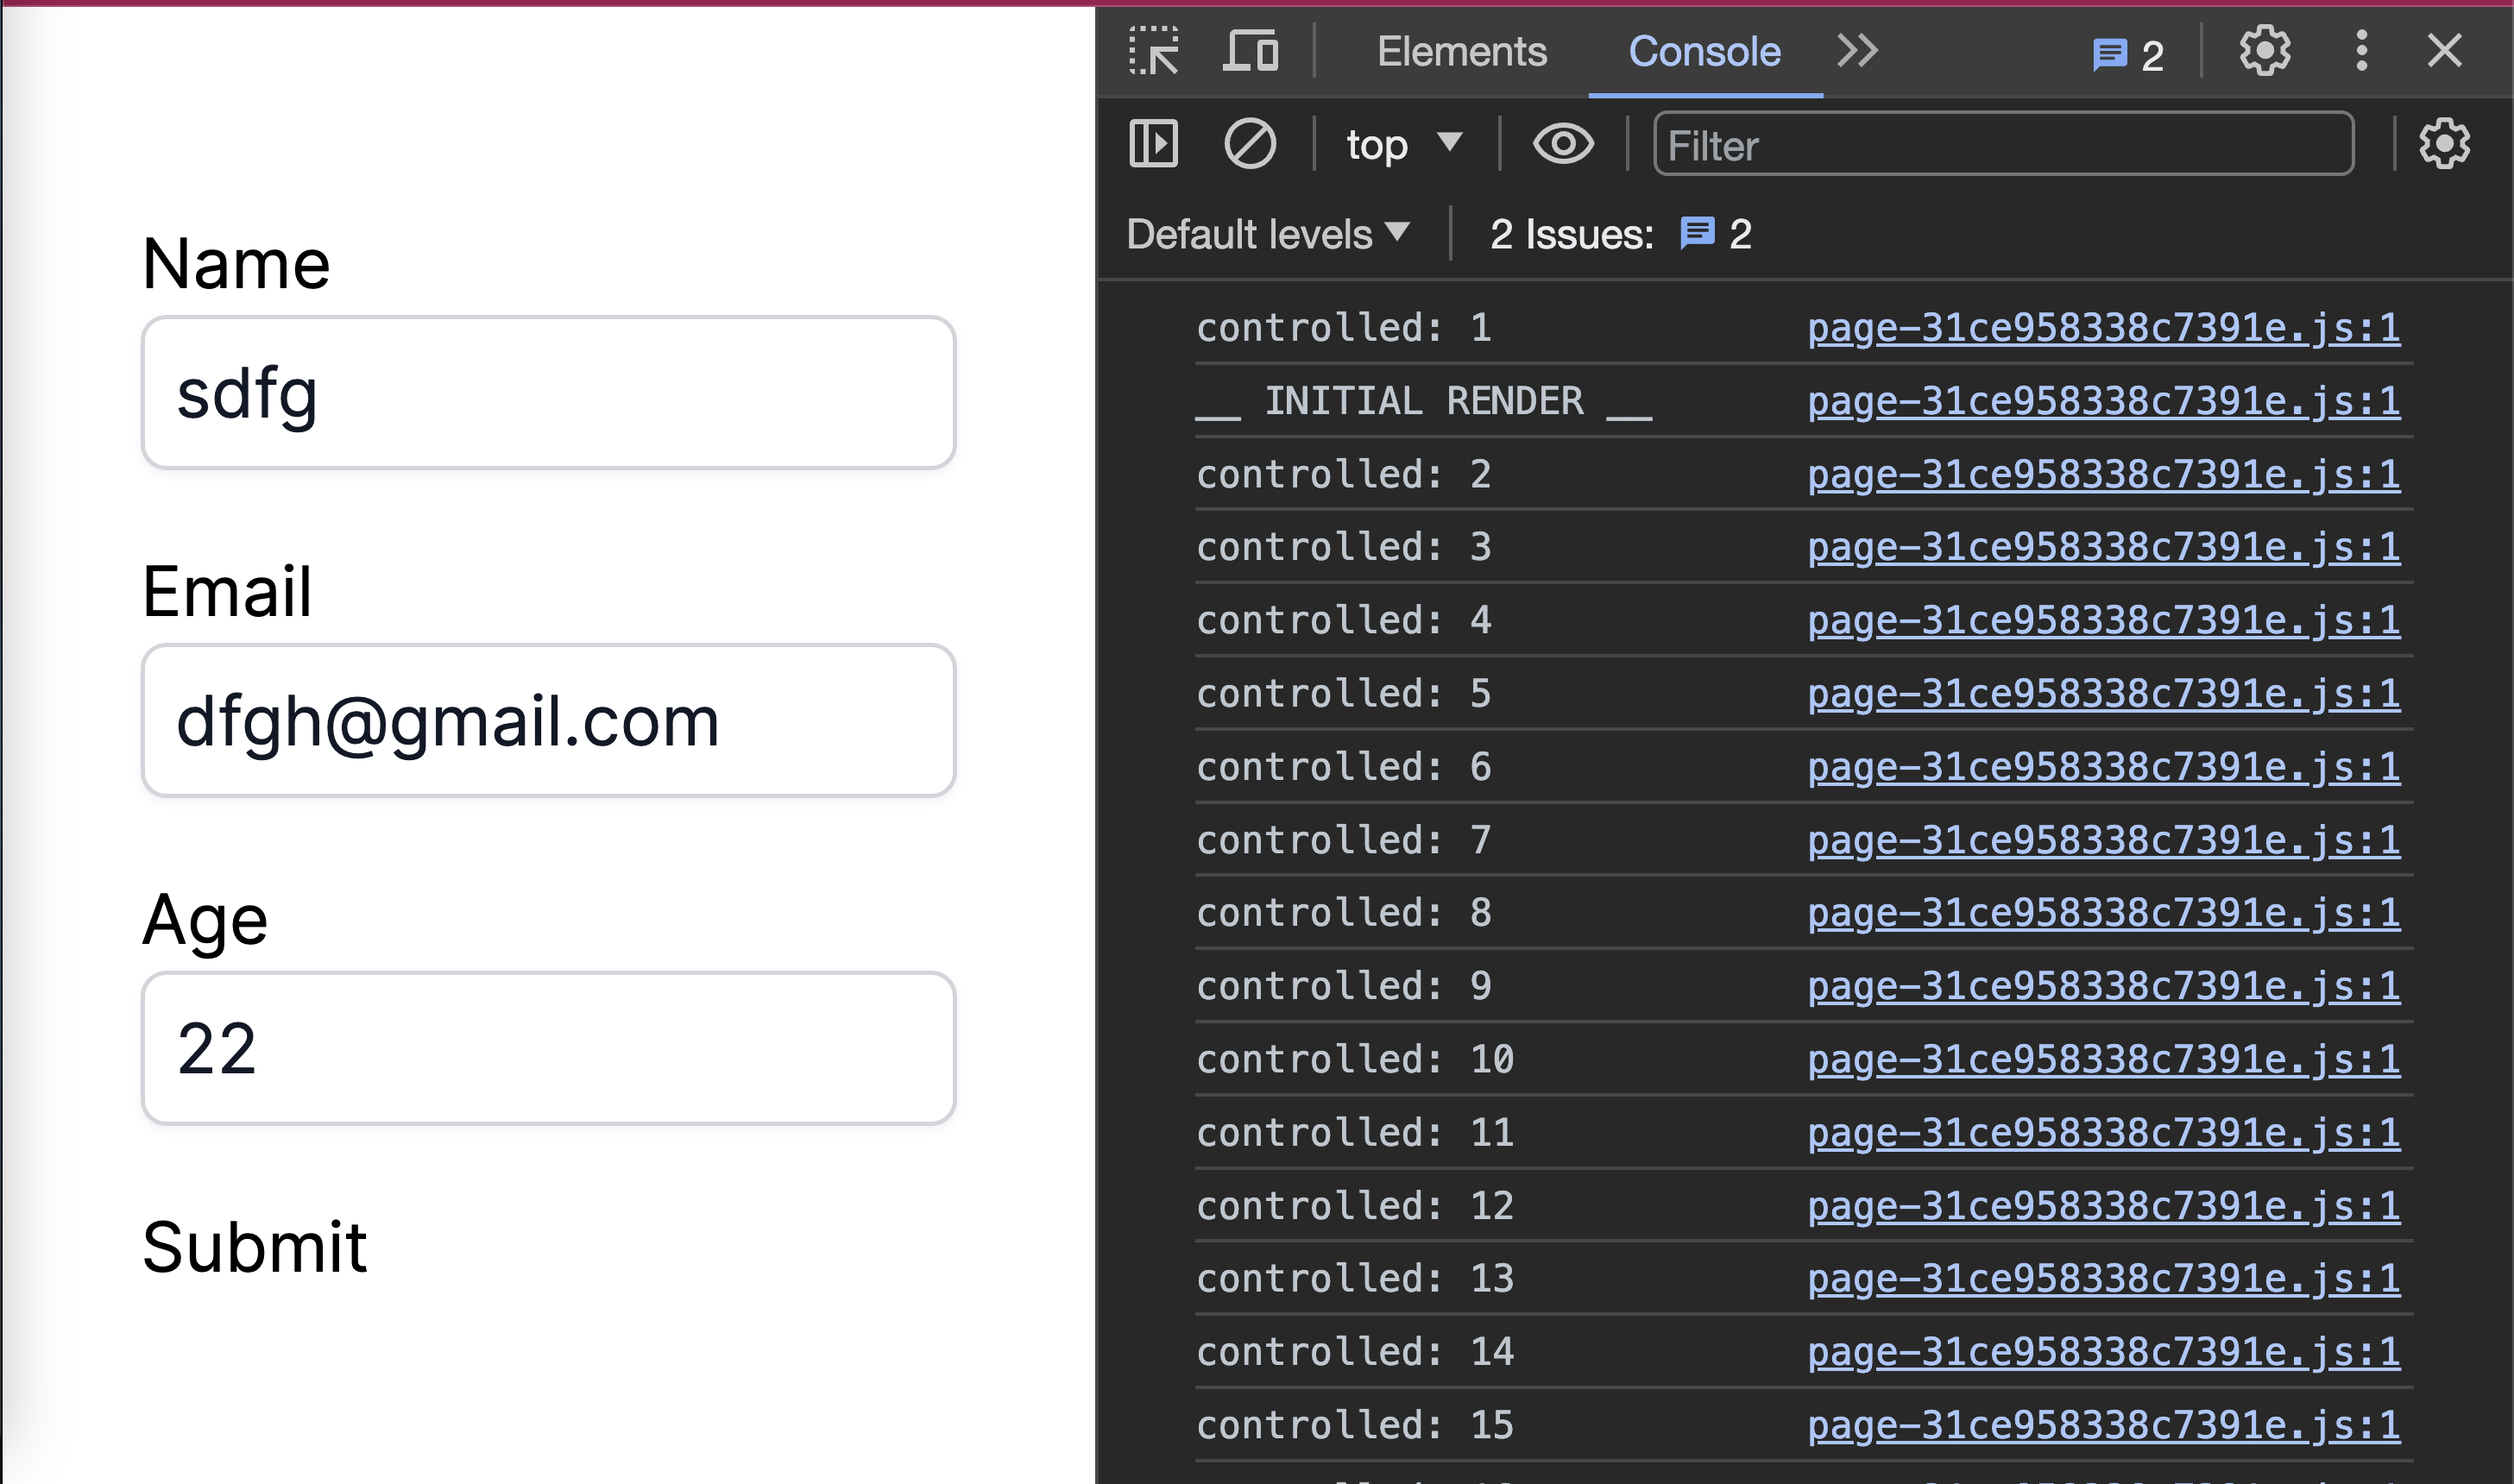
In the form example, the console.count('controlled') shows the number of times the form re-renders. The first log, controlled: 1 is when the form is initially mounted. As you can see from the image above, the form re-renders on every keystroke and every blur. We’ll explore an alternative to address these re-renders using uncontrolled inputs.
Uncontrolled Inputs
In contrast to controlled inputs, React does not manage the form elements’ values directly. Instead, the Document Object Model (DOM) retains control of the form’s state. This allows users to interact with the form without triggering React to update the entire component.
Here is a basic example of uncontrolled inputs:
export default function Form() {
  const submit = (e) => {
    e.preventDefault();
  };

  console.count("uncontrolled"); // keep count of how many times this Form rerenders

  return (
    <form>
      <div>
        <label htmlFor="name">Name</label>
        <input type="text" name="name" id="name" />
      </div>
      <div>
        <label htmlFor="email">Email</label>
        <input type="text" name="email" id="email" />
      </div>
      <div>
        <label htmlFor="email">Age</label>
        <input type="number" name="age" id="age" />
      </div>
      <button type="submit">Submit</button>
    </form>
  );
}
Notice we didn’t pass the value or checked props to the input field. This is what makes it an uncontrolled input.
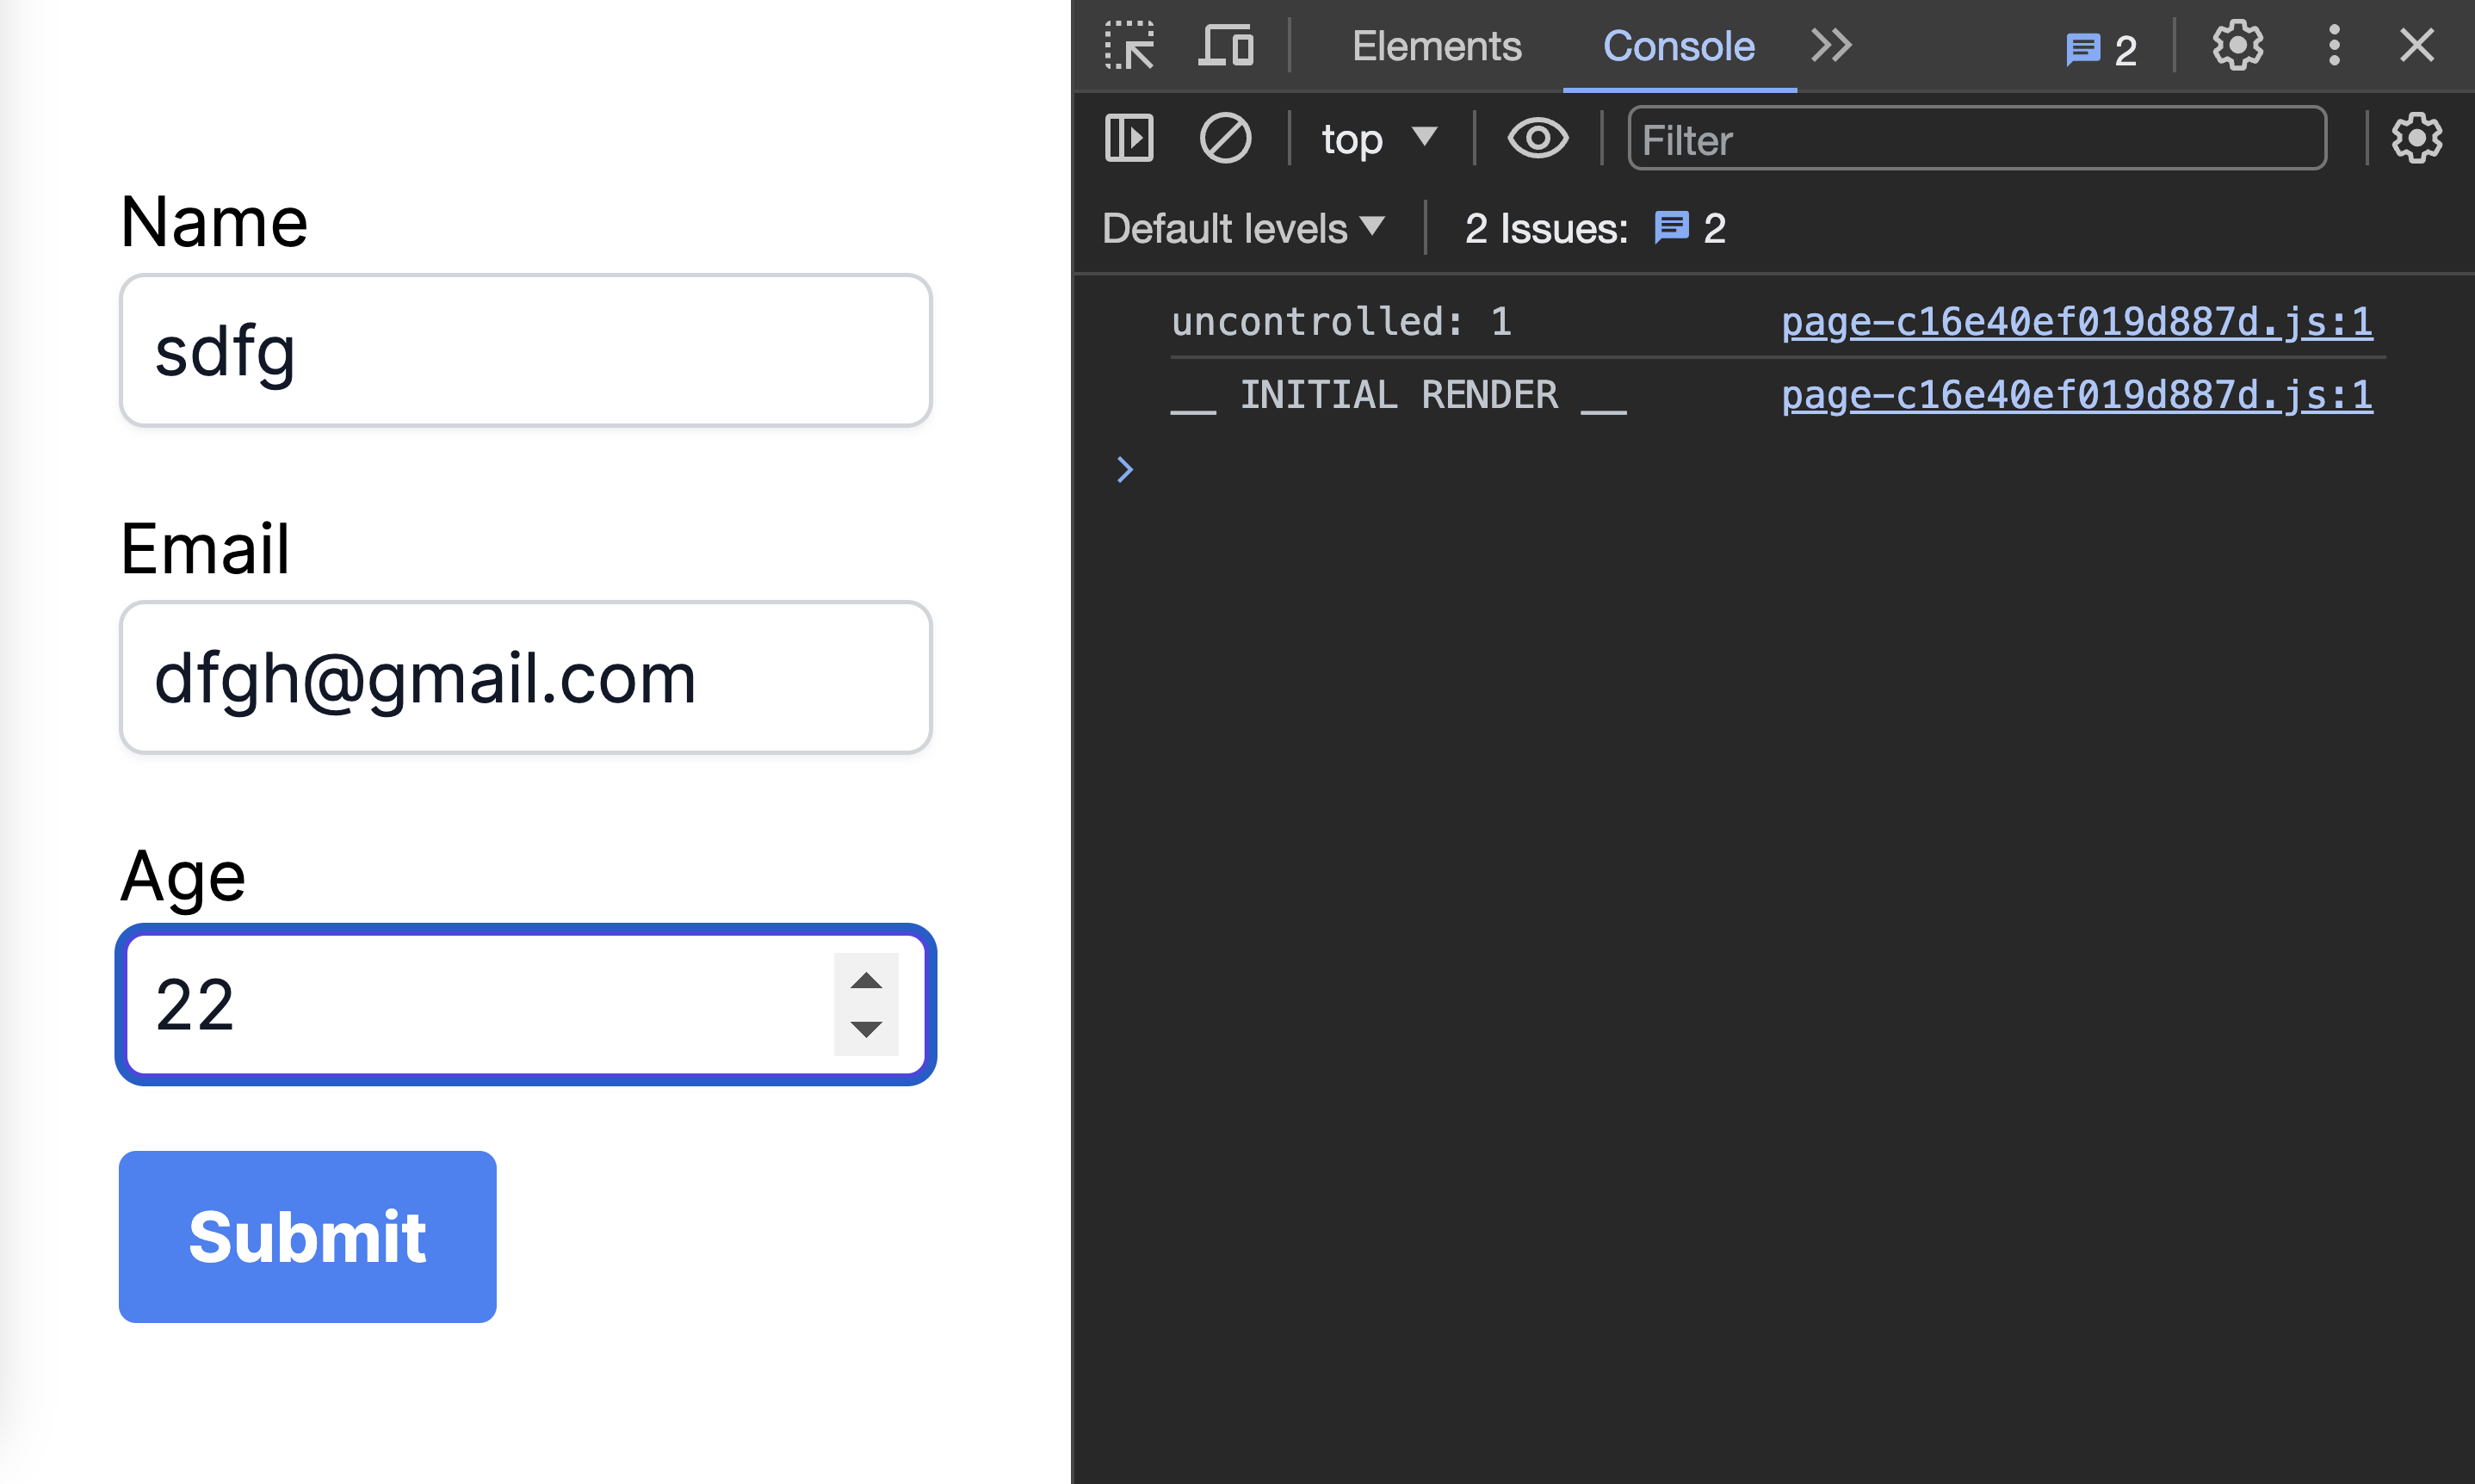
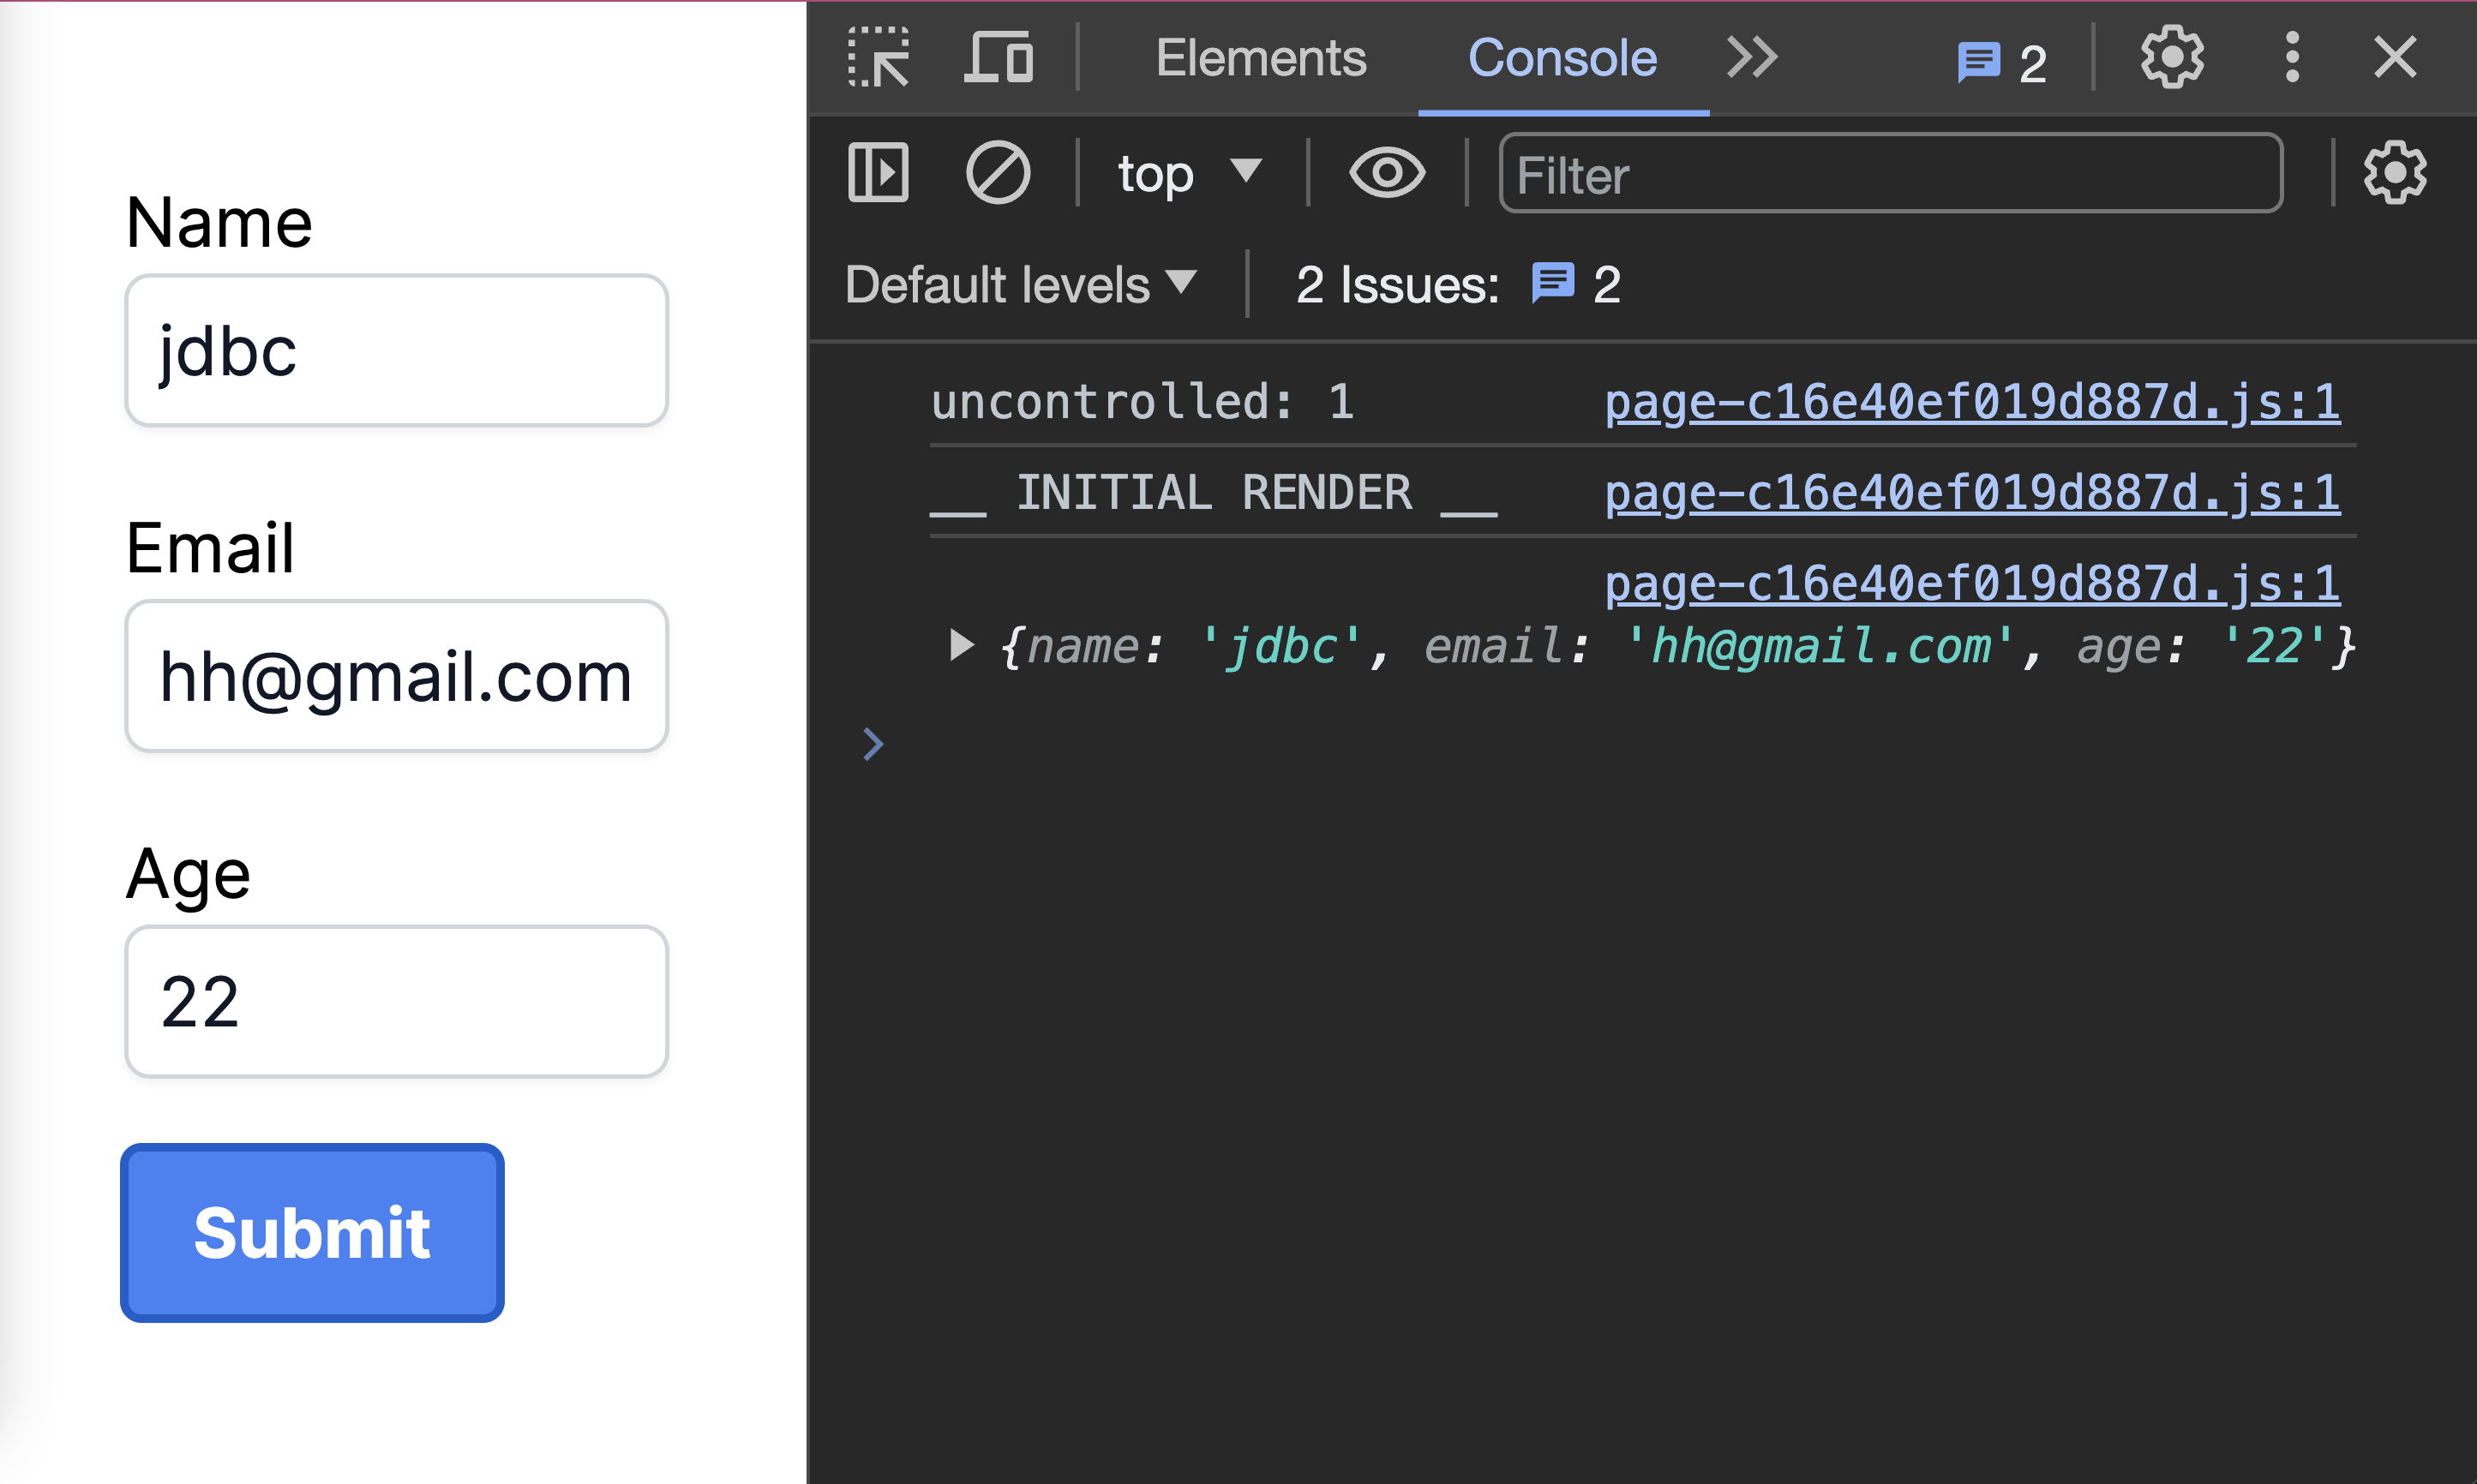
The example shows that the form only re-renders once, even after changing and blurring the input fields. This means that we can have as many uncontrolled fields as necessary without affecting our form’s performance.
You might wonder, how about validating the fields and collating the values? Well, you can use the default HTML constraint validations to validate the fields. Let’s look at an example in action:
export default function Form() {
  const submit = (e) => {
    e.preventDefault();
    console.log("SUBMITTED");
  };

  console.count("uncontrolled"); // keep count of how many times this Form rerenders

  return (
    <main>
      <form autoComplete="off" onSubmit={submit}>
        <div>
          <label htmlFor="name">Name</label>
          <input
            type="text"
            name="name"
            id="name"
            // comment 1
            required
            // comment 2
            pattern=".{3,}"
          />
        </div>
        <div>
          <label htmlFor="email">Email</label>
          <input
            type="email"
            name="email"
            id="email"
            // constraints validation
            required
          />
        </div>
        <div>
          <label htmlFor="email">Age</label>
          <input
            type="number"
            name="age"
            id="age"
            // constraints validation
            required
            // comment 3
            min="12"
          />
        </div>
        <button type="submit">Submit</button>
      </form>
    </main>
  );
}
We make use of constraints validation like required, pattern, and min to validate our fields:
comment 1: Therequiredattribute ensures that an empty field is not submitted. In our form, users must specify a value in all fields that have this attribute.comment 2: Thepatternattribute works like a regular expression where certain conditions must be met. In our case(pattern=".{3,}"), we are making sure that a user must provide at least 3 characters in the name field.comment 3: Theminattribute sets the minimum value expected in anumberfield. In our form, we are making sure the user is at least 12.
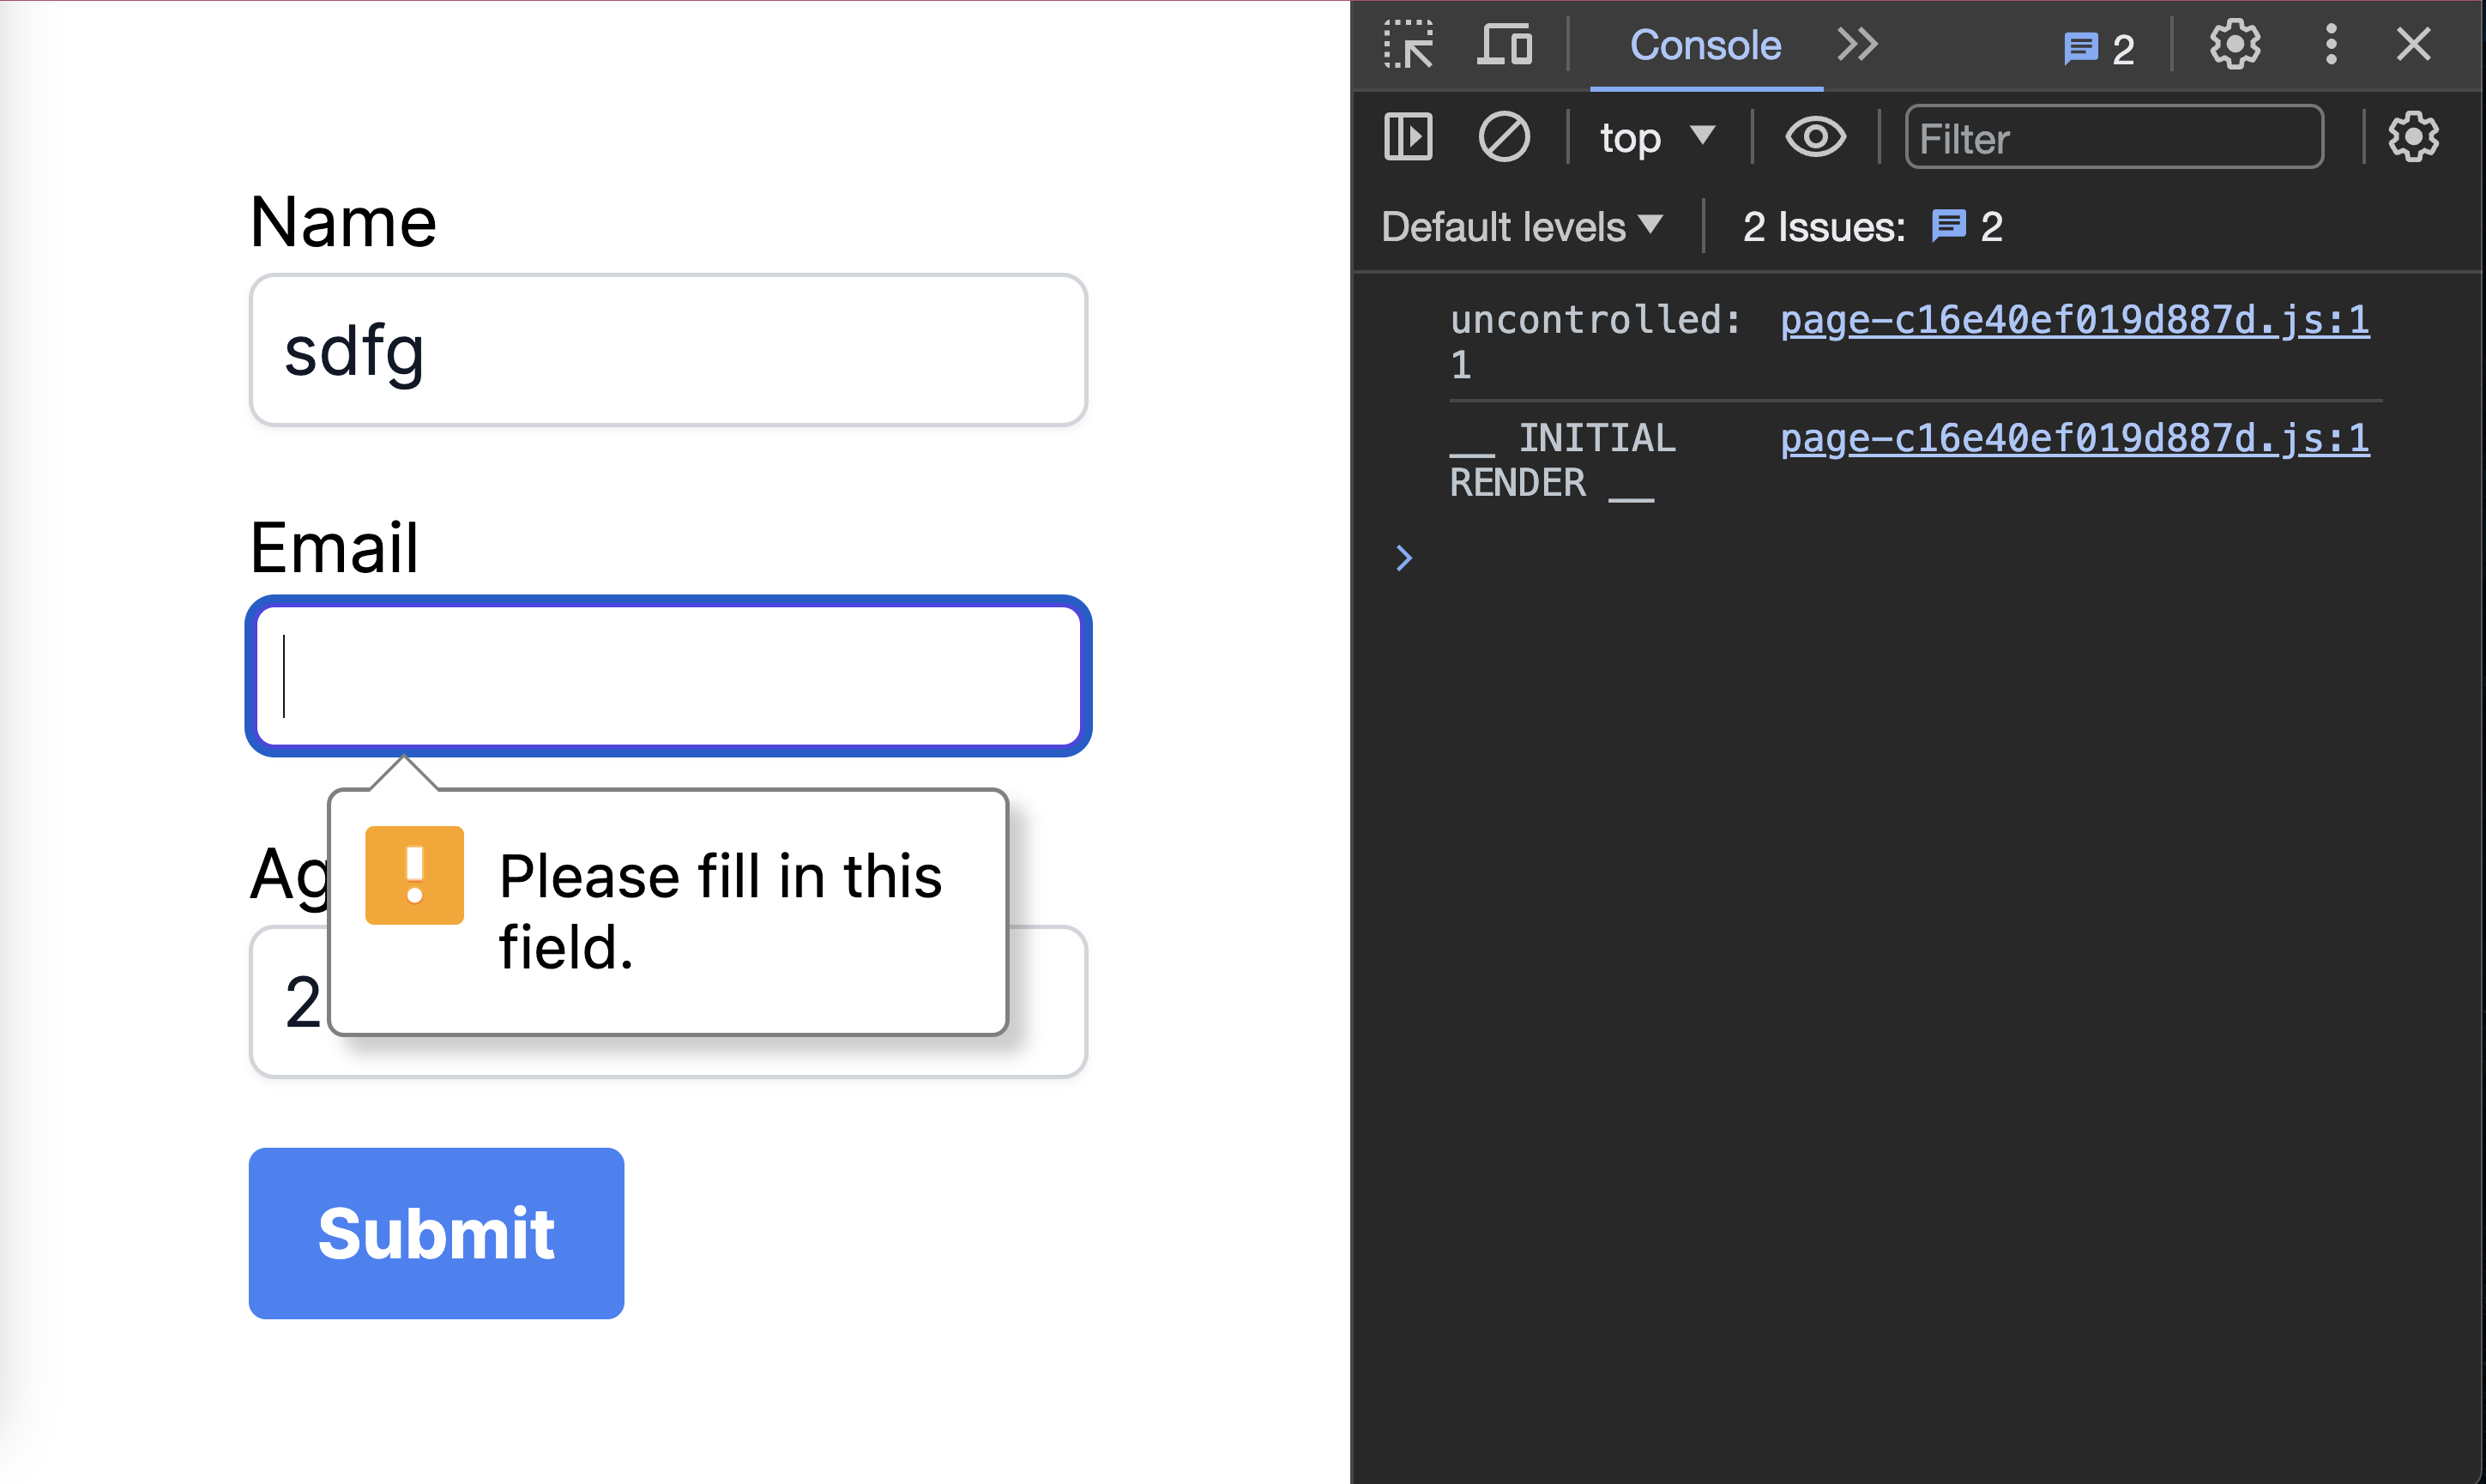
As seen in the above image, not providing a value in the email field triggers a default error message, and the form doesn’t get submitted. This works the same way for other fields that have the required constraint.
We can collate the form values by using the FormData constructor. The FormData constructor accepts a form as its argument. It then constructs a set of key/value pairs representing the form fields and their values. We can then send these key/value pairs to our API.
In our simple form, updating the previous submit function achieves this:
export default function Form() {
  const submit = (e) => {
    e.preventDefault();

    // comment 1
    let data = new FormData(e.target);
    // comment 2
    let values = Object.fromEntries(data.entries());
    console.log(values);

    // other validations if necessary
    // send a request to API
  };

  console.count("uncontrolled"); // keep count of how many times this Form rerenders

  return (
    <main>
      <form onSubmit={submit}>
        {/* previous code*/}
        <button type="submit">Submit</button>
      </form>
    </main>
  );
}
comment 1:e.targetpoints to the element that triggers the event. It’s our form in our case. Then,new FormDataconstructs the key/value pairs.comment 2:data.entries()returns an iterator that contains ourFormDatakey/value pairs.Object.fromEntriesthen converts it to an object.
This approach allows us to easily collate the form values while still maintaining our initial render.
With what we have in our arsenal, a simple search form can easily make use of uncontrolled input. All we need to do is:
- Make sure there is a
requiredconstraint on the field. This prevents an empty search. - Get the search value using the FormData constructor.
In more complex forms, we can rely on external libraries that follow the principle of uncontrolled inputs. One such library is React Hook Form, which streamlines form management and validation. OpenReplay can help you get started by using the React Hook Form.
Traditional ways of handling forms have one common performance issue. All our JavaScript bundles are always sent to the client. What if there is a way to send a sizeable JavaScript to the client? We will explore how to achieve this in the next section.
Server Actions
Server actions are a new feature in React(V18) that allows you to run asynchronous code on the server. They allow you to handle server-side logic and perform operations such as data manipulation, authentication, and more on the server side.
We can define server actions in React Server Components, and client components can also make use of them.
React Server Components
React Server Components(RSC) are a new kind of component introduced by the React team. They run ahead of time, and they are excluded from our javascript bundle. They can also run on the server, letting you access your data layer without having to build an API.
Shipping a small JavaScript bundle avoids the potential performance issues of the traditional ways of handling forms. You should check out OpenReplay’s article on RSC.
How to Use Server Actions to Handle Form
We can use server actions in 3 ways:
- with server components
- in a separate file for reusability
- as props in client component
With Server Components
In React18, our components, by default, are server components. We can create server actions by making use of the:
use serverdirective at the top of the form submit body function(this function must be asynchronous).actionattribute of the form instead of theonSubmit.
export default function Form() {
  const submit = async (formData) => {
    "use server"; // make it a server action

    // comment 1
    let values = Object.fromEntries(formData.entries());
    console.log(values);
  };

  console.count("server component");

  return (
    <main>
      <form action={submit}>
        <div>
          <label htmlFor="name">Name</label>
          <input type="text" name="name" id="name" required pattern=".{3,}" />
        </div>
        <div>
          <label htmlFor="email">Email</label>
          <input type="email" name="email" id="email" required />
        </div>
        <div>
          <label htmlFor="email">Age</label>
          <input type="number" name="age" id="age" required min="12" />
        </div>
        <button type="submit">Submit</button>
      </form>
    </main>
  );
}
Our submit function looks familiar. The action attribute on our form returns the FormData by default. We then grab the values(comment 1) the same way we did in the uncontrolled section.
One way to confirm this is a server component is by checking where the
console.countis logged. In our traditional ways of handling a form section, theconsole.counts are logged to our browser console. In server components, the console is logged in our nodejs environment(in our case, the terminal where we started the Nextjs app).
In a Separate File
Adding the use server directive to the top of a js/ts file converts all the functions in that file to server actions. This makes our server actions usable by both server and client components.
// utils.js
"use server";

export const submit = async (formData) => {
  // work on your form data
};

export const addPost = async (formData) => {
  // work on your form data
};
We can now import our server actions into different server and client components.
// import the server action
import { submit } from "./utils";

// server-form.jsx
export default function Form() {
  console.log("server component");

  return (
    <main>
      {/* pass the server action to the form action */}
      <form action={submit}>
        {/* --- form fields ---- */}

        <button type="submit">Submit</button>
      </form>
    </main>
  );
}"use client";
// import the server action
import { submit } from "./utils";
// client-form.jsx
export default function Form() {
console.log("client component");
return (
<main>
{/* pass the server action to the form action */}
<form action={submit}>
{/* --- form fields ---- */}
<button type="submit">Submit</button>
</form>
</main>
);
}Client components are marked by the “use client” at the top of the file.
As Props in Client Components
Server components have some limitations that might prevent us from using them to handle our form:
- they do not have access to browsers’ APIs
- cannot use React hooks like useReducer, useState, e.t.c
- cannot use custom hooks that depend on the two above
Due to these limitations, we may opt to pass server actions from a parent server component to a child client component. The child component can now be a controlled/uncontrolled component, depending on our use case.
// client.jsx
"use client";

export default function ClientForm({ onSubmit }) {
  return (
    <form action={onSubmit}>
      {/* fields */}
      <button type="submit">submit</button>
    </form>
  );
}

//sign-up.jsx
export default function ServerPage() {
  const submit = async (formData) => {
    "use server";

    let values = Object.fromEntries(formData.entries());
    console.log(values);
  };

  return (
    <main>
      <ClientForm onSubmit={submit} />
    </main>
  );
}- We created our client component in a separate file. It accepts the
onSubmitprops, which submit the form. - We then have our server component in a separate file. We defined our server action in this file and passed it as props to the client form.
Conclusion
Enhancing form performance in React involves several strategies.
With controlled inputs:
- React manages the form state through hooks like useState or useReducer.
- There is easy access to form field values.
- Dynamic changes based on user input lead to excessive re-renders, impacting form performance.
With uncontrolled inputs:
- DOM controls the form’s state
- The FormData constructor collects form values.
- Form only renders once, thereby improving form performance.
- HTML5 constraints validation effectively handles field validation.
With React Server Component(RSC):
- They are excluded from the JavaScript bundle, thereby minimizing performance concerns.
- Server actions can be used in server and client components.
In summary, the three methods exist to handle form. Your choice depends on your application’s specific needs. Optimizing form performance greatly enhances the user experience.