
State persistence maintains data across page reloads. It’s a user-friendly experience bonus to ensure users pick up where they left off. As a Vue.js developer, Vue uses Pinia as its official state management library. This guide will discuss state persistence and how you achieve it across Vue.js applications.

Discover how at OpenReplay.com.
If you have used Pinia in your projects, you might lack persistence. It doesn’t include built-in persistence across reloads. You need to know this is not a bug, and it’s designed to be agnostic about how the state persists works. This gives you the authority to choose how you want to persist in your data.
Let’s highlight a few points to why persistence is important:
- In a server-based setup, saving states improves app performance as saved data will be loaded locally.
- Persistence creates data consistency between different user sessions.
- You get an enhanced user experience as users will save their preferences and other activities that they can continue from where they left off.
So, let’s dive into this guide and learn how to add Pinia persist. Along the guide, you will use methods such as LocalStorage and useStorage to get your state persistence right.
Creating a Sample Vue.js Pinia App
Before diving into these strategies, you’ll need a working Vue Pinia-inspired application. This guide shows you how to get started. However, you will use the following basic notes app to comfortably follow along.
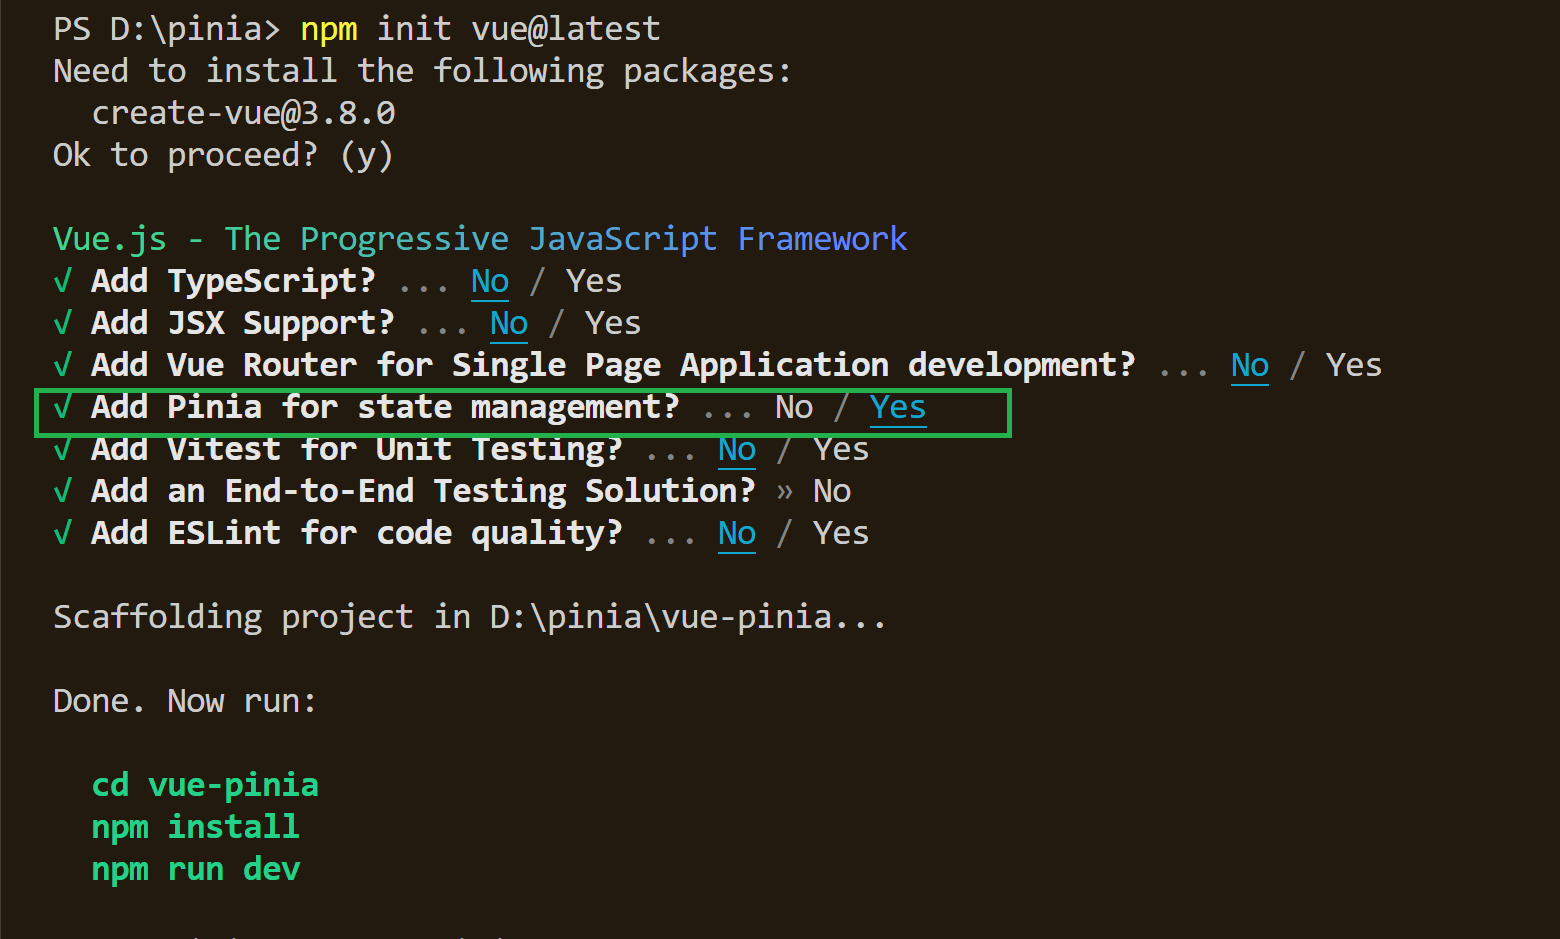
- First, ensure you have created your Vue app and added Pinia for state management:
- Navigate to the
src/storesdirectory, create aNoteStore.jsfile, and manage your store as follows:
import { defineStore } from "pinia";
export const useNoteStore = defineStore({
  id: "note",
  state: () => ({
    notes: [],
  }),
  actions: {
    createNote(title) {
      this.notes.push({ id: Date.now(), title, done: false });
    },
    isDone(note) {
      note.done = !note.done;
    },
    deleteNote(note) {
      this.notes = this.notes.filter((t) => t.id !== note.id);
    },
  },
});- Go ahead and create your notes app right in your
src/App.vueas follows:
<template>
  <div>
    <h1>Notes App</h1>
    <input
      v-model="newNote"
      @keyup.enter="createNote"
      placeholder="Add a new Note"
    />
    <ul>
      <li v-for="note in notes" :key="note.id">
        <input type="checkbox" :checked="note.done" @change="isDone(note)" />
        <span>{{ note.title }}</span>
        <button @click="deleteNote(note)">Delete</button>
      </li>
    </ul>
  </div>
</template>

<script setup>
import { useNoteStore } from "./stores/NoteStore";
import { ref, computed } from "vue";
const noteStore = useNoteStore();
const newNote = ref("");
const notes = computed(() => noteStore.notes);
const createNote = () => {
  if (newNote.value.trim() !== "") {
    noteStore.createNote(newNote.value);
    newNote.value = "";
  }
};
const isDone = (note) => noteStore.isDone(note);
const deleteNote = (note) => noteStore.deleteNote(note);
</script>
You’re ready to go. When you interact with this simple app, Pinia works as expected:
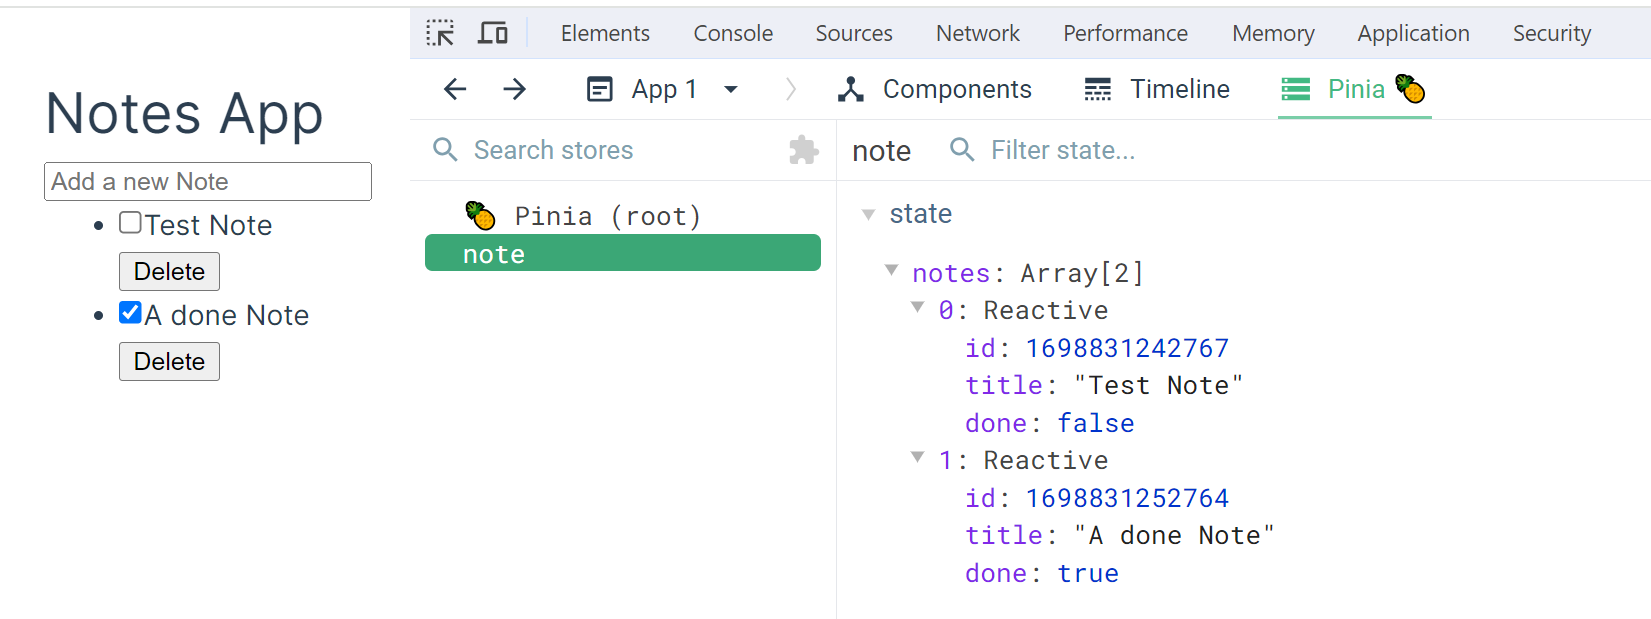
However, on page refresh, every state you have is lost. And this is where the journey to Pinia persistence starts. In the following sections, you will learn the strategies to add to this app and make it persistent.
Persisting Pinia Using LocalStorage
LocalStorage is a browser-based key-value store for browsers. Using LocalStorage and Pinia, your web browser will persist data on the client side. This way, reloads will fetch the exiting states directly from the LocalStorage.
To add LocalStorage to your store, you’ll focus on the getItem and setItem methods from LocalStorage. Pinia will look up to these methods, and based on your store actions, any state changes will be recorded to the browser. Here’s how you will implement this concept:
In your NoteStore.js file, you need to modify your state. In this case, you will instruct Pinia to fetch from LocalStorage using getItem as follows:
export const useNoteStore = defineStore({
  id: "note",
  state: () => ({
    notes: JSON.parse(localStorage.getItem("notes")) || [],
  }),
});- Next, you must save any Pinia
actionsto LocalStorage. Here, you first need to create a method that will save the data to LocalStorage whenever it changes usingsetItemas follows:
actions: {
  persistToLocalStorage() {
    localStorage.setItem("notes", JSON.stringify(this.notes));
  },
}
Finally, every action you have will point to the created persistToLocalStorage so you can save state mutations to localStorage as follows:
actions: {
// Your setItem localStorage method
persistToLocalStorage() {
localStorage.setItem("notes", JSON.stringify(this.notes));
},
createNote(title) {
this.notes.push({ id: Date.now(), title, done: false });
// Allow createNote() method to use LocalStorage
this.persistToLocalStorage();
},
isDone(note) {
note.done = !note.done;
// Any updated note properties should reflect to localStorage
this.persistToLocalStorage();
},
deleteNote(note) {
this.notes = this.notes.filter((t) => t.id !== note.id);
// You delete action must delete from localStorage as well
this.persistToLocalStorage();
},
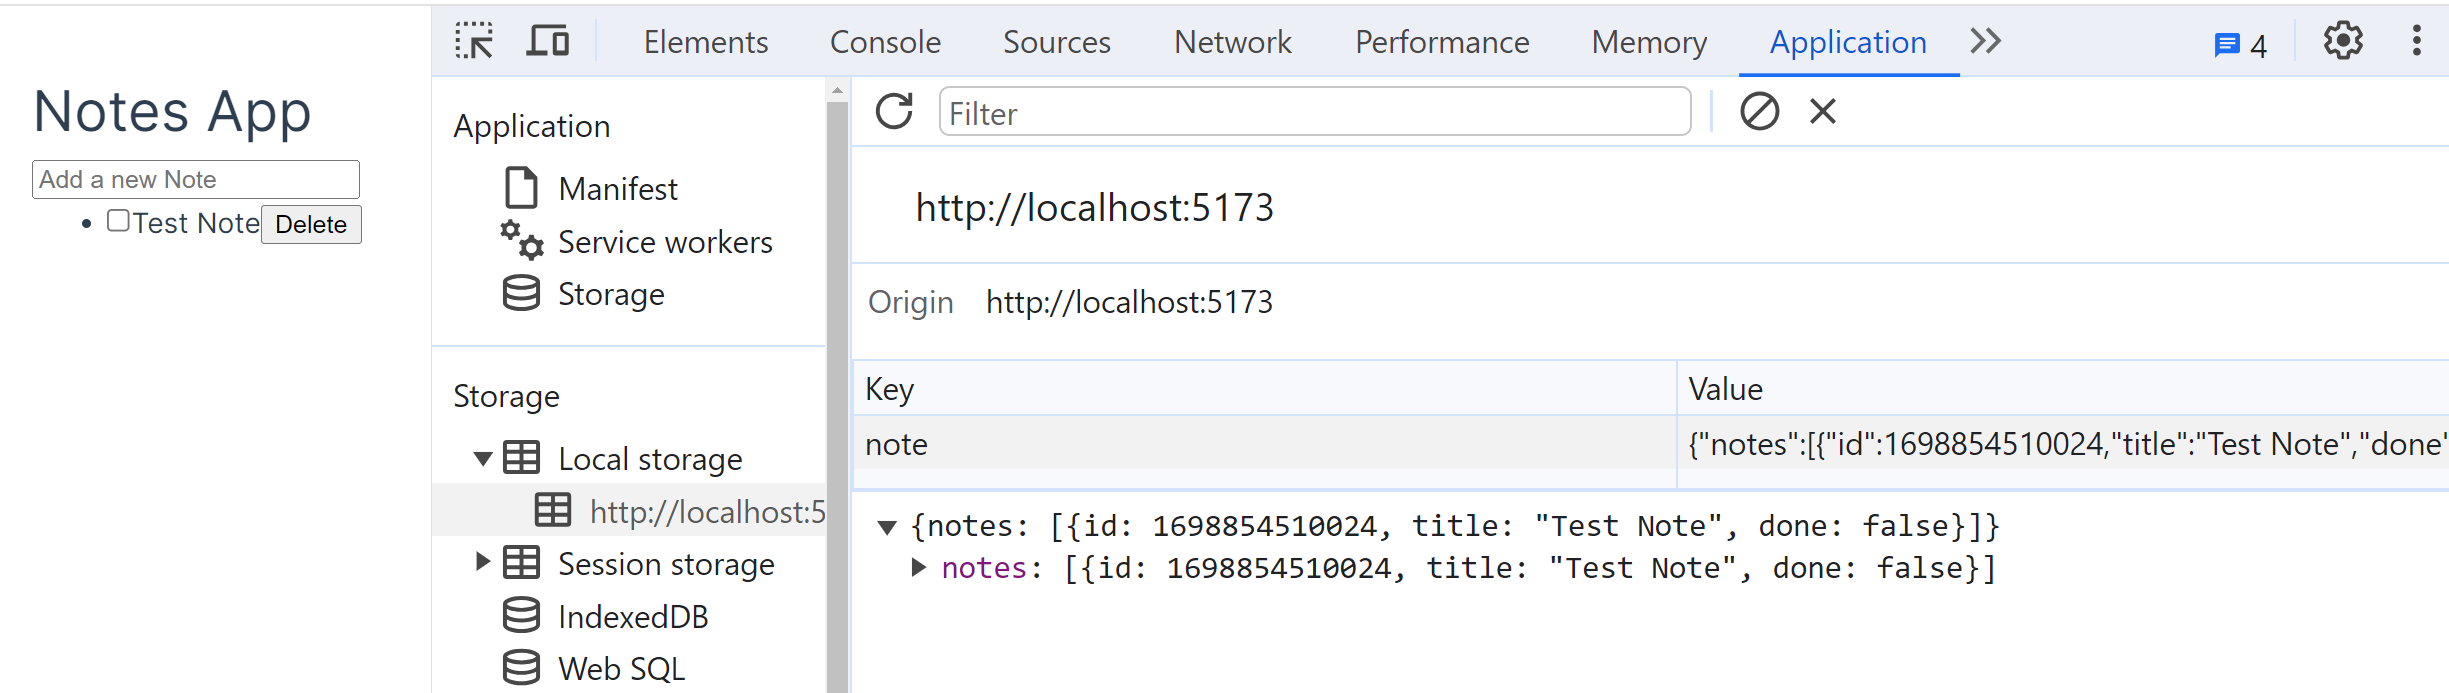
},Let’s test how the app is working so far. LocalStorage key-value should work and persist in states as follows:

Using VueUse and useStorage
VueUse is a list of Vue Composition API utilities used to abstract how your Vue app should work based on your preference. Among these utilities, you have useStorage function that manages Vue storage reactively.
To add useStorage(), you must install VueUse and use an explicit import as follows:
- Install VueUse:
npm i @vueuse/core- Add your VueUse import to your store. In this case, your
NoteStore.jsfile:
import { useStorage } from "@vueuse/core";- All you need now is to add
useStorage()to smartly watch for any state’s changes:
state: () => ({
  // Listen to any state changes
  notes: useStorage('notes', [])
}),
Using Persisted State Plugin
If you want an out-of-the-box solution, the persistedstate plugin is specifically created to manage your states. Its storage mechanisms allow you to access LocalStorage while allowing you to specify which state properties to persist. To use it:
- First, install your plugin:
npm i pinia-plugin-persistedstate- Initialize this plugin to Pinia. Navigate to your
src/main.jsfile and add the following configurations:
import { createApp } from "vue";
// Add your plugin import
import piniaPluginPersistedstate from "pinia-plugin-persistedstate";
import { createPinia } from "pinia";
import App from "./App.vue";
const app = createApp(App);
// initialize Pinia
const pinia = createPinia();
// Use the plugin
pinia.use(piniaPluginPersistedstate);
app.use(createPinia());
app.use(pinia);
app.mount("#app");- Navigate to your store and set Pinia persist to true as follows:
export const useNoteStore = defineStore({
  // Set persist to true
  persist: true,
// ... The rest of the code
});
Go ahead and interact with the app. By default, this plugin will use the browser LocalStorage to persist Pinia as follows:
Conclusion
This guide showed you how to harness the power of Pinia and use persistent states using LocalStorage, VueUse, and the persisted state plugin. Now, your states can still be accessed across page reloads.
Using these approaches, you can additionally persist your arrays and objects. However, note that these strategies use LocalStorage to store your states. Thus, you will have data size limits of up to 5MB. Remember, be mindful of security risks to sensitive data such as passwords and tokens.