
Rematch: an improved Redux-based state handler


Anyone who has used Redux for a project knows that while it gets the job done, it is time-consuming due to repetitive boilerplate code.
Built on top of Redux is a state-management library known as Rematch that offers a simple API that saves developers from writing voluminous amounts of code that Redux is known for.
This article shows a practical approach to using Rematch as a state management tool. Prior knowledge of Rematch or Redux isn’t required. The features, architecture, and practical use of Rematch will all be covered. You will learn about Rematch’s architecture while building a simple application with React.
What is Rematch?
Rematch is an improved version of Redux with extra capabilities, a more streamlined architecture, Redux best practices, and less boilerplate.
It makes state management easy with a better developer experience while leveraging Redux principles and features. Just like Redux, Rematch is open source too.
It can be easily integrated into Reactjs, Vue.js, AngularJs, and vanilla Javascript projects.
It also offers practical features like React Devtools support, TypeScript support, side effects, plugins, multiple store generation, and less than 2kb in size to enhance the development experience. The complete list of features can be found here.
Creating a project with Rematch
Run the command below in your terminal to create a React project, install all needed dependencies, and see if everything runs OK:
npx create-react-app rematch-project
cd rematch-project
npm install @rematch/core react-redux @rematch/loading
npm start
Add the code block below to your css file:
body {
  padding: 2rem;
  margin: 0;
  background-color: #eee;
}

.container {
  display: flex;
  align-items: center;
  flex-direction: column;
}

.title {
  text-align: center;
  letter-spacing: 1px;
}

.card {
  box-shadow: 2px 2px 5px rgba(0, 0, 0, 0.2);
  background-color: #fff;
  padding: 1rem;
  border-radius: 5px;
  margin: 1rem 0;
  width: 40%;
}

.card > h3 {
  text-transform: capitalize;
  color: #333;
}

.card > p {
  color: #888;
}
Now the project has been set up; the following sections will be focused on the following features of Rematch: Store, Models, and Plugins.
1. Store
The Rematch API provides an init method that initializes a Rematch store ( an undercover Redux store with extra features).
Create a new file src/store.js and paste the code below to initialize a store:
import { init } from "@rematch/core";

const store = init({
  // config goes here
});

export default store;
The init method receives a config object that has the following properties:
name: The store’s name, as you can have multiple stores.models: An object of models; where each model has a state, reducer, and effects.plugins: An array of plugins; plugins are configurations that extend the functionality of Rematch.redux: An object containing Redux configurations such as middlewares.
To connect the newly created store to the application, replace the code in src/index.js with the code block below:
import ReactDOM from "react-dom/client";
import App from "./App";
import { Provider } from "react-redux";
import store from "./store";
import './index.css'

ReactDOM.createRoot(document.getElementById("root")).render(
  <Provider store={store}>
      <App />
  </Provider>
);
2. Models
Models are the key feature Rematch leverages to reduce boilerplate code; within a single model, you define the initial state, reducers, and effects.
This means combining action types, action creators, reducers, and state, into one object model.
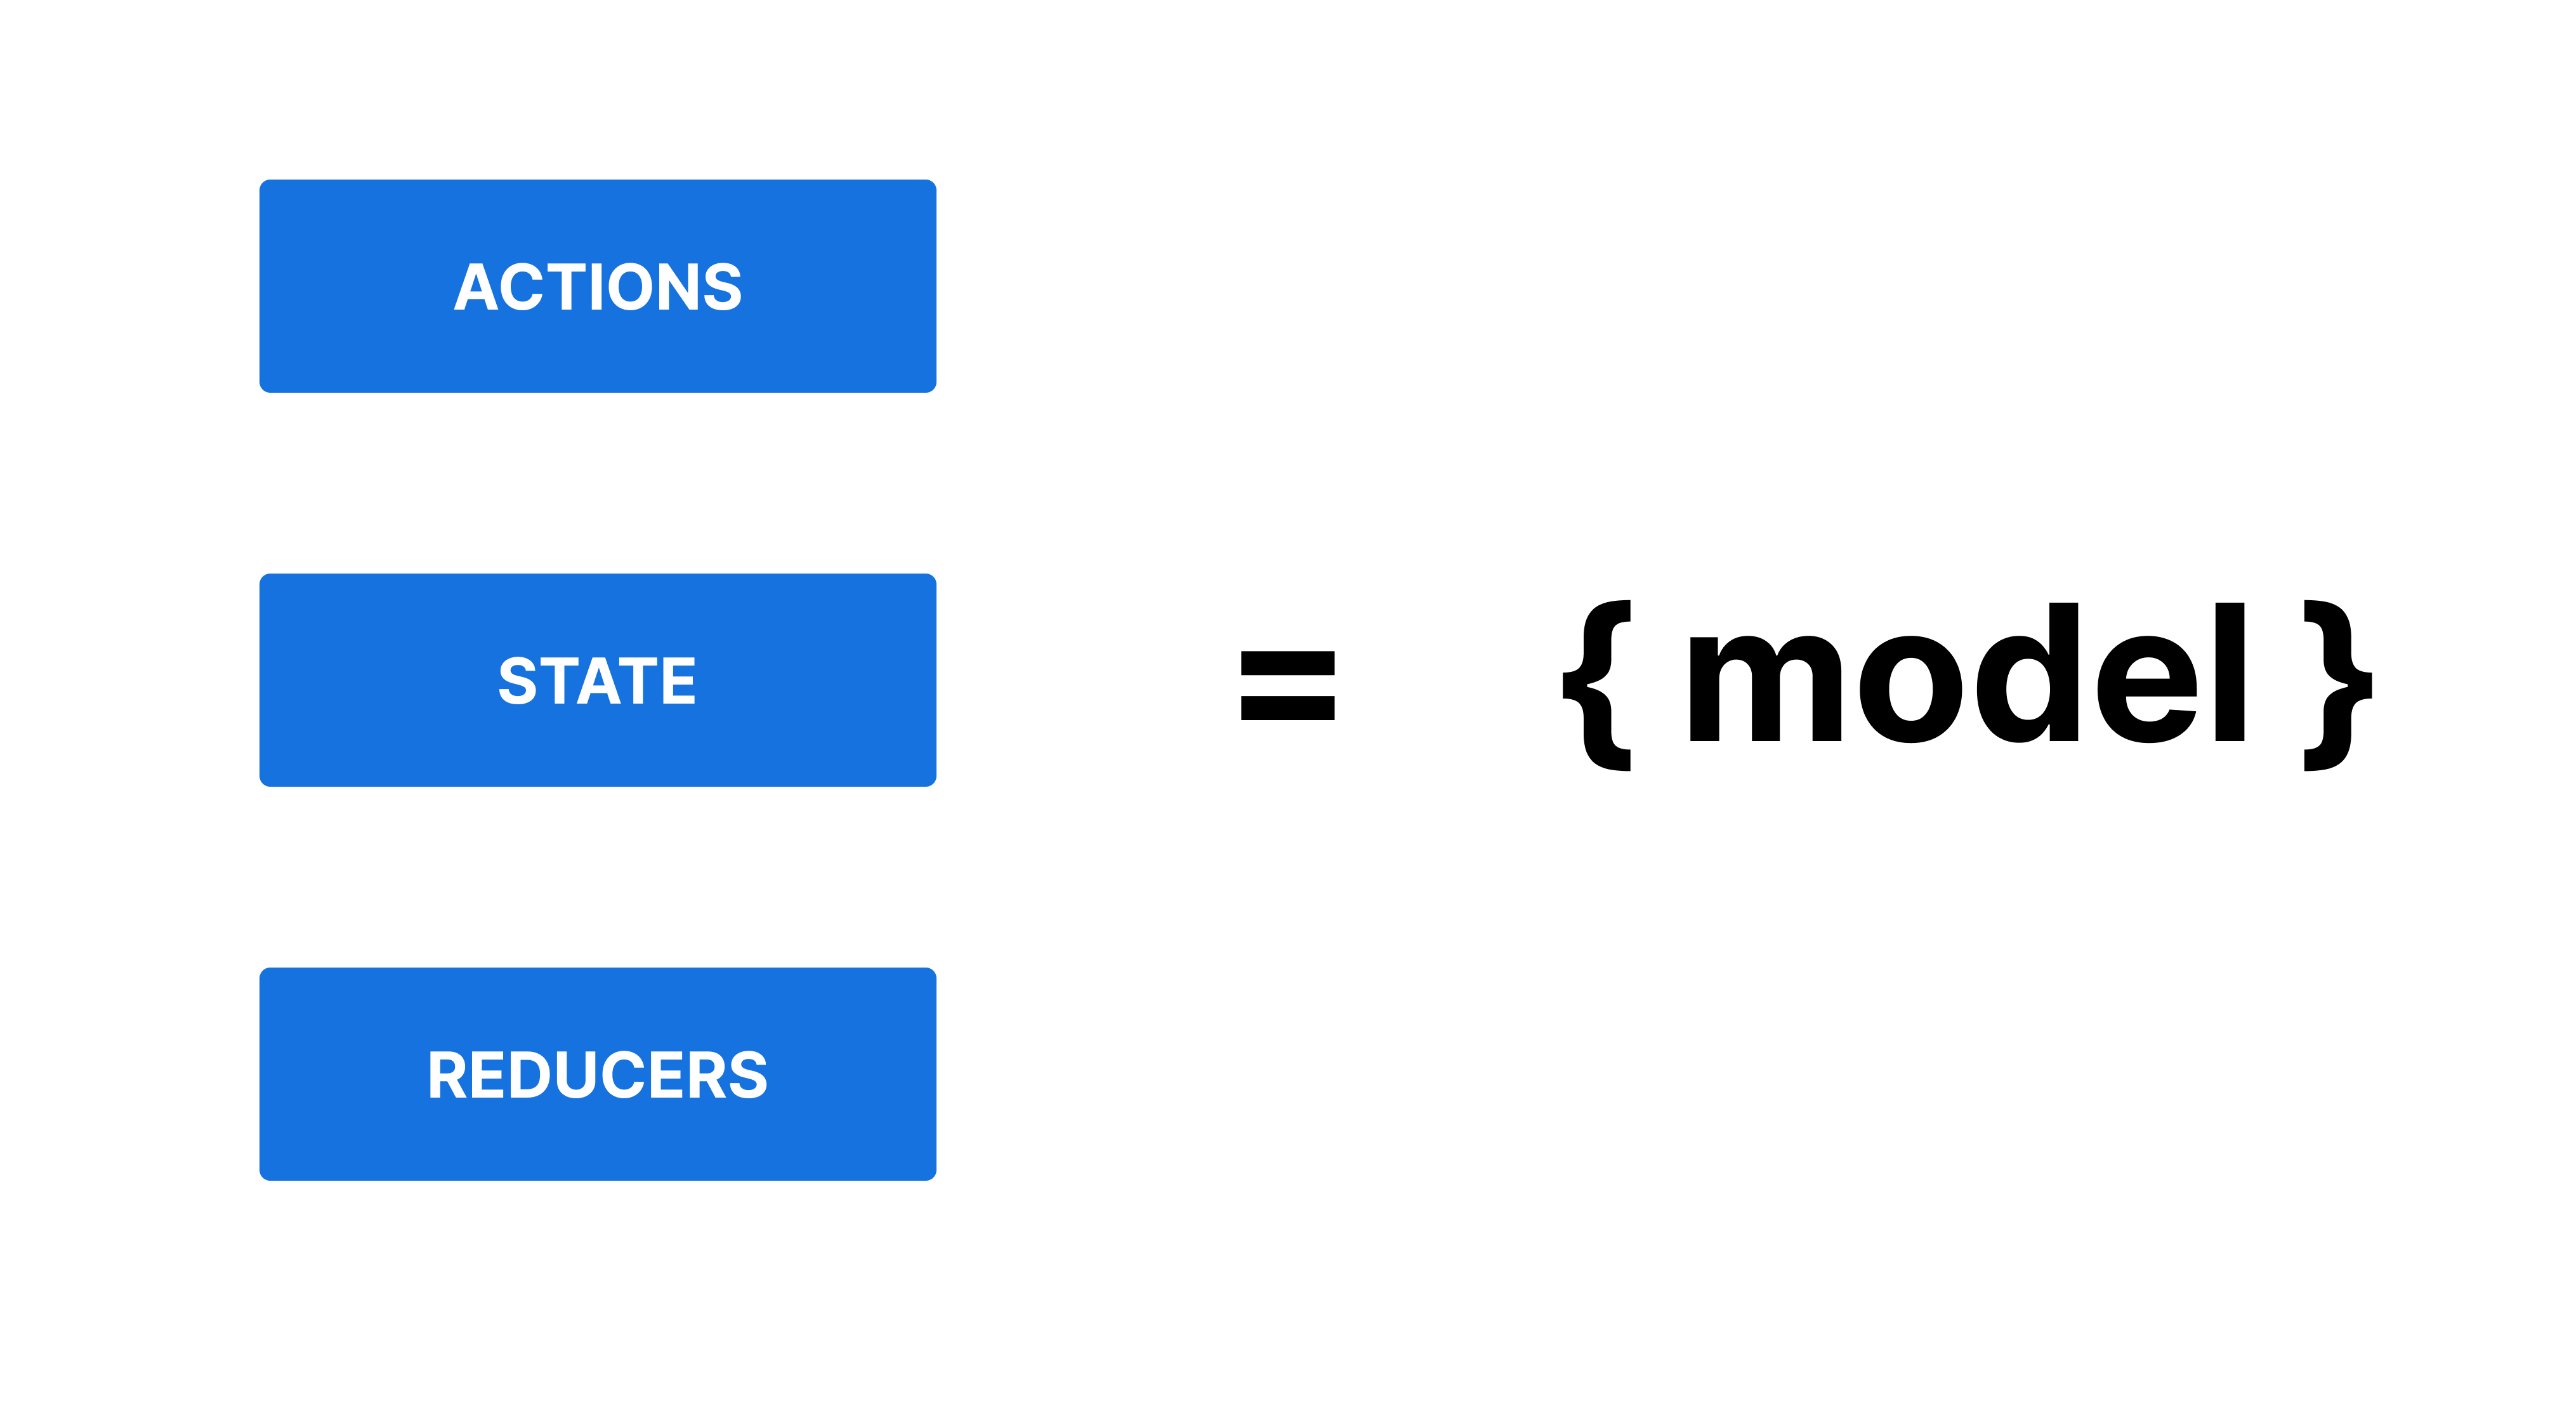
Instead of having all three separate like in Redux, they’re all added within a single model, a Javascript Object.
With this, there’s less code, but the same Redux logic applies.
To add a model to our app, create a new file src/models.js and paste the code block below to create a model:
export const posts = {
    state: [],
    reducers: {
      loadedPosts: (state, payload) => payload,
    },
  };
A model object takes in the following properties:
state: Used to define the initial state.reducers: An object of pure functions to change the model’s state.effects: A function used to handle asynchronous actions.
Navigate to src/store.js and add the model.
import { posts } from "./models"
const store = init({
models: { posts },
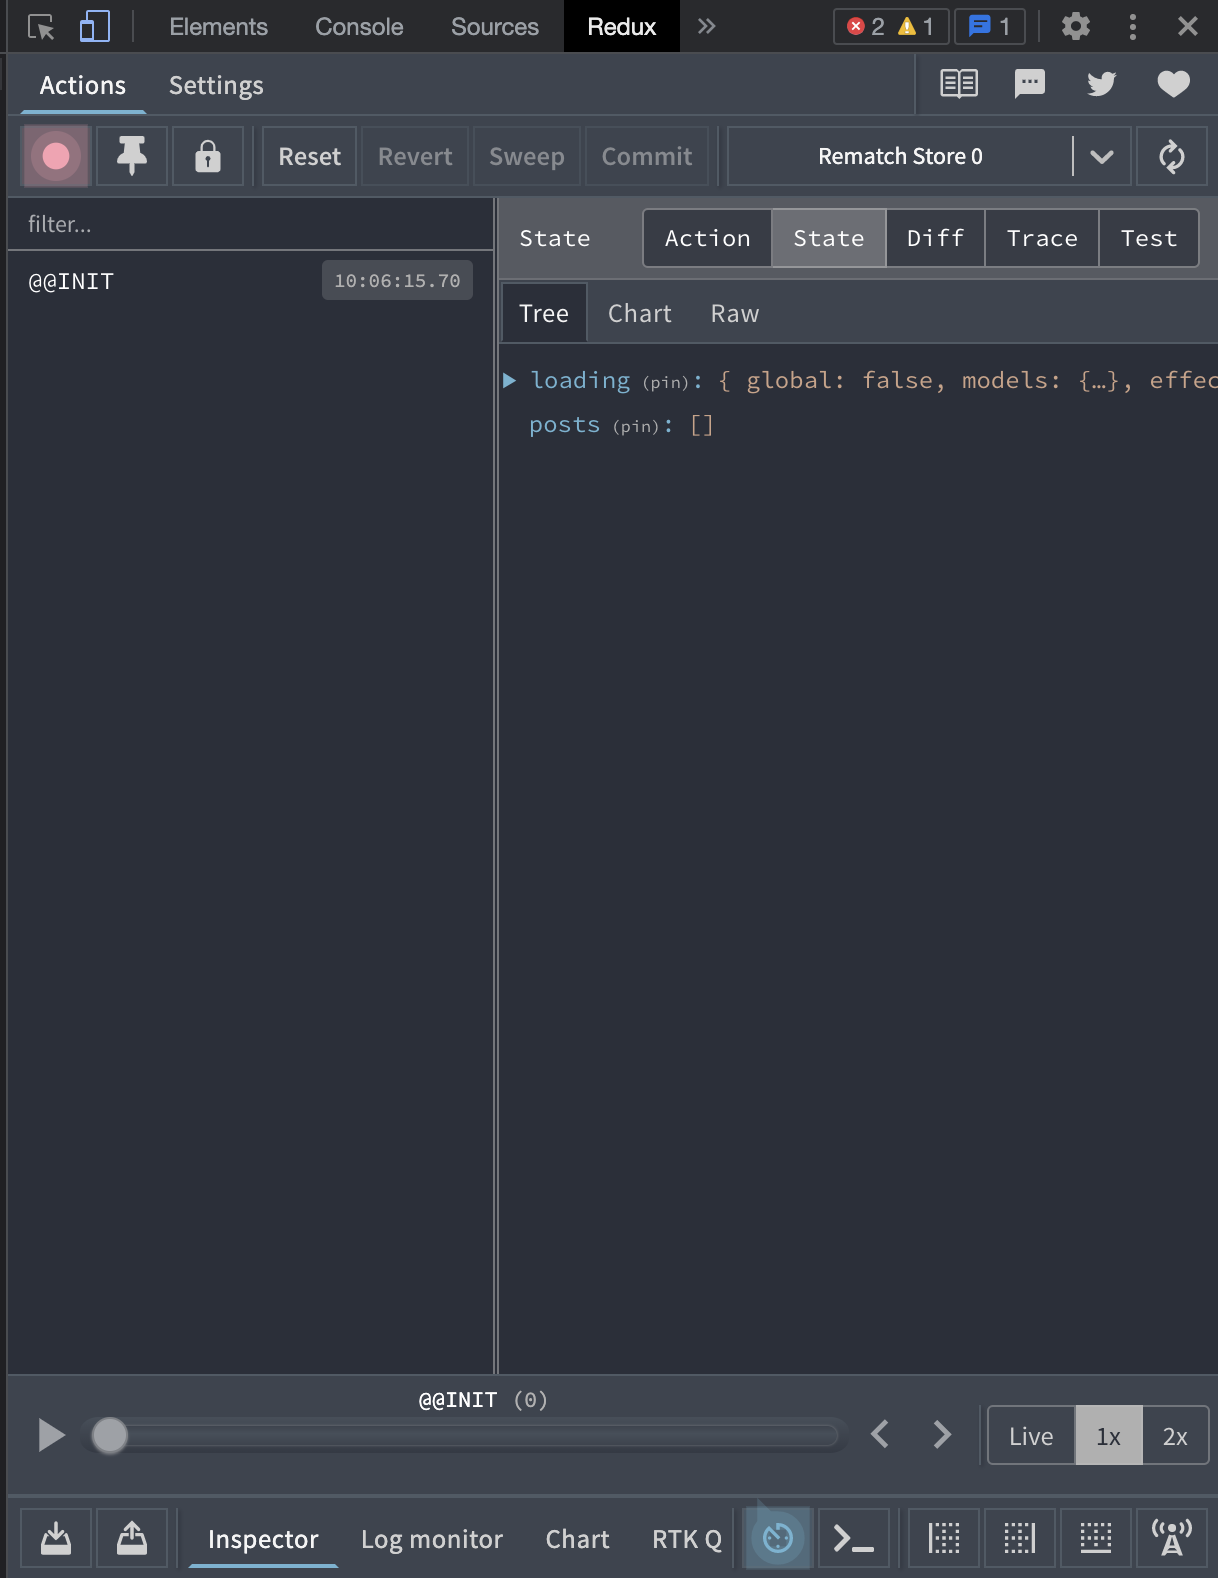
})If you inspect with Redux dev tools, you’ll see that the model’s initial state has been added to the store.

We’ll also have to add Side Effects: functions with access to its model’s state and reducers; effects are used to handle asynchronous actions.
For this project, mock data will be fetched from jsonplaceholder posts.
An effect will be created to handle this action.
Update src/models.js with the code block below:
export const posts = {
  state: [],
  reducers: {
    loadedPosts: (state, payload) => payload,
  },
  effects: (dispatch) => ({
    async load() {
      const data = await loadPosts();
      dispatch.posts.loadedPosts(data);
    },
  }),
};

const loadPosts = async () => {
  const posts = await fetch("https://jsonplaceholder.typicode.com/posts");
  const data = await posts.json();
  return data;
};
An asynchronous function loadPosts fetches the data.
Within the model object, an effect is created. It calls loadPosts and adds its return value into loadedPosts reducer as a payload.
3. Plugins
Another feature of Rematch is plugins. Depending on your needs, several plugins are available, adding to Rematch’s functionality. Additionally, you can build your custom plugin.
Some of the available plugins are:
Let’s implement the loading plugin.
Update src/store.js by implementing the loadingPlugin.
import loadingPlugin from "@rematch/loading"

 const store = init({
  models: { posts },
  plugins: [loadingPlugin()], // Add loading plugin
})
This plugin detects when an effect is being fired and sets loading to true. When our component is built, the loading plugin will be implemented to detect when loading is true in the component.
Open Source Session Replay
OpenReplay is an open-source, session replay suite that lets you see what users do on your web app, helping you troubleshoot issues faster. OpenReplay is self-hosted for full control over your data.

Start enjoying your debugging experience - start using OpenReplay for free.
Building the Component
Now that Rematch has been set up, let’s head on and build out the application’s component.
Update src/App.js with the code block below:
import { connect } from "react-redux";

function App({ posts, loading }) {
  console.log(posts, loading)
  return (
    <div className="container">
      {loading ? (
        <h1>Loading...</h1>
      ) : (
        <>
          <h1 className="title">Posts</h1>
            {posts.map((post, index) => (
              <div className="card" key={index}>
                <h3>{post.title.slice(0, 20)} </h3>
                <p>{post.body}</p>
              </div>
            ))}
        </>
      )}
    </div>
  );
}

const mapState = (state) => ({
  posts: state.posts,
  loading: state.loading.models.posts,
});

const mapDispatch = (dispatch) => ({
  load: dispatch.posts.load(),
});

export default connect(mapState, mapDispatch)(App);
Some explanations:
- The
connectmethod links theAppcomponent to the store, giving it access to thestateanddispatchof the store.
export default connect(mapState, mapDispatch)(App);
// mapState and mapDispatch functions are passed as the first two parameters within connectmapStatereceives the store state and will be called whenever the store state changes.mapDispatchwill receive thedispatchof your store, giving your component access to the store’sreducersandeffects. Theloadeffect is asynchronous, so when fired,loadingis automatically set totrue.- Within the component, state and actions are easily destructured as
props.
function App({ posts, loading }) {
  //
}
Conclusion
Rematch is not only straightforward, clean, and simple; its functionality can be extended via its plugin API.
Getting started with Rematch is simple and has an awesome developer experience, whether you’re new to state management or an experienced Redux user.
Consider using Rematch as the state management tool for your next project, and share your experience with it in the comment section ;)
Resources
To learn more about react-redux connect(), visit the docs.
Visit Live Link and Code Source of this project.
More Rematch example projects can be found here for further practice.
- Rematch | Redesigning Redux
- Rematch Playlist | Konstantin Lebedev
- Rematch Docs
- React-Redux
- Redux Docs
A TIP FROM THE EDITOR: For another take on Rematch, give a look at our Rematch - a better Redux? article — and if you want to consider more alternatives, don’t miss Zustand: simple, modern state management for React and State management in React with MobX!