Unleashing the Potential: Building a Serverless React App with AWS Lambda and API Gateway
Go full-cloud for a serverless React app


Serverless Architecture is the set of steps and processes taken to build an application managed by the cloud. The concept of serverless architecture eliminates the need for server management, which allows developers to focus on building the application instead of managing the application infrastructure, and this article will show you how to do this for a React app.

Discover how at OpenReplay.com.
What does “Serverless Architecture” mean? It means that the cloud will handle the backend of an application while developers are focused on building the frontend or client side. Developers are only to pay for the time when the functions are executed. Examples of serverless offerings are AWS Lambda, Google Cloud Functions, Azure Functions, and IBM Cloud Functions. AWS Lambda is a computing service that allows you to run your code without having to manage the server. There are several benefits to using AWS Lambda and Amazon API Gateway for an application server, and they are as follows:
- Pay per use: As the name suggests, developers only pay for the compute time when your Lambda functions are executed. There are no idle costs. This minimizes costs since it only charges based on the time your application is used.
- Security: AWS (Amazon Web Services) provides built-in security controls that protect applications and data from cyberattacks. These features include API keys, IAM roles, VPC endpoints, and OAuth, which reduce the risk of being hacked.
- High Scalability: AWS Lambda and API Gateway are designed to scale a workload automatically based on the number of requests. This enables proper handling of excessive load and error handling, which could have been too much for a developer.
- Easy to use: Both services have a graphical interface that is easy to use, configure, and integrate with other AWS services, such as S3, DynamoDB, and SNS.
- Event-driven: AWS Lambda functions are triggered based on events in AWS services. This ensures the application is always available because Lambda can handle a large load and quickly respond to incoming events.
A simple example
For this article, we’ll go with a simple blog application built with AWS Lambda using the Lambda function, API Gateway, and DynamoDB to store blog posts. Users will be able to create a blog post, delete a post, edit a post, and also view a particular post. Before moving forward with the project, the following are the requirements to follow through with it:
AWS account setup
To move forward with the project, you will need an AWS account to build this blog app. If you don’t have an account, go to AWS website, and follow the instructions to create an account.

An AWS account is necessary to manage and protect your application. When you create an account, you will be given an account ID only accessible to you to prevent fraudsters from hacking into your application.
Node.Js and npm installation
You will also need Node.Js and npm installed on your machine. If you don’t have Node on your system, go to Node website to download it.
To check if Node is properly installed on your system, run npm -v on your terminal. This will show you the version of Node installed currently on your system.

npm is a package manager for Node. Run this command to check the version of npm installed on your system, npm -v.
Serverless installation
You need to install serverless framework, which is necessary for deploying and managing a serverless application. For serverless, run this command npm install -g serverless.
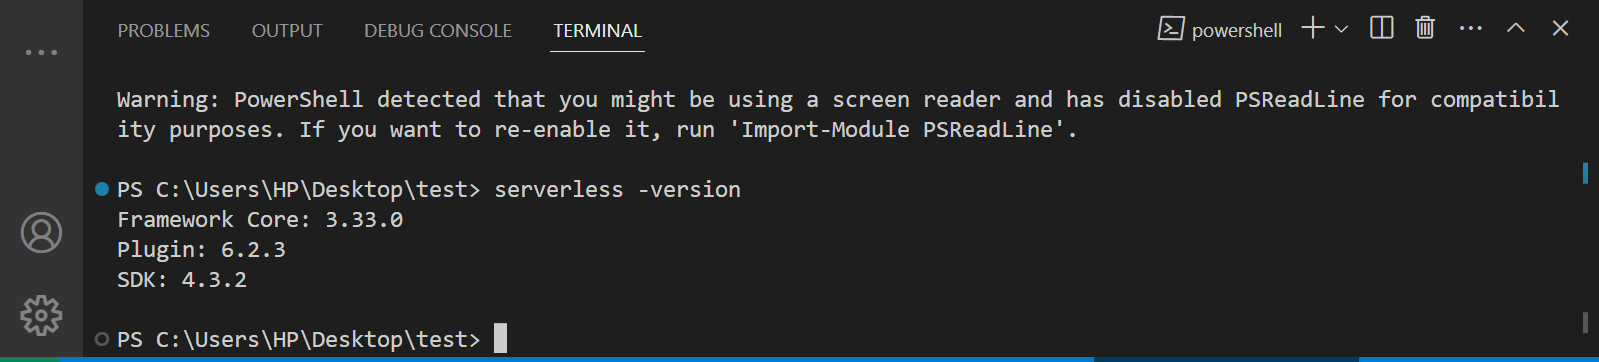
Once installed, you can check if it is installed correctly by running this command serverless --version. This will show the version of the serverless framework installed.
Creating an API Gateway
AWS API Gateway is a service that allows developers to build and manage their API (Application Programming Interface), which can be accessed by backend resources such as AWS Lambda functions, Amazon EC2 instances, or any HTTP(S) endpoint. The API Gateway provides a simplified way for developers to create, maintain, and monitor their APIs. Its services include RESTful APIs, WebSocket APIs, and HTTP APIs.
Steps to create an API in API Gateway
To create an API from the API Gateway, follow these steps:
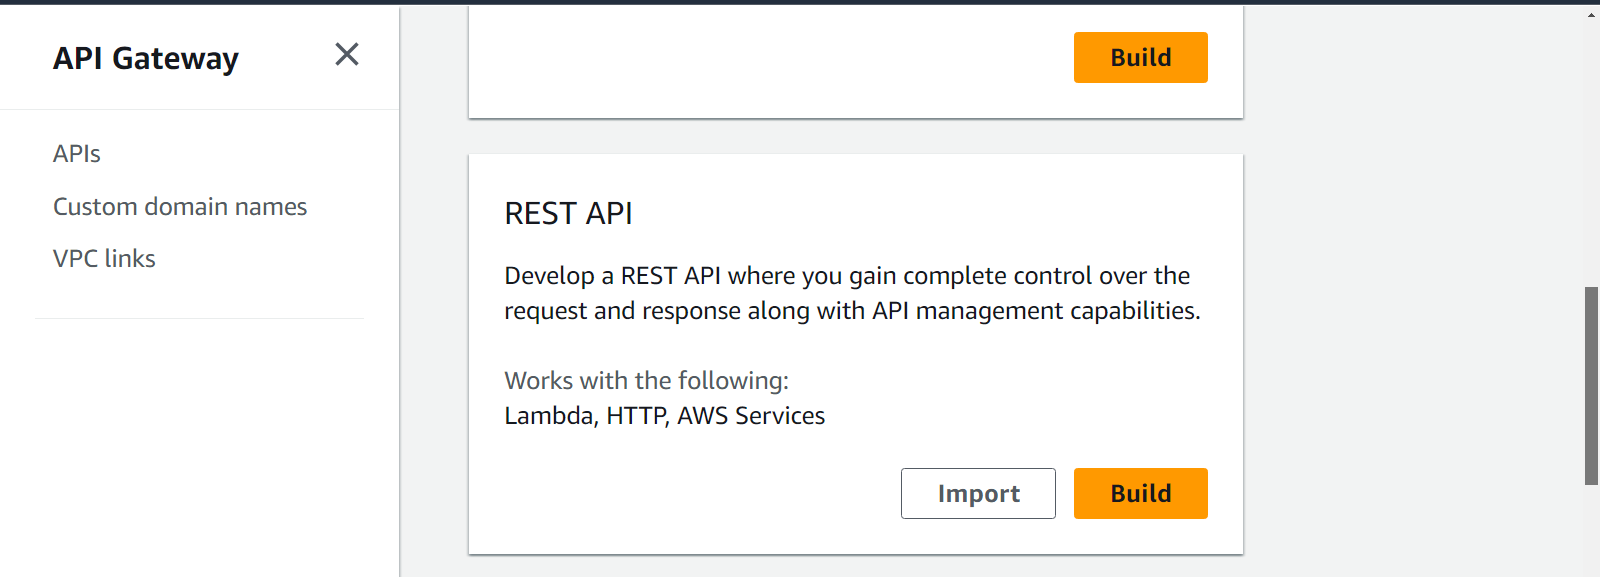
Login to your AWS console, click on Services on the navbar and select API Gateway. On the right sidebar, click on Create API.

Select REST API as the API type and click on build.
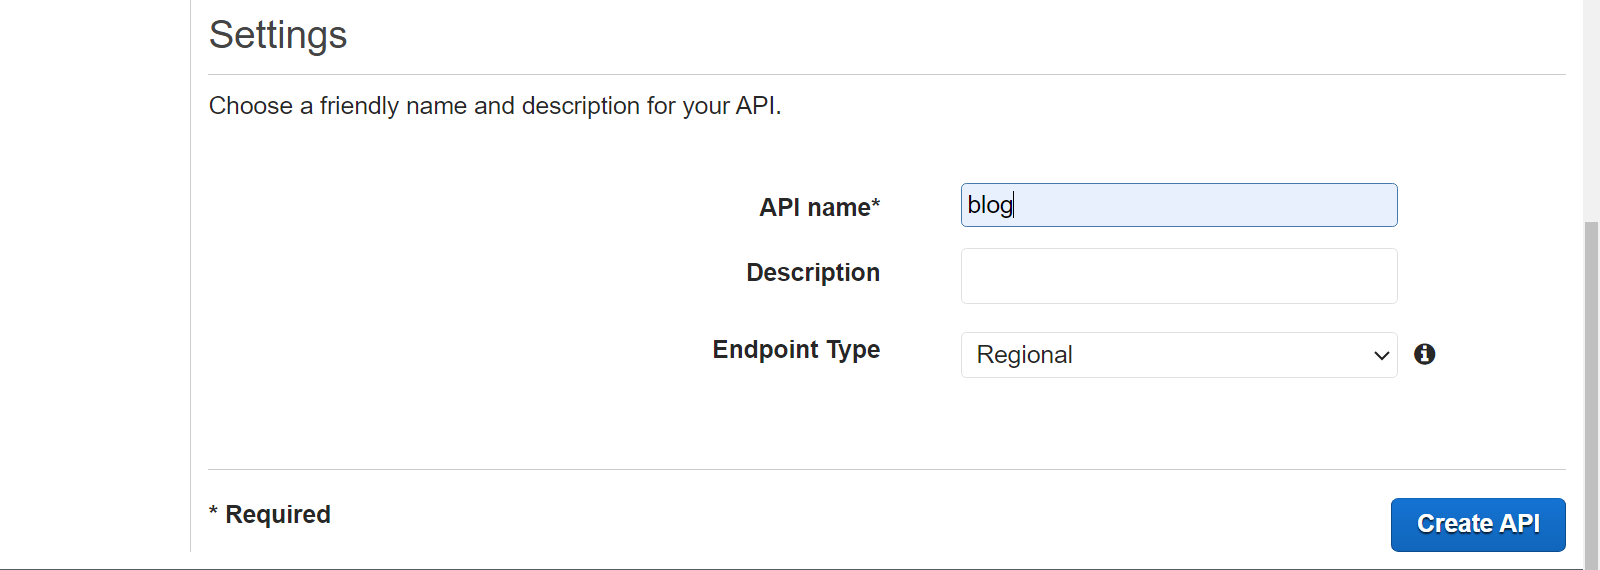
Give your API a name and description, and click Create API.
Setting up API Resources and Methods
API resources are the endpoints a client can use to interact with an API. Each API resource can have one or more methods, such as GET, POST, PUT, PATCH, and DELETE.
After creating your API, you will be directed to the API dashboard to create your API resources. To create API resources, follow these steps:
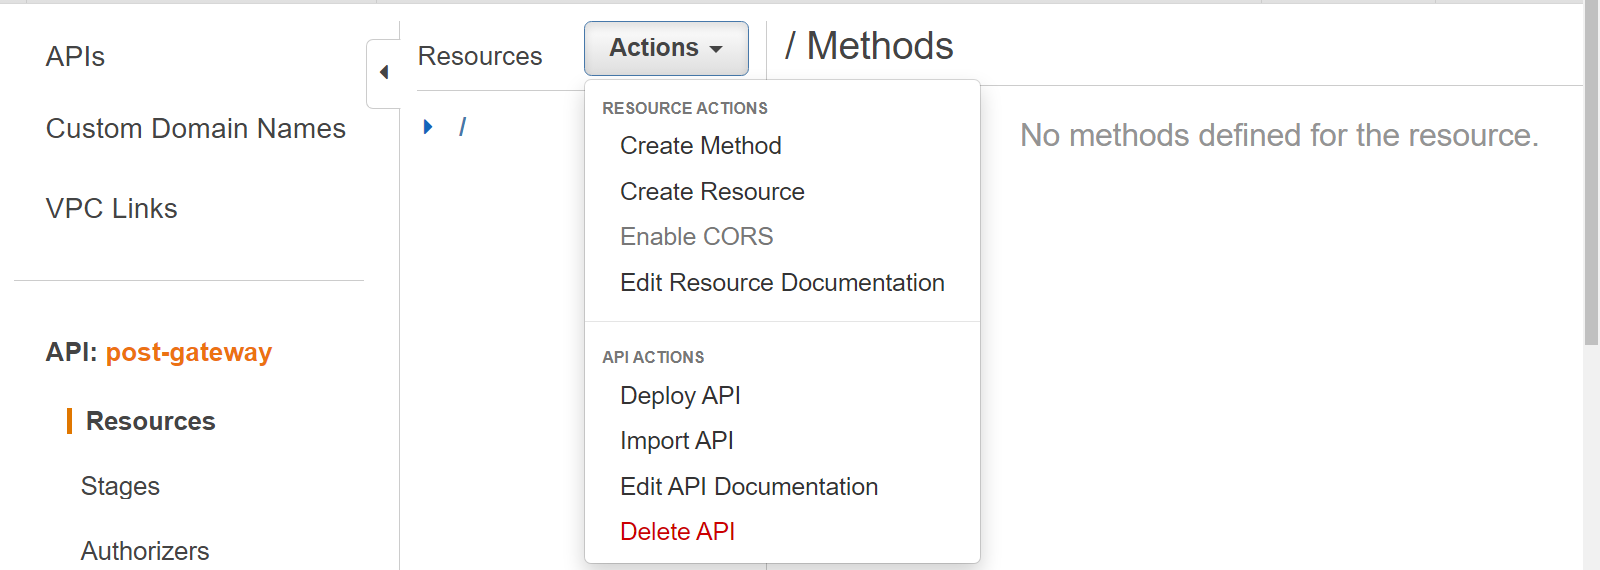
Click on the Actions button on the left sidebar and select Create Resources.
Give your resource a name, e.g., posts for getting all posts, and the path should be /posts.
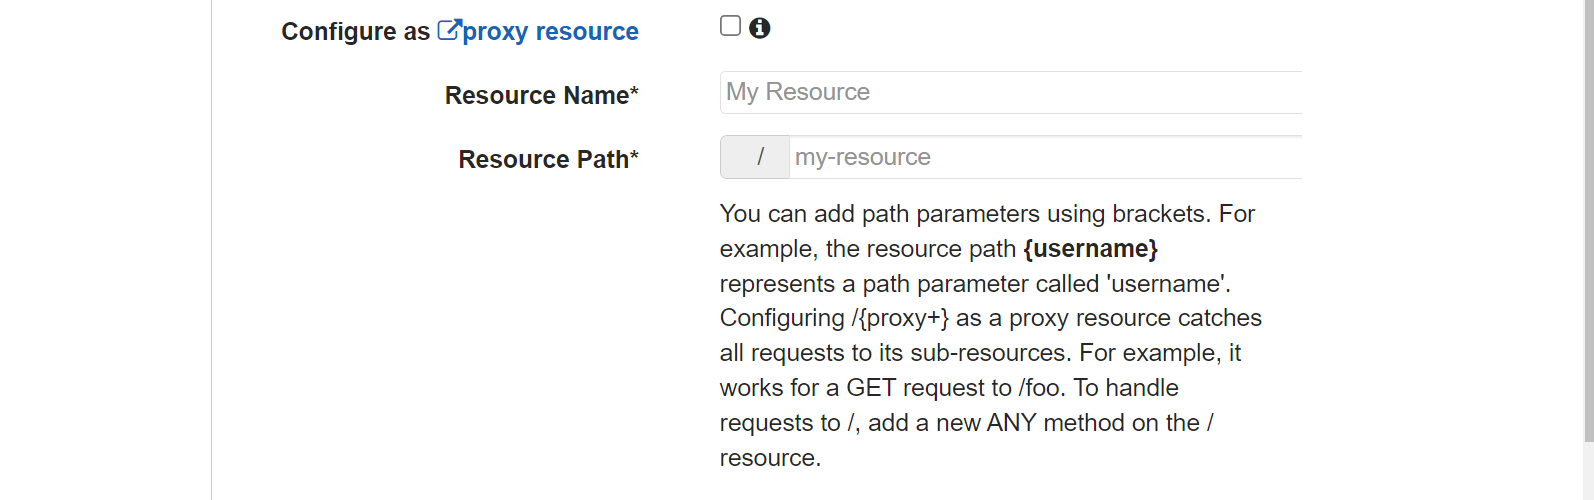
Similarly, create another resource named posts/id for a single blog post resource.
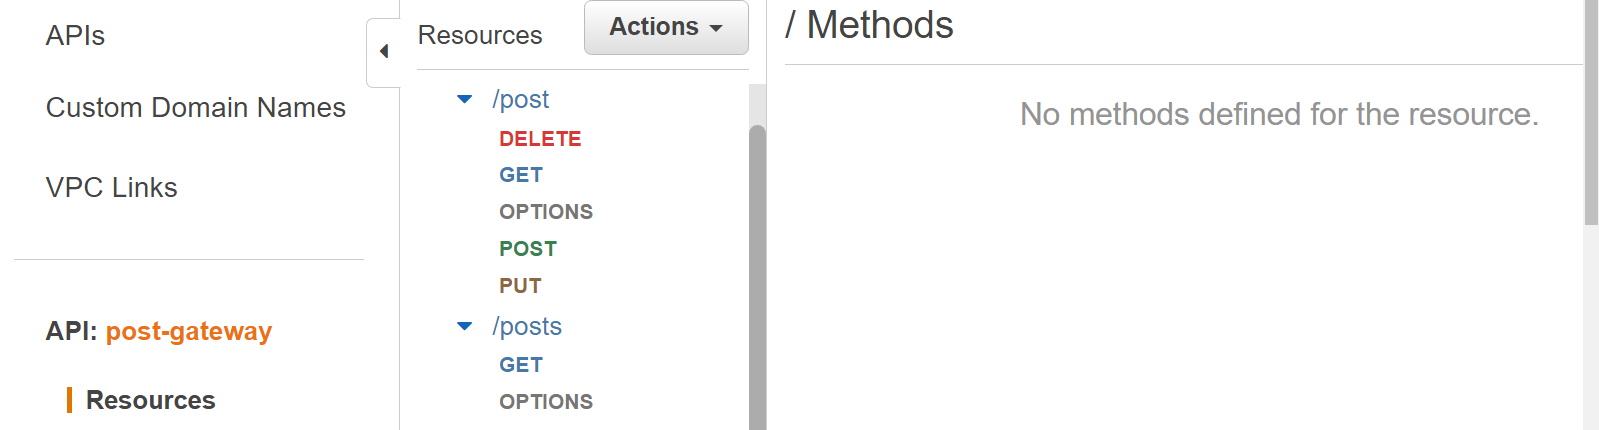
The next step is to create methods for each resource, which are the GET method, POST method, PUT method, and DELETE method.
To create a method, follow these steps:
Click on Posts Resource and then click on the Actions button. Select Create Method. Select the GET method and save.
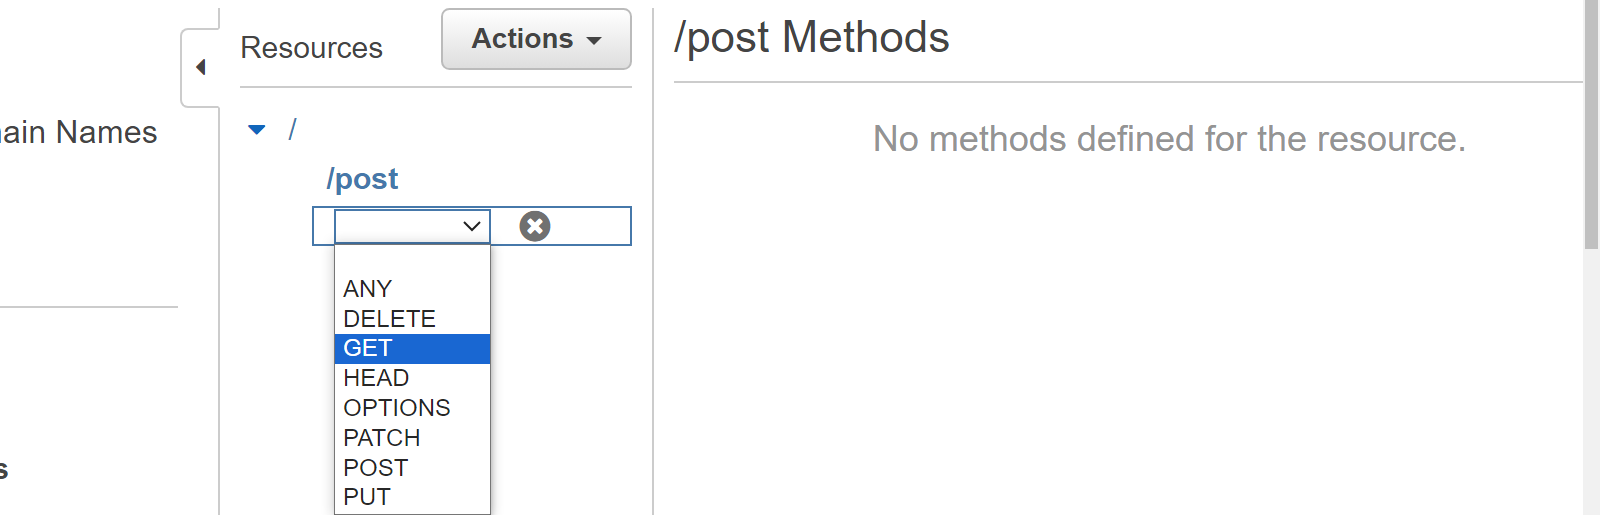
Follow the above step to also create POST, DELETE, PUT, and OPTIONS methods.
The next step is creating methods for the postid using the following process:
Click on postid Resource and then click on the Actions button. Select Create Method. Select the GET method and save. You will create the DELETE, PUT, and OPTIONS methods with the above step.
Adding CORS support
Cross-origin resource sharing (CORS) is a security feature implemented on a web browser that restricts requests from web pages to resources located outside the domain of the origin of the web page. To add CORS support to the RESTful API, go to the API Gateway and open the API you created. Go to Resources, and click on Action. Select Enable CORS.
Deploying the API
To deploy the API, you have to configure the API Gateway to the Lambda function to execute the application using events. This is because the AWS Lambda function performs a CRUD operation on the DynamoDB database in response to a click event.
Building Lambda Functions
AWS Lambda function is a serverless service that allows you to run your code and also integrate with other AWS services to build your application.
Creating Lambda functions for:
You will create a Lambda function to get all posts, get a single post, create a post, update a post, and delete a post for the blog application.
To create a Lambda function, follow these steps:
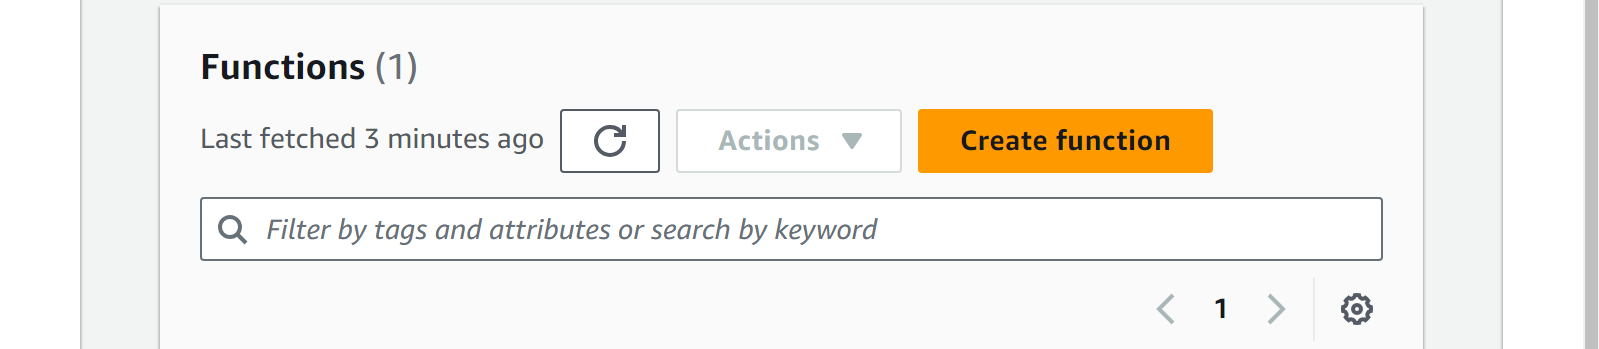
On the AWS homepage, click on services and select Lambda. When taken to the Lambda page, click on Create Function.
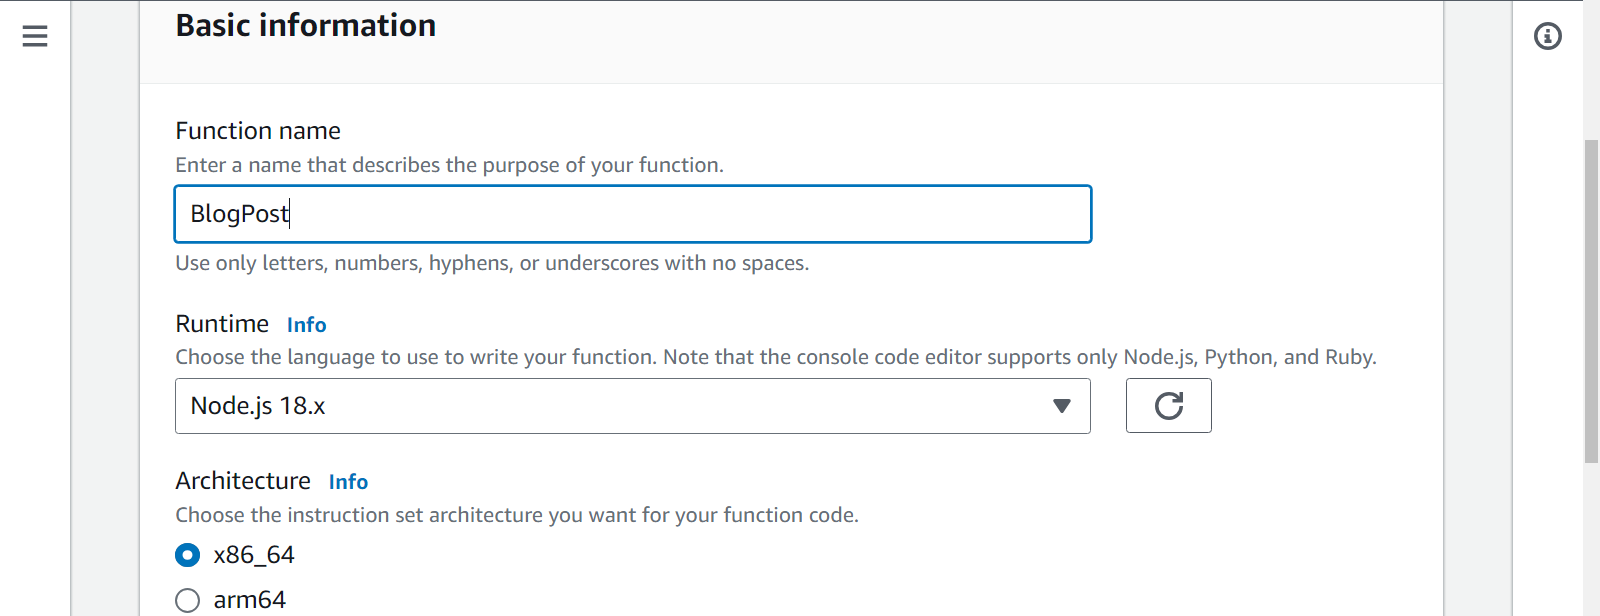
Give your function a name, select node.js as its runtime, and click on Create Function.
The next step is writing the Lambda function for the blog application.
import { DynamoDBClient } from "@aws-sdk/client-dynamodb";
import {
 DynamoDBDocumentClient,
 ScanCommand,
 PutCommand,
 GetCommand,
 DeleteCommand,
} from "@aws-sdk/lib-dynamodb";
The first line imports the DynamoDBClient class from the @aws-sdk/client-dynamodb package, which is used to interact with DynamoDB. The second line imports several classes from the @aws-sdk/lib-dynamodb package, which provides a higher-level abstraction layer for DynamoDB operations.
const client = new DynamoDBClient({});
const dynamo = DynamoDBDocumentClient.from(client);
The DynamoDBClient and DynamoDBDocumentClient contain configurations for the DynamoDB database, which provides a means of interacting with DynamoDB.
const tableName = process.env.tableName;
const postPath = "/post";
const postsPath = "/posts";
tableName retrieves the table name from the environment variables using process.env.tableName. postPath and postsPath represent the paths for individual posts and all posts.
export const handler = async (event) => {
 let body;
 let requestJSON;
 let id;
 let statusCode = 200;
 let headers = {
  "Content-Type": "application/json",
  "Access-Control-Allow-Origin": "*",
 };

 // The blog code...
}
The async function is the entry point for the AWS Lambda function. It takes an event parameter representing the event data passed to the Lambda function.
The headers variable defines the response headers, including the content type and the CORS (Cross-Origin Resource Sharing) policy.
Get all posts
In this section, you will write a function that gets all posts when the event is triggered.
try {
 switch (true) {
  case event.path == postPath && event.httpMethod == "GET":
   const scanCommand = new ScanCommand({ TableName: tableName });
    body = await dynamo.send(scanCommand);
    body = body.Items;
   break;

  default:
   throw new Error(`Unsupported route: "${event.path}"`);
 }
} catch (err) {
 console.log(err);
 statusCode = 400;
 body = err;
} finally {
 body = JSON.stringify(body);
}
The switch statement is used to handle different combinations of event.path and event.httpMethod, which depend on the path and HTTP method.
If the path equals postsPath and the HTTP method is GET, a ScanCommand is created to scan the entire DynamoDB table to retrieve all posts.
Get a single post
case event.path == postPath && event.httpMethod == "GET":
    id = event.queryStringParameters.id;
    const getCommand = new GetCommand({
     TableName: tableName,
     Key: {
      id: id,
     },
    });
The GET method requests a post from the DynamoDB using an id parameter, and the id is to retrieve a single post by its primary key.
Create or Update a post
case event.path == postPath && event.httpMethod == "PUT":
    requestJSON = JSON.parse(event.body);
    const putCommand = new PutCommand({
     TableName: tableName,
     Item: { ...requestJSON, date: Date.now() },
    });
    await dynamo.send(putCommand);
    body = `Updated item ${requestJSON.id}`;
    break;
It updates a post from the DynamoDB using an id parameter; if the post does not exist, it creates a new one.
The post is updated from DynamoDB using the PUT request to the /posts endpoint.
Delete a post
case event.path == postPath && event.httpMethod == "DELETE":
    id = event.queryStringParameters.id;
    const deleteCommand = new DeleteCommand({
     TableName: tableName,
     Key: {
      id,
     },
    });
It handles a DELETE request with an id parameter for a post to delete that post by its primary key.
Testing the Lambda functions
To test out if your Lambda function is working properly, follow these steps:
Go to the API you created in the API Gateway and click on a method, e.g., GET.

Click on the link with the text Test to test the method and provide the post ID from DynamoDB to access a post. Paste the post ID in the query string box and click the button below Test.
NOTE: You can only test your Lambda function after integrating it with the API Gateway and DynamoDB database.
Integrating Lambda with API Gateway
Integrating the Lambda function with the API Gateway is done while configuring your API methods. When the Lambda function is integrated with the API Gateway, you can manage and secure your APIs effectively, control requests, and leverage the benefits of event-driven architectures.
Adding API Gateway as a trigger for Lambda functions
Follow these steps to configure your API resource method: Go to your API Gateway page and click on your API. On your Resource page, select the method you want to configure. For each method, select the Lambda function as the integration type. Choose the region where your Lambda function is deployed. Tick the box with the option to use the Lambda proxy for integration. Under the Lambda function input, give it the name of the lambda function you created, e.g., BlogPost, and click save.
Assigning Lambda functions to API resources and methods
Go to your Lambda function page. Click on Configuration and select Triggers. Click on Add trigger. Select API Gateway as the source. Click on Use Existing API and enter your API ID.
Configuring Lambda function permissions
Lambda function permission is important for security because it protects your AWS resources from risks and unauthorized access. To configure your AWS Lambda function permissions, follow these steps: Go to your function page and click on Configuration. Select Permission and click on the name under Role Name to view the IAM Role on the IAM dashboard. Under the Permission tab, click on Add an inline policy to add a new policy to this role. Choose API Gateway as the Service and the Access Level as the InvokeFunction. Expand Resources and tick the box next to Any to allow access to all API Gateway resources. Give your policy a name and click on Create policy.
Storing blog post data in DynamoDB
The DynamoDB database will store and manage the blog post, which will be accessible on the API Gateway when you run the Lambda function.
Setting up a DynamoDB table for blog posts
Follow the following steps to set up your blog posts on DynamoDB:
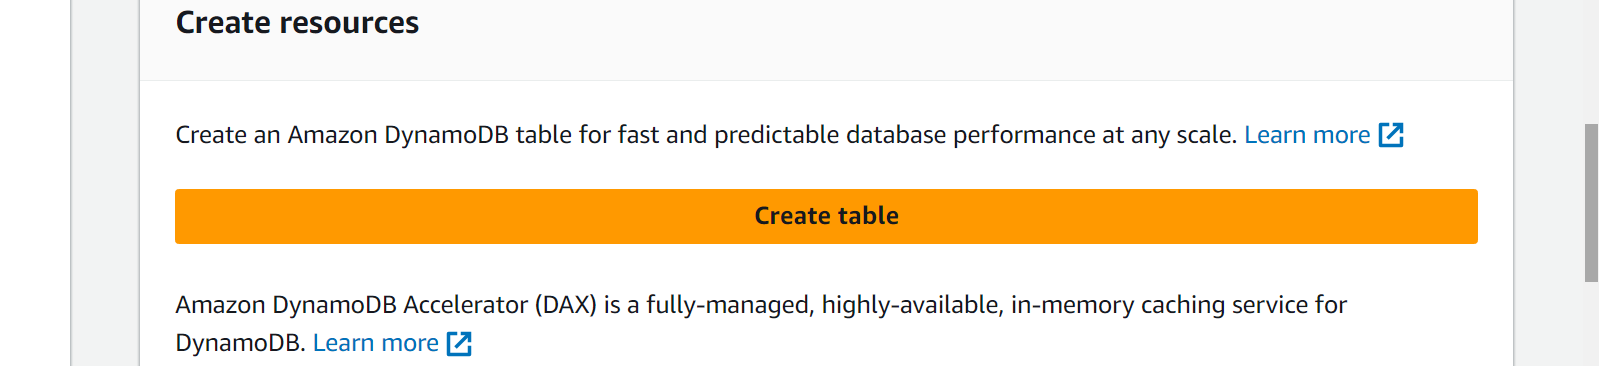
On your AWS management console, click on Services and select DynamoDB. Click Create Table and give your table a name, e.g., Blogpost. Also, define the partition key for the table and click Create table.
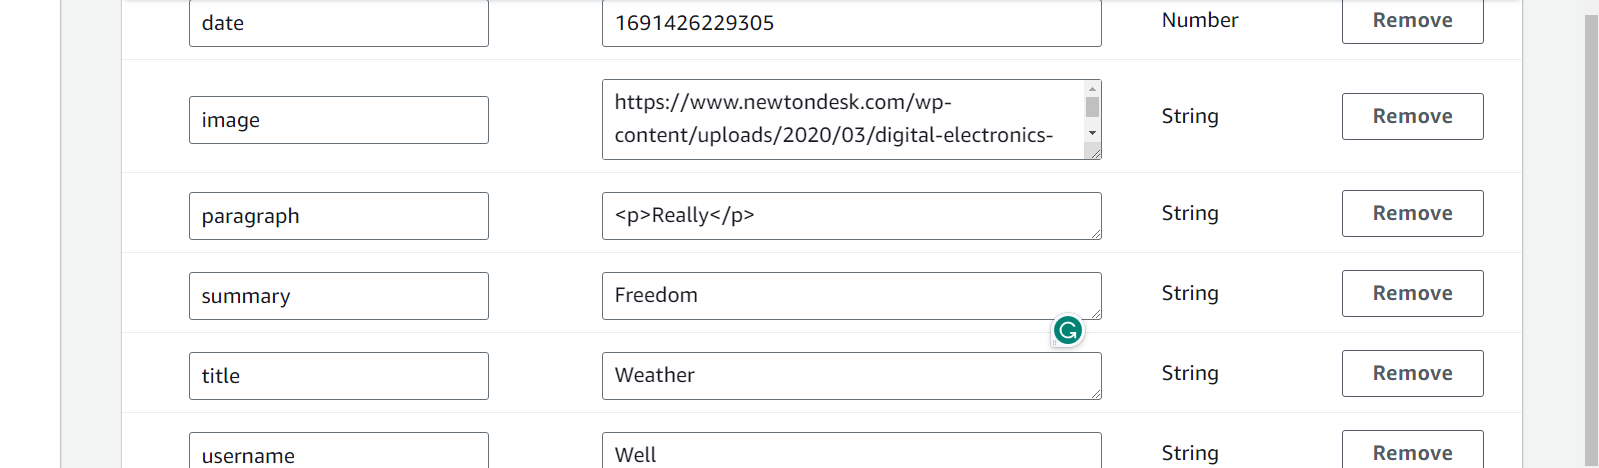
Creating a post model
After creating a DynamoDB table, the next step is creating a Post model inside to handle the blog post. Below are the steps:
Under the Blogpost table, click on Create item. The post model contains the blog title, image, author, date, and content.
Using the DynamoDB SDK in Lambda functions to interact with the database
The DynamoDB SDK is used within the Lambda function to interact with the DynamoDB database to perform CRUD operations. The DynamoDB SDK is an AWS library that allows easy interaction between the DynamoDB database and other AWS services.
import { DynamoDBClient } from "@aws-sdk/client-dynamodb";
import {
 DynamoDBDocumentClient,
 ScanCommand,
 PutCommand,
 GetCommand,
 DeleteCommand,
} from "@aws-sdk/lib-dynamodb";
The above code integrates the DynamoDB with the Lambda function by importing commands from the @aws-sdk/client-dynamodb and @aws-sdk/lib-dynamodb packages.
Publishing API Gateway Endpoint
To be able to test out your Lambda function and blog post, you have to publish your API endpoints, which are the methods created from the Resources.
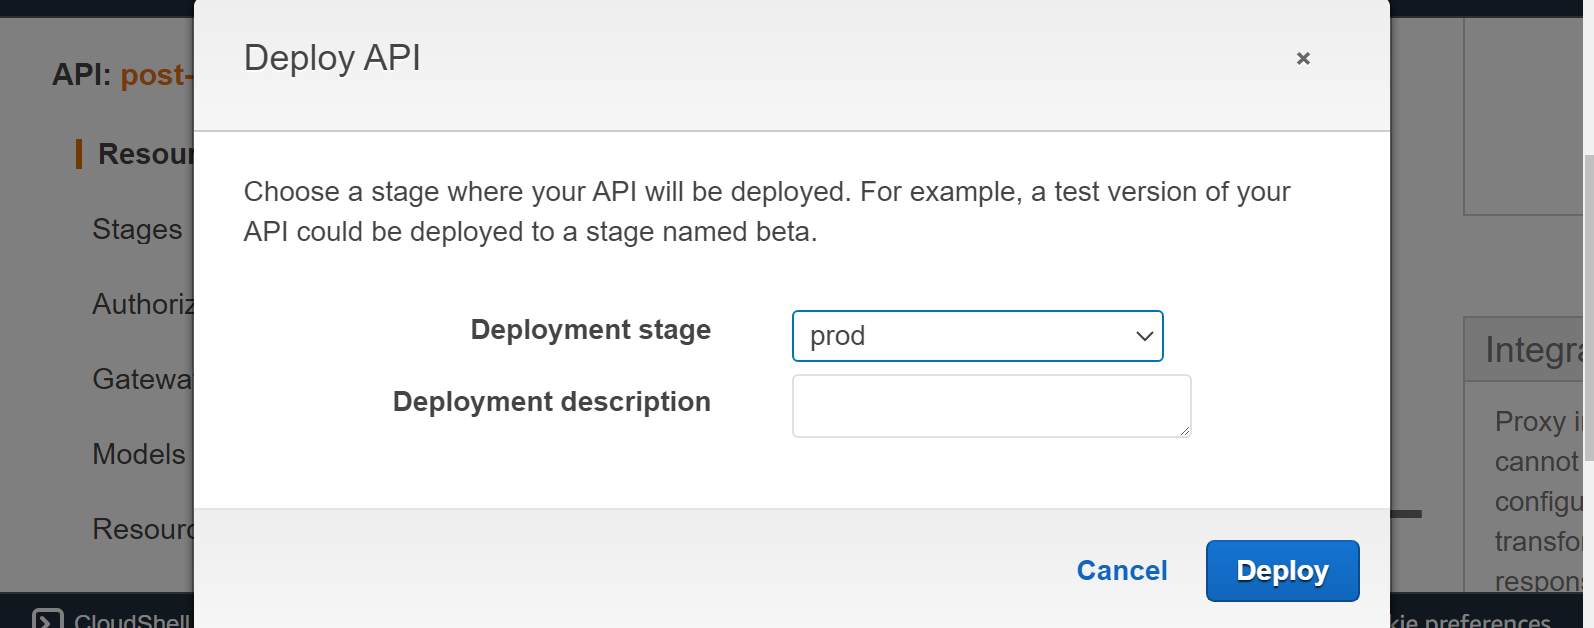
Publishing a Stage in API Gateway
To publish a stage, go to your API, and in the API Gateway, click Actions and select Deploy API. Give your API a stage name and description, select the stage deployment, and click on Deploy.
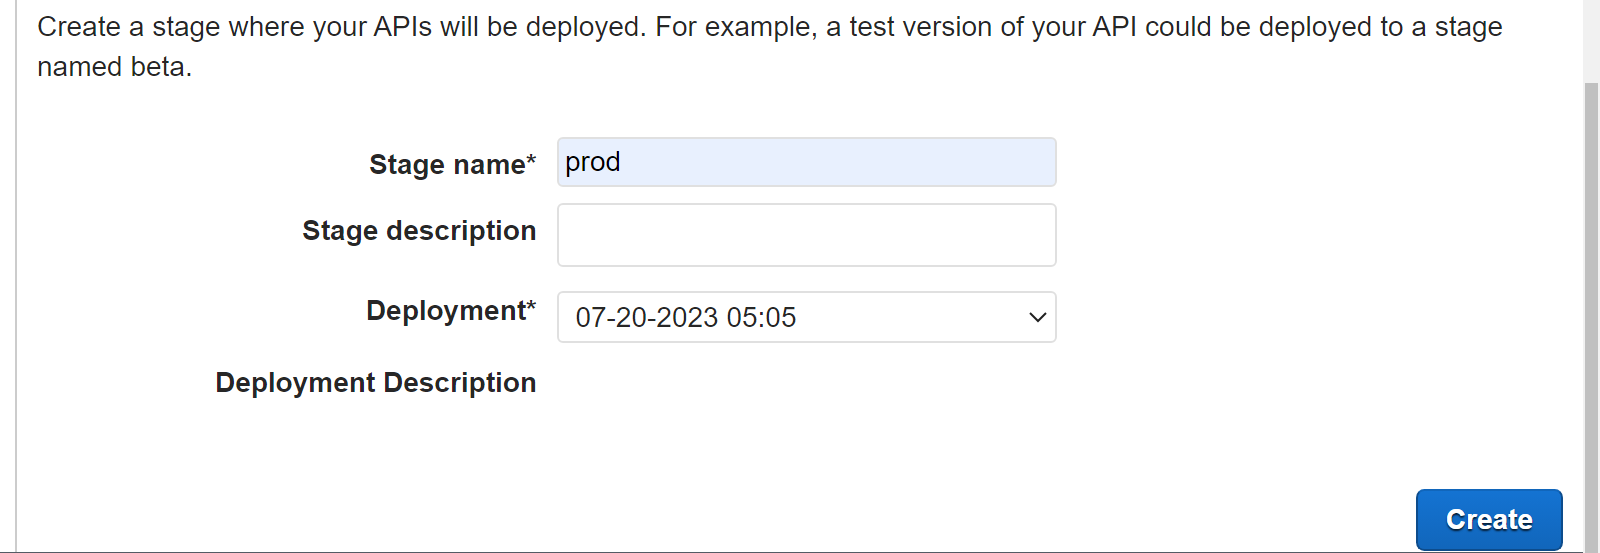
On the API dashboard, Under Stages, click on Create. Give your stage a name and description, and select the deployment time. The stage name should be the same as the API you deployed, and click Create.
Accessing the API URL
With the API URL, you will be able to view a post, delete a post, edit a post, and create a post. To access the API URL, click on the stage name to access the stage editor. Click on the link next to Invoke URL to retrieve the URL for this stage of the API.

You can append resource paths and query parameters to the URL to access the deployed API.
Conclusion
AWS serverless services allow developers to easily manage their applications, as seen above. You are only required to write the function to execute your application. One of the benefits of running your application on an AWS server is that you only pay when the Lambda function is executed.
Scale Seamlessly with OpenReplay Cloud
Maximize front-end efficiency with OpenReplay Cloud: Session replay, performance monitoring and issue resolution, all with the simplicity of a cloud-based service.
Start with Cloud