Understanding Sessions Management and Authentication with Node.js
Learn how to use sessions with Node


HTTP requests are considered stateless protocols and are used to transmit data between the server and the browser. Stateless means they do not store any data. However, circumstances may force you to build a stateful server to save data between the client and server sides. One of the best ways to save such data is by using sessions. A session helps you store HTTP data to be used across multiple pages on a website.
This guide will help you understand how to use sessions in Node. To understand how Node uses sessions, we will build session-based authentication and use sessions to hold the authenticated user’s data using Redis and MongoDB.
To continue with this article, it is helpful to have the following:
- Node.js installed on your computer.
- Redis server installed on your computer. We will use Redis to store the user session.
- MongoDB installed on your computer. We will use the MongoDB database to store the user credentials.
Ensure your MongoDB and Redis servers are up and running before we dive in and create the application.
How Sessions Work
When using an application, the computer knows who you are and how much time you spend using that application. However, in HTTP web servers, things are a bit different. An HTTP server does not know you and the time you spend interacting with the server. This is because HTTP servers are stateless and don’t store user information; they only get requests from the user and send back a response. This means each request your browser makes is unaware of the actions of the previous requests.
Sessions are used to make the HTTP server stateful. Session variables are used to store user information to be used across the web application. It helps to keep track of the state between the server(web app) and the client (browser). This way, the browser keeps session variables with the information of the previous request made to the server.
This is made possible by allowing the server to create a session ID. A cookie value is saved on the client’s browser when a session is created. This way, the request will be sent along with the value of this cookie. The server will then check if the cookie value matches the session stored value.
The difference between a cookie and a session is that a cookie is saved on the client/browser while the session is saved o the server. Unlike the session, a cookie doesn’t store any user credentials.
Why use Redis for Session Storage?
Redis is an in-memory database that can store and persist multiple data formats. We will use Redis as an in-memory data store to save sessions. Reasons for using Redis storage in this use case include the following:
- Due to security reasons, it is not advisable to save session IDs in the browser. Redis makes a good choice to save the session on the server side.
- Easy to manage session caches. You can log out of the current browser session anytime using the Redis session cache.
- You don’t need to manually encrypt any keys for the Redis session, and Redis will handle this for you.
- Saving a session on the client means higher CPU usage is required to ensure the safe transfer of data, and this is not the case when using an in-memory database such as Redis.
Setting up the Application
Open the command line from your working directory and run the following command to initialize the application with default Node.js configurations.
npm init -yWe will use the following third-party packages throughout the article:
- Bcrypt: For encrypting and decrypting passwords.
- Connect-redis: For connecting to the Redis server from the application.
- EJS: For rendering the views(templates).
- Express: For setting up the application’s HTTP server.
- Express-session: For handling sessions in the application.
- Redis: For creating a Redis client on the application.
- Mongoose: MongoDB object-relational model. For providing a schema-based solution to your application data.
- Nodemon: For restarting the development server automatically whenever any change is done.
Run the following commands to install the packages:
npm i bcrypt connect-redis ejs express express-session redis mongoosenpm i --save-dev nodemonCreating a Basic Session Server
Inside the project folder, create an index.js file. The main configuration will be hosted here. On the package.json file, under scripts, add the following line:
"dev": "nodemon index.js"We will be running the above command when starting the development server. Inside the index.js file:
Let’s create a basic session middleware that shows how sessions work at the primary level. First, import the necessary dependencies:
const express = require("express");
const session = require("express-session");
const mongoose = require("mongoose");
const redis = require('connect-redis');
Define the port the server will run on:
const PORT = process.env.PORT || 8080;Initialize the Node.js Express application:
const app = express();Accept JSON data in the application:
app.use(express.json());
app.use(express.urlencoded({ extended: true }));
Initialize the view engine:
app.set('view engine', 'ejs');Configure the Redis client:
const redisClient = require('redis').createClient({
    legacyMode:true
});
We will use the Redis client to save the sessions. Here ensure you have a connection to the Redis server:
redisClient.connect().catch(console.log);Initialize the Redis store to save the session:
const RedisStore = redis(session);Go ahead and configure the session using the following session middleware:
app.use(
    session({
        store:new RedisStore({client:redisClient}),
        secret: "my_session_secret",
        resave: true,
        saveUninitialized: false,
        cookie:{
            // Only set to true if you are using HTTPS.
            // Secure Set-Cookie attribute.
            secure:true,
            // Only set to true if you are using HTTPS.
            httpOnly:false,
            // Session max age in milliseconds. (1 min)
            // Calculates the Expires Set-Cookie attribute
            maxAge:60000
        }
    })
);
To create any session, you need Express-session options that will instruct the server to initialize a session. In the above code block, we are initializing a session middleware. The adding the following parameters:
cookie- a cookie is a set object for the session ID token. This object can have various options, such as secure, httpOnly, and maxAge.store- instruct the server where to save session instances. In this case, we are using the Redis store.secret- to create any session, you need a secret, which is the key used to encrypt the session ID cookie.resave- this forces the server to restore the session to the session store even if the session was not changed during subsequent requests to the server. Ifresaveto true, the server will be forced to resave any session. In this case, we will set it to false. Resave can be true for our store. We will set an expiration date on stored sessions to ensure such values are deleted when a given time elapses.saveUninitialized- when a session is created but not yet updated, it is considered uninitialized. This allows the server to force an “uninitialized” session to be stored in the store. However, here we want to implement login sessions. Therefore, settingsaveUninitializedto false will be ideal. This will reduce server storage requirements or adhere to legislation requiring consent before setting a cookie. False will also assist in race-condition situations where a client makes numerous concurrent requests without a session.
There are many options that you can add to your session middleware. Check this guide and learn what best fits your session use case.
💡 Note: In the above parameters, we have set
httpOnlyto false. Sessions should be typically implemented in an HTTPS protocol to ensure a secure data exchange. Therefore, always ensure you run a session on HTTPS, and you can set this by ensuring thathttpOnlyis true. We are setting false only for demonstrative purposes to run the sessions server on localhost.
To execute the above middleware, create a dummy route as follows:
app.get("/",(req,res) => {
    return res.json({
        "message": "Hello World!",
        "success":true
    })
})
Start the server and the database as well:
app.listen(PORT, async () => {
    mongoose.connect("mongodb://localhost:27017/session_app", {
        useNewUrlParser: true,
        useUnifiedTopology: true,
    }).then(
        () => console.log(`App listening on port ${PORT}`)
    ).catch(console.error);
});
Let’s test this basic server. Start the development server from your terminal by running the following:
npm run devFrom your browser, open http://localhost:8080. You should get the following:
{"message": "Hello World!"," success":true}First, the server will create a cookie session ID based on the cookie options created on the session middleware. You can check this instance right on your browser using the inspect tool as follows:
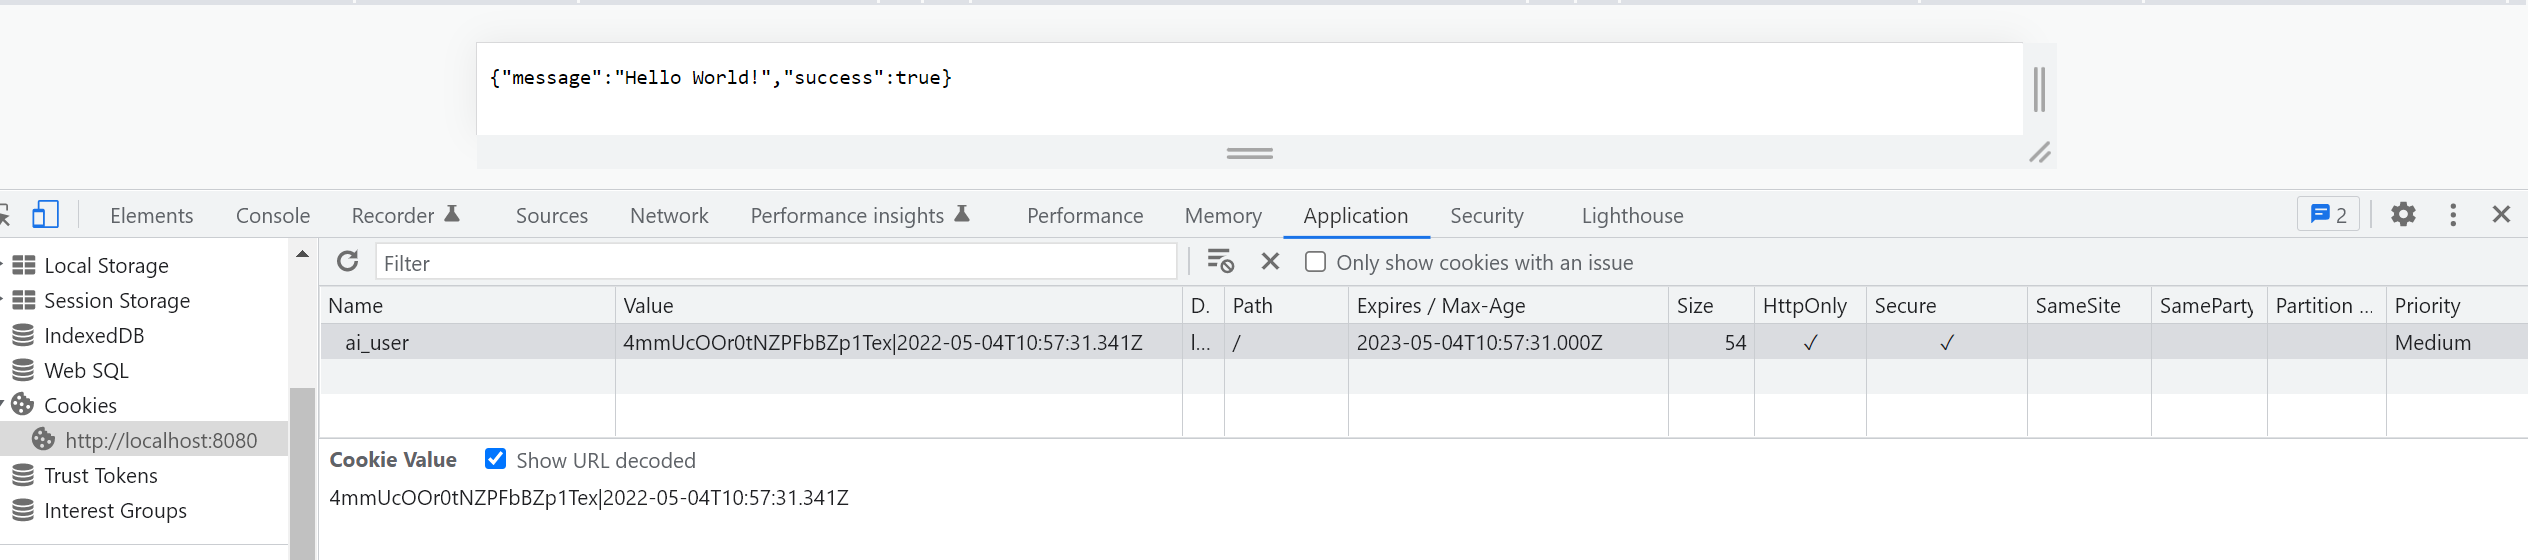
Your session should be stored in your Redis store as such. Run the following command to confirm that:
redis-cli KEYS \*
Session Replay for Developers
Uncover frustrations, understand bugs and fix slowdowns like never before with OpenReplay — an open-source session replay tool for developers. Self-host it in minutes, and have complete control over your customer data. Check our GitHub repo and join the thousands of developers in our community.
Building a Session Authentication-Driven App
There you have your session ready and stored. Let’s now dive in and implement an authentication-driven session app.
Setting up User Models
On the project folder, create a models directory. Inside the directory, create a User.js file. We will define the user model on the file. Inside the User.js file:
- Import
model, andSchemafrommongoose:
const {model,Schema} = require('mongoose');- Construct the user schema as follows:
const UserSchema = new Schema({
    first_name:{
        type:String,
        required:true
    },
    last_name:{
        type:String,
        required:true
    },
    email:{
        type:String,
        required:true,
    },
    password:{
        type:String,
        required:true,
        select:false
    }
});- Export the User model:
module.exports = model('User',UserSchema);Setting up User Controllers
On the project folder, create a controllers directory. Inside the directory, create a user.js file.
Inside the file:
- Import the necessary modules:
const User = require('../models/User');
const bcrypt = require('bcrypt');- Define a handler for the Home page:
exports.homePage = async function(req, res) {
    // Check if we have the session set.
    if (req.session.user) {
        // Get the user using the session.
        let user = await User.findById(req.session.user);
        // Render the home page
        res.render("pages/home", {
            name: user.first_name + ' ' + user.last_name,
            isLoggedIn: true
        });
    } else {
        // Redirect to the login page
        res.redirect("/login");
    }
}
Setting up application routes
On the project directory, create a routes directory. Inside the directory, create an index.js file. Inside this file (routes/index.js):
- Import the necessary modules:
const express = require("express");
const router = express.Router();
const {homePage} = require("../controllers/user");- Define the route for the home page:
// Home page
router.get("/",homePage);- Export the router:
module.exports = router;The next step is to expose the router object we defined earlier to the application server. On the index.js file:
- Import the module:
const routes = require("./routes");- Replace the point we defined the dummy routes with the following:
app.use(routes);Create application views with EJS
On the project folder, create a views directory. Inside the directory, create two more sub-directories: pages and partials.
Inside the partials folder, create three files:
footer.ejs: For the footer.head.ejs: For the head content.navbar.ejs: For the navigation bar.
On the pages directory, we will add three files too:
home.ejs: For the home page.login.ejs: For the login page.signup.ejs: For the signup page.
To make it easier to follow this guide, the above EJS views can be accessed from this GitHub repository. Up to this point, ensure each view reflects as such.
Since to view the home page, you have to be authenticated. We will handle that in the next step.
Handling authentication
On the controllers/user.js file, start by defining a handler for the login page.
The handler will check if we already have a session. If we do, it will redirect to the logout page; else, it will render the login page as follows:
exports.loginPage = function(req,res){
     // check whether we have a session
     if(req.session.user){
        // Redirect to log out.
        res.redirect("/logout");
    }else{
        // Render the login page.
        res.render("pages/login",{
            "error":"  ",
            "isLoggedIn": false
        });
    }
}
On the routes/index.js:
- Import the
loginPagehandler:
const {homePage,loginPage} = require("../controllers/user");- Define a route for it:
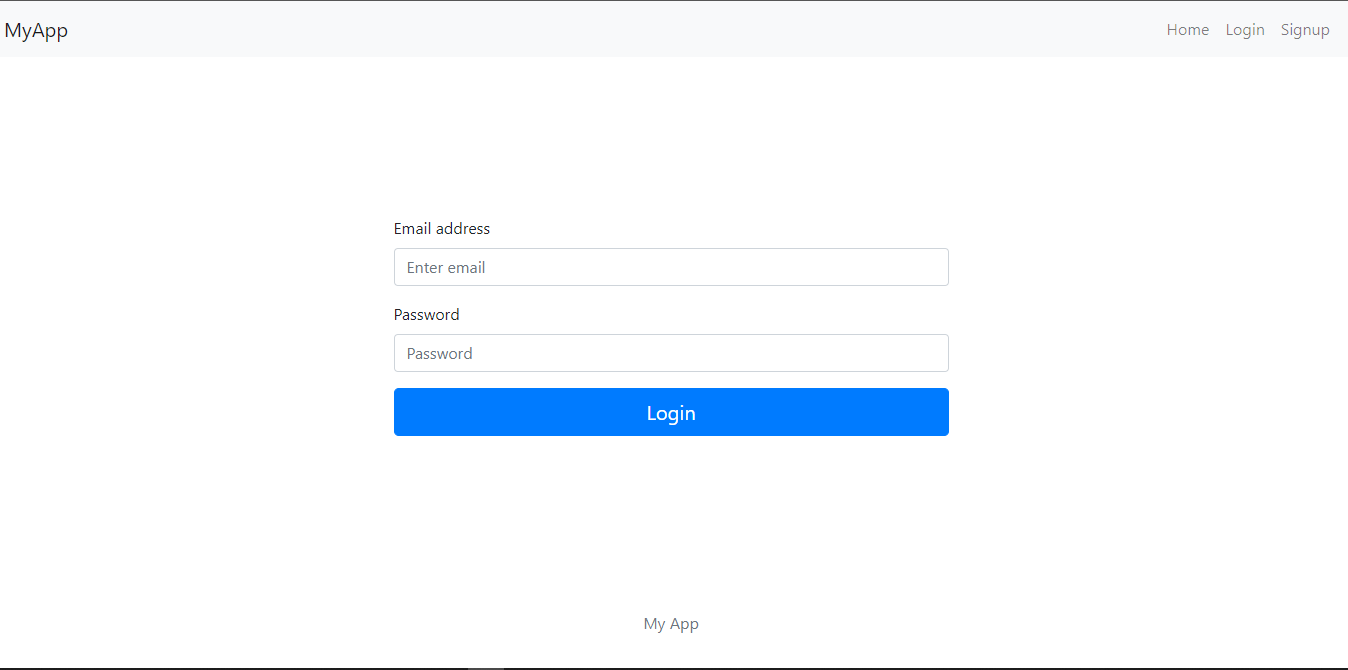
router.get("/login",loginPage); // Login pageWith that defined, ensure that your development server is started and then visit: http://localhost:8080. You should be redirected to the login page as follows:

Handling User Login
The next step is to handle the logic for login so that the form can be responsive. On the controllers/user.js, define a handler for processing the form input sent by the user as follows:
exports.processLogin = async function(req,res){
    // get the data.
    let email = req.body.email;
    let password = req.body.password;
    // check if we have data.
    if(email && password){
        // check if the user exists.
        let existingUser = await User.findOne({email:email}).select('password');
        if(existingUser){
            // compare the password.
            let match = await bcrypt.compare(password,existingUser.password);
            if(match){
                // set the session.
                req.session.user = existingUser._id;
                // Redirect to the home page.
                res.redirect("/");
            }else{
                // return an error.
                res.render("pages/login",{
                    "error": "Invalid password",
                    isLoggedIn: false
                });
            }
        }else{
            // return an error.
            res.render("pages/login",{
                "error": "User with that email does not exist.",
                isLoggedIn:false
            });
        }
    }else{
        res.status(400);
        res.render("pages/login",{
            "error": "Please fill in all the fields.",
            isLoggedIn:false
        });
    }
}
On routes/index.js file:
- Import the handler:
const {homePage,loginPage,processLogin} = require("../controllers/user");- Define a route for it:
router.post("/login",processLogin); // Process loginEnsure that the development server is up and running. Refresh the page, and then submit the form. At this time, since you have not signed up, you will get an error of User with this email does not exist. To resolve this, we will handle the signup route next.
Handling User Signup
Under controllers/user.js, define a handler for sign up page as follows:
exports.signupPage = function(req,res){
    // Check whether we have a session
    if(req.session.user){
        // Redirect to log out.
        res.redirect("/logout");
    } else {
        // Render the signup page.
        res.render("pages/signup",{
            "error":"  ",
            "isLoggedIn":false
        });
    }
}
On routes/index.js file:
- Import the handler:
const {homePage,loginPage,processLogin,signupPage} = require("../controllers/user");- Define the route for it:
// Signup page
router.get("/signup",signupPage);
Ensure that the development server is up and running. Refresh the page, and then click on the signup link on the navigation bar. You should be directed to such a page:
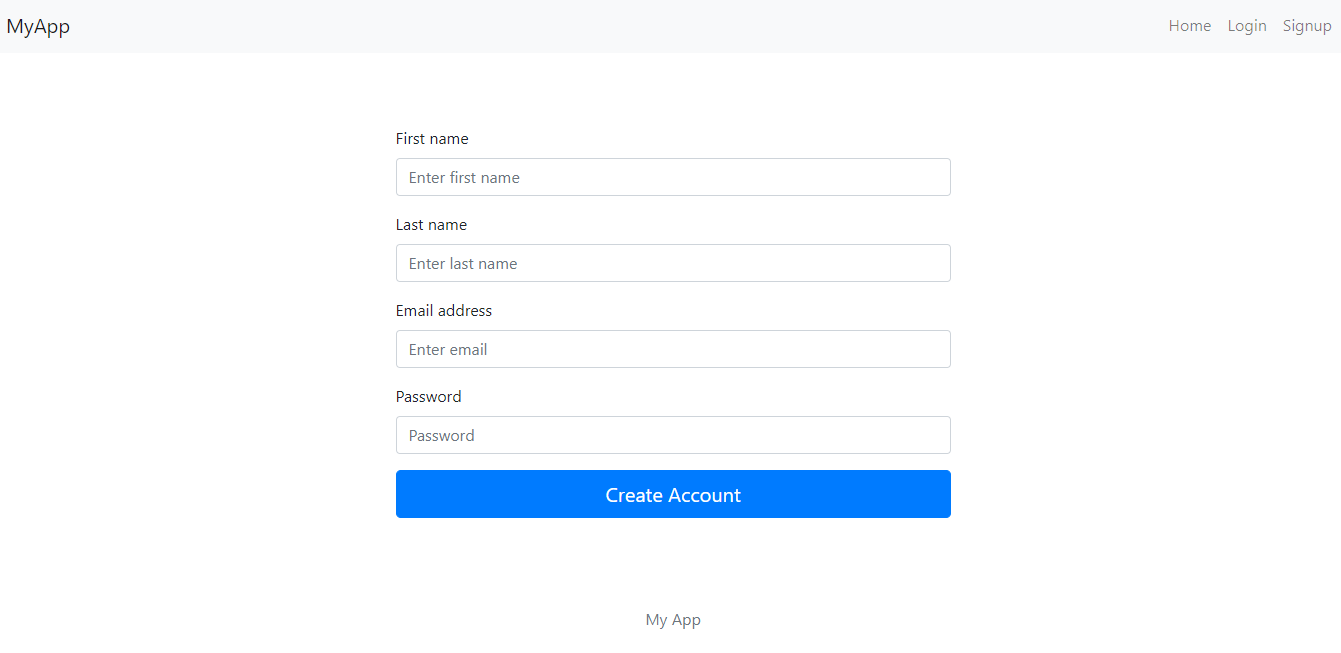
At this point, the form is not responsive. Under controllers/user.js, add the handler for signup as follows:
exports.processSignup = async function(req,res){
    // Get the data.
    let first_name = req.body.first_name;
    let last_name = req.body.last_name;
    let email = req.body.email;
    let password = req.body.password;
    // Check the data.
    if(first_name && last_name && email && password){
        // Check if there is an existing user with that email.
        let existingUser = await User.findOne({email:email});
        if(!existingUser){
            // hash the password.
            let hashedPassword = bcrypt.hashSync(password,10);
            // create the user.
            let newUser = new User({
                first_name:first_name,
                last_name:last_name,
                email:email,
                password:hashedPassword
            });
            // save the user.
            newUser.save(function(err){
                if(err){
                    // return an error.
                    res.render("pages/signup",{
                        "error": "Something went wrong when creating account.",
                        isLoggedIn:false
                    });
                }else{
                    // set the session.
                    req.session.user = newUser._id;
                    // Redirect to the home page.
                    res.redirect("/");
                }
            });
        }else{
            // return an error.
            res.render("pages/signup",{
                "error": "User with that email already exists.",
                isLoggedIn:false
            });
        }
    }else{
        // Redirect to the signup page.
        res.render("pages/signup",{
            "error": "Please fill in all the fields.",
            isLoggedIn:false
        });
    }
}
Under routes/index.js:
- Import the handler:
const {homePage,loginPage,processLogin,signupPage,processSignup} = require("../controllers/user");- Define a route for it:
// Process signup
router.post("/signup",processSignup);
With the development server up and running, refresh the page. Fill in the form with the required details. Once your account has been created, you will be redirected to the home page as follows:
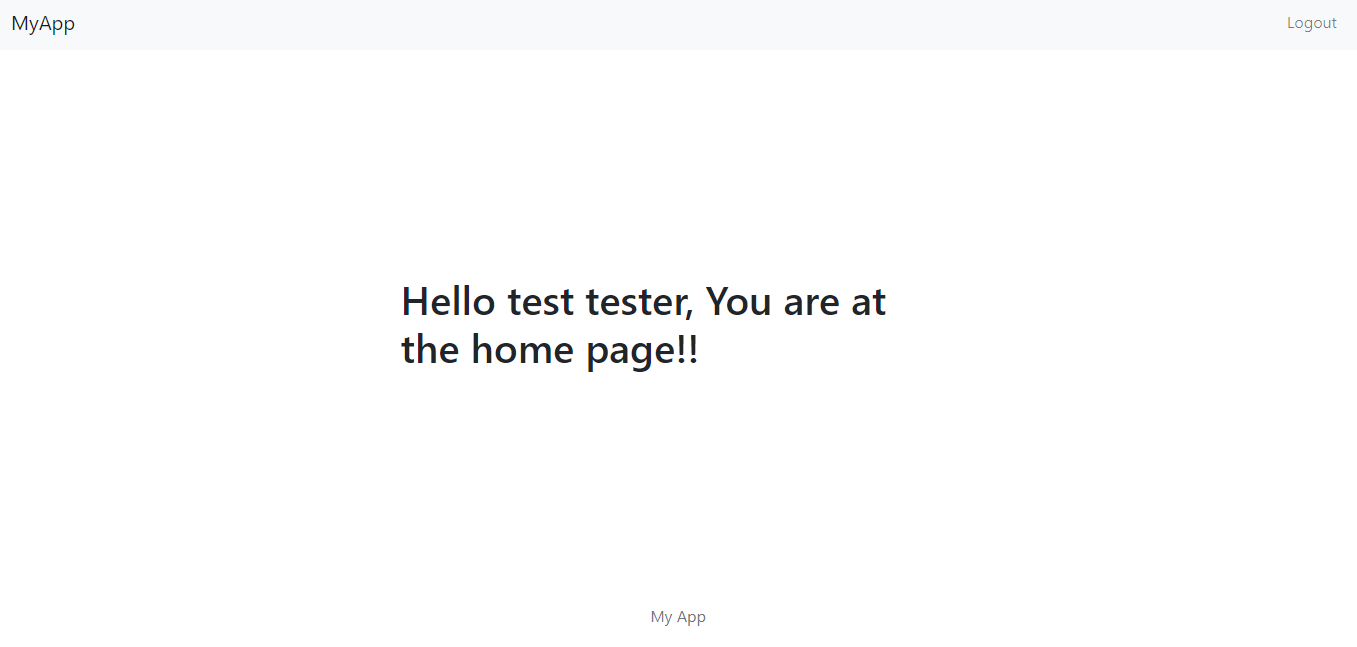
Once you create the account, a Session ID will be generated and saved on the Redis store. Likewise, a cookie to identify the session created will be created and sent back to the client. Let’s check if this is the case with the application.
Starting with the client/browser, use the inspect tool and check the cookie value as follows:
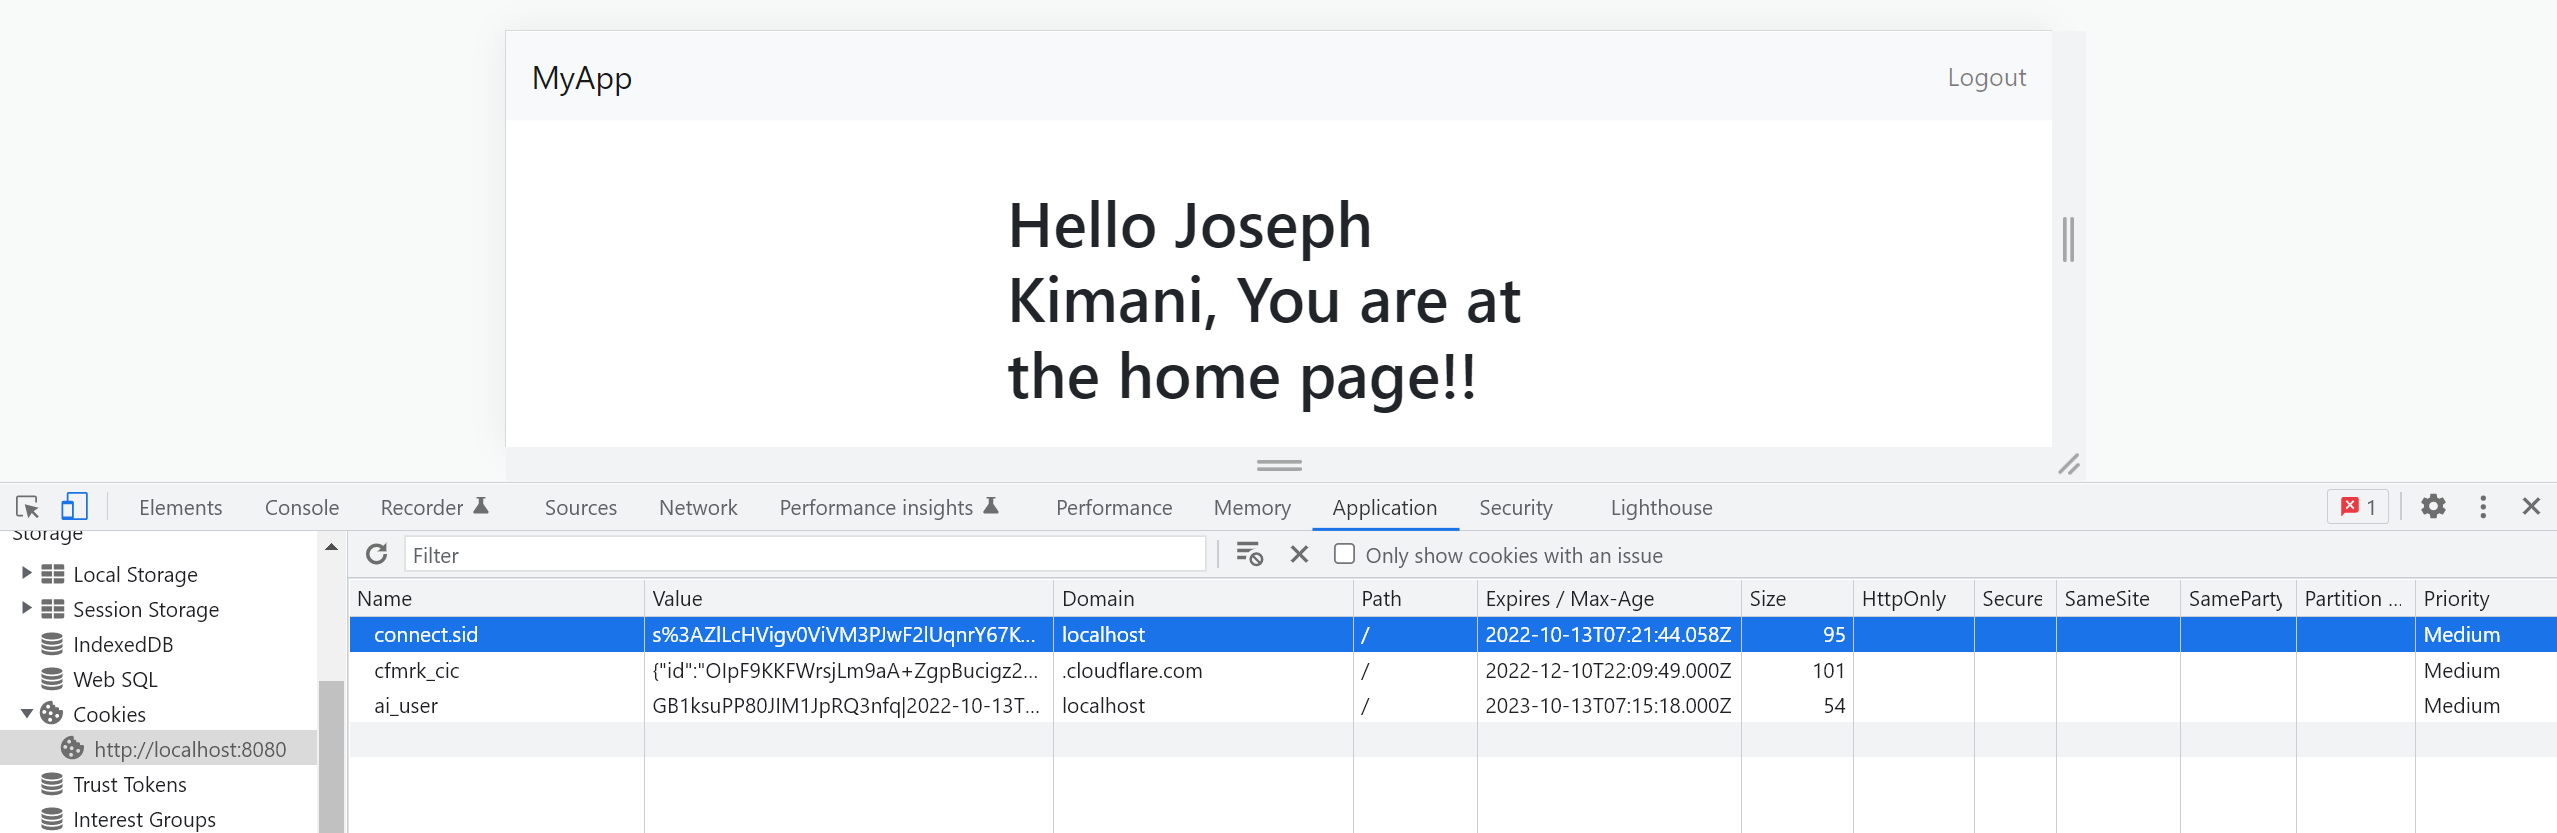
This is the cookie value sent back to the client. Let’s now check the session ID saved by the server. Run the following command to confirm that:
redis-cli KEYS \*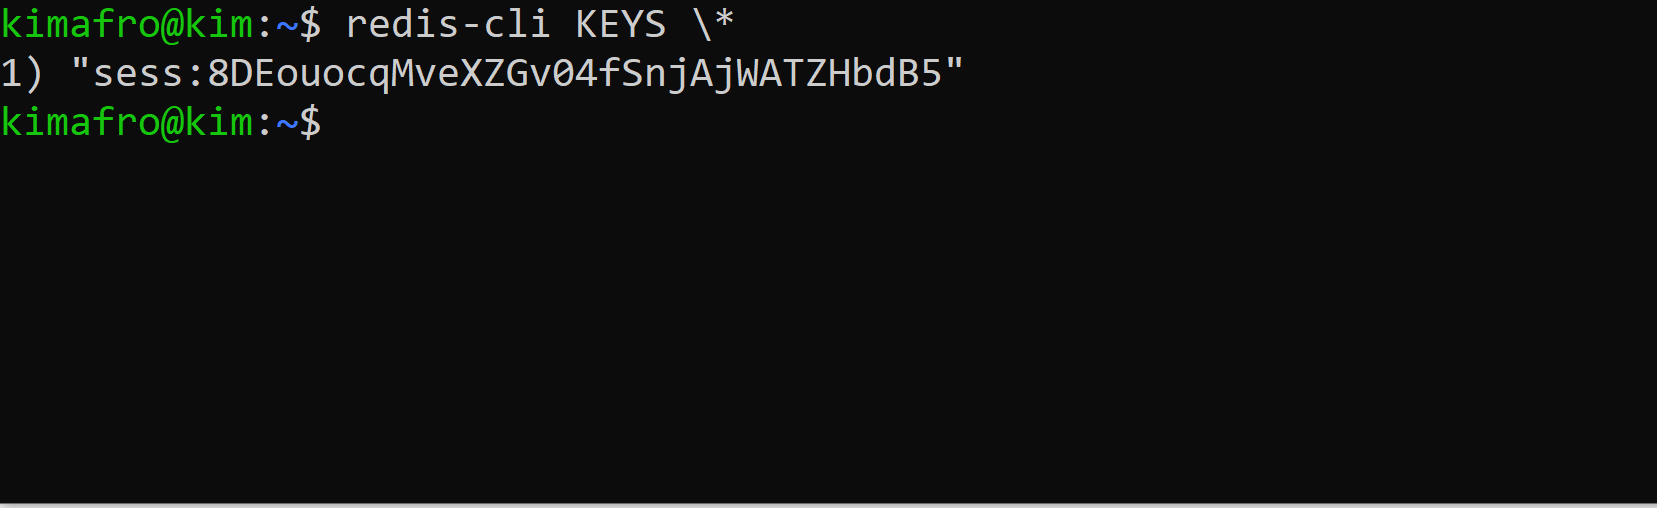
There you have the session created, saved, and ready to authenticate the created user.
The session ID and cookie ID, along with a description of the activity itself (user authentication in this case), are sent back to the server each time a user performs an action or submits a request through a web application. When a user wants to login into the application again, the app will use the client-saved cookie and check it against the server-saved session ID. The app will authenticate the user if the request and the cookie ID match the saved session ID.
The cookie is saved on the browser, and an attacker can access its value. However, if, by any chance, an attacker manages to get the cookie value, they cannot be able to access the saved session as it is stored somewhere safe on the server. If the attacker happens to modify the cookie (trying to make a match to the saved session), this will break the cookie signature. When a login request is sent alongside the modified cookie, the server will detect any change that will automatically render the cookie useless. This way, the client and server remain secure, as the two remains in sync.
We used MongoDB o hold user details. Therefore, the registered user information should be available in the database as follows:
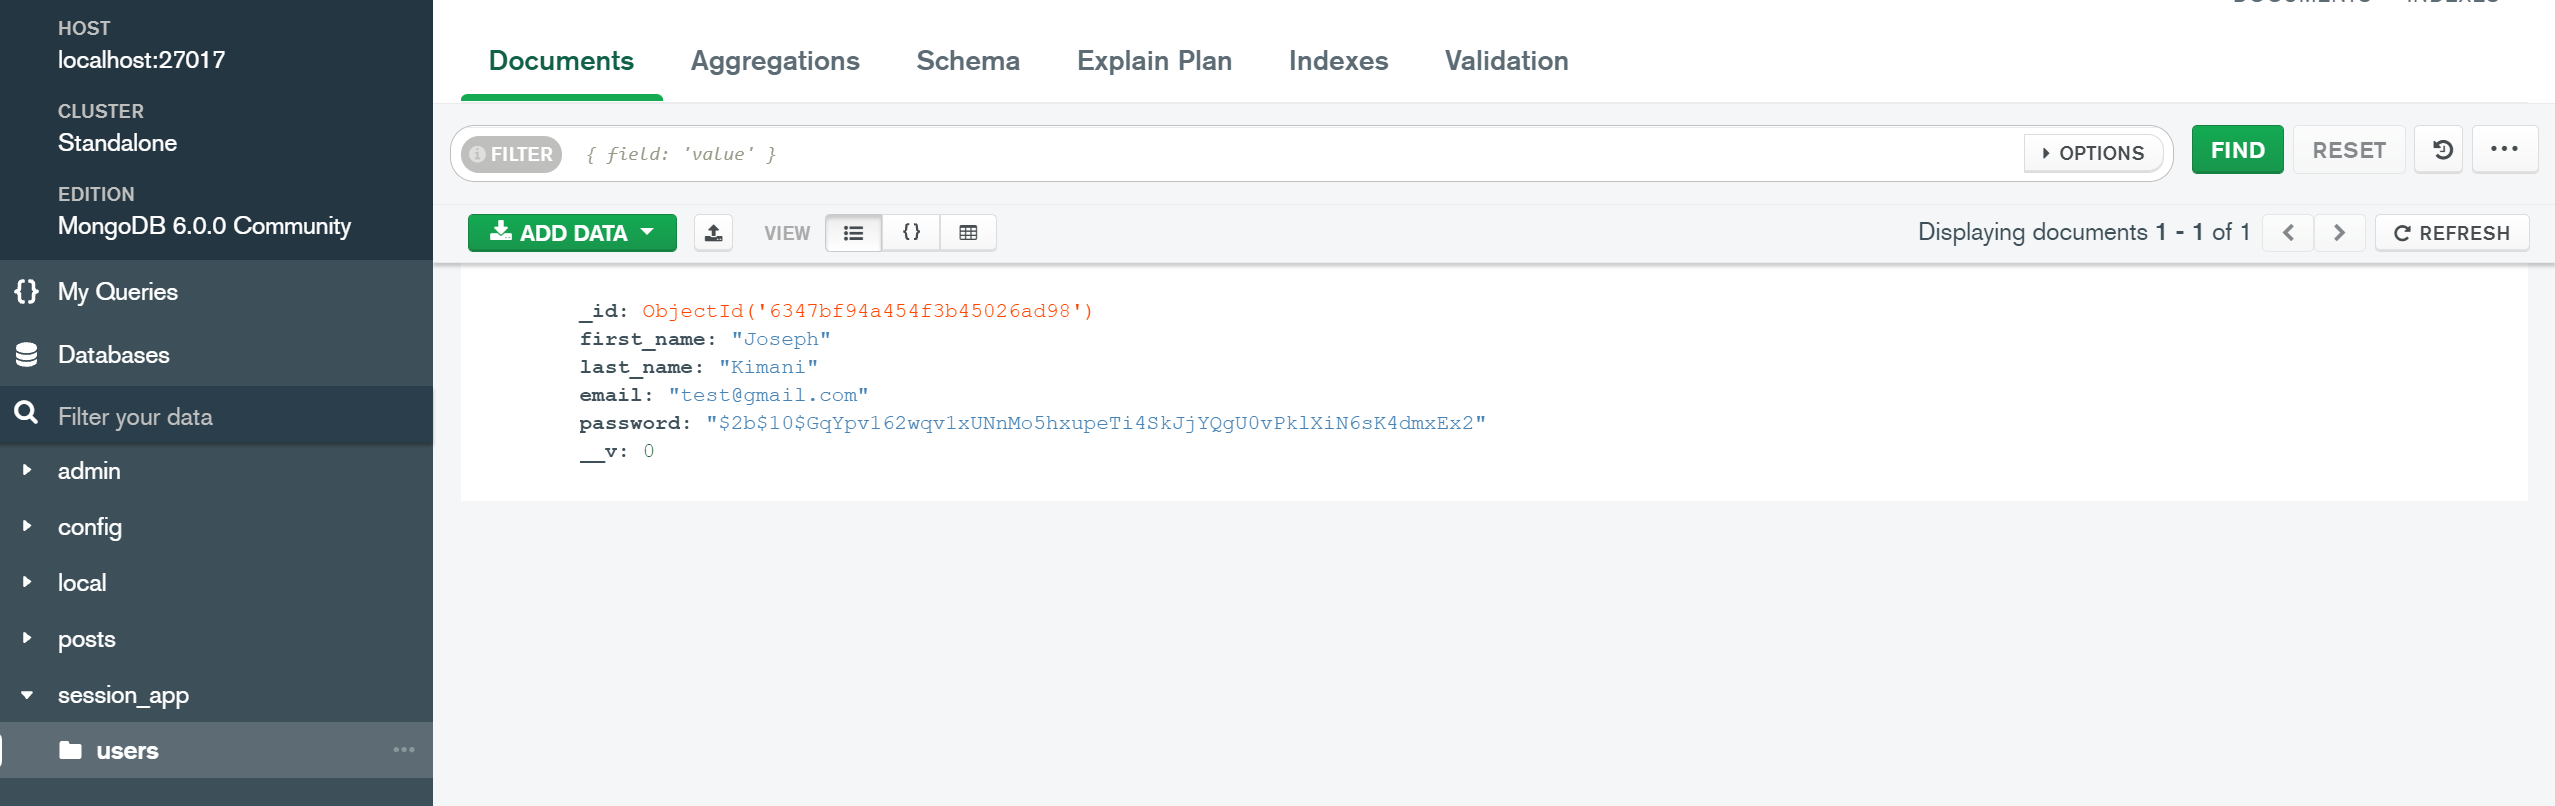
We have done great up to this point. Let’s now add a logic to handle the user logout.
Handling User Logout
The last step will be to handle logout. Once you have logged in, you need to be able to log out.
On the controllers/user.js file, add the handler for logout as follows:
exports.logoutPage = function(req,res){
    // clear the session.
    req.session.destroy();
    // Redirect to the login page.
    res.redirect("/login");
}
On routes/index.js:
- Import the handler:
const {homePage,loginPage,processLogin,signupPage,processSignup,logoutPage} = require("../controllers/user");- Define the route for logout:
router.get("/logout",logoutPage); // LogoutWith the development server up and running, refresh the page. Once you have created an account, click on the logout link on the navbar.
It’s important to note that the session remains valid for a given time. Once the set time elapses, the session will be deleted from the server. The server will generate another session against the save cookie when the user logs in again. This approach uses an automatic session expiration method. The session will be stored in the server until the expiration time is set by the Max-Age attribute.
However, when implementing a logout to the authentication application, a user is forced to destroy the session. The logout button provides options for security-conscious users to manually terminate their session when they have done using the web application.
When the logout button is clicked, req.session.destroy() will be executed to clear the session. You will be redirected to the login page since your session has been destroyed.
Once you log out, you can check if the session got destroyed. Run the following command to confirm that:
redis-cli KEYS \*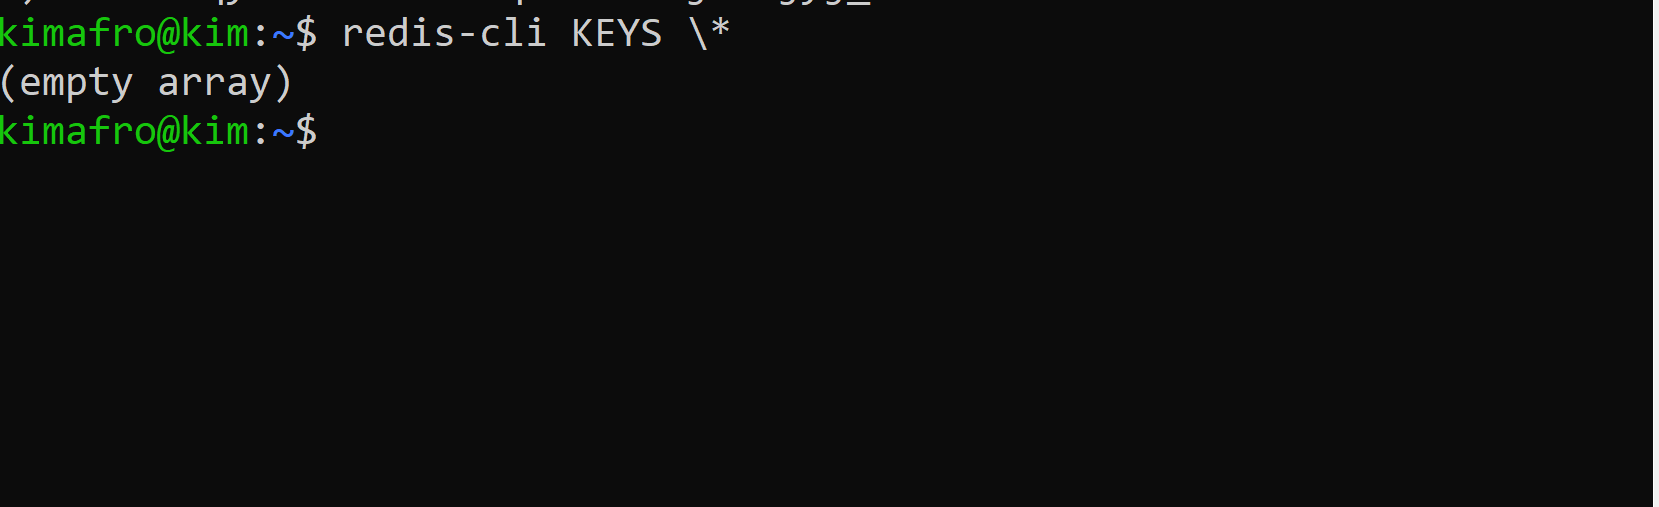
This returns an empty array since no session is available. Since MongoDB has the user details, you can log in again. This time a session will be recreated to identify the user’s active session.
Conclusion
Sessions are used by web applications to keep track of a series of HTTP requests and response operations that are coupled to the same user over the network. In this guide, we have learned how to use sessions to authenticate users.
For any code references, check the application on this GitHub repository. I hope you found this helpful. Happy coding!
A TIP FROM THE EDITOR: For a related topic, don’t miss our JWT Authentication Best Practices and Authentication With JWT For Your Website articles!
Gain Debugging Superpowers
Unleash the power of session replay to reproduce bugs and track user frustrations. Get complete visibility into your frontend with OpenReplay, the most advanced open-source session replay tool for developers.