Video and Audio conferencing in few minutes with React

Video conferencing takes place over the internet to allow mobile devices and laptops equipped with webcams to be connected to a meeting room with video conferencing systems. It also helps teams become more productive, engaged, and connected with a simple, unified video conferencing solution with screen-sharing software.
It enables organizations to save time and money while reducing travel expenses. With video conferencing, you can take advantage of these benefits without constantly travelling for physical meetings. This tutorial demonstrates how to quickly scaffold a video conferencing application using the 100ms SDK by building a Zoom-clone demo with React.
What is 100ms
According to the website, 100ms is an infrastructure for live apps that enables you to build powerful live apps in hours. It provides you with a pre-built template to build virtual events, audio rooms, and classrooms with a few lines of code. The 100ms infrastructure handles all audio-video edge cases, so you don’t have to.
To follow along with this tutorial, you should be familiar with the basics of this technology: JavaScript, React, HTML, and CSS. Below is a demo of what we are building:
Setting up Our Development Environment
To set up your React.js project, run the following command below to create a new project folder.
npx create-react-app zoom-clone
The command will automatically scaffold a new React.js Application inside a project folder. Go into the project folder and run the application once the process is done with the following command below:
cd zoom-clone
npm start
The command above will run the development server at http://localhost:3000. You can then load the URL in your browser. To use icons in our application, we need to install fontawesome. Run the following commands to install it:
npm i --save @fortawesome/fontawesome-svg-core
npm i --save @fortawesome/free-solid-svg-icons
This command will install the core packages, including all the utilities, to make the icons work. If you’re new to integrating font-awesome with React, check the docs here.
Integrating the 100ms SDK
The 100ms platform provides us with React SDK for developers who want to build a video/audio conferencing application with React( and support for other languages and platforms ). We’ll be using the functional component with the powerful hooks provided by the SDK.
npm install --save @100mslive/react-sdk@latestYou can follow along with the accompanying source code on Github.
We first need to initialize the libraries and then wrap the entire application with the <HMSRoomProvider/> component, enabling us to use the hooks for state and actions. Go into src/index.js and add the following code below.
import React from 'react';
import ReactDOM from 'react-dom';
import './index.css';
import App from './App';
import reportWebVitals from './reportWebVitals';
import { HMSRoomProvider } from "@100mslive/react-sdk";

ReactDOM.render(
  <React.StrictMode>
    <HMSRoomProvider>
      <App />
    </HMSRoomProvider>
  </React.StrictMode>,
  document.getElementById('root')
);
Before we proceed, these are some concepts you need to understand:
- Room: When we join a conference call, the participants are said to be in a video call called Room.
- Peer: For participants in the video call, you’re the local peer while others are remote.
- Track: Media. A peer can have two types of tracks - audio and video.
We’ll get some important data from the SDK:
-
hmsStoreholds the application’s entire state, including details of all the participants. Using the devtools extension, you can visualize this state at any time. -
hmsActionswill enable us to perform actions such as joining the room, muting our audio/video, and sending messages.
Joining a Room
To join a room( a video call), we need to call the join method on hmsActions and pass a config object. Additionally, you must pass the following field below to the config object.
-
userName: This is the name of the user. The username is the value set on thepeerobject and is visible to everyone connected to the room. It’s the value that will be set on thepeerobject and be visible to everyone connected to the room. -
authToken: It’s the client-side token used to authenticate the user. You should read how to generate your own token here before proceeding because you will need it later for authorization.
Let us collect these fields from the user using a sign-in form. To do that, create a src/SignIn.js component and add the following code below.
import { useState } from "react";
import { useHMSActions } from "@100mslive/react-sdk";

function SignIn() {

    const hmsActions = useHMSActions();
    const [inputValues, setInputValues] = useState({
        name: "",
        token: ""
    });
    const handleInputChange = (e) => {
        setInputValues((prevValues) => ({
            ...prevValues,
            [e.target.name]: e.target.value
        }));
    }
    const handleSubmit = (e) => {
        e.preventDefault();
        hmsActions.join({
            userName: inputValues.name,
            authToken: inputValues.token
        });
    }

    return (
        <form onSubmit={handleSubmit}>
      <h2 className="meeting-title">Join Meeting</h2>
      <div className="input-container">
        <input
          required
          value={inputValues.name}
          onChange={handleInputChange}
          id="name"
          type="text"
          name="name"
          placeholder="Your name"
        />
      </div>
      <div className="input-container">
        <input
          required
          value={inputValues.token}
          onChange={handleInputChange}
          id="token"
          type="text"
          name="token"
          placeholder="Auth token"
        />
      </div>
      <button className="btn-signin">Join</button>
    </form>
    )
}
export default SignIn;
This sign-in form will receive the user sign-in details and log them into the meeting. Add the signIn form to our <App> component.
import './App.css';
import SignIn from './SignIn';

function App() {
  return (
      <div className="App">
          <SignIn />
      </div>
    );
}

export default App;
You need to copy the CSS style from App.css in the source code on Github into your App.css file for the styling to work. Your output should look like this below:
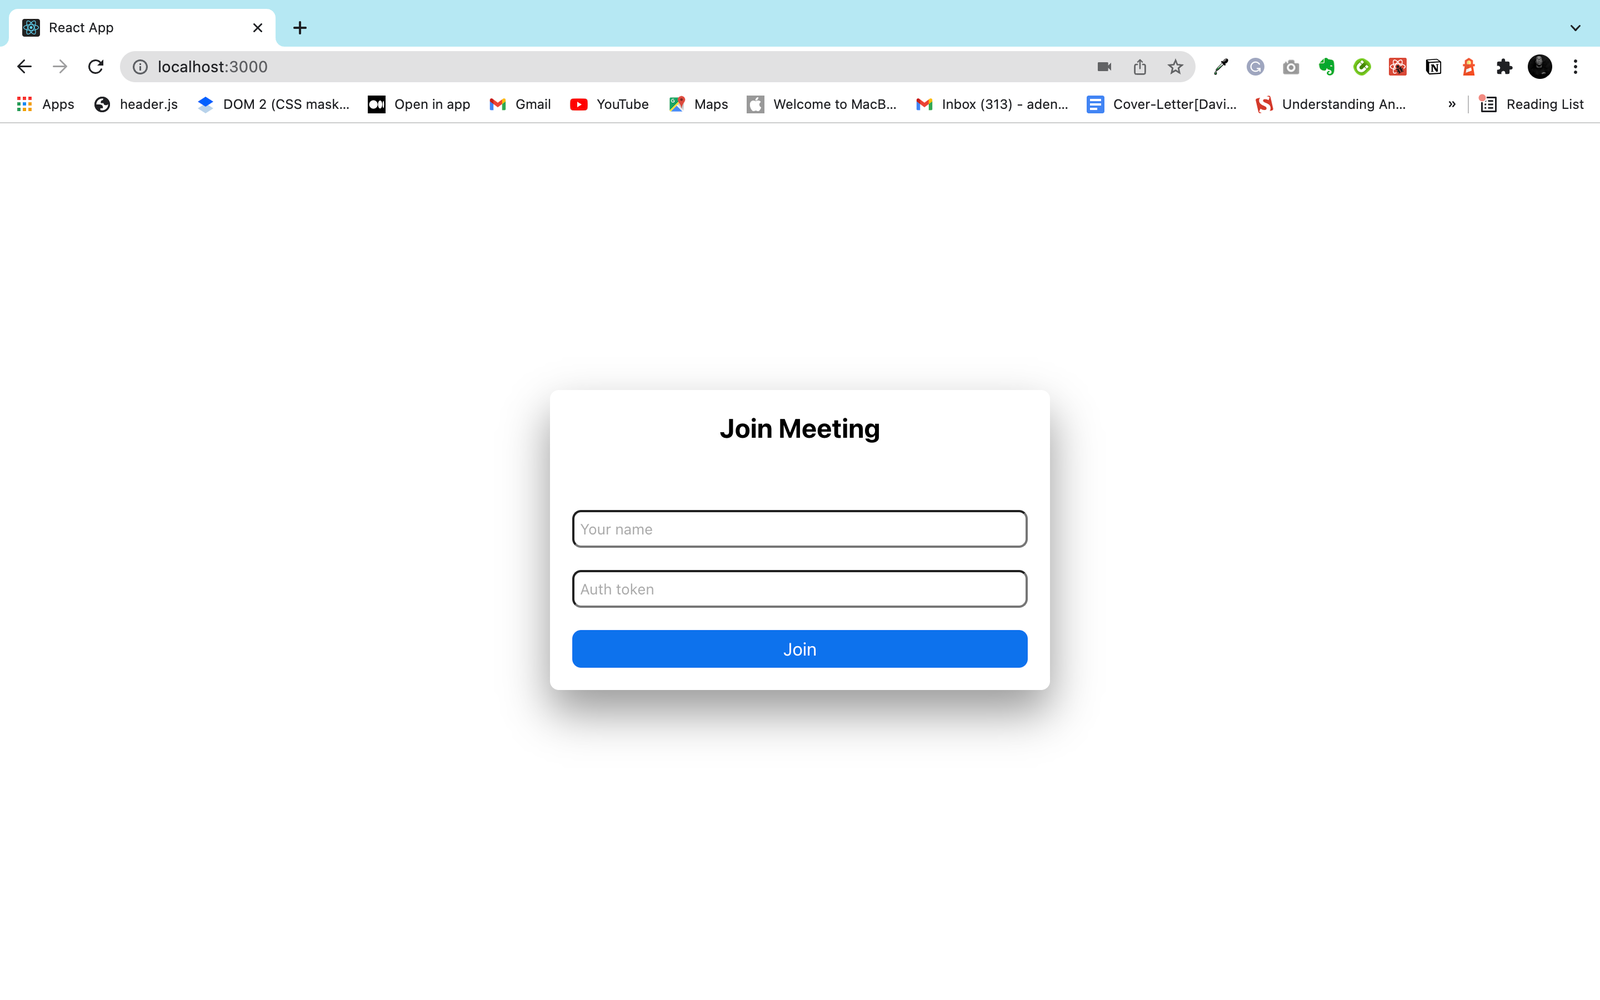
With this above, you will have an audio-only conference ready for use. If a participant joins from another device, you can have a pleasant, friendly conversation.
Adding the video section
Before we continue, let us add a way to show a title for every participant in the room. We’ll need a list of the peer connected to the room. You can get the list of peers at any point in time.
import { useHMSStore, selectPeers } from '@100mslive/react-sdk';

function Component() {
    const peers = useHMSStore(selectPeers);
    return <Peers peers={peers} />;
}
Let’s briefly pause to understand how the hmsStore works. The store keeps the video call’s state, including the room’s connection state, the tracks, track states, peers, etc. To get the data piece we’re looking for, we can use a “selector” that returns a slice of the state.
Also, the hmsstore is reactive, implying that any component using the HMSStore hook will re-render when the slice of the state listens to changes. This enables us to write declarative code.
Let’s create a Conference component to render a list of peers. We’ll get the peers from the store and render them, and our component gets rendered if this list of peers changes. Add the following code below to the src/Conferences.js.
import {selectPeers, useHMSStore} from "@100mslive/react-sdk";
import React from "react";
import Peer from "./Peer";
import './App.css';

function Conference() {
    const peers = useHMSStore(selectPeers);
    return (
    <div className="room-section">
        <div className="conference-section">
            <div className="peers-container">
                {peers.map((peer) => (
                <Peer key={peer.id} peer={peer} />
                ))}
            </div>
        </div>
    </div>
    )
}
export default Conference;
Now, let’s render the video element. To do that, create or open the src/Peer.js component. The component will render a ‘video’ element and a div element with the name of each peer. Rendering the video requires calling the attachVideo method of hmsActions, which accepts both trackId and a DOM element.
According to the docs, the implementation has been abstracted inside the useVideo hook for ease, which will return an object videoRef given a video trackId. The returned videoRef can be set on the video element to display the video. The hook will handle the attaching and detaching of videos and will automatically detach at the end of a video to conserve bandwidth. Add the following code below to the src/Peer.js.
import { useVideo } from "@100mslive/react-sdk";

function Peer({peer}) {
    const { videoRef } = useVideo({
        trackId: peer.videoTrack
      });

    return (
        <div className="peer-container">
      <video
        ref={videoRef}
        className={`peer-video ${peer.isLocal ? "local" : ""}`}
        autoPlay
        muted
        playsInline
      />
      <div className="peer-name">
        {peer.name} {peer.isLocal ? "(You)" : ""}
      </div>
    </div>
    )
}

export default Peer;
Also, note that the width and height CSS properties need to be set on the video element to render the peer’s video. You can copy the style in the App.css file.
Open Source Session Replay
OpenReplay is an open-source, session replay suite that lets you see what users do on your web app, helping you troubleshoot issues faster. OpenReplay is self-hosted for full control over your data.

Start enjoying your debugging experience - start using OpenReplay for free.
Switching user interfaces based on connection state
Our SignIn form shows even after joining the room. We need a way to identify the connection state of the room and hide the form after we’ve connected. To do that, we can use the selectIsConnectedToRoom selector. Add the following code below to src/App.js.
import { useEffect } from 'react';
import {
  selectIsConnectedToRoom,
  useHMSActions,
  useHMSStore
} from "@100mslive/react-sdk";
import SignIn from './SignIn';
import Conference from './Conference';
import './App.css';
import SignIn from './SignIn';


function App() {
    const isConnected = useHMSStore(selectIsConnectedToRoom);

  return (
      <div className="App">
          {isConnected ? (
                <Conference />
              ):(
                <SignIn />
          )}
      </div>
    );
}

export default App;
Building the Conference Control Functionalities
In the section, we will look at how to mute/unmute local tracks, display the number of participants in the room, and how to leave the room.
Mute/Unmute local tracks
We have audio and video feed accessible to the user whenever they join the room. Just like how the Zoom app works, we may want users to mute/unmute their own tracks - both video and audio.
Perhaps if you explicitly need granular data like knowing the current video status, you can use selectIsLocalVideoEnabled and for audio selectIsLocalAudioEnabled instead.
We can use the useToggle hook for this case. The hook will give us access to the user’s current video/audio status and the function to toggle them. Open or create src/Footer.js components and add the following code below.
import React from "react";
import { useAVToggle } from "@100mslive/react-sdk";
import {
    selectIsConnectedToRoom,
    useHMSActions,
    useHMSStore,
    selectPeers,
  } from "@100mslive/react-sdk";
import { FontAwesomeIcon } from "@fortawesome/react-fontawesome";
import { faMicrophoneSlash, faMicrophone, faVideo, faVideoSlash,faUserPlus,
         faArrowUpRightFromSquare, faMessage, faFaceSmile, faGear, faEllipsis
} from "@fortawesome/free-solid-svg-icons";

function Footer() {

    const {isLocalAudioEnabled,
    isLocalVideoEnabled,
    toggleAudio,
    toggleVideo
    } = useAVToggle();

    return (
        <div className="main_control">
             <div className="main_controls_button" onClick={toggleAudio}>
                {isLocalAudioEnabled ? (
                <><FontAwesomeIcon icon={faMicrophoneSlash} size="lg" /><span
                  className="button_name">Mute</span></>
                ): (
                <><FontAwesomeIcon icon={faMicrophone} size="lg" /><span
                  className="button_name">Unmute</span></>
                )}
                </div>
                <div className="main_controls_button" onClick={toggleVideo}>
                {isLocalVideoEnabled ? (
                <><FontAwesomeIcon icon={faVideoSlash} size="lg" /><span
                  className="button_name">Stop Video</span></>
                ): (
                <><FontAwesomeIcon icon={faVideo} size="lg" /><span
                  className="button_name">Start Video</span></>
                )}
                </div>
        </div>
    )
}

export default Footer;
In the footer component, we fetched the current state of the local audio and video and toggled them whenever the buttons were clicked.
Displaying Number of Participants in the Room
The hmsStore maintains the state of the video call, including the list of peers, so we need to retrieve the current state of the peers from the hmsstore to count the number of participants in the conference room. Open the Footer component and update the code:
...
function Footer() {
  const peers = useHMSStore(selectPeers);
  const userCount = peers.length;

  ...

  return (
    ...
    <div className="main_controls_section">
                <div className="main_controls_button">
                    <div>
                    <FontAwesomeIcon icon={faUserPlus} size="lg" /><>{userCount}</>
                    </div>
                    <span className="button_name">Participants</span>
                </div>
                <div className="main_controls_button">
                    <FontAwesomeIcon icon={faArrowUpRightFromSquare}  size="lg"
                    color="" />
                    <span className="button_name">Share Screen</span>
                </div>
                <div className="main_controls_button">
                    <FontAwesomeIcon icon={faMessage} size="lg" />
                    <span className="button_name">Chat</span>
                </div>
                <div className="main_controls_button">
                    <FontAwesomeIcon icon={faFaceSmile} size="lg"/>
                    <span className="button_name">Reactions</span>
                </div>
                <div className="main_controls_button">
                    <FontAwesomeIcon icon={faGear} size="lg"/>
                    <span className="button_name">Settings</span>
                </div>
                <div className="main_controls_button">
                    <FontAwesomeIcon icon={faEllipsis} size="lg" />
                    <span className="button_name">More</span>
                </div>
      </div>
      ...
  )
}
...
In the code above, after retrieving the state of the peers, we stored the number of peers(participants) into a variable called userCount. After that, we use the userCount variable in the participant button section in the footer to display the number of participants on the screen. We also added other functionalities in the real-world zoom application (You can build on this demo by working on the functionalities like the chat or Reaction button).
Leaving the room
To add a way to leave the room, we will need to call the leave method on hmsActions to leave the room. We will set up the leave method to be called whenever the user clicks the leave button, closes the window, or refreshes the tab. To implement when the user clicks the leave button to leave the room, open the src/footer.js file and update it with the code below:
...
function Footer {
  ...
    const isConnected = useHMSStore(selectIsConnectedToRoom);
    const hmsActions = useHMSActions();
  return (
    ...
    <div className="main_controls_section">
        <div className="main_controls_button">
              {isConnected && (
                  <button
                  id="leave-btn"
                  class="btn-danger"
                  onClick={() => hmsActions.leave()}
                  >
                  Leave
                  </button>
              )}
       </div>
      </div>
    ...
  )
}
...
To implement when the user closes the window or refreshes the tab to leave the room, open the src/App.js folder and add the following code:
...
function App() {

  const isConnected = useHMSStore(selectIsConnectedToRoom);
  const hmsActions = useHMSActions();

  useEffect(() => {
      window.onunload = () => {
          if(isConnected) {
            hmsActions.leave();
          }
        }
  }, [hmsActions, isConnected]);

...
}
...
To render the buttons only when connected to the room, add the footer component to the <App> component.
...
import Footer from './Footer';
function App() {
  const isConnected = useHMSStore(selectIsConnectedToRoom);
    ...
  return (
      <div className="App">
          {isConnected ? (
              <>
                  <Conference />
                  <Footer />
              </>
              ):(
                <SignIn />
          )}
      </div>
    );
}
...
Now, you can deploy your application to any hosting service. In my case, I used Github Pages. Afterward, go into your 1OOms dasboard to get the login token for both Host and Guest.
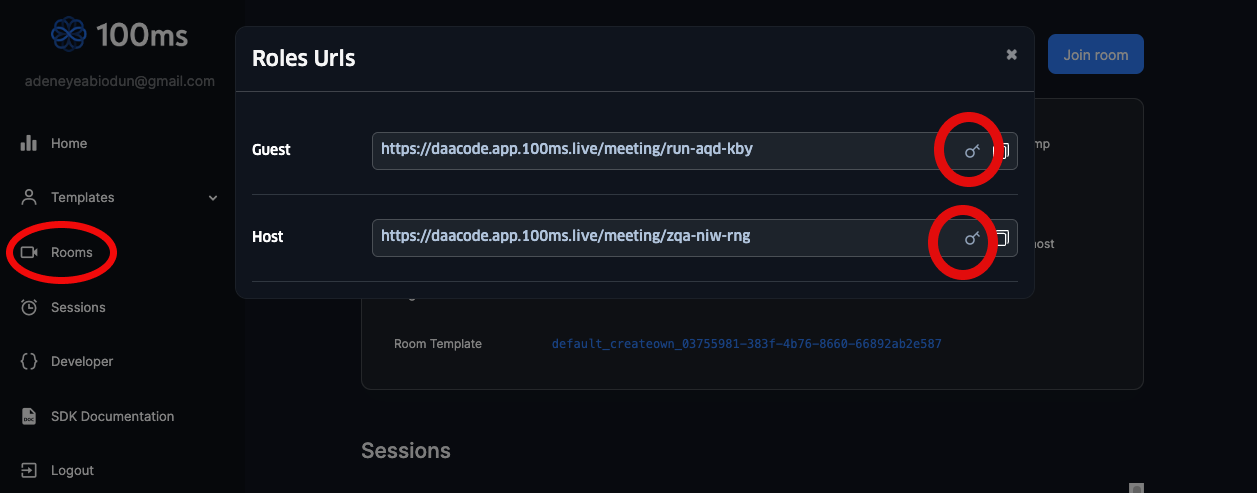
Share your application URL and token to Guess to have a smooth Video Conferencing experience. Your final application should look like this below:
Congratulations, happy Coding!
Conclusion
I hope you enjoyed reading through this tutorial. You can easily build powerful live applications using 100ms. In this tutorial, we explored how to build a video conferencing app by building a zoom clone application in a few minutes with the help of 100ms SDK. There are still some other amazing features you can integrate with the help of 100ms SDK that we cannot cover in this tutorial. You can extend this tutorial by adding the chat, Notification, and Share Screen.